


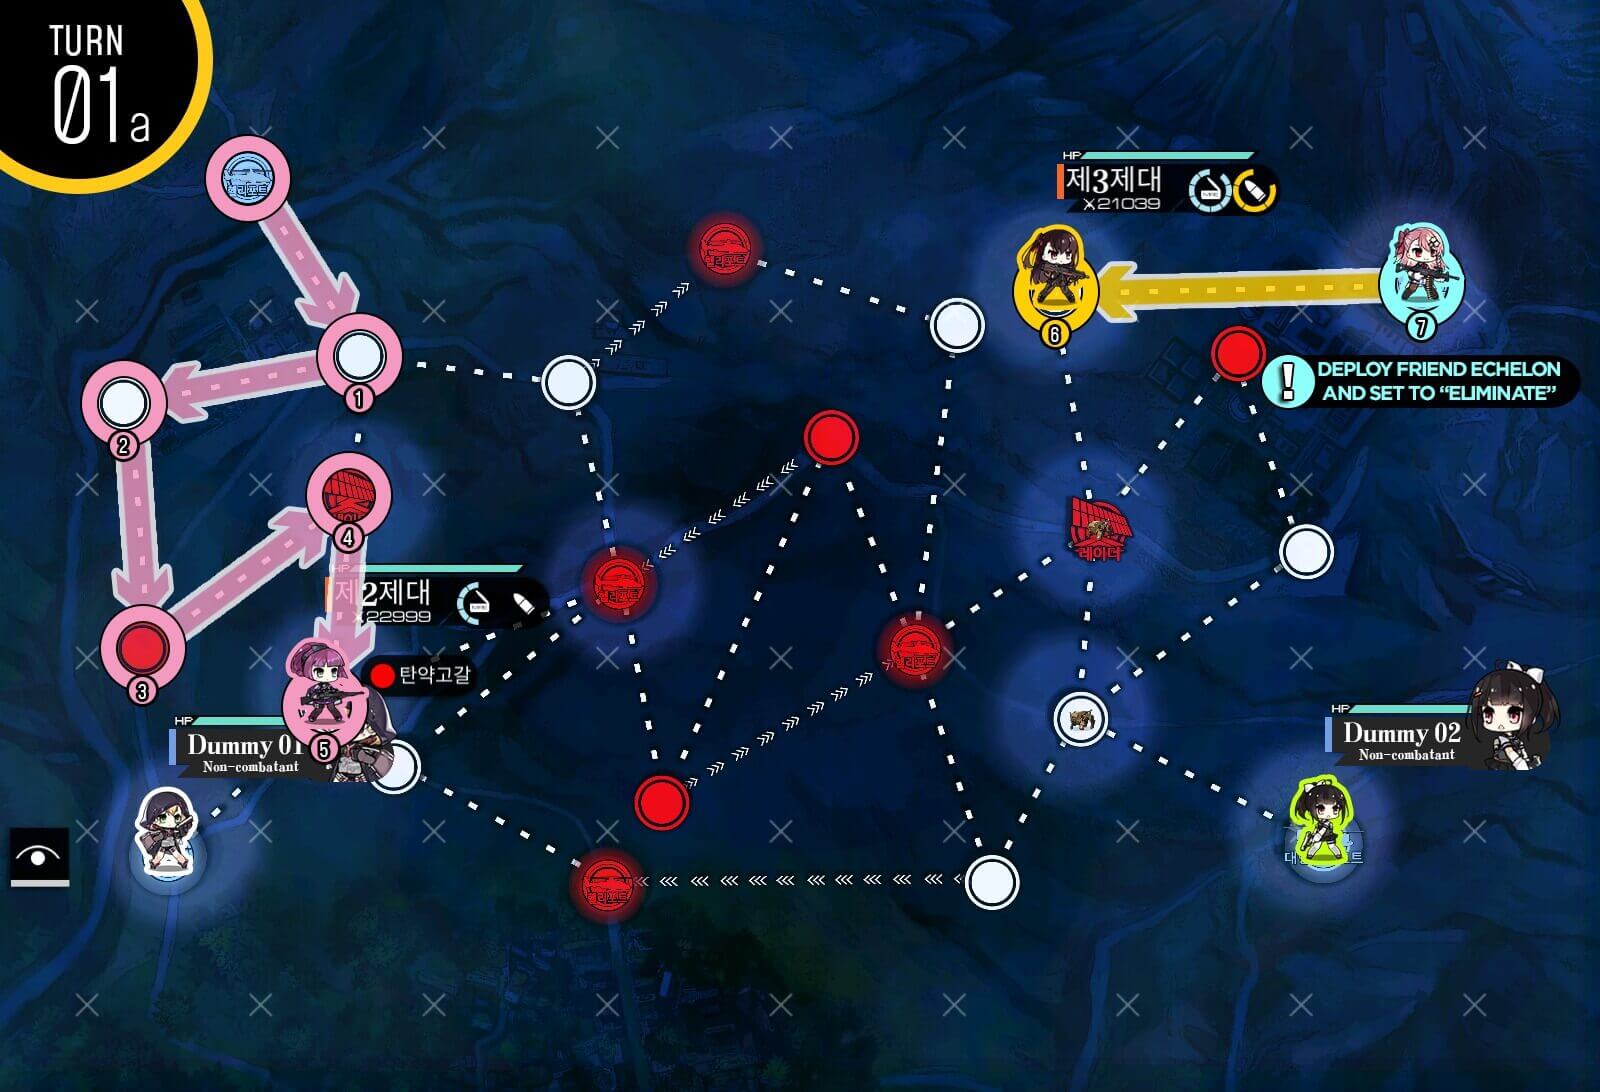
Turn 1a
Combat echelon to the left sweeps the left side of the map on its way to the allied helipad on the bottom. It should fight 5 times with all battles being just Dinergates or Tarantulas. Combat echelon on the right side moves once to the left and we will deploy a Friend echelon and set it to 'eliminate' command.
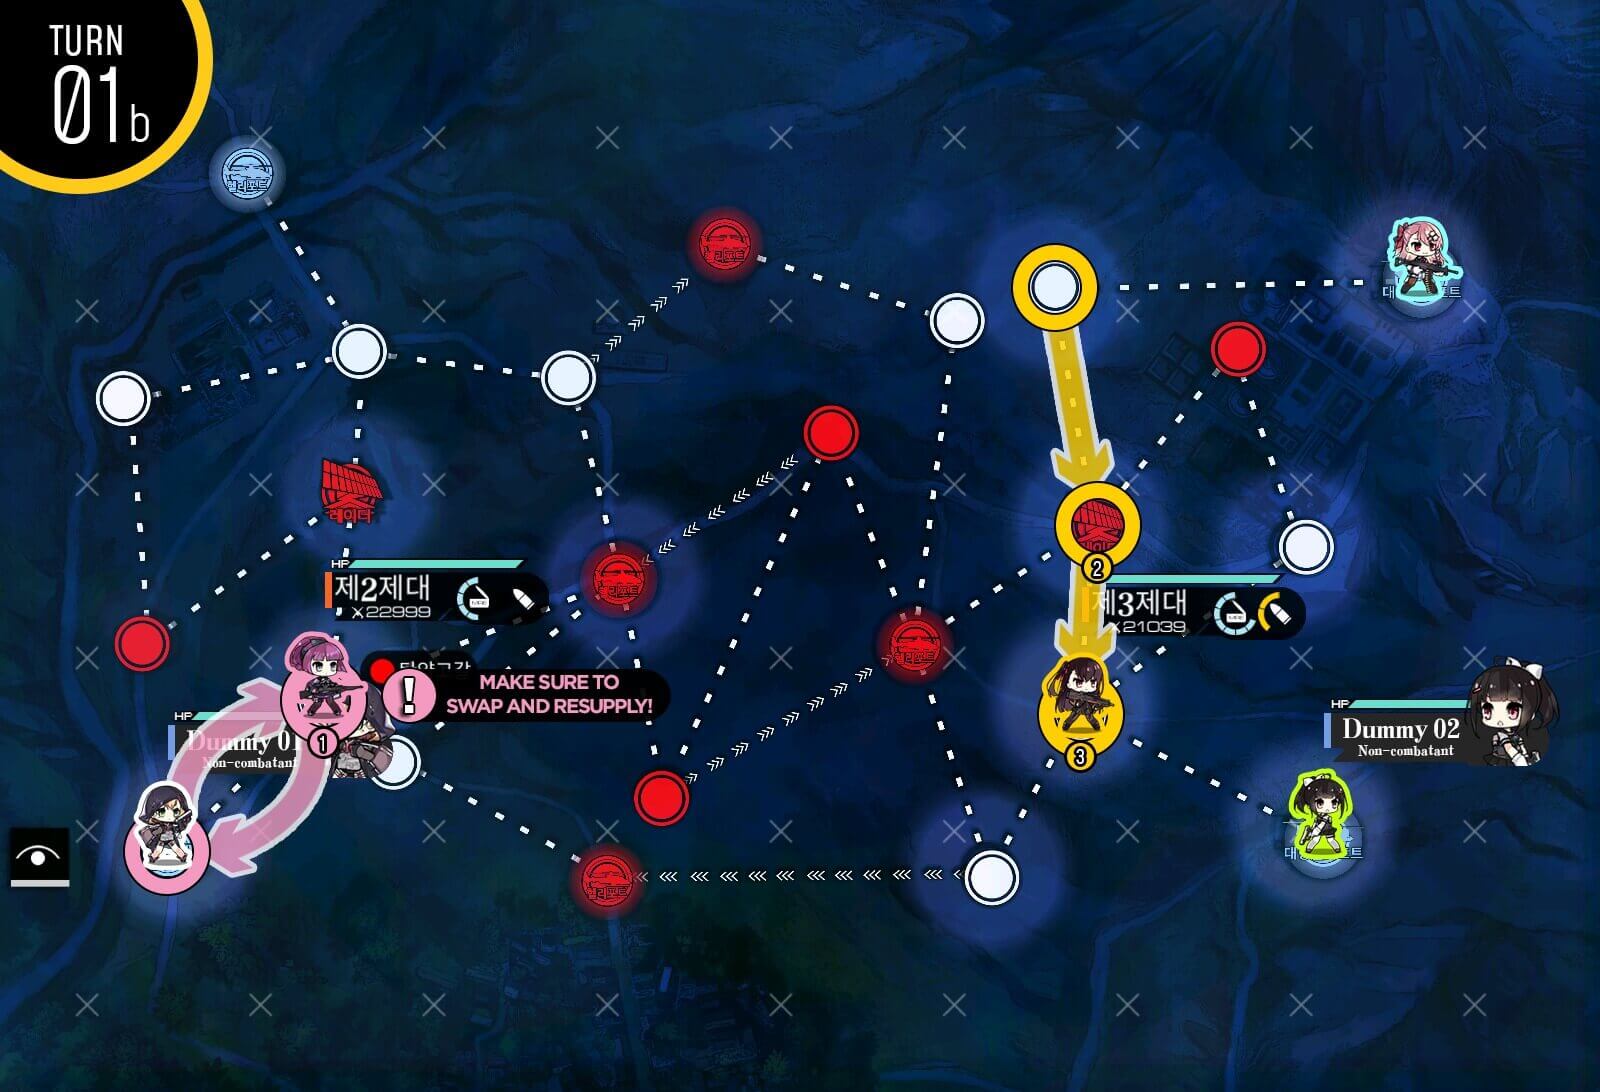
Turn 1b
Combat echelon on the right side also makes its way to the allied helipad on the bottom-right side. BEFORE ending the turn, swap the combat echelons and dummy echelons so that they are resupplied before ending the turn.
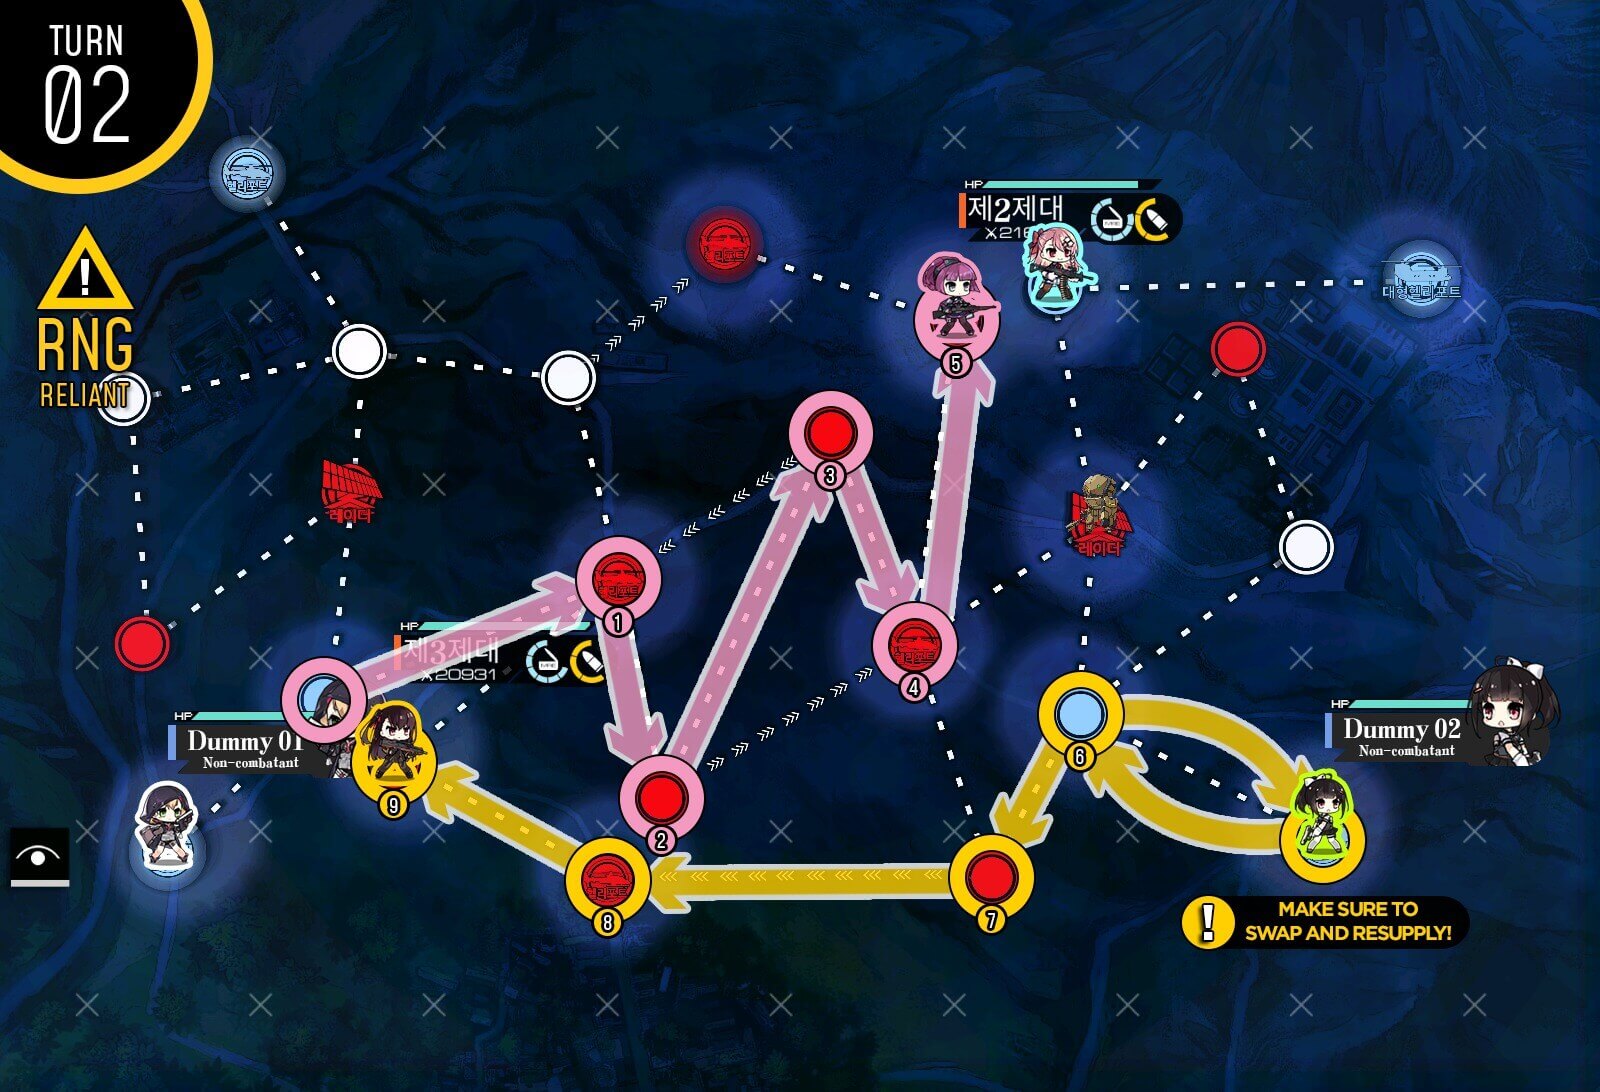
Turn 2
This is where there's going to be some variations to the routing as new enemy unit[s] will spawn from helipads and you will have to find them all this turn. Combat echelon on the right side will sweep the bottom side while the other echelon will sweep the middle and top portion of the map. You might have to go through the top portion of the map first instead than checking the middle depending on RNG.
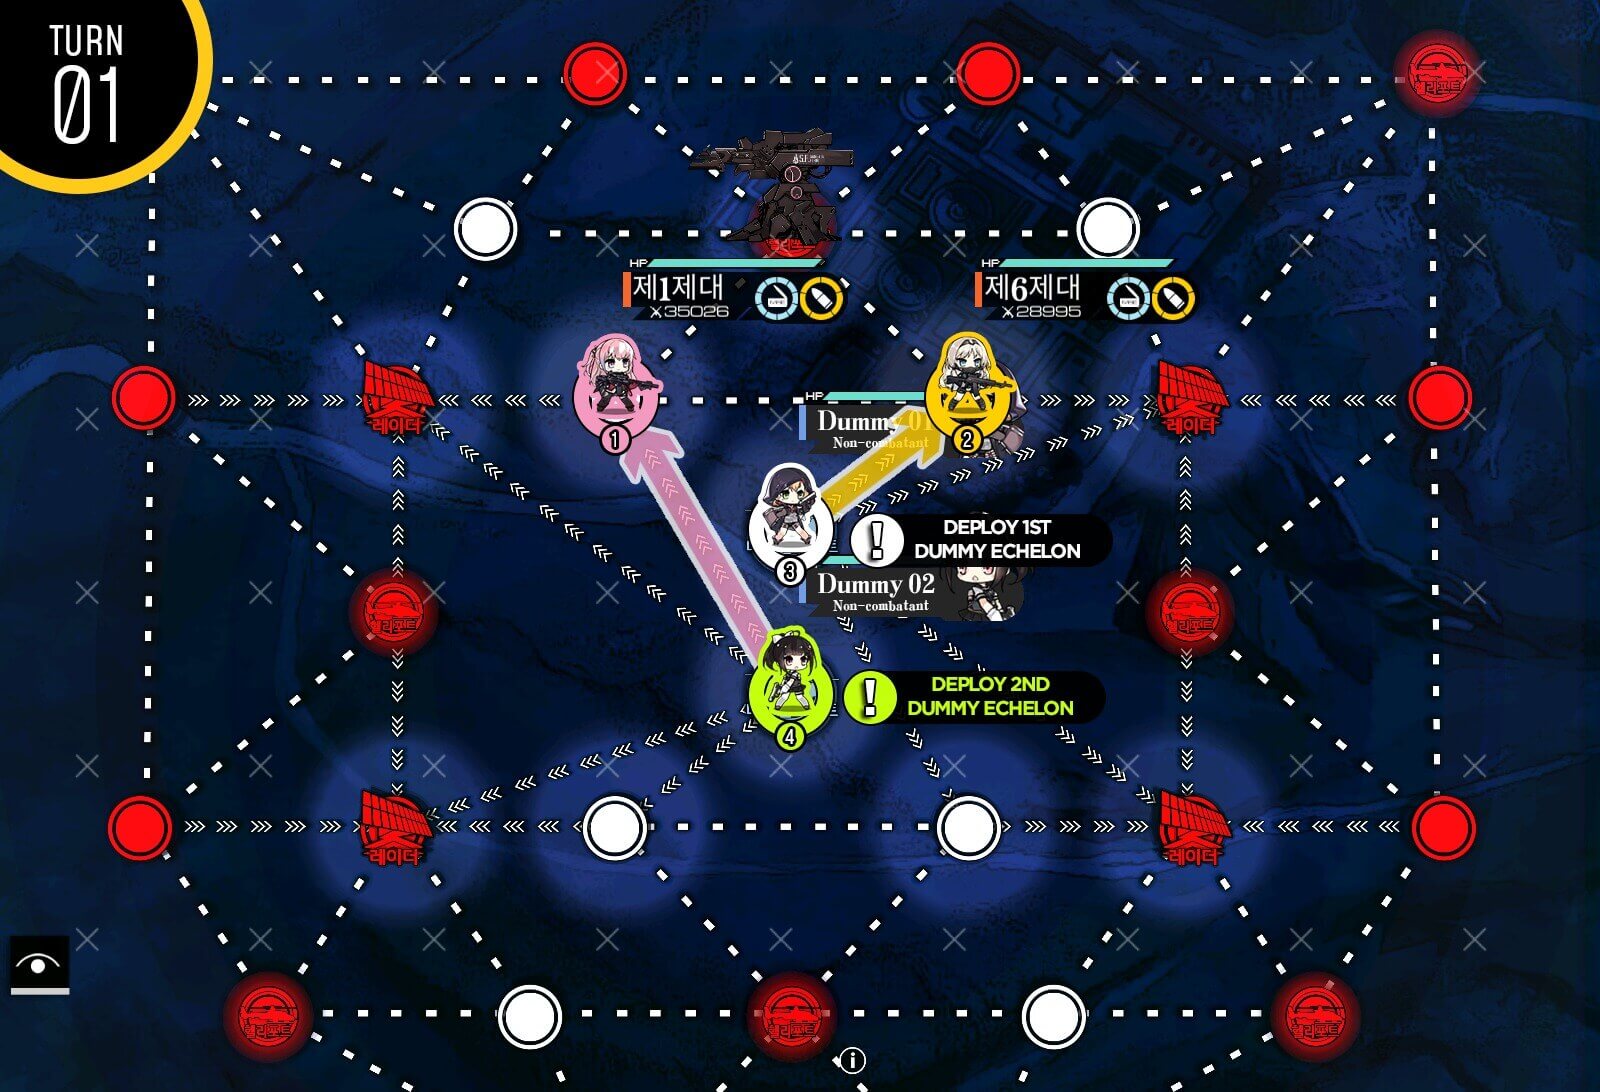
Turn 1
From here on, you will need to mind the sheer RNG in the enemy's movements so that dummy echelons don't get into battle. However once you get to later turns, you should have plenty of movement points to sweep the entire map and clear without issue. Black beans serve as DPS checks, proper ARSMG teams are up for the task.
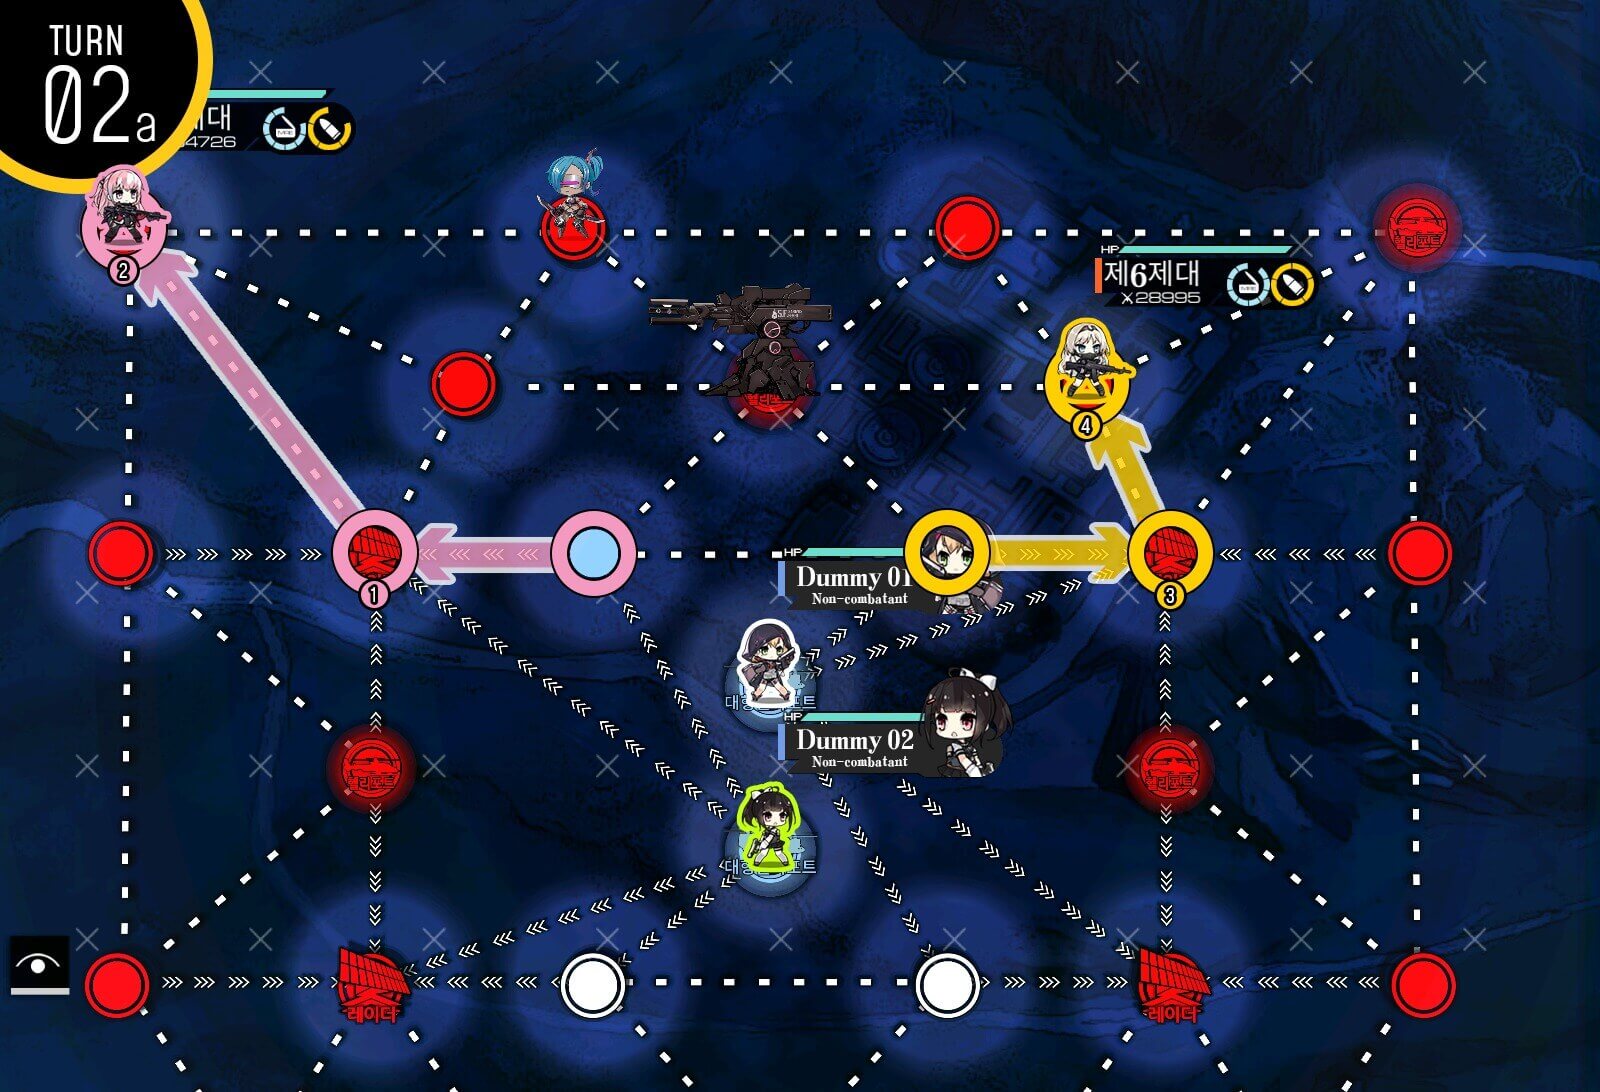
Turn 2a
Move each combat echelon to the top left helipad and the node to the right of the Jupiter cannon respectively.
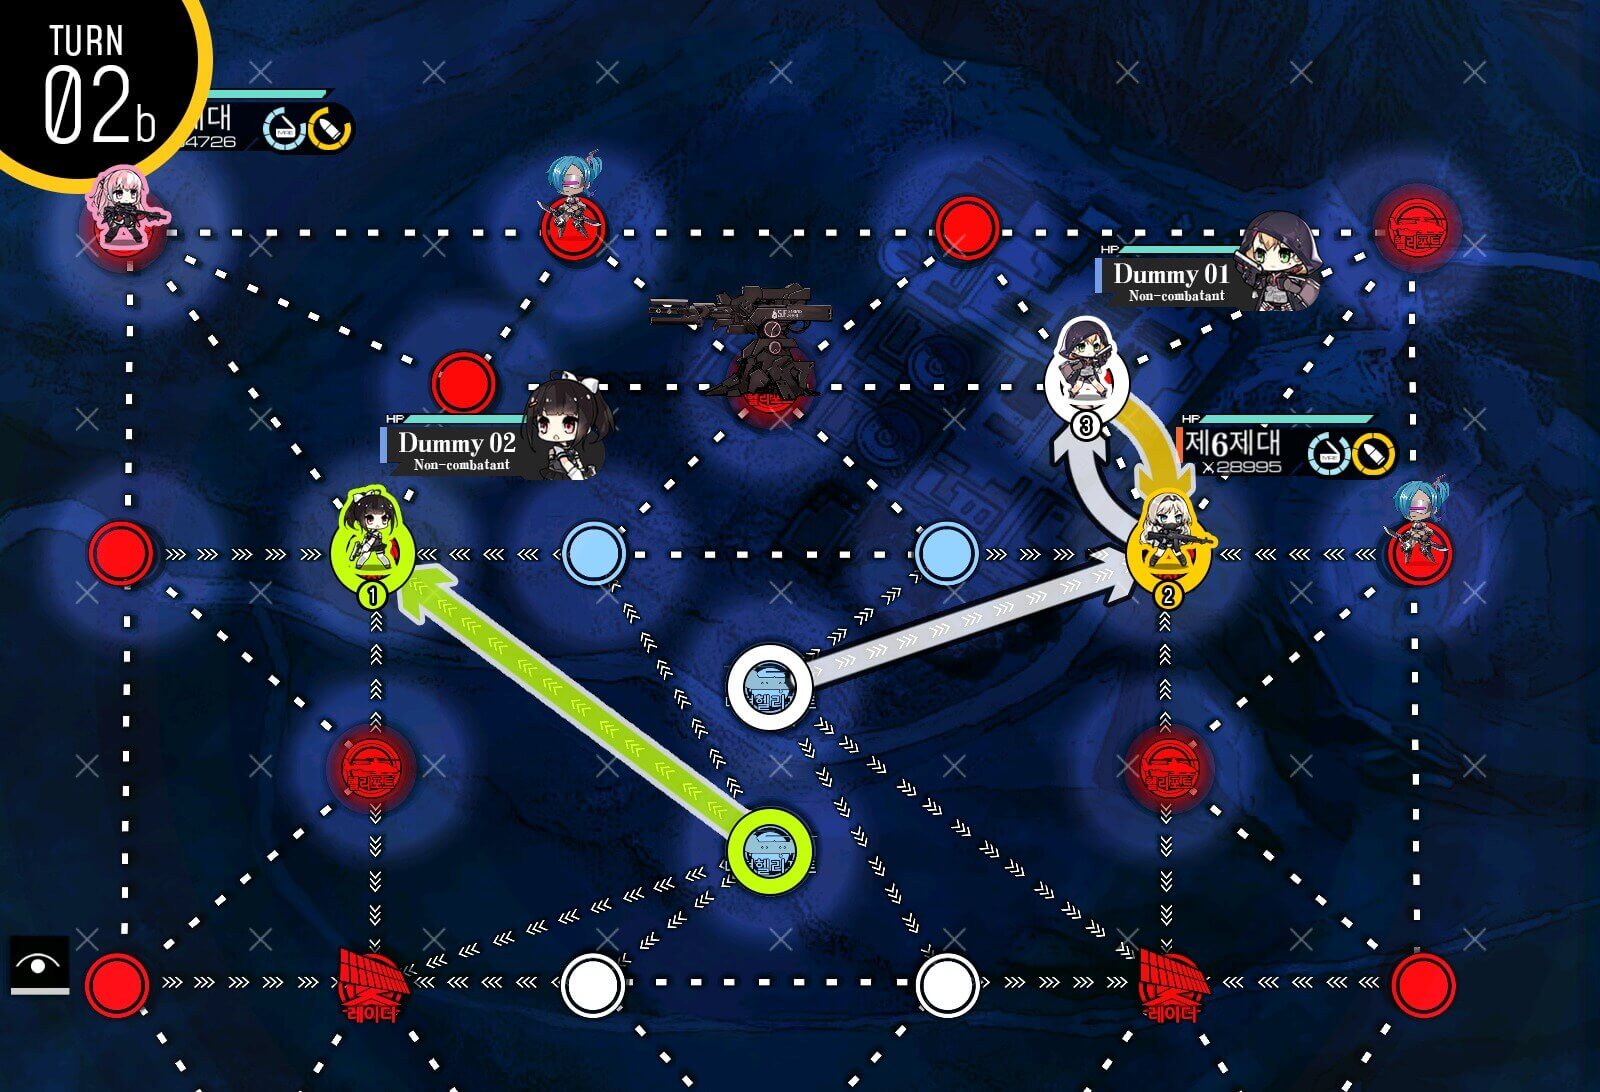
Turn 2b
Dummy echelon follows suit so that nodes can be captured and not revert back during the enemy's turn. You probably have to swap dummies' and combat echelons' positions on the right side to get the dummies out of harm's way.
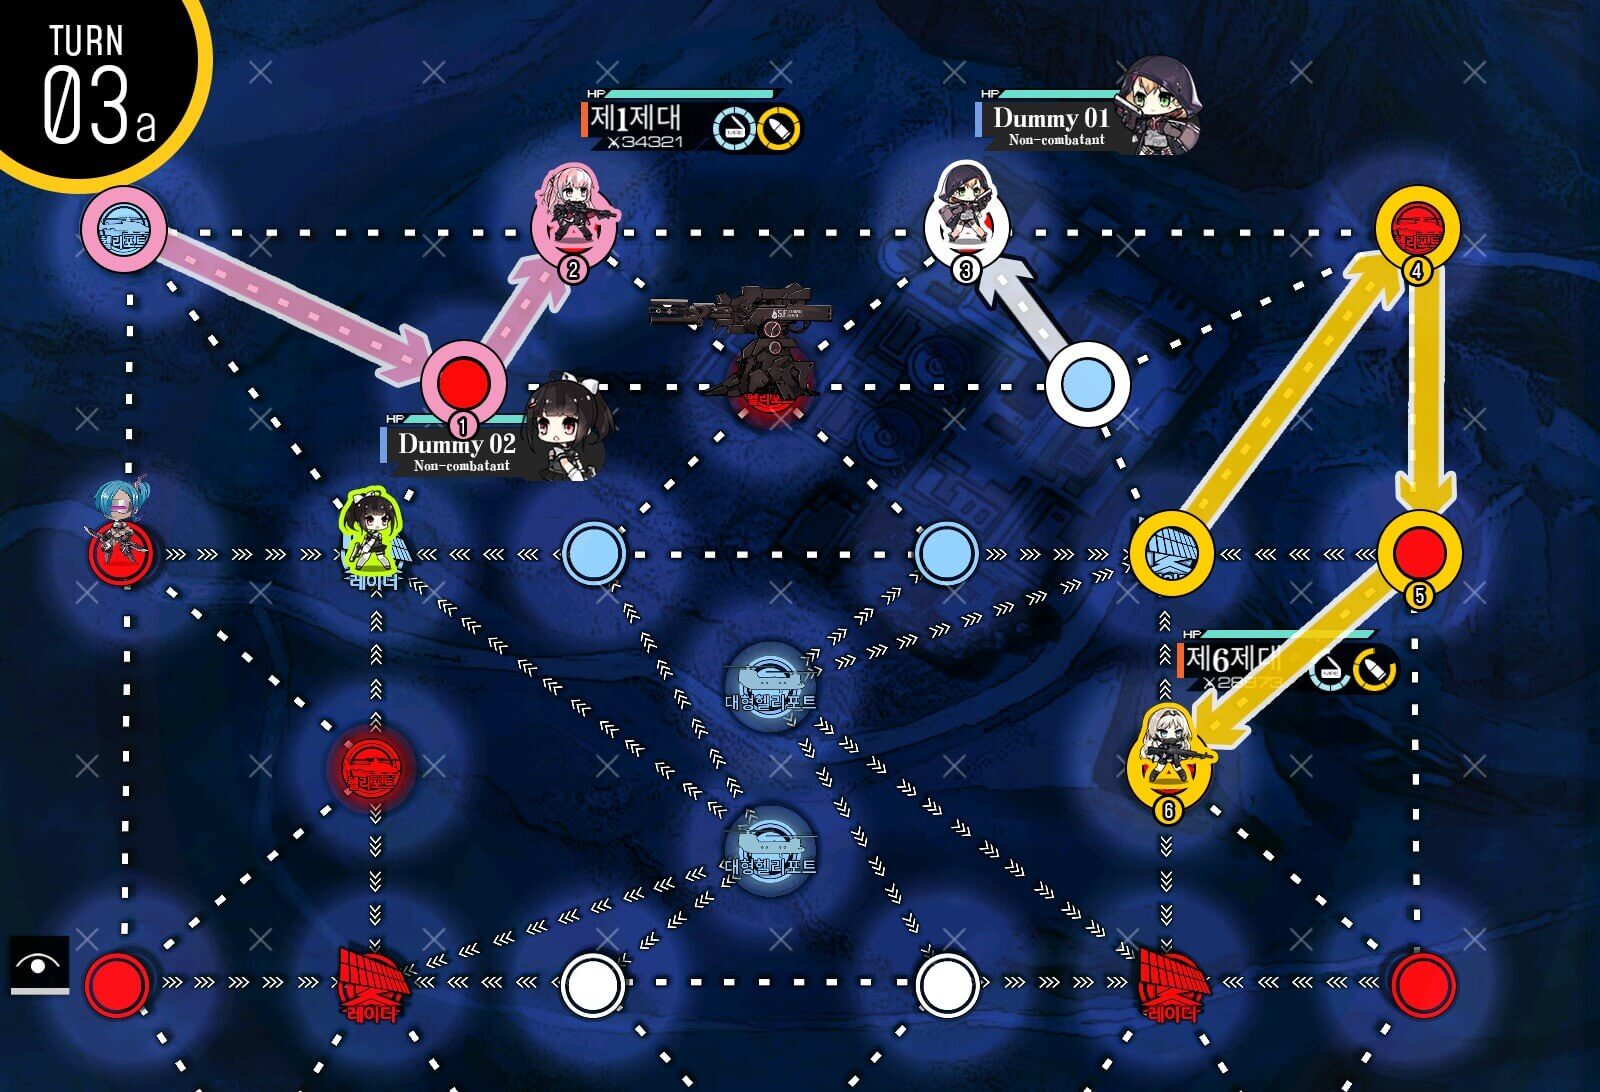
Turn 3a
Again with the variations depending on RNG this turn. But we are looking to finish surround-capturing the Jupiter cannon.
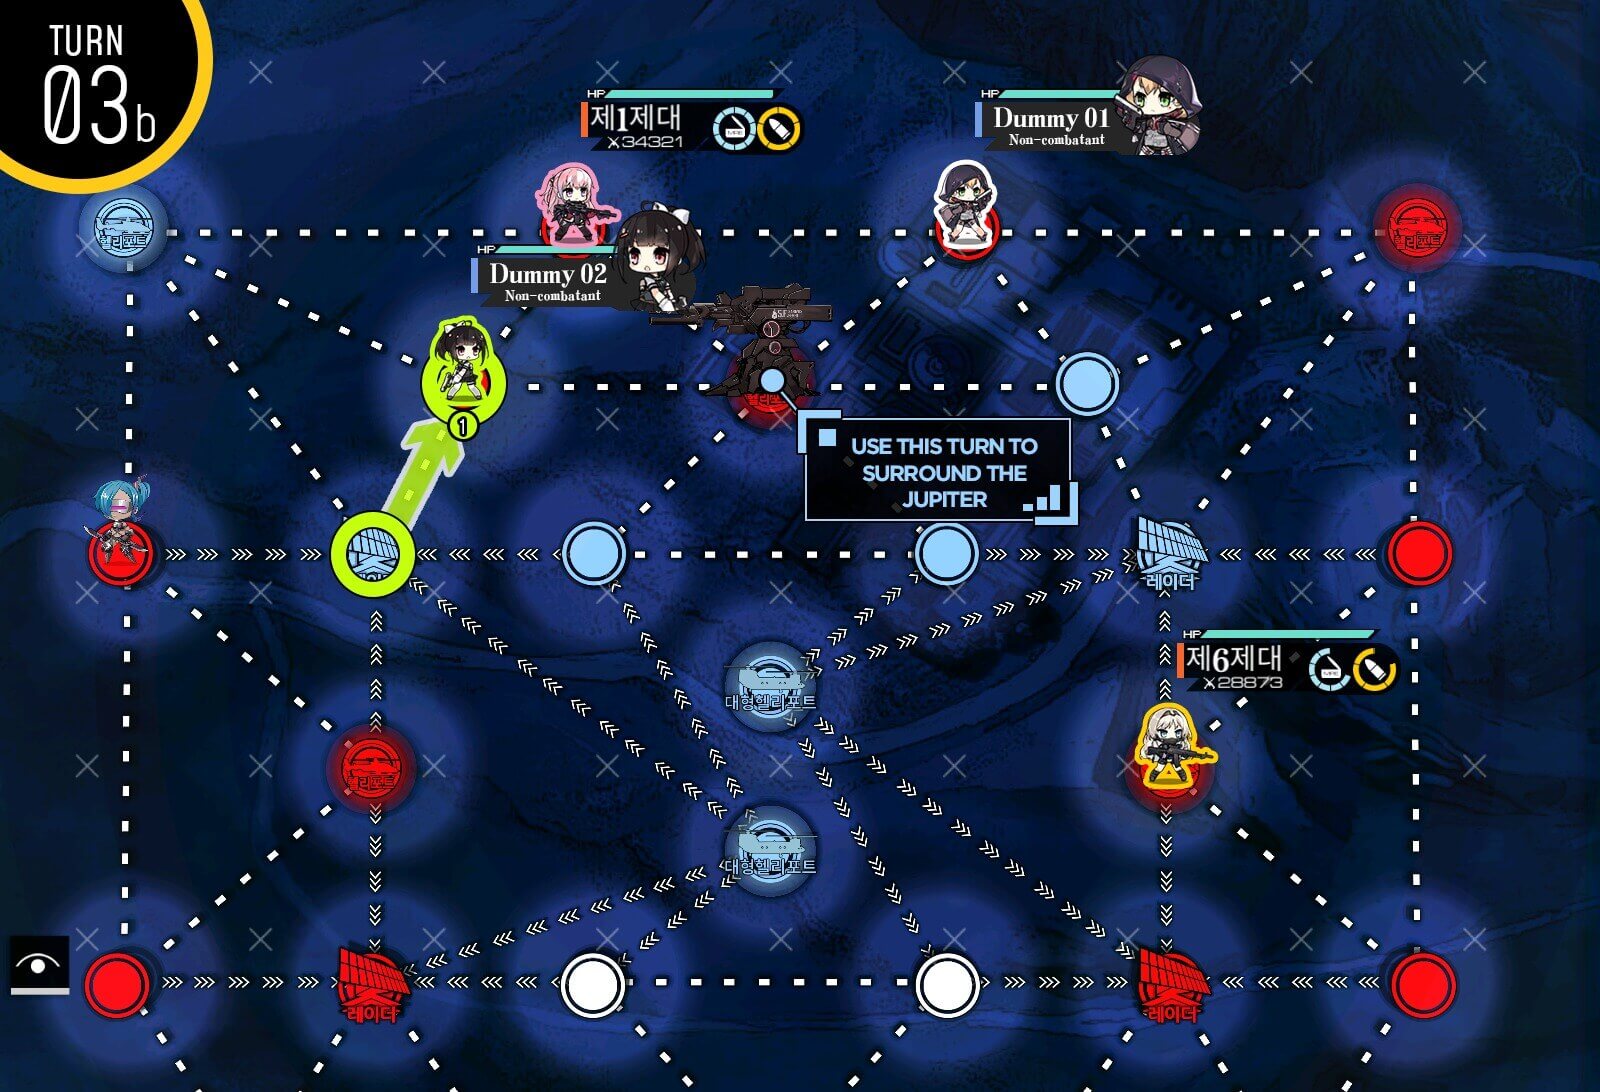
Turn 3b
Move the dummy echelon to finish the surround-capture.

Turn 4a
Continue to sweep the map thoroughly while the combat echelon takes care of the weakened Jupiter cannon.
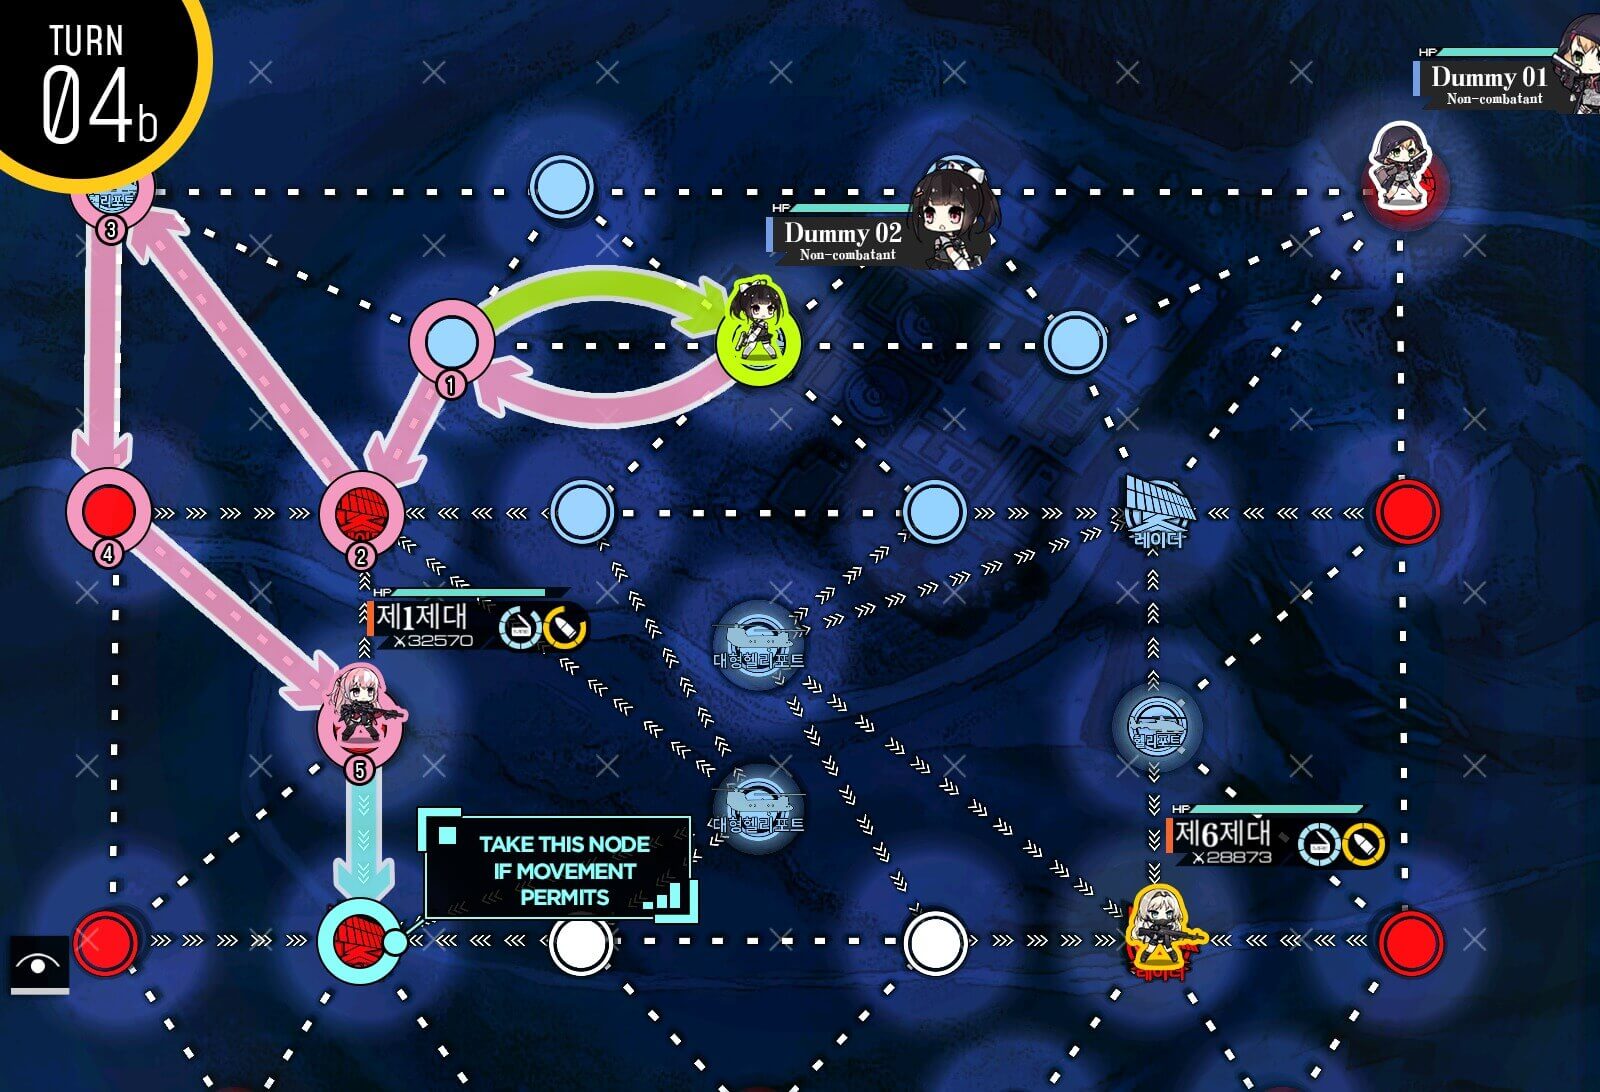
Turn 4b
Movement will vary with enemy movement but we are looking to get to the radar if there's enough movement points. However it's no big deal if you cannot.
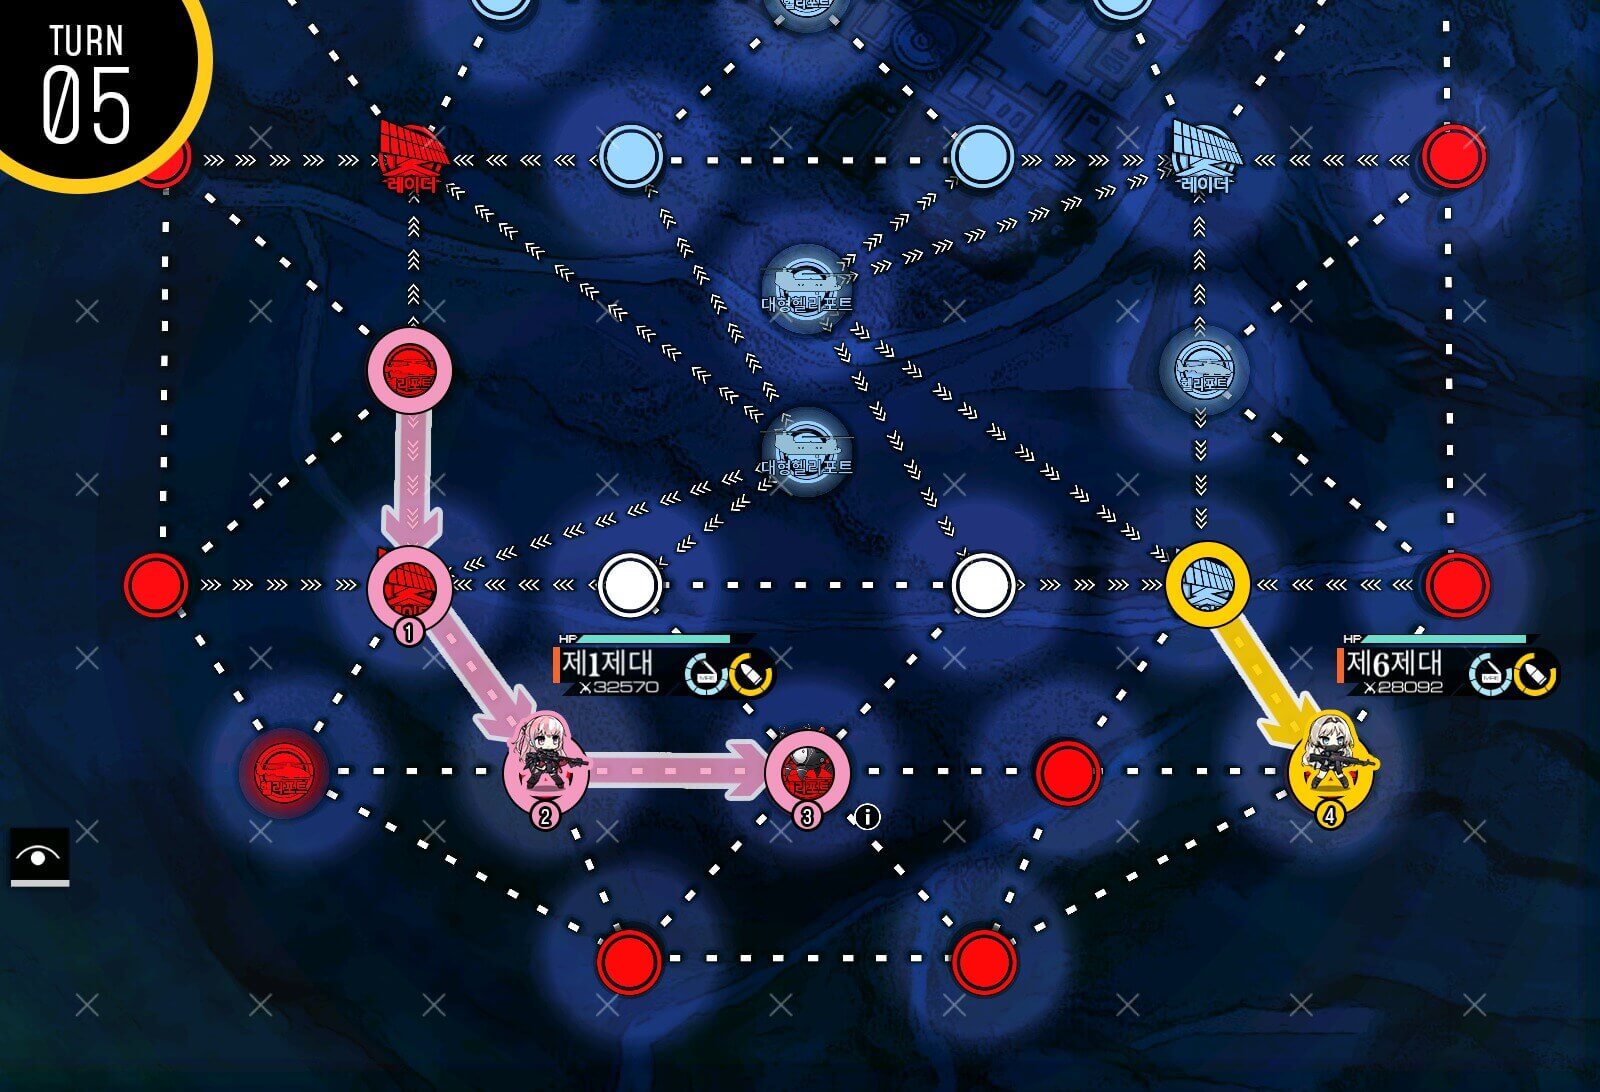
Turn 5
Now you should have plenty of move points to finish killing of rest of the units and clear the mission.
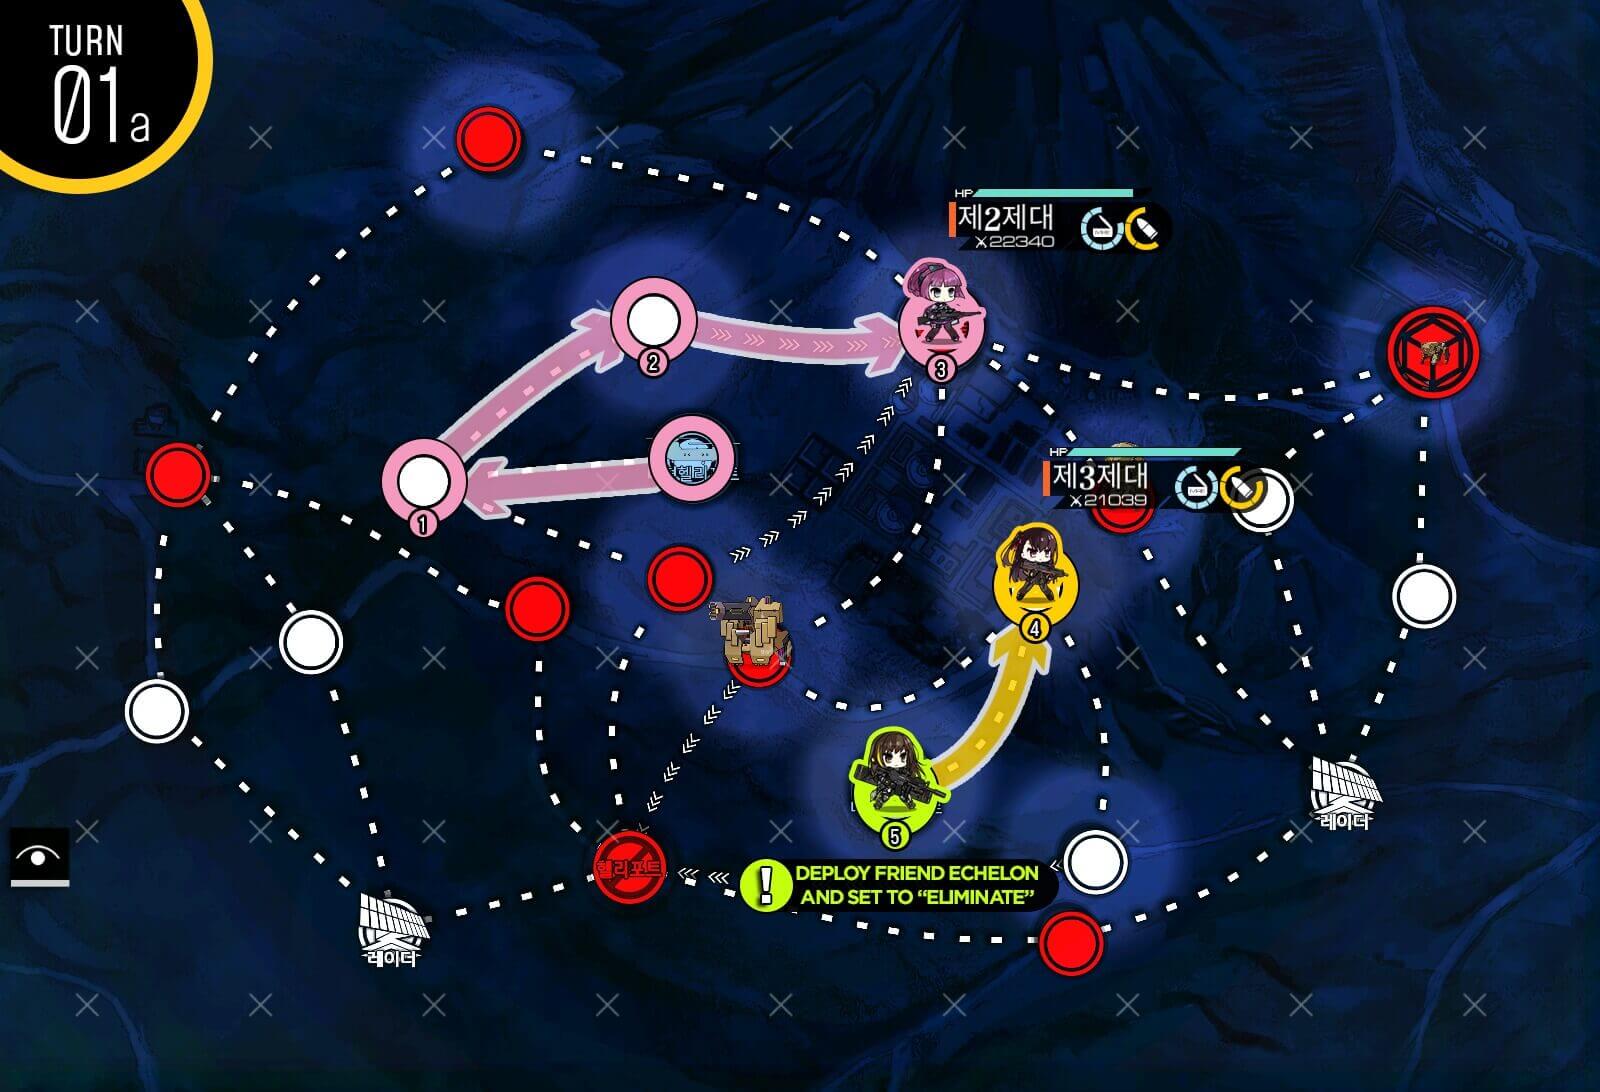
Turn 1a
Combat echelon on the left helipad captures the closed helipad at the intersection, while the combat echelon on the bottom-center moves up once for you to deploy a Friend echelon. Get a strong one that can fight just about anything.
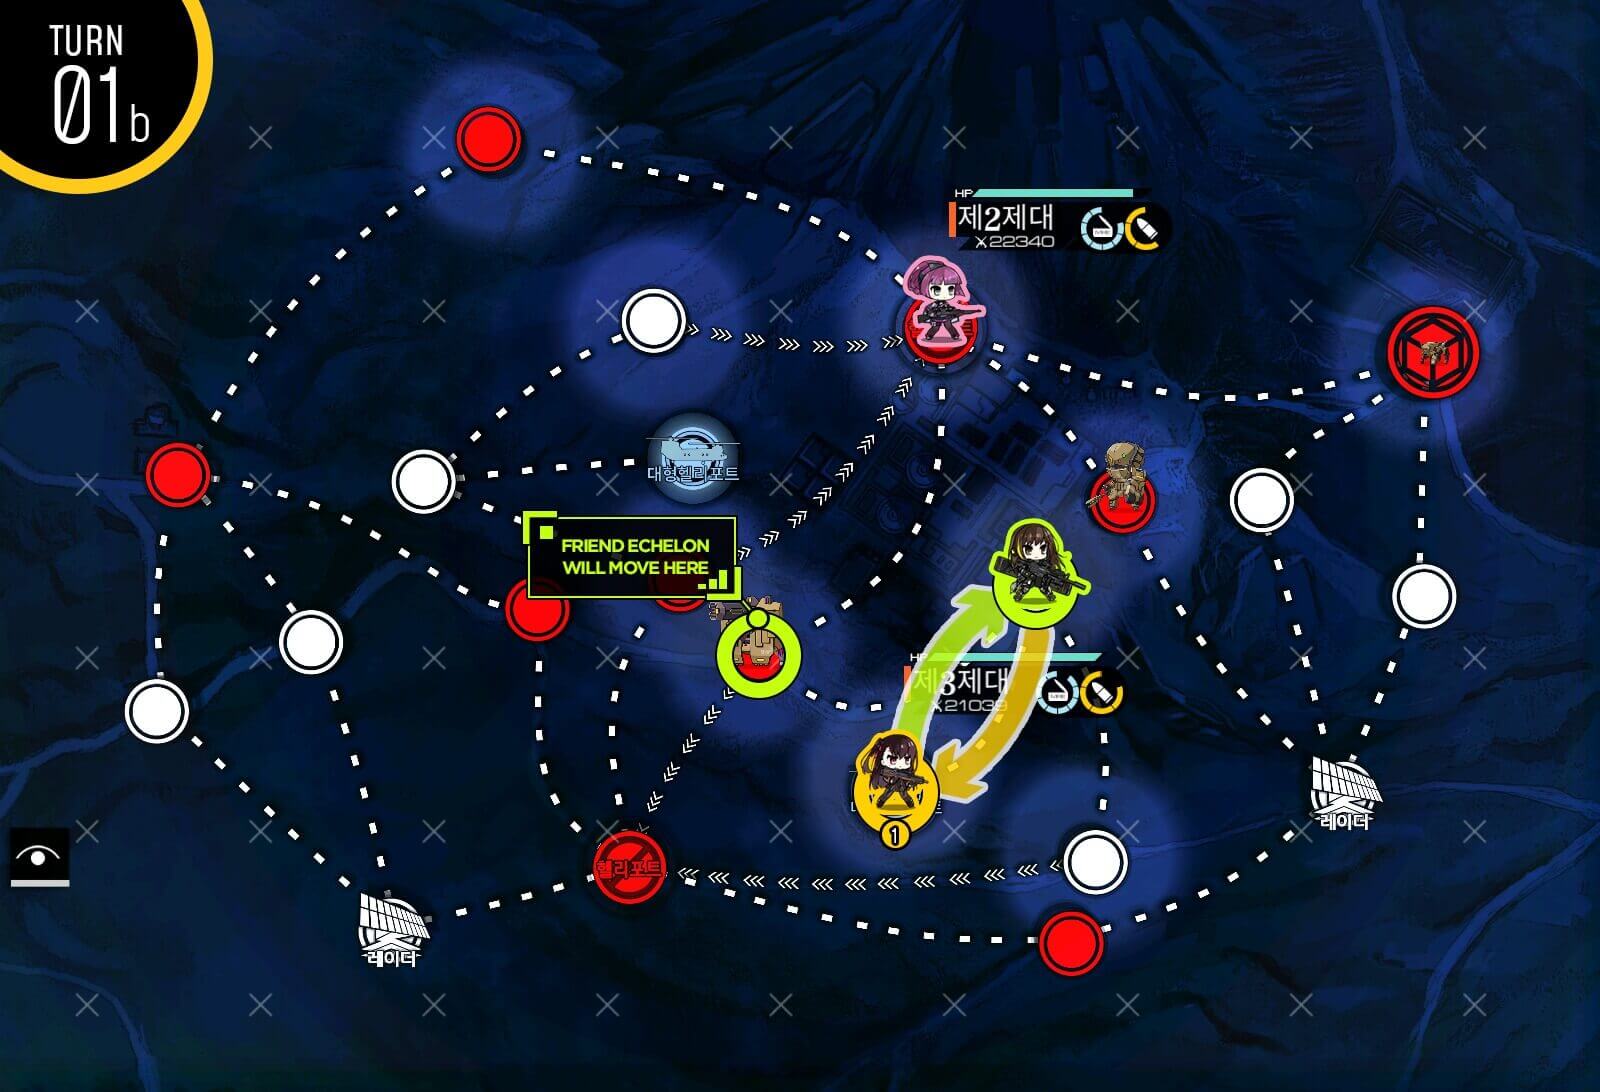
Turn 1b
We will set it to 'eliminate' and swap back into the helipad.

Turn 2a
Combat echelon at the bottom side moves towards the closed helipad at the bottom side first.

Turn 2b
Combat echelon at the top intersection swaps with friend echelon, then moves next to the other combat echelon. We then set the Friend echelon to 'wait'. This is so that we can split the map into two sections, both we can sweep at a time.
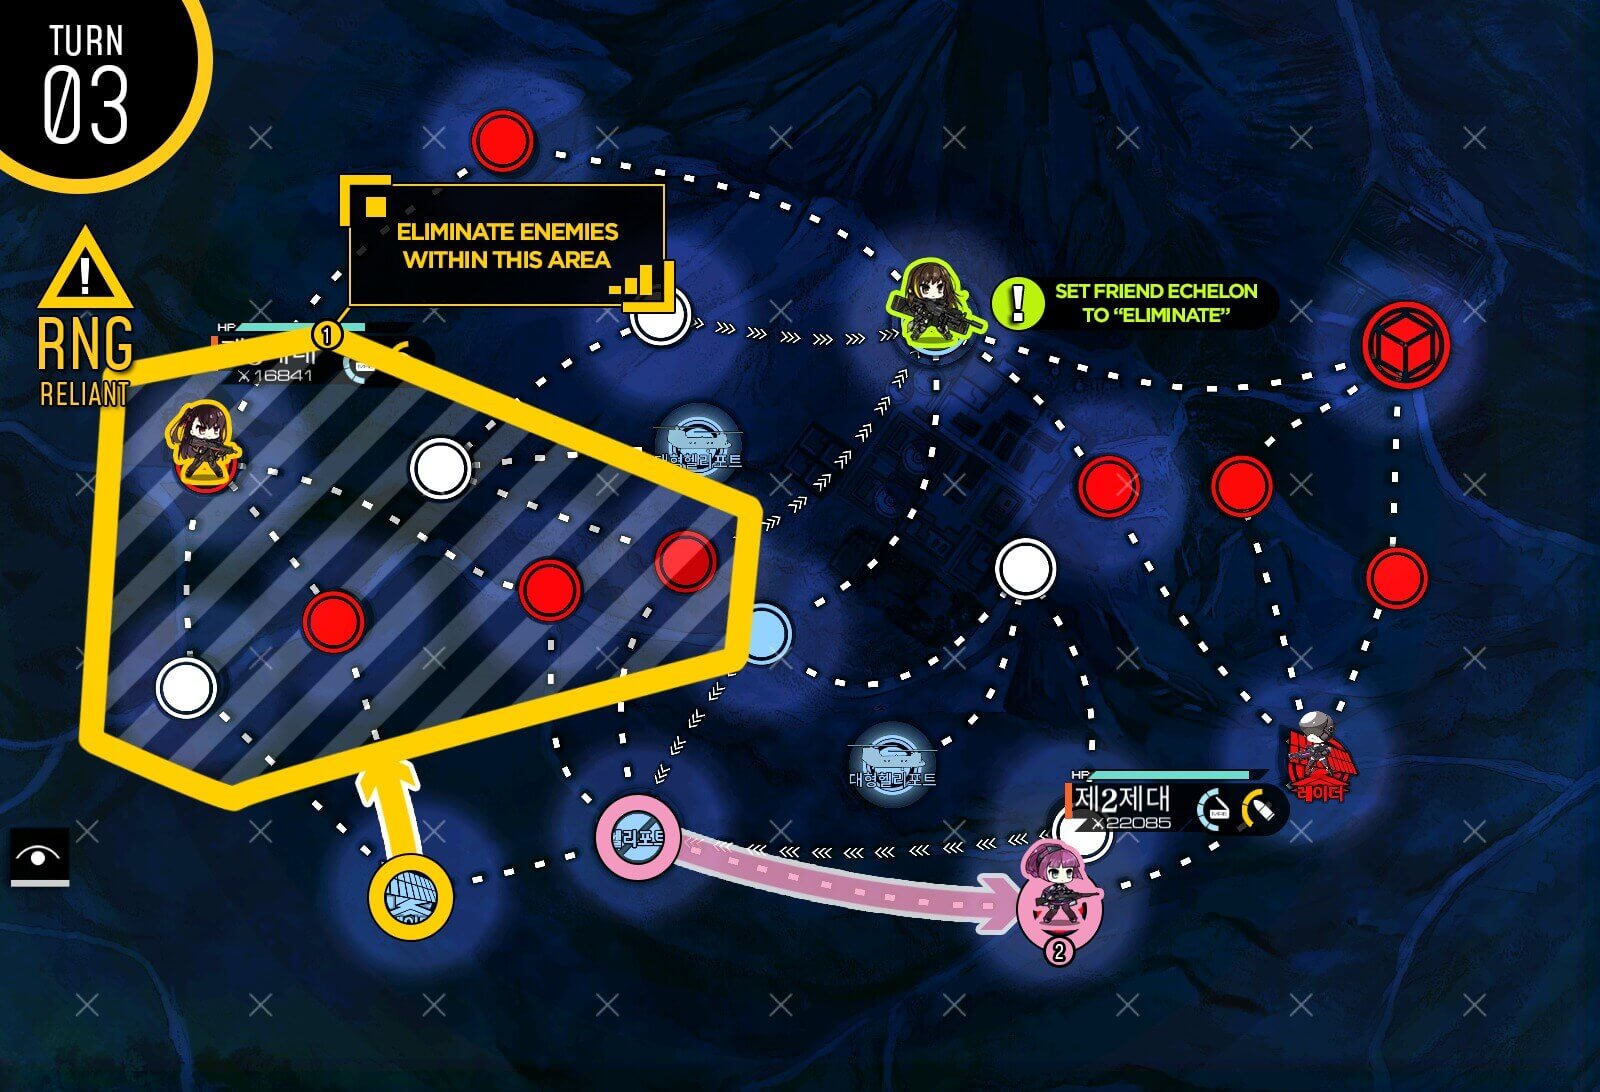
Turn 3
Clear out the left pocket of the map first, we should have plenty of movement points to do so. Set the Friend echelon to 'eliminate' once more and move the Combat echelon at the bottom intersection to close in on the right pocket.
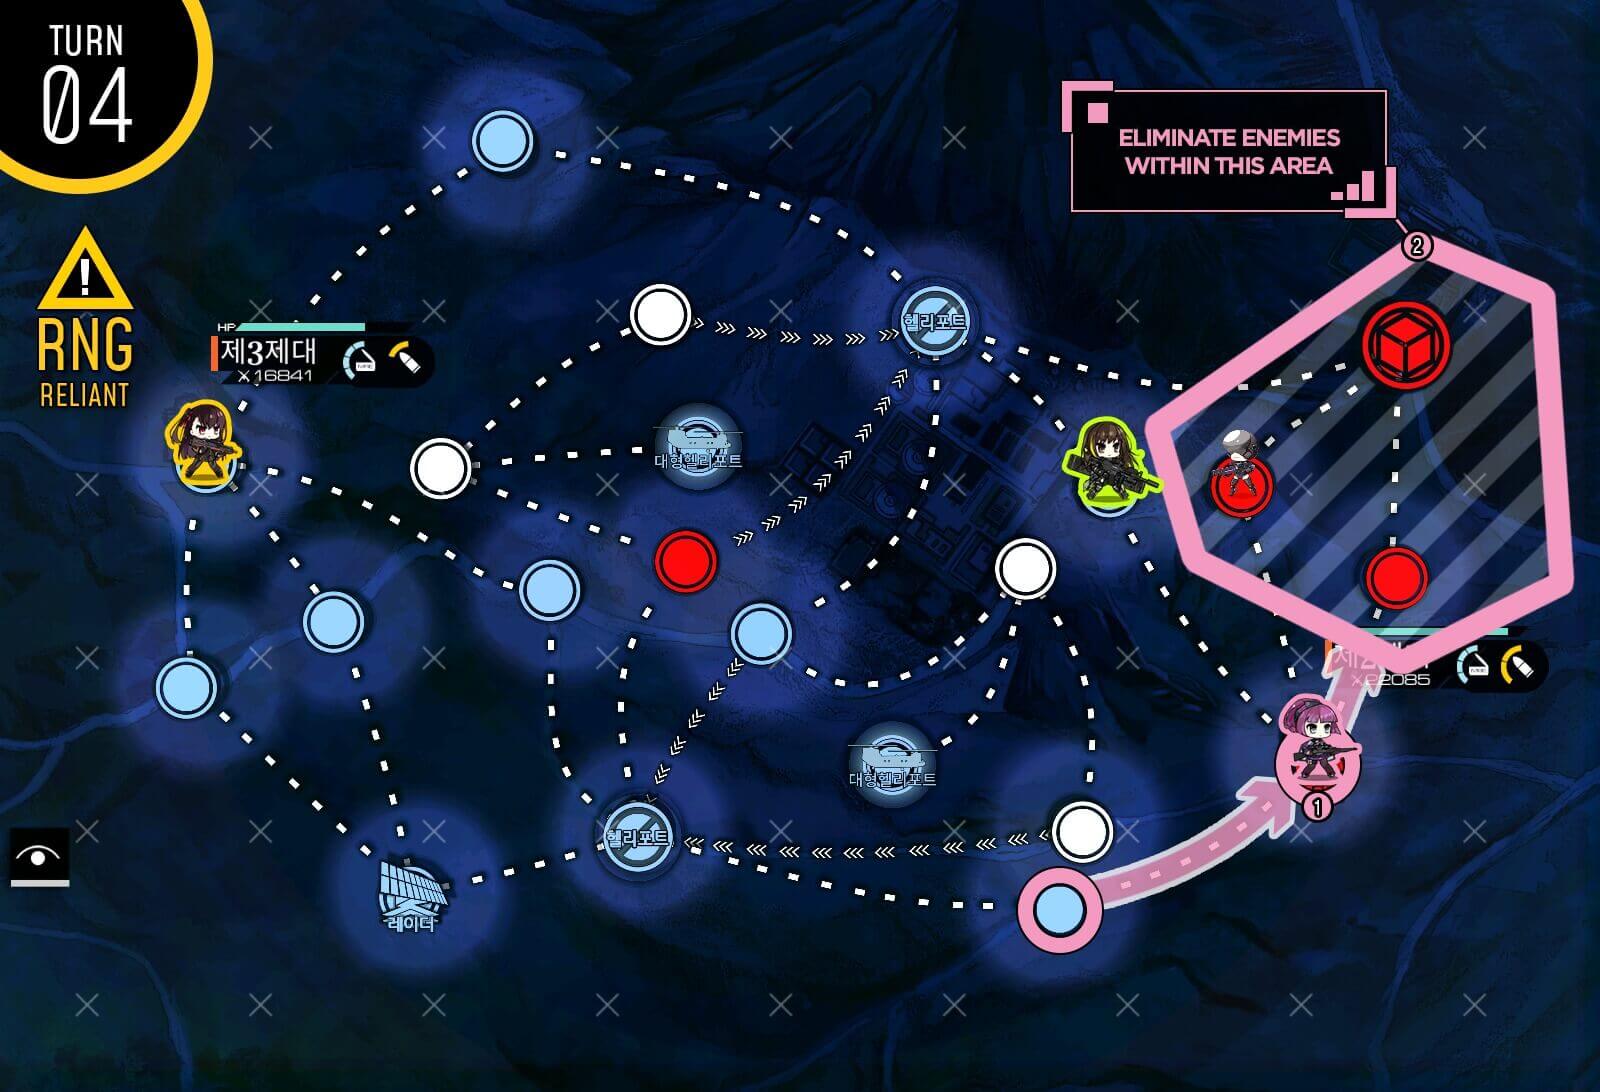
Turn 4
Clear out the remaining enemy units and if you need to, resupply using the temporary node.
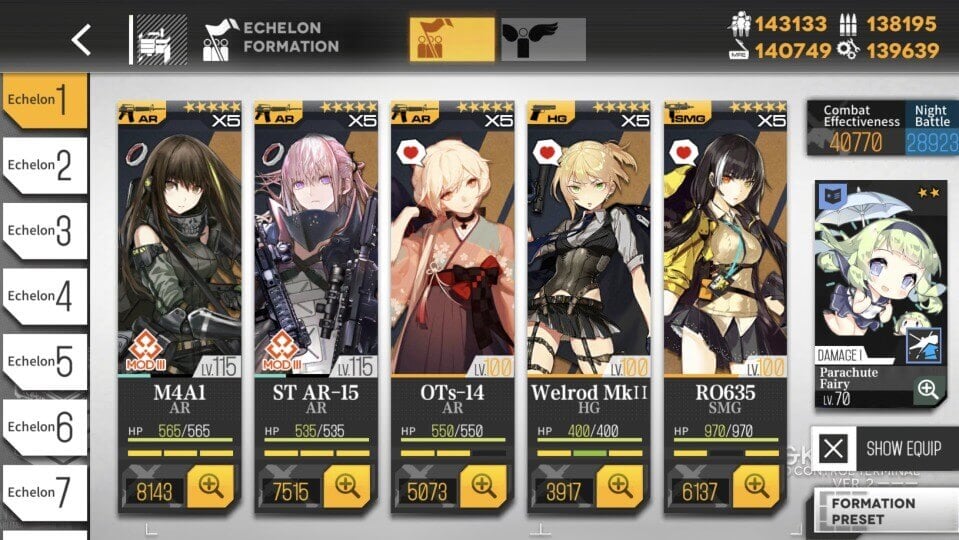
Team
This is the team set up used [with a different Fairy] to clear Dreamer and any enemy units along the way. Welrod and RO give surprisingly high survival versus Scouts and Dreamer. If you do not have OTs-14, 9A91 is a good substitute AR. As for Welrod, you can throw in Mk23 instead for pure firepower to break through the tough armor.
Formation
Once the battle against Dreamer starts, similar to 7N's boss fight, you'll need to spread your Dolls out in an X formation, so you can dodge her laser attack easily.

Turn 1
The map looks rather intimidating for its sheer size and visible enemy units shown at the start of the map, but all we have to do is kill Dreamer to end it with an S-rank'd victory. Just remember to avoid the red beans [Golyat Plus] along the way and you will be all set.