Have you checked out Area 1N yet? I explain my Echelons set up [Here].
UPDATE:11-06-2018
- Included ARSMG + HG method for 5-4N Manticores to reduce resource usage
Welcome to Chapter 5N, where night missions’ difficulty ramps up even higher and frequent repair seems unavoidable. Not only have enemy units gotten stronger, but their starting positions in battle are also farther forward, giving less time for T-dolls to kite and buy time for back-line DPSs to take care of the threats.
This Chapter is where MGSG echelons truly shines, as their burst of damage up front is going to reduce incoming damage, or RFHG echelons that will take care of back-line enemies like Nemeum. Additionally, RFHG Echelon will be relied on to take care of Manticores on 5-4n, so make sure to top up on Skill levels and equipment enhancements/calibrations if you want to minimize the repair later on.
-
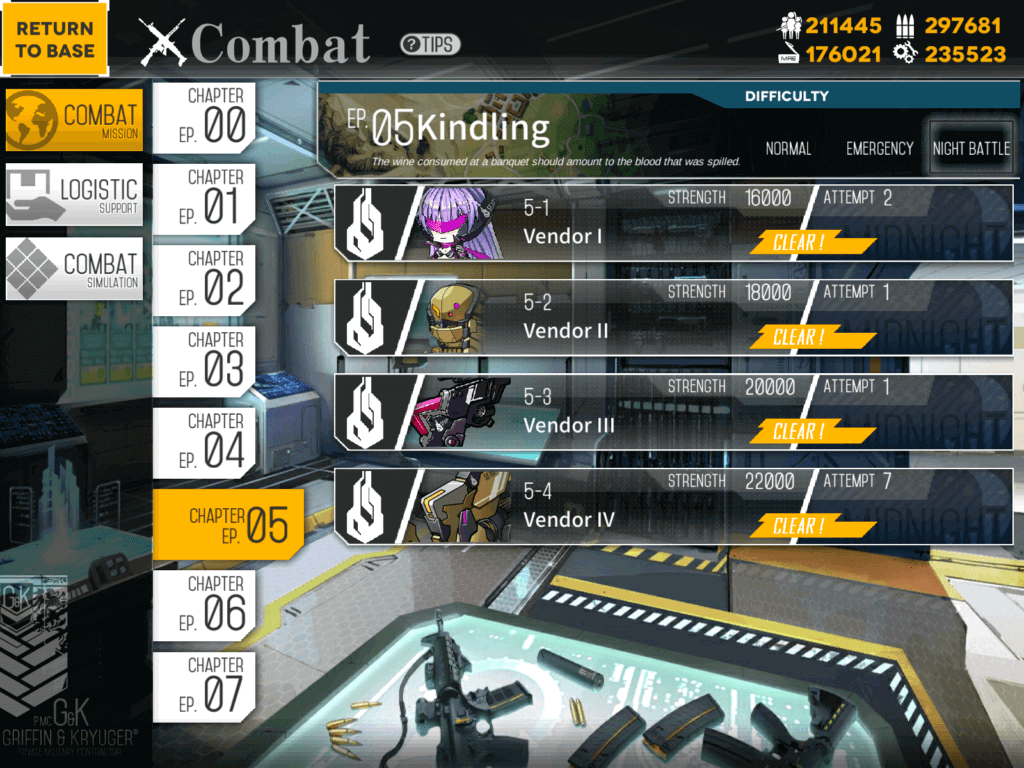
5-1N
S-Rank condition: Kill all 9 unit in 5 turns
Required Squads: 2AR + 1 Friend Echelon
Shown enemy Str: 16,000


-
5-2N
S-Rank condition: Kill all 13 unit in 2 turns
Required Squads: 1RF + 1MGSG/ARMGSMG + 2 Dummy + 1 Friend Echelon
Shown enemy Str: 18,000
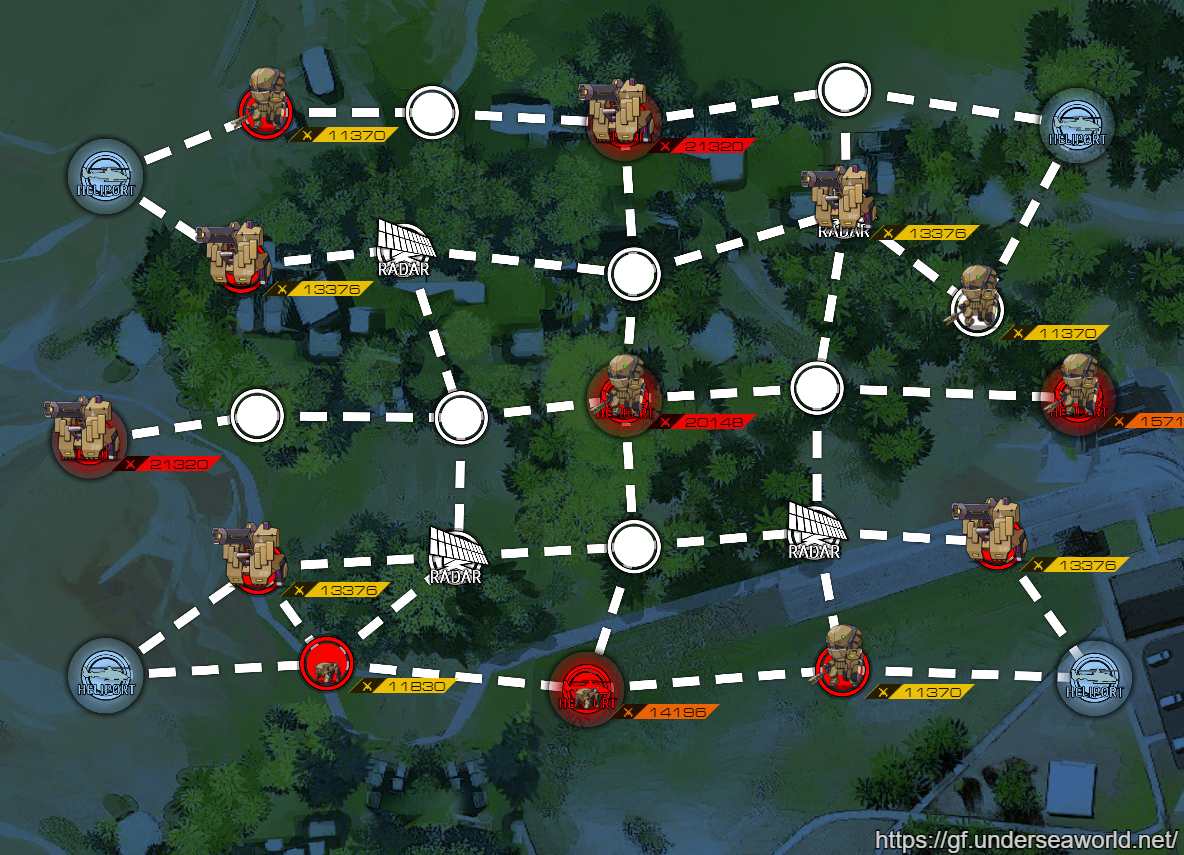

I have added photo of where echelons are set up. Because of armored Dinergates, MG echelons are better suited than RF echelons to handle the bottom side. You can try a mix of AR and MG echelons if you are lacking the T-dolls.
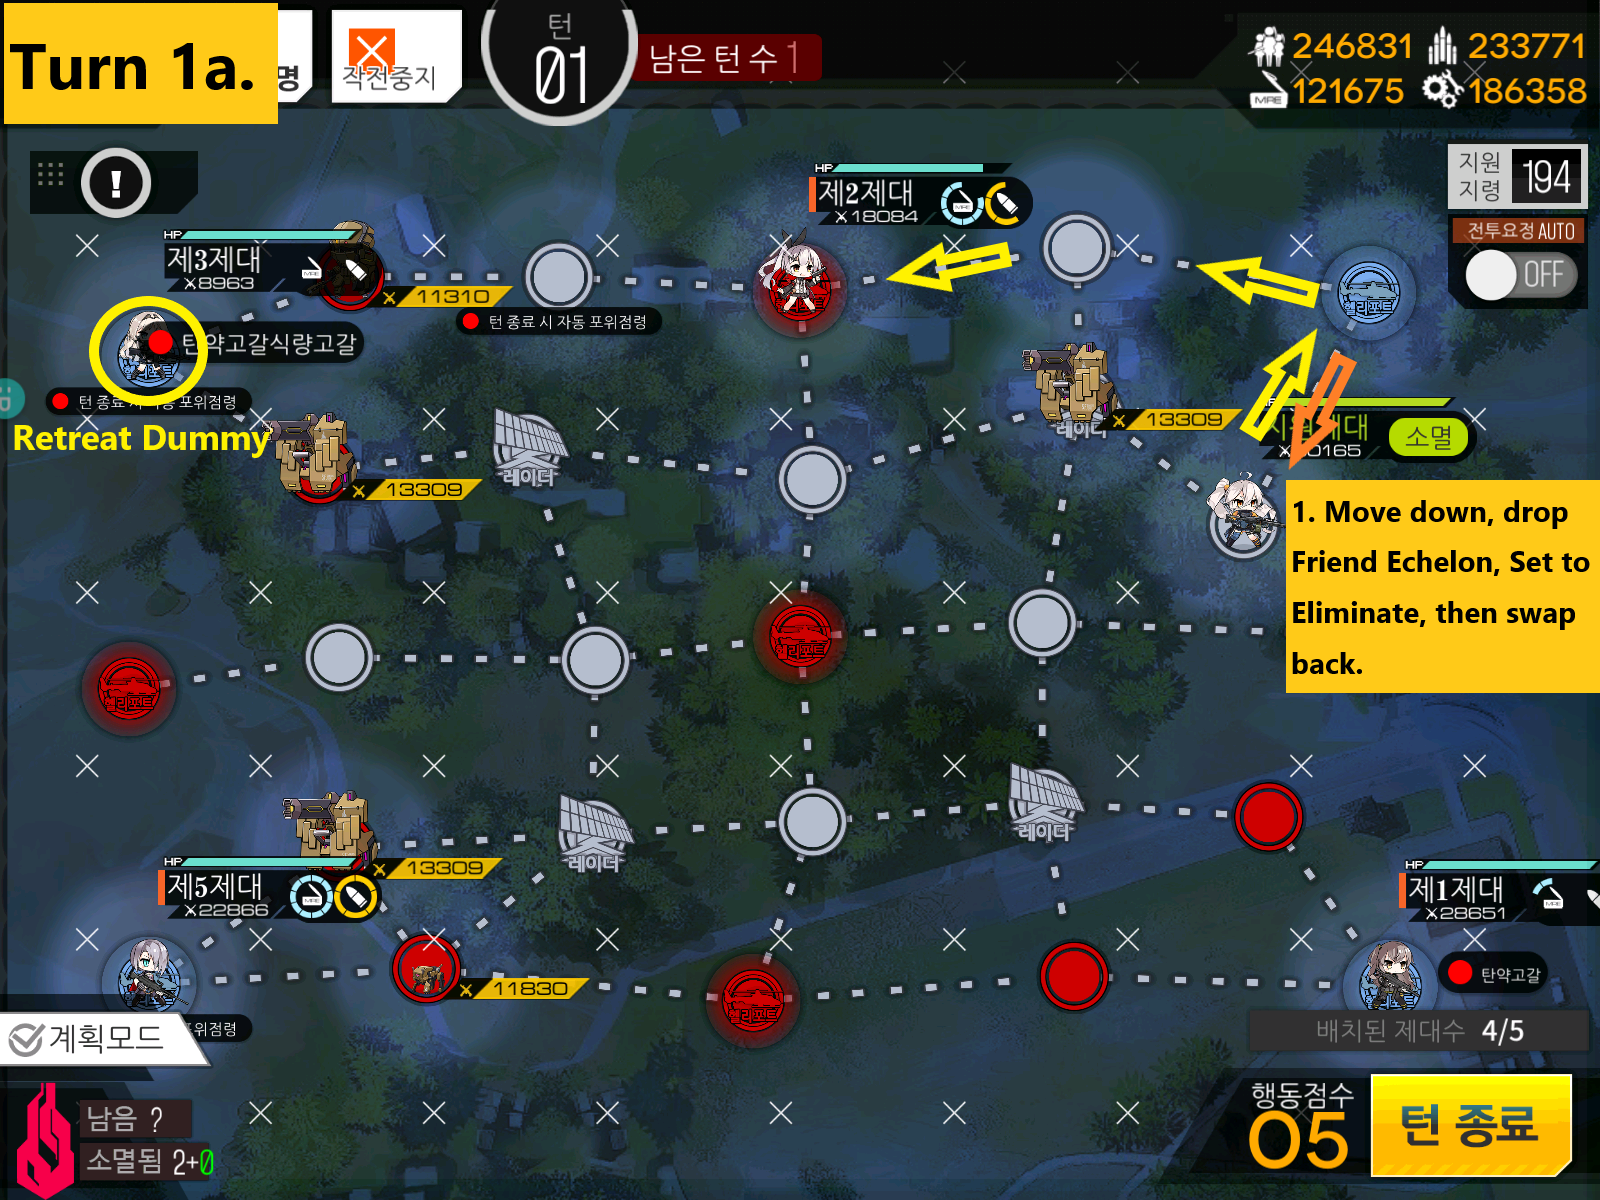
Because we only got 2 turns and there’s lot to be done, I have divided movements to top and bottom. Make sure to retreat the Dummy on the left top helipad before moving on to bottom side.

The reason we retreated Dummy and resummoned to the bottom is to make sure that helipad does not become taken in end of the turn by being surrounded. We will need all the movement points we get. Swap MG echelon to helipad at the end to defend it from potential run-in.
-
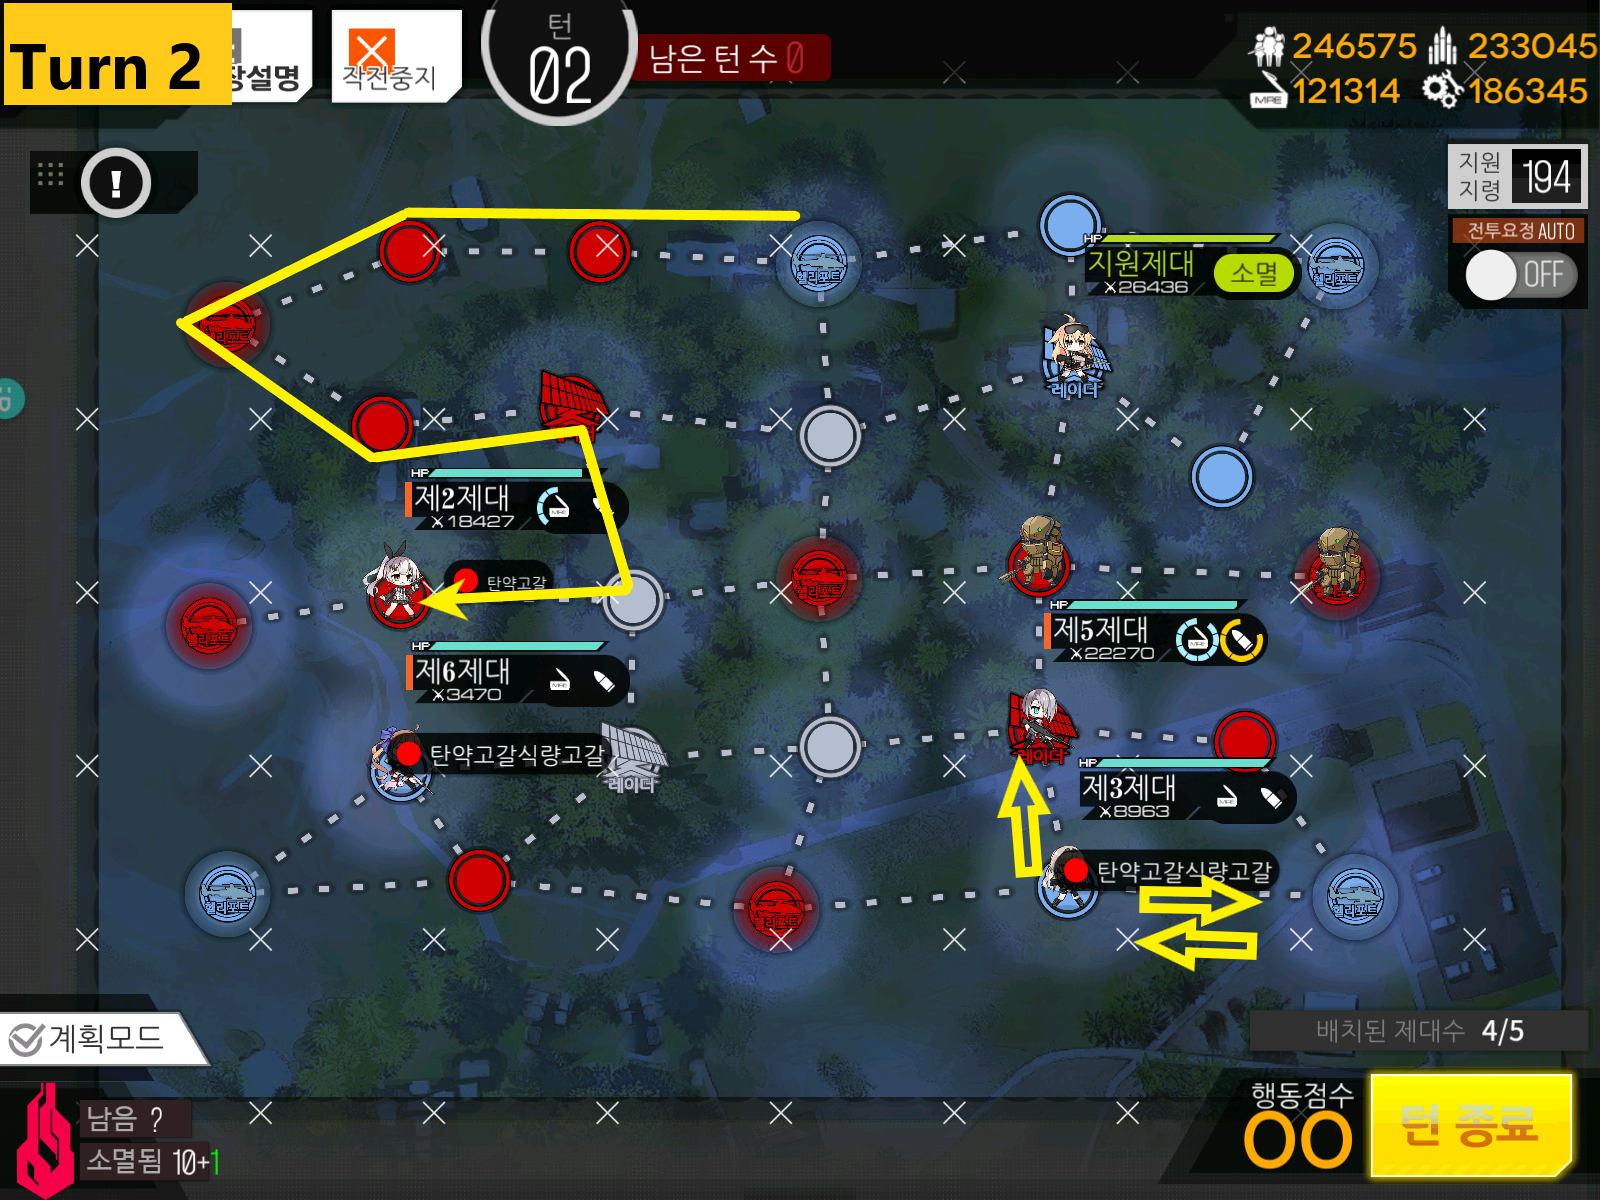
5-3N
S-Rank condition: Kill all 13 unit in 5 turns
Required Squads: 1MGSG/ARMGSMG + 2AR
Shown enemy Str: 20,000


Start with MG/ARMG Echelon on the right moving up to helipad and AR Echelon on the left. After taking out the unit in the front, drop 2nd AR echelon on the helipad.

[I lost my footage… so here is the gist of the turn.] MG/AR echelon stay put while 2 AR Echelons on the left expand up north.
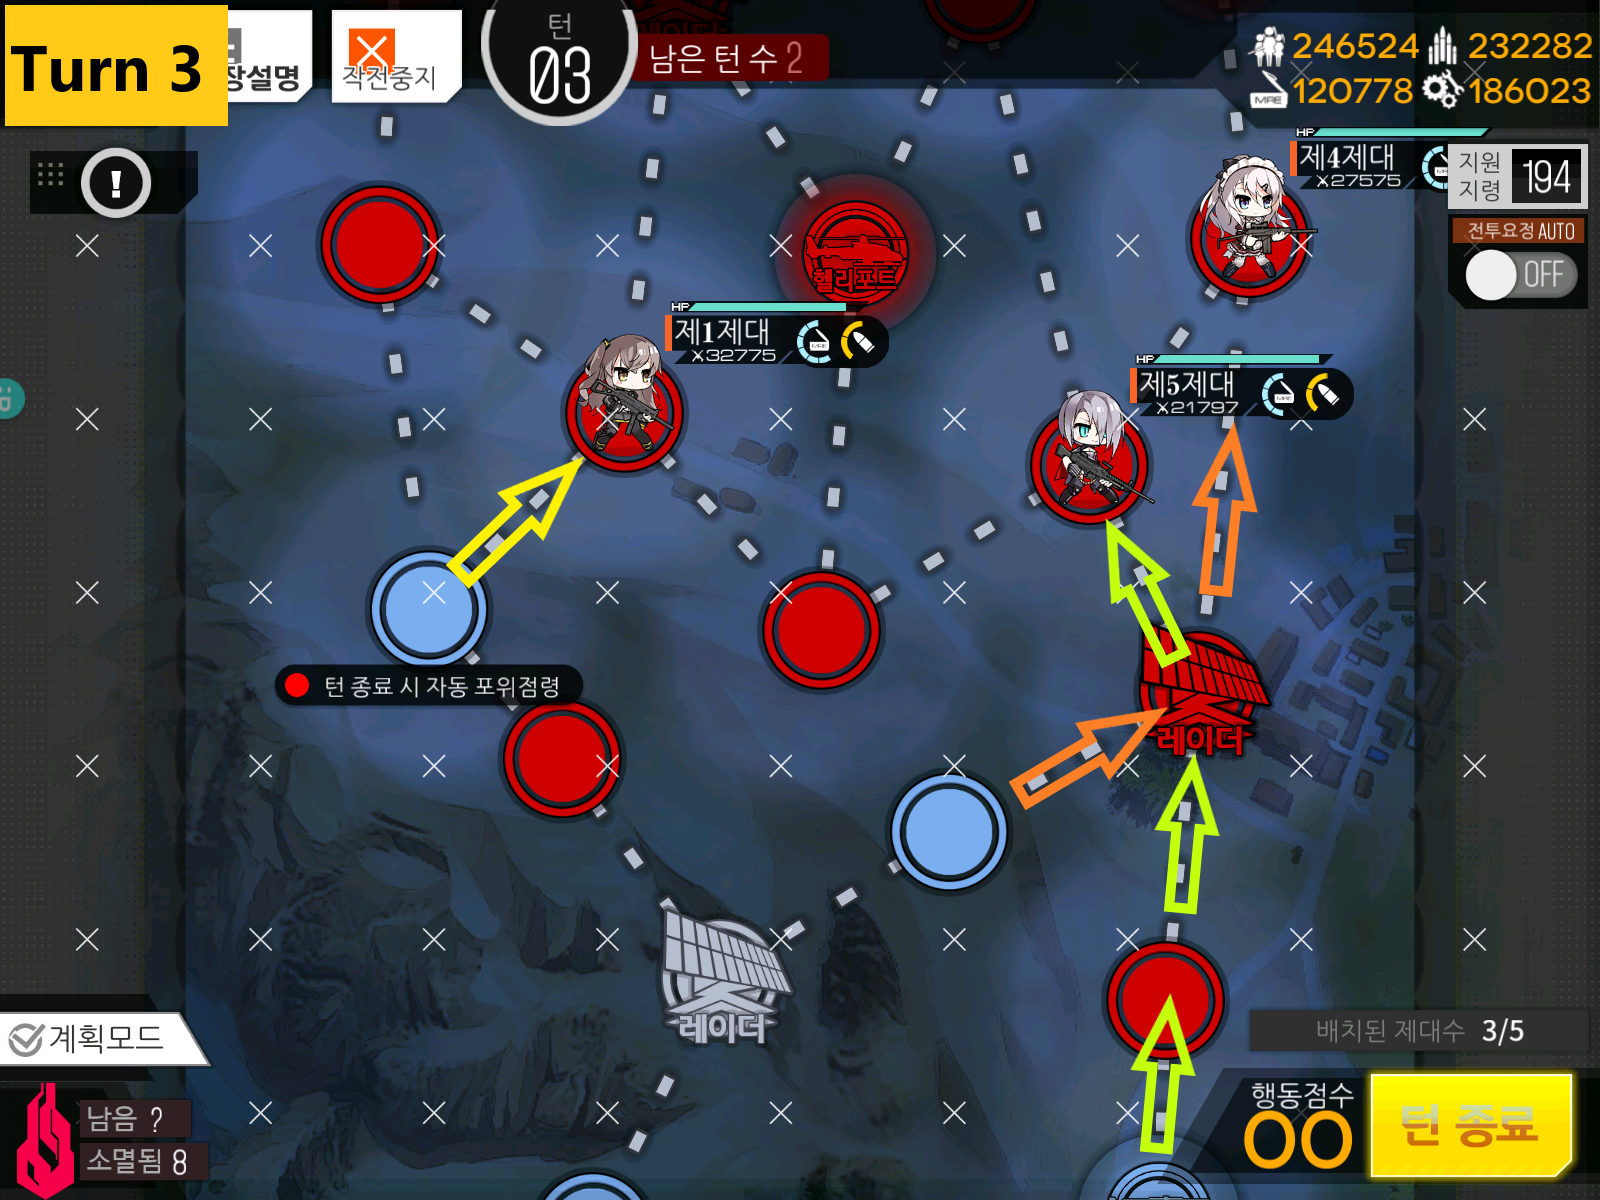
I have color coordinated the echelons to make it easier to understand the movements. If there’s an enemy unit in the Radar intersection, use MG Echelon to maintain HP on SMGs for Scout fight ahead.
I have yet to see any enemy units on the left helipad but it’s better safe than sorry. Check to make sure the enemy is not there then proceed up to decrease the area that needs to be covered on the last turn.

-
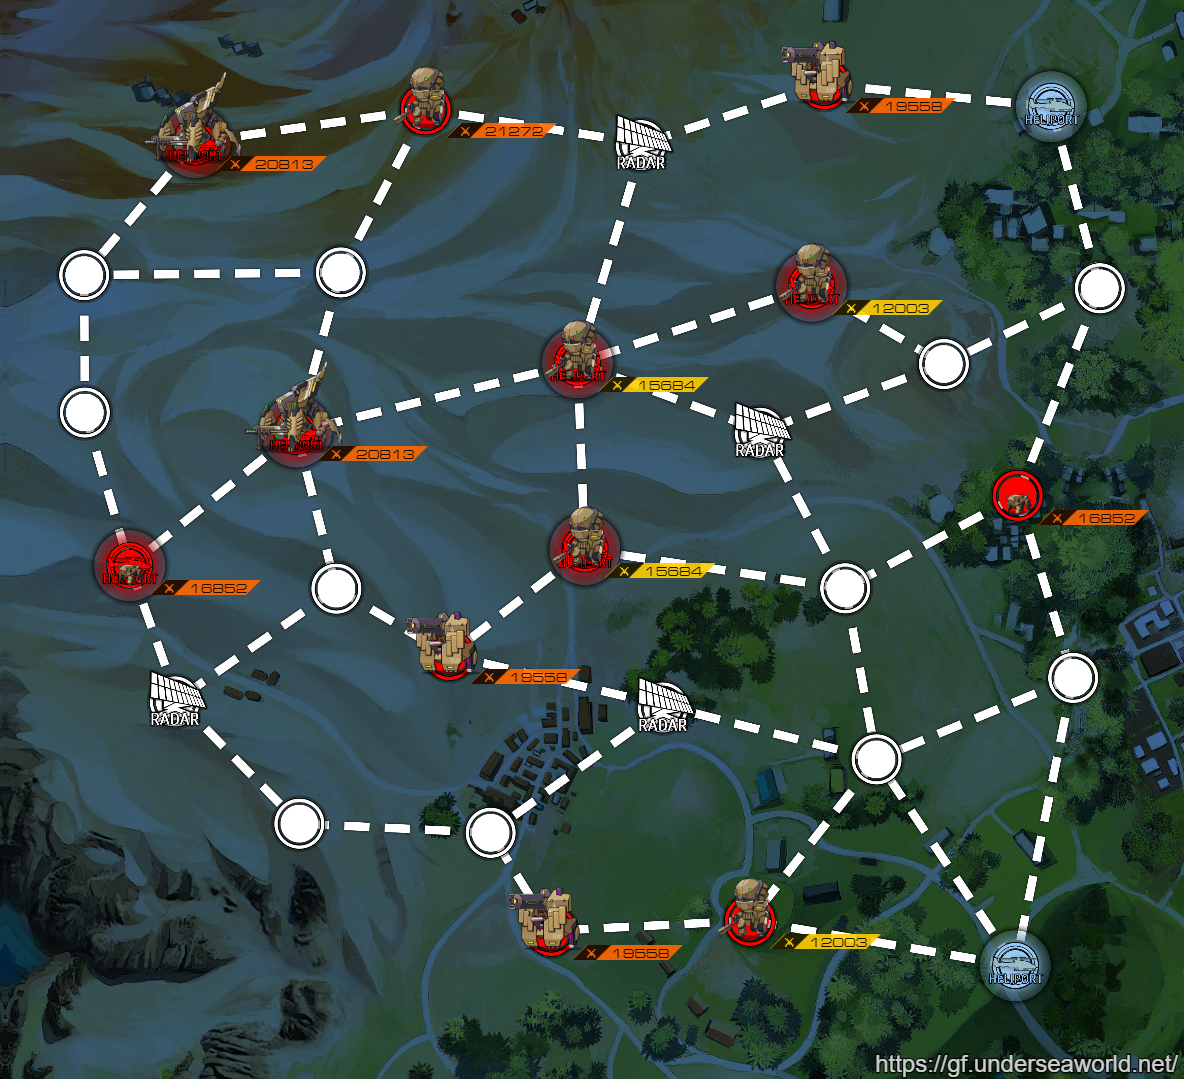
5-4N
S-Rank condition: Kill all 12 unit in 6 turns
Required Squads: 2RF + 2MG/ARMG… Recommended [CAN be done with 1RF + 1 ARHG + 1 Friend + 1 Dummy at a high repair cost
Shown enemy Str: 22,000
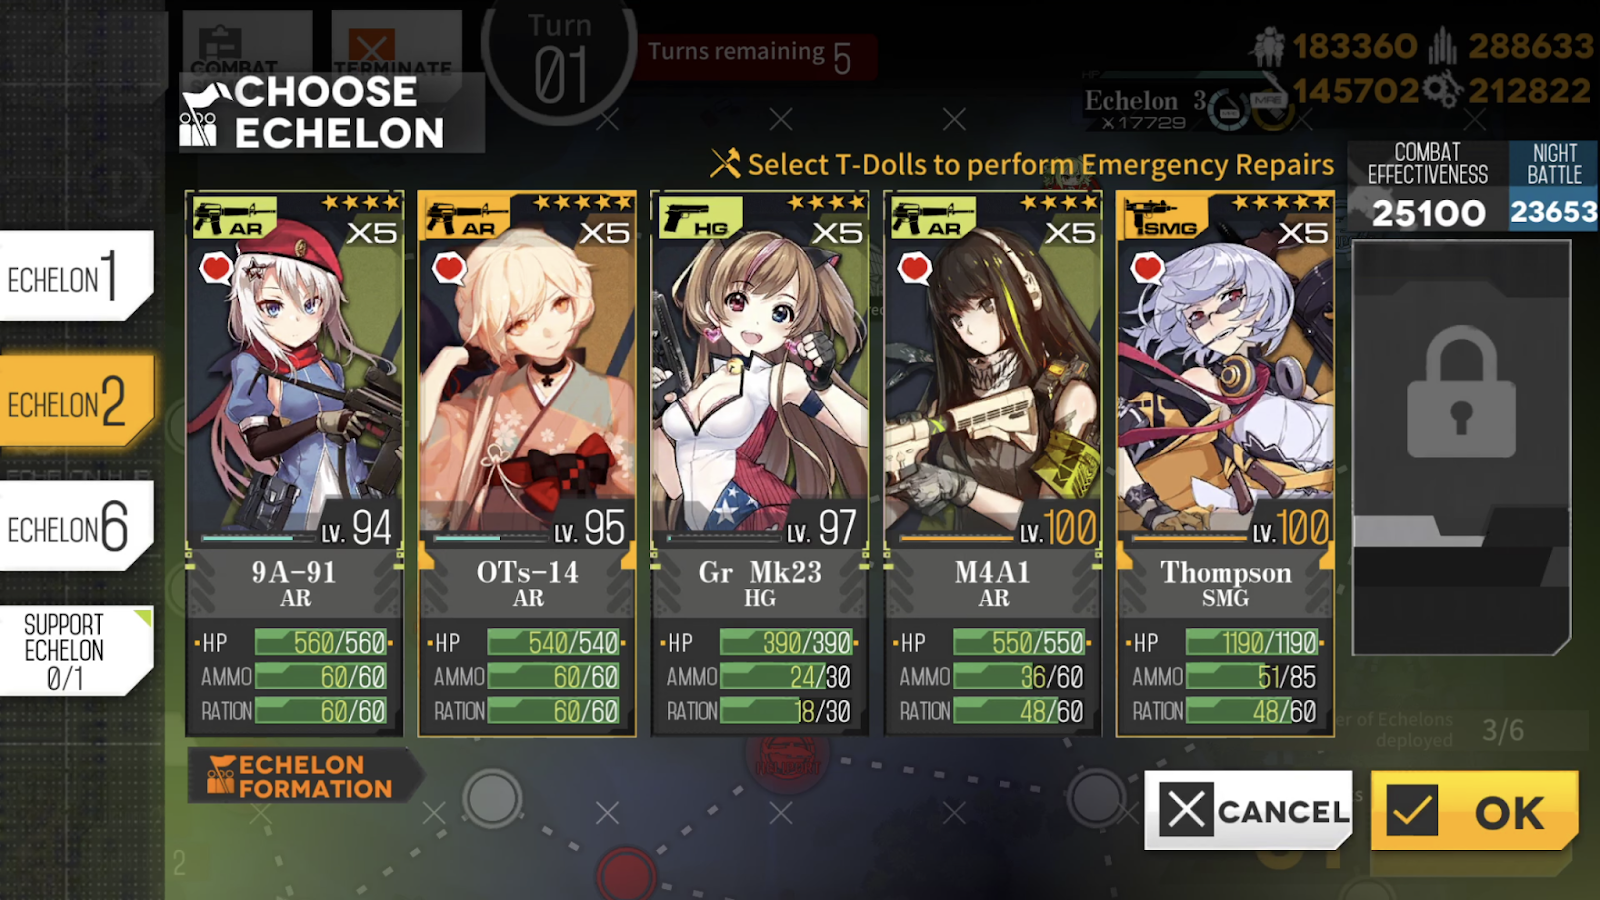
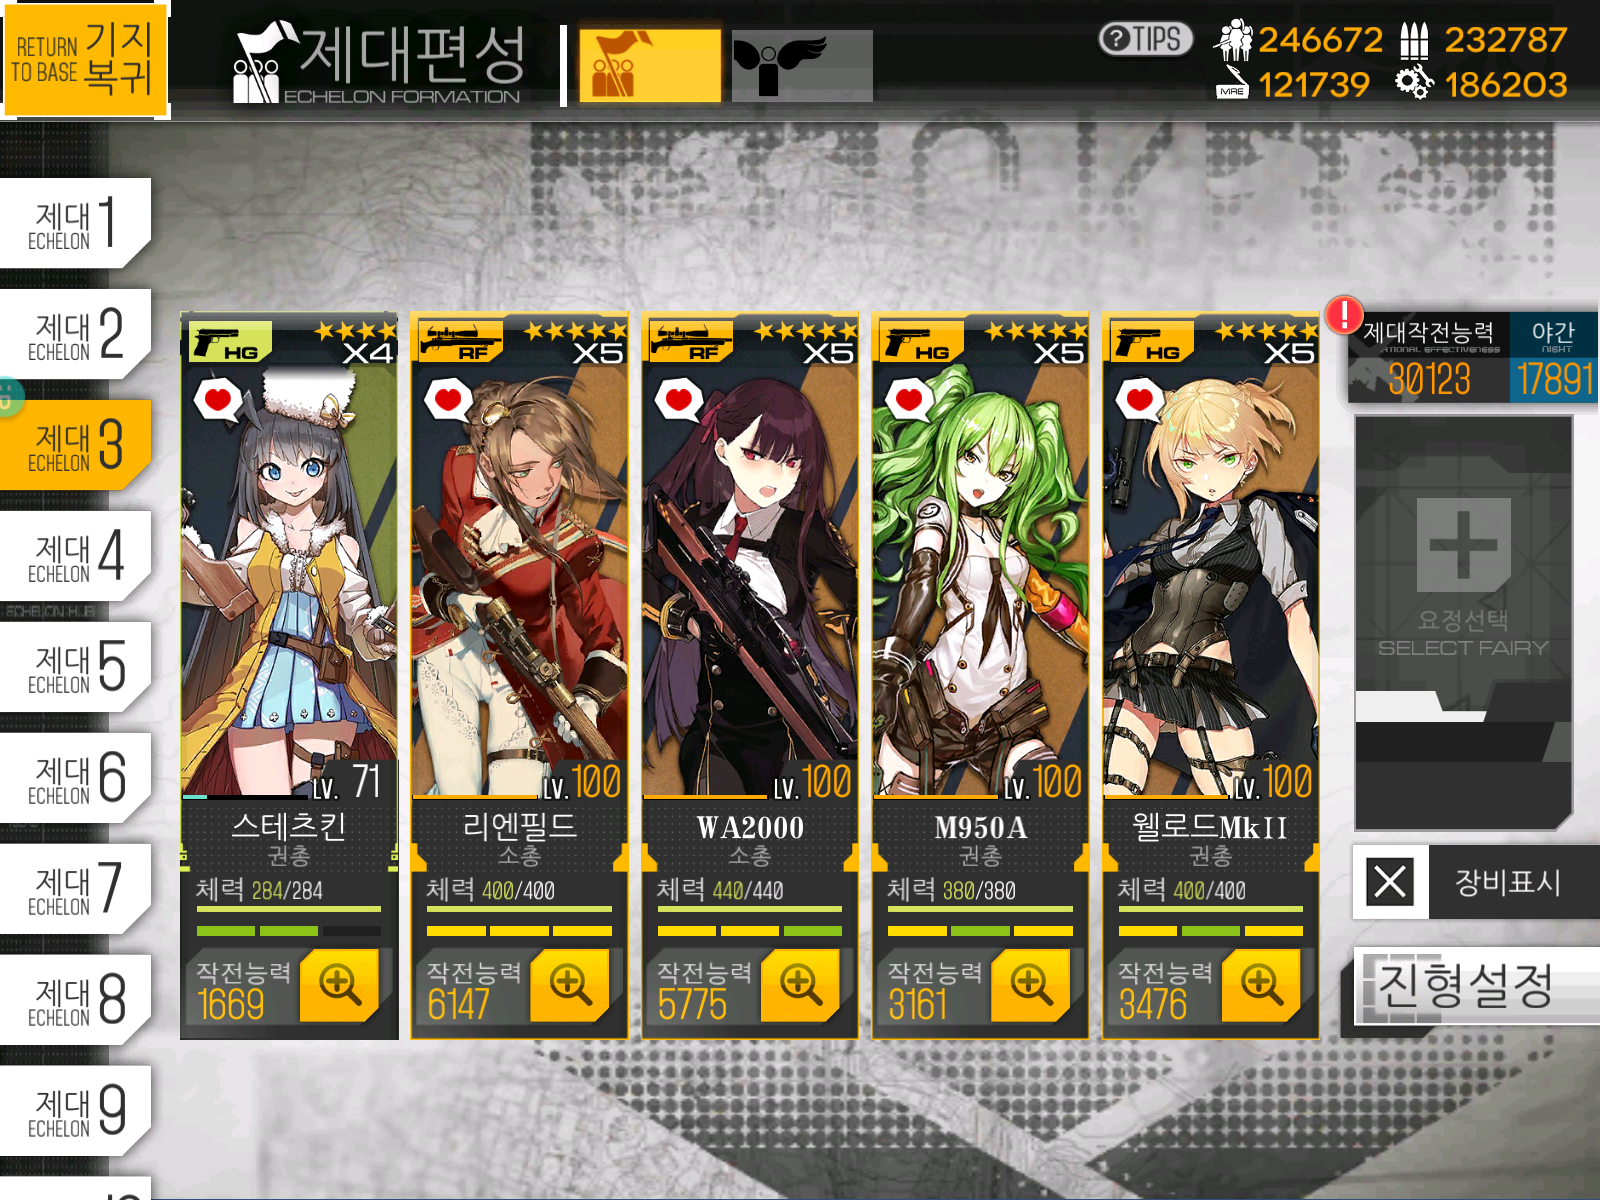
Here is my set up for the replacement Echelon to 2nd MGSG echelon I was using originally. It can reliably kill Manticore units but I suggest you avoid other units if you can if kiting is an issue for you.

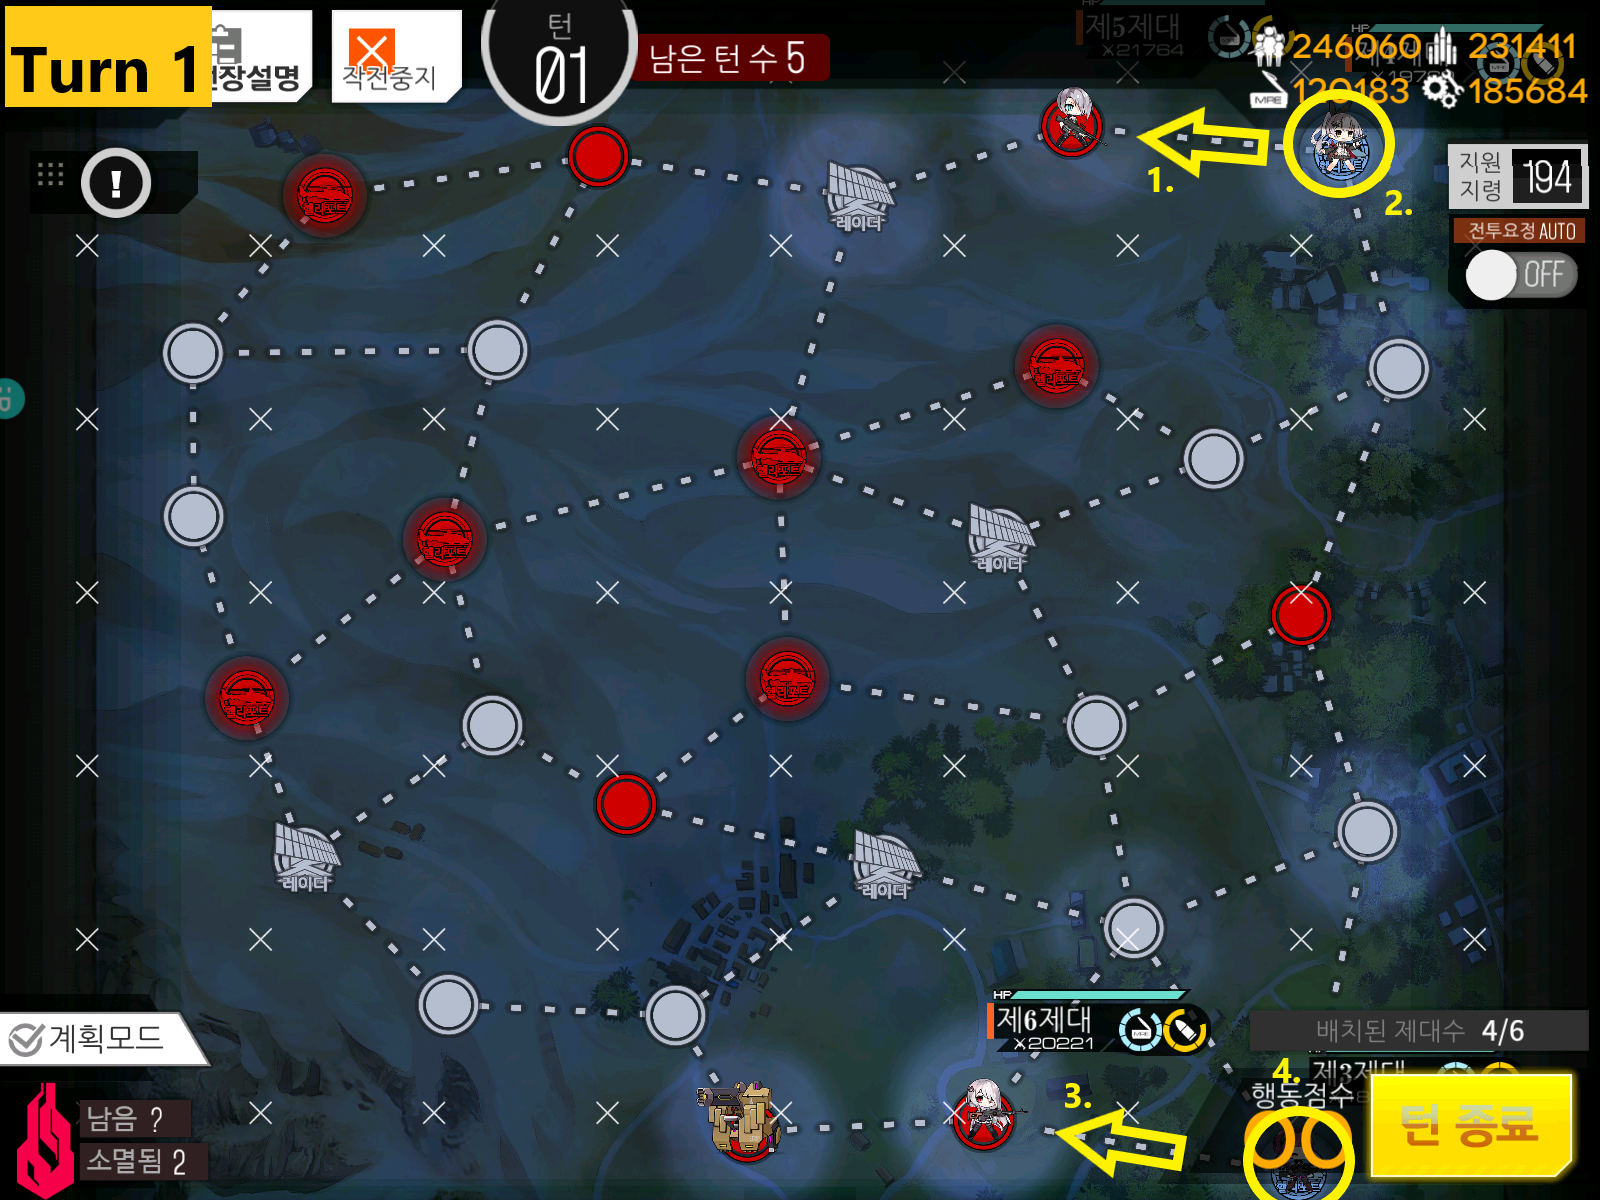
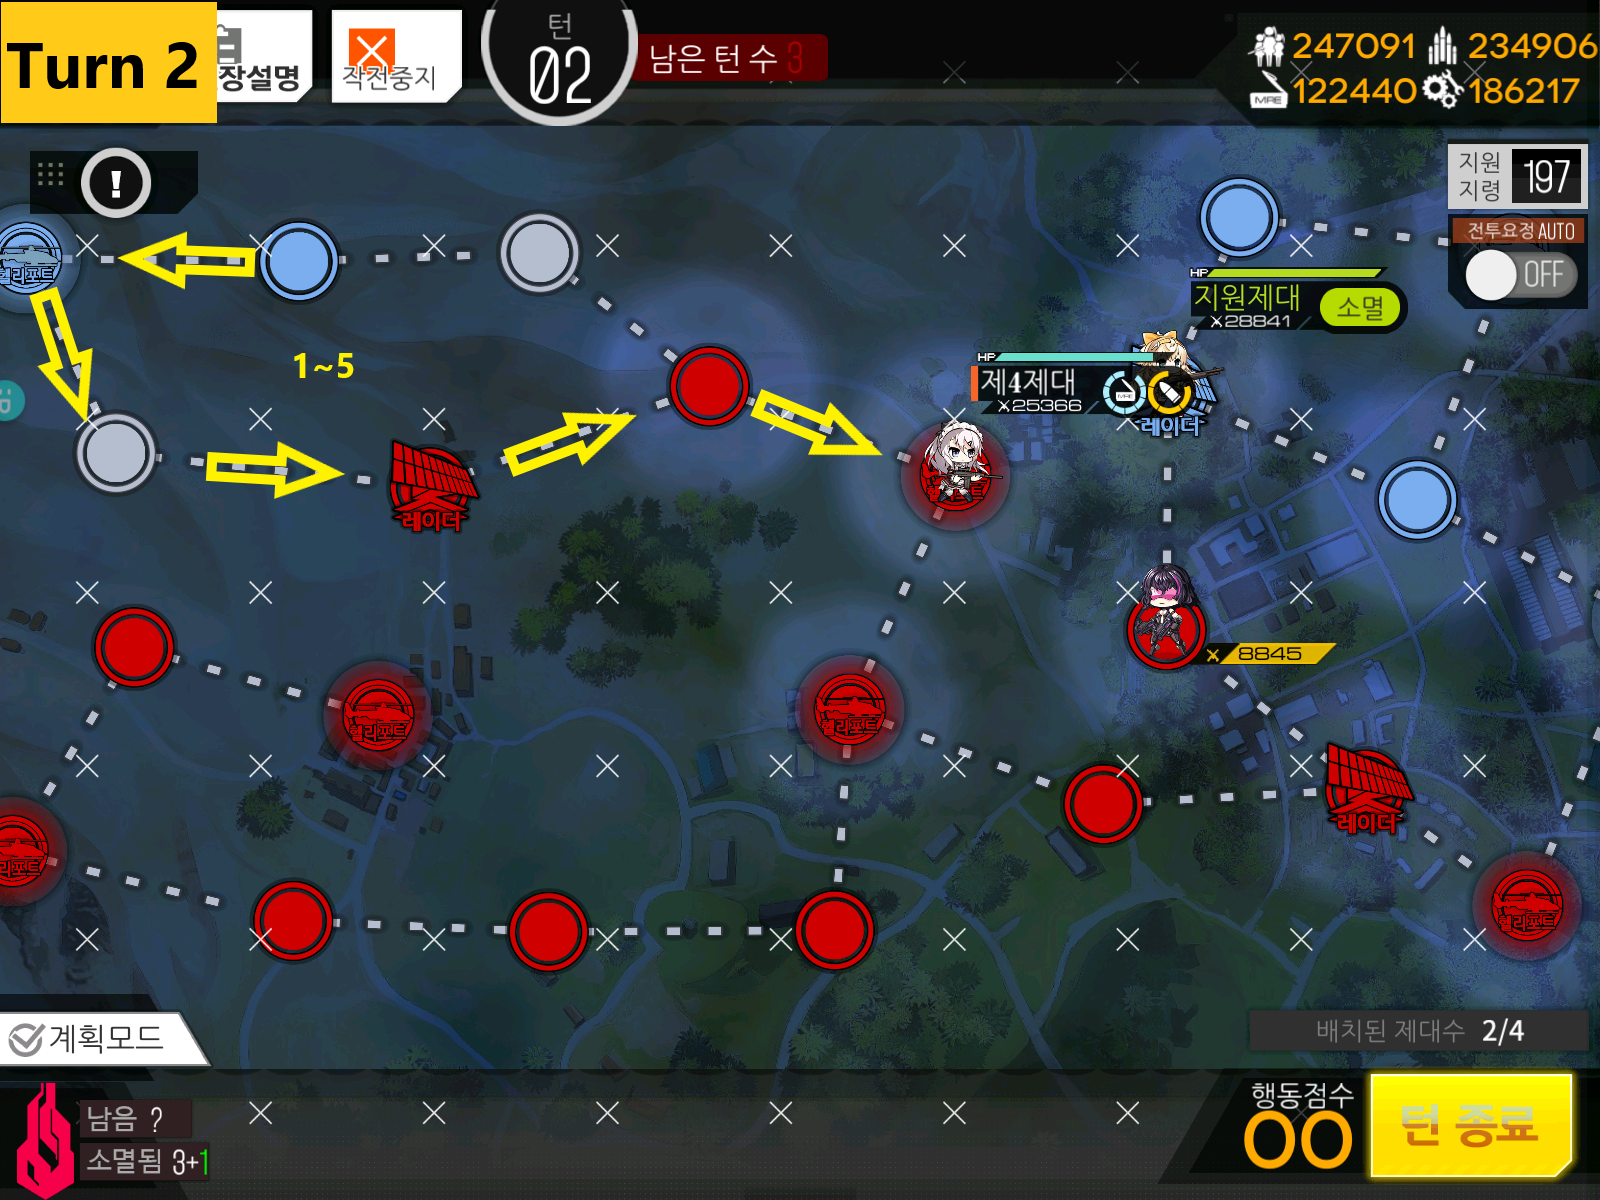
Start with 2 MG/ARMG echelon on each helipad. Move one to left and spawn RFHG Echelon that will fight Manticore.
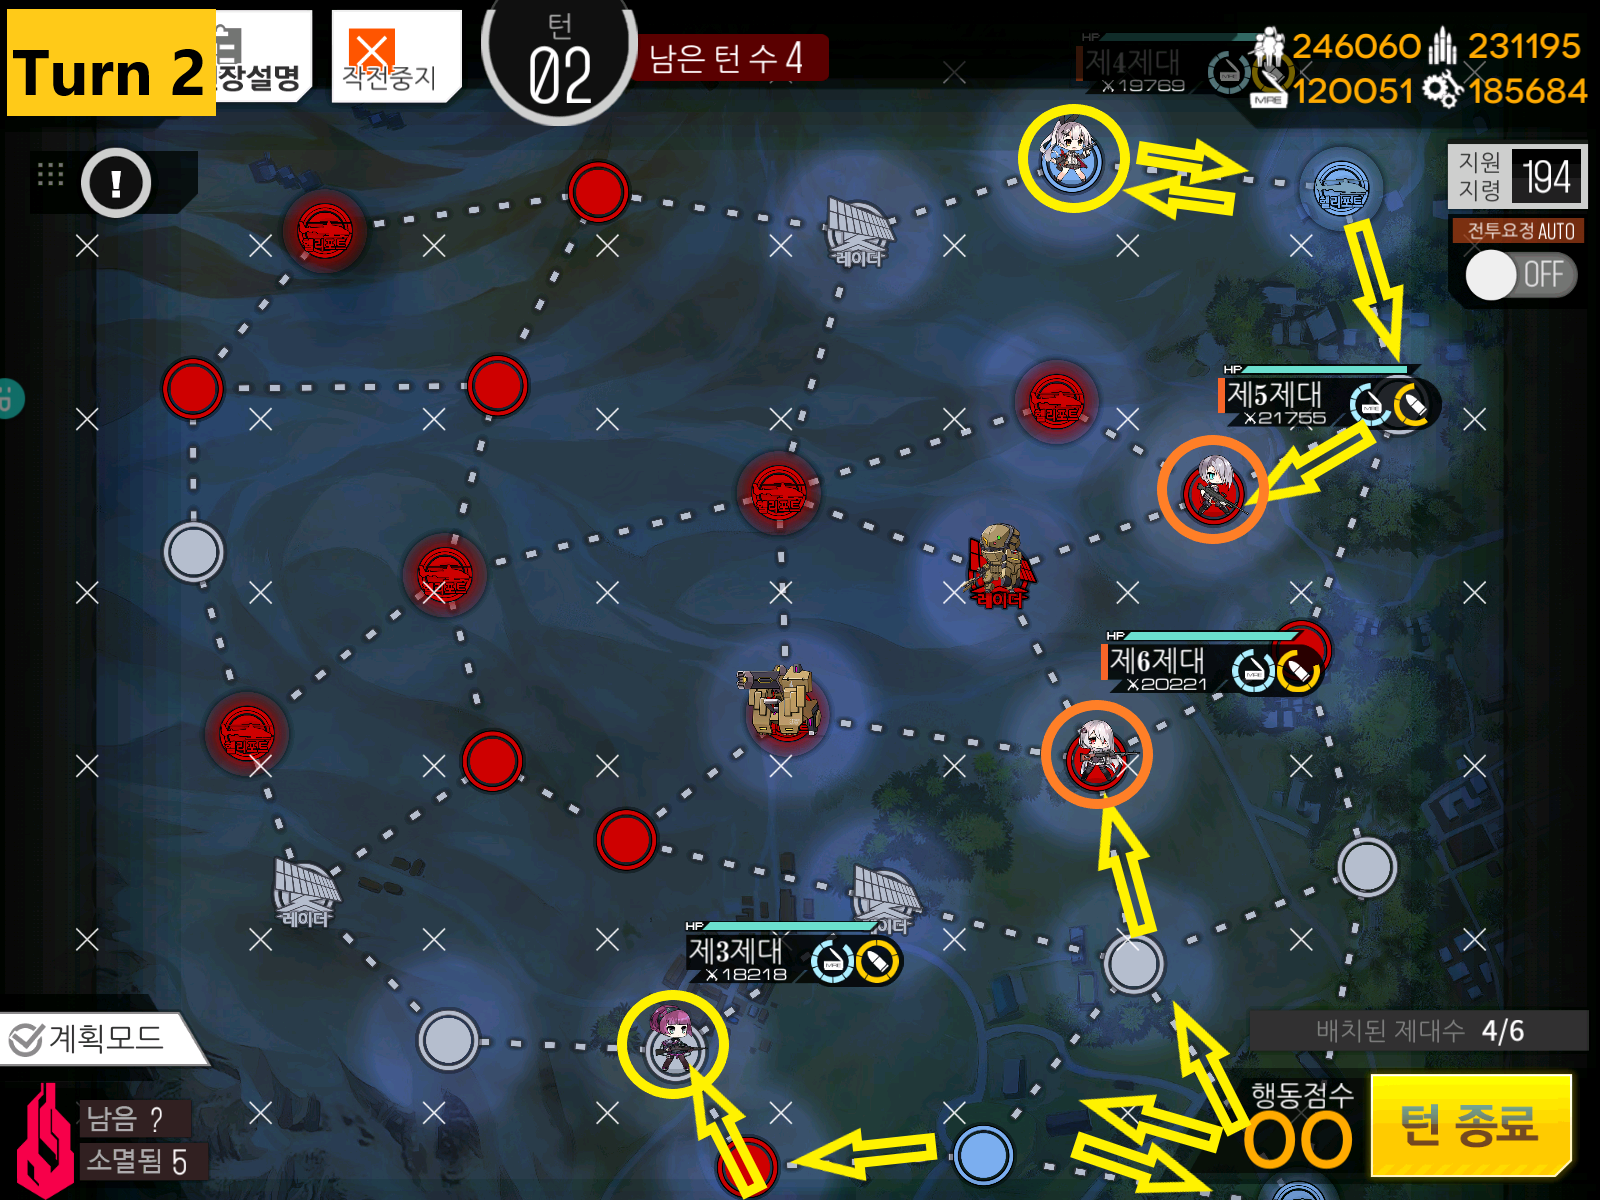
I Swapped MG with RF echelon and sent them to center where Tarantula and high CE armor units are chilling in the center. Retreat SG units against Nemeum to prevent damage while MGs do the work.
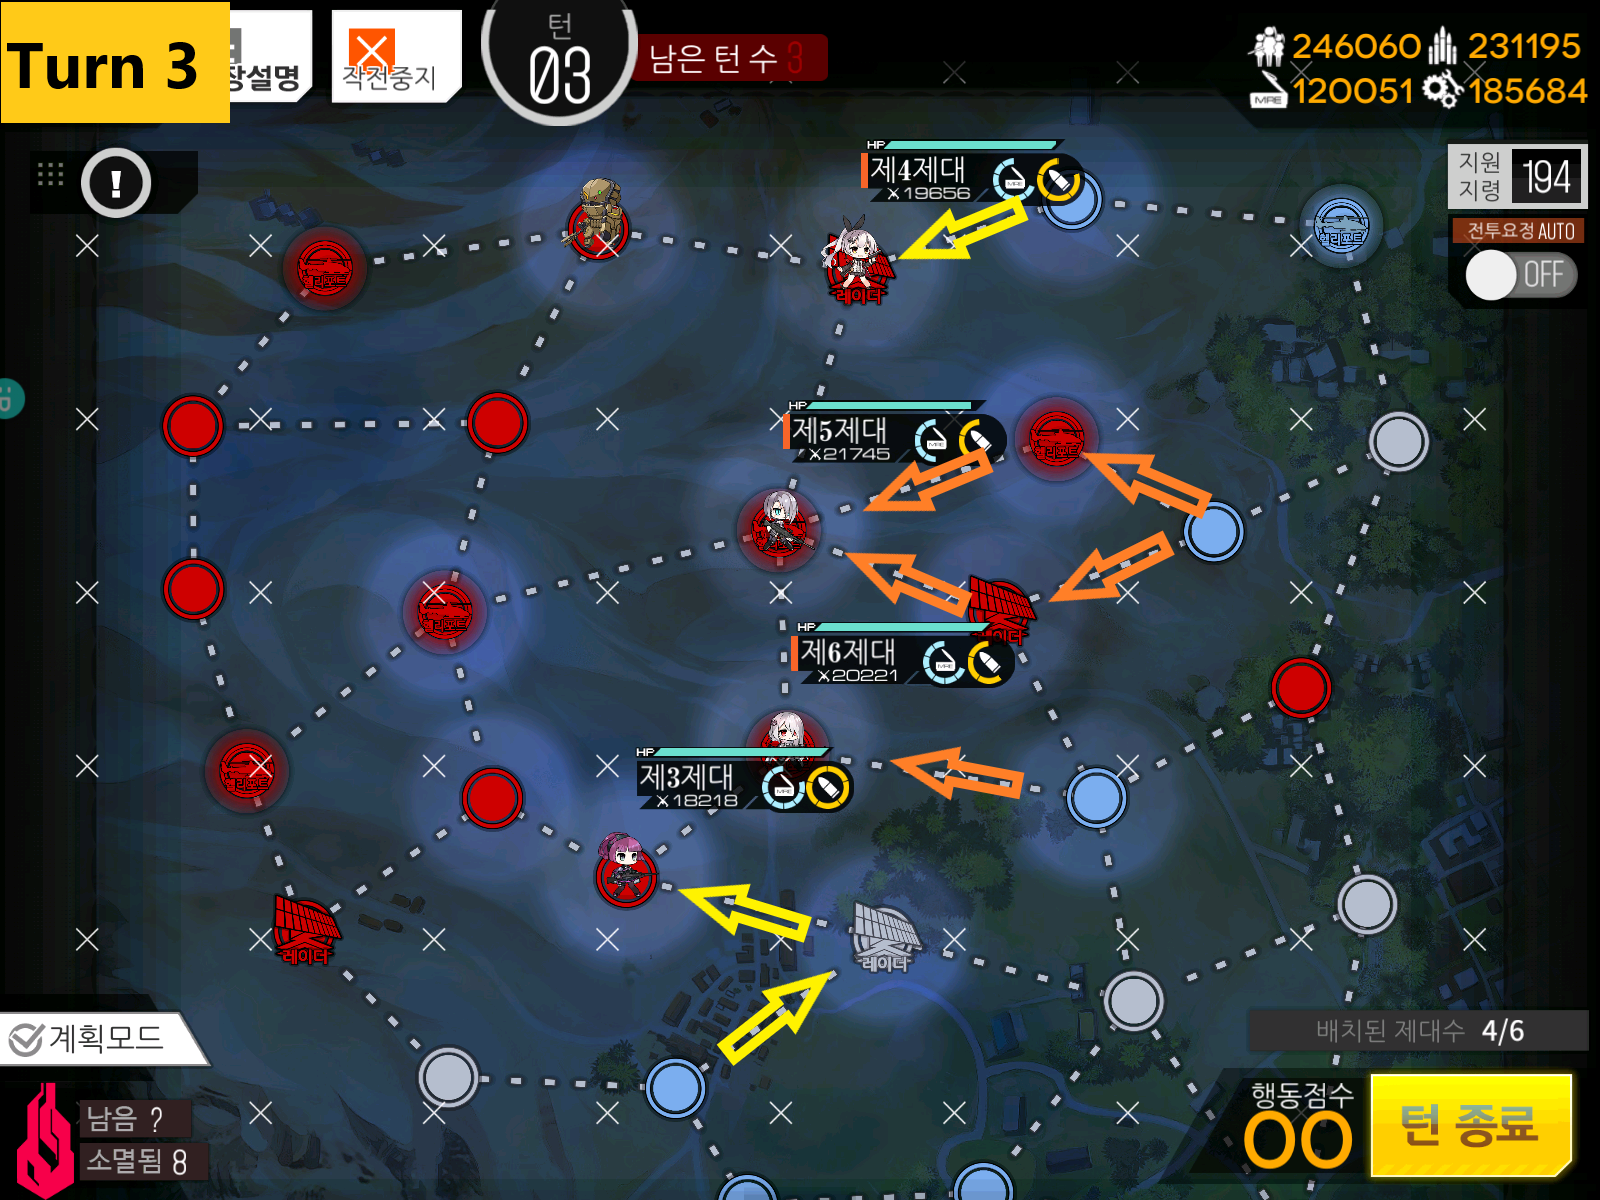
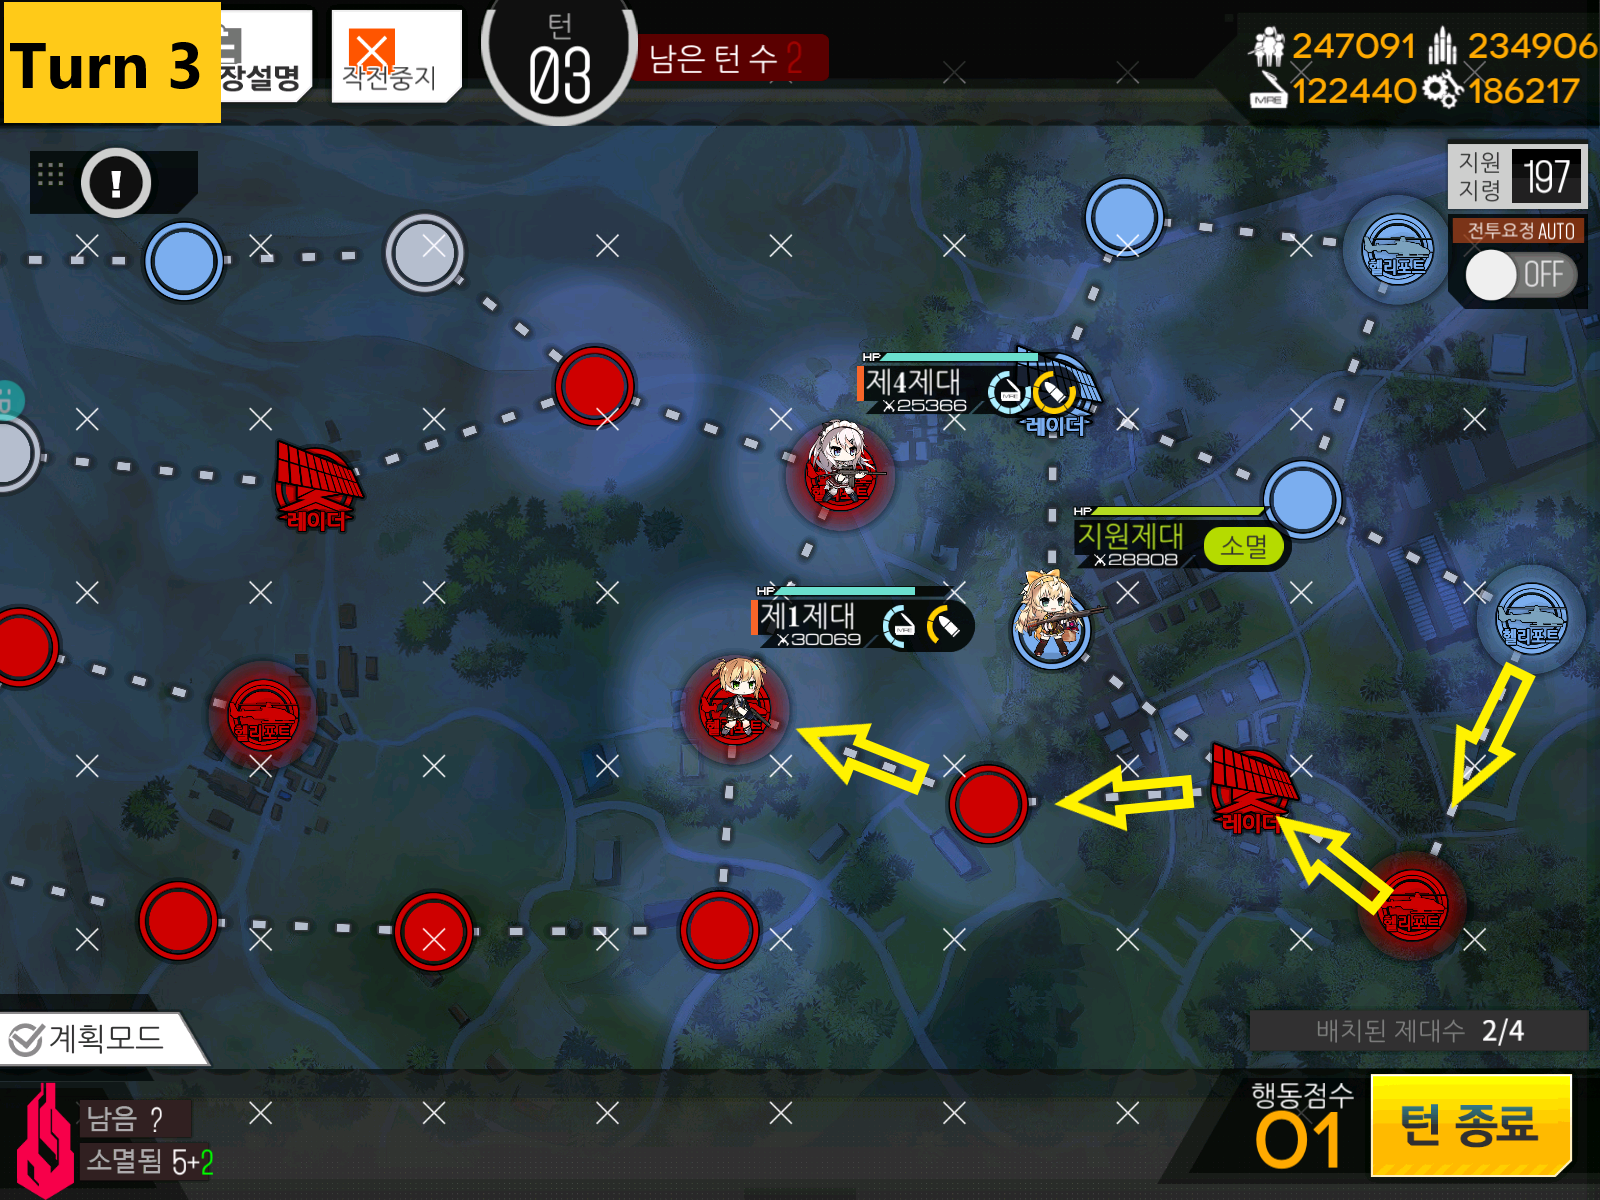
Advance the line you have formed across the map. Kill non-elite units and continue to light up more area. Make sure that RFHG echelons are not in danger from Tarantula unit.

Echelon 1 is set up to fight with Tarantula unit once and be done after killing few units. Kite or die. Mixing in a MG in the echelon can increase its longevity.
Echelon 2 will be fighting everything but Tarantula and Manticores. With good kiting and retreating, you can do it with some heavy damage but not dying and losing affection.

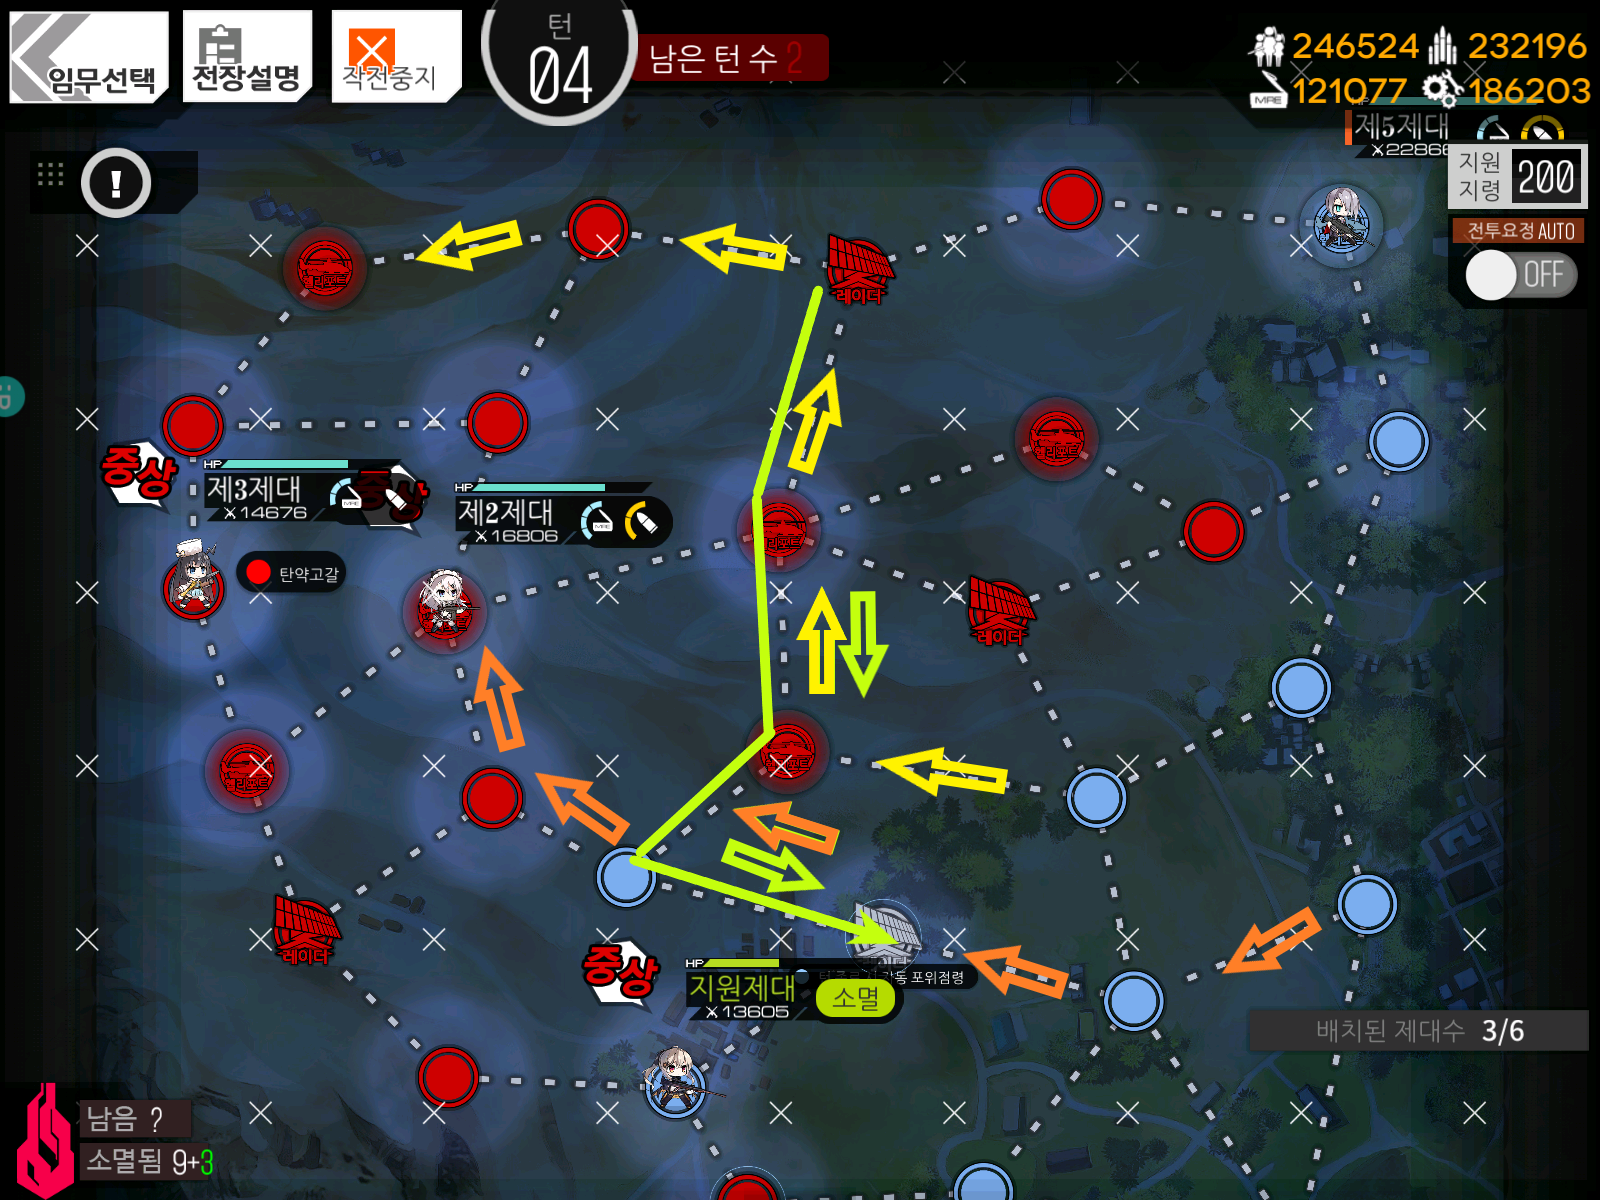
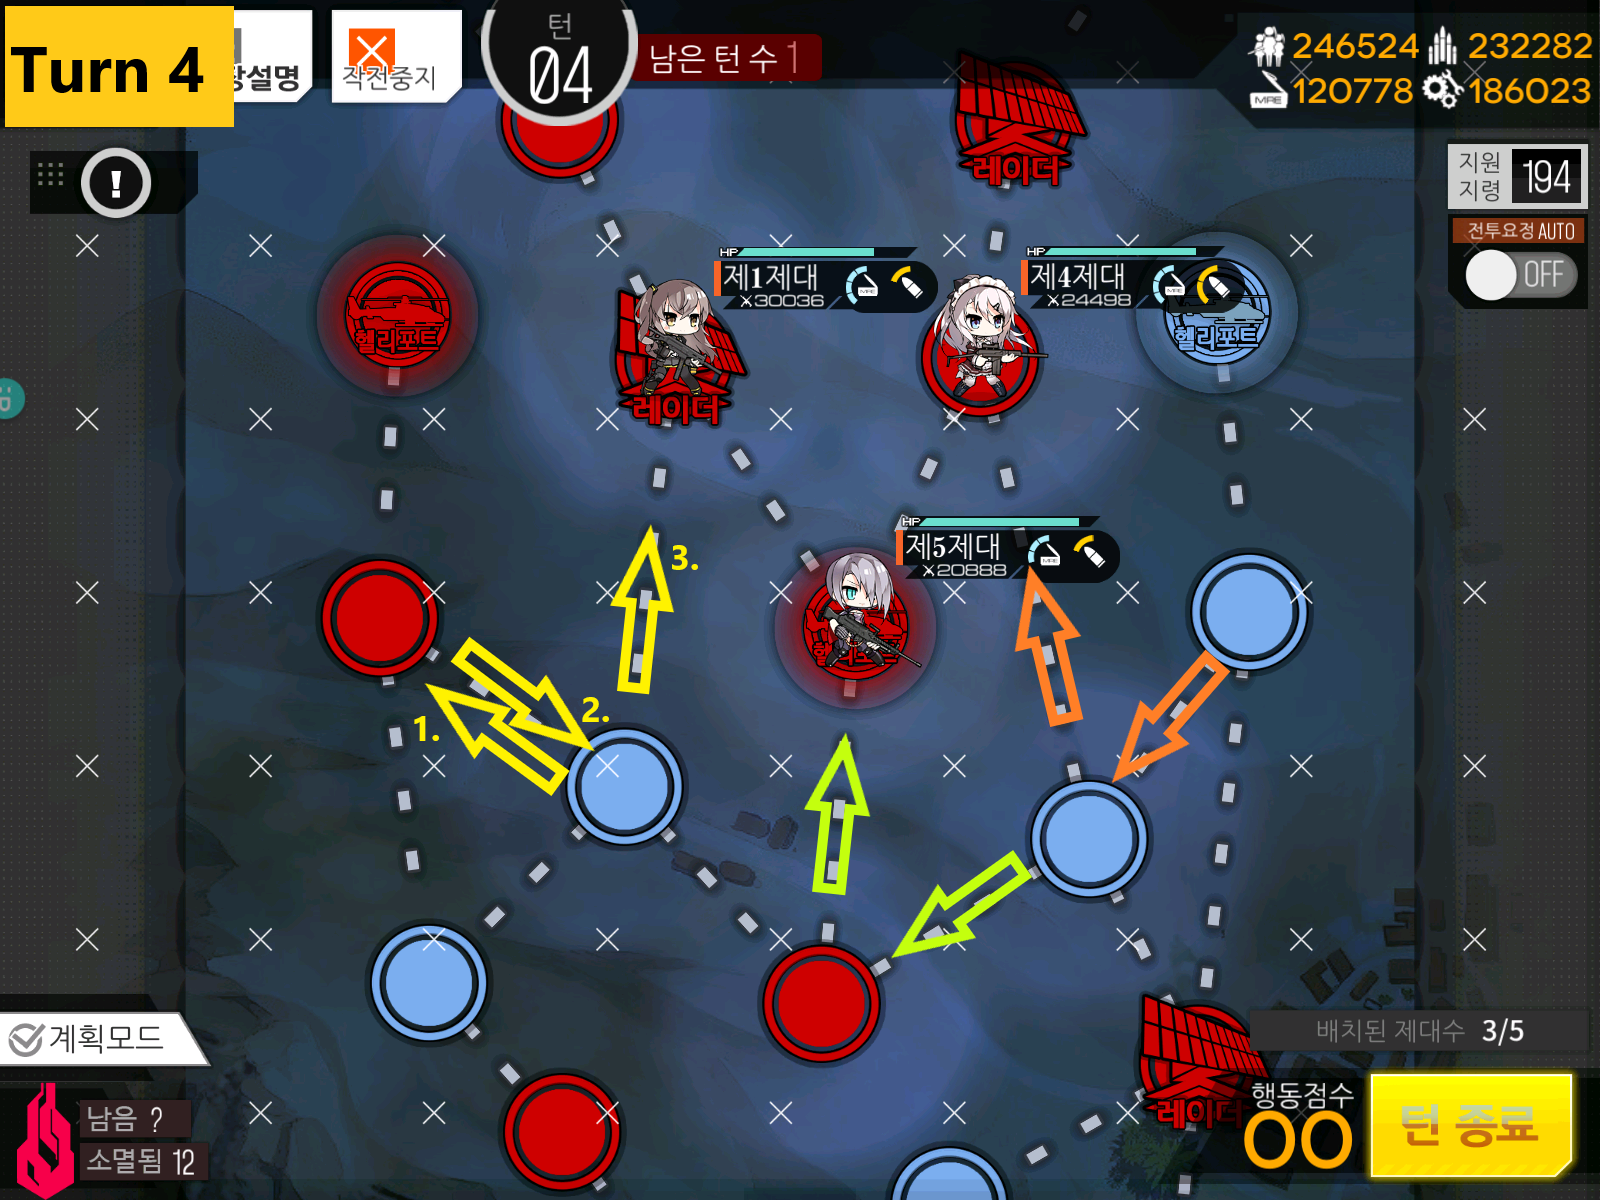
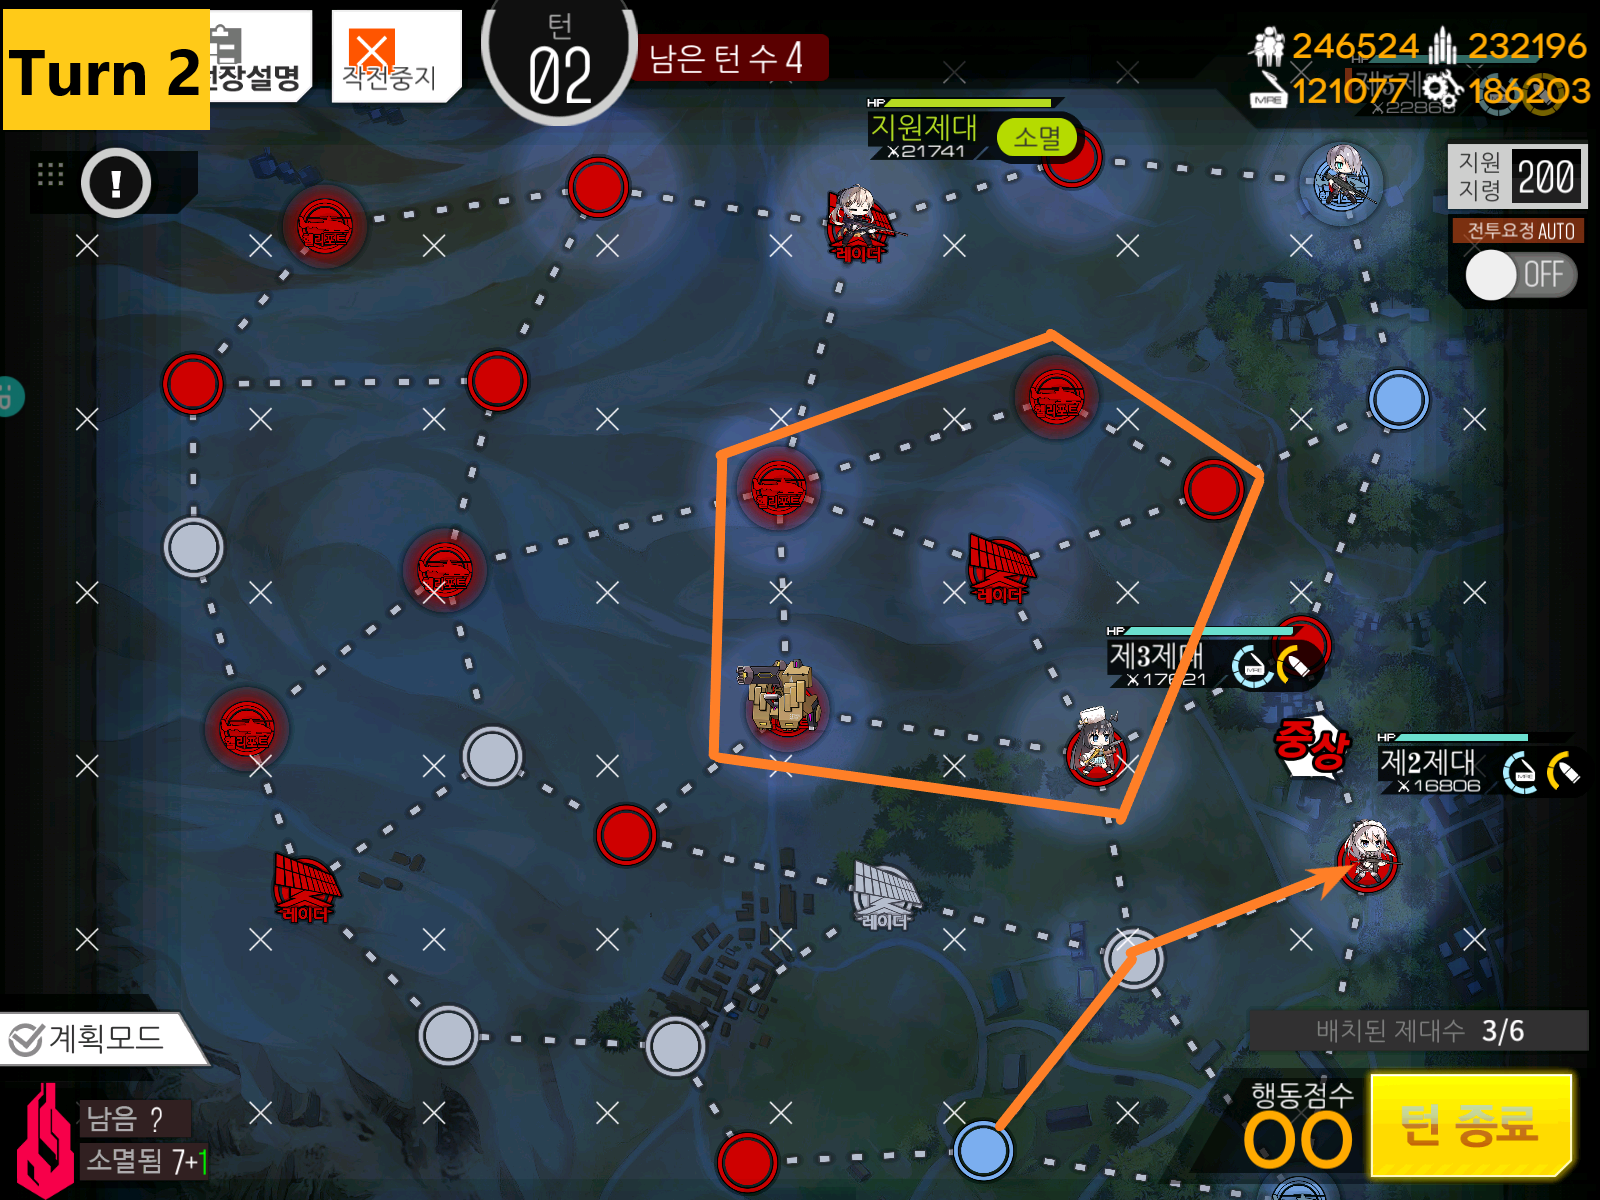
Move RFHG echelon to left, spawn Friend Echelon that can handle armor units, set to eliminate and swap back. Move one down and spawn a Dummy. This Dummy can be a MG Echelon that can effectively save lot of time if you can get it to run into Tarantula you see in the center right of the map. If not, kiting is your only friend.
If Tarantula unit is your main concern, deviate from this guide by placing Friend Echelon to south of the Helipad and let it take care of the center.
ARHG unit’s movement is in orange, Friend Echelon in green, and RFHG echelon in Yellow.
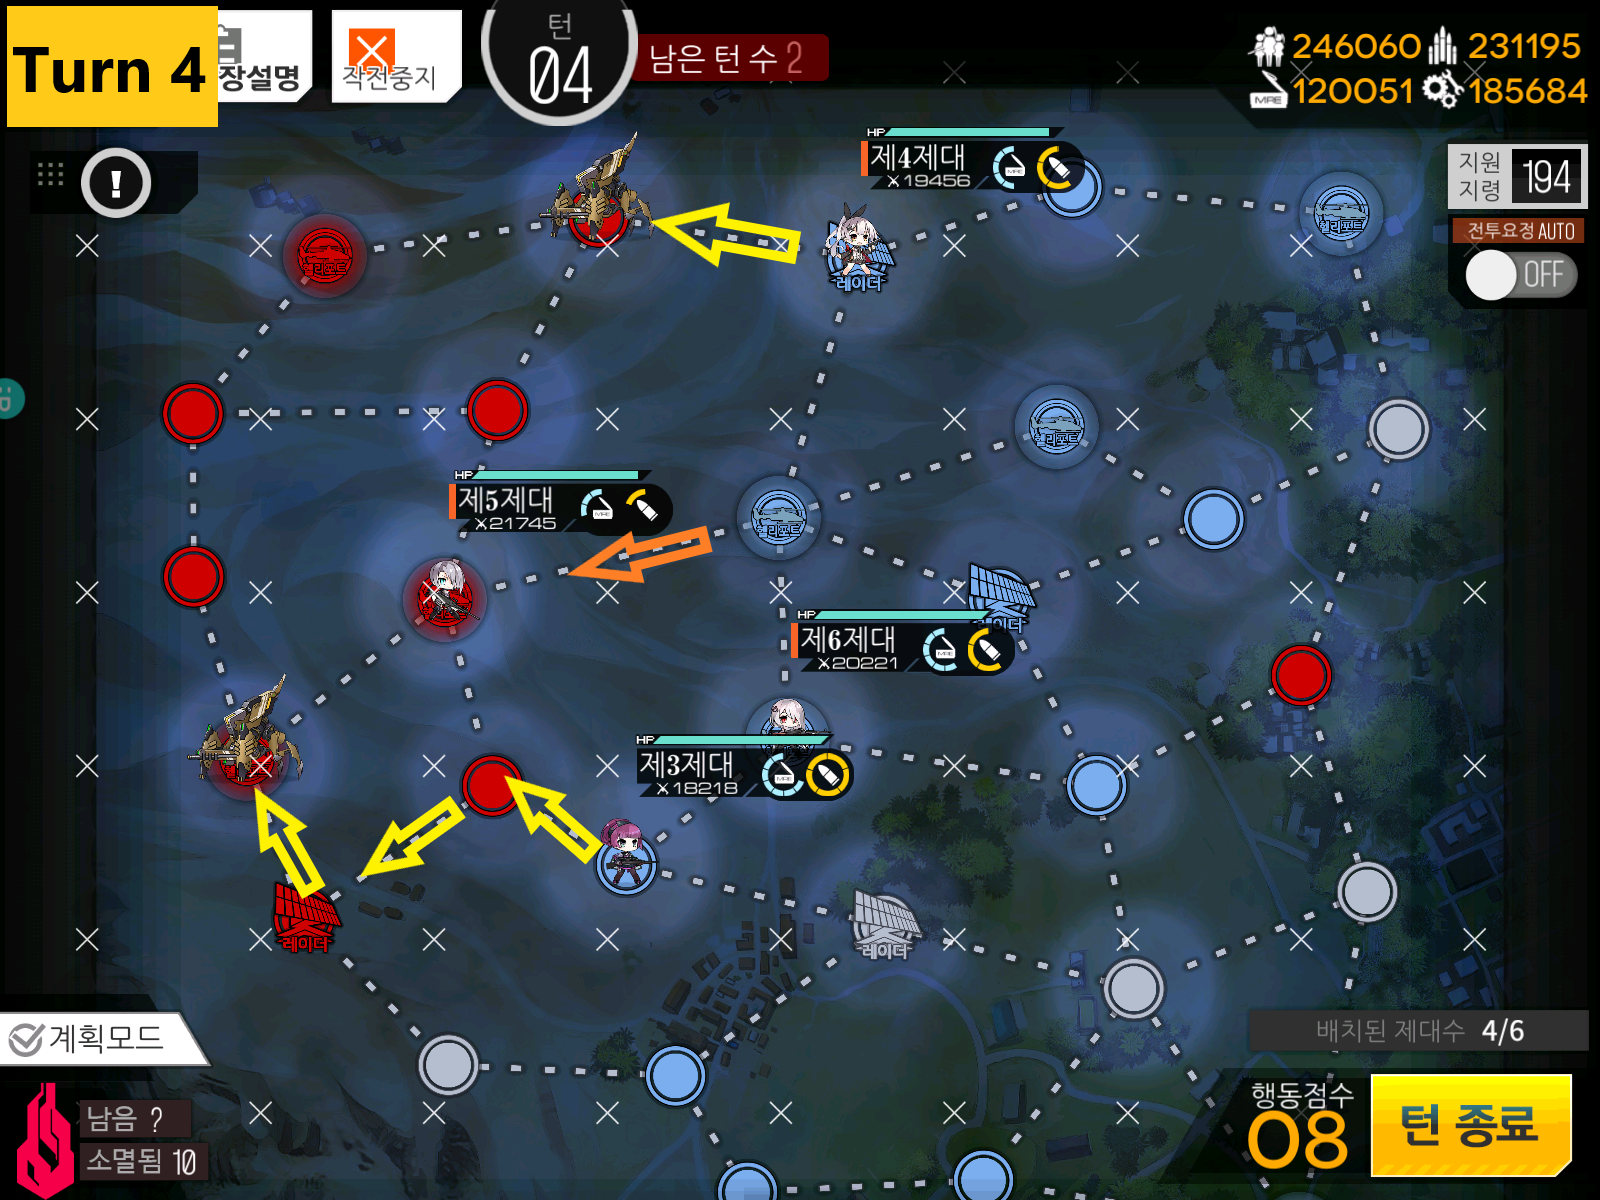
This is where you have to free move to clear out the highlighted area. In my case, Tarantula escaped so I was forced to use ARHG echelon early to take out the unit. Keep in mind there is one more on the left side.