
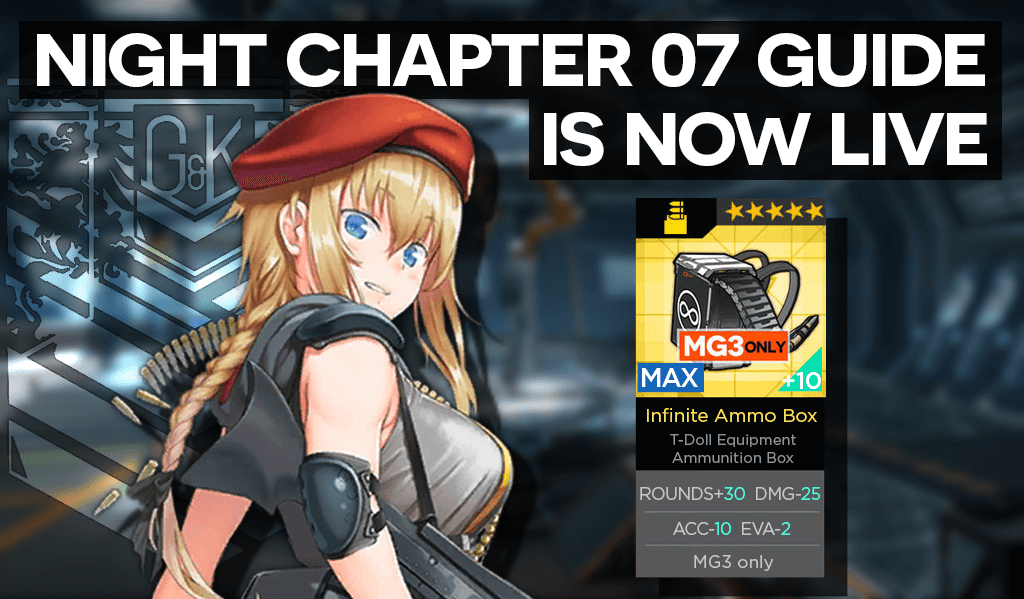

Setup
Start with Dummy Echelon on the helipad and take the radar to the left.
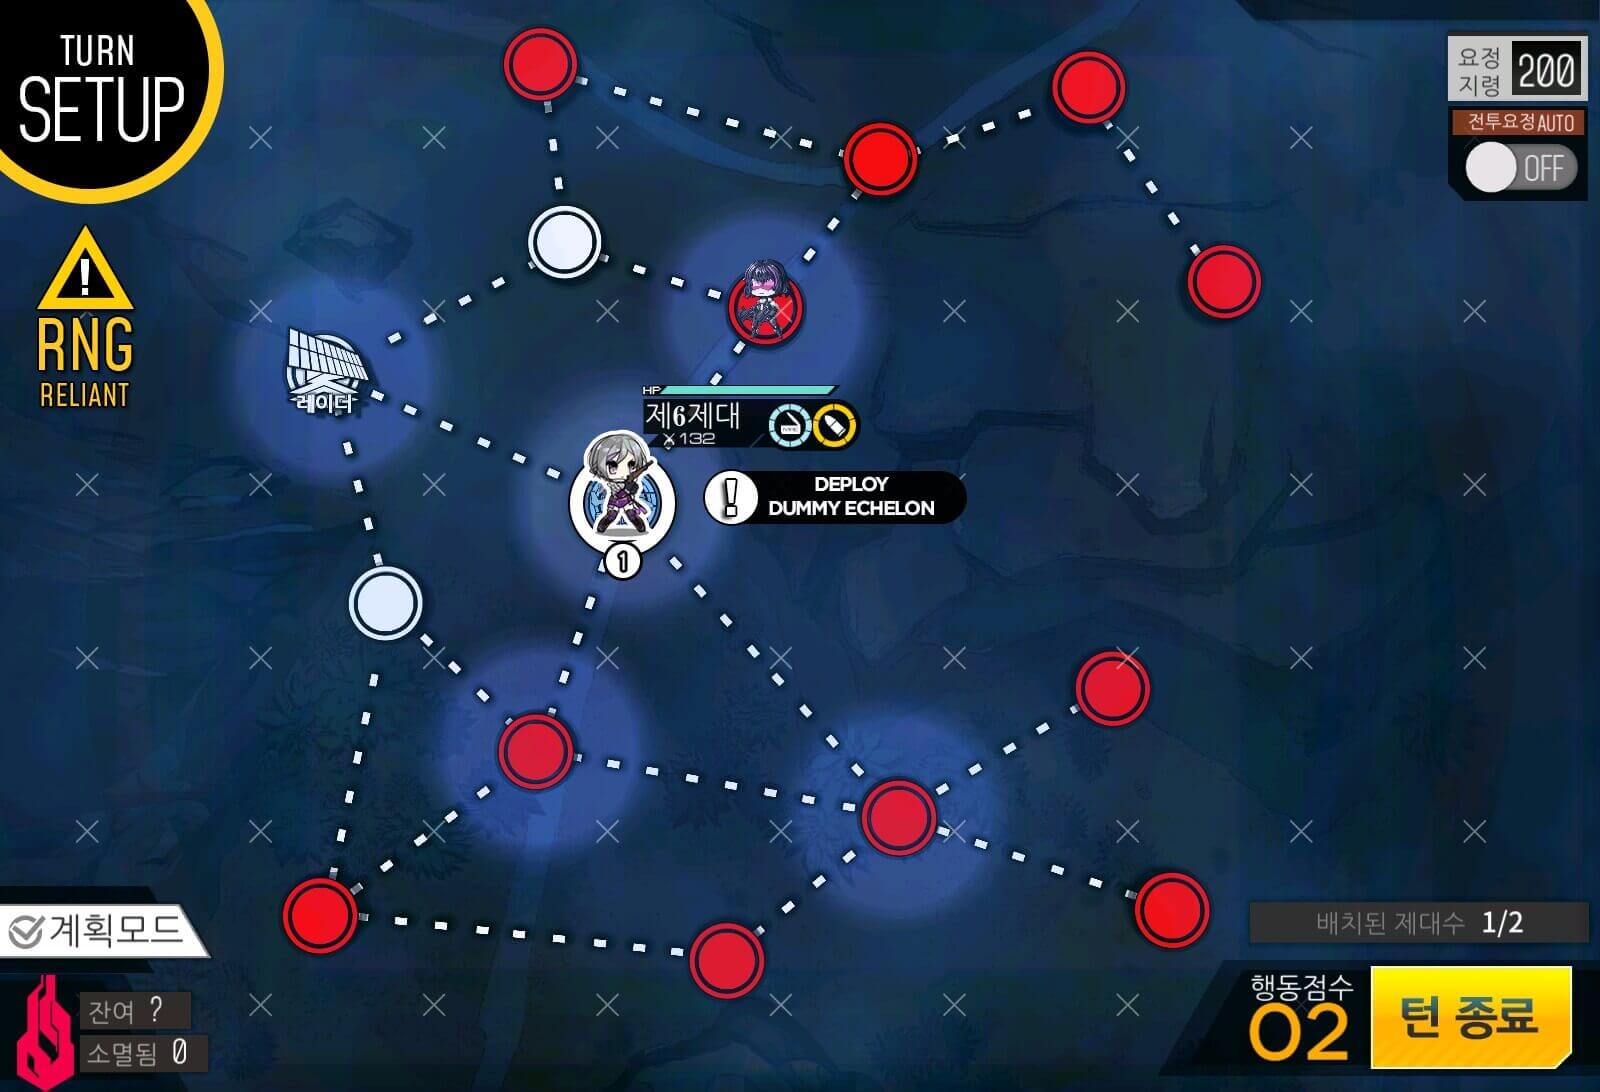
Turn 1
Then deploy a combat echelon.
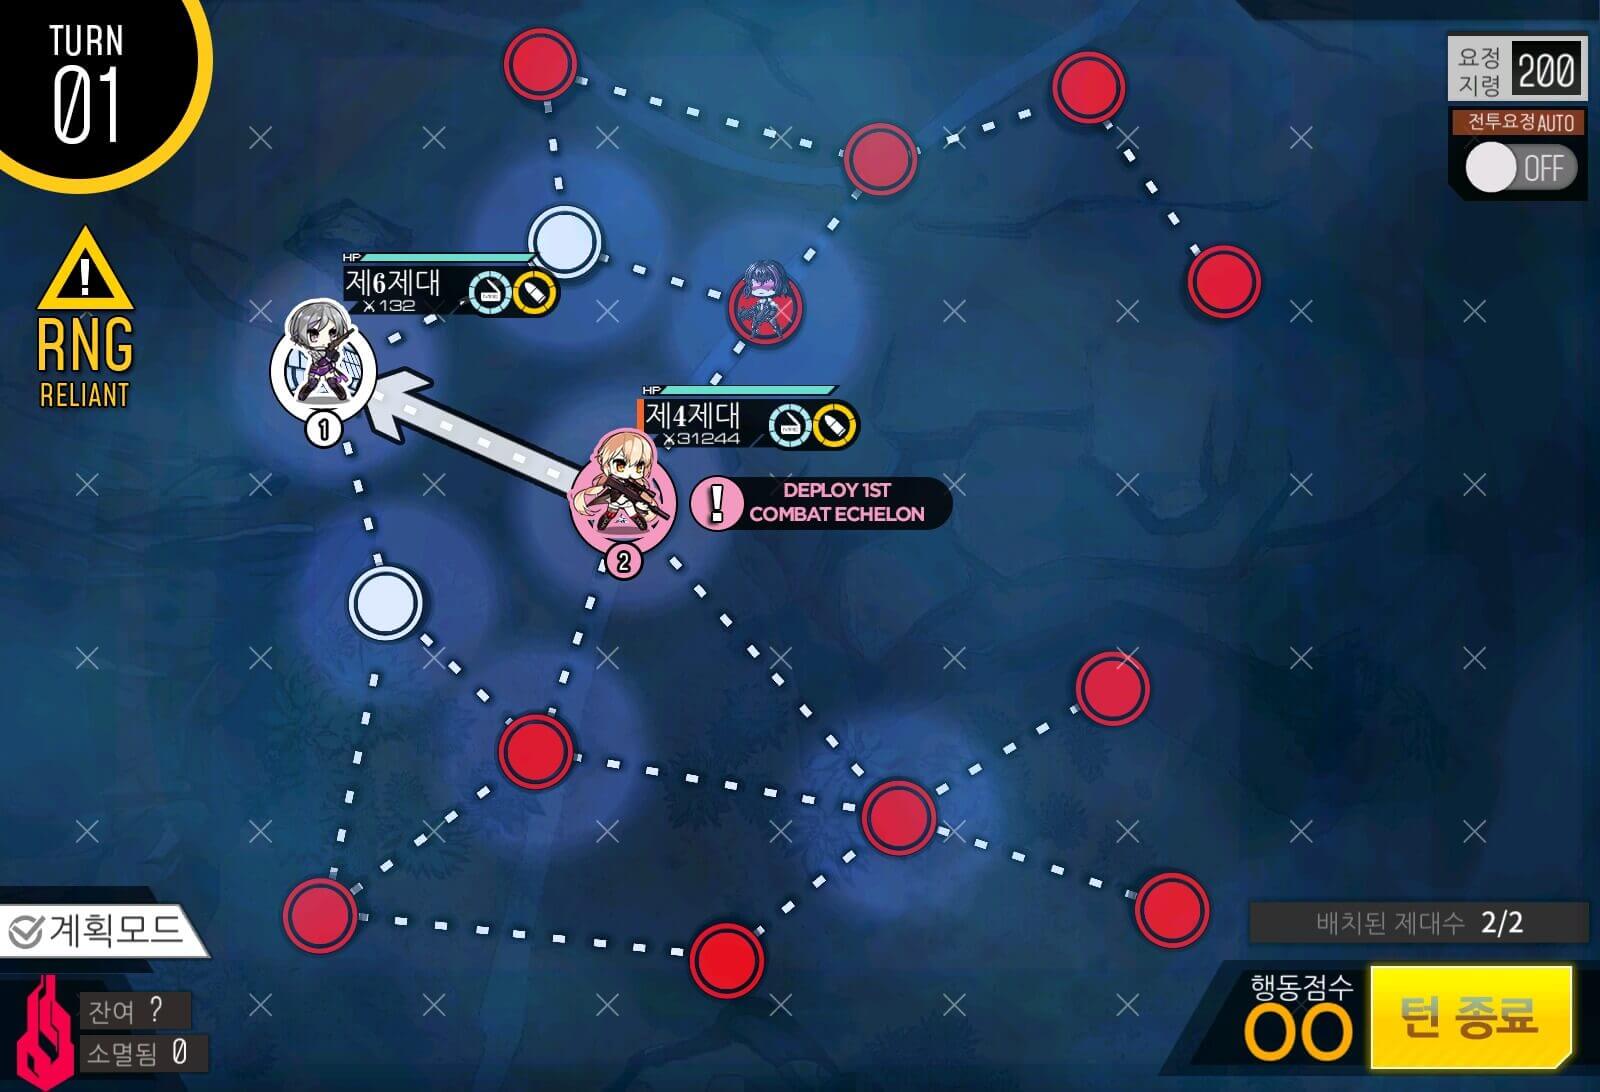
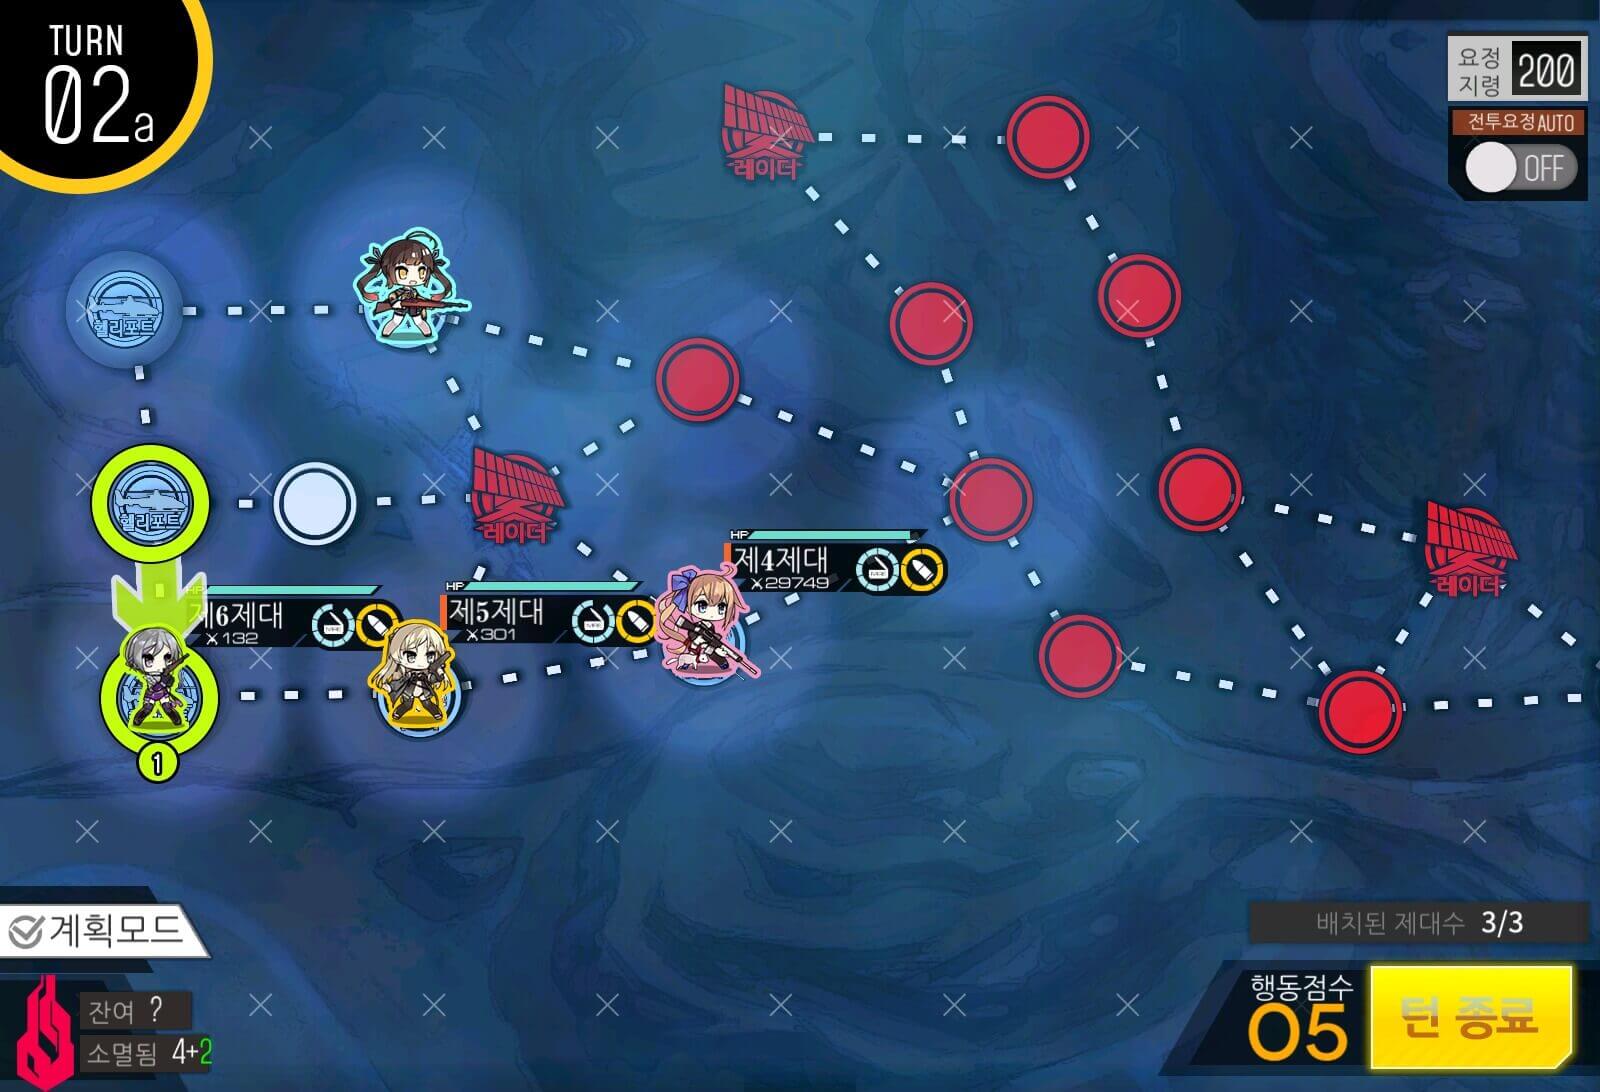
Turn 2a
Since there are fewer nodes to be covered at the top of the helipad, we are going to leave the task to a Friend Echelon. Again, would recommend if the echelon had AoE skills to deal with scouts. Make sure to set its pattern to 'Eliminate'.
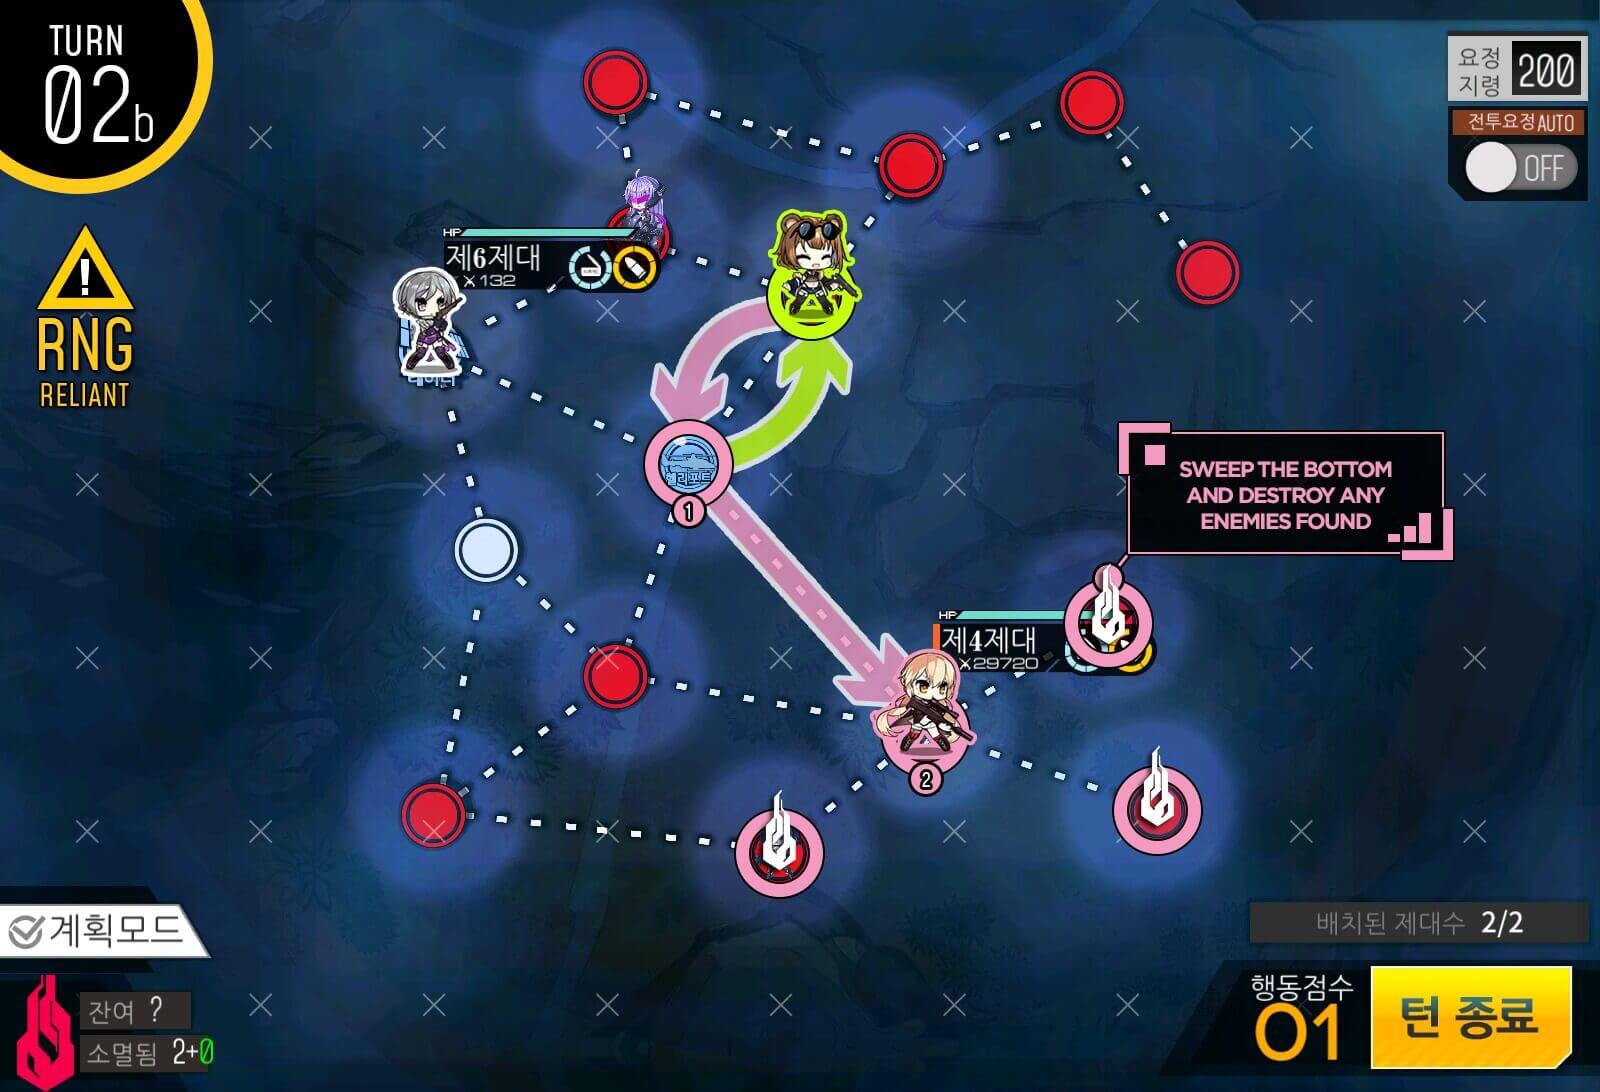
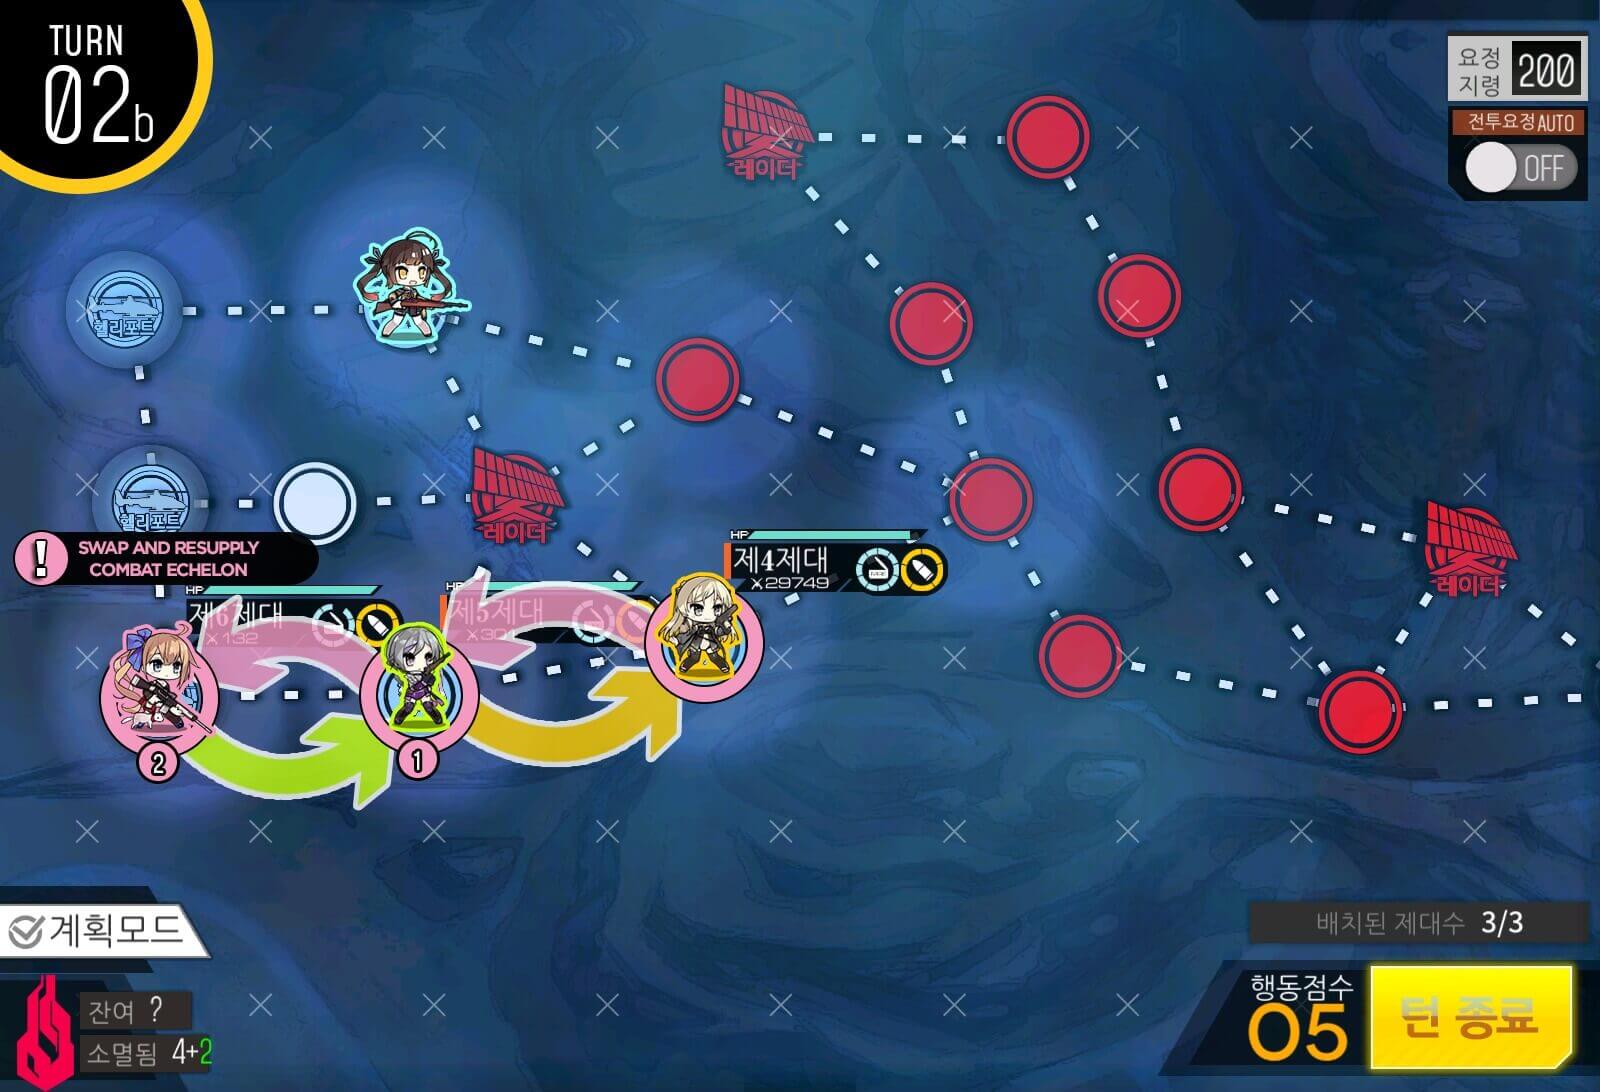
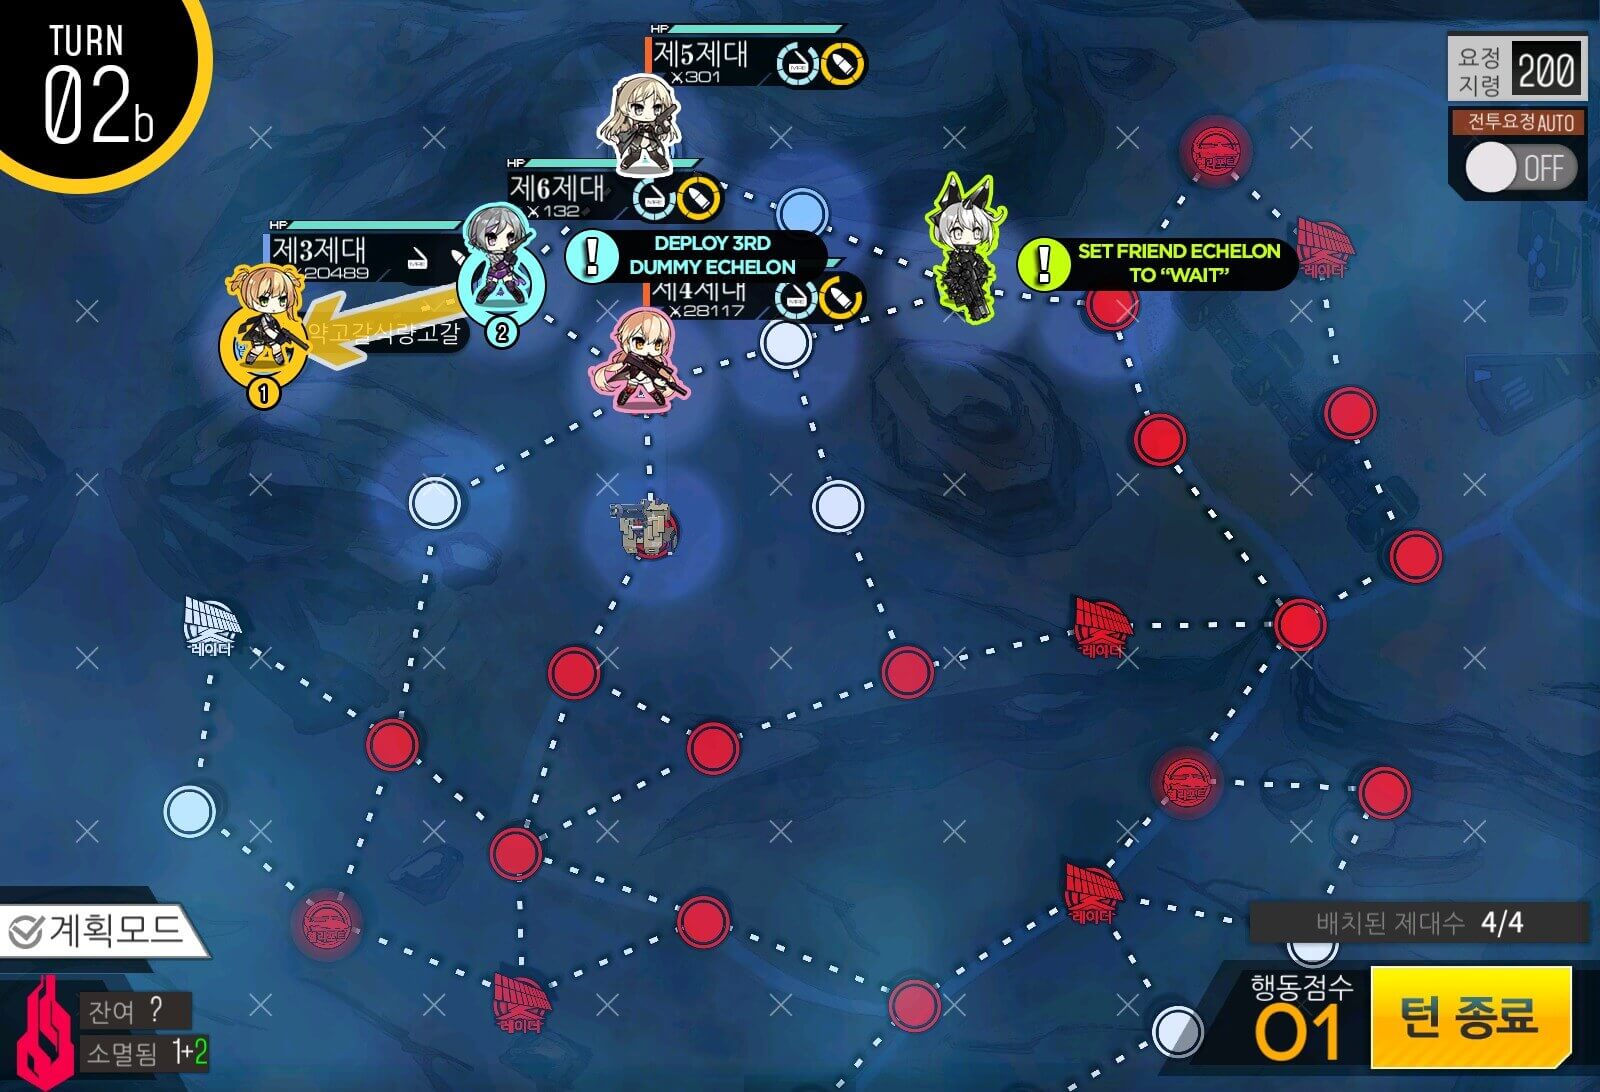
Turn 2b
Use your remaining move points to scout out the vicinity of helipad. If the Dummy Echelon is in danger from the bottom side, take care of left side first.
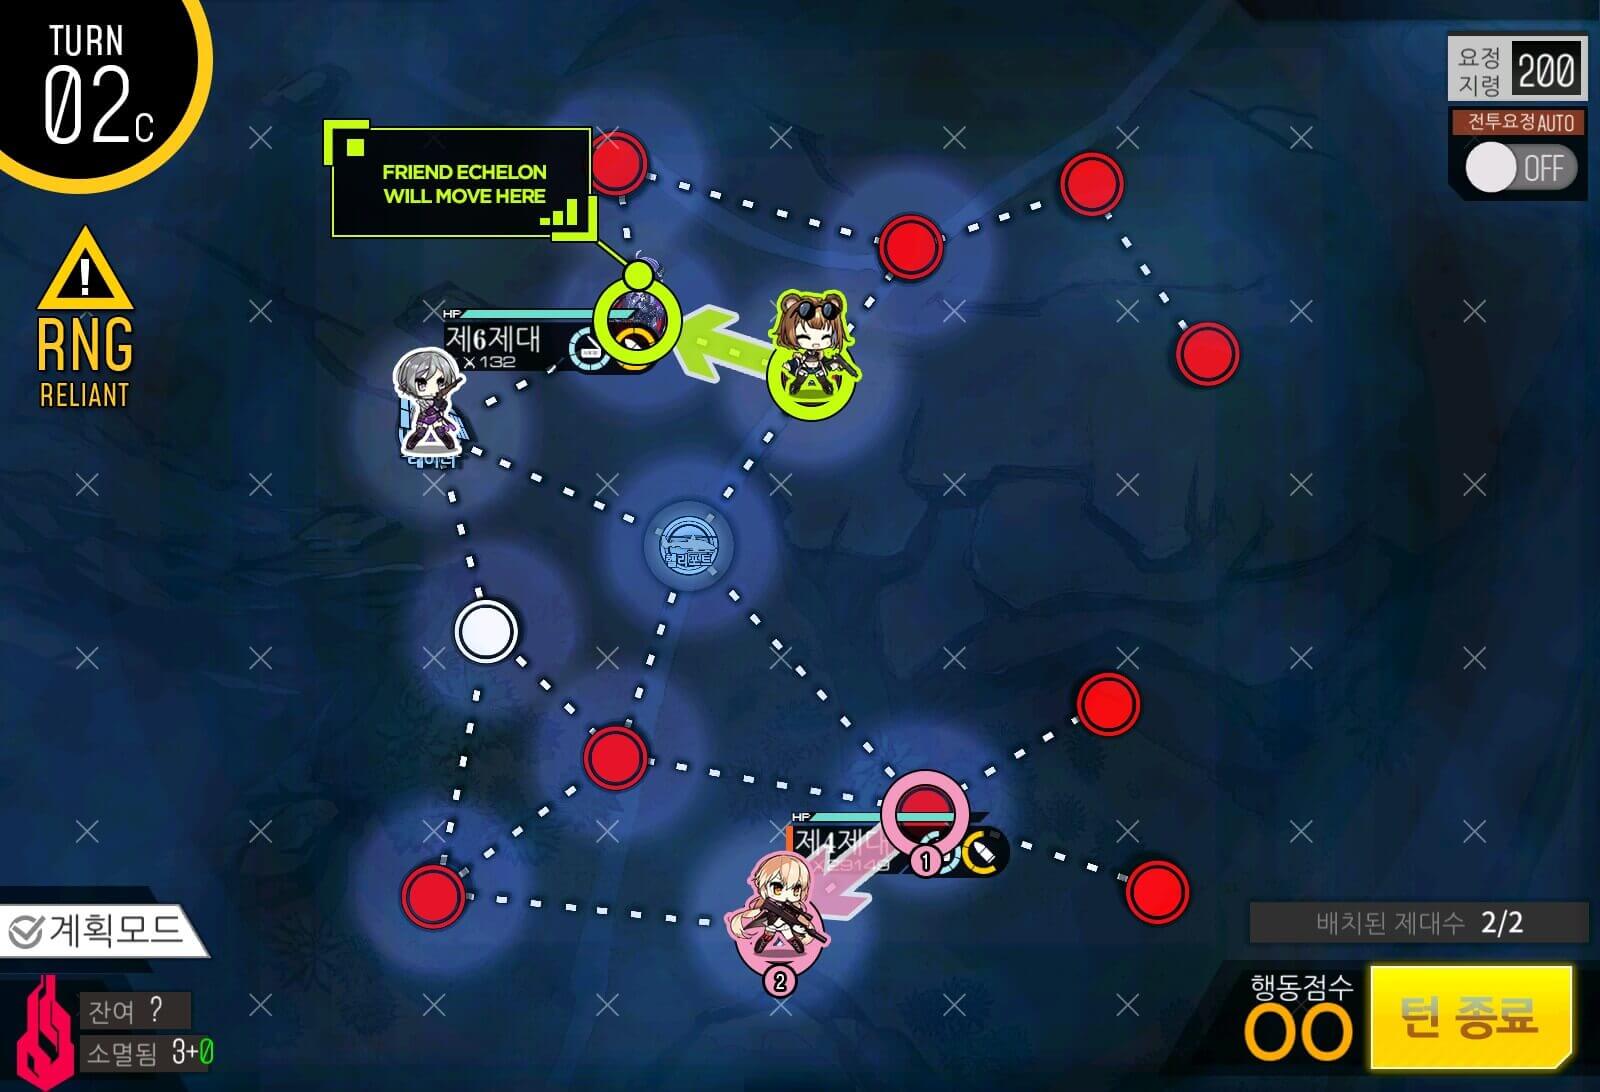
Turn 2c
Friend Echelon should take care of SF units threatening the Dummy Echelon.
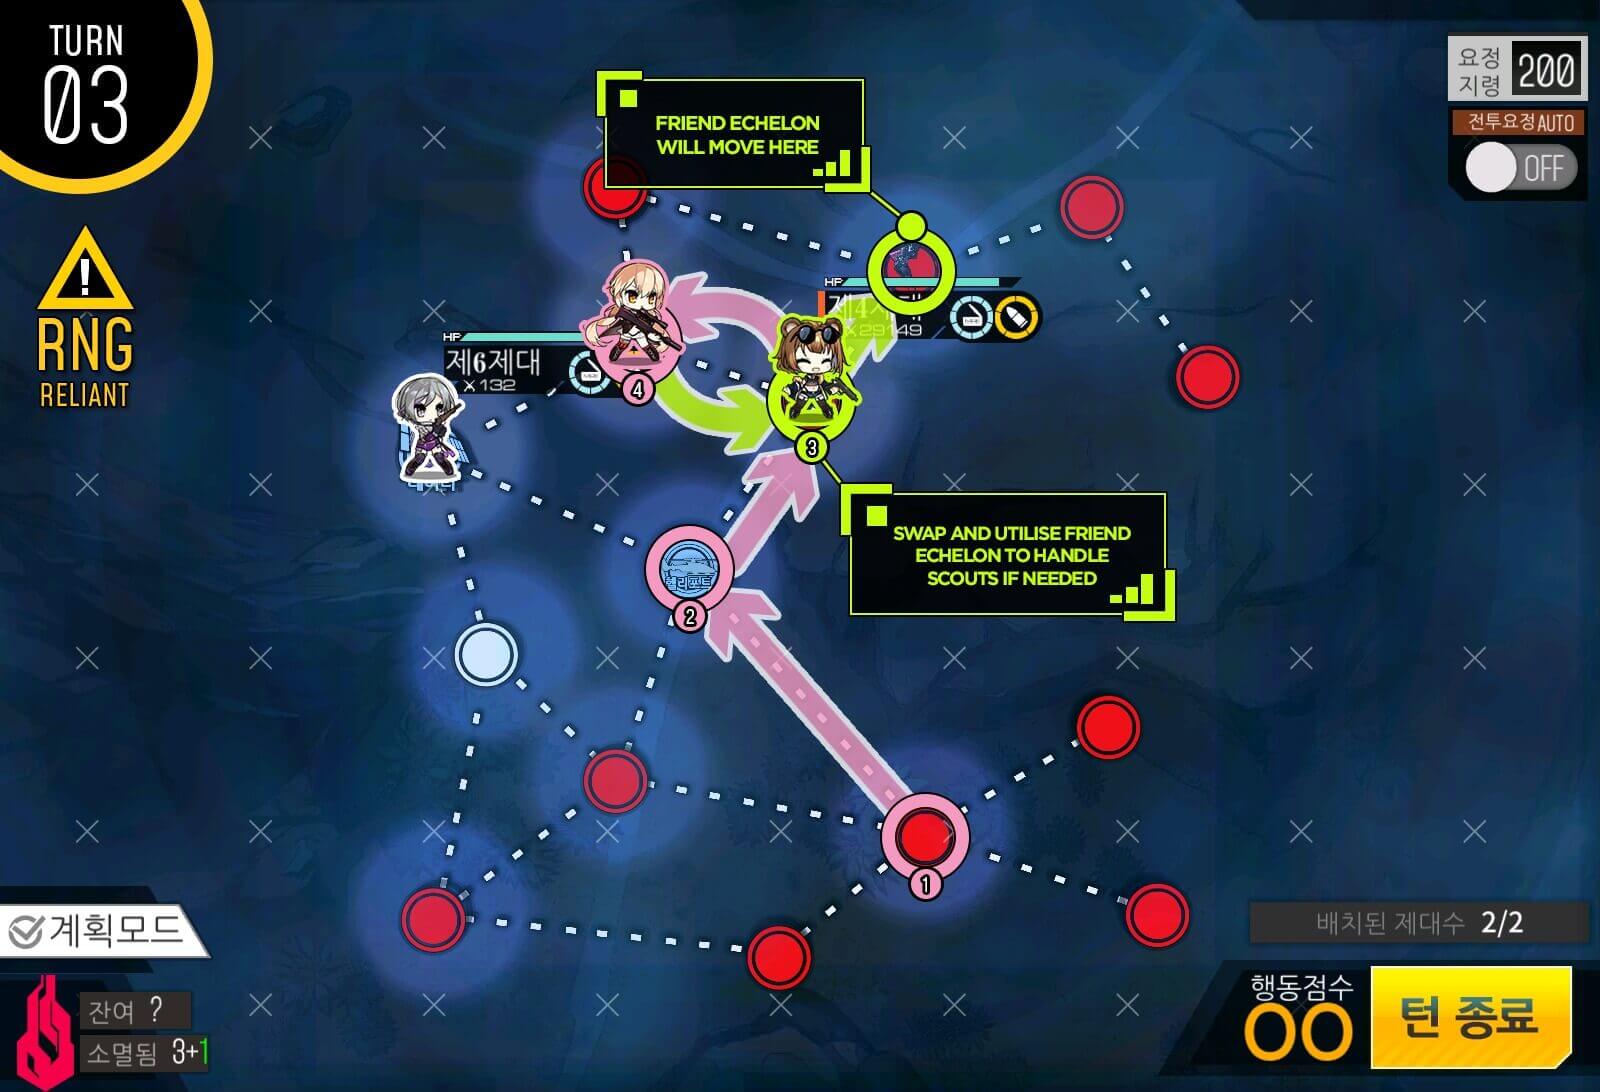
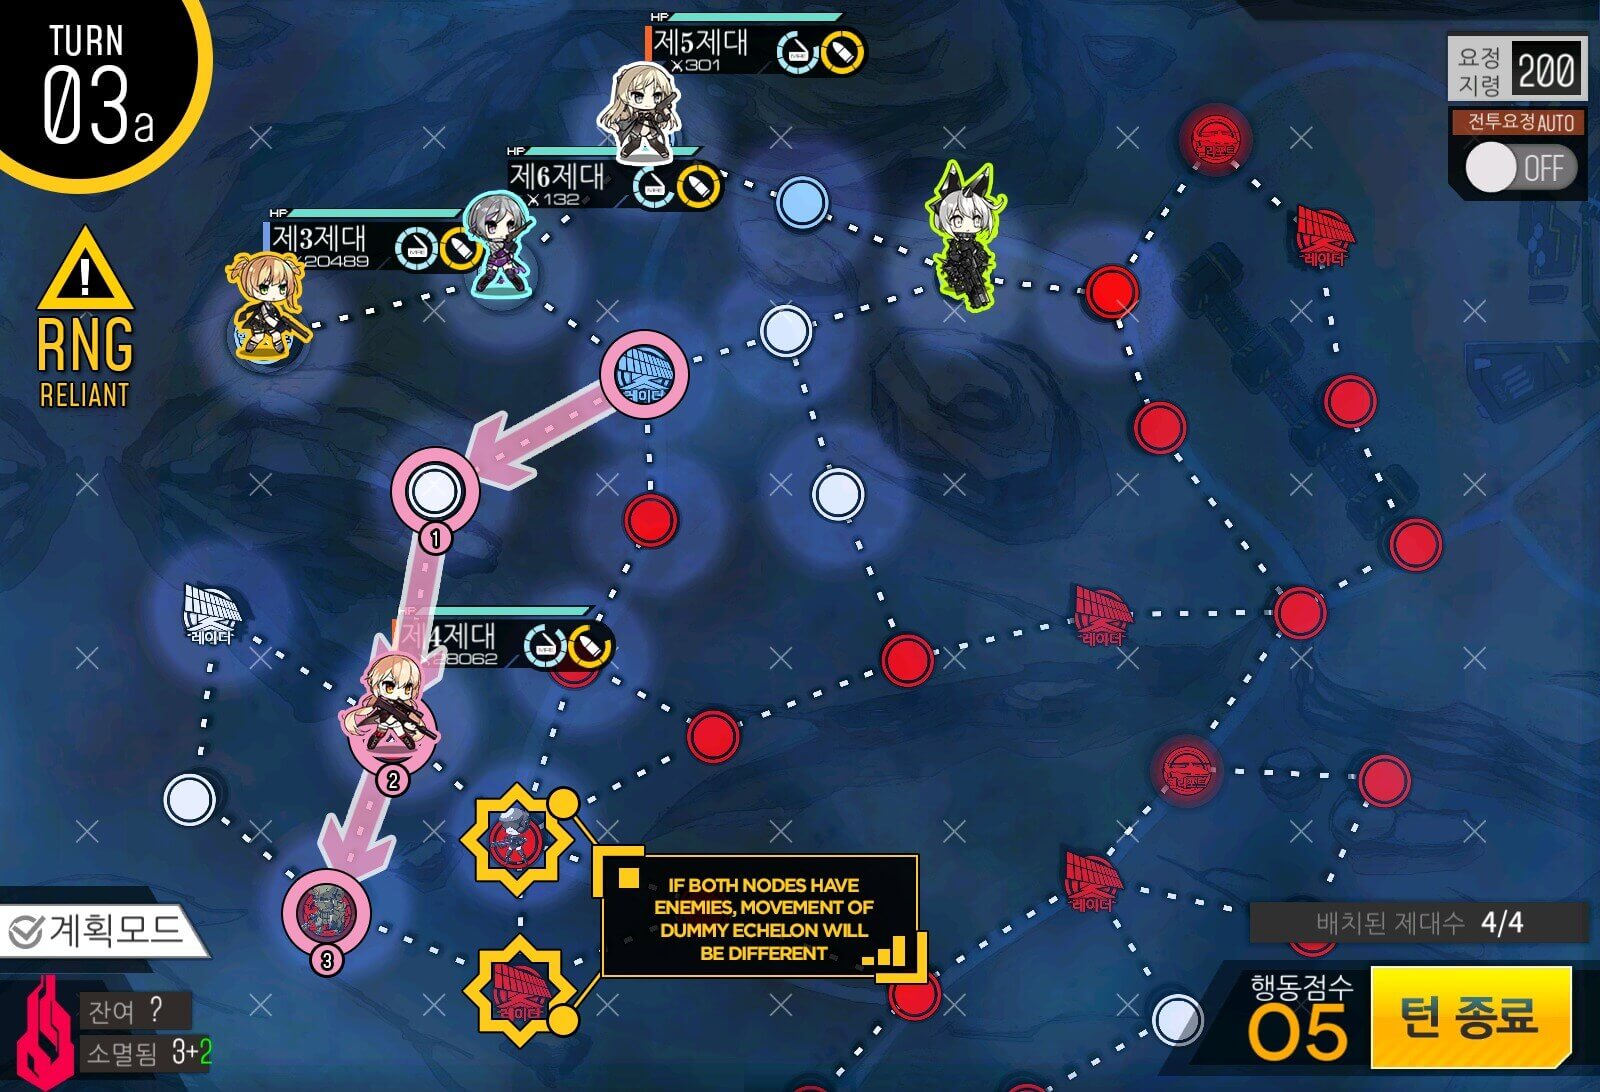
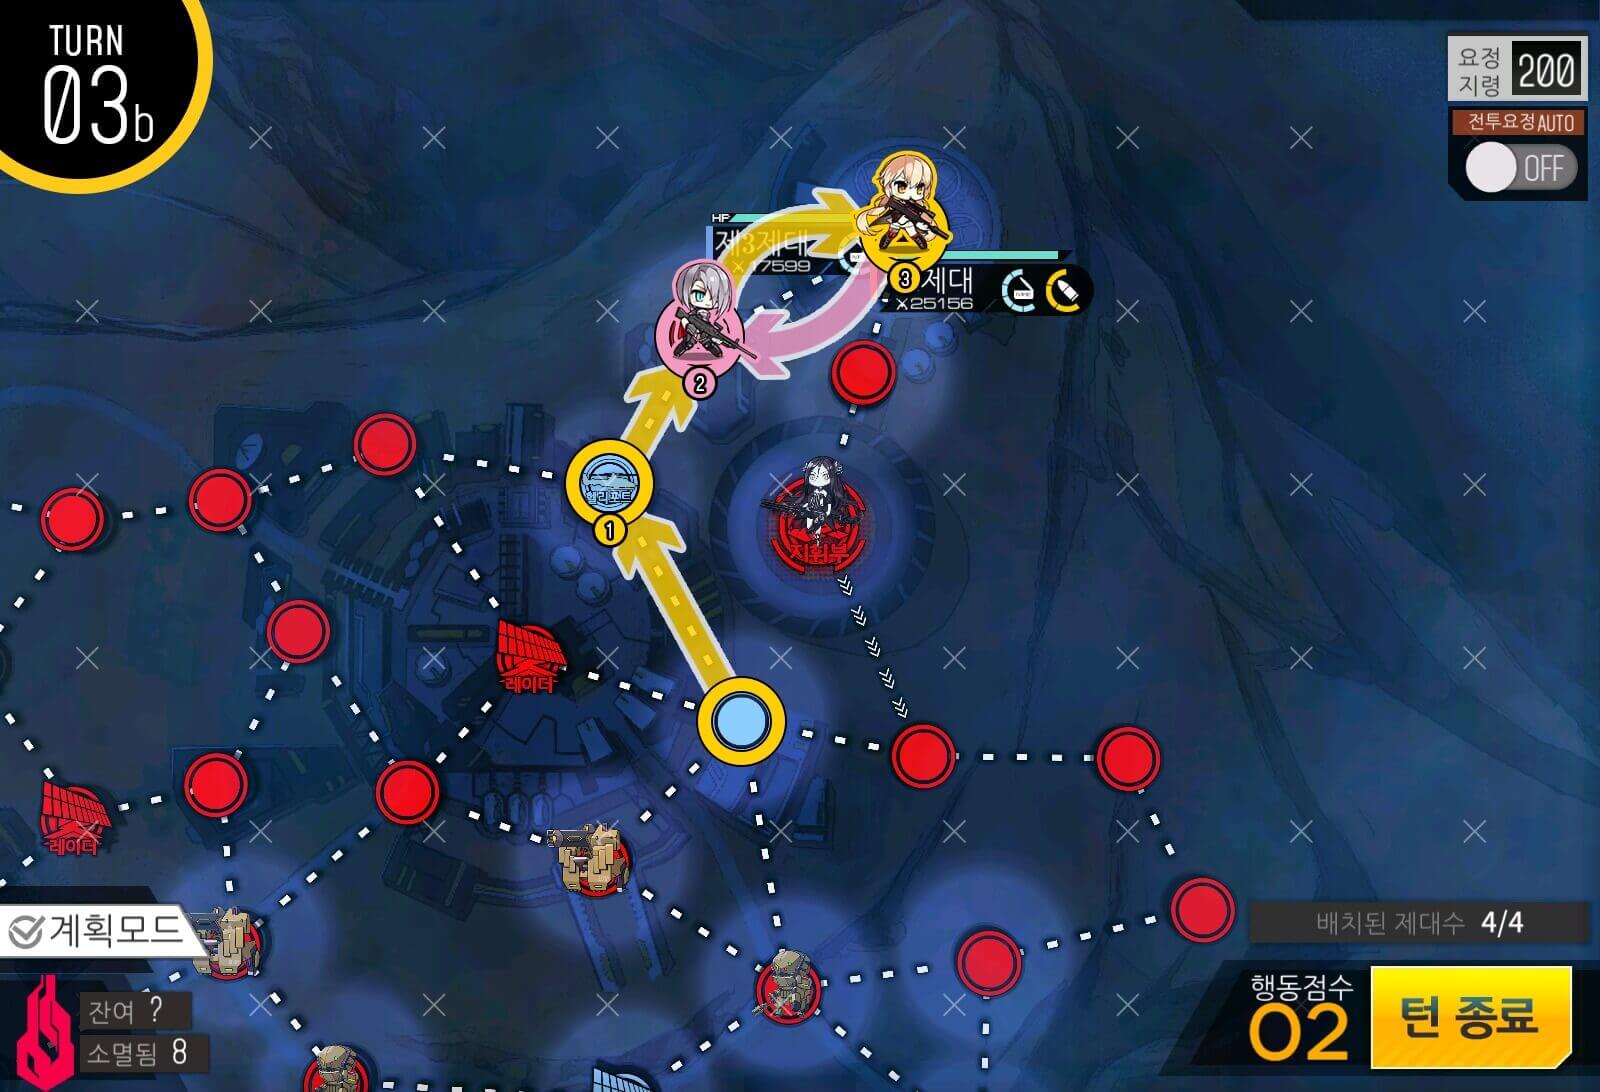
Turn 3
Now that the bottom side is clear, move your Echelon to the top side, swap out with the Friend Echelon if you want to save resources. Use the Friend Echelon to take out scouts if you can't handle them.

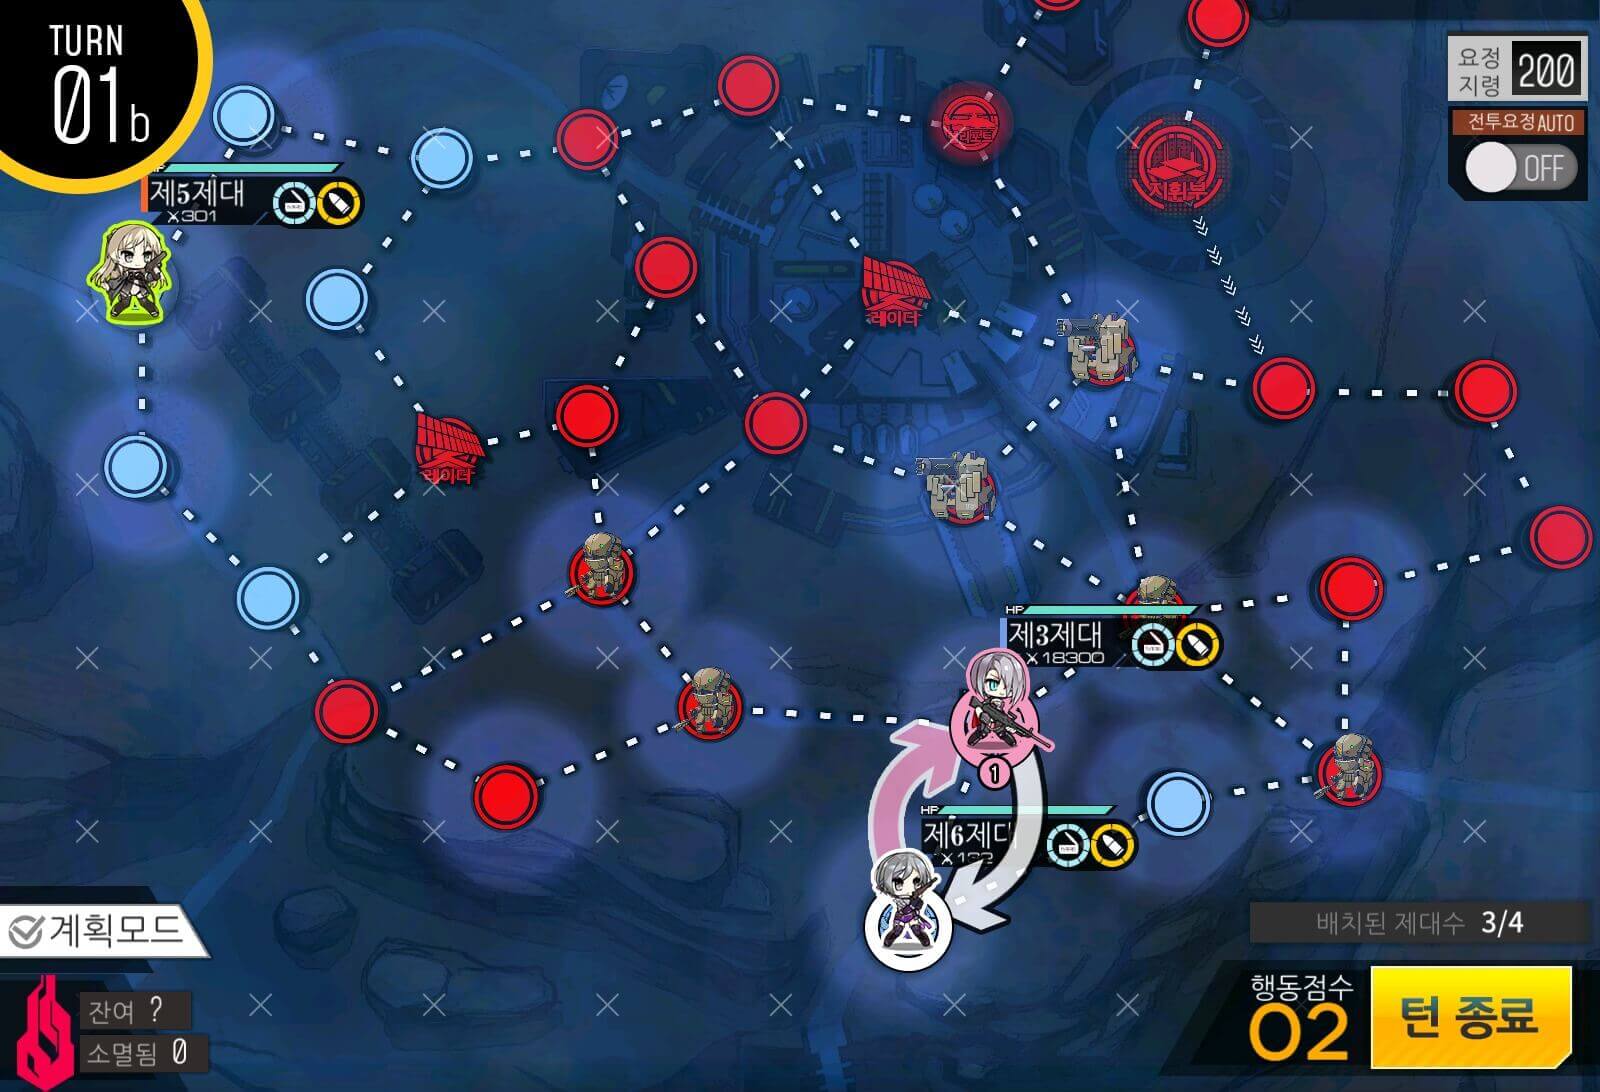
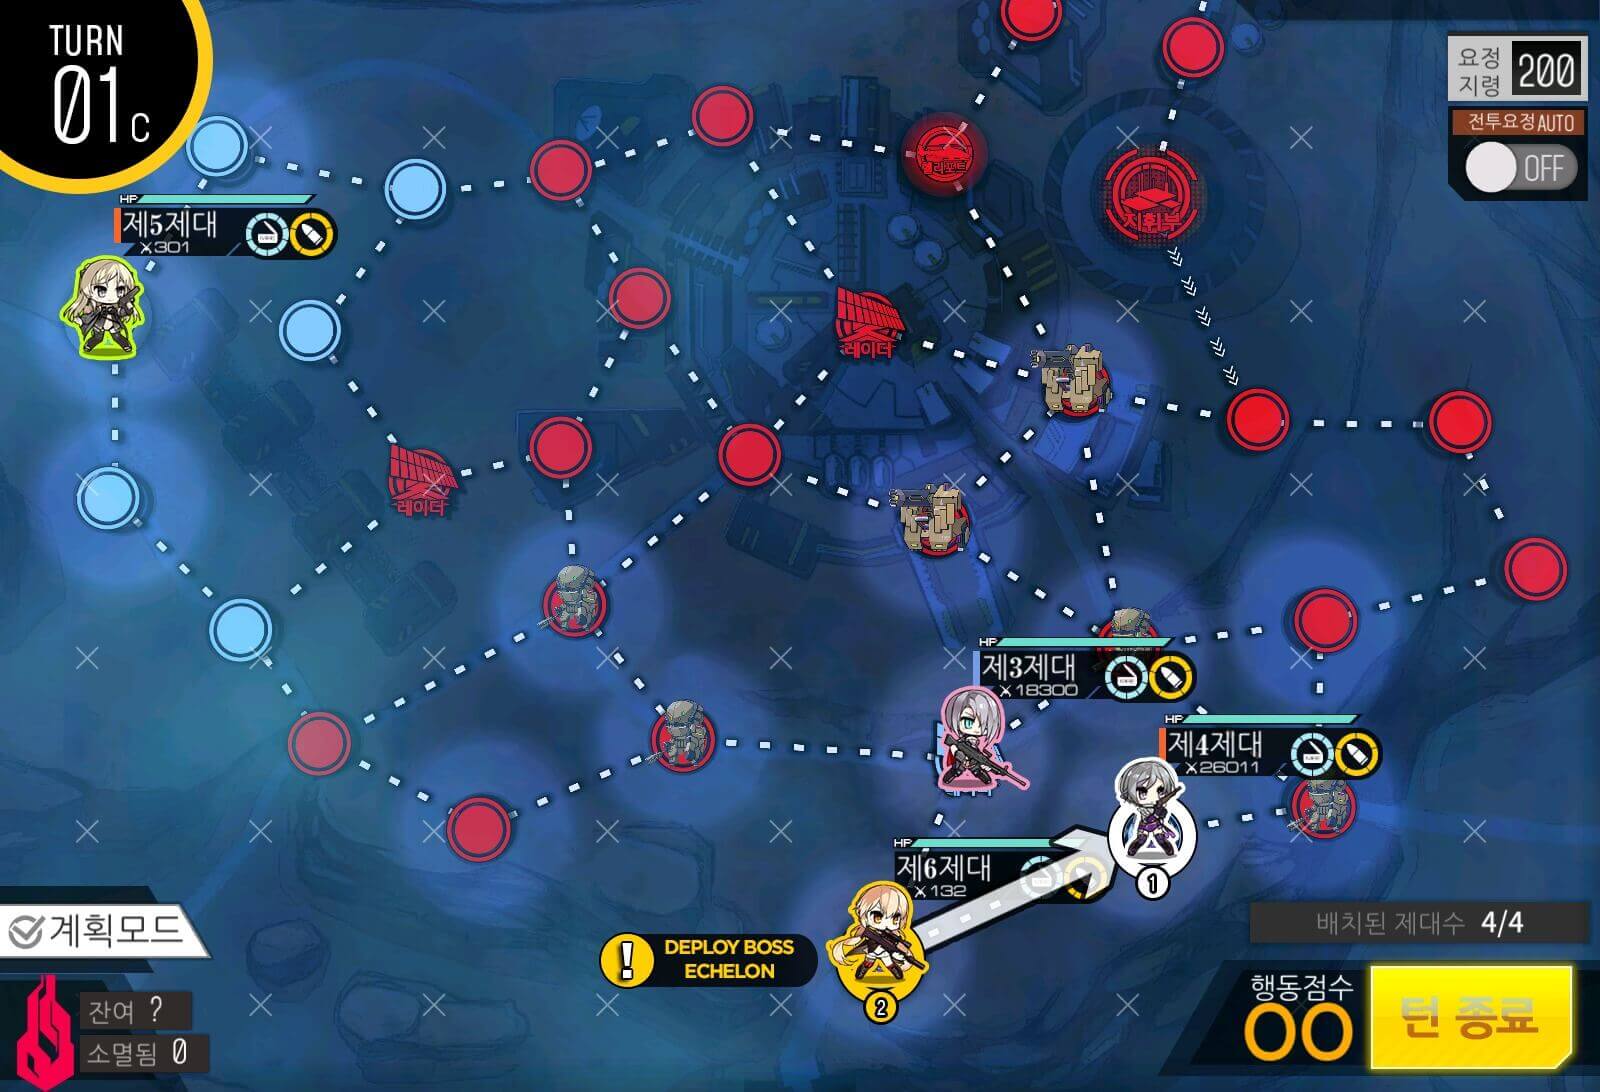
Turn 1a
Start with a Combat Echelon at the bottom helipad and a Dummy on other helipads. Combat Echelon sweeps the bottom half of the map just past the radar node.

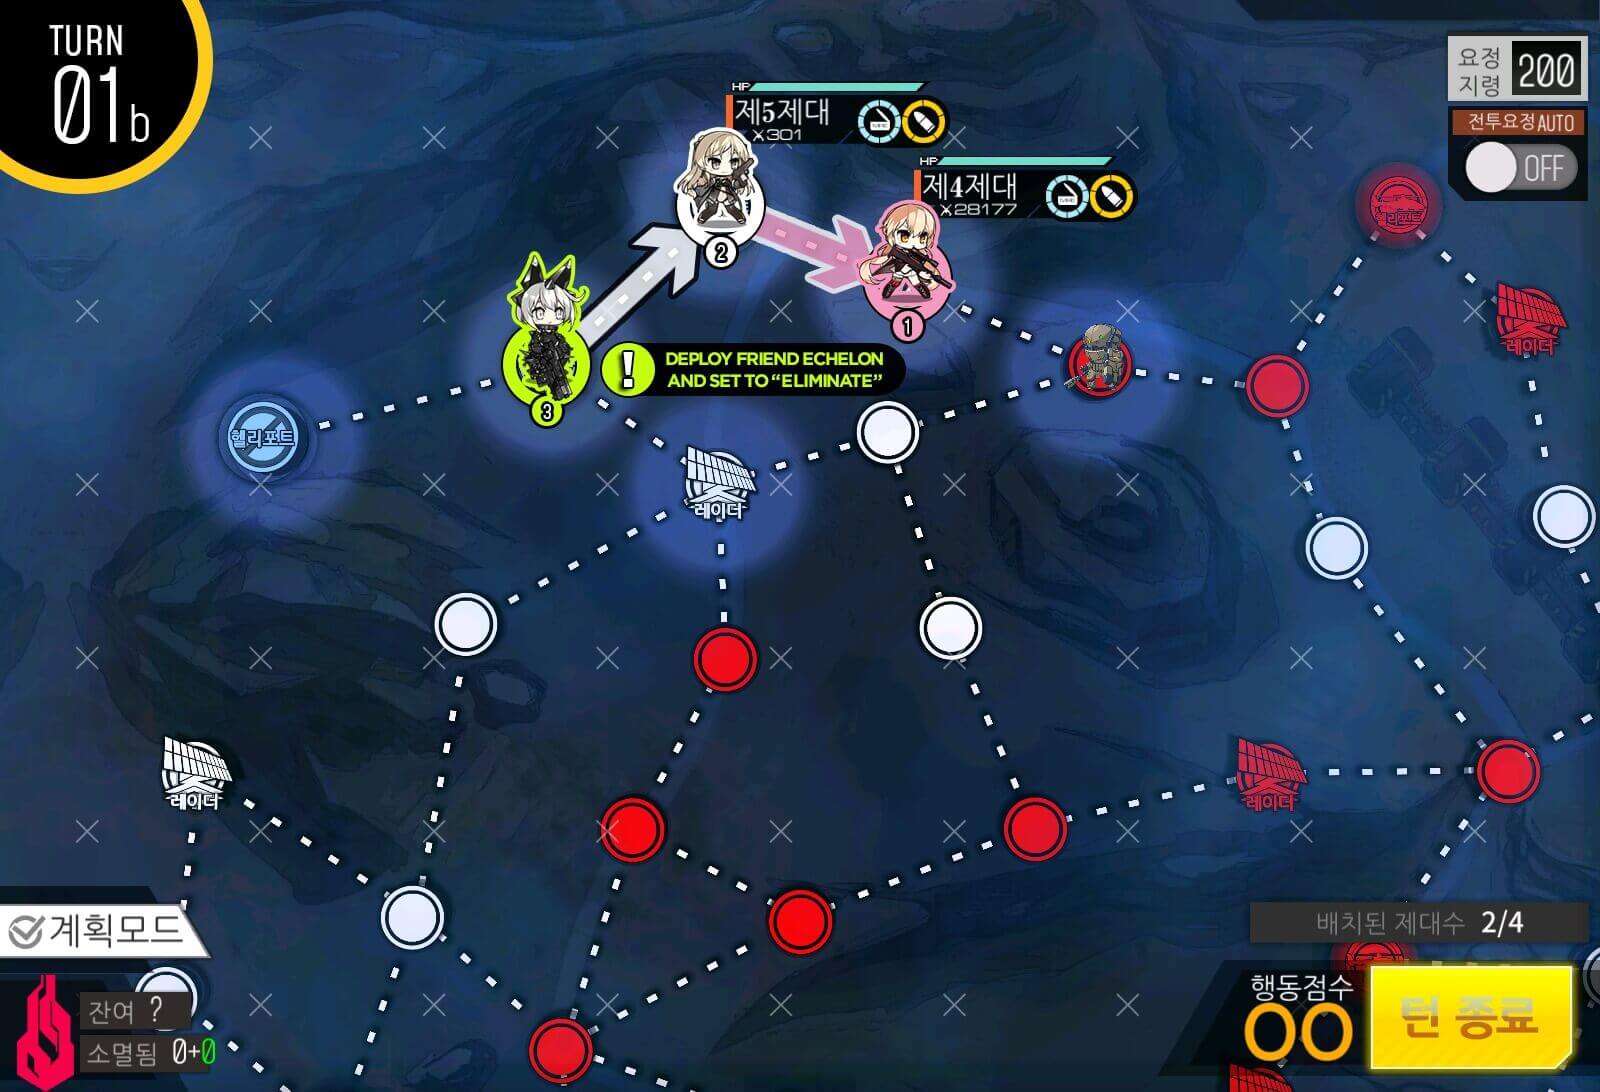
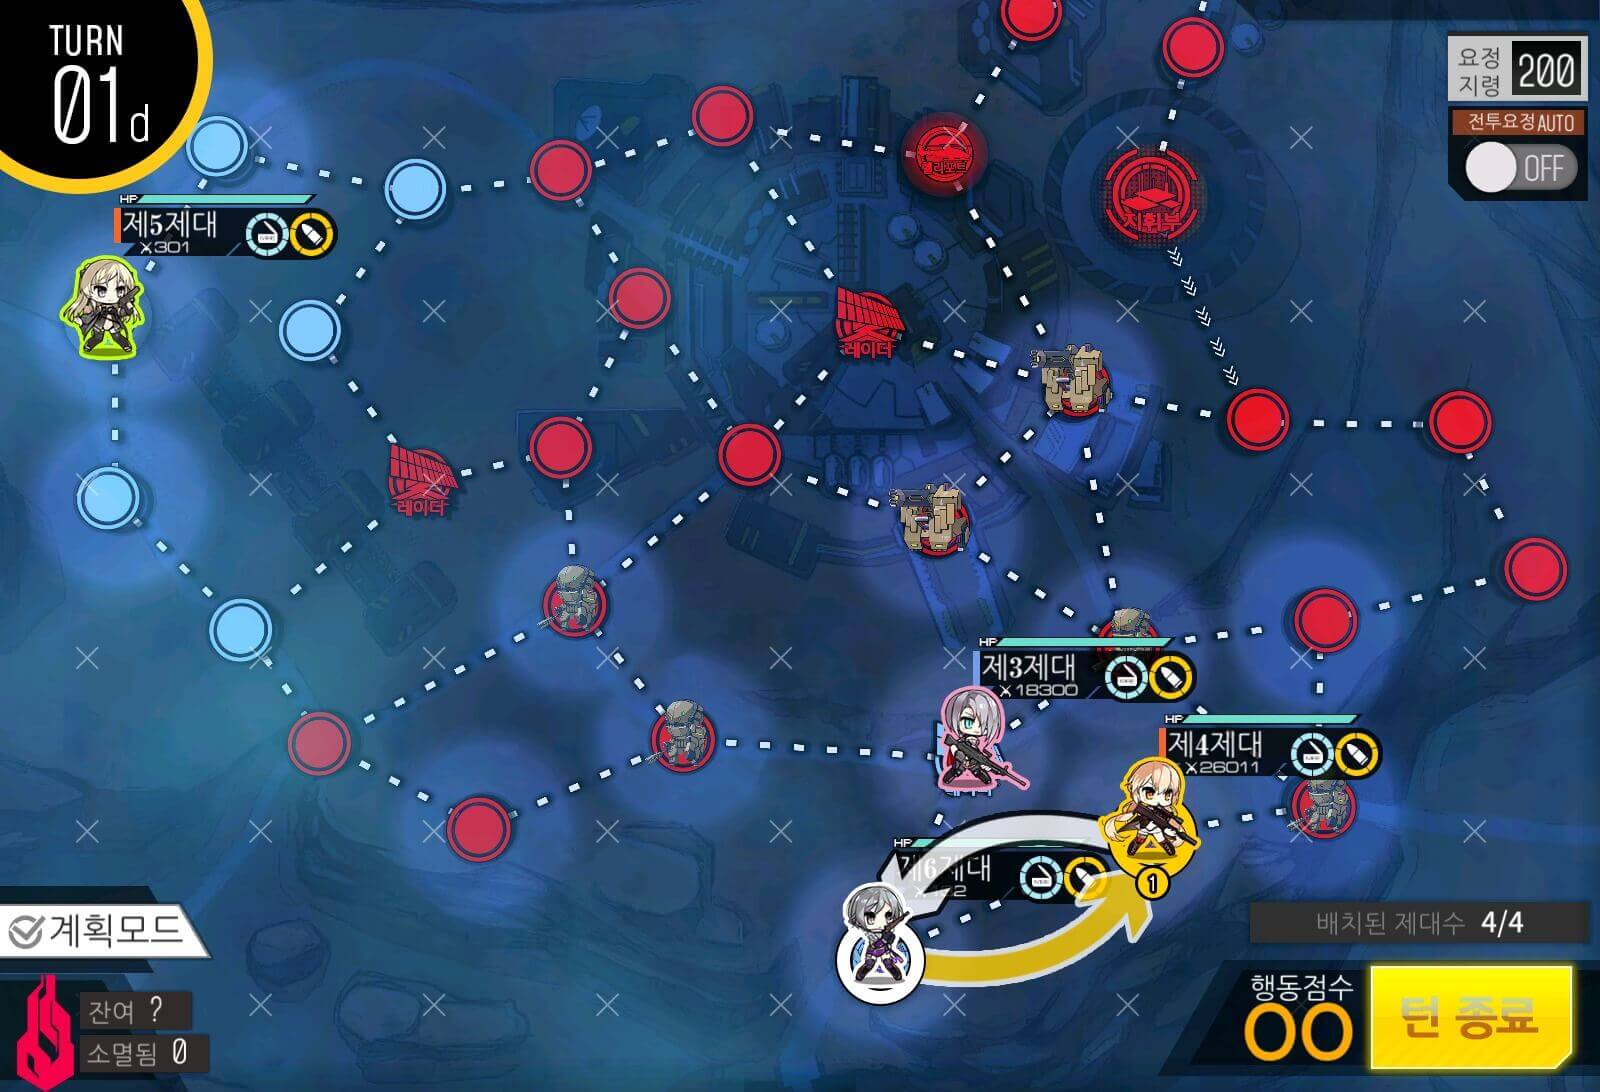
Turn 1b
With the remaining moves, scoot your Dummy Echelon to the bottom, leaving space for a Friend Echelon on the top helipad.
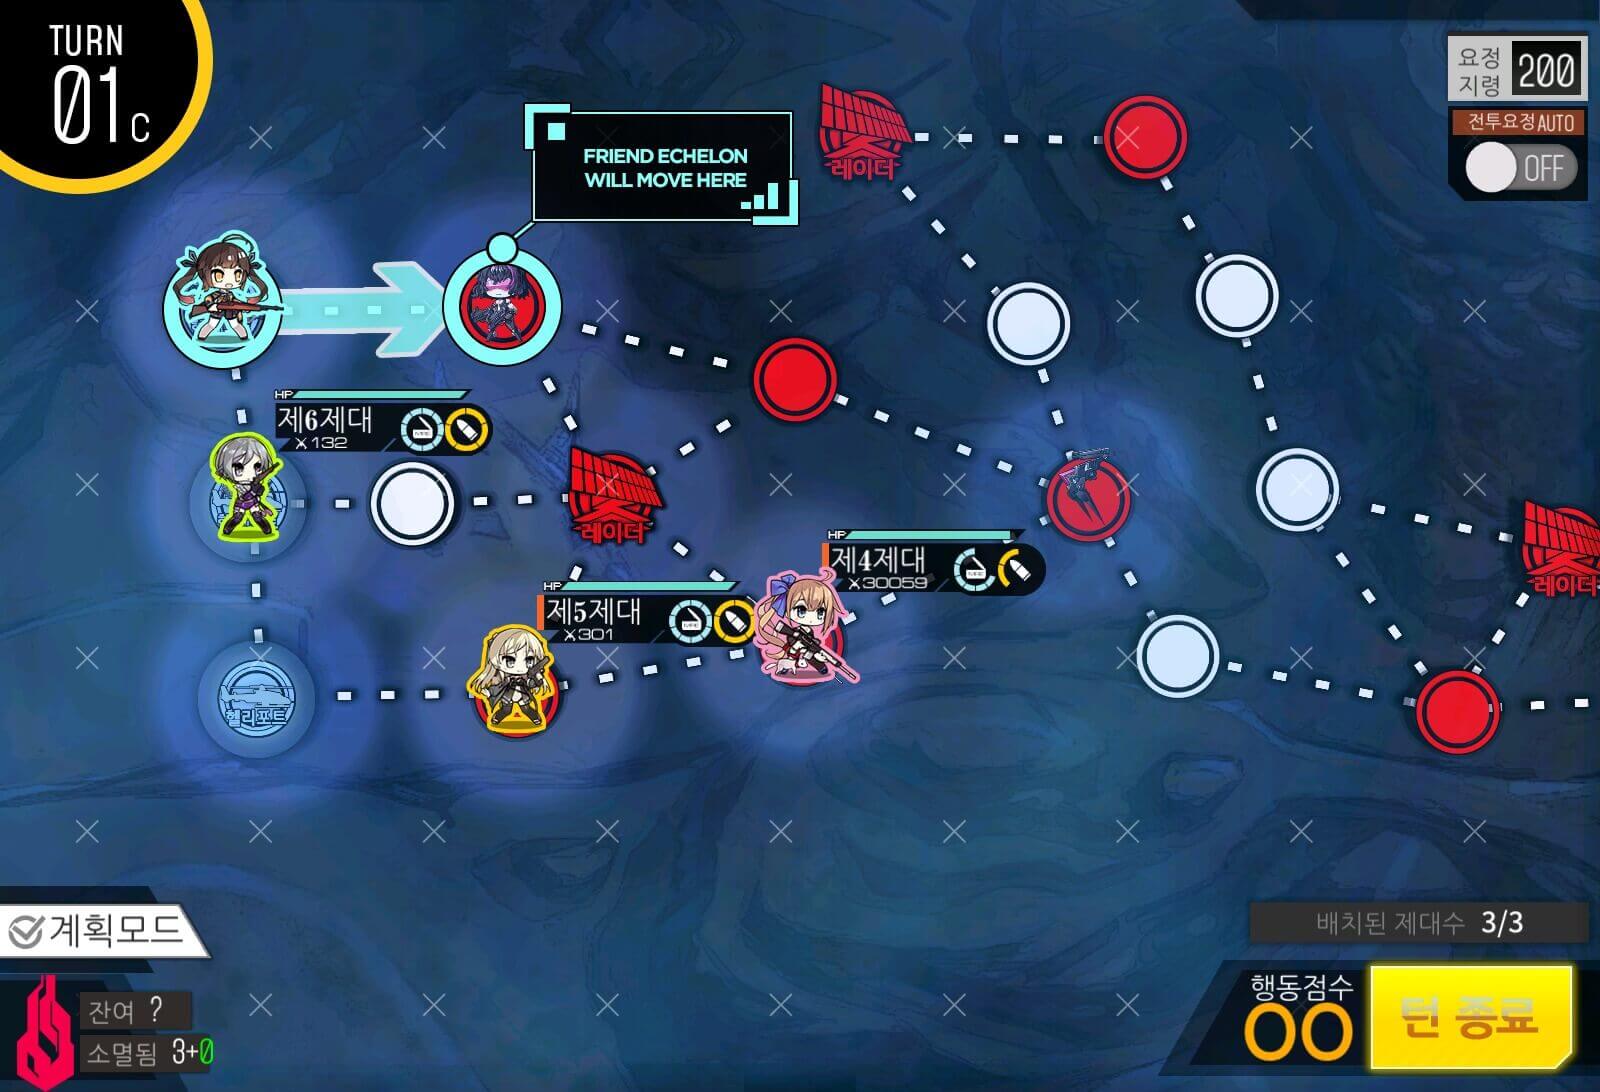
Turn 1c
Deploy a Friend Echelon and set it to 'Eliminate'.
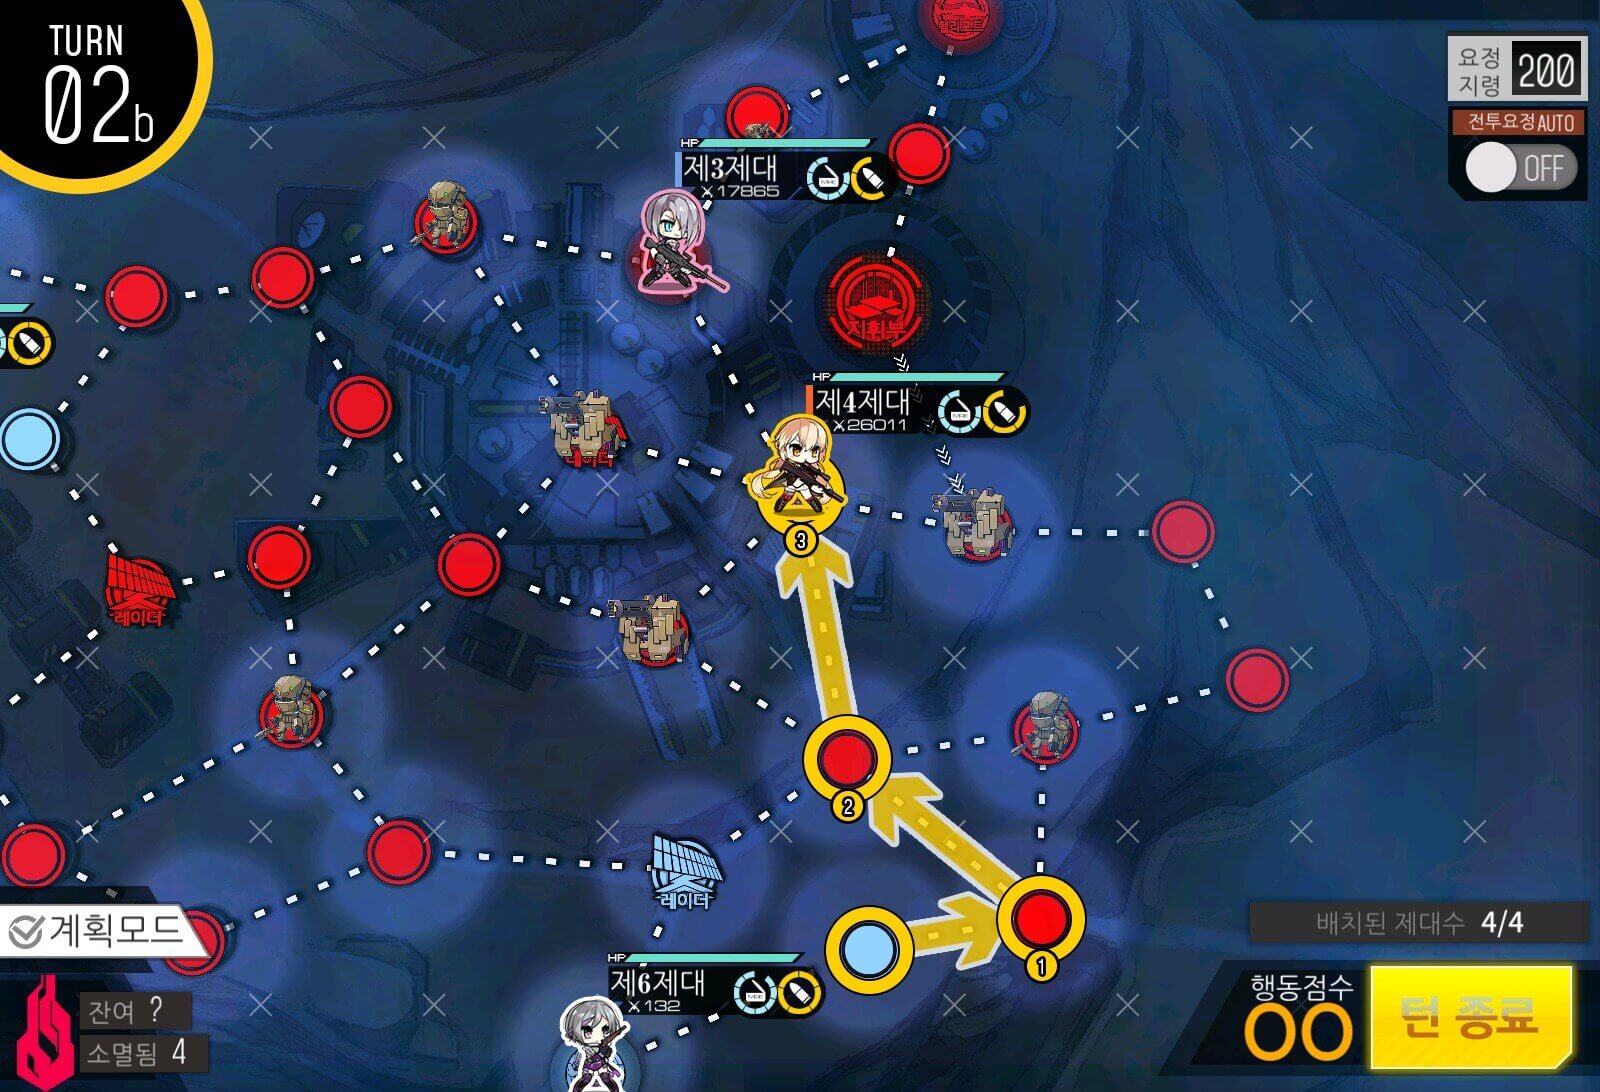
Turn 2a
Move your Dummy still on the middle helipad to the bottom, creating a conga line for the Combat echelon to swap back for resupply. Return the Combat Echelon to its original position.

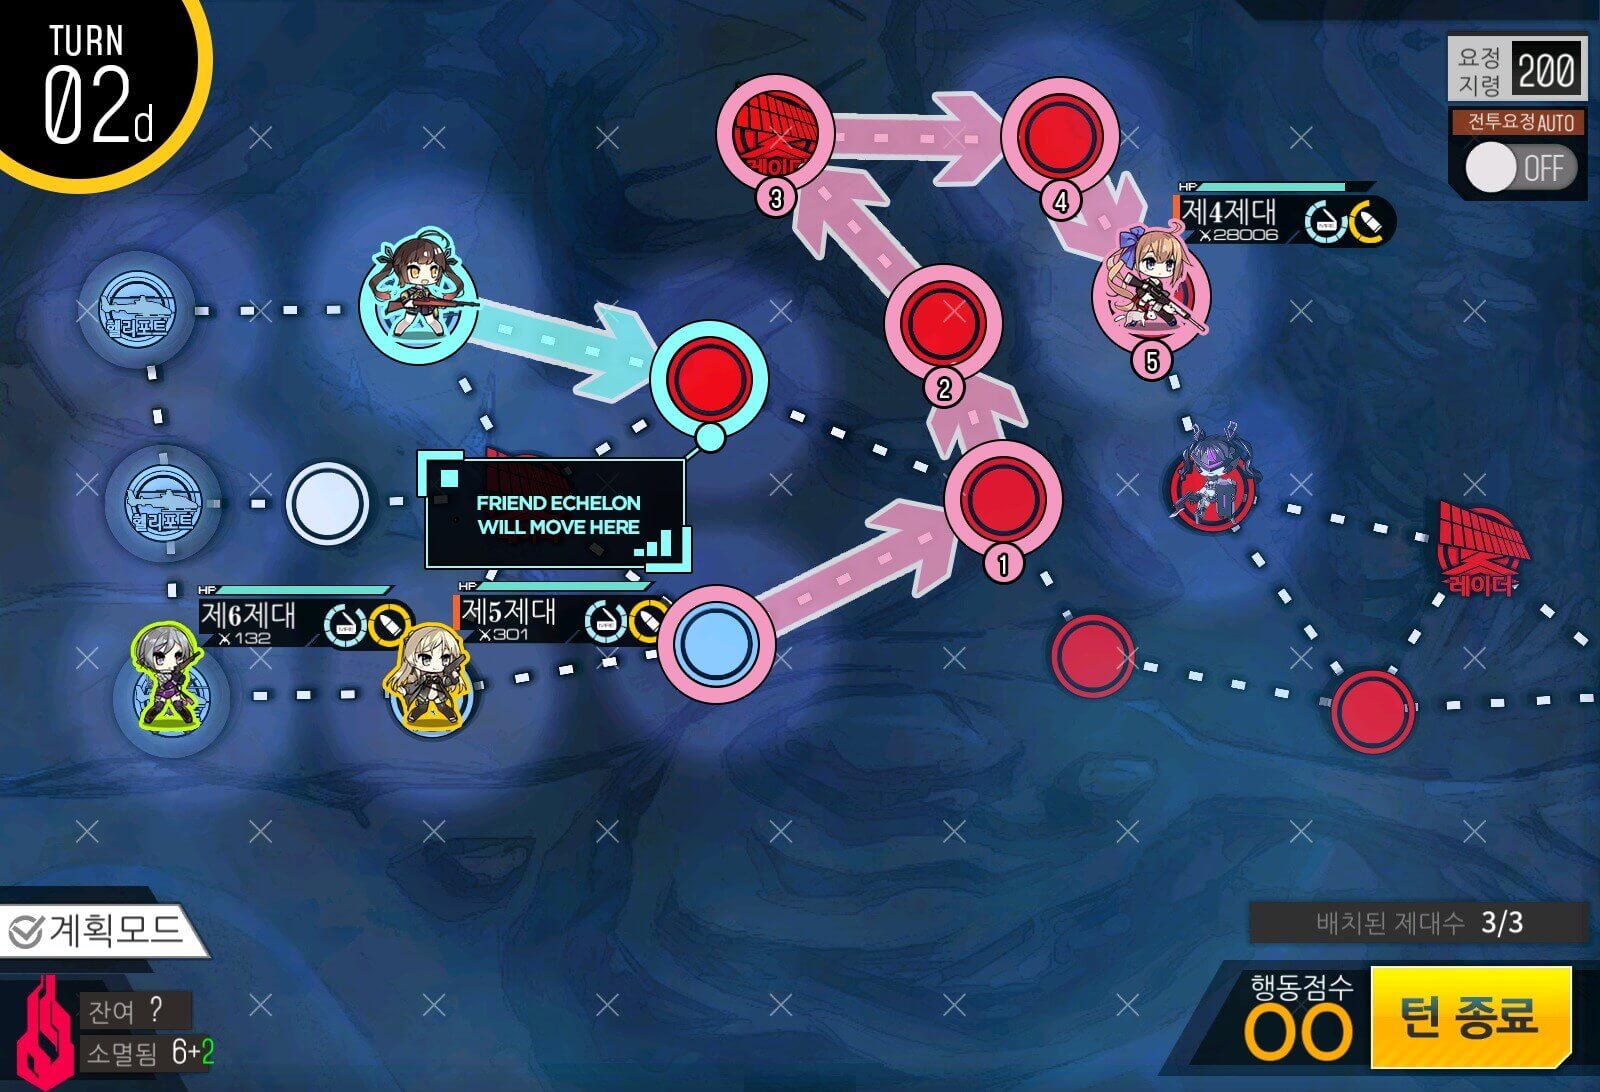
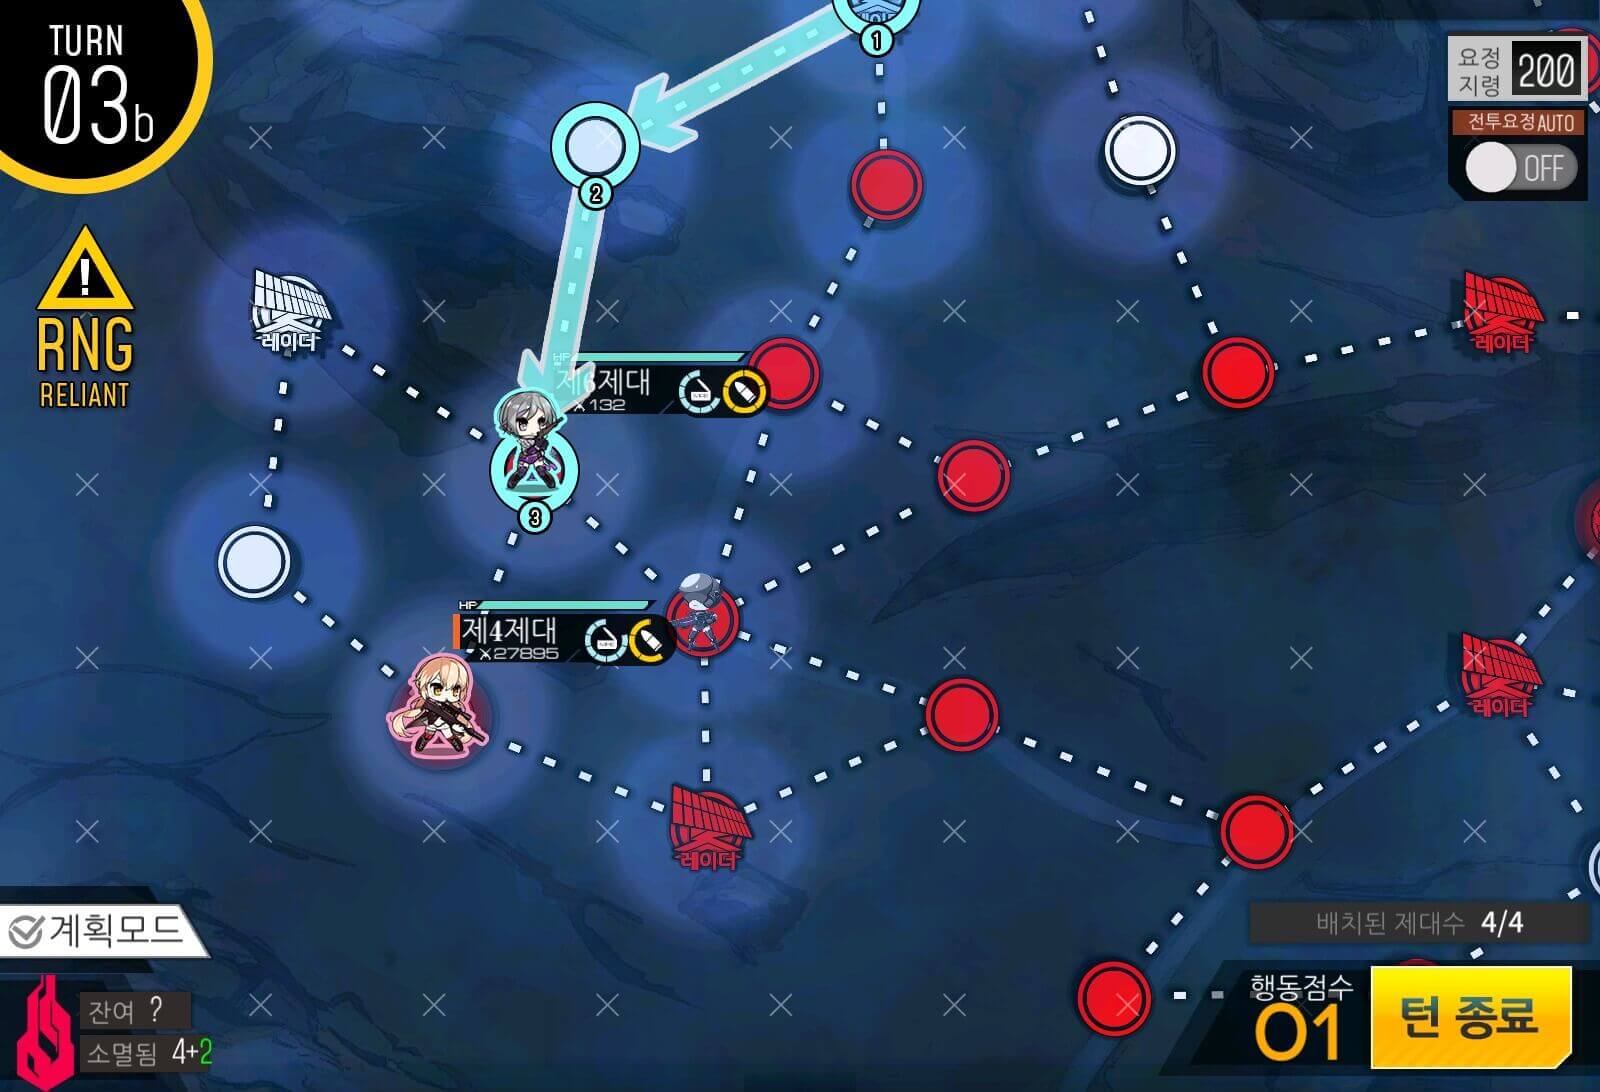
Turn 2d
Follow the top route of the map and sweep to clear.

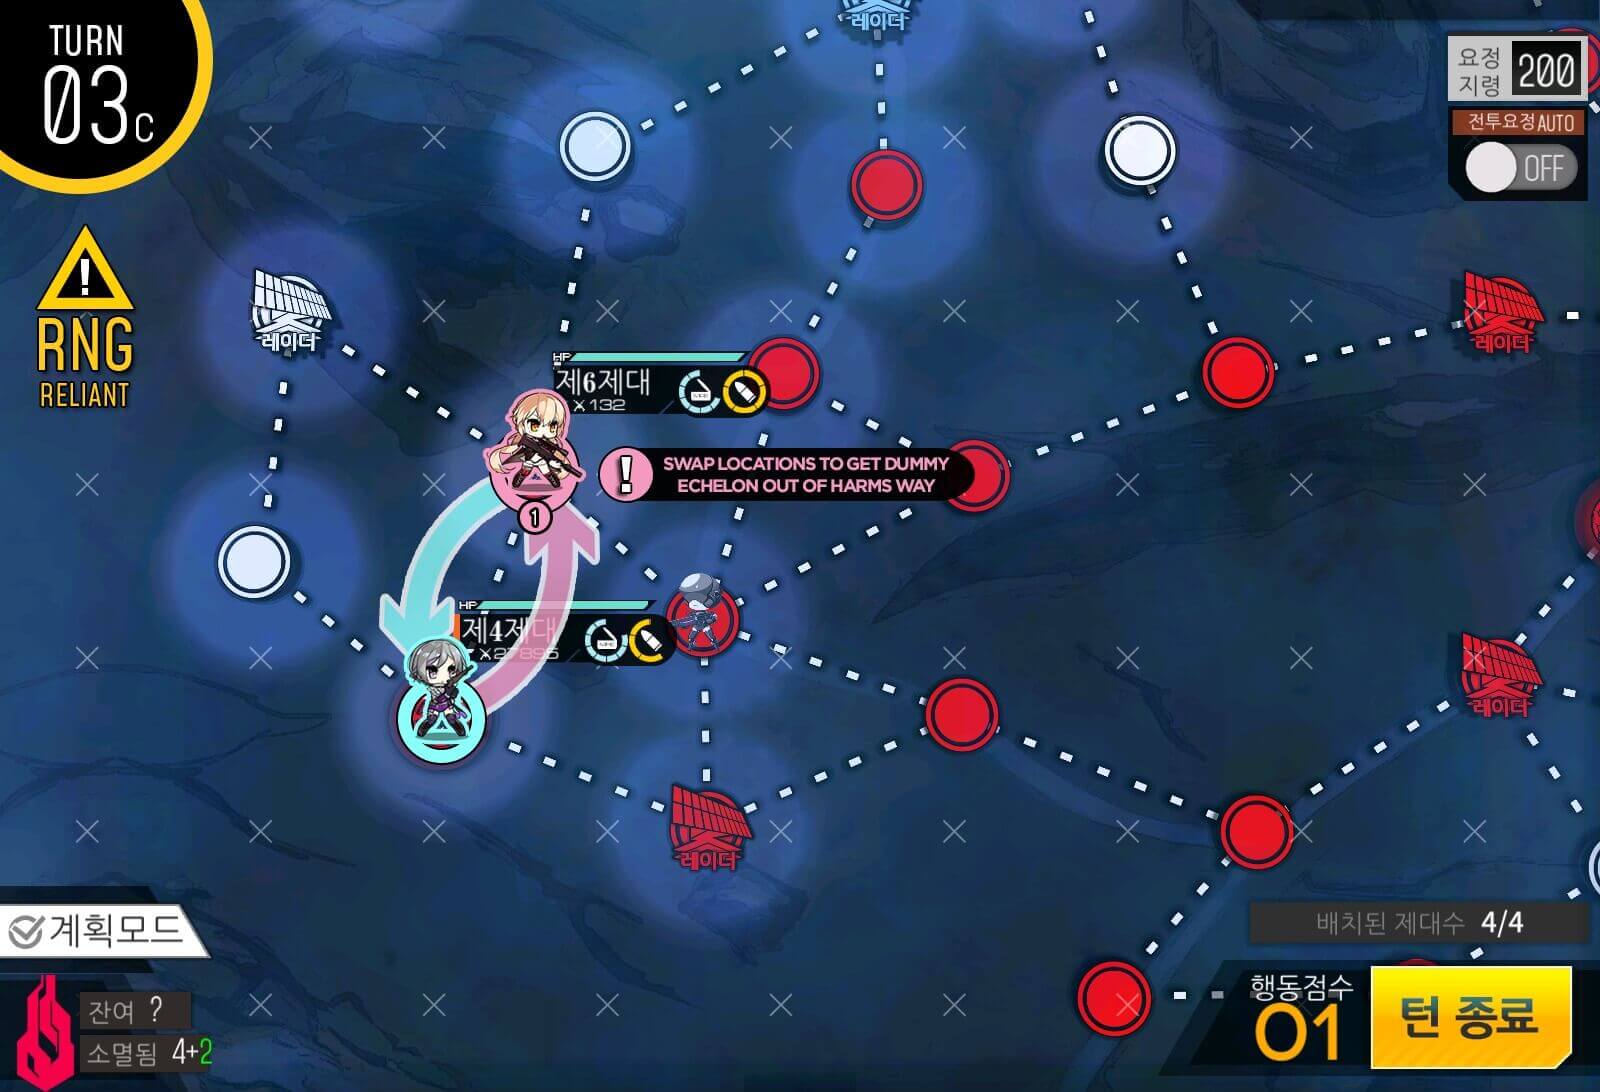
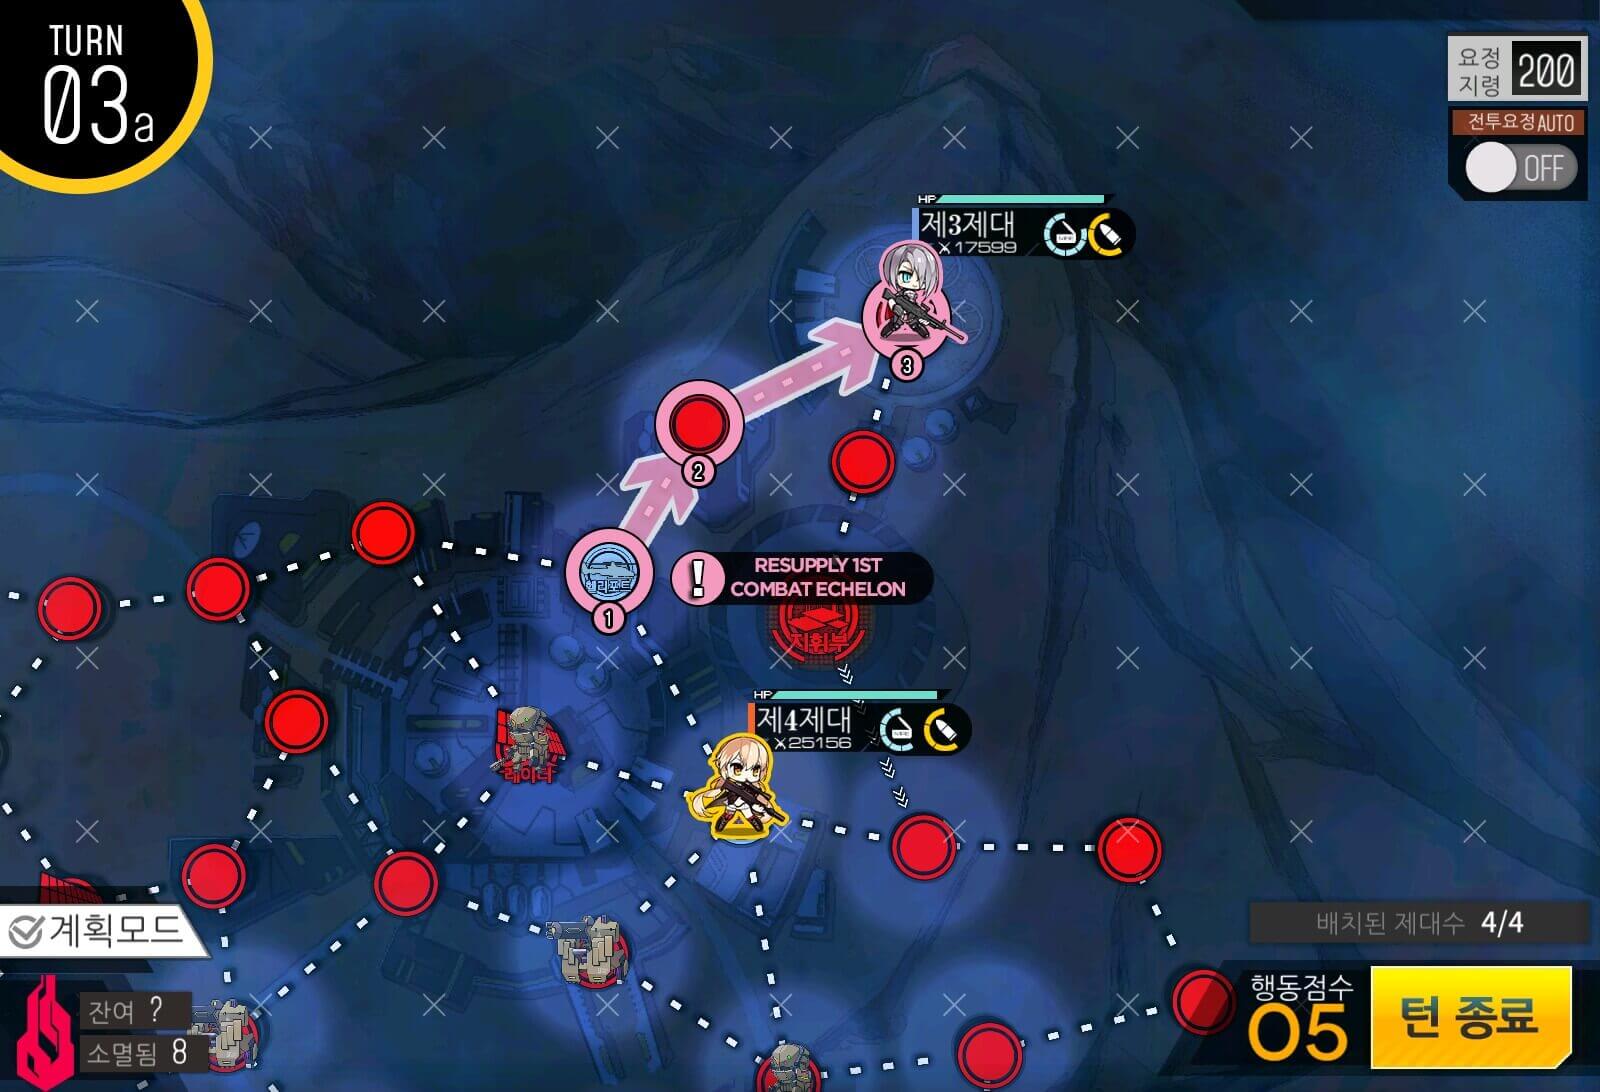
Turn 3
Clear out the remaining enemy units on the map. You should have plenty of moves to clear them with.

Echelon setup
Instead of having 2 SMGs here, having 2 AR and 1 MG with HG as an off-tank might make for a better choice. This setup will definitely suffice for this though.

Turn 1a
Move the Combat Echelon up once, then spawn first Dummy.
Turn 1b
Both Echelons scoot up the line by one each, then spawn a Friend Echelon (ideally MGSG). Set it to 'Eliminate.'

Turn 1c
Swap your Friend Echelon all the way to the front of the line and the Combat Echelon back to the starting location.

Turn 2a
Spawn a 2nd Dummy Echelon after moving your Combat Echelon down once towards the radar. Then move the Dummy Echelon to the left so we can spawn a 4th echelon.
Turn 2b
This is where you can spawn either a 3rd Dummy or 2nd Combat echelon to minimize RNG. Demonstrated will be the method were one to choose to deploy a 3rd Dummy Echelon.
Turn 3a
Take your Combat Echelon all the way to the helipad. Your situation may be different but I was able to take the helipad because only one of the highlighted nodes had an enemy on it. If you had 2 Combat Echelons, this would not be an issue.
Turn 3b
Bring down your Dummy/Combat Echelon right above the helipad. Swap out with the Combat Echelon if the Dummy is in harm's way.

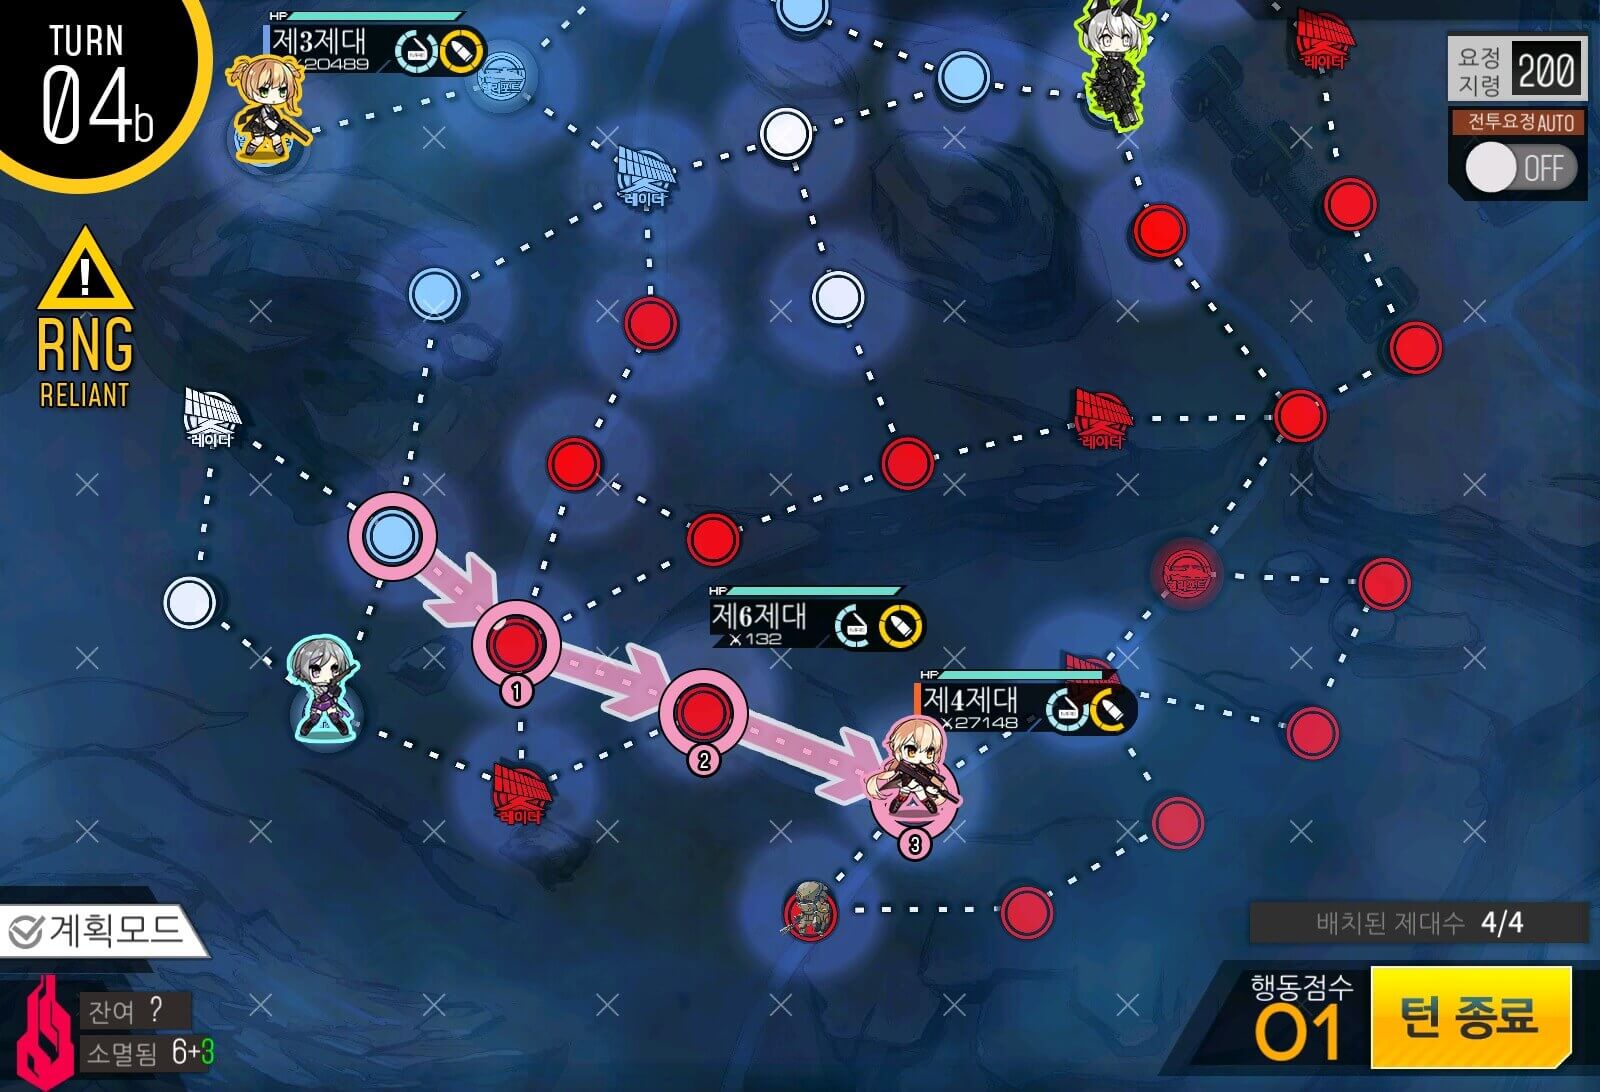
Turn 4a
Your goal is to move 2 Echelons in tandem and take the radar node. If you are using 3 Dummy Echelons, this can be troublesome when you have 2 enemy units threatening both spots that your Echelons will end up in. If this is the case, just take it slow since you have an extra turn to spare.
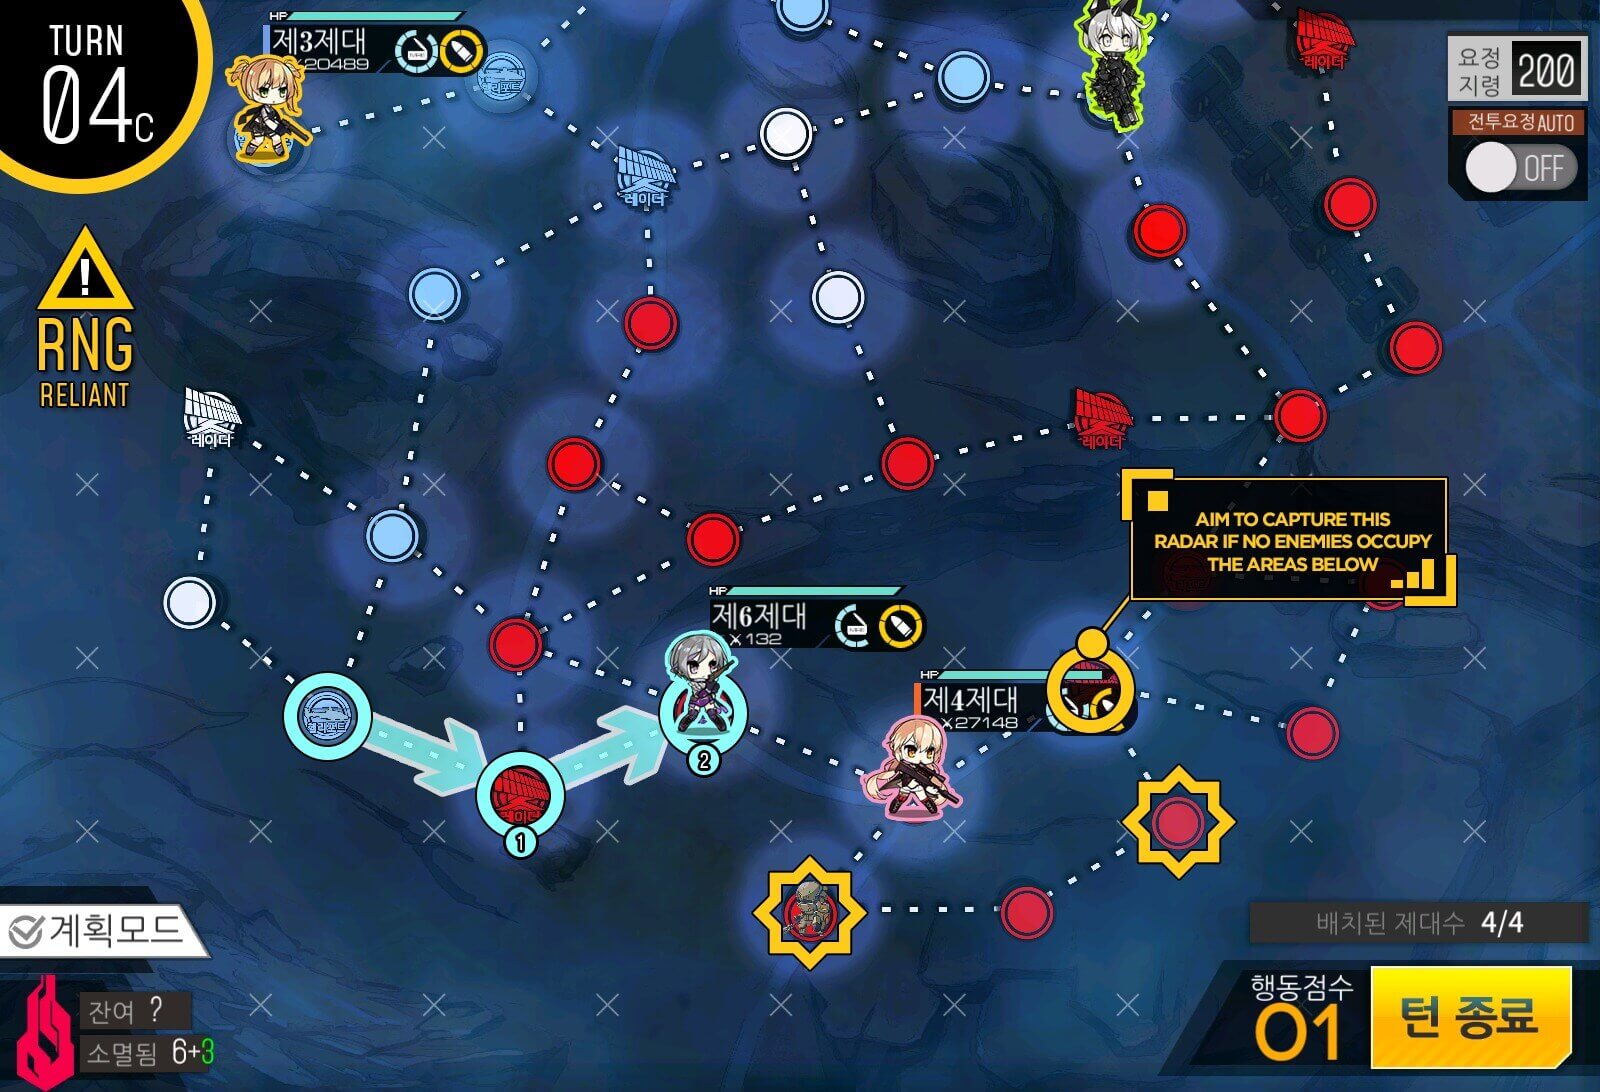
Turn 4b
Since I have 3 Dummy Echelons, I decided to play safe and clear out the enemy units.
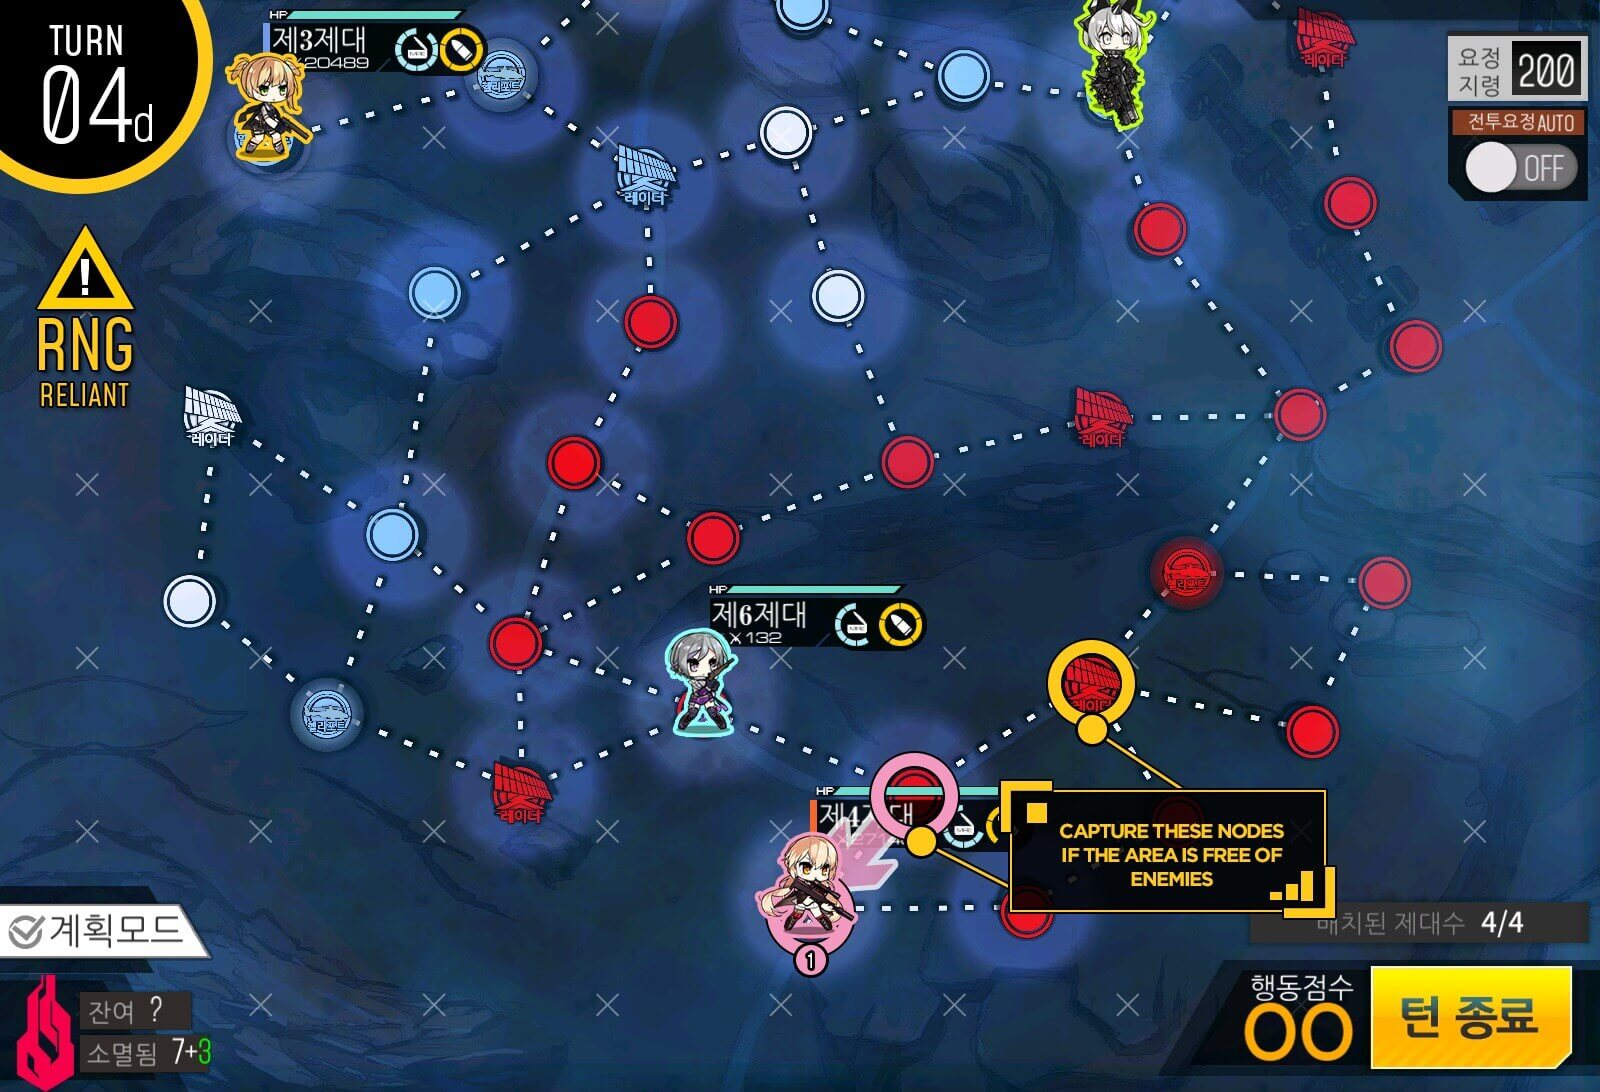
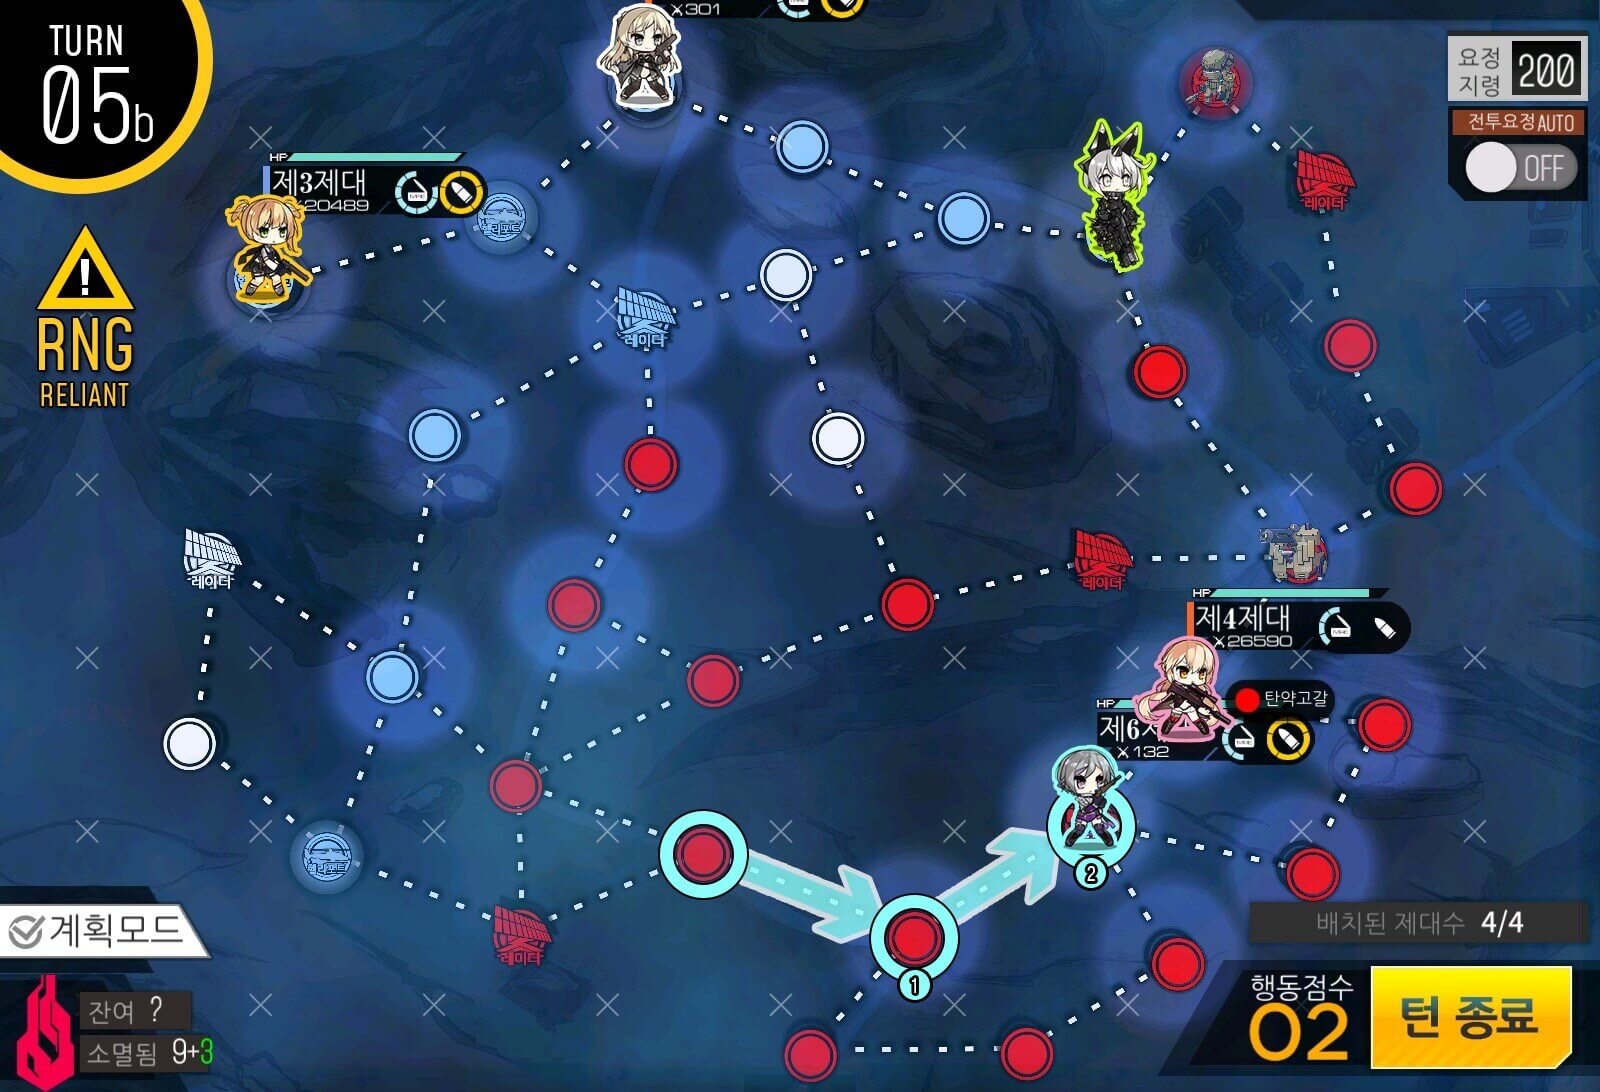
Turn 5a
You might end up in a similar situation where you run out of ammo and have to take the helipad to resupply. In this case you are free to retreat one of the Echelons and redeploy it on the starting location to bring it back. Alternatively you can take a calculated risk which is what I did.
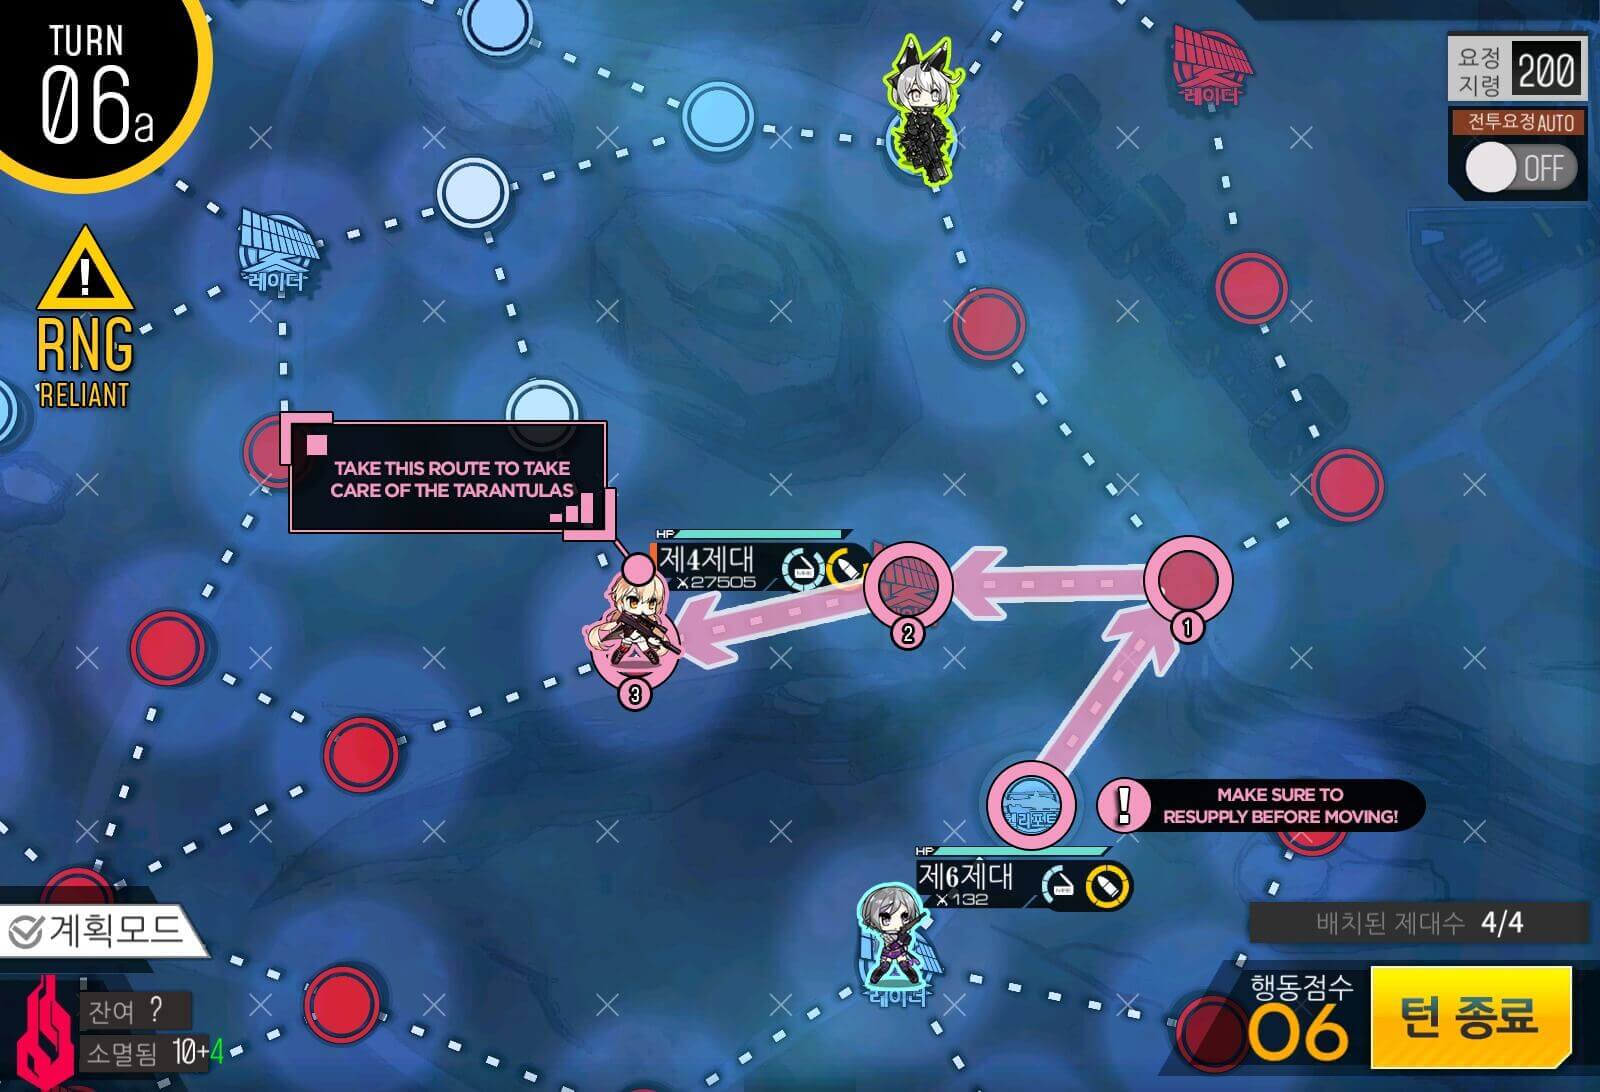
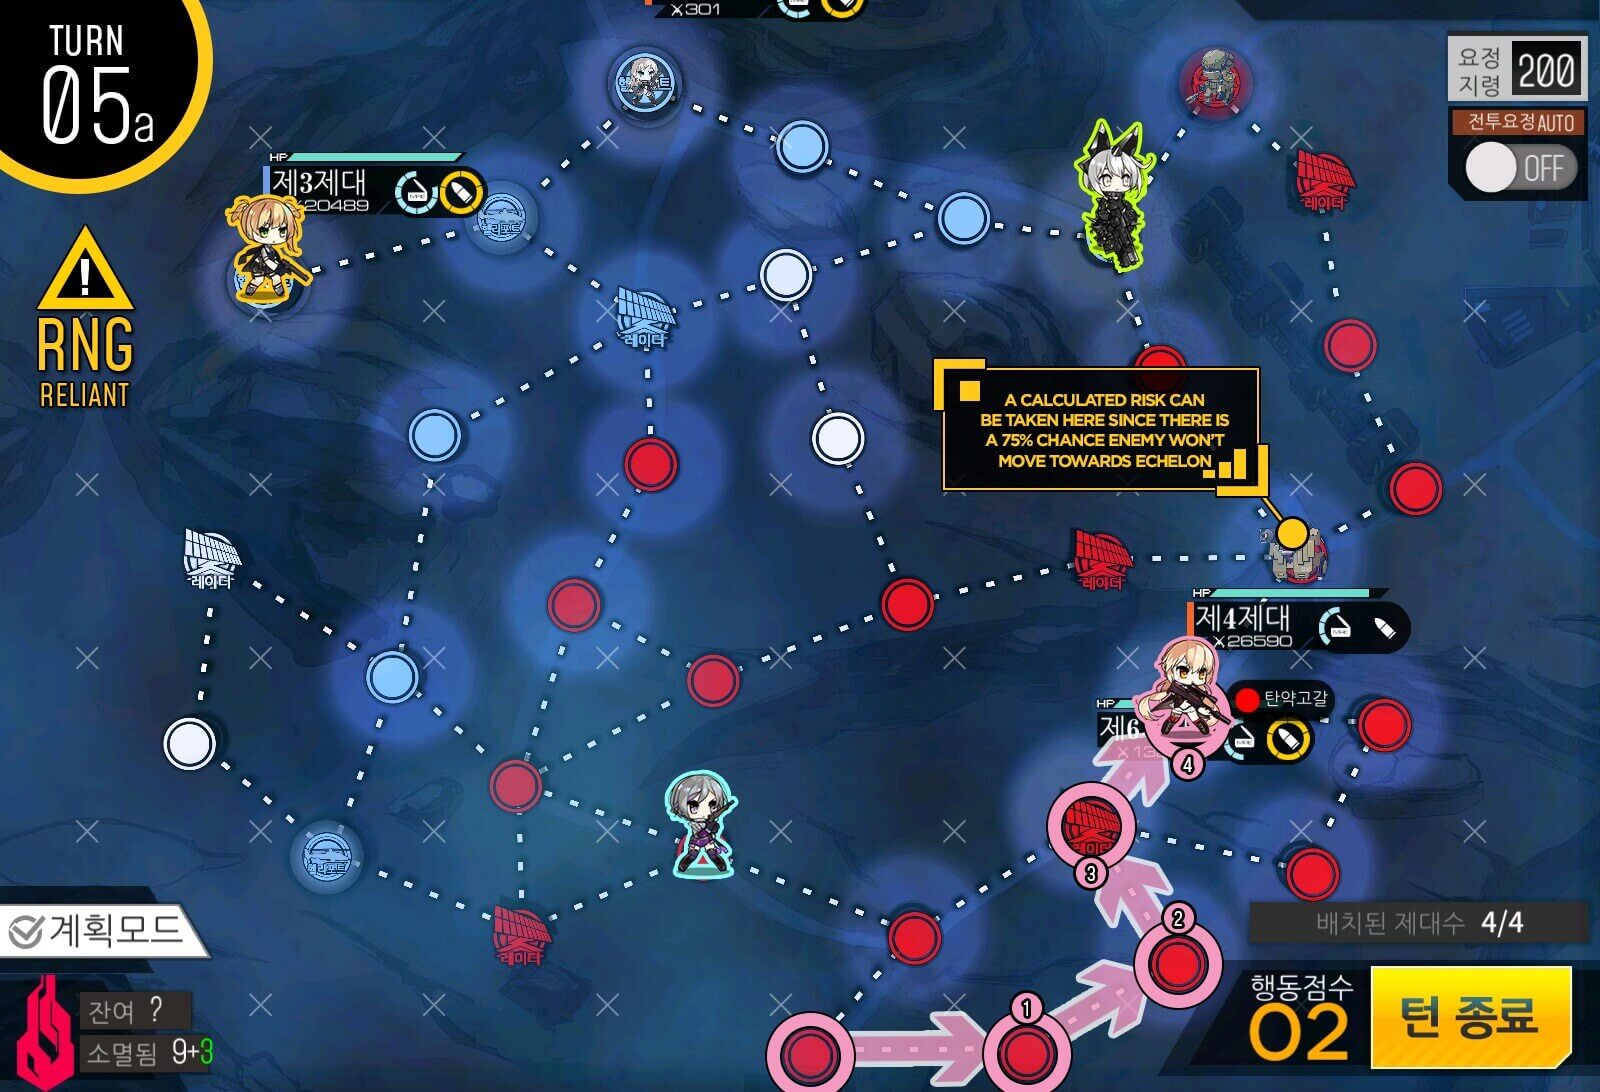
Turn 6a
Resupply the Echelon and clear the middle of the map of the armored doggo unit.
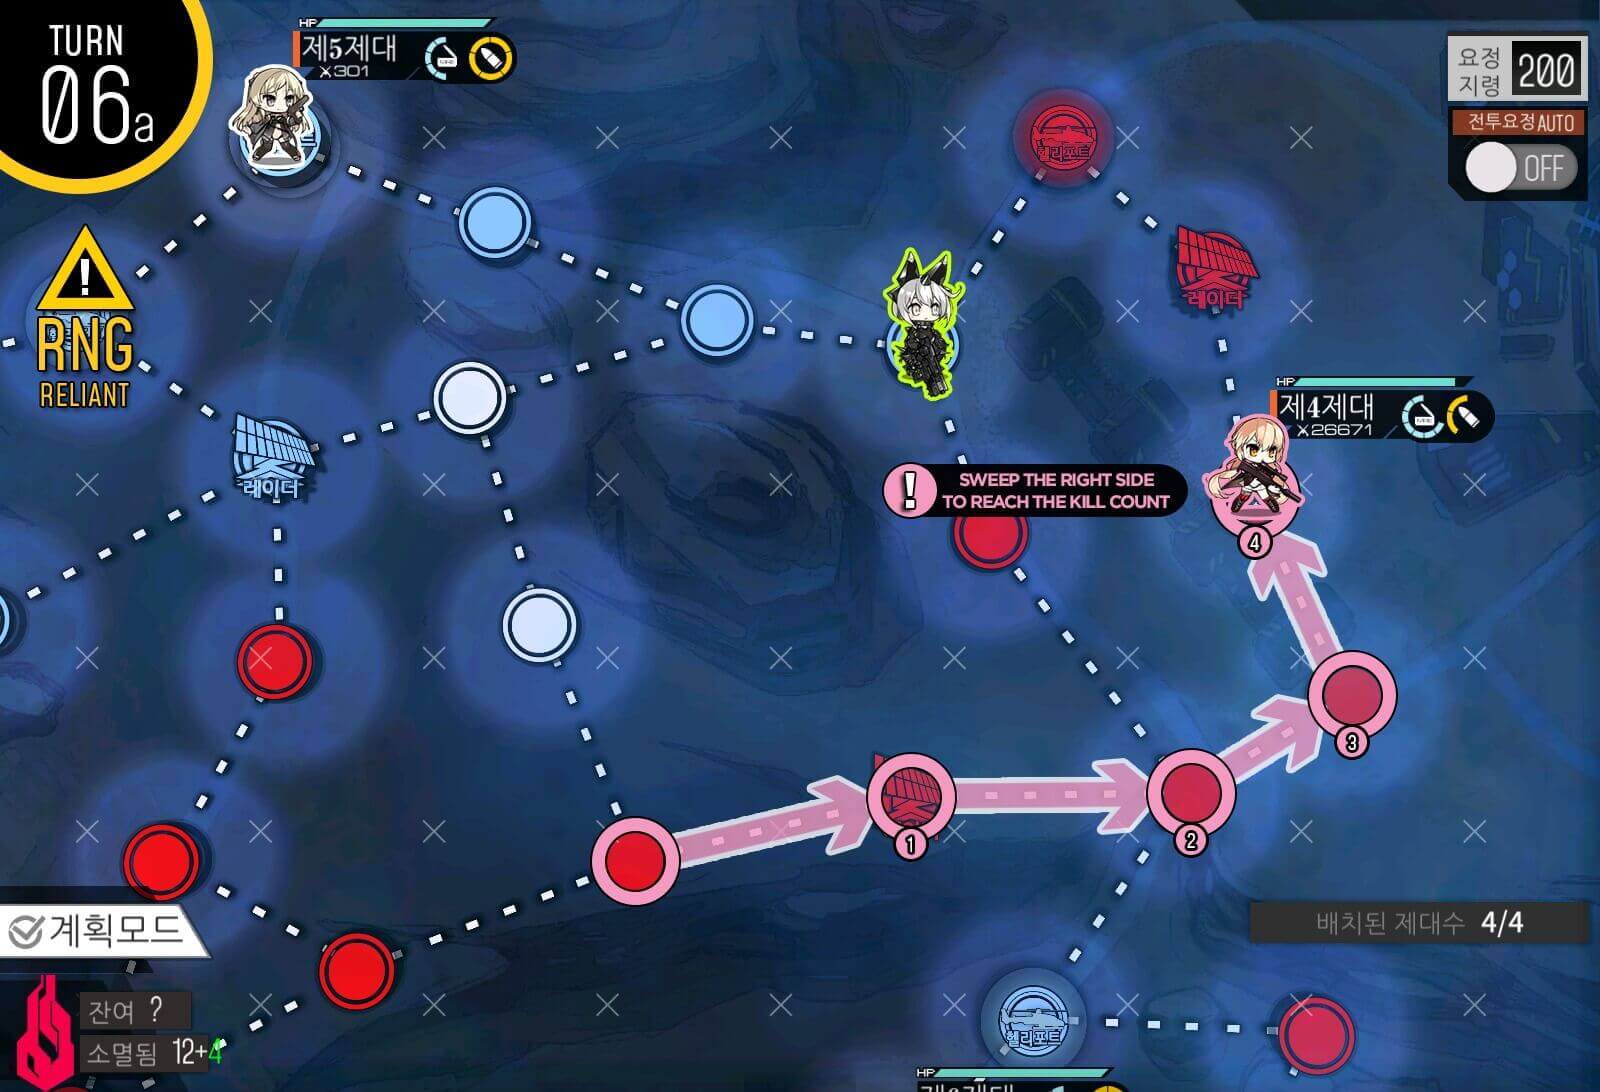
Turn 6b
Kill the remaining enemies on the right side to clear the map.

Echelon setup
For the Boss Echelon, the main focus is to emphasize on firepower and evasion for survival-insurance. As for fairies, a Mortar Fairy would be recommended for the pure FP boost, but a Command and Illumination Fairy works as well. [Dreamer has 30 evasion].

Turn 1a
Start with 2 Dummy Echelons on the map. Ignore the left side and use the bottom helipad to spawn an MG Echelon, swapping back with the Dummy Echelon. The MG Echelon will make a path for Boss echelon.
Turn 1c
Repeat step 1 but use the bottom node and Boss Echelon.

Turn 2a
MG Echelon moves to take the helipad near the enemy HQ. The Boss Echelon will follow suit.
Turn 2b
Resupply the MG Echelon here, then move to clear remaining armor units on the way to Dreamer.
Turn 3a
Boss Echelon will move towards Dreamer. The fight is pretty much identical to Chapter 8's Dreamer fight.
Turn 3b
Boss Echelon will move towards Dreamer. The fight is pretty much identical to Chapter 8's Dreamer fight.

Turn 3c
If you'd like to make having to dodge her lasers more convenient, changing your Echelon's formation to an 'X' shaped formation when running into Dreamer would be recommended.