


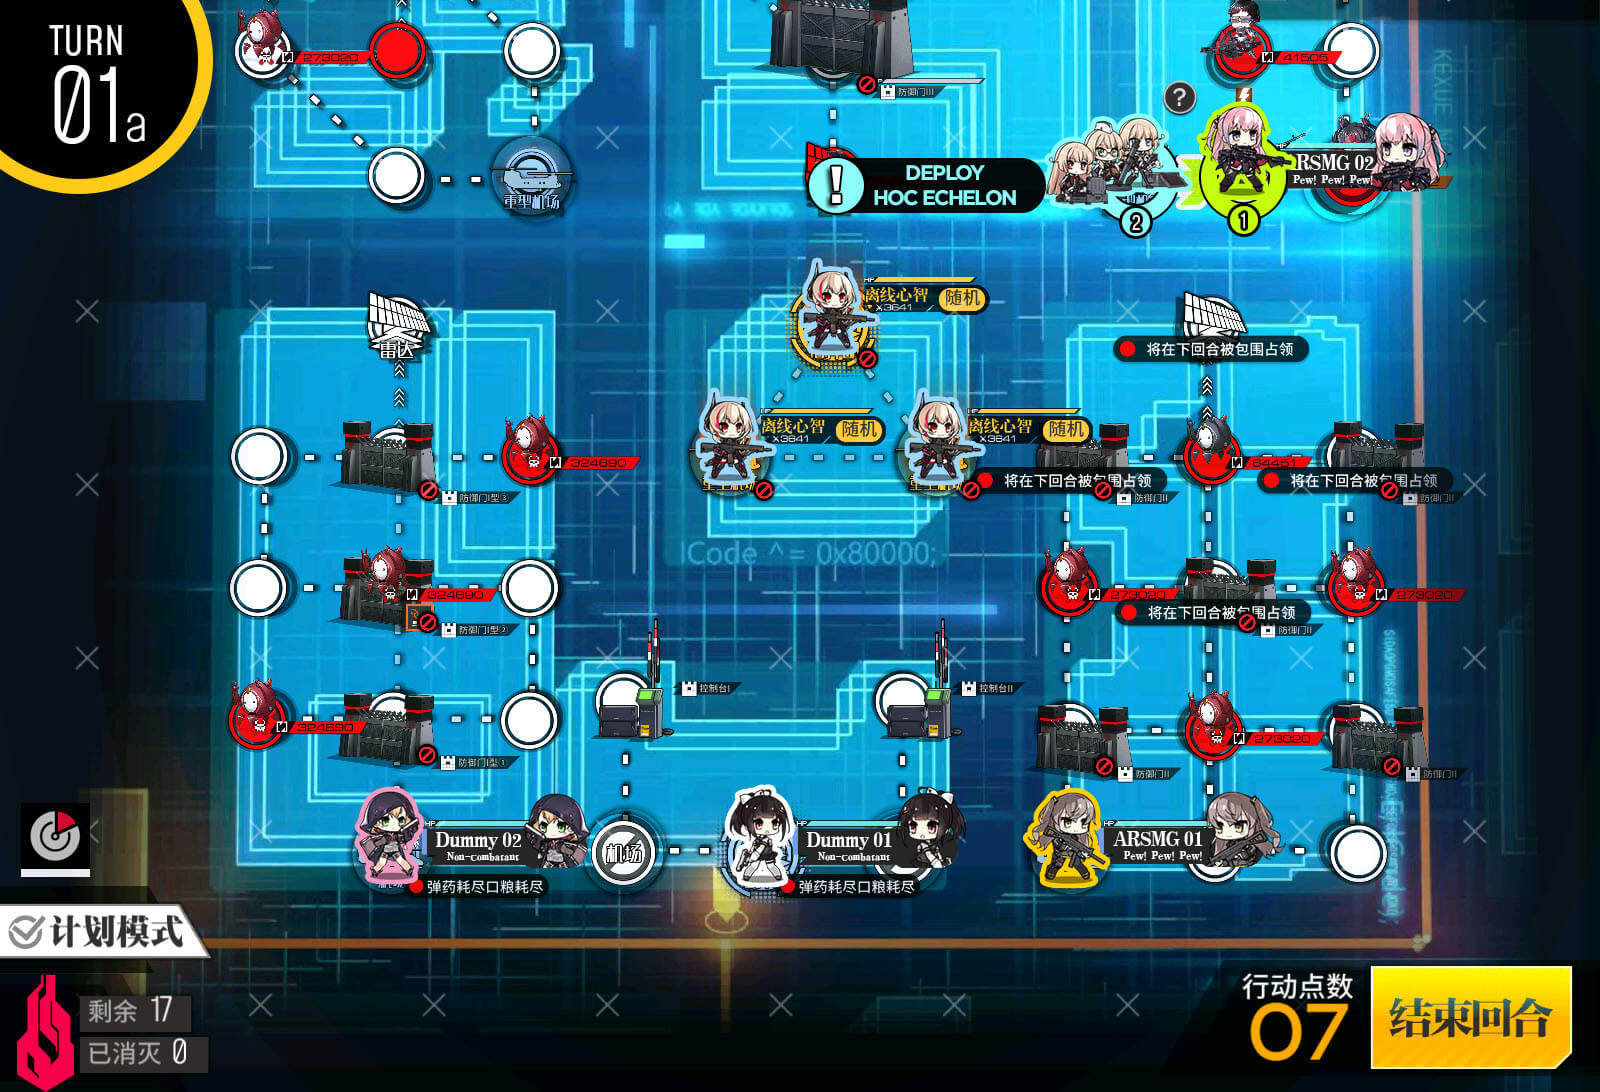
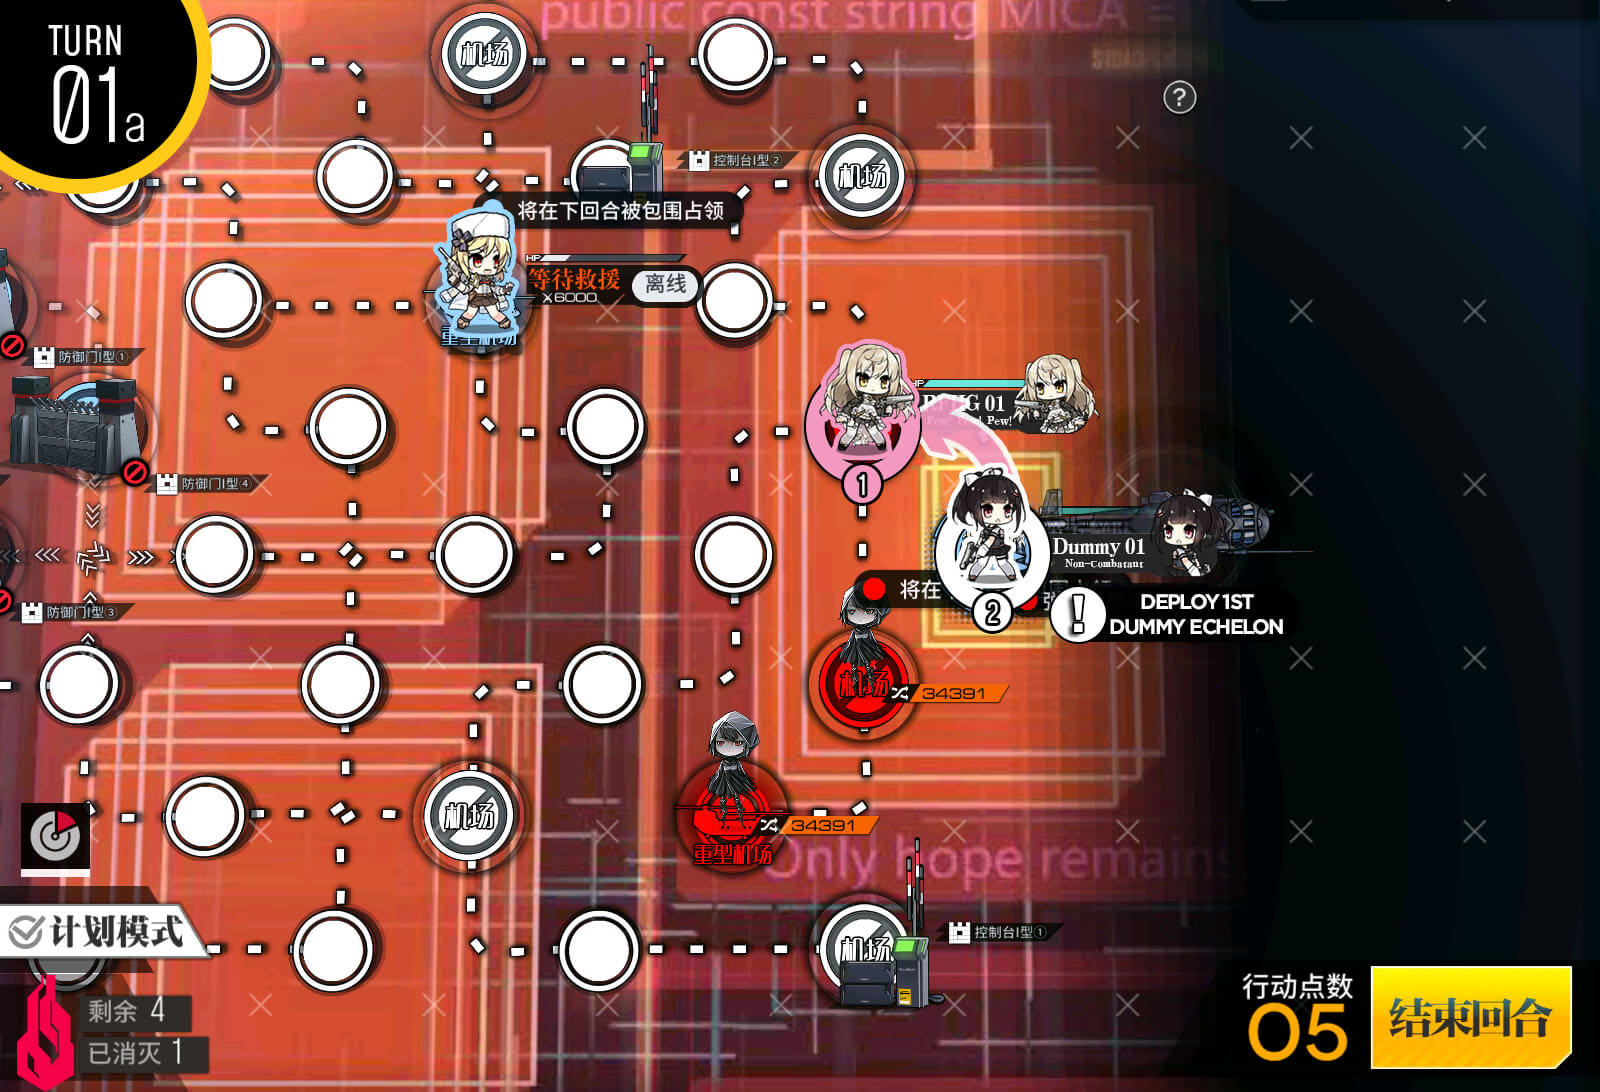
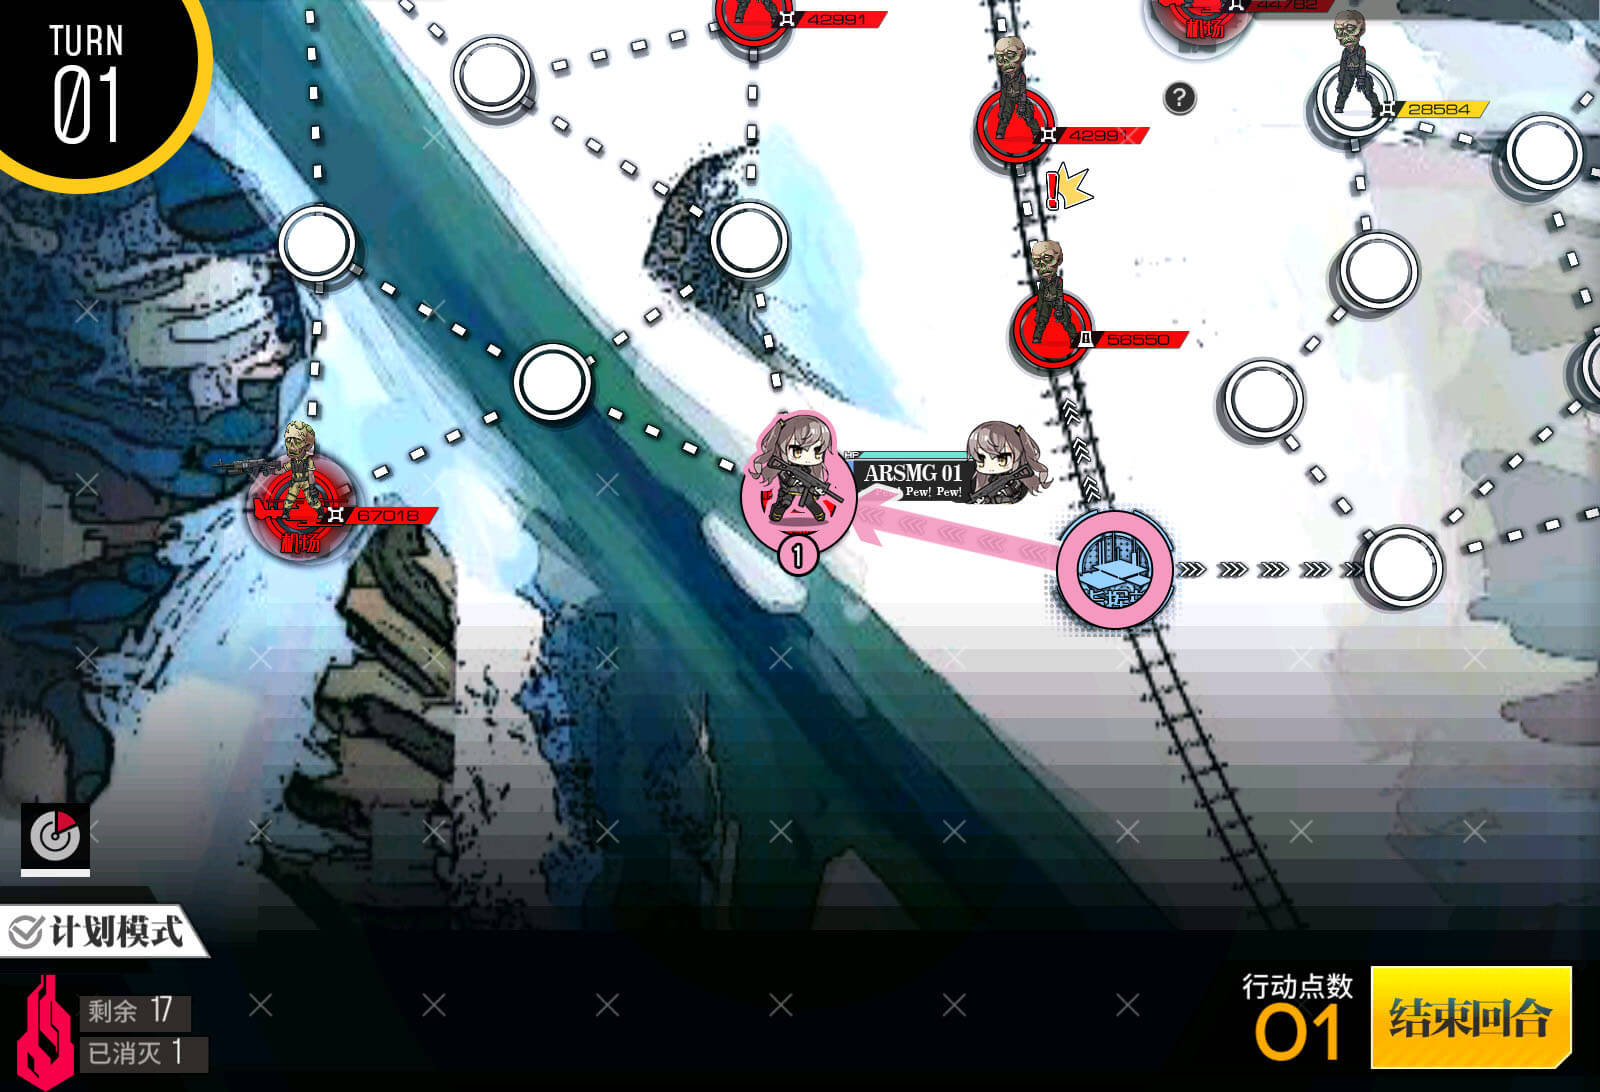
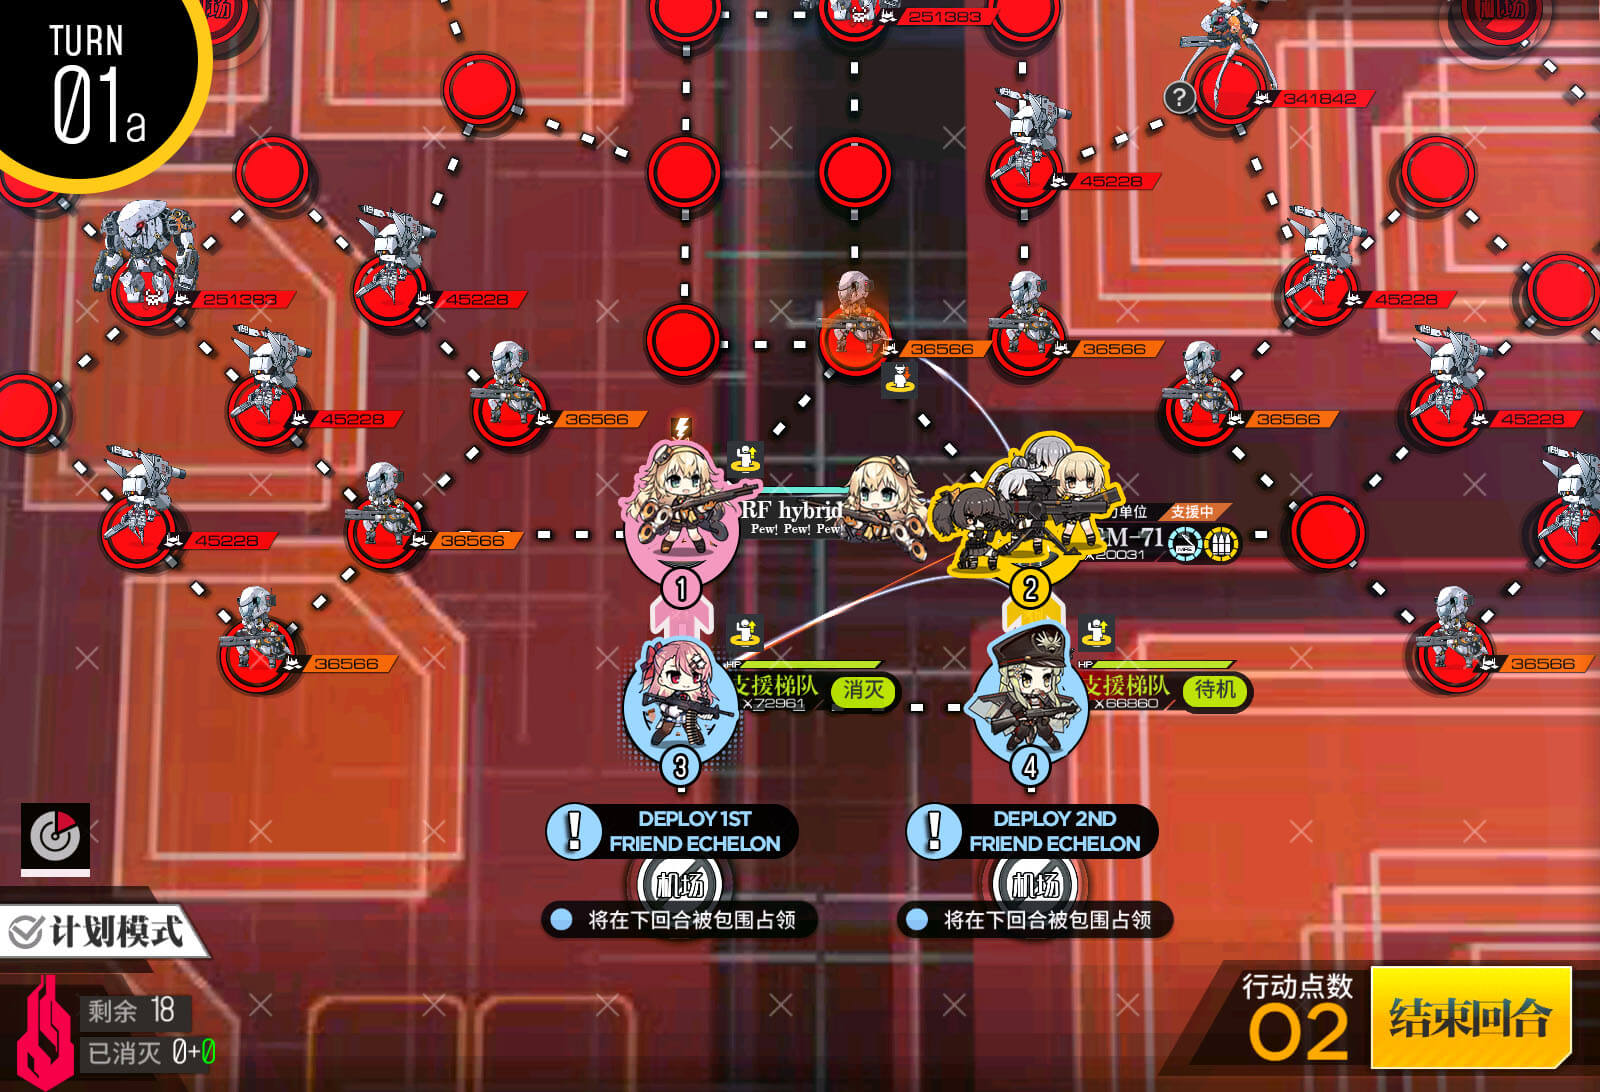
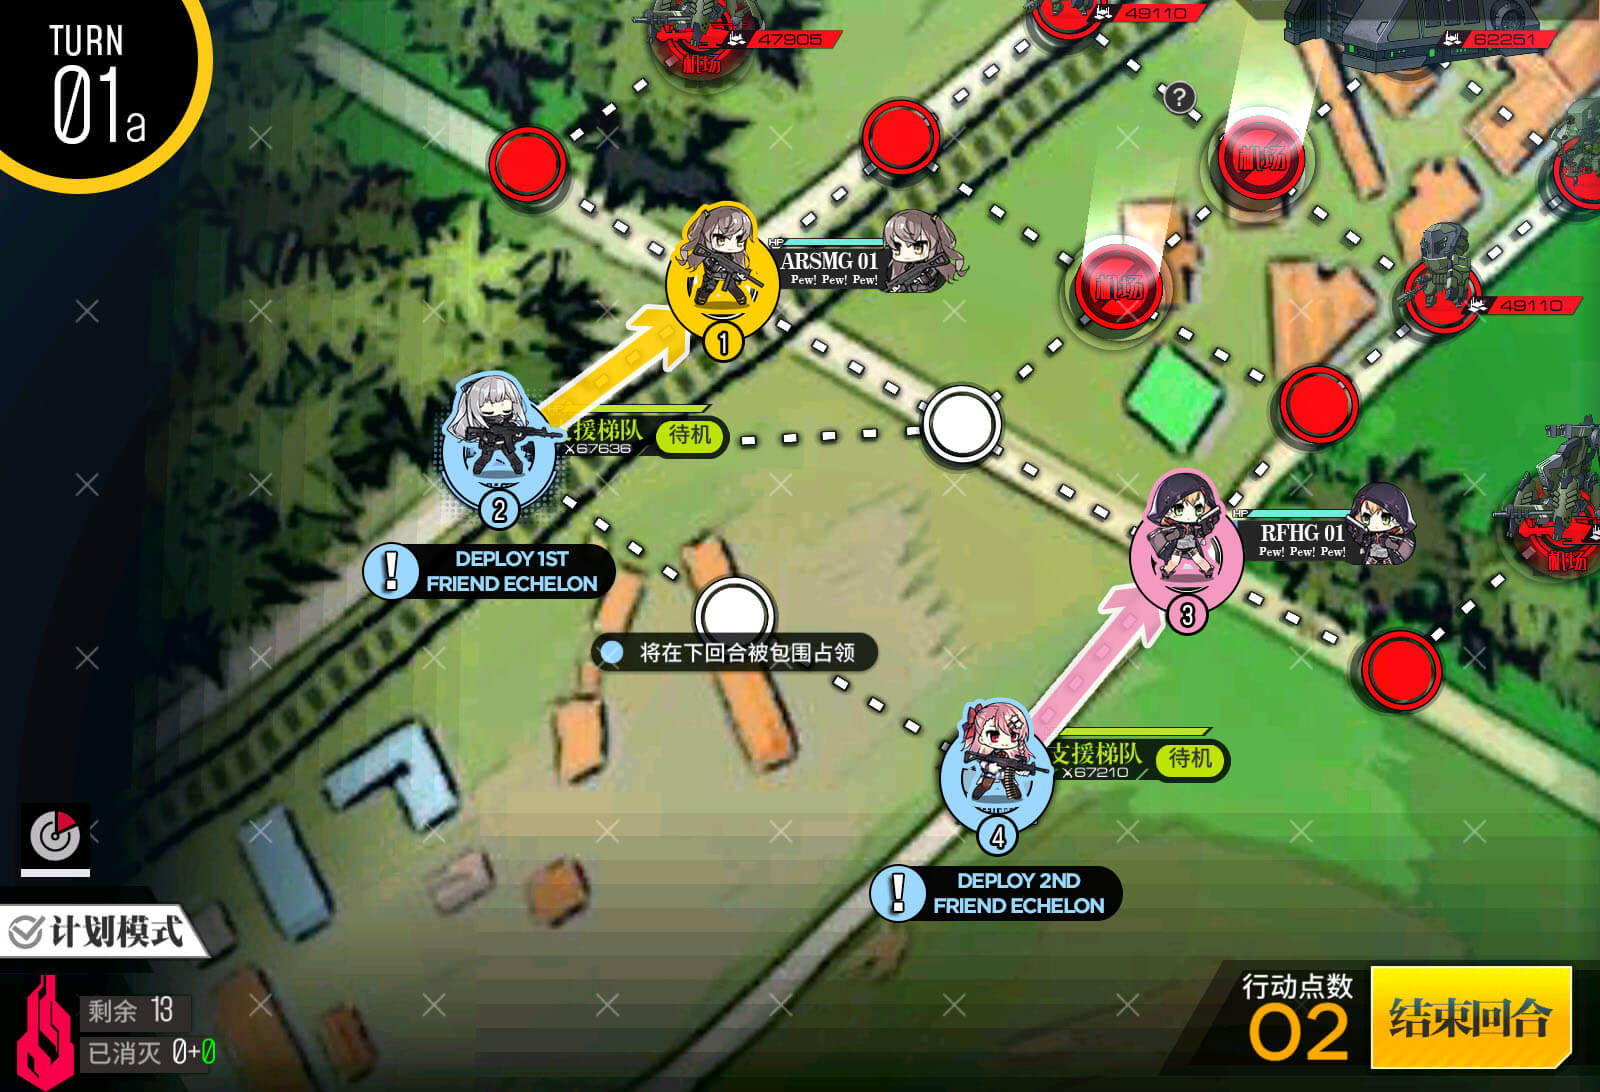
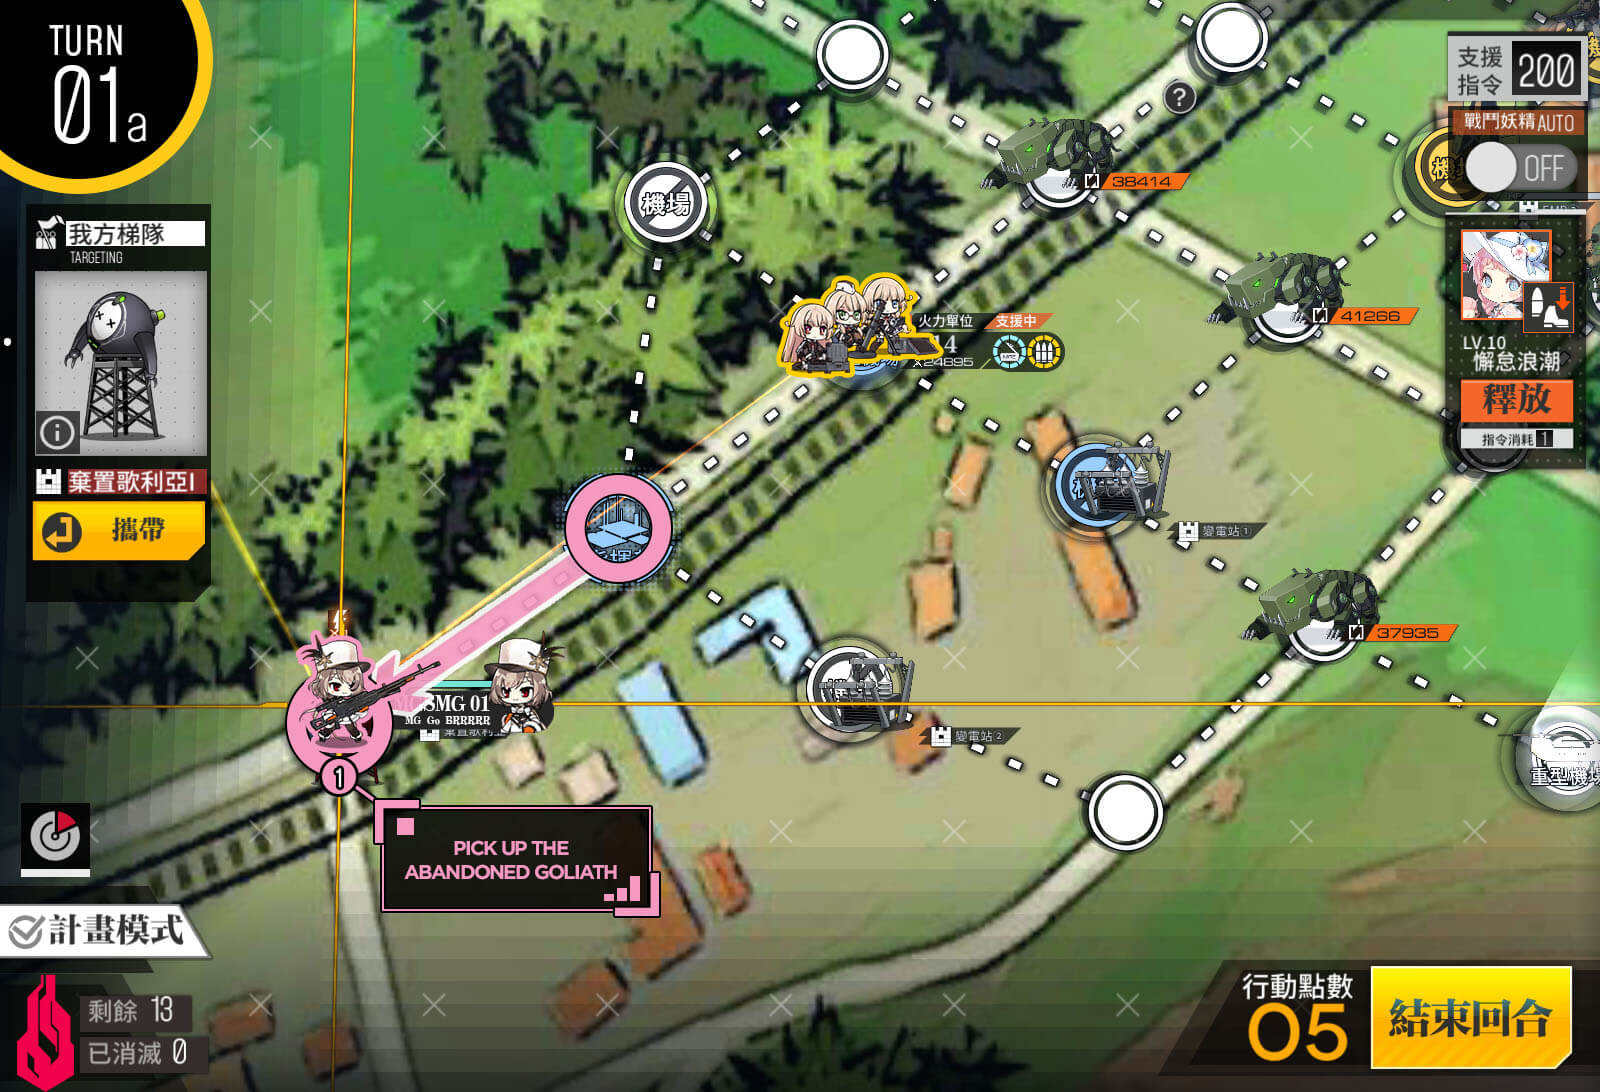
Turn 1 A
Spawn one dummy team on the bottom left helipad and one on the HQ, ARSMG on the bottom right and a combat team on top right. Topmost combat team will move to allow you to deploy a HOC.
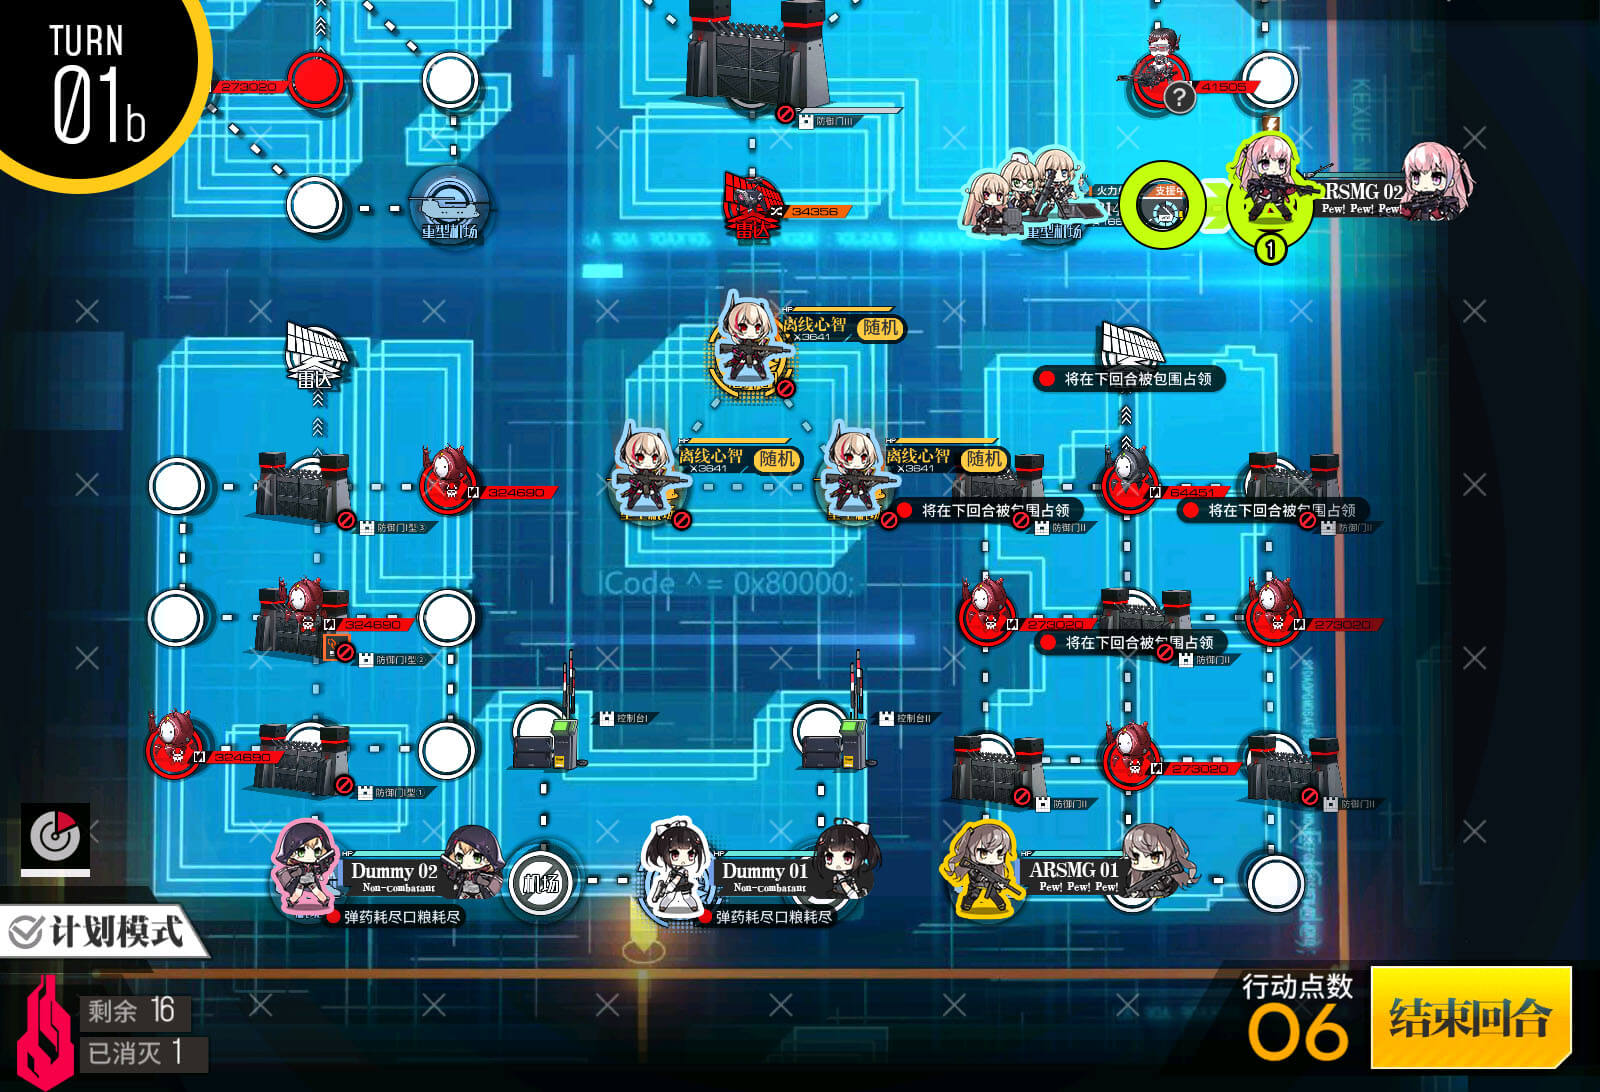
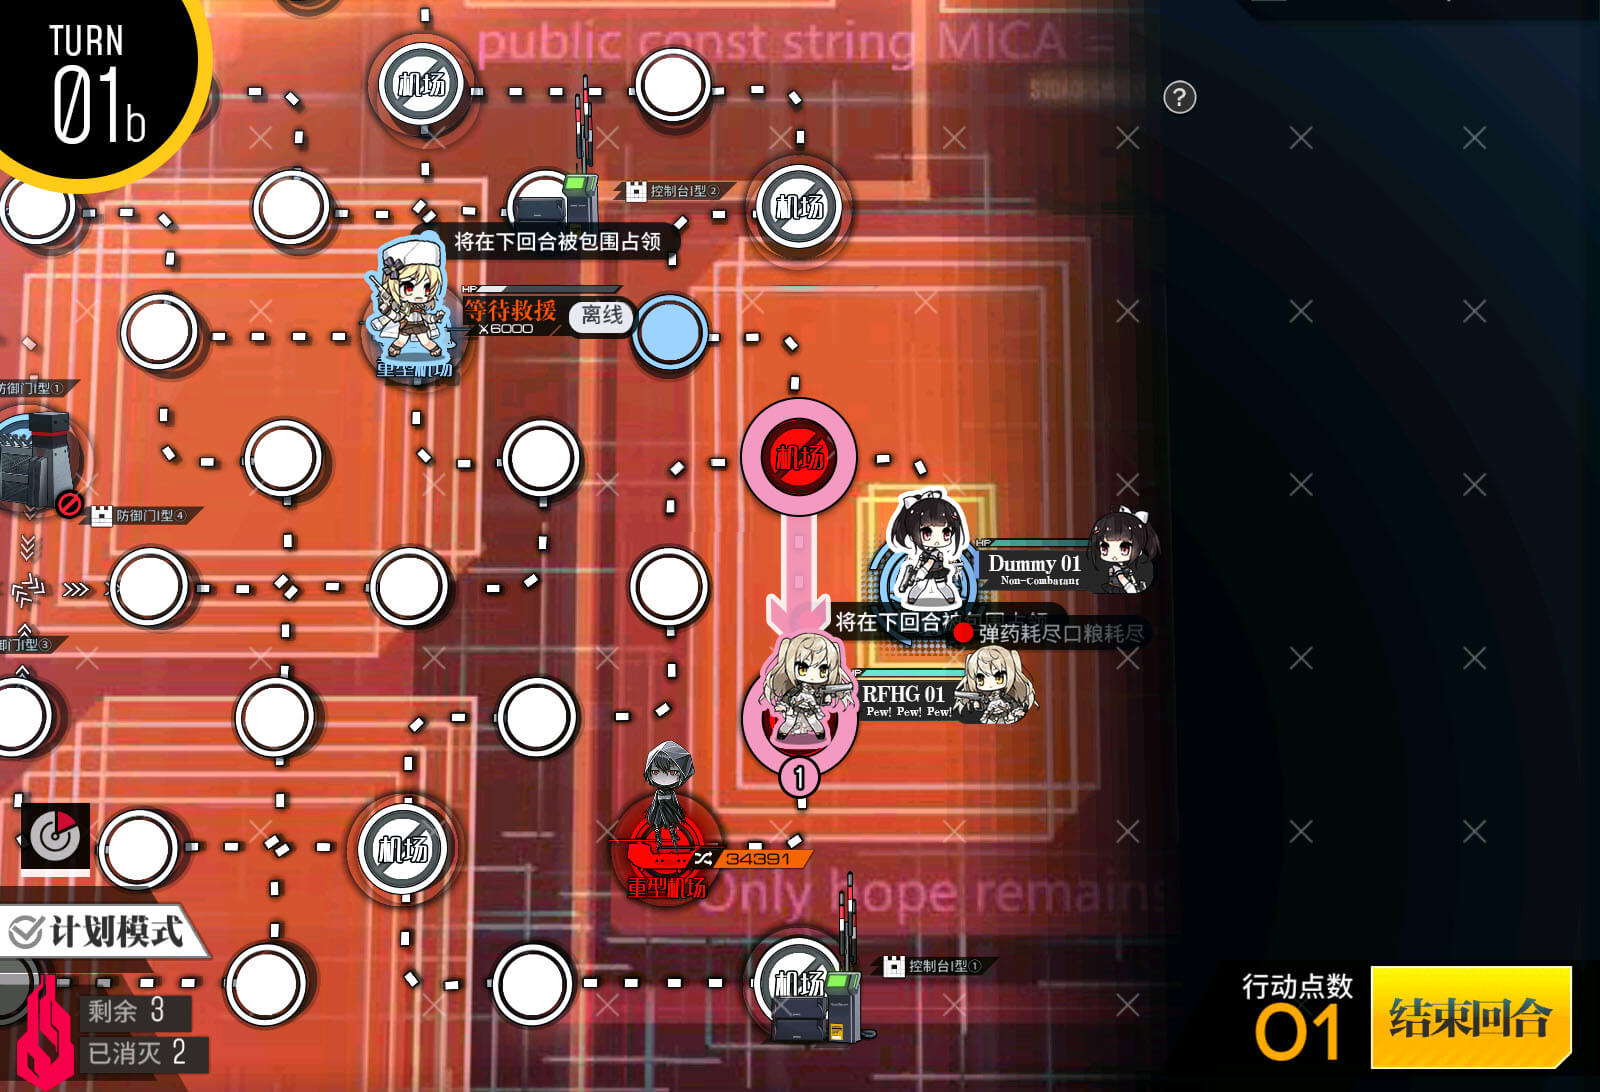
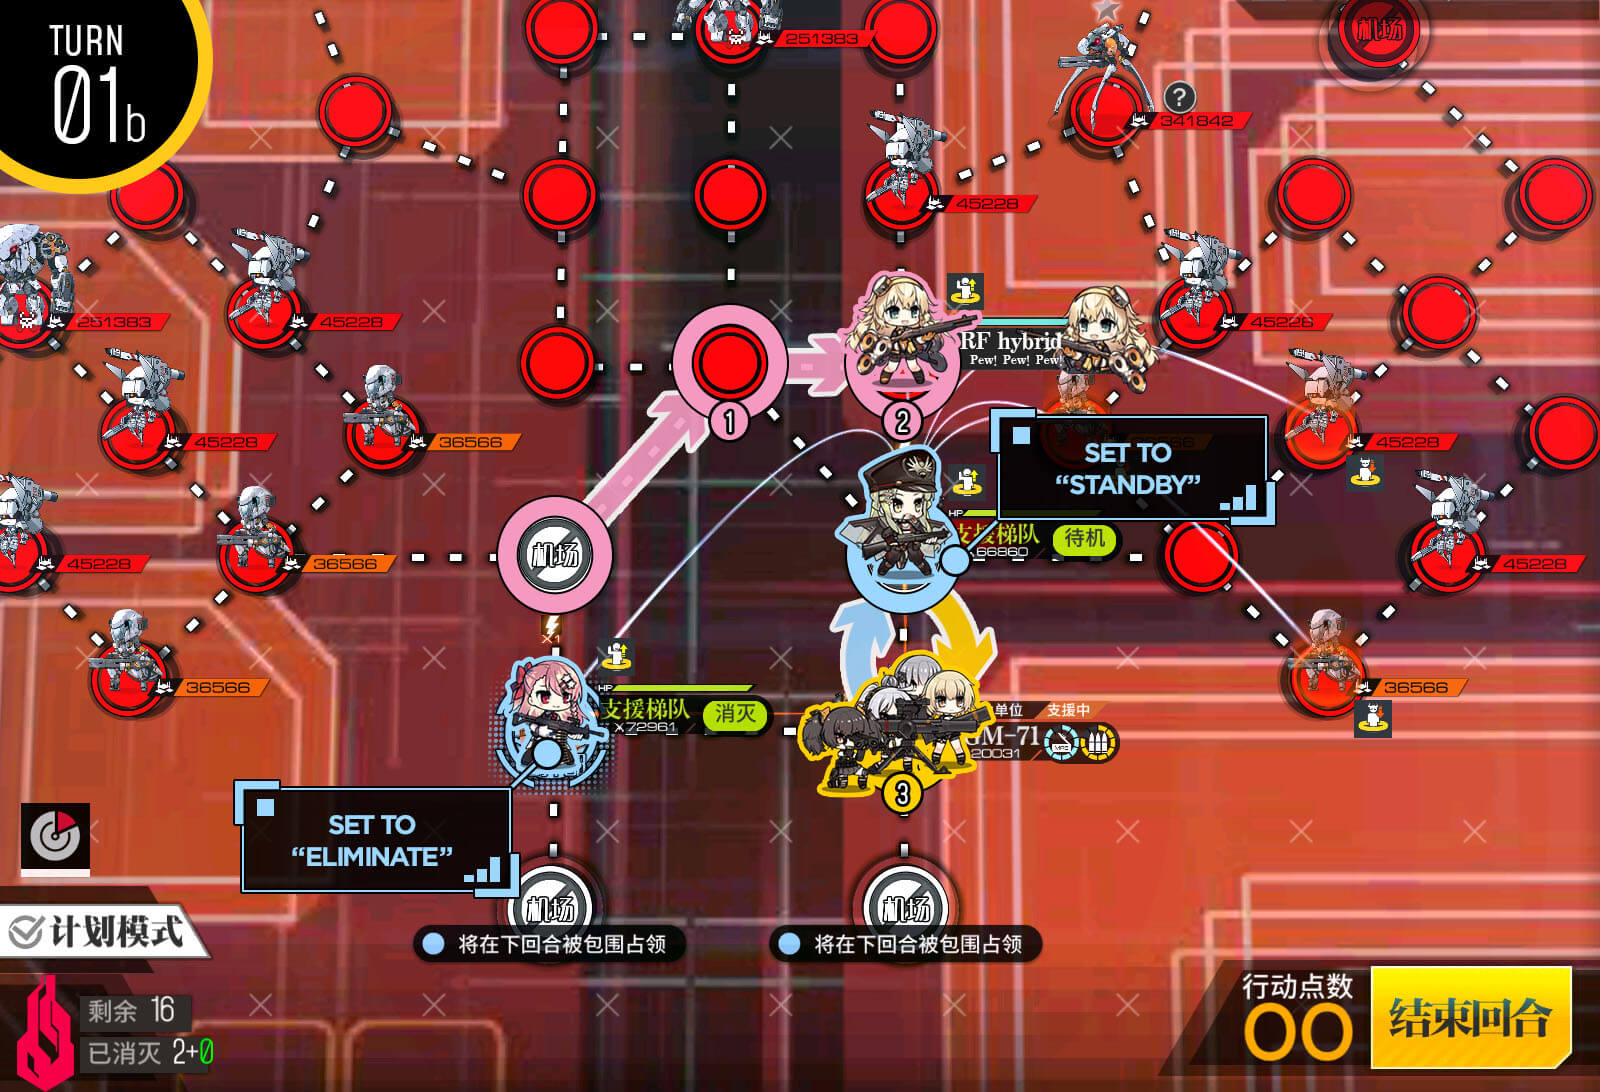
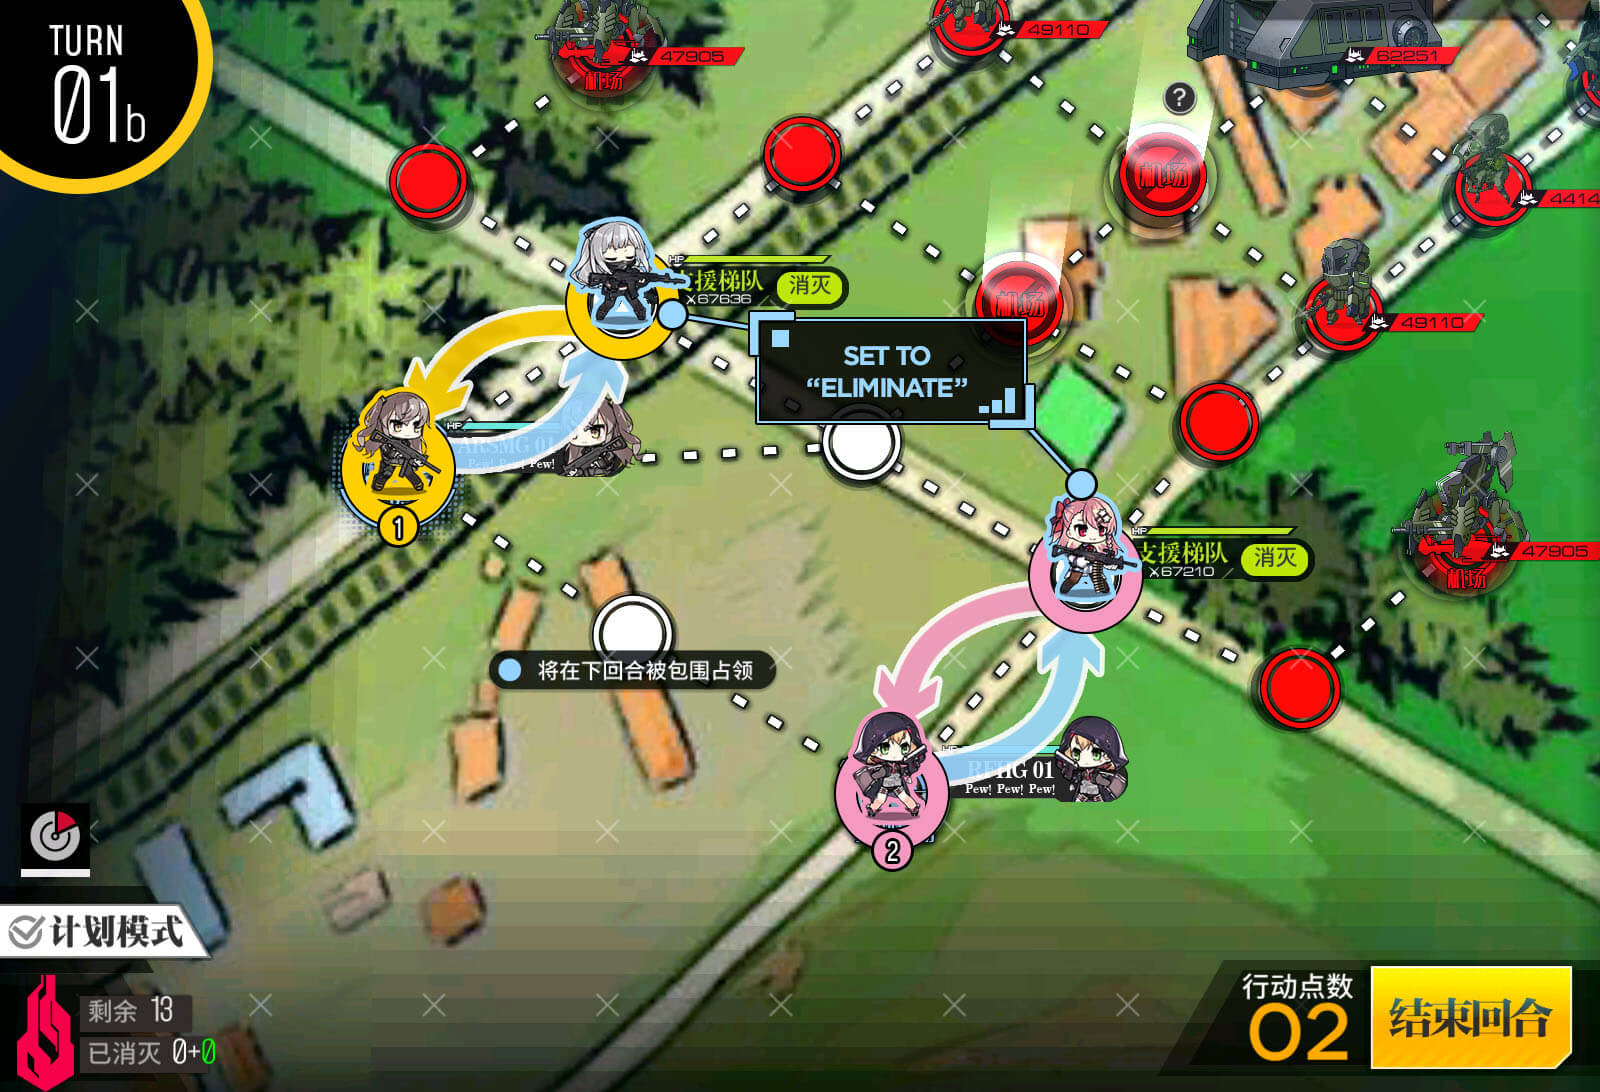
Turn 1 B
The topmost combat team will then eliminate the enemy next to it.
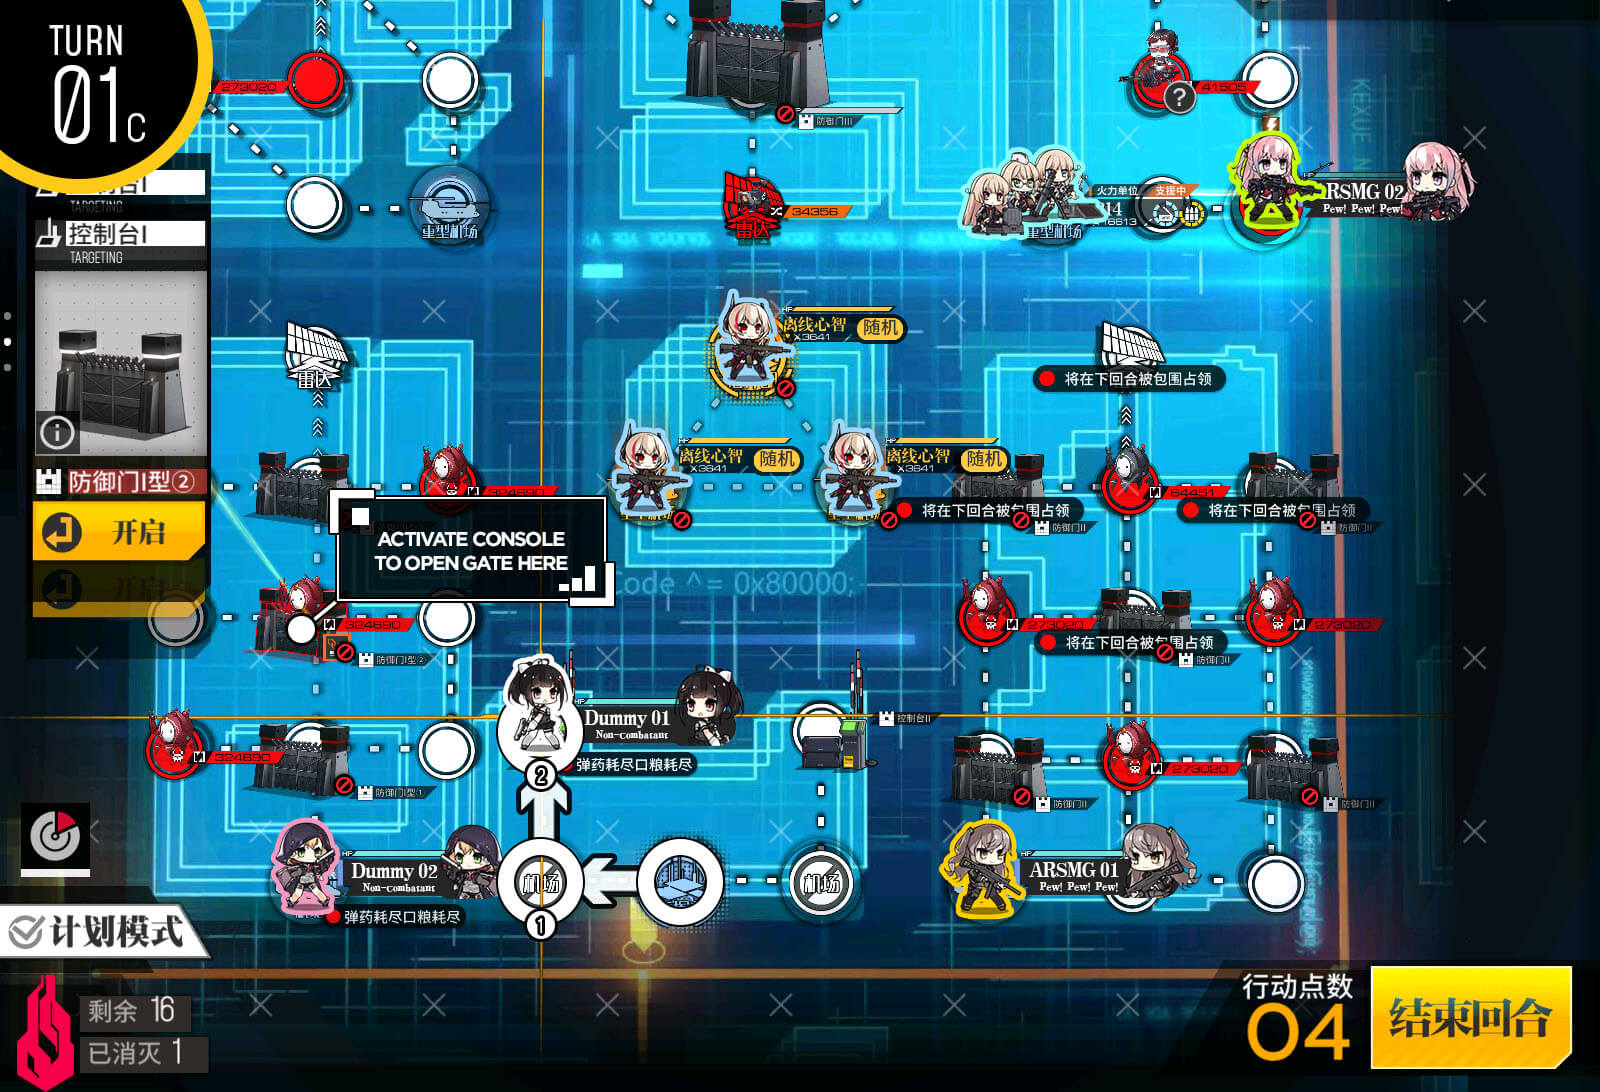
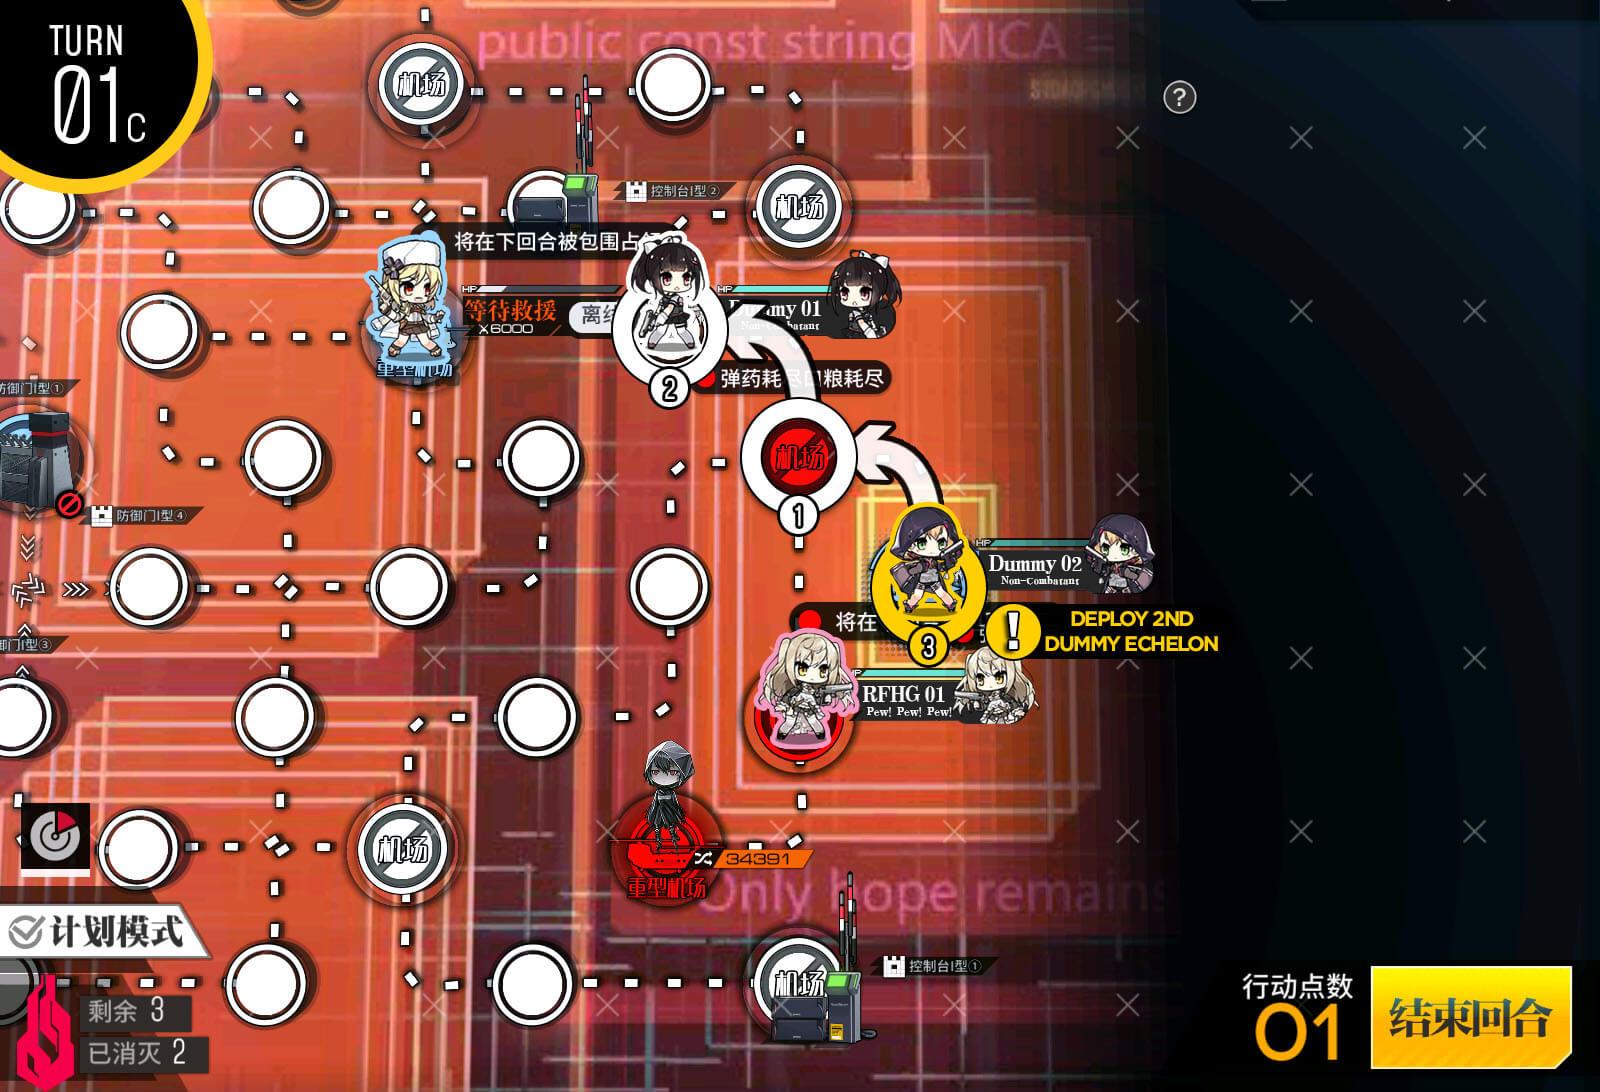
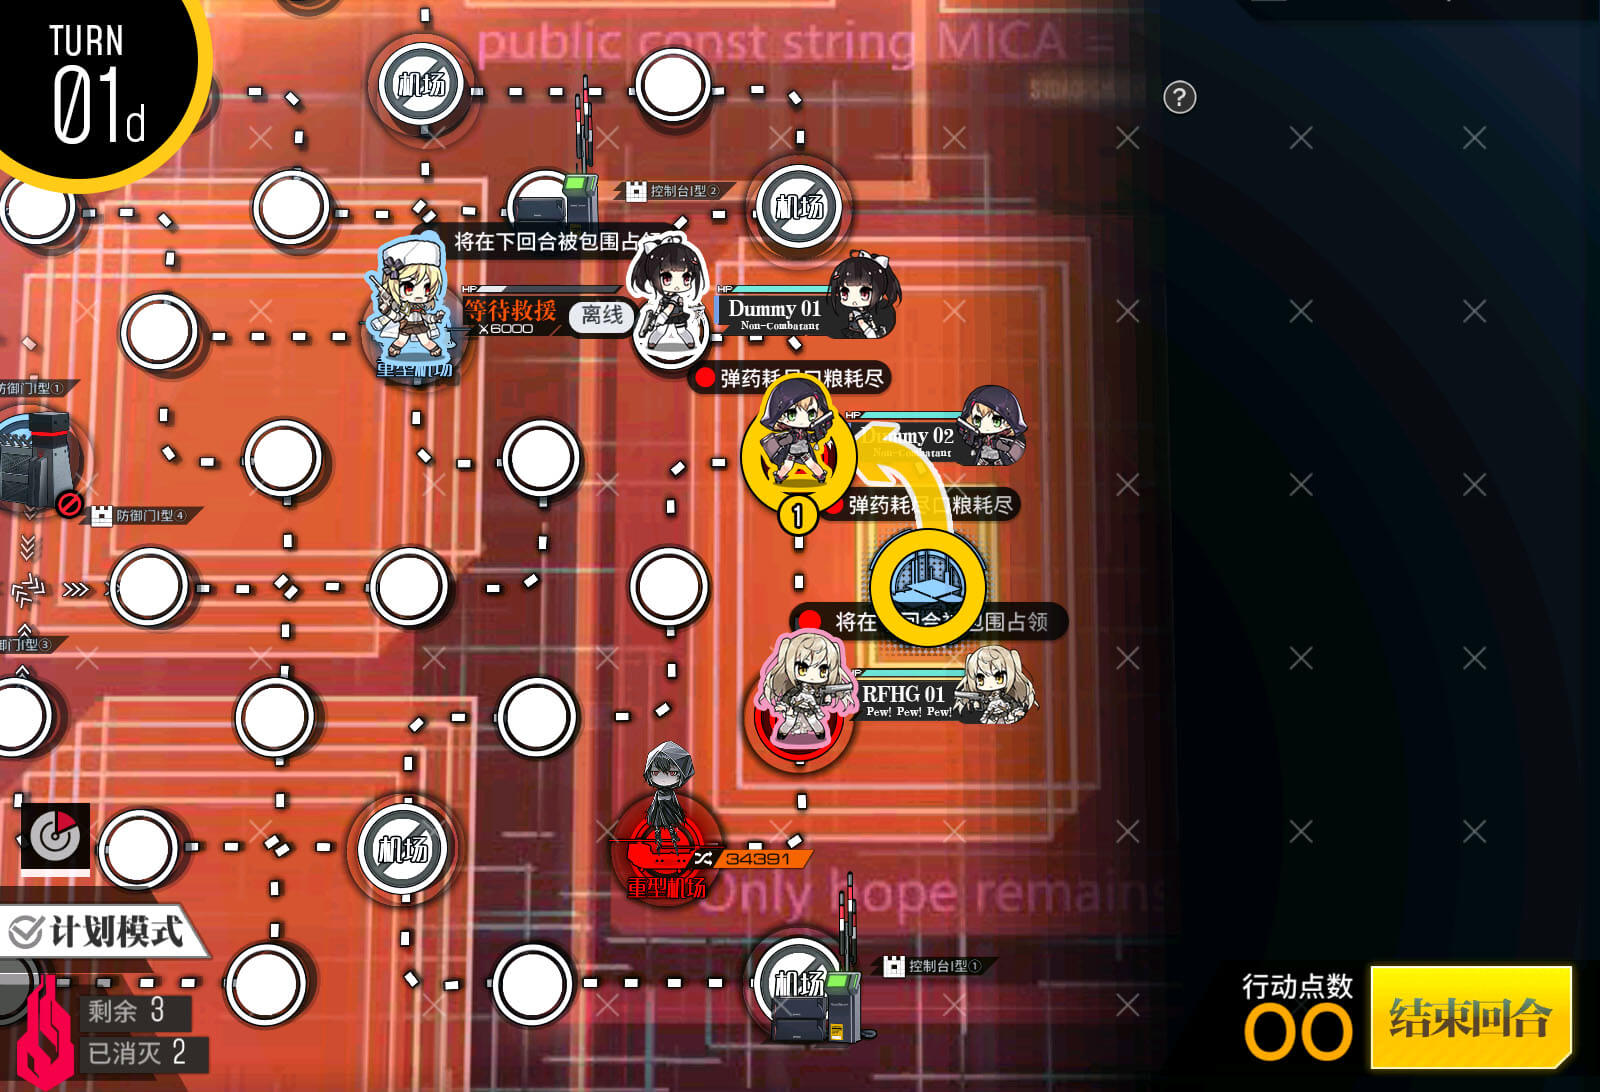
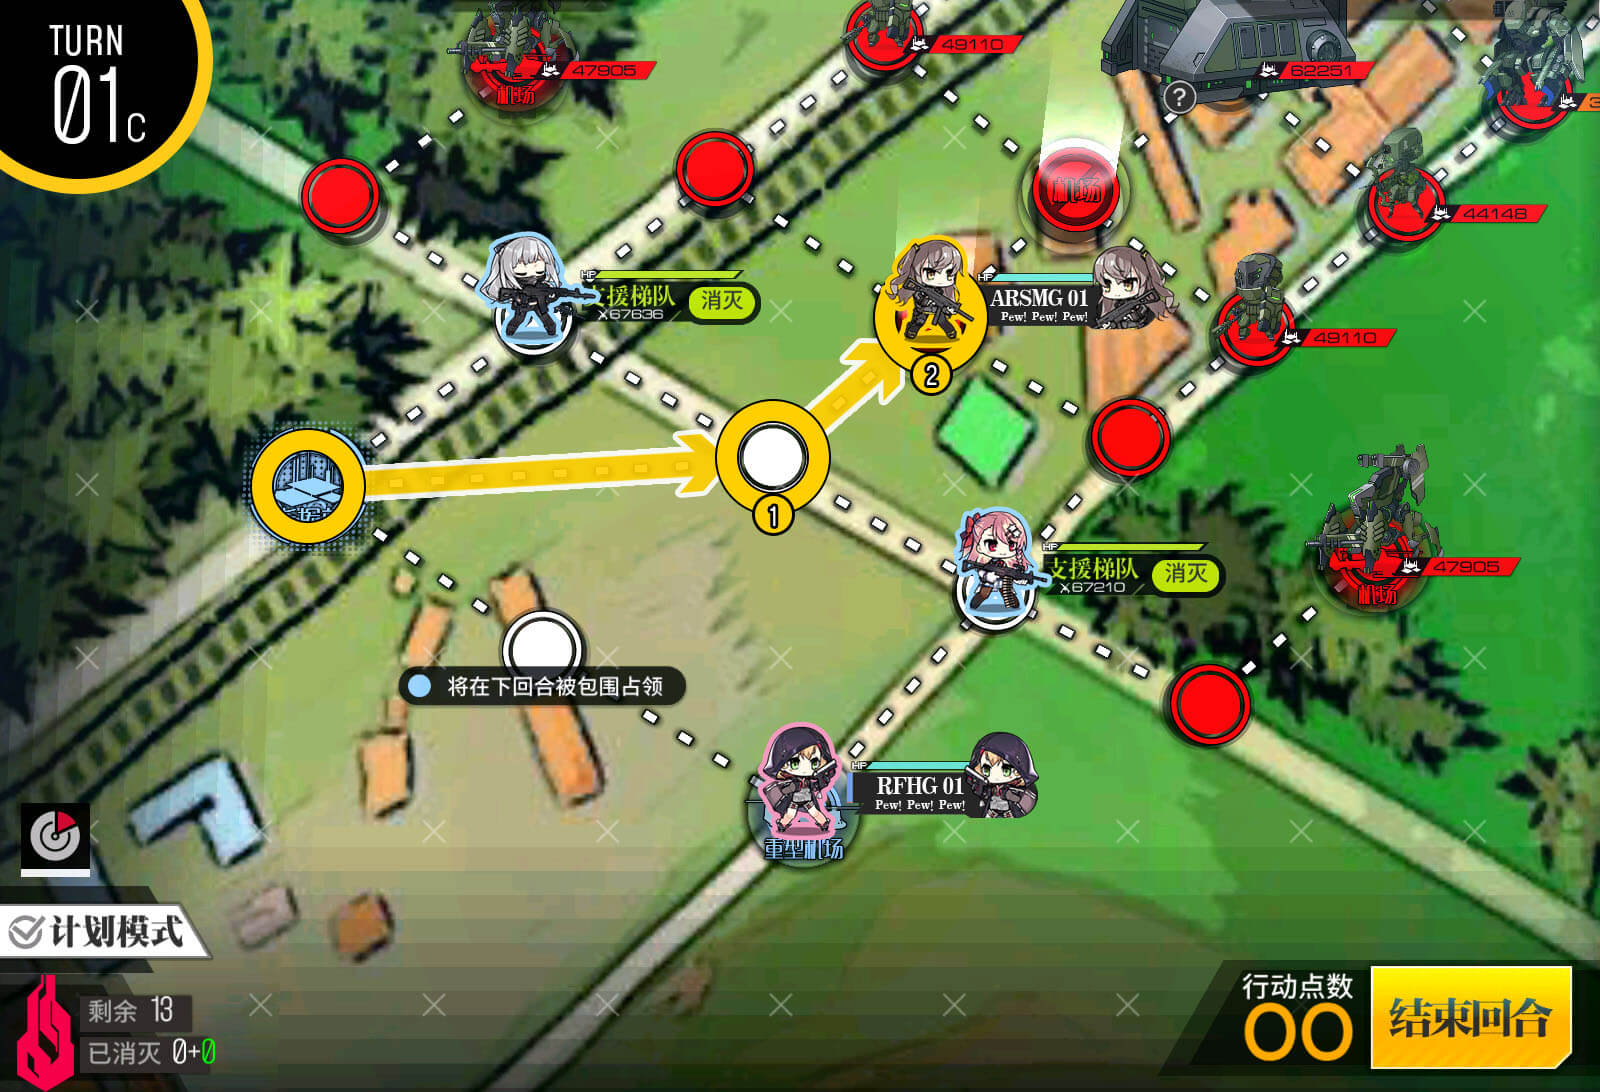
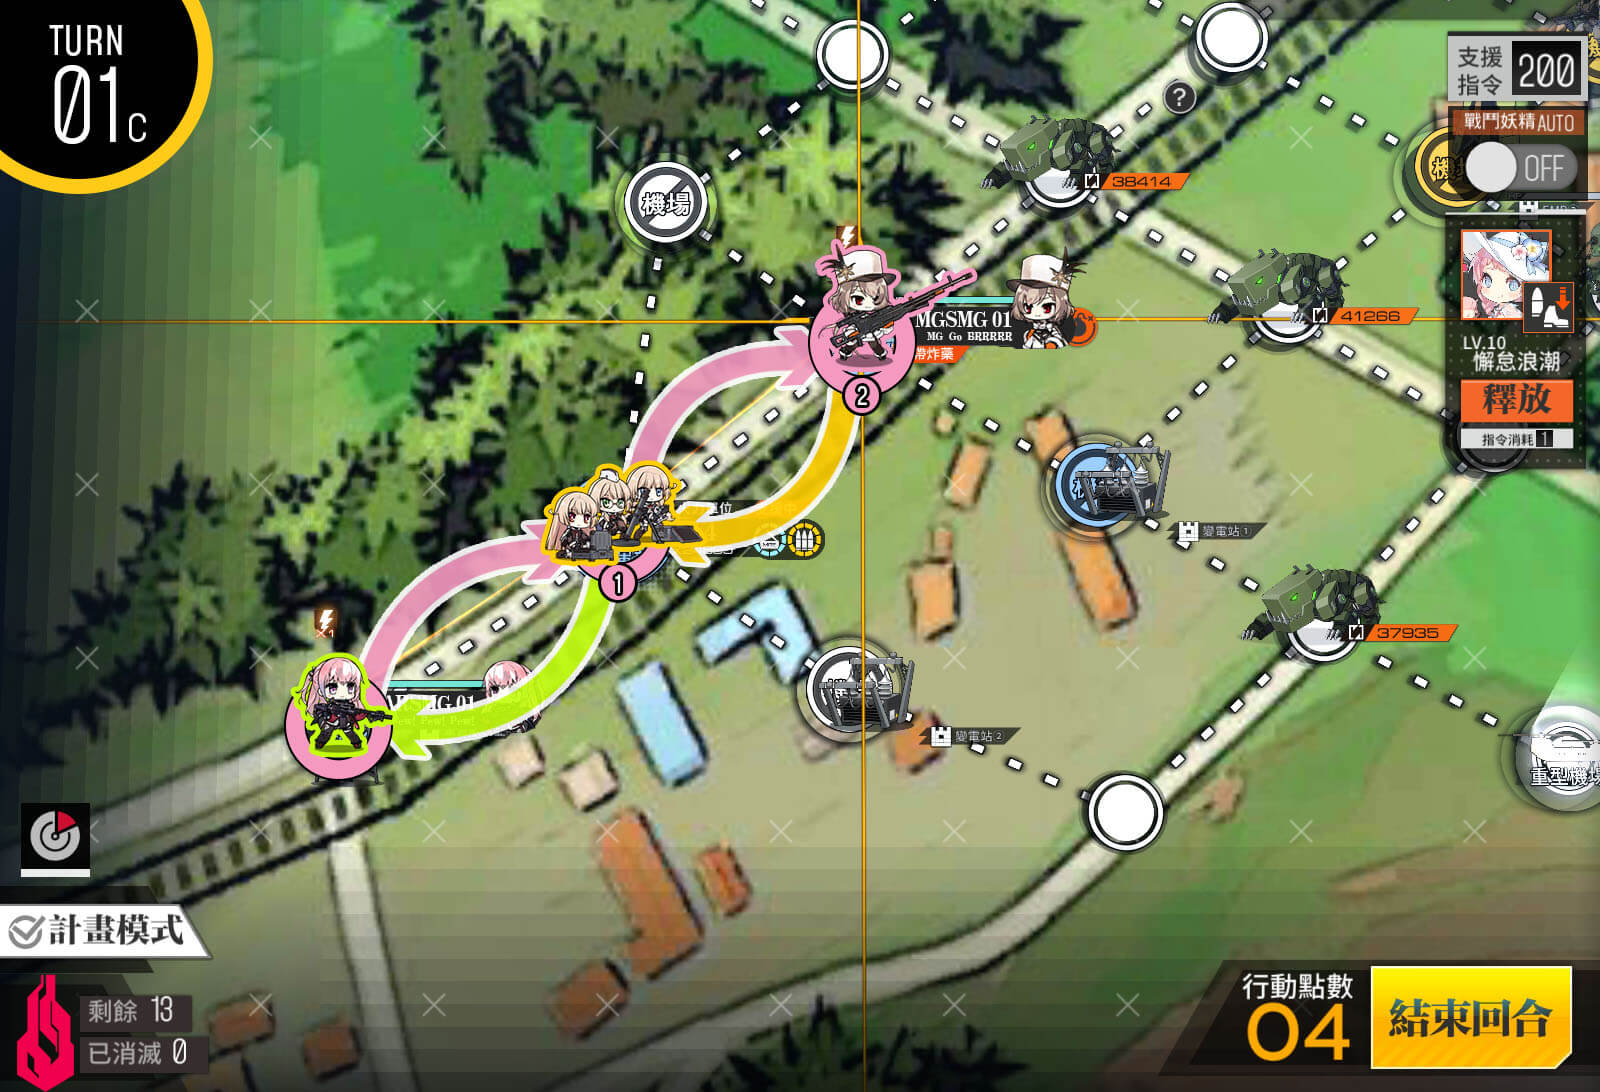
Turn 1 C
Dummy team will move to the terminal on the left, and then activate it so that the middle gate is open. Only this gate should be opened, which allows the Golyat to move out of the way.
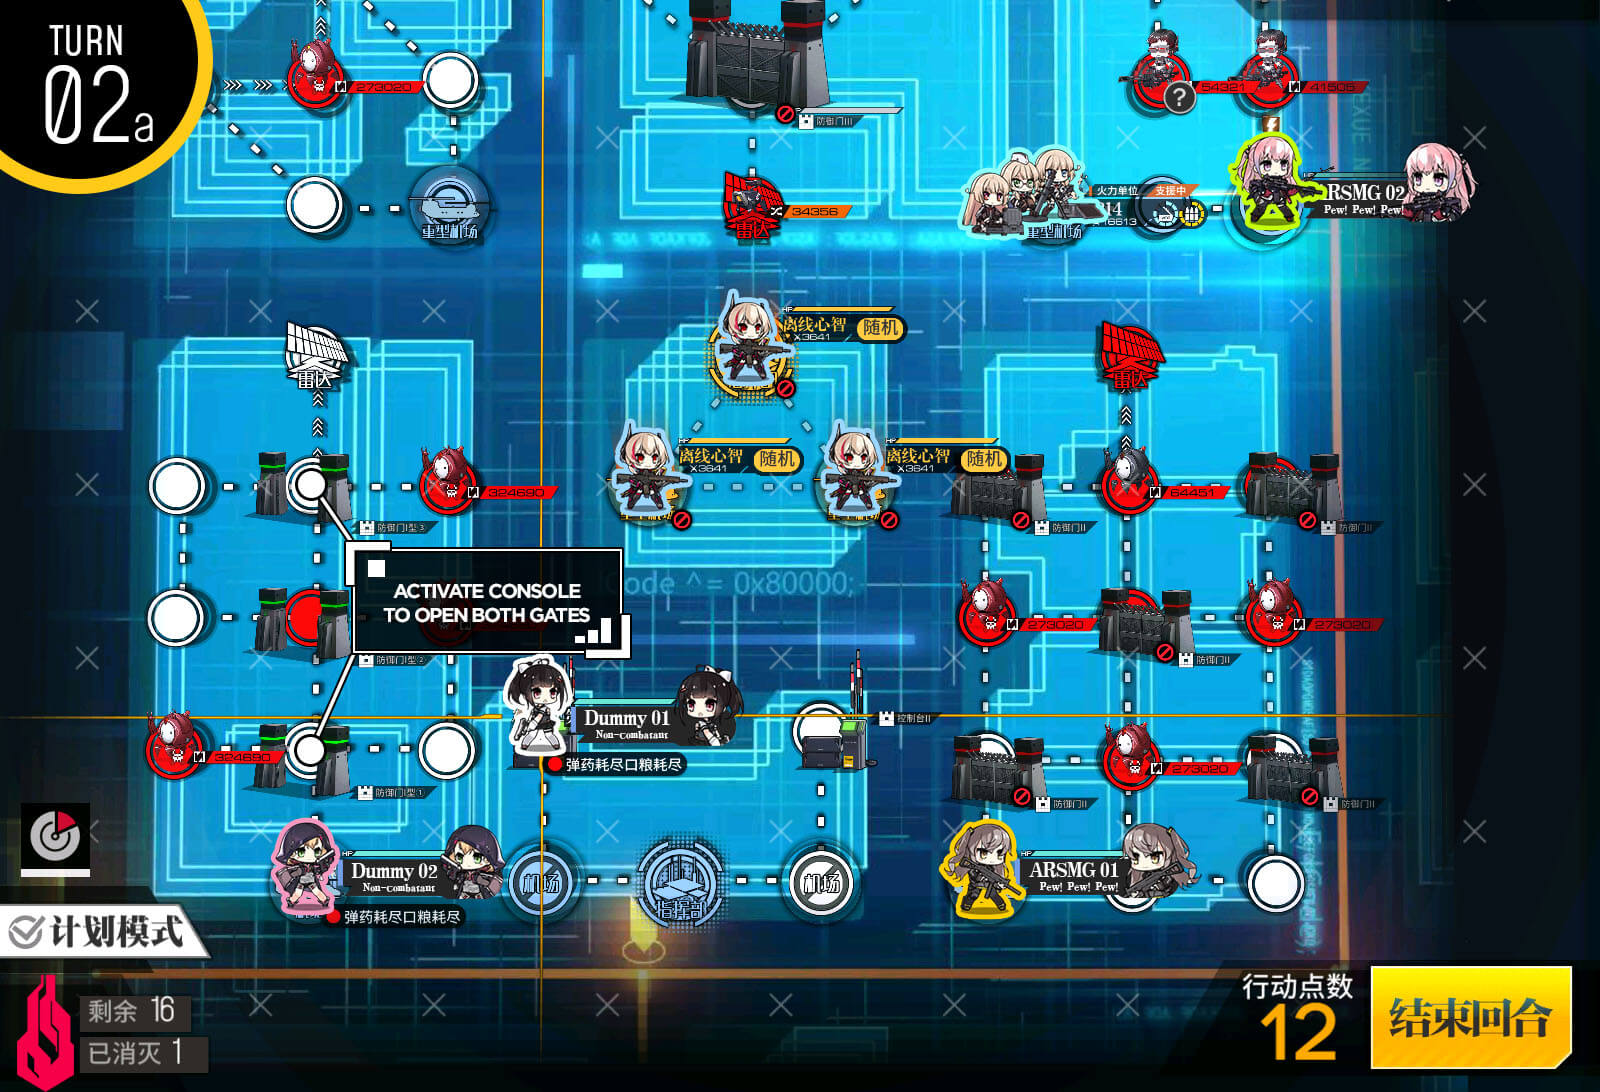
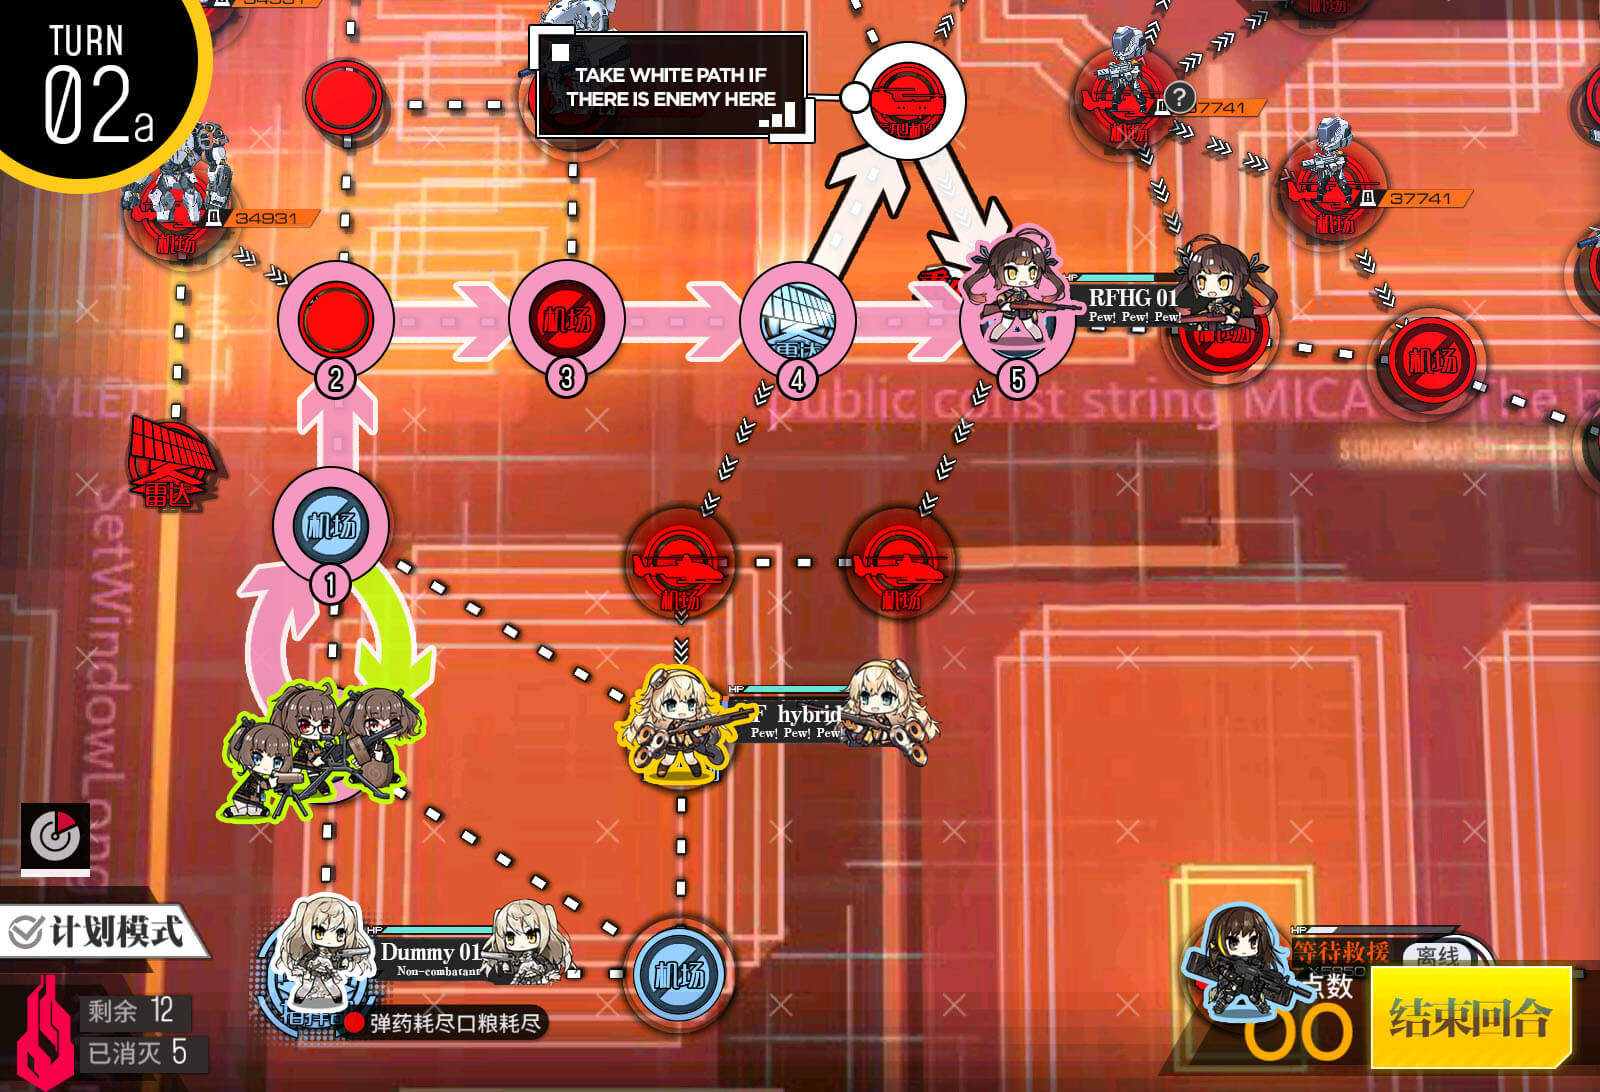
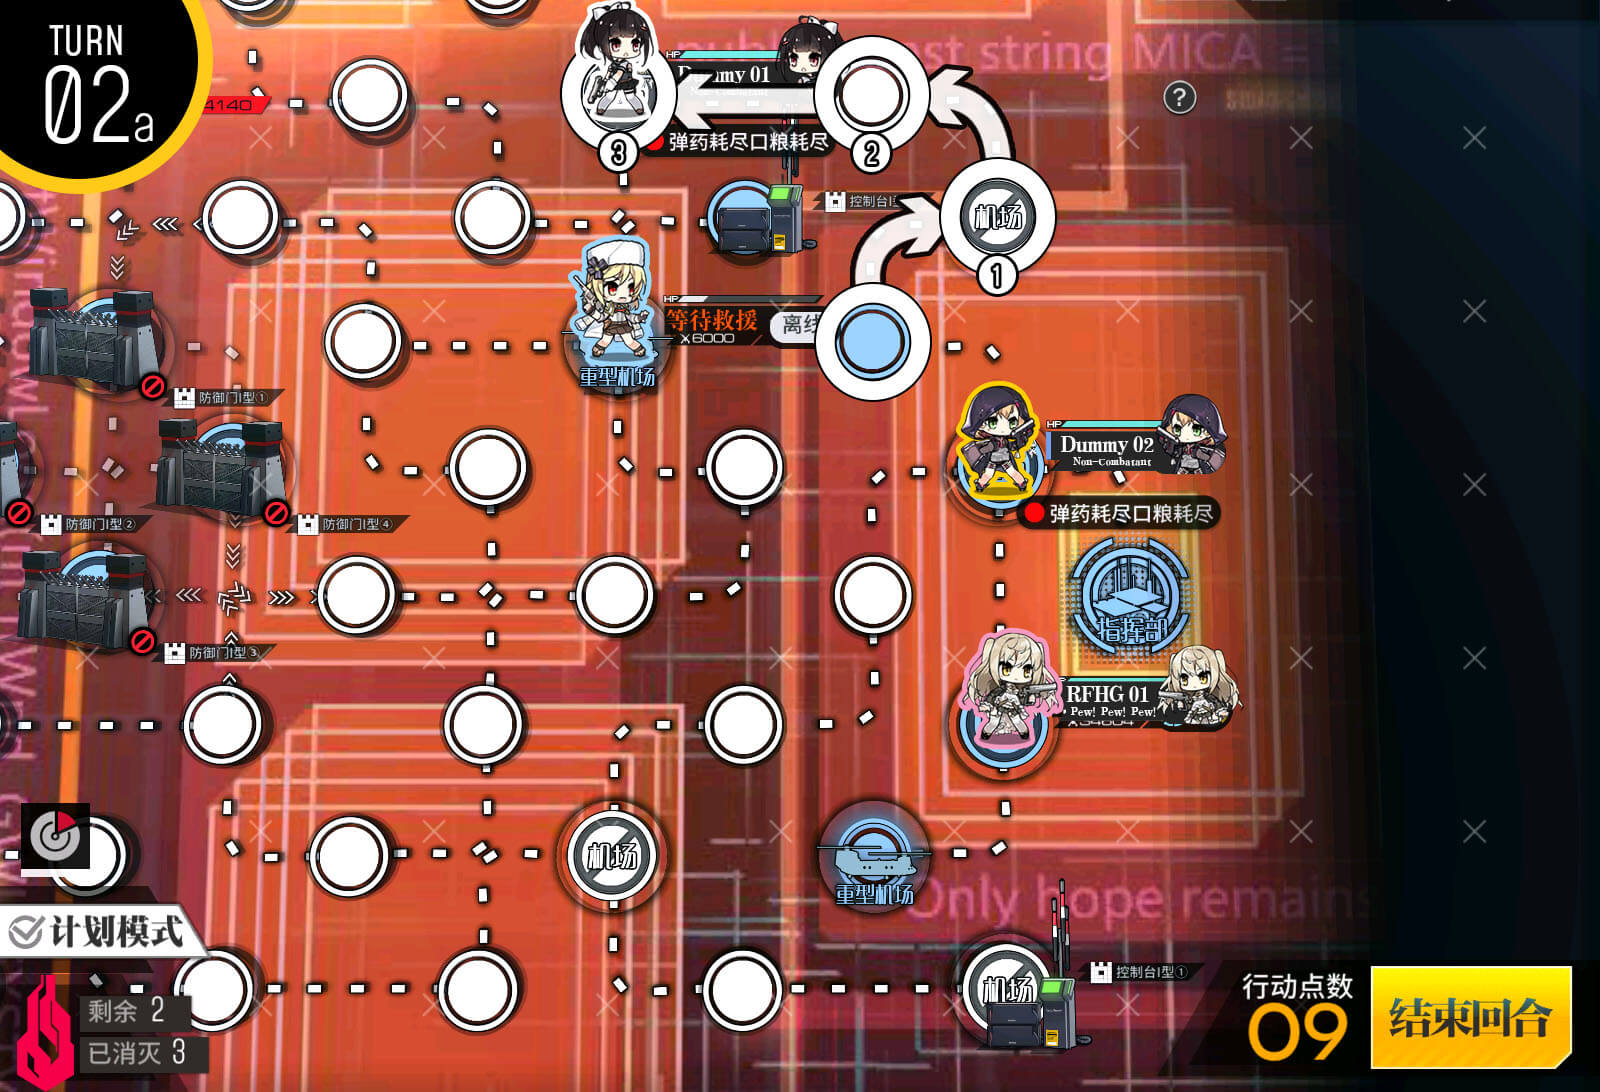
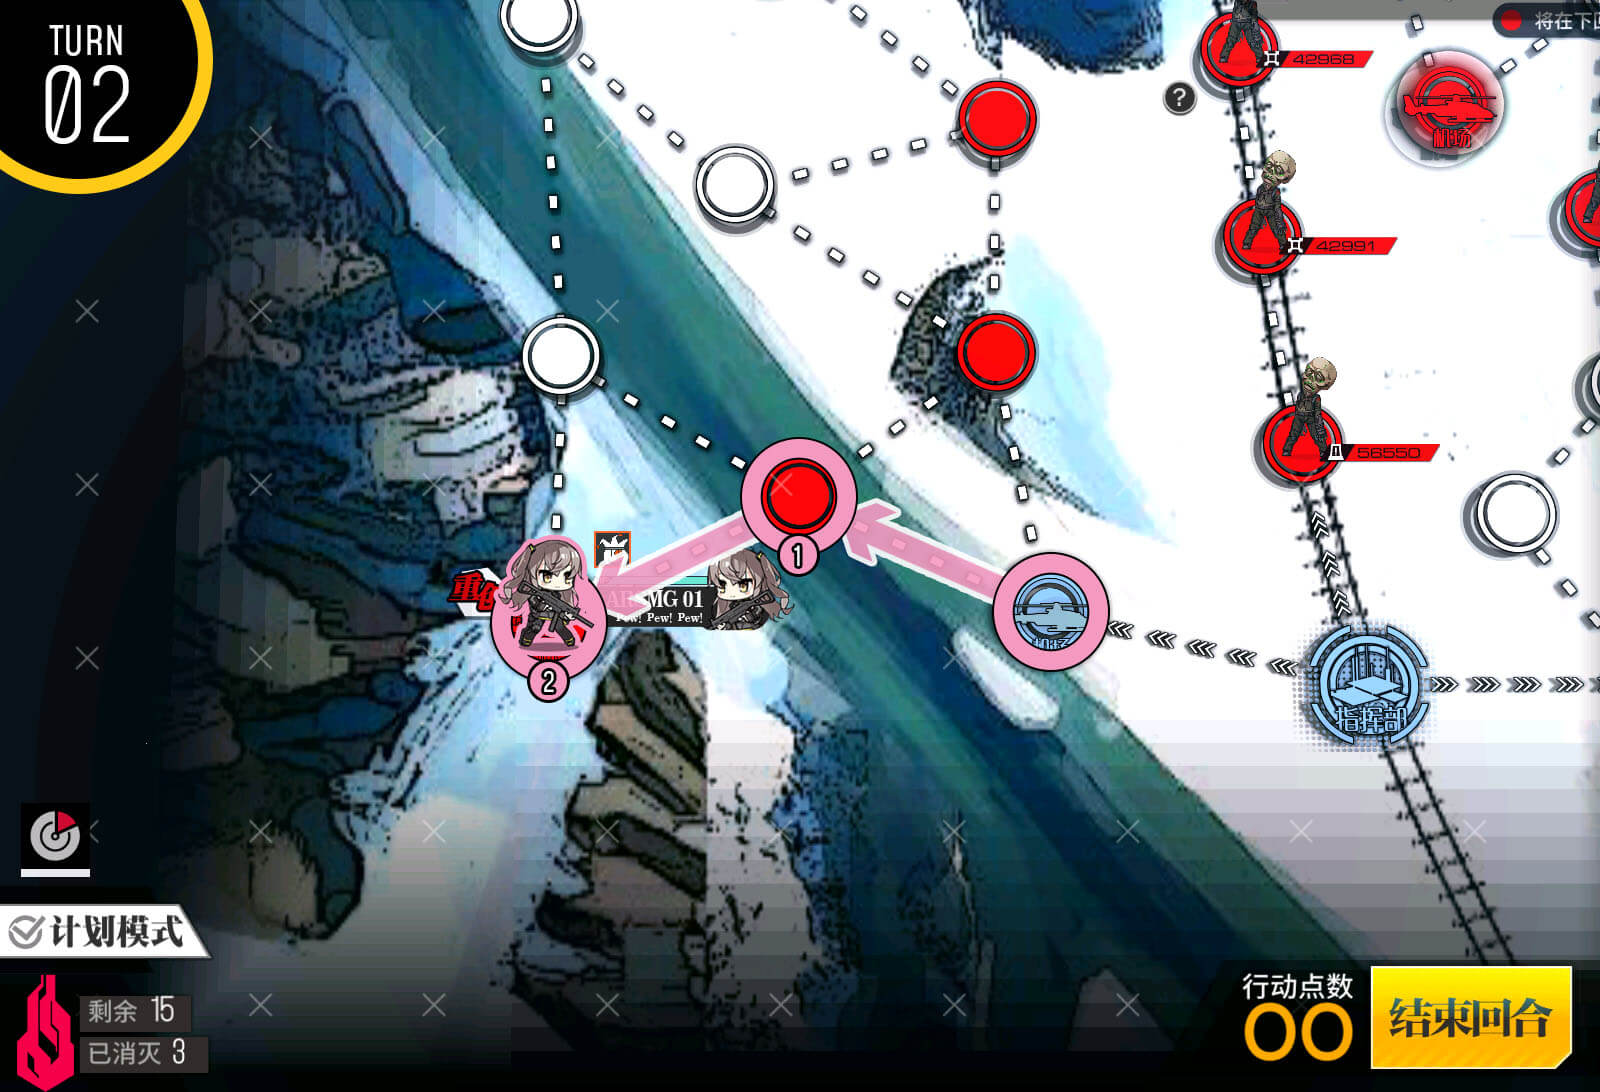
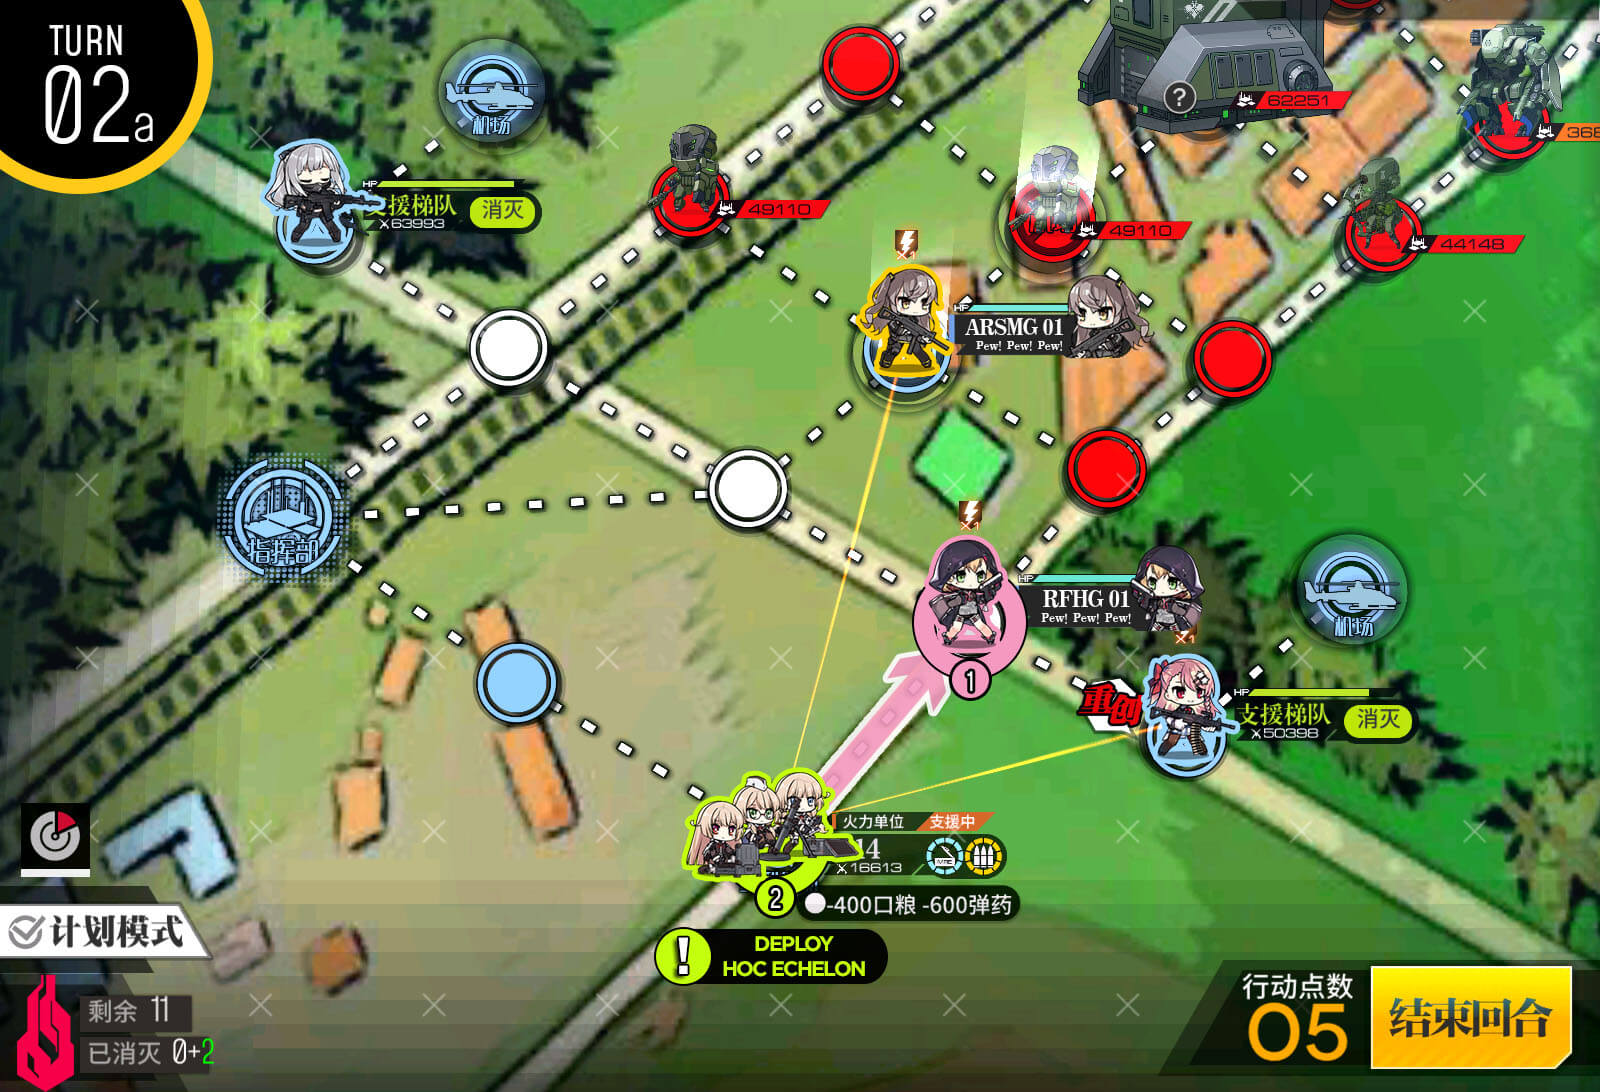
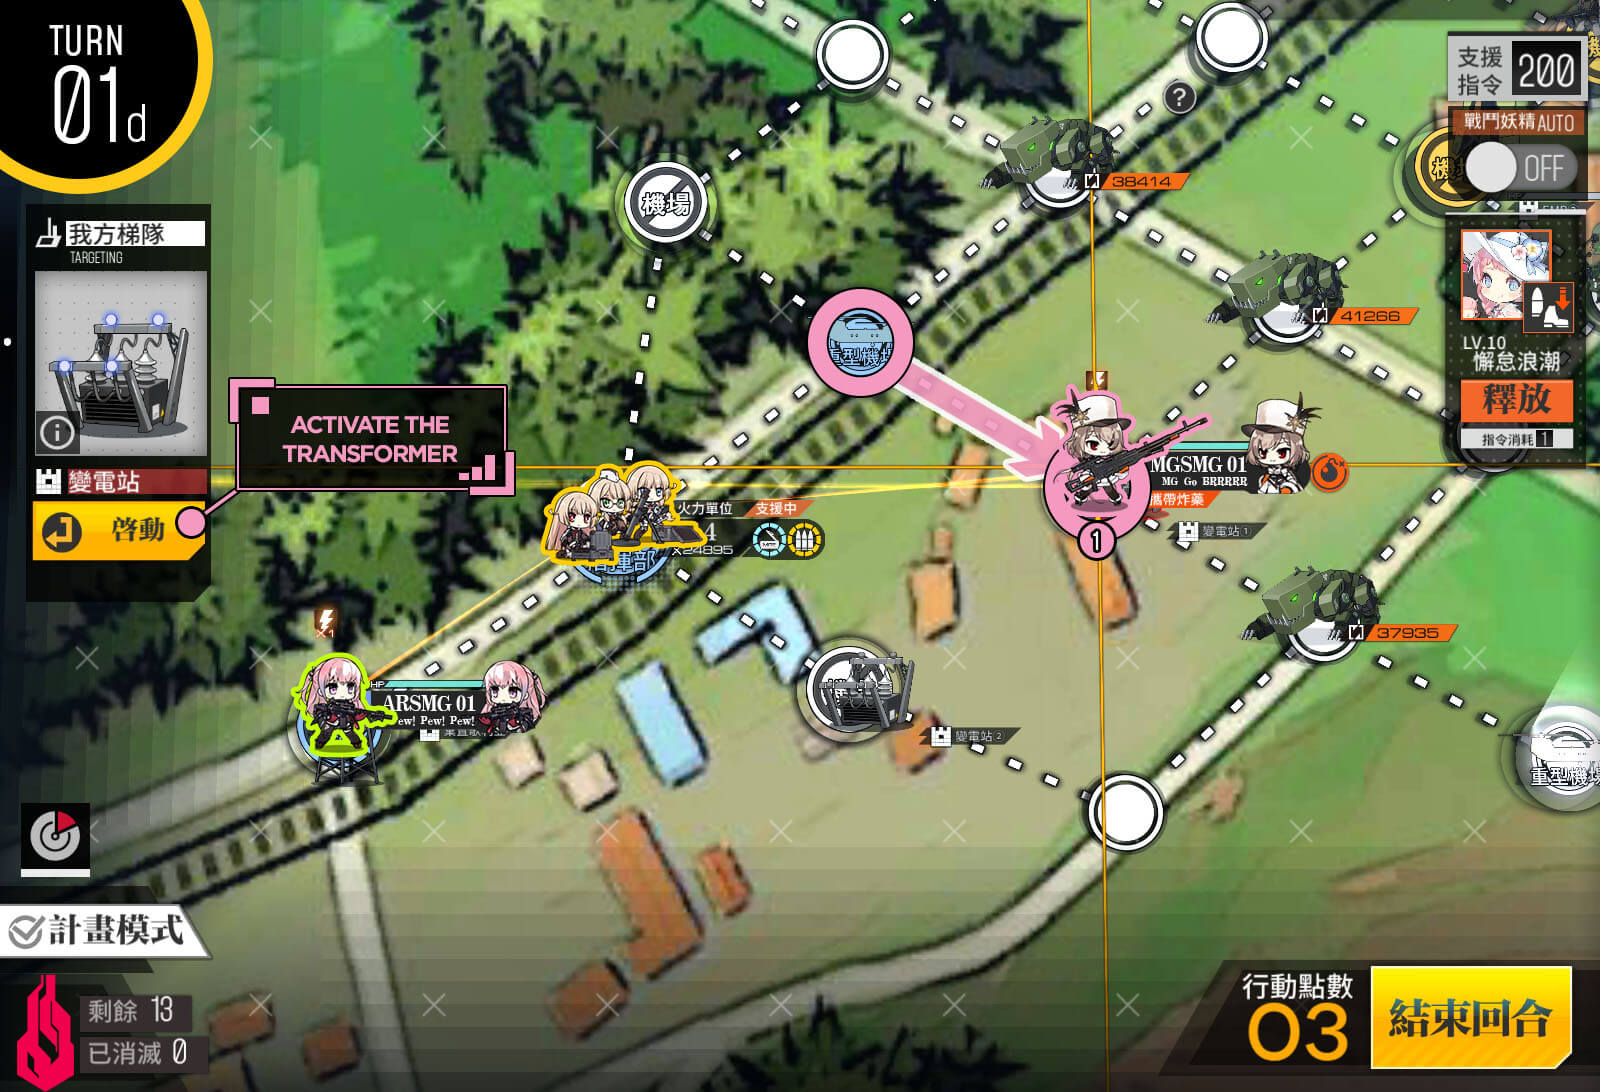
Turn 2 A
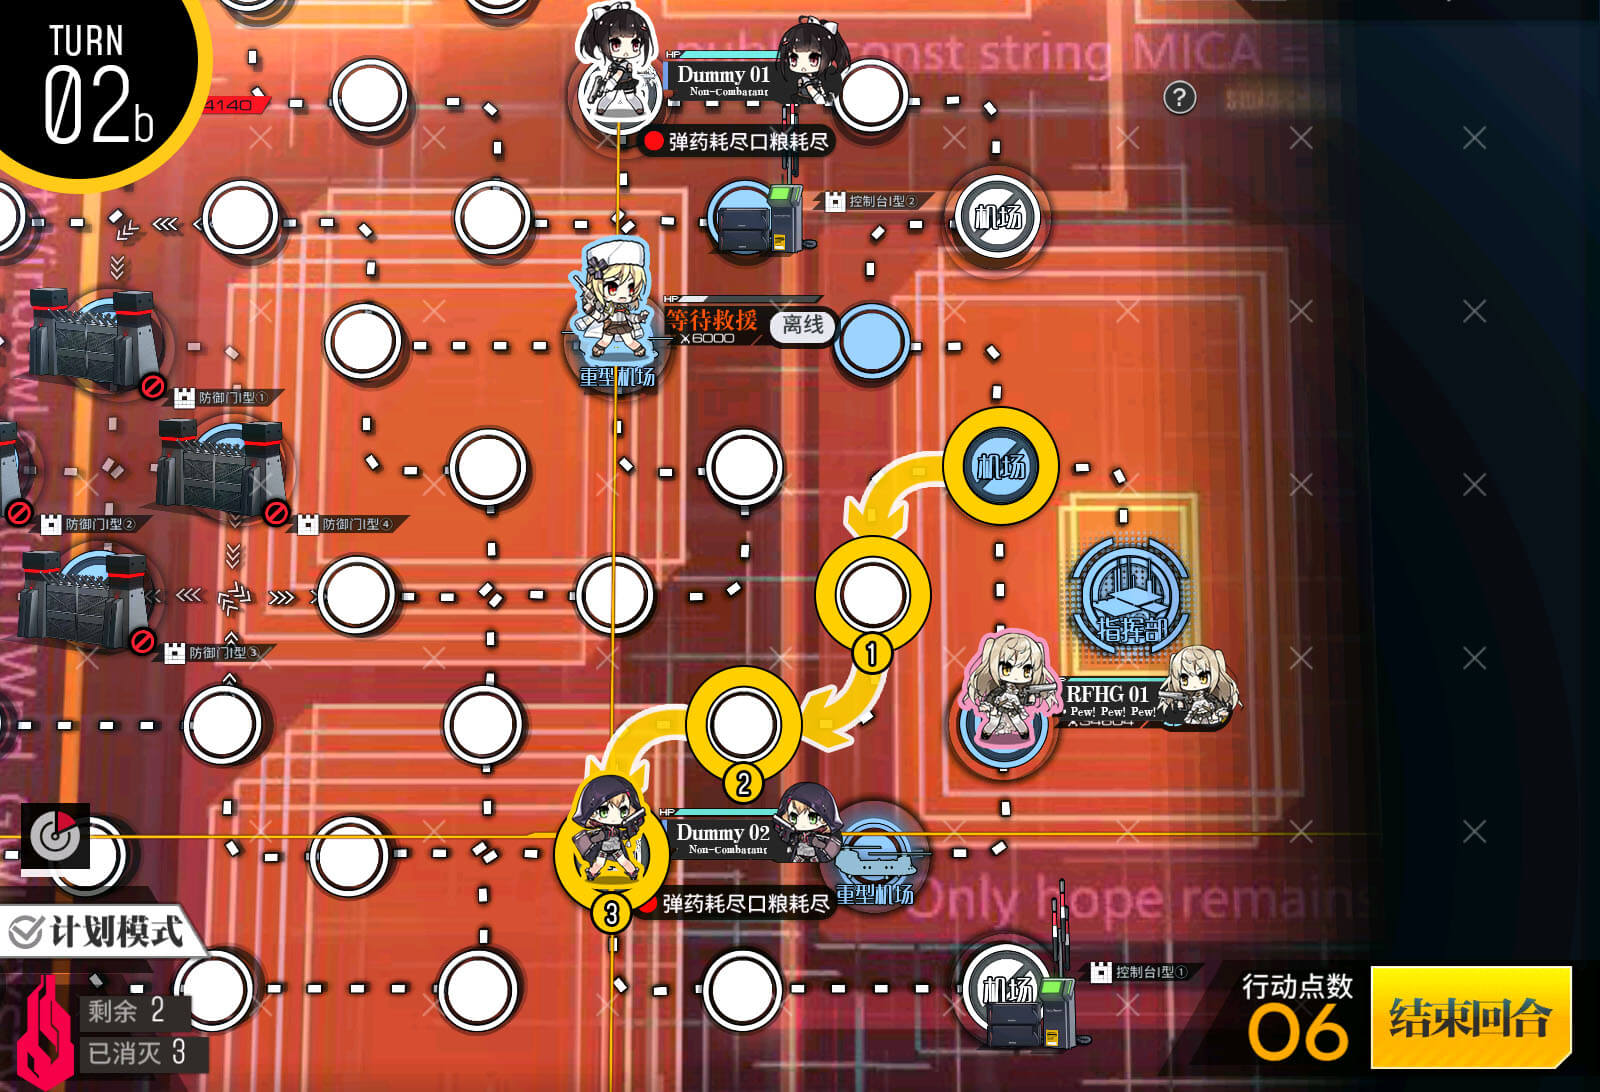
Start by opening the remaining two gates.
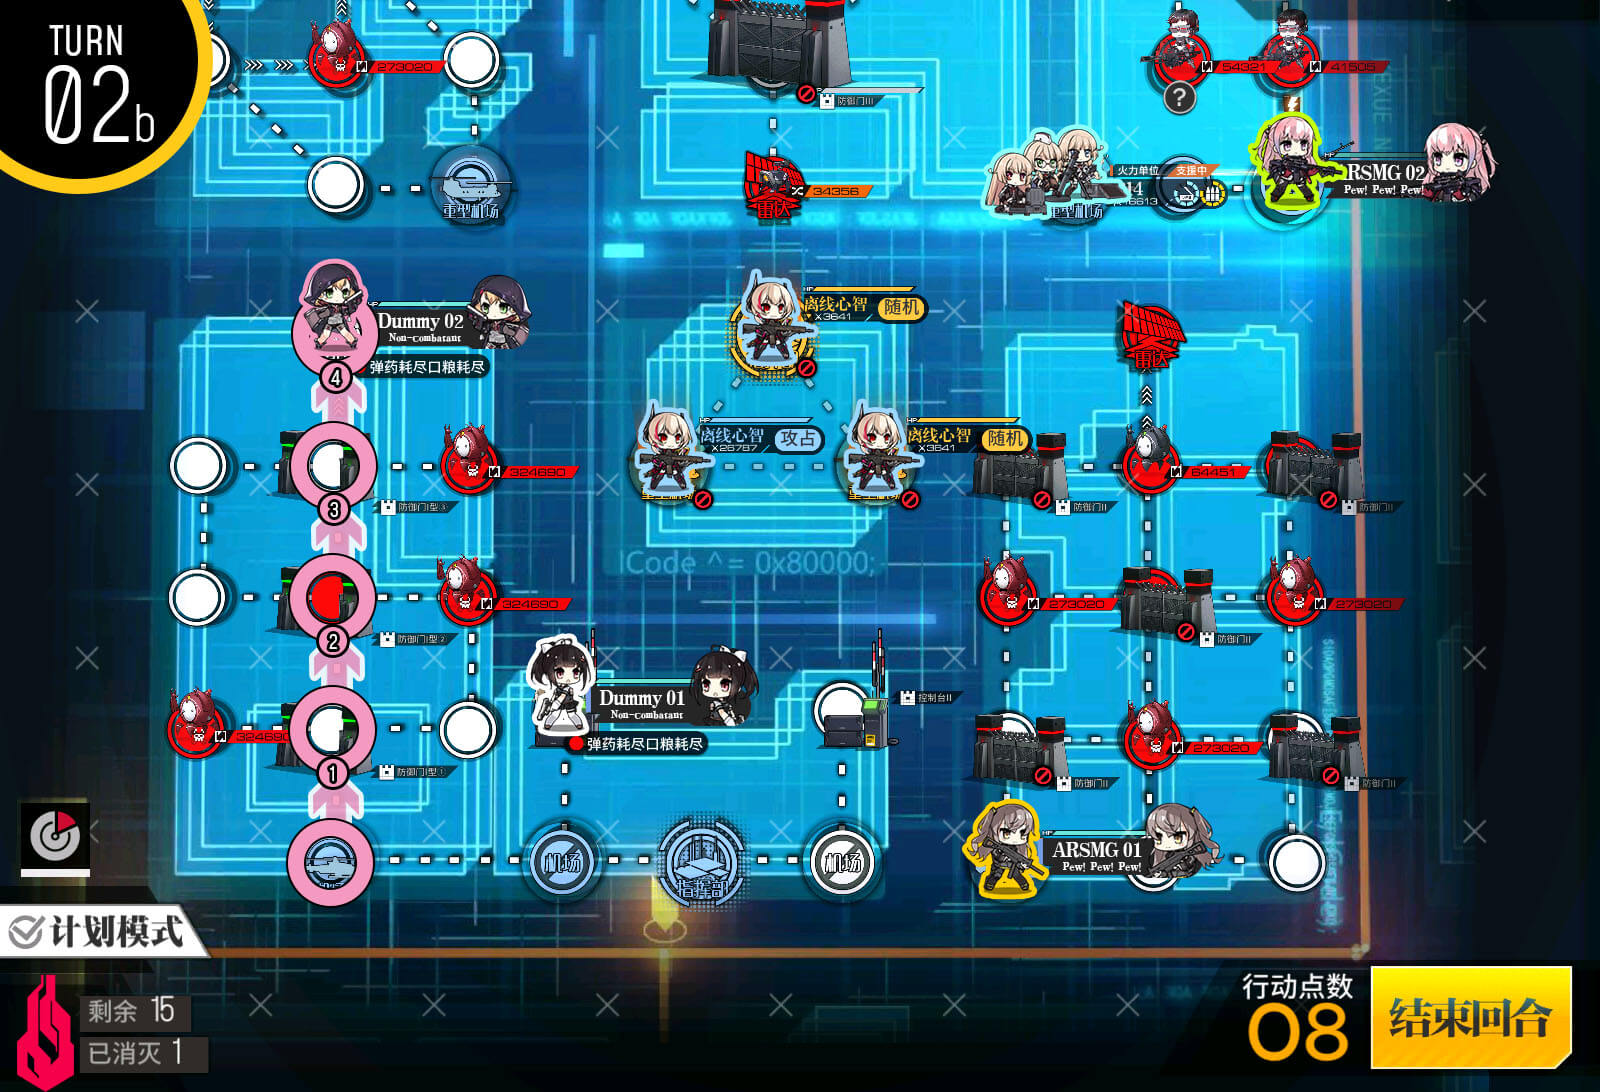
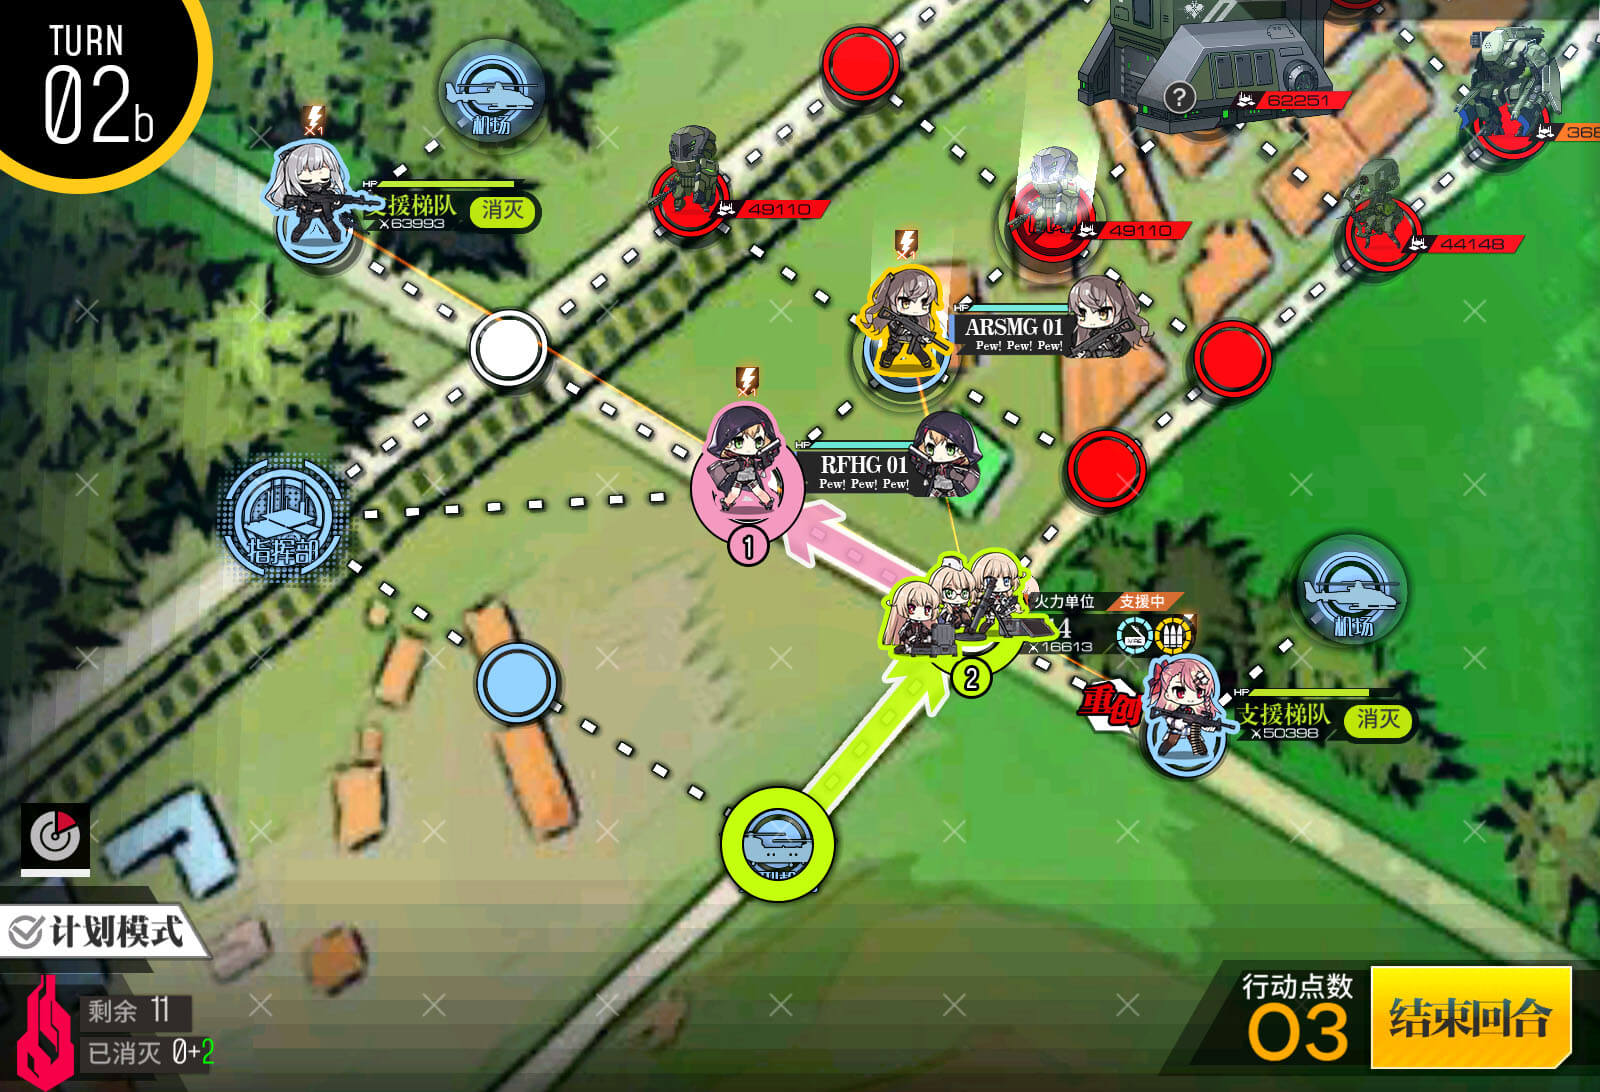
Turn 2 B
Left side dummy team will move to take the radar.
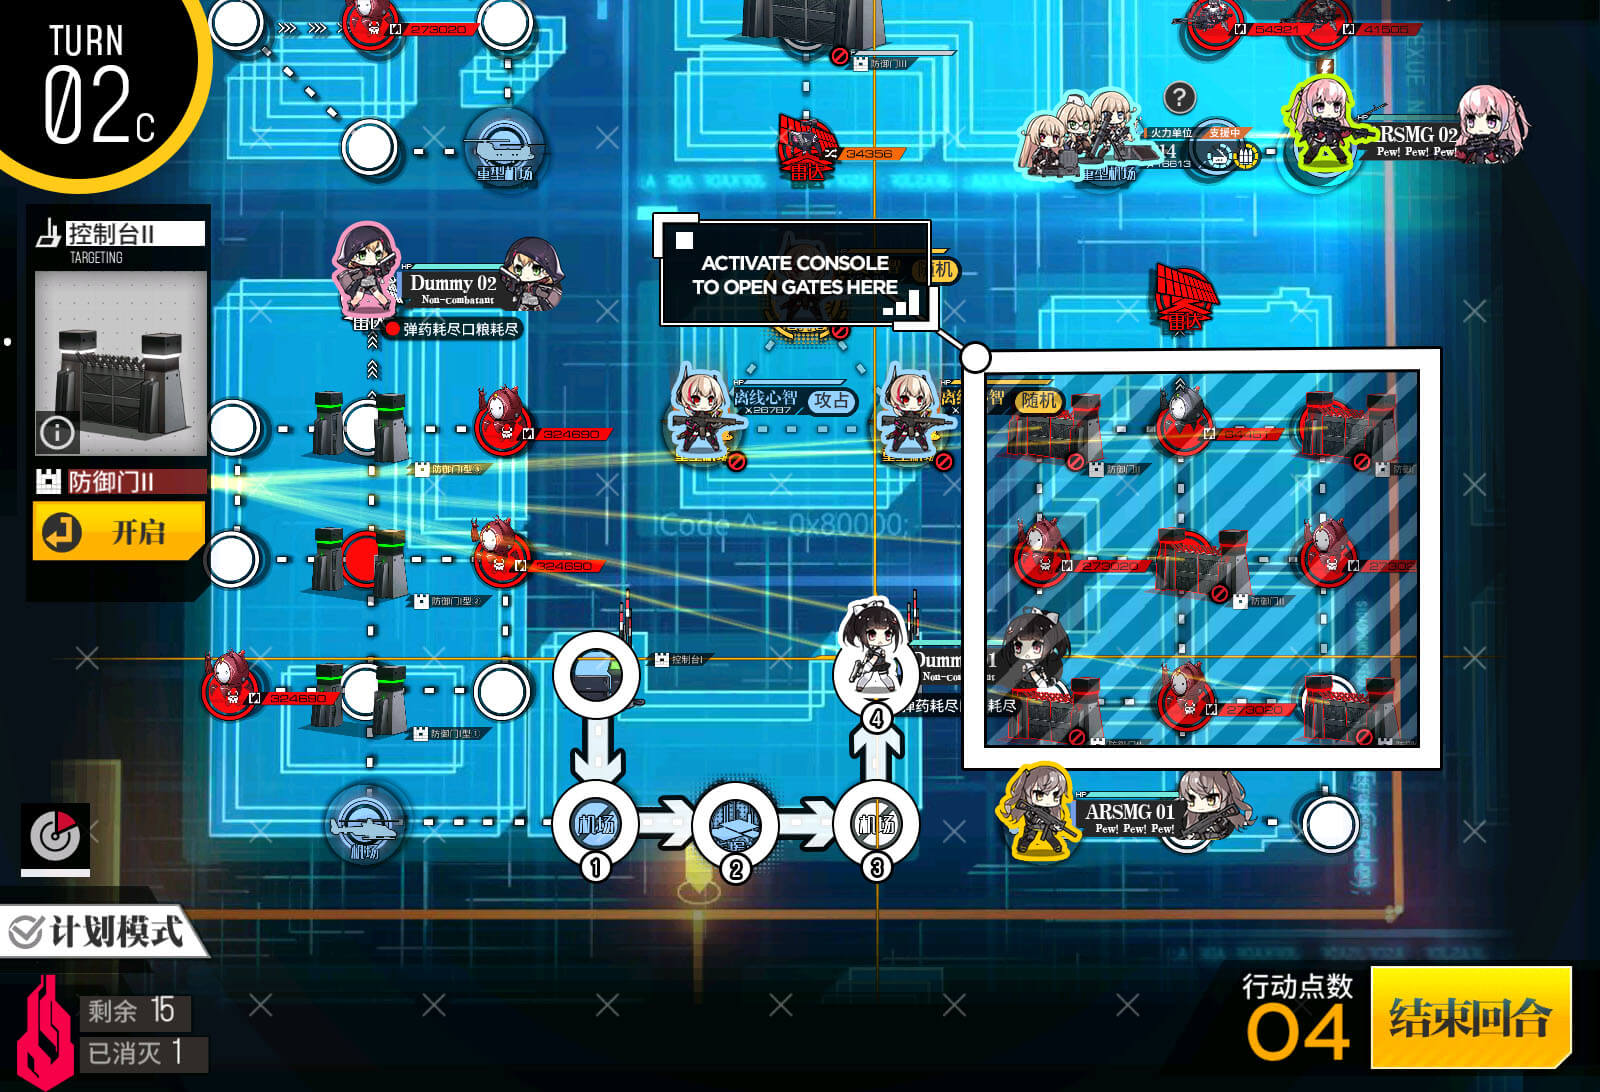
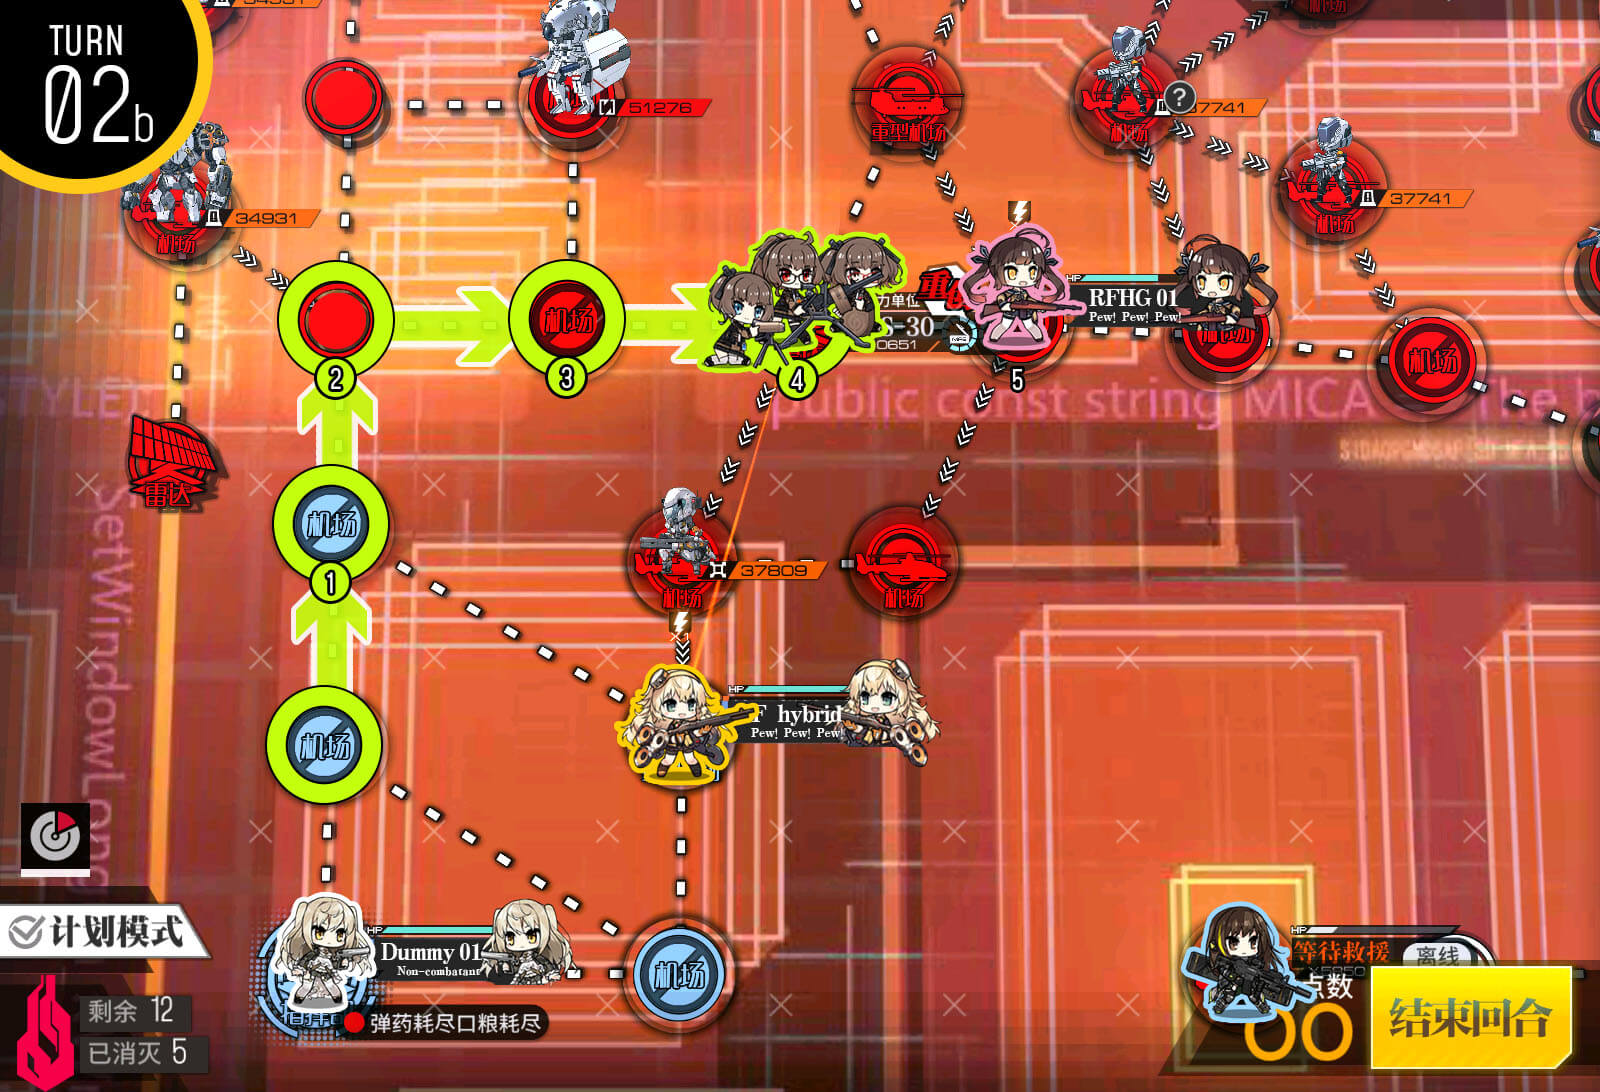
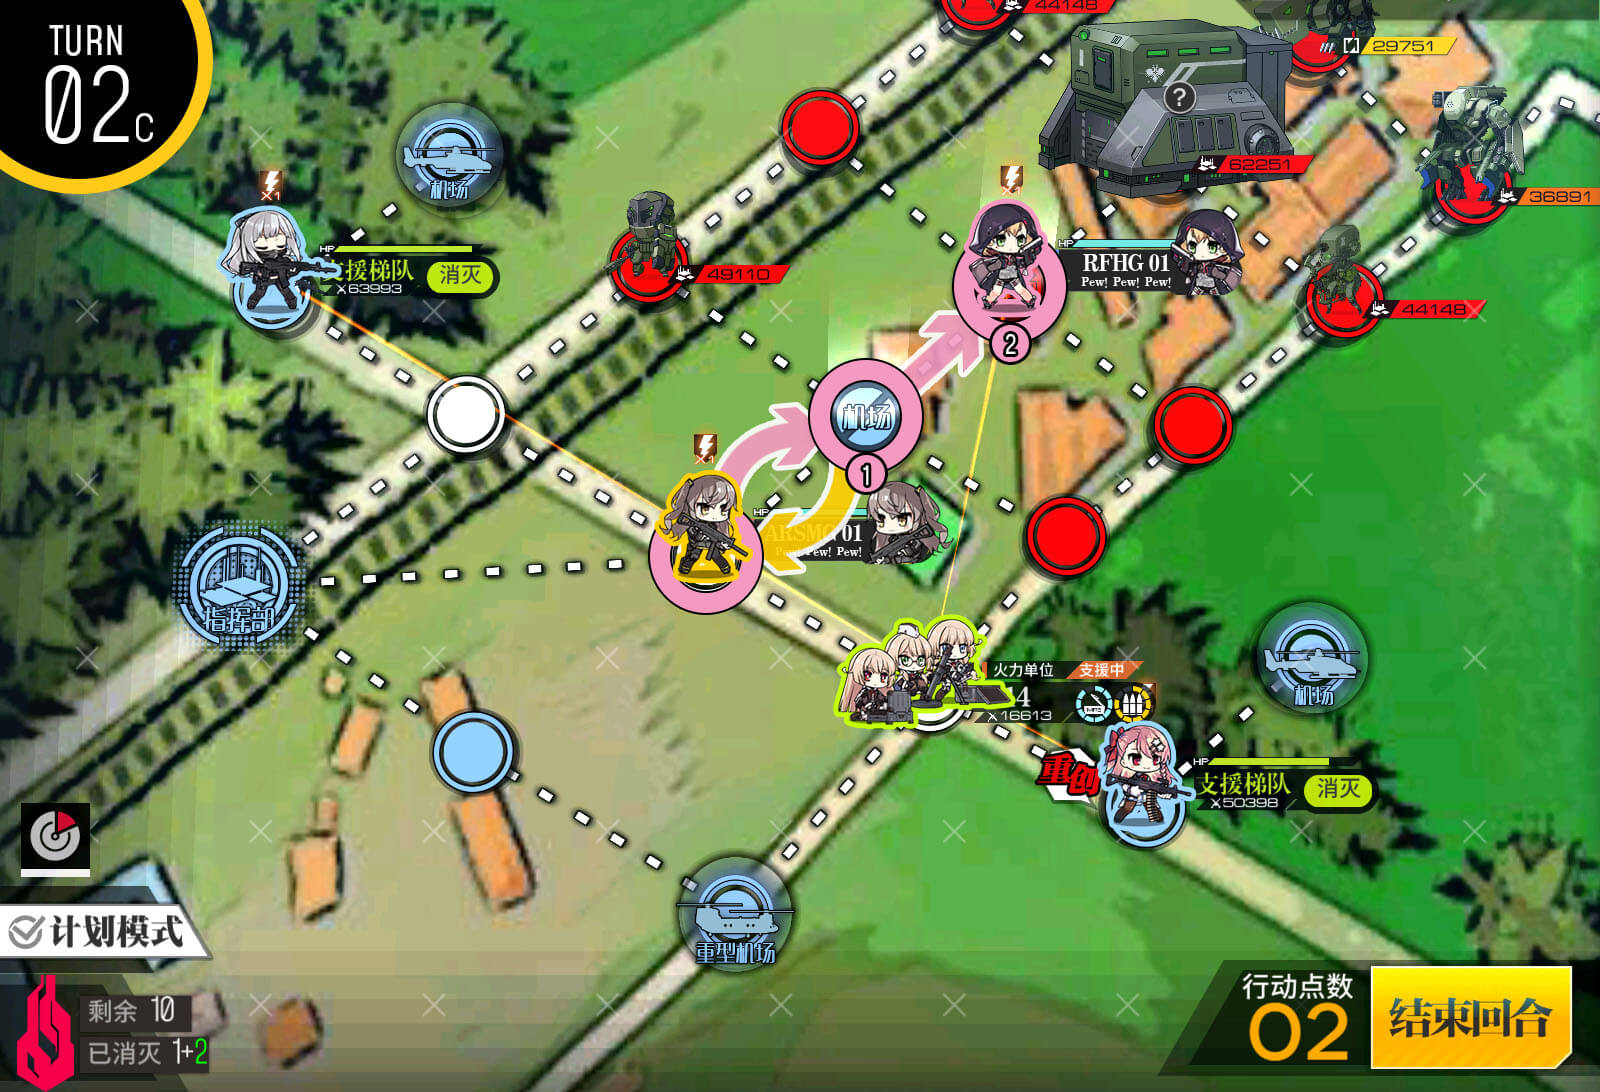
Turn 2 C
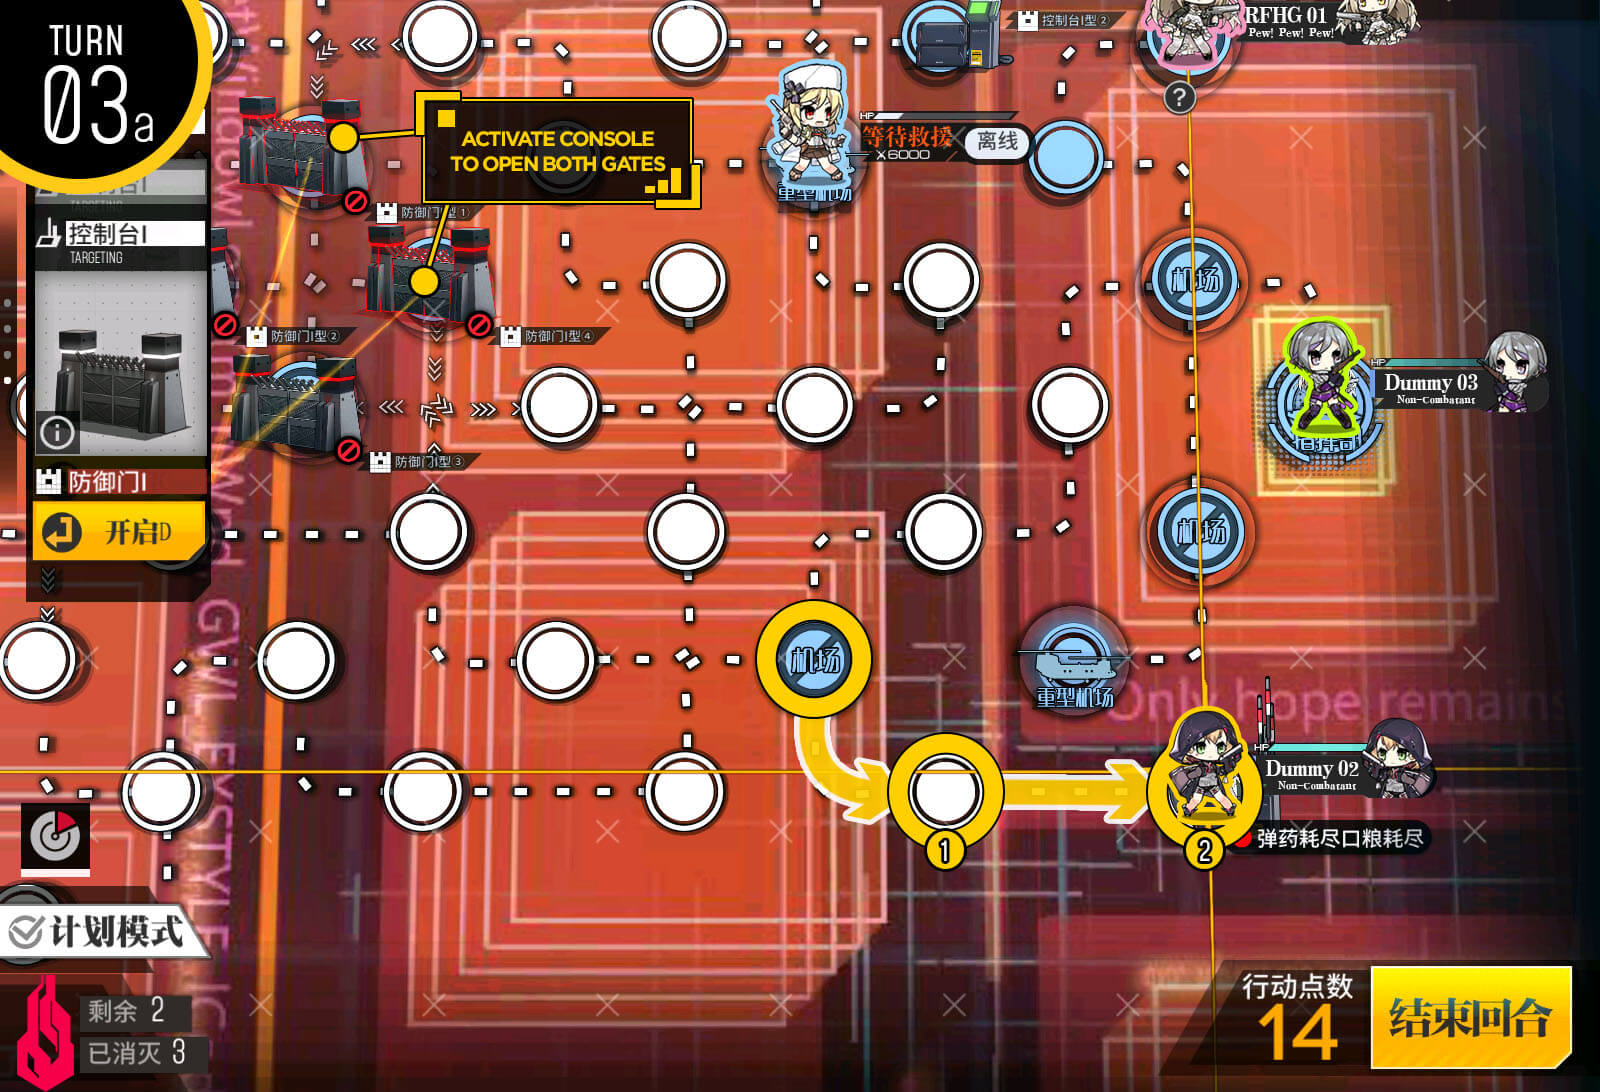
Dummy team on terminal will then move to the other terminal. Activate it to open all the gates on the right side.
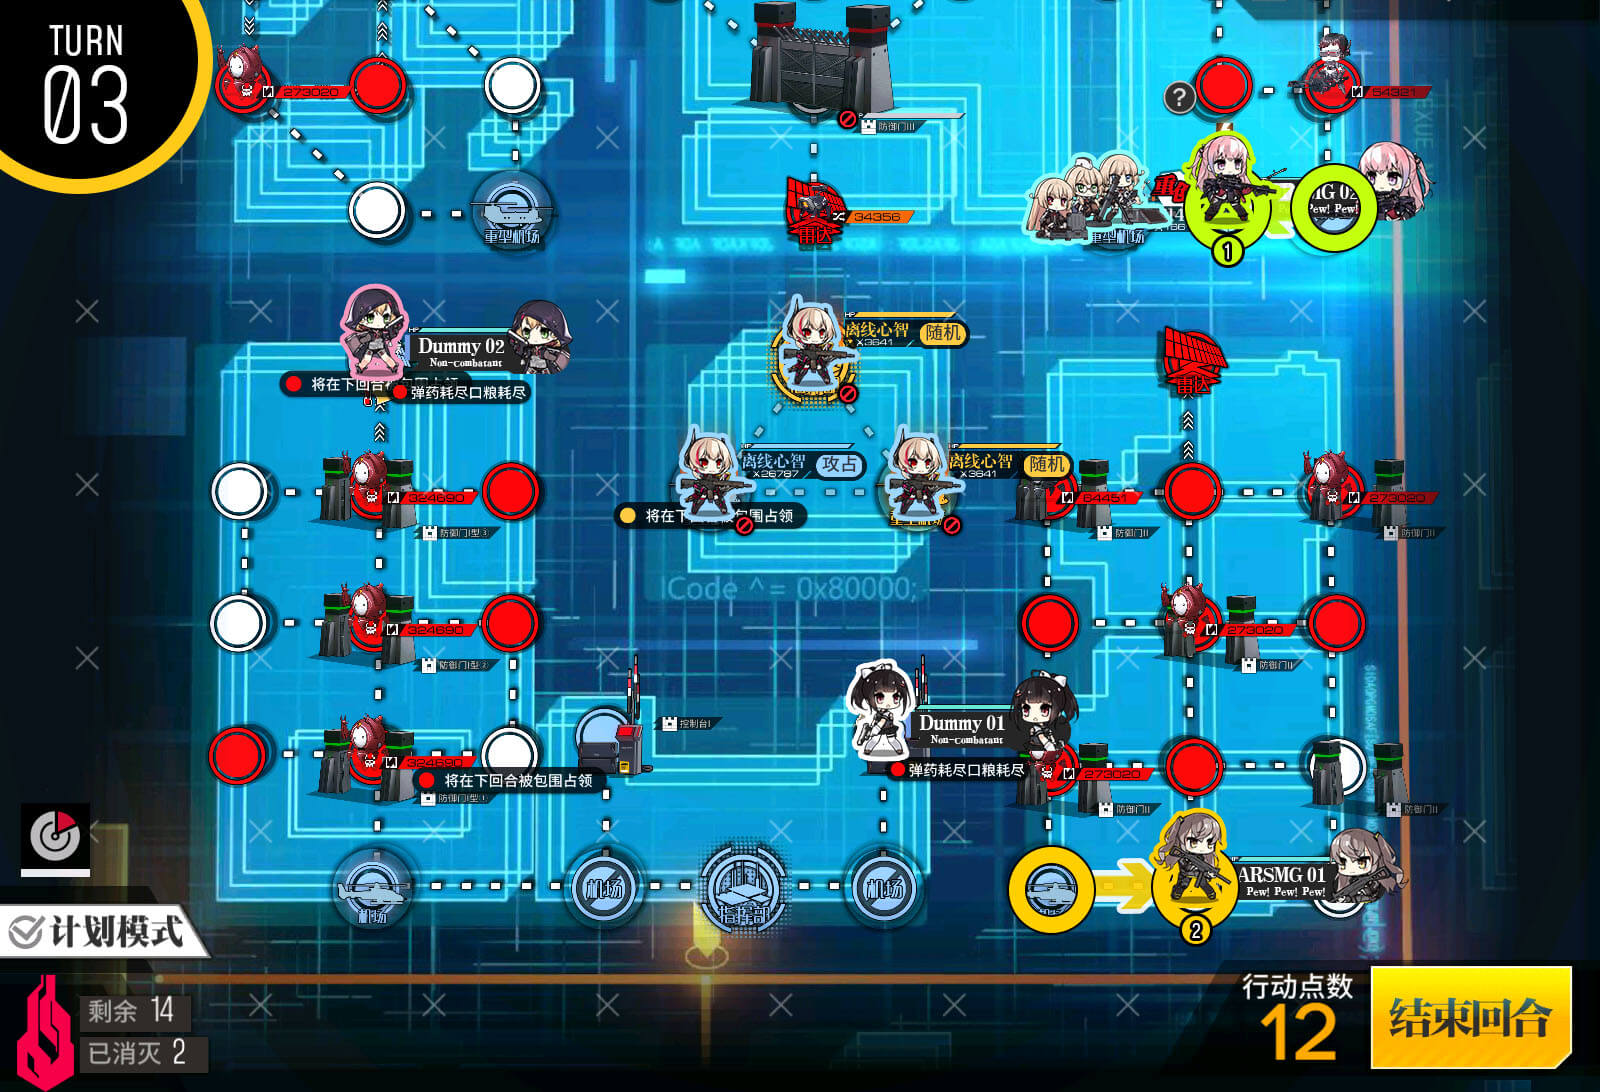
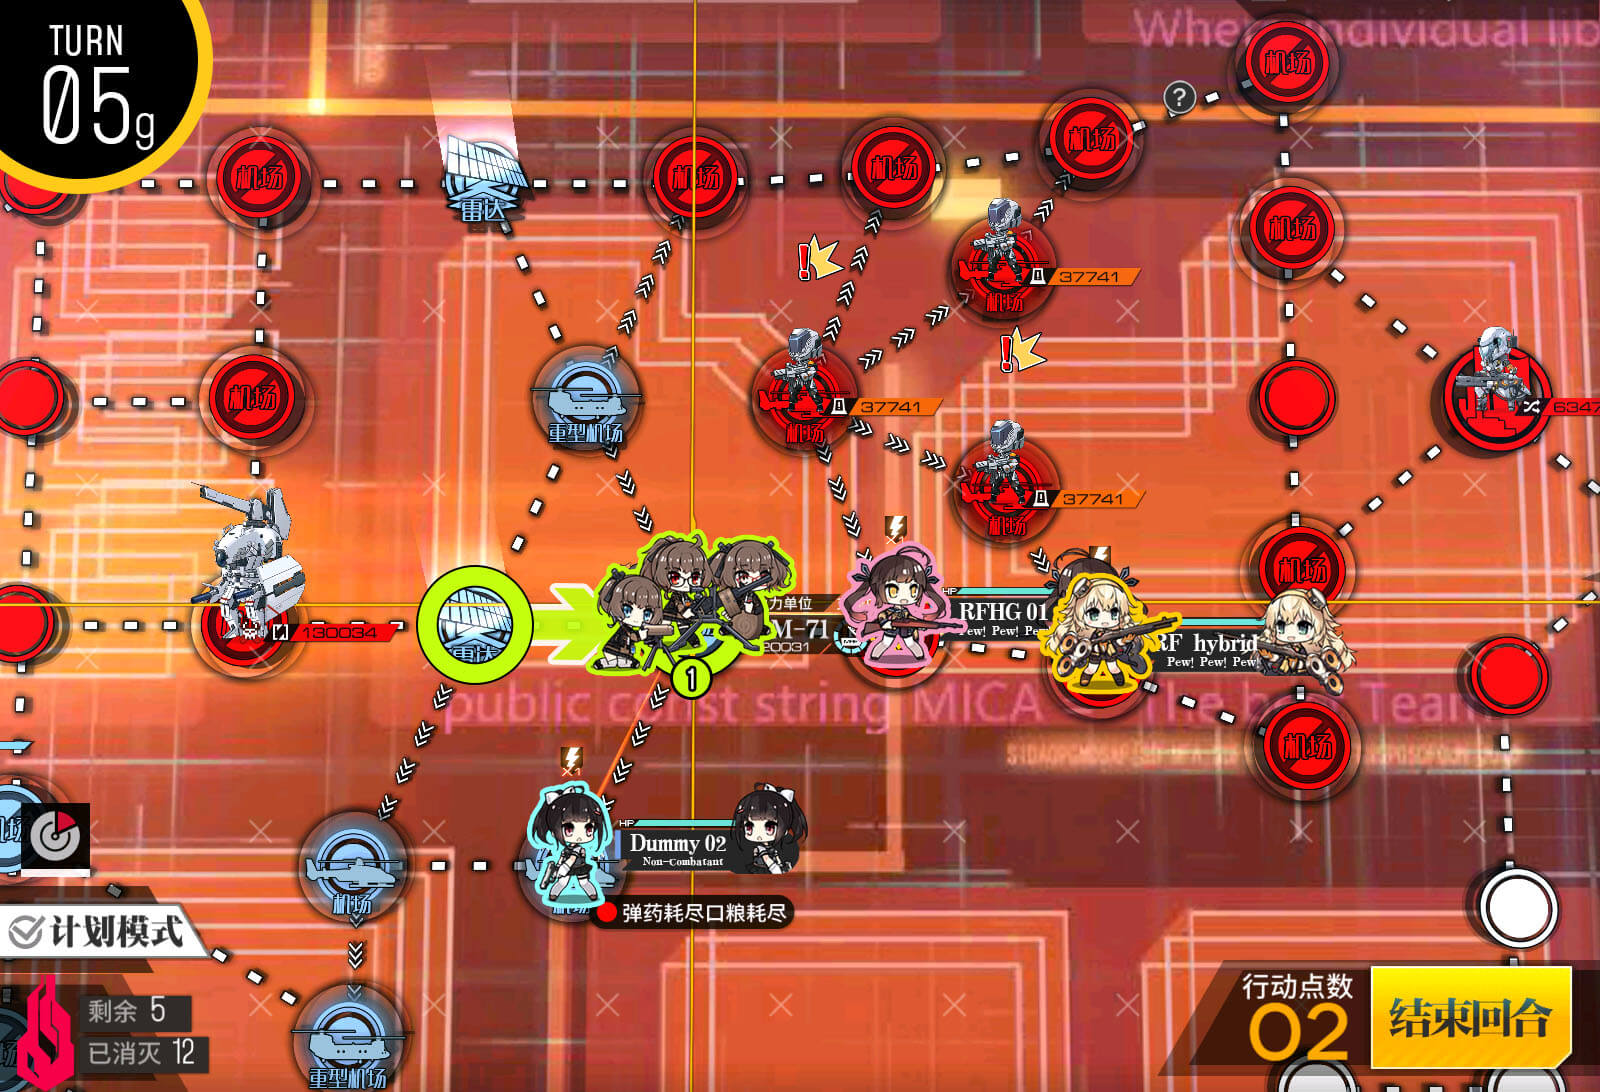
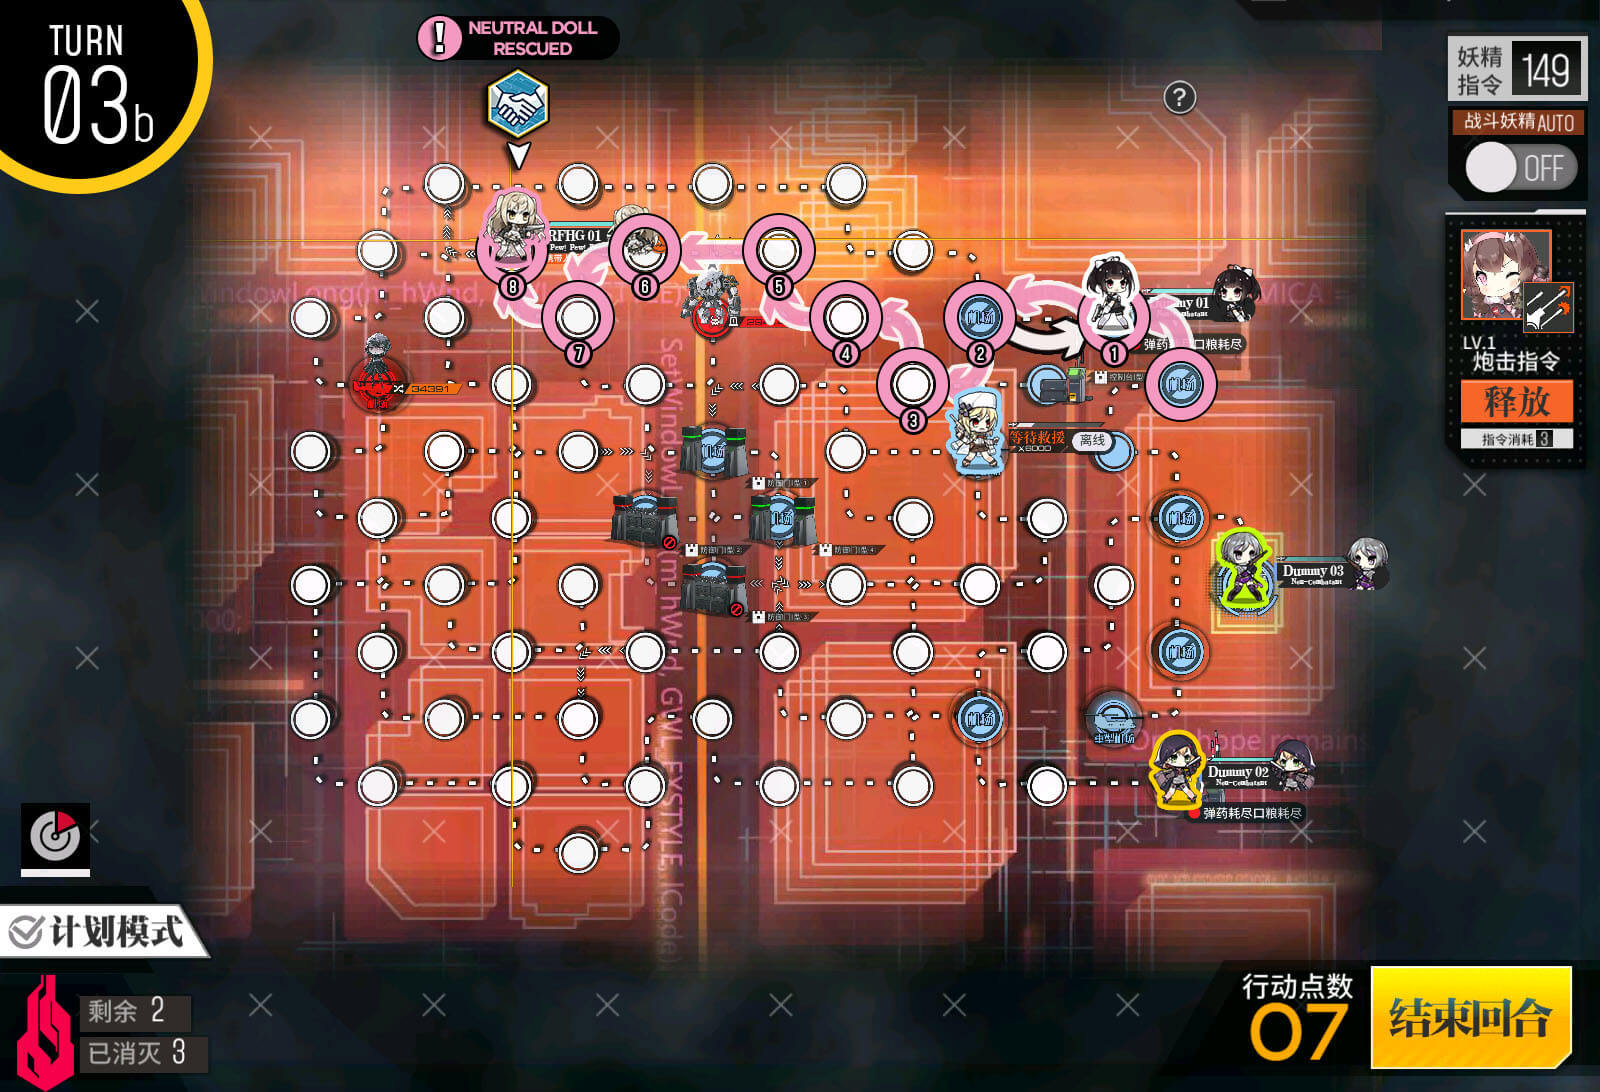
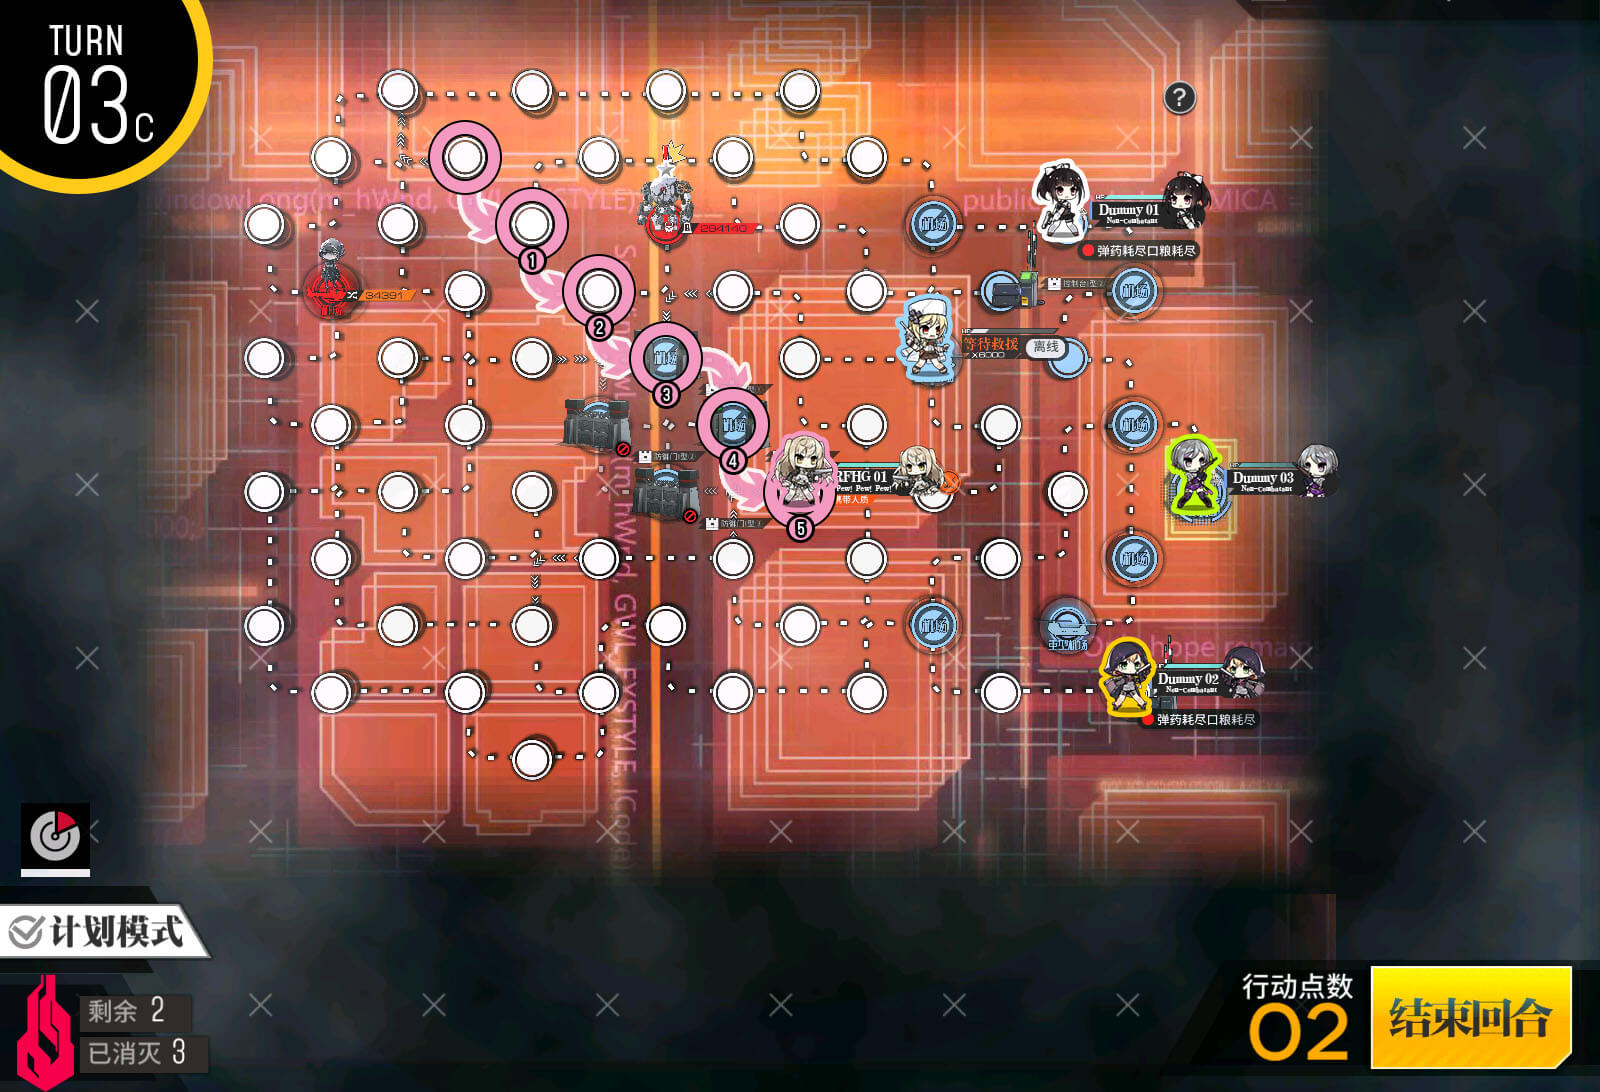
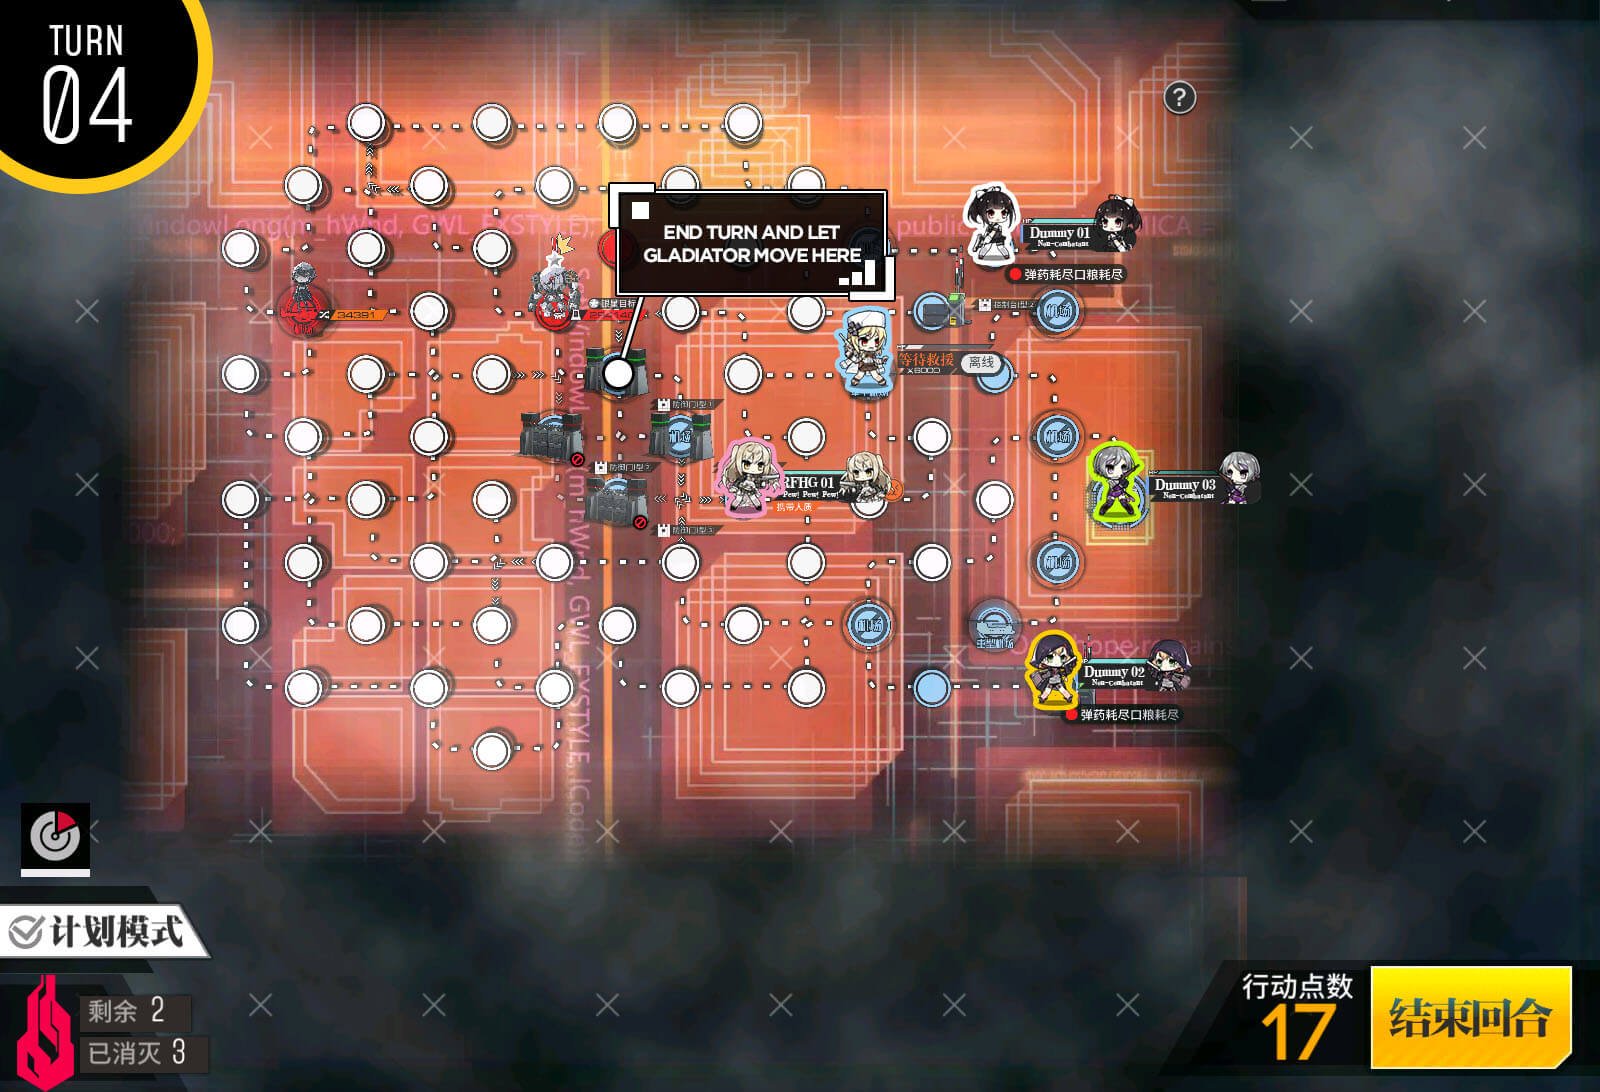
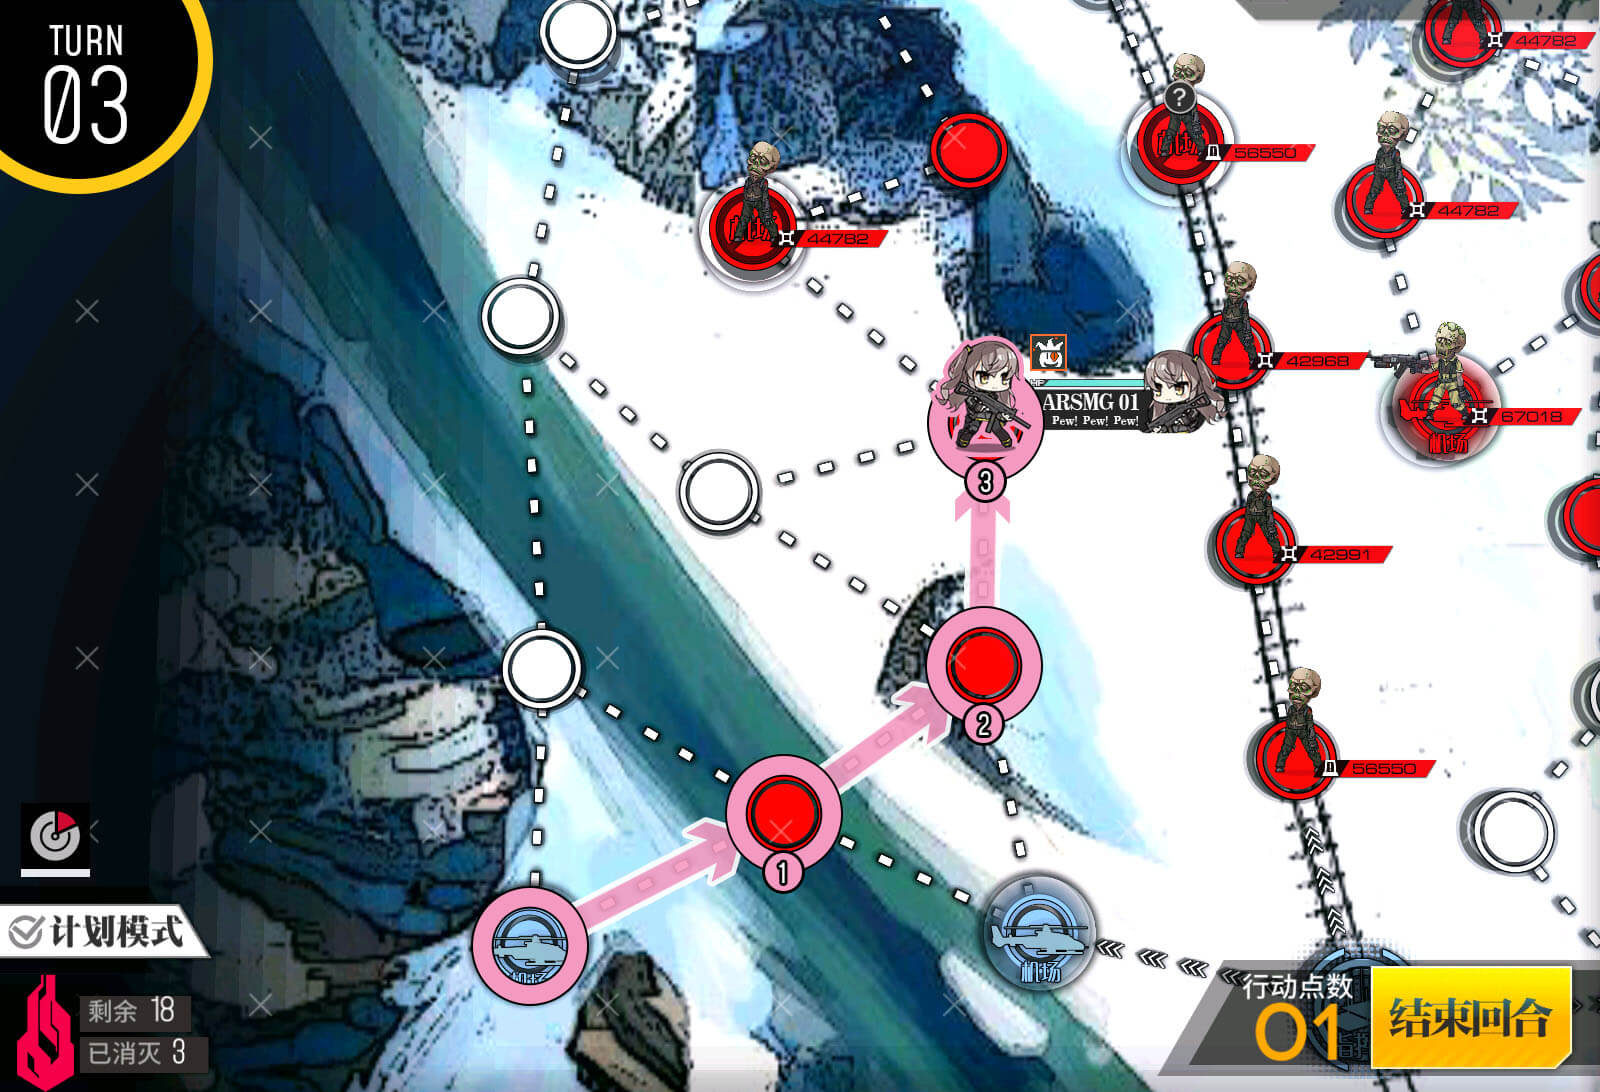
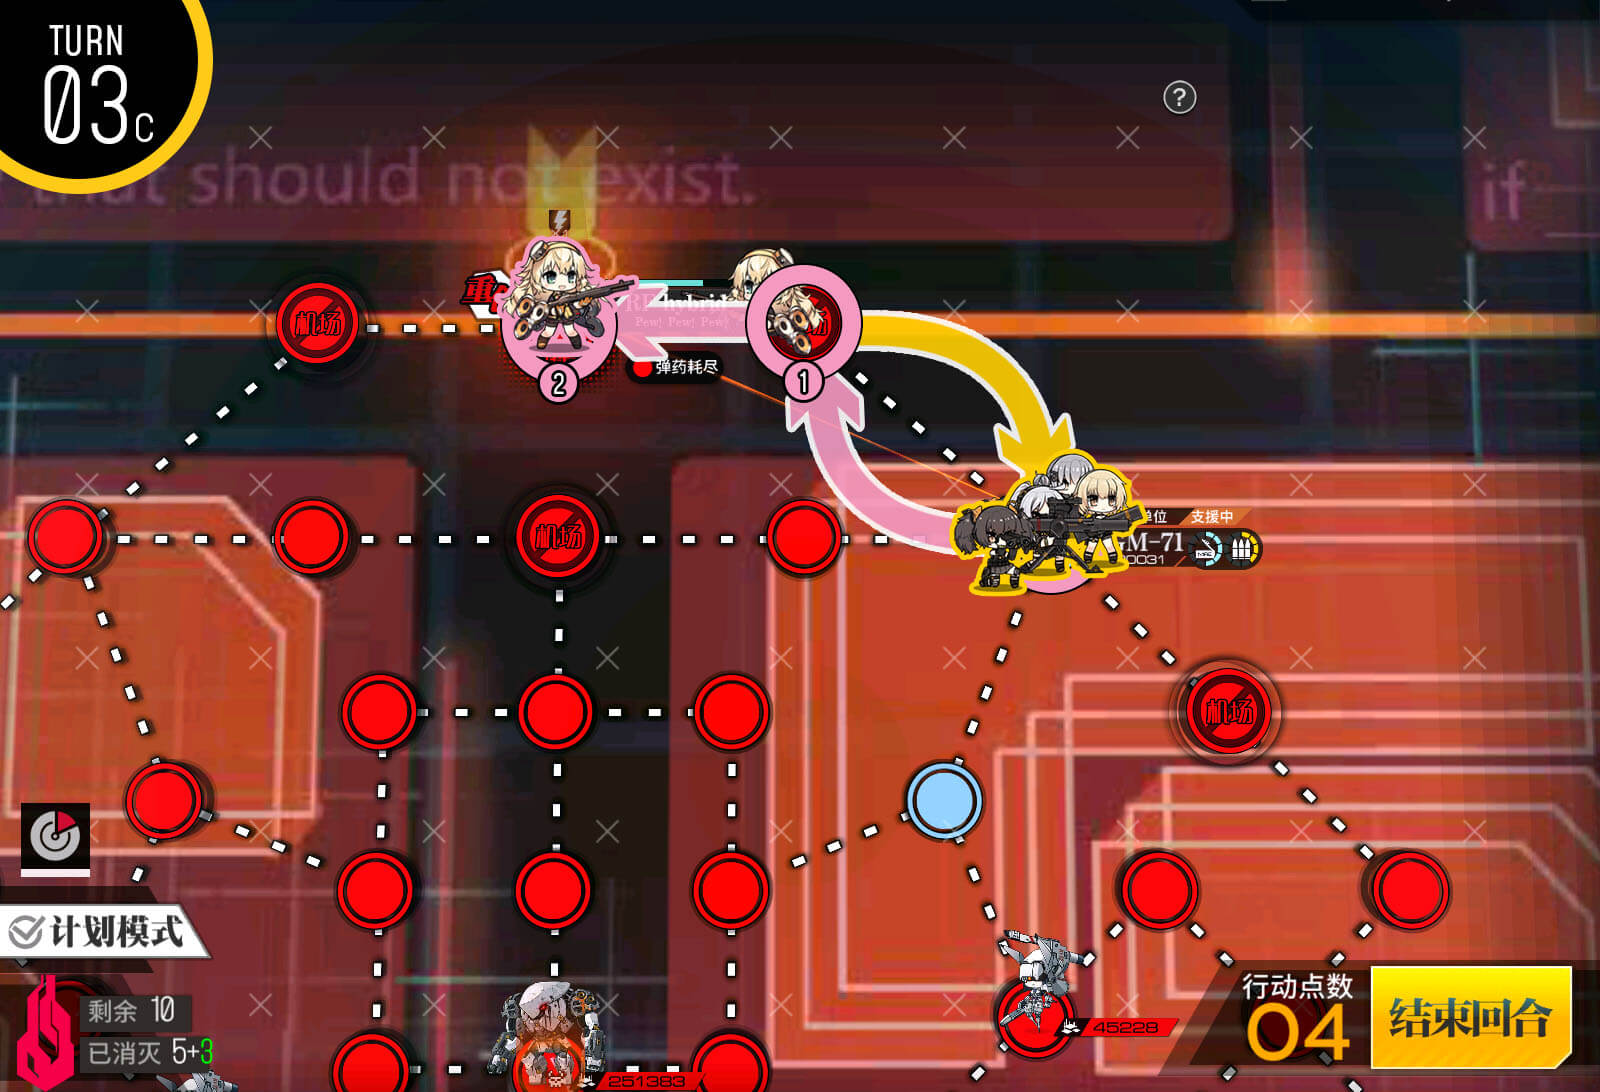
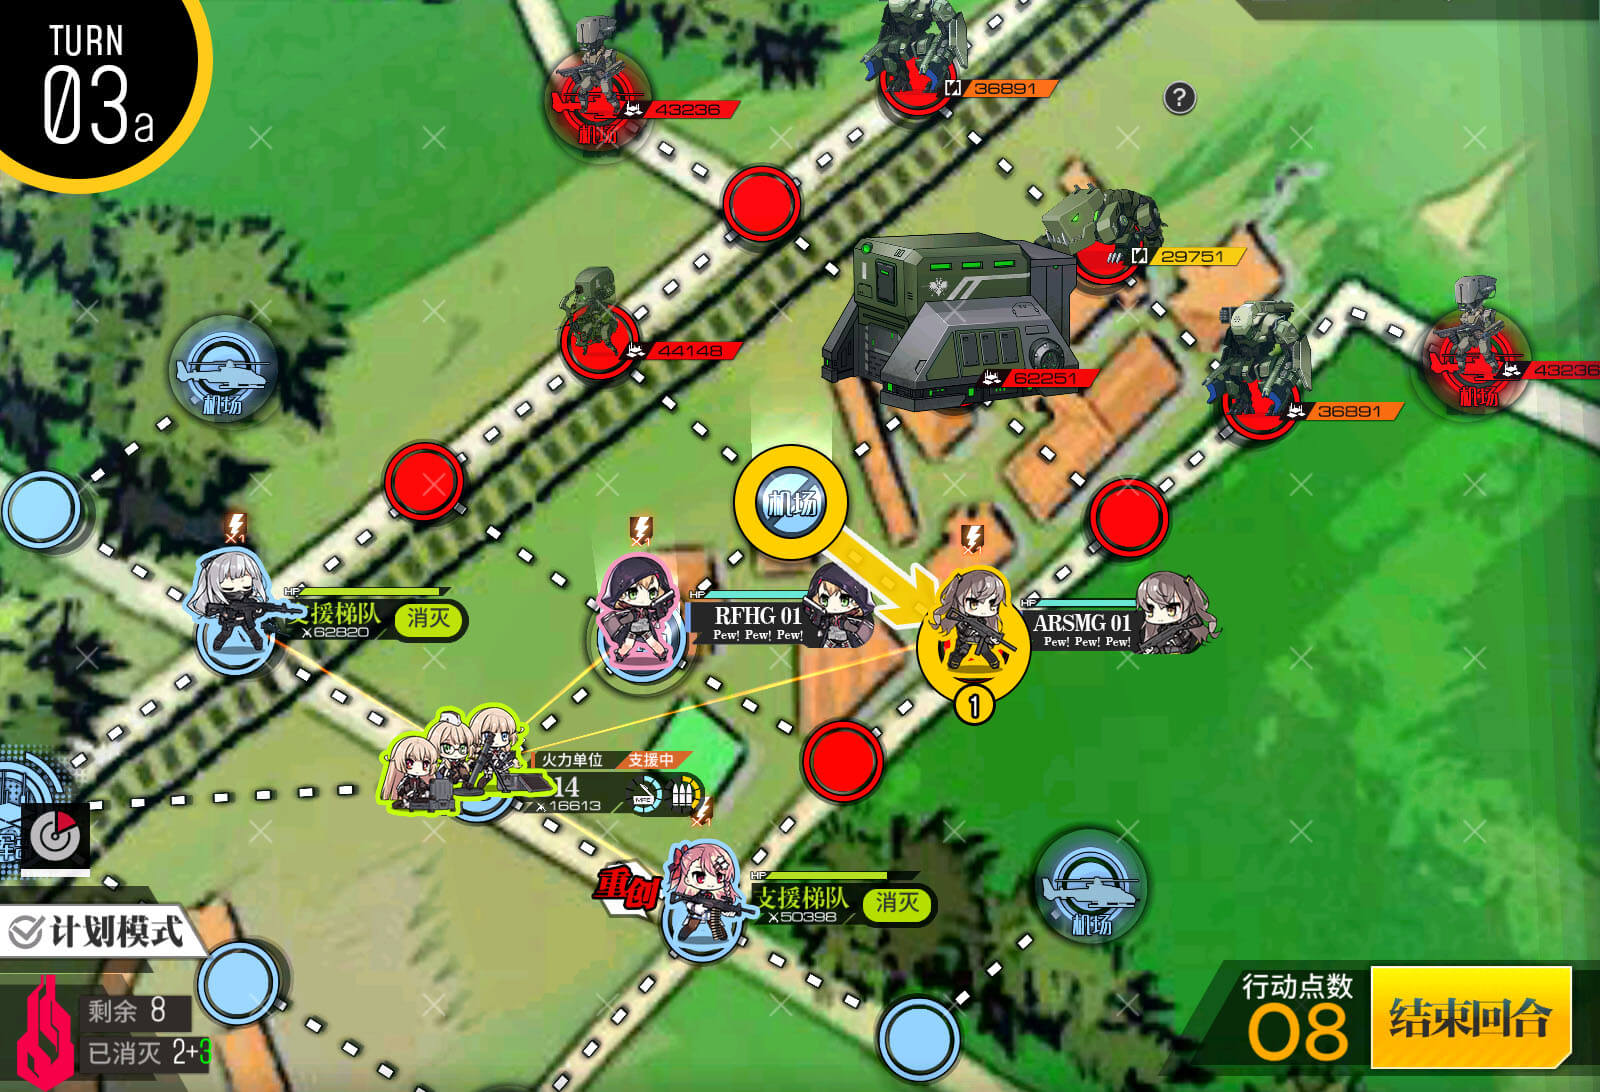
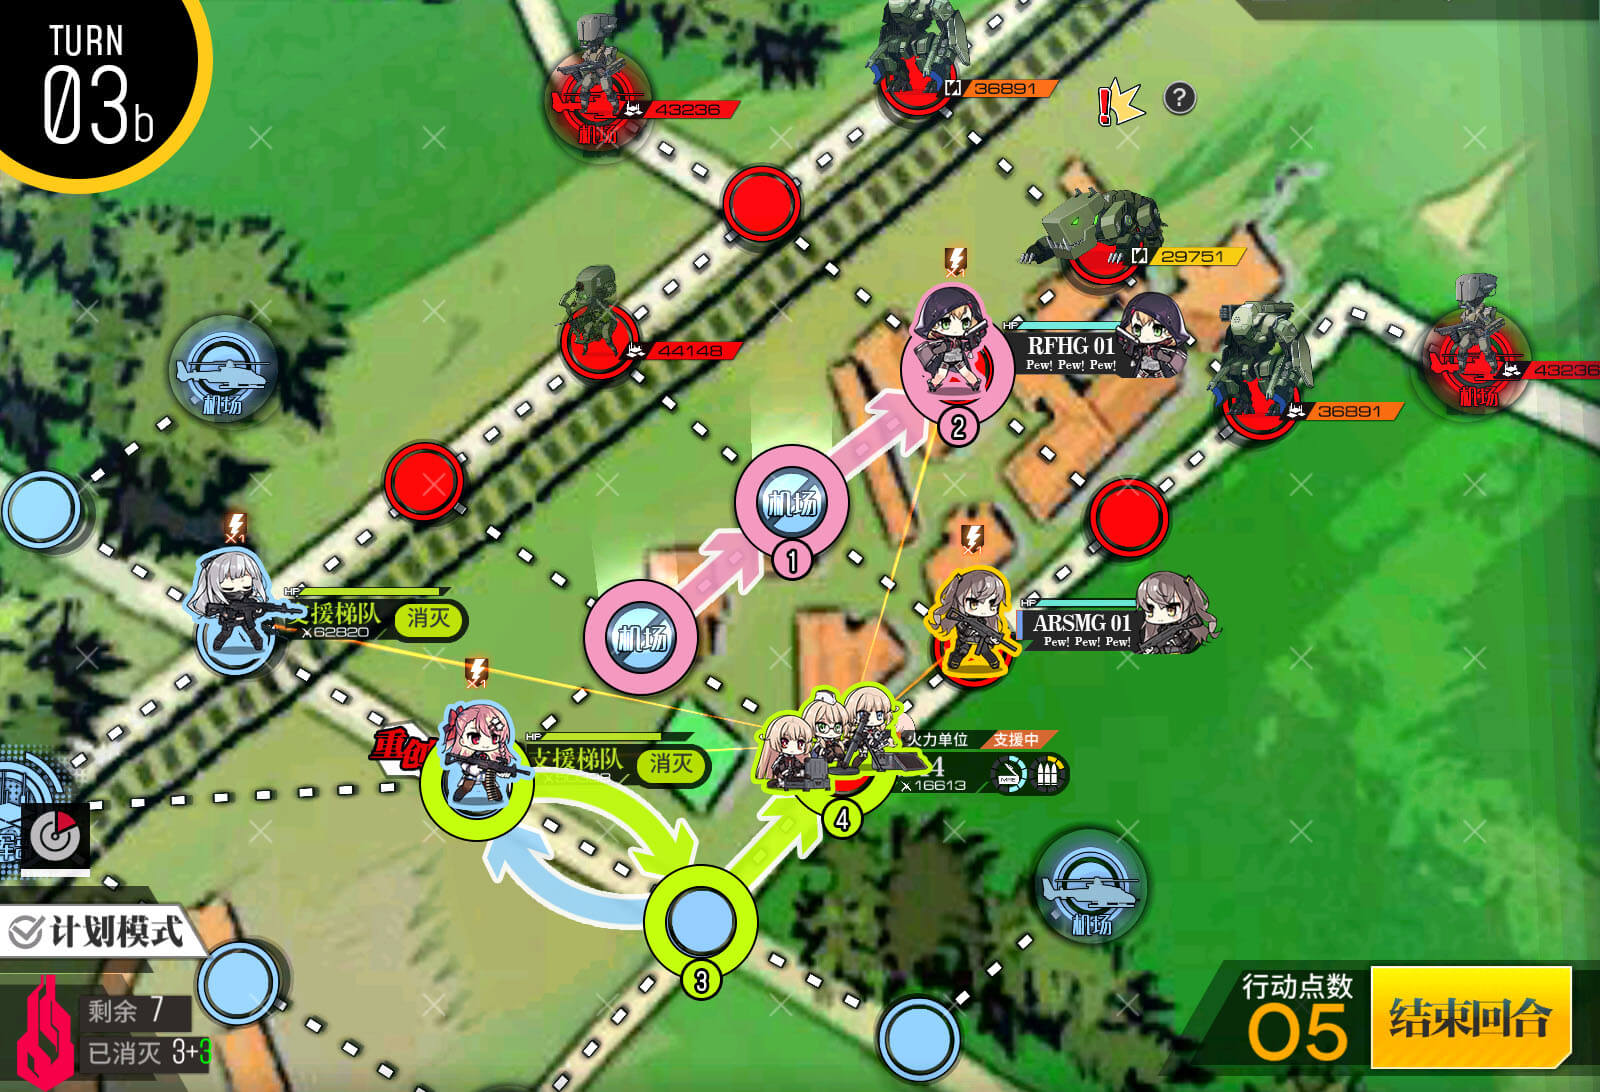
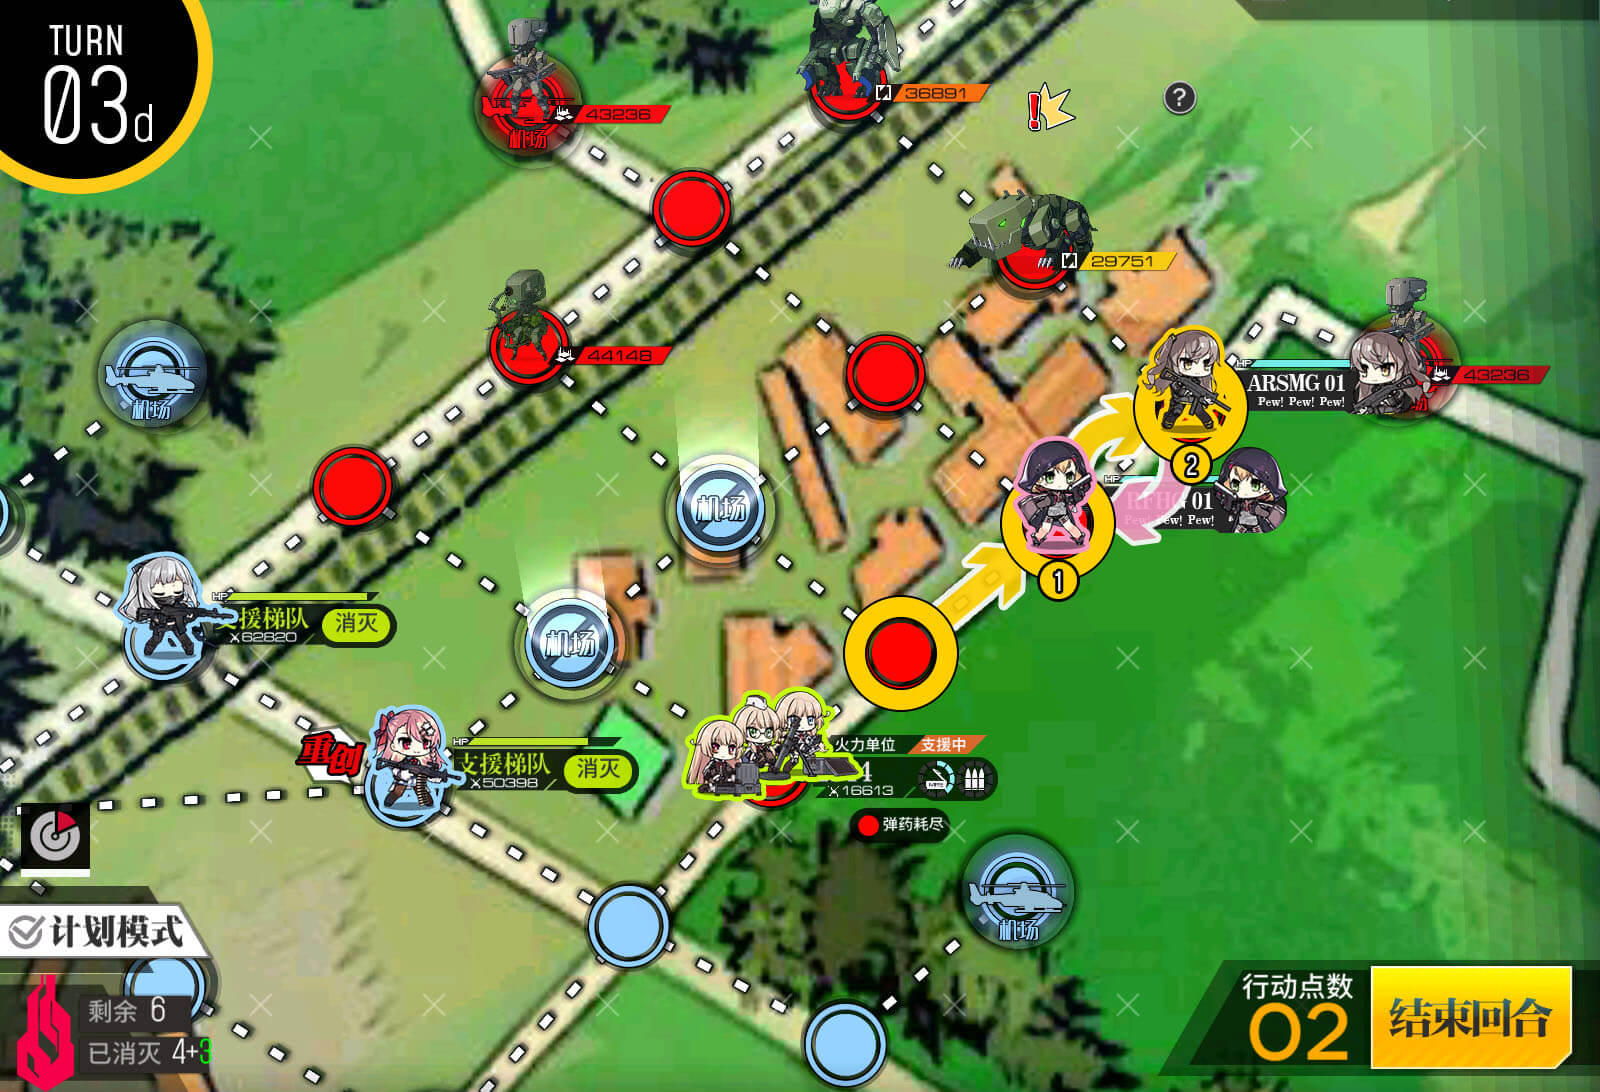
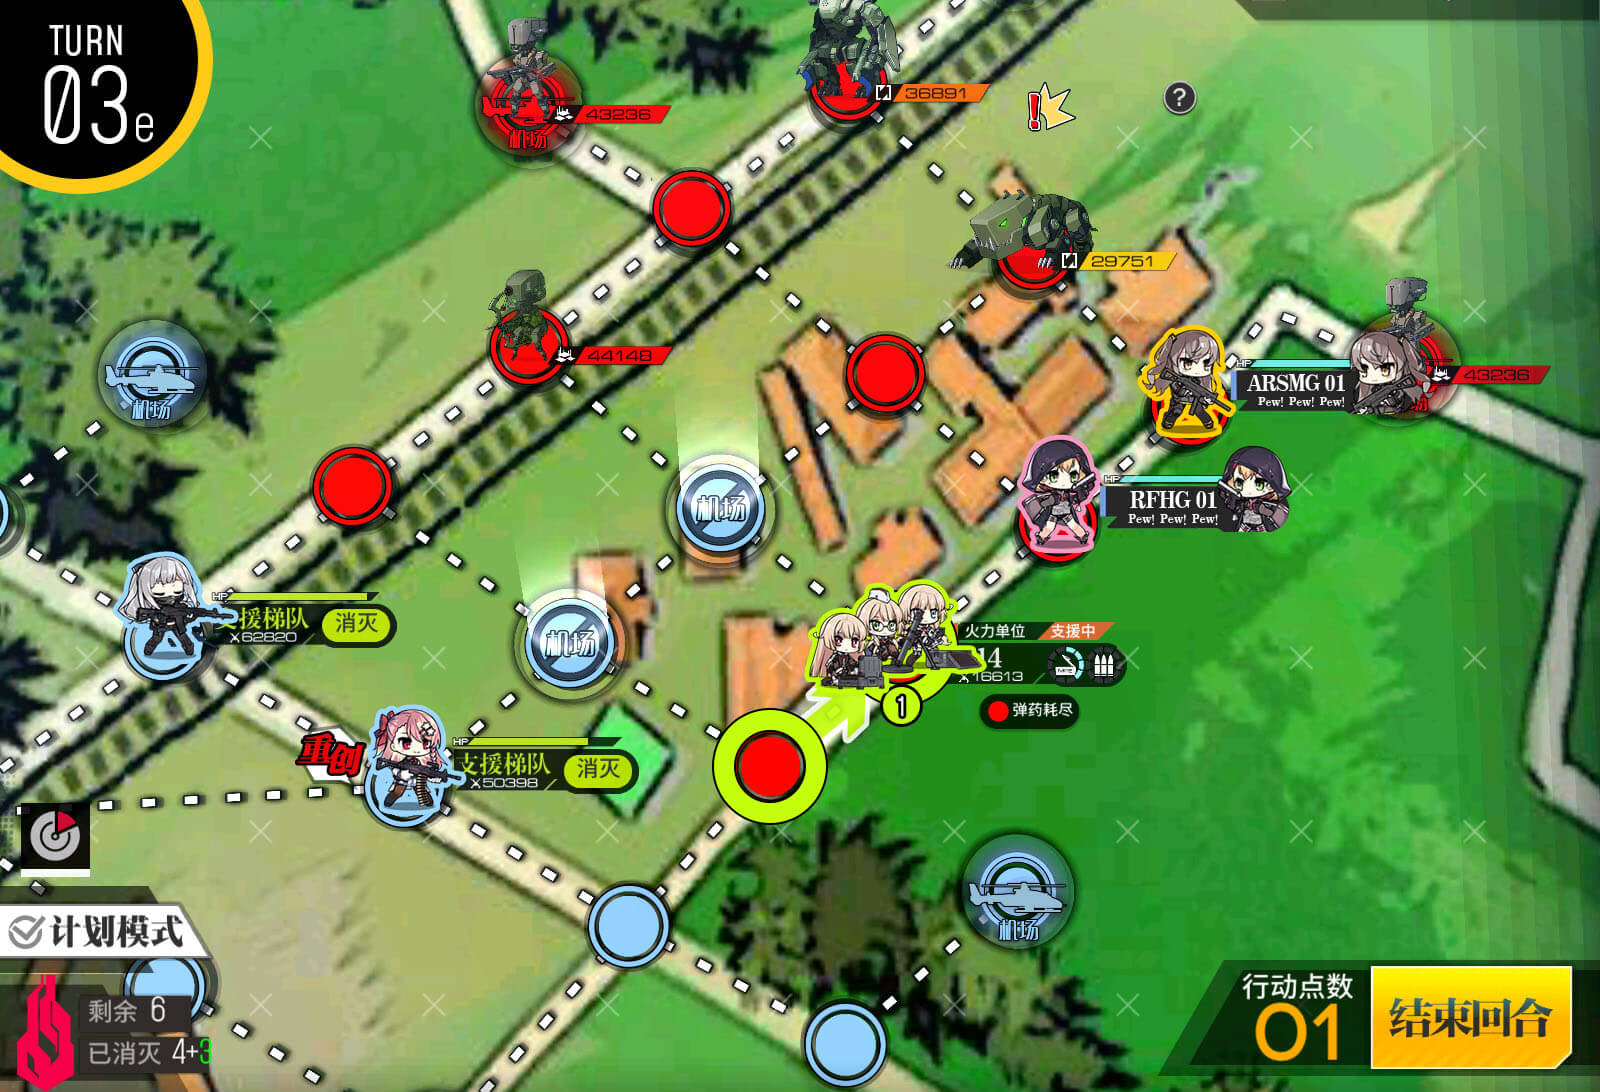
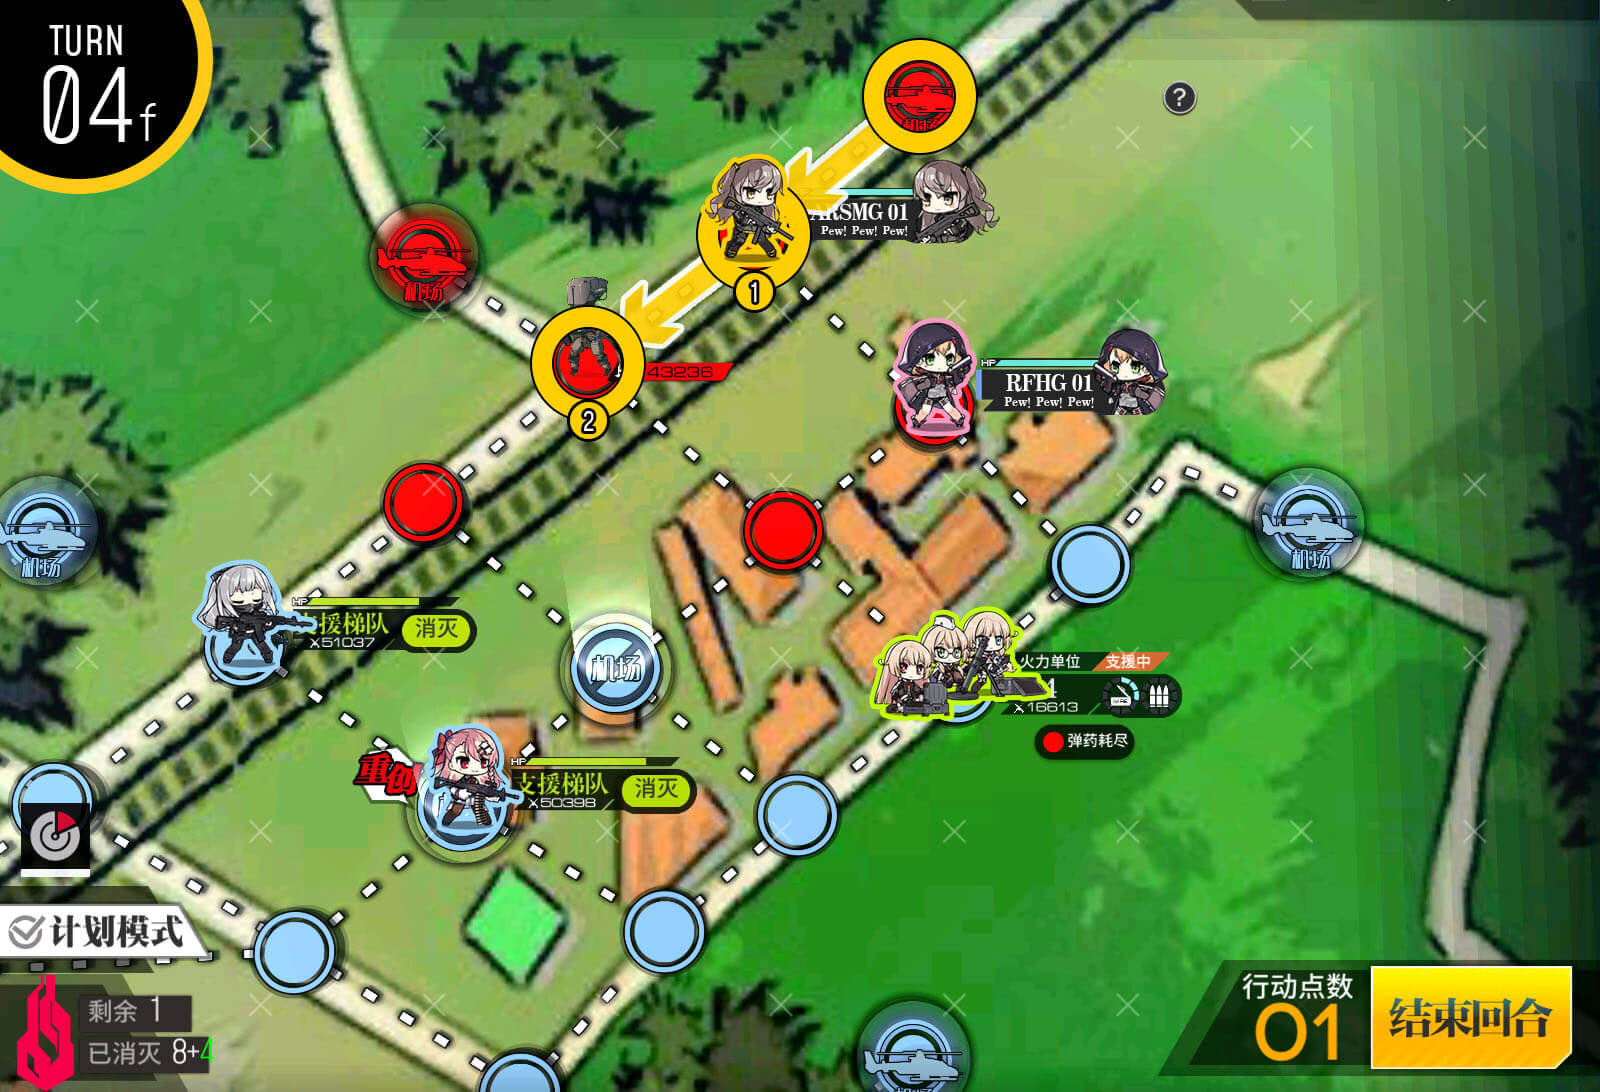
Turn 3
Move the bottom ARSMG team to the right. At this point, check that the topmost combat team has taken a minimum of two fights. If it has, move it back one node so that it doesn't have to take a third.
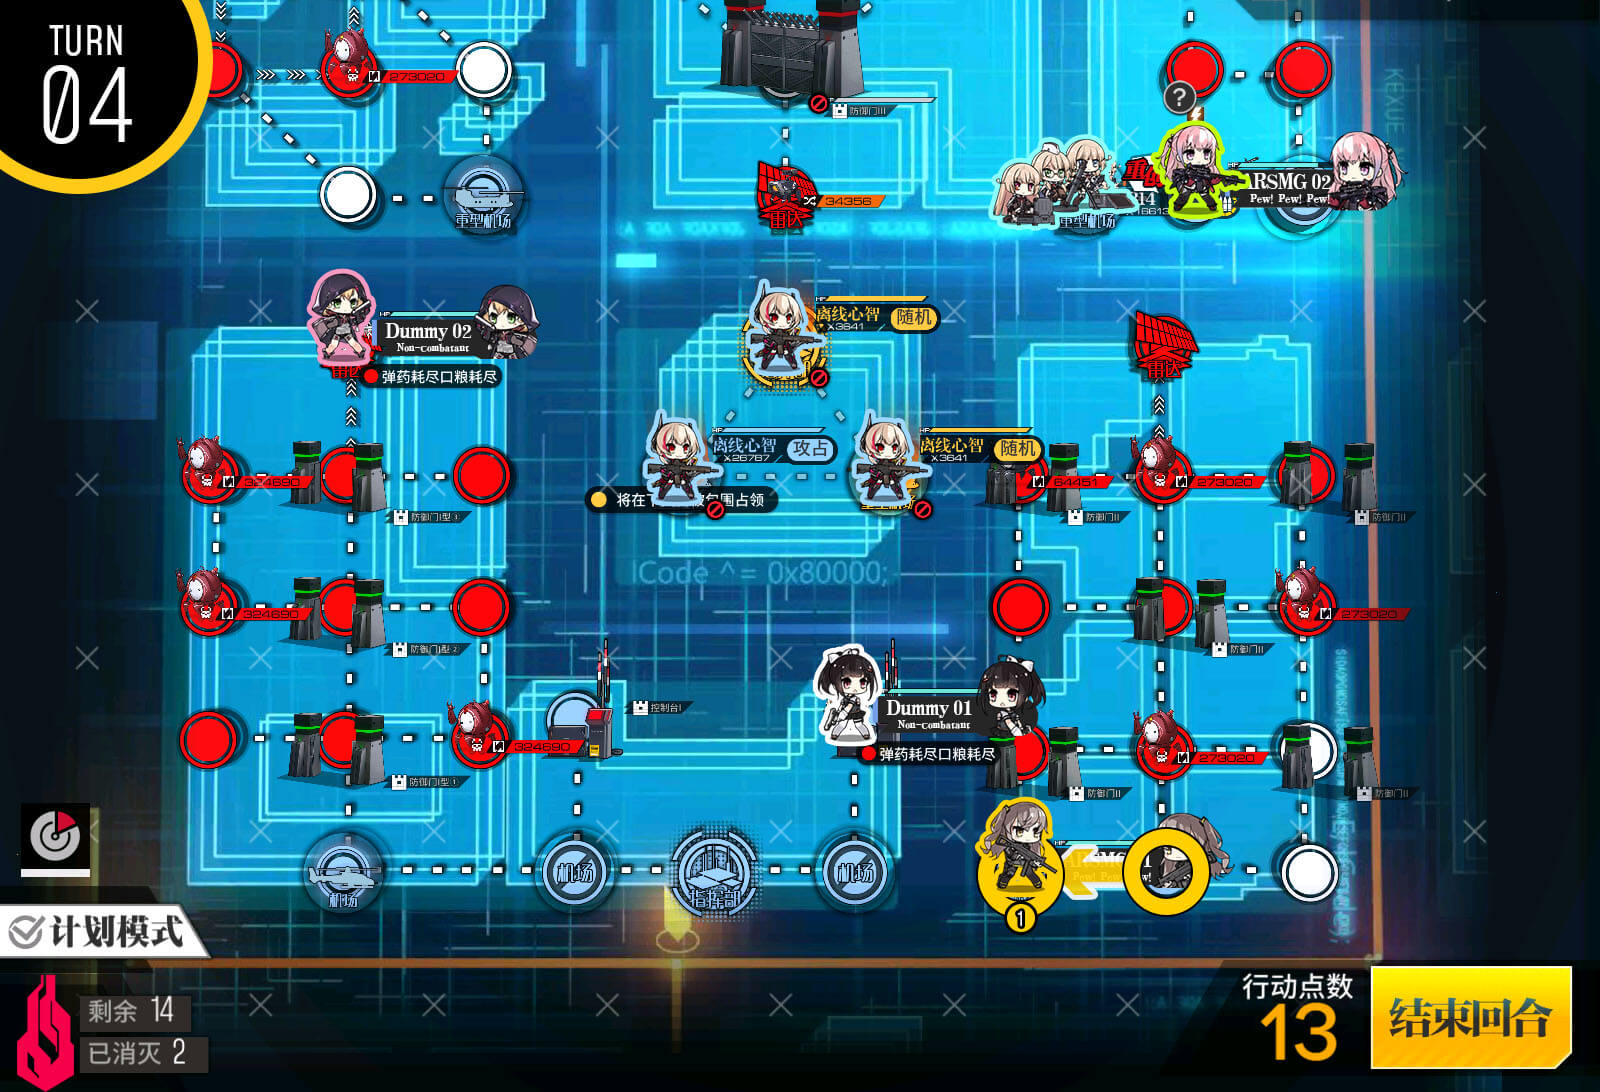
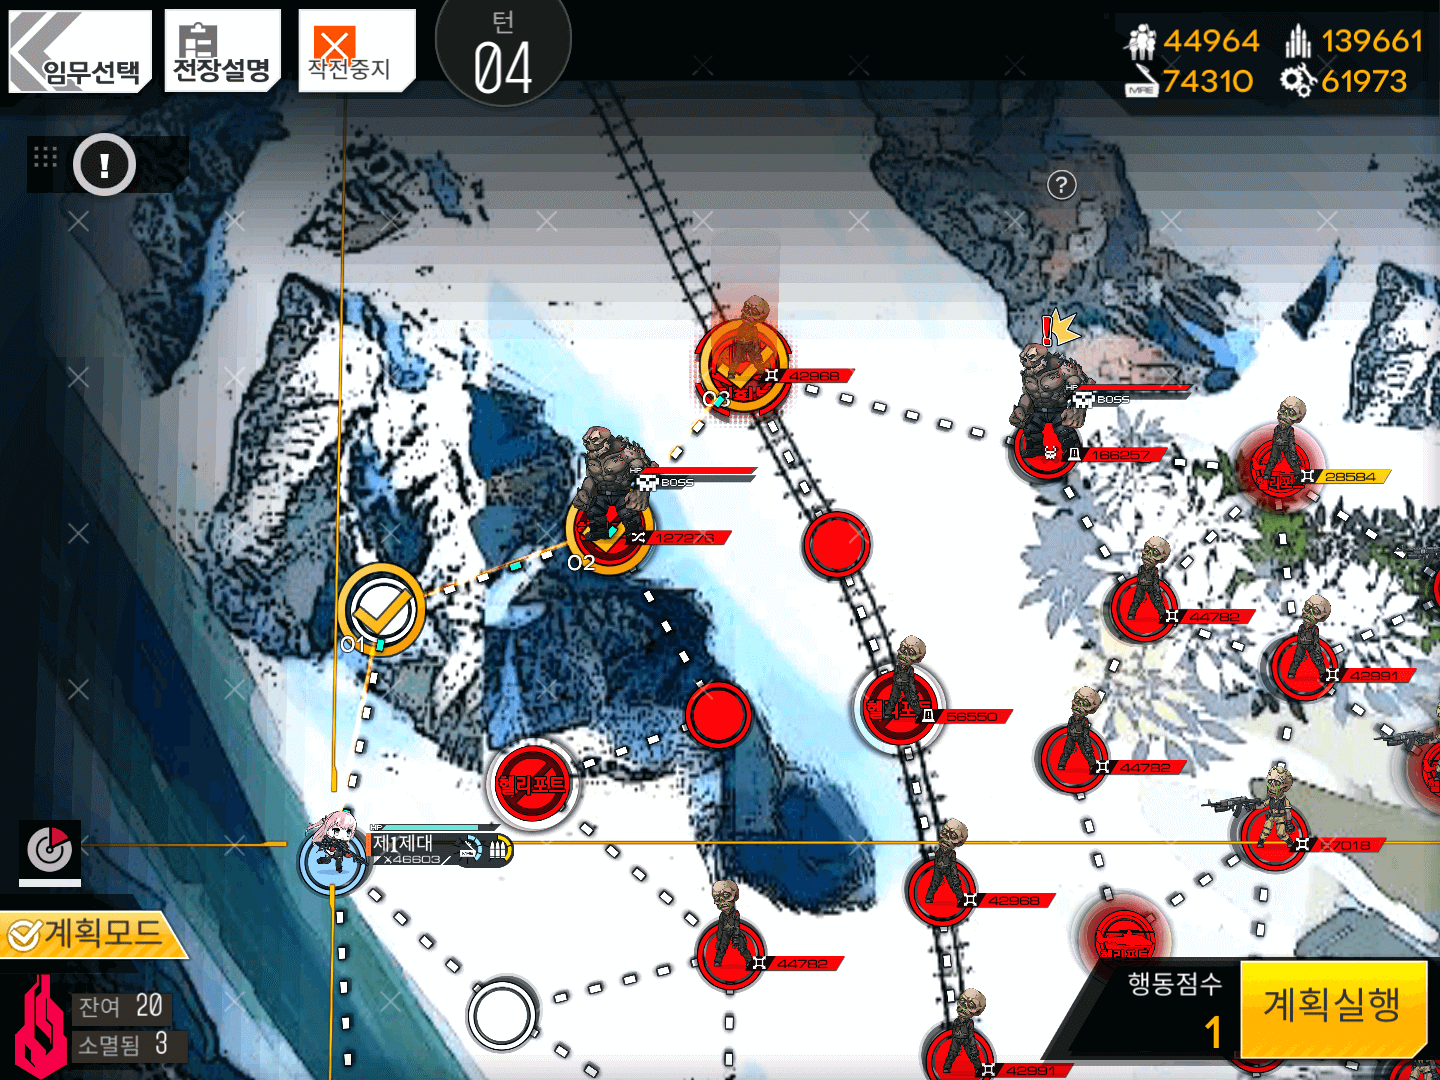
Turn 4
Move the bottom ARSMG.
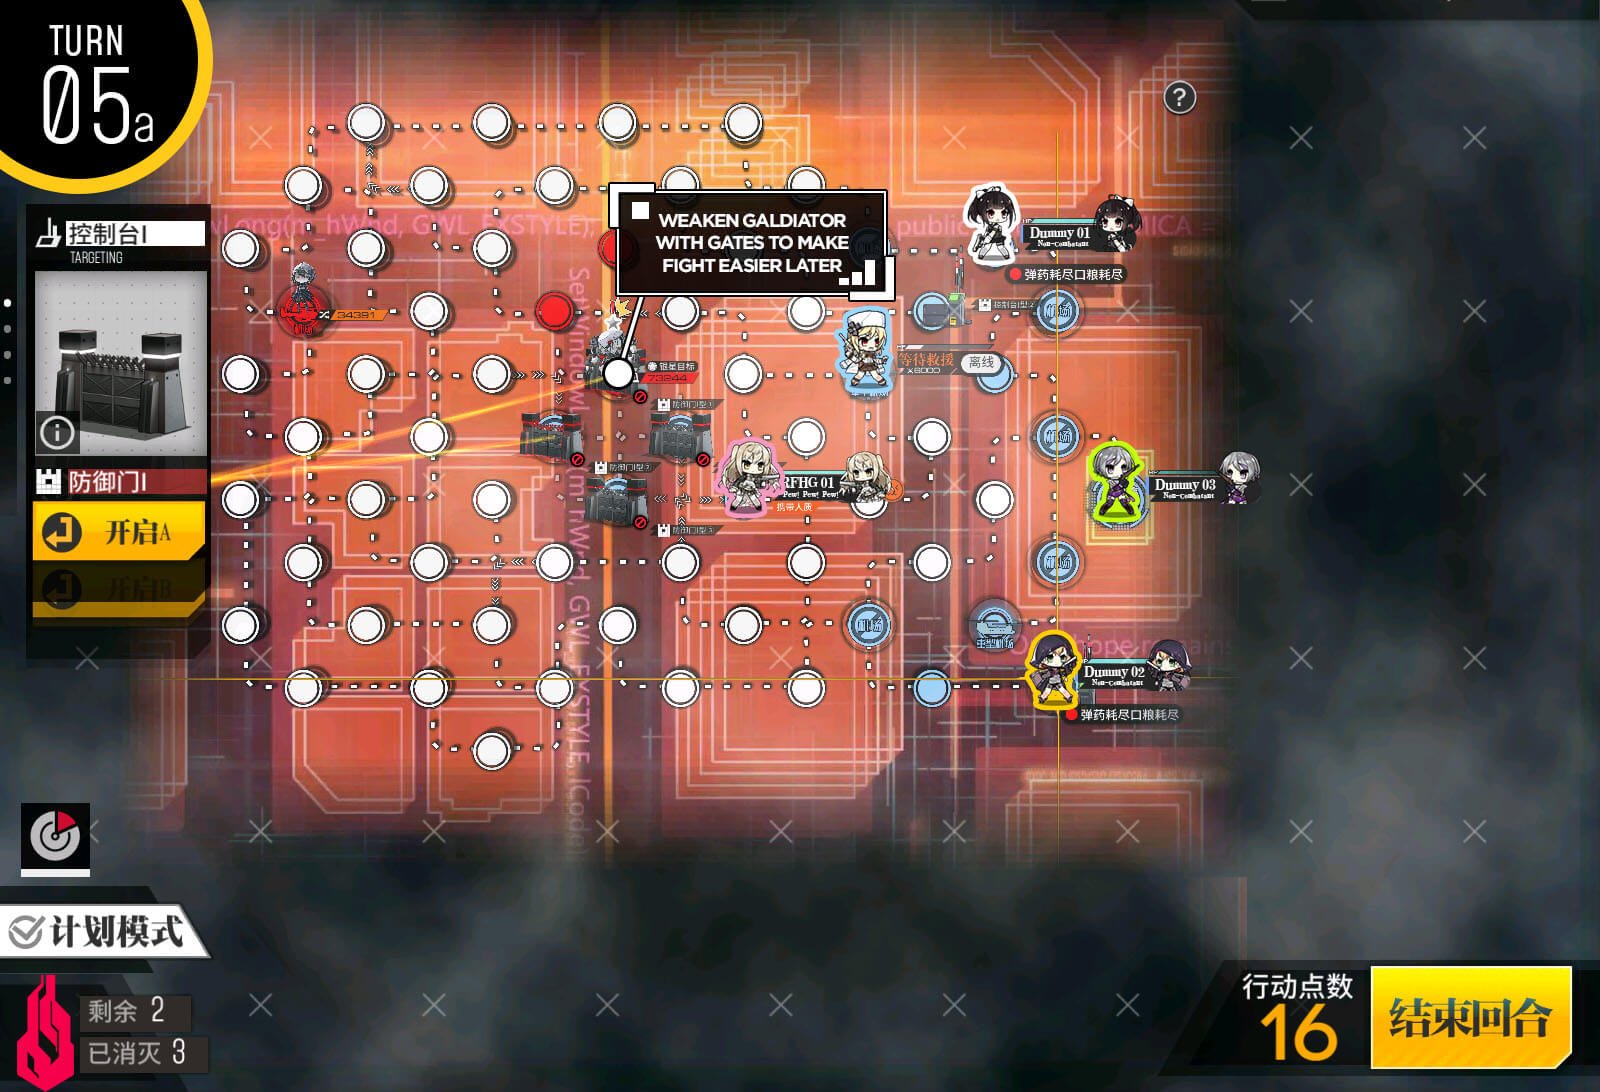
*Note: If there isn't a red bean blocking the tile under radar (it's the black bean instead), you can just capture the radar directly like Turn 5 suggests.
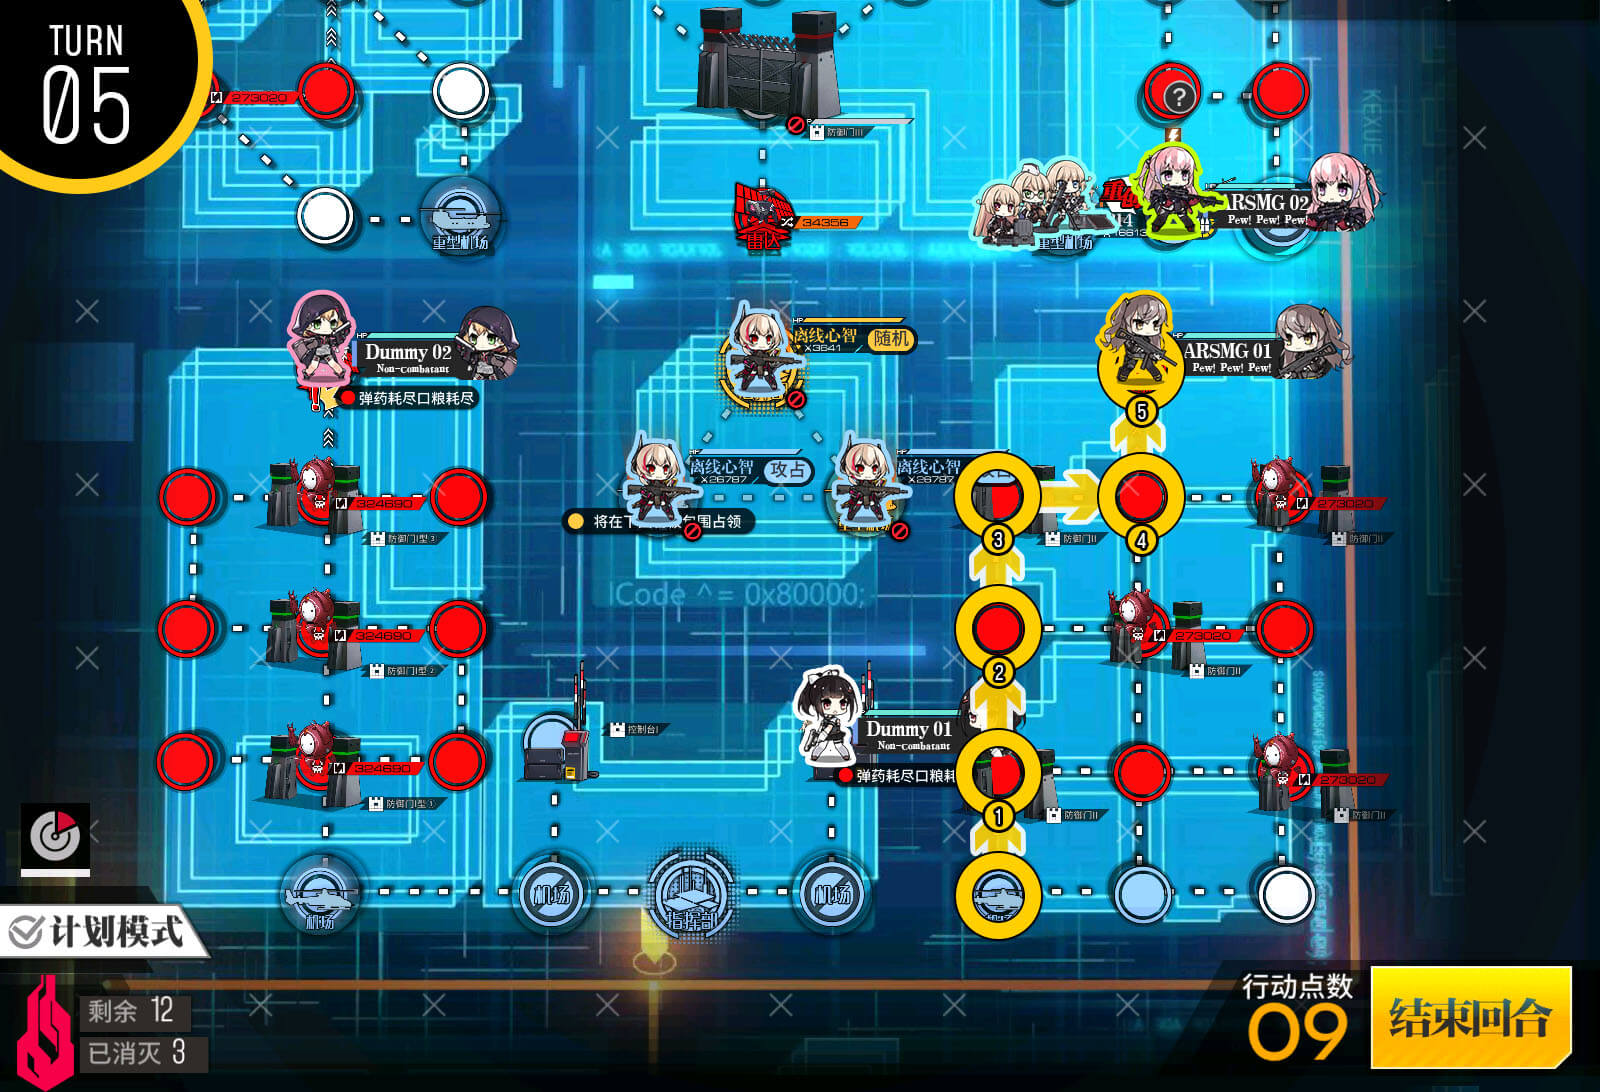
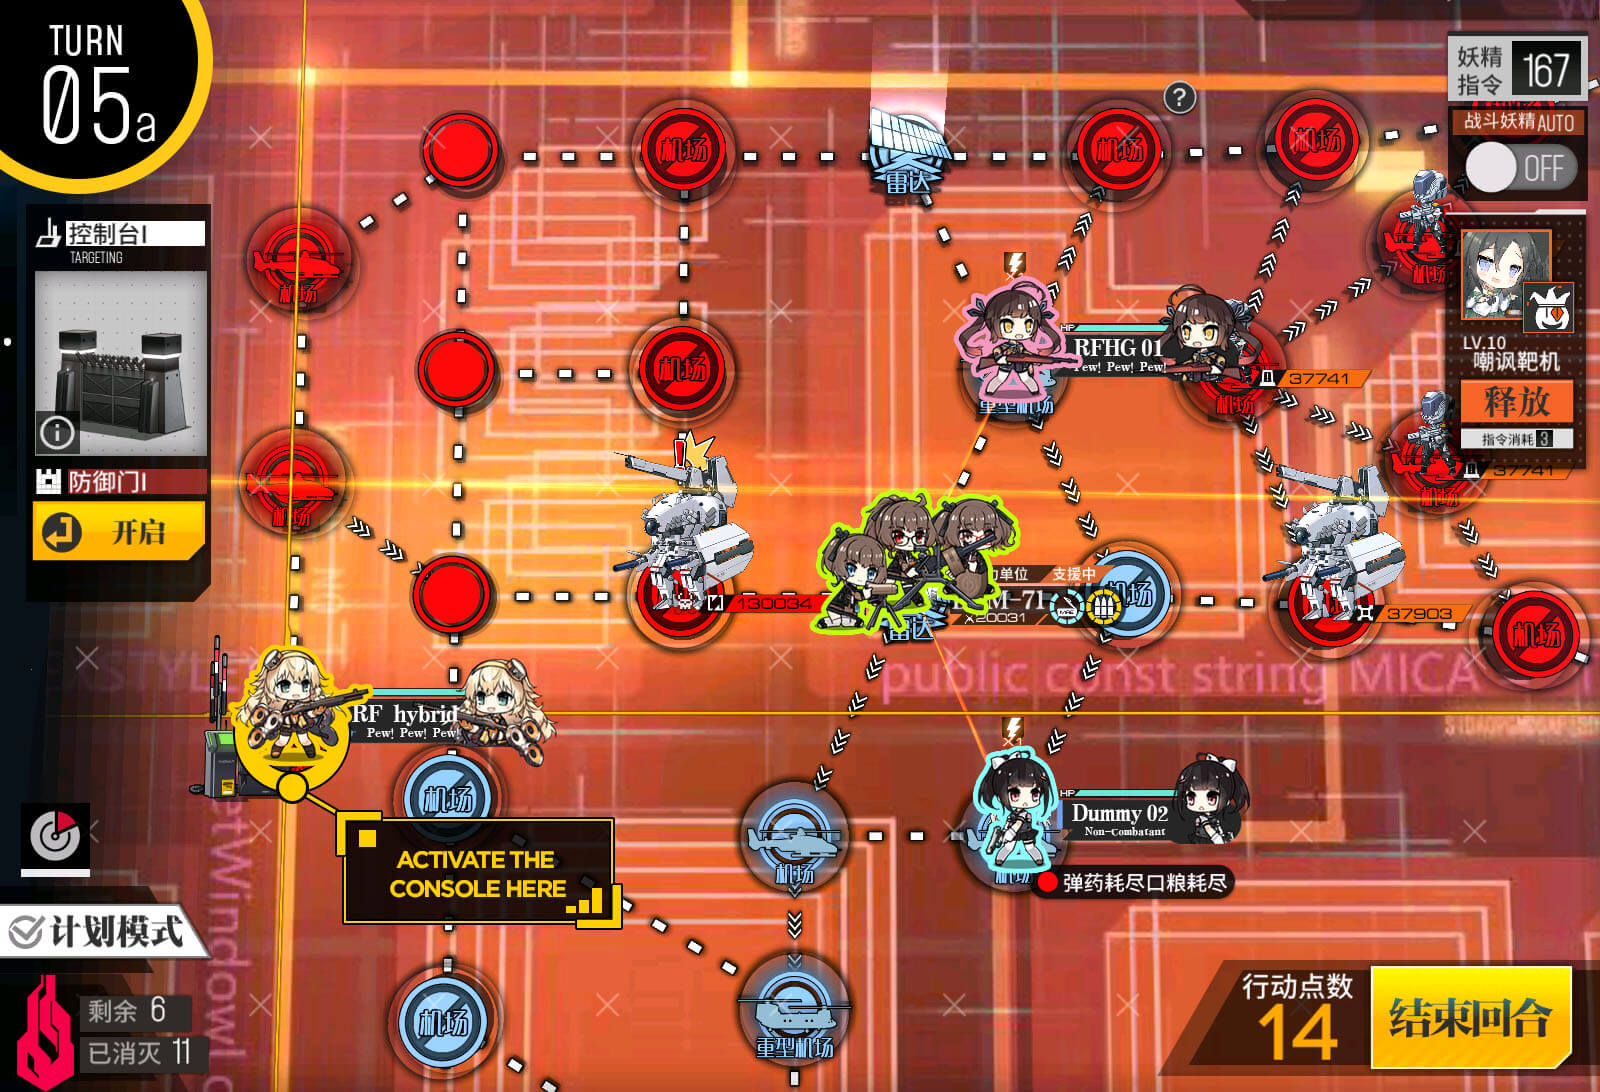
Turn 5
Take the path to take the radar. Make sure that you eliminate the black Golyat in order to meet the kill requirement.
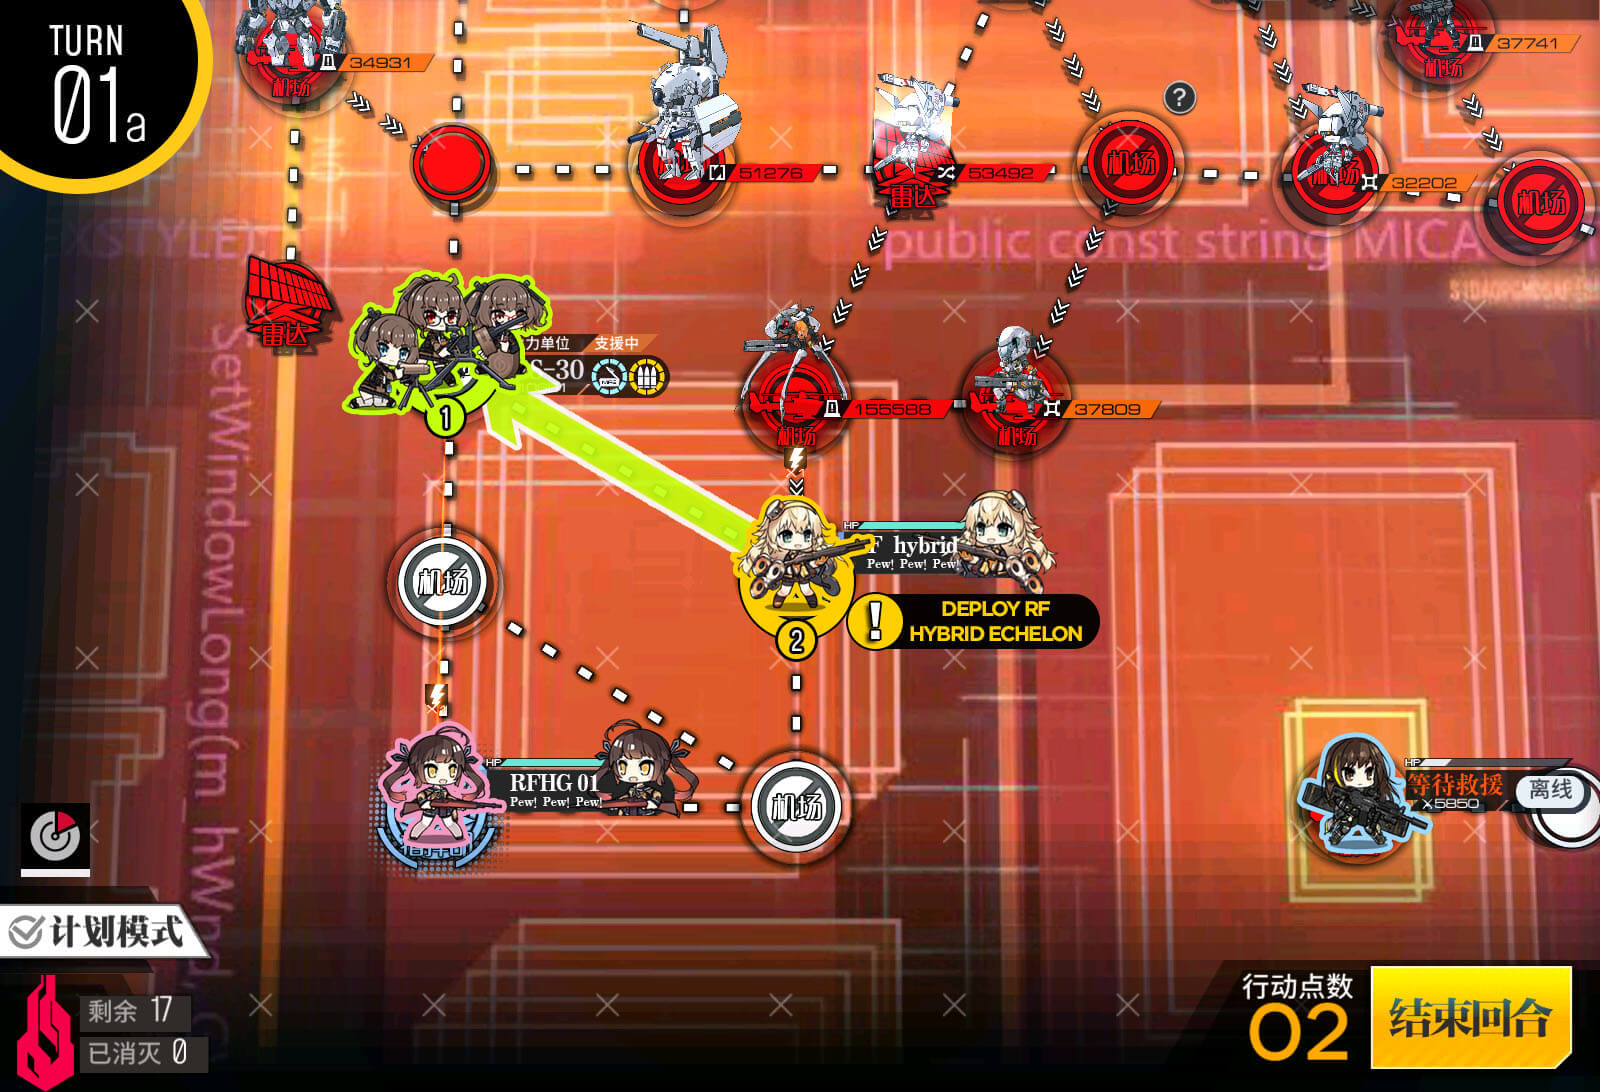
Turn 1 A
Start with a RFHG on the HQ, and a HOC on the heavy helipad. Move the HOC, and then spawn the hybrid team.
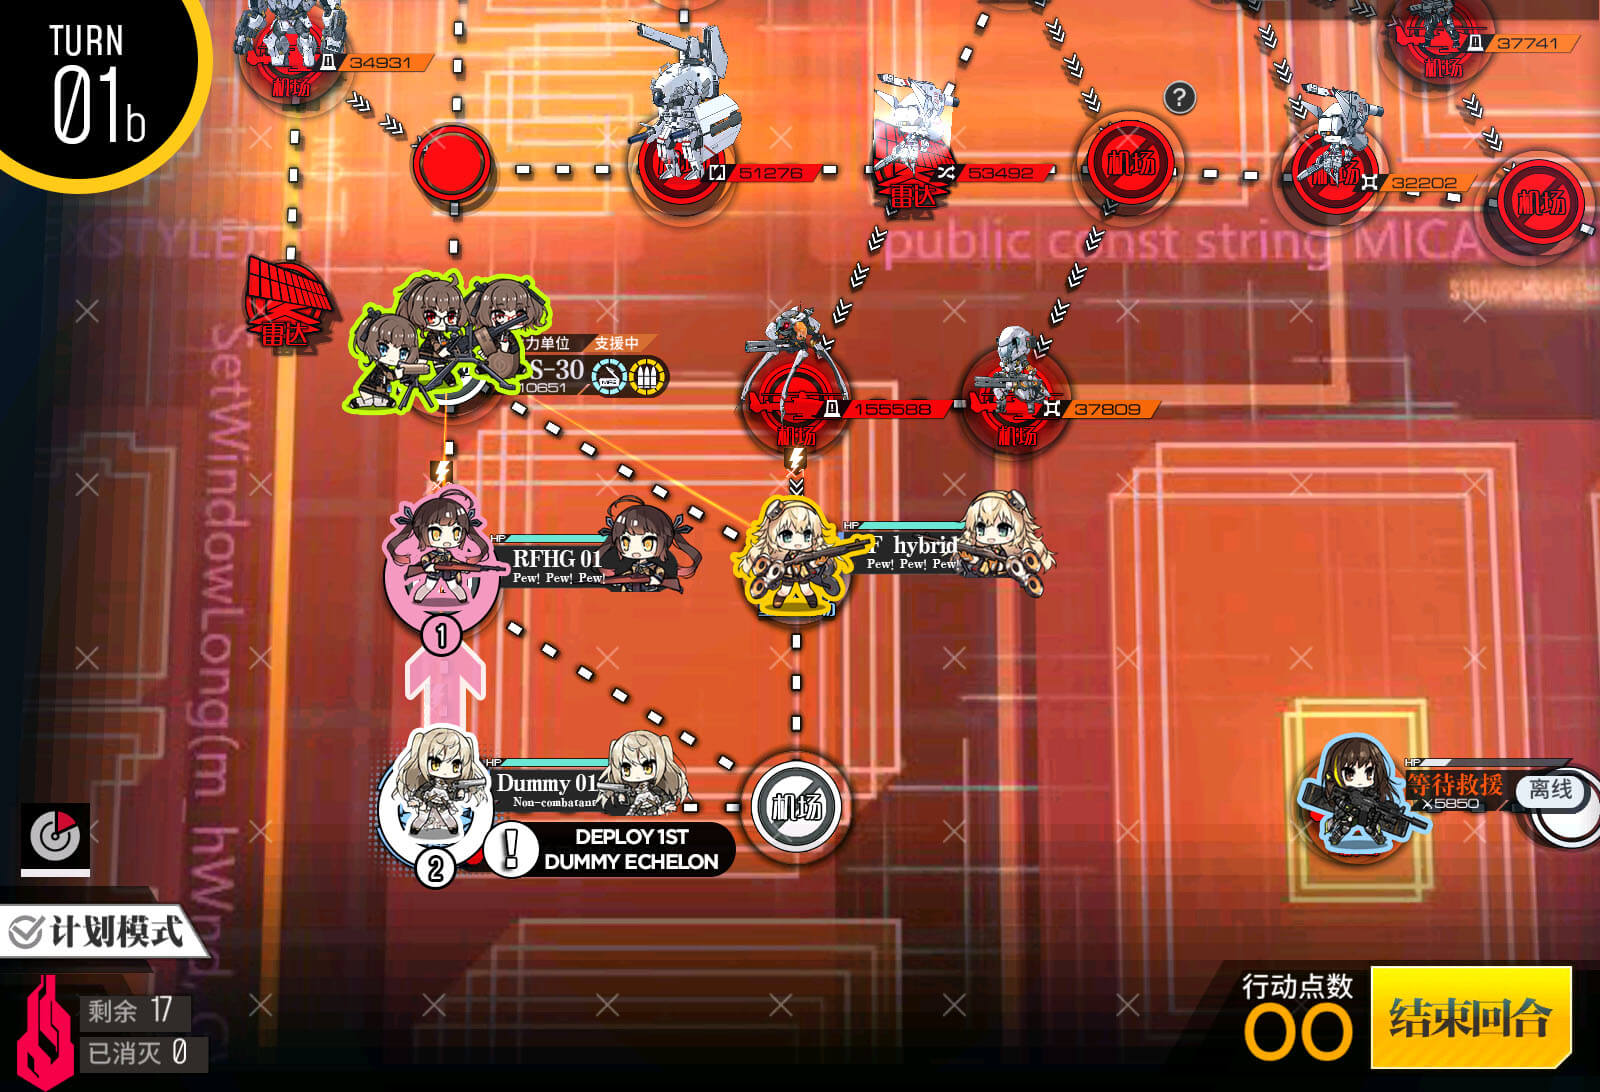
Turn 1 B
Move the RFHG up one node, and then spawn a dummy echelon on the HQ.
Turn 2 A
Swap the RFHG with the HOC, and the move as indicated.
* Your HOC should follow closely behind to support your RFHG if needed! Swap with the dummy and resupply if needed.
Make sure the heavy helipad is clear of any potential enemies so take it out if there is one on top of it.
Turn 2 B
If you haven't already moved your HOC echelon to support your RFHG, you should now move it behind the RFHG as shown.
Swap and resupply the HOC if it is not fully refilled before moving!

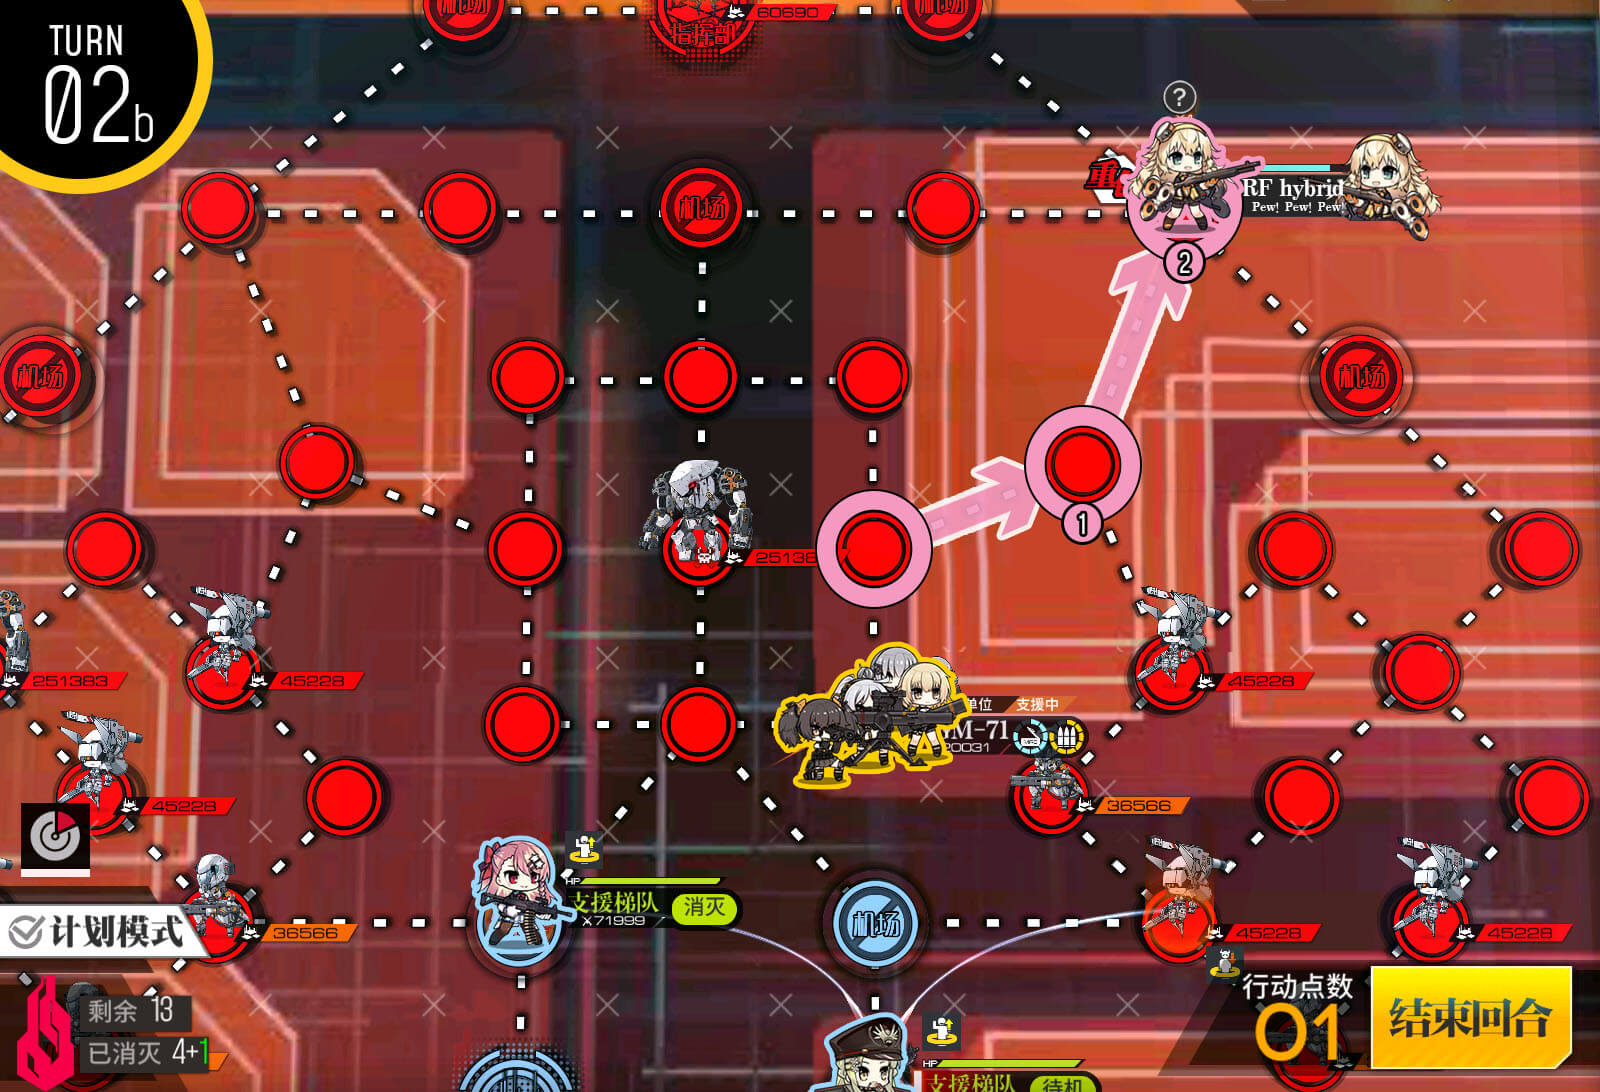
Turn 3
The hybrid team will move as indicated to the location. HOC will then move on to the heavy helipad.
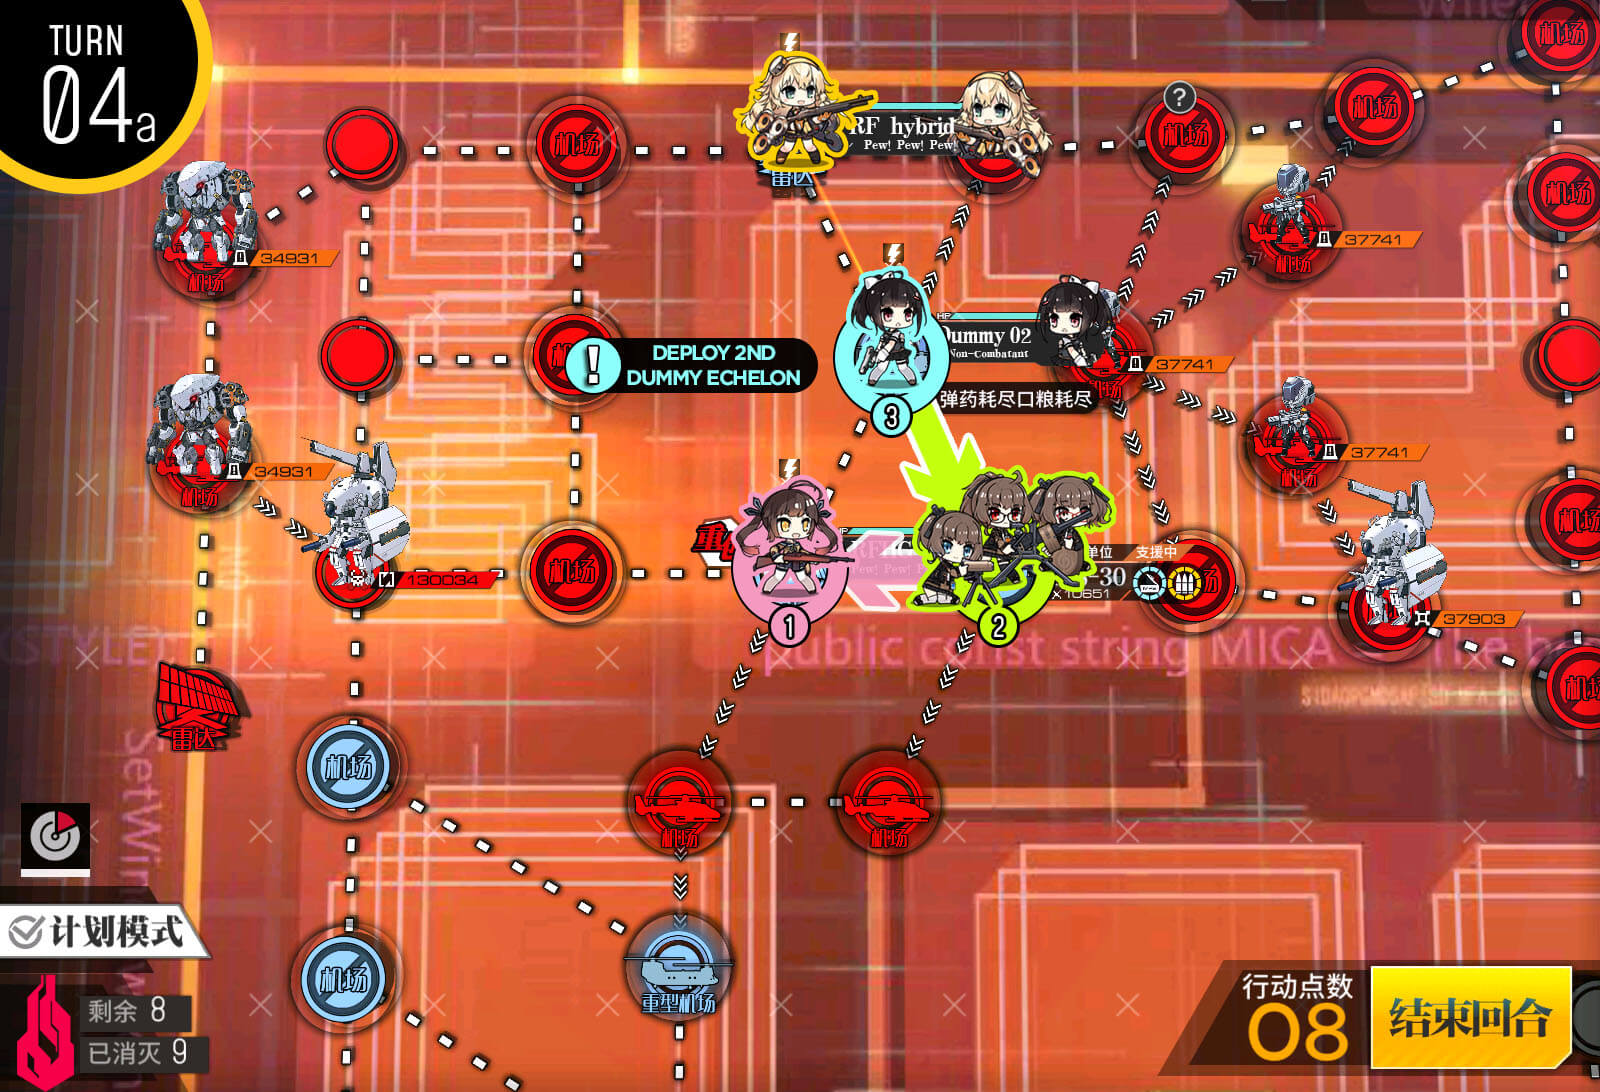
Turn 4 A
Move the RFHG to the left, move the HOC down to where the RFHG was, and then spawn a dummy echelon on the heavy helipad.
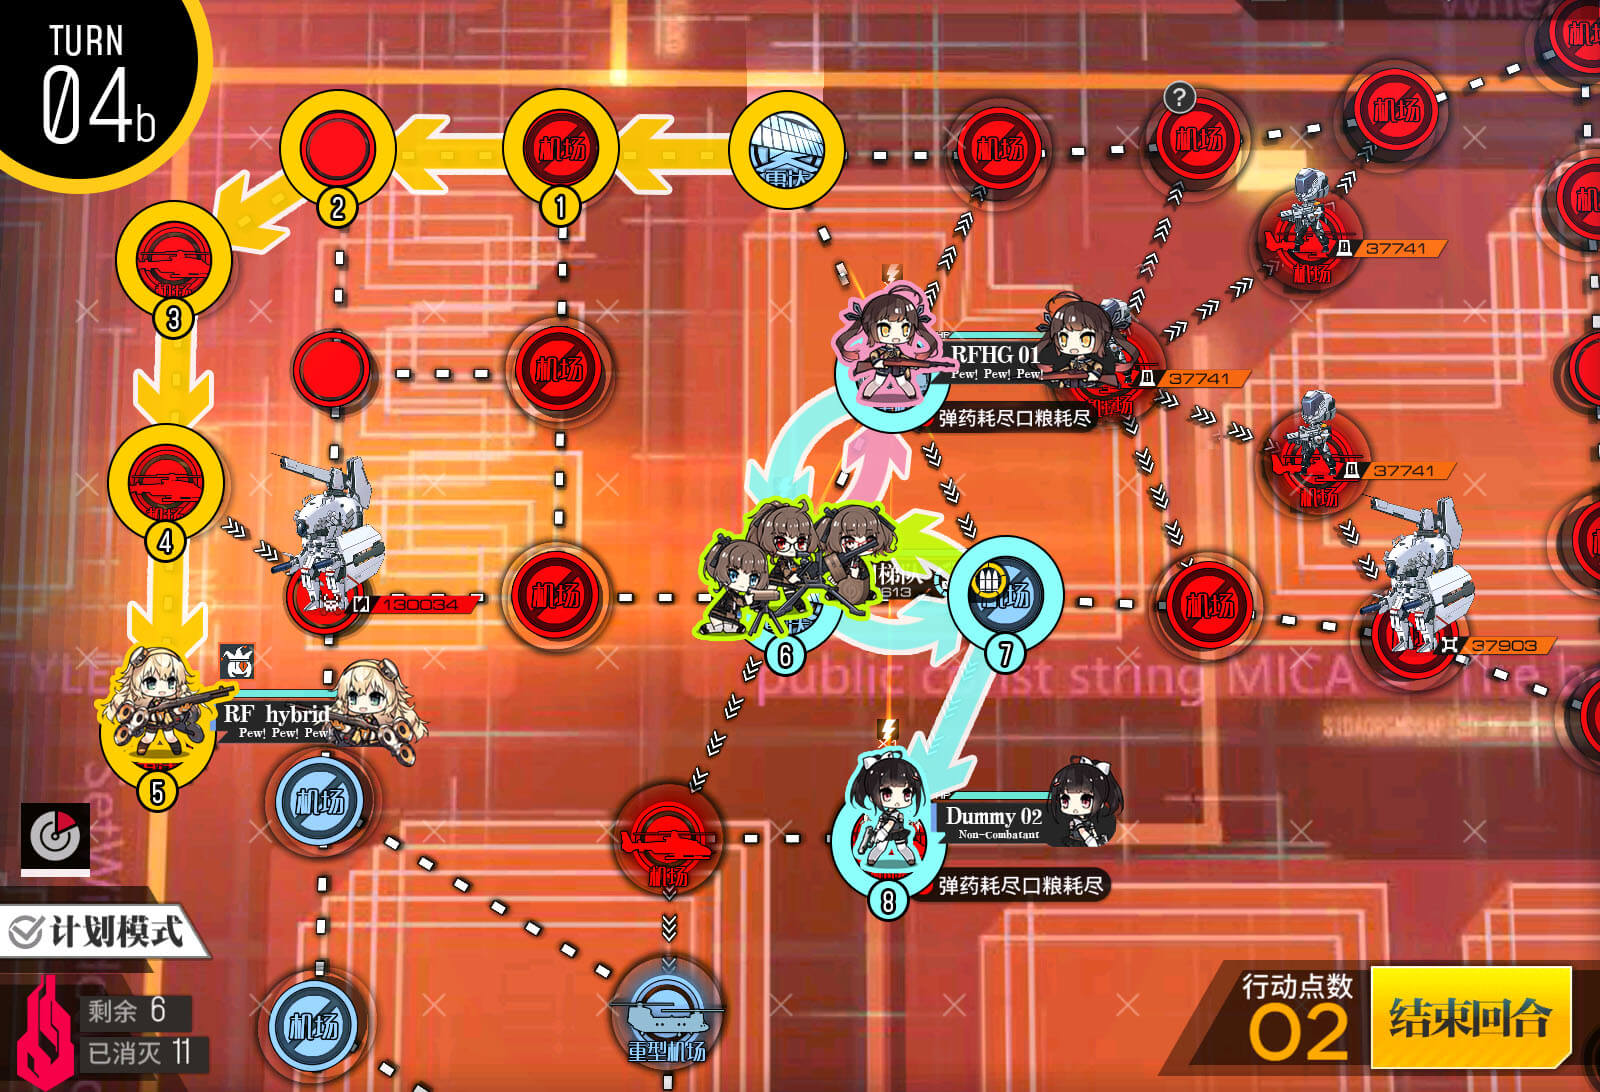
Turn 4 B
Move the hybrid team to the radar on the left. Swap chain the dummy echelon to the indicated helipad. NOTE: Some players may find it easier to swap first so that the second Gladiator fight has HOC support (for 3-range HOCs).
Turn 5 A
A terminal to control the gate should appear on the turn. Make sure to activate it.

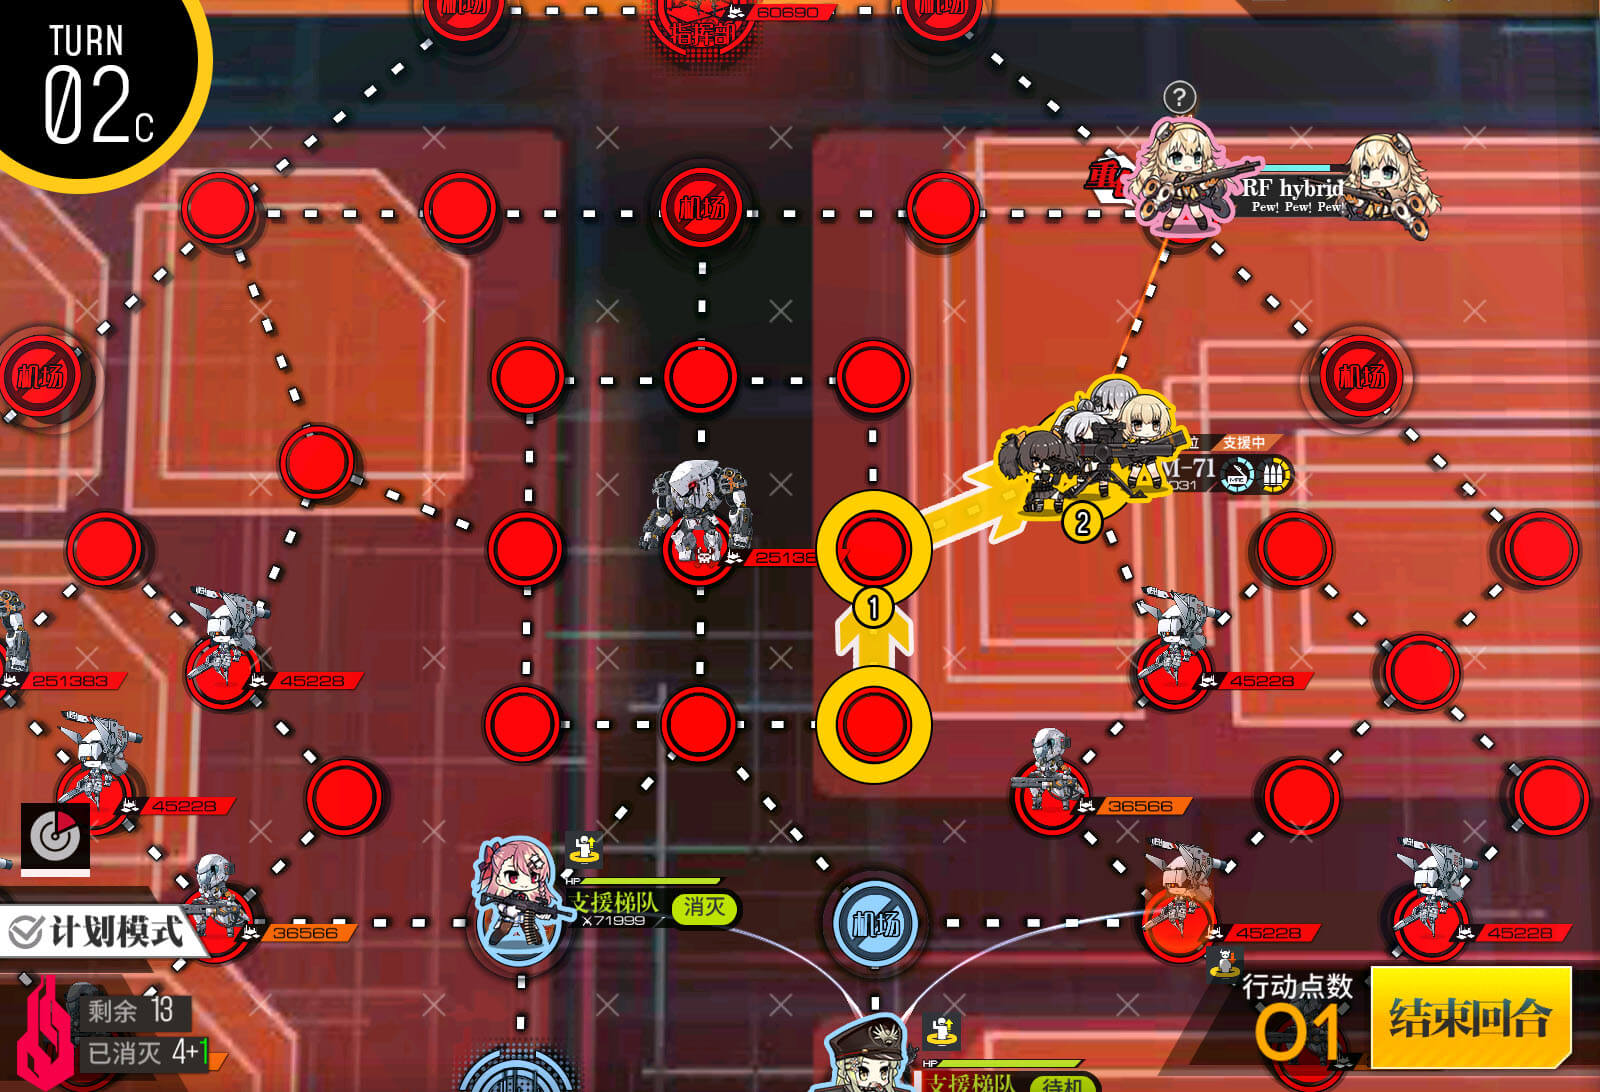
Turn 5 B
Move the hybrid team back the way it came.

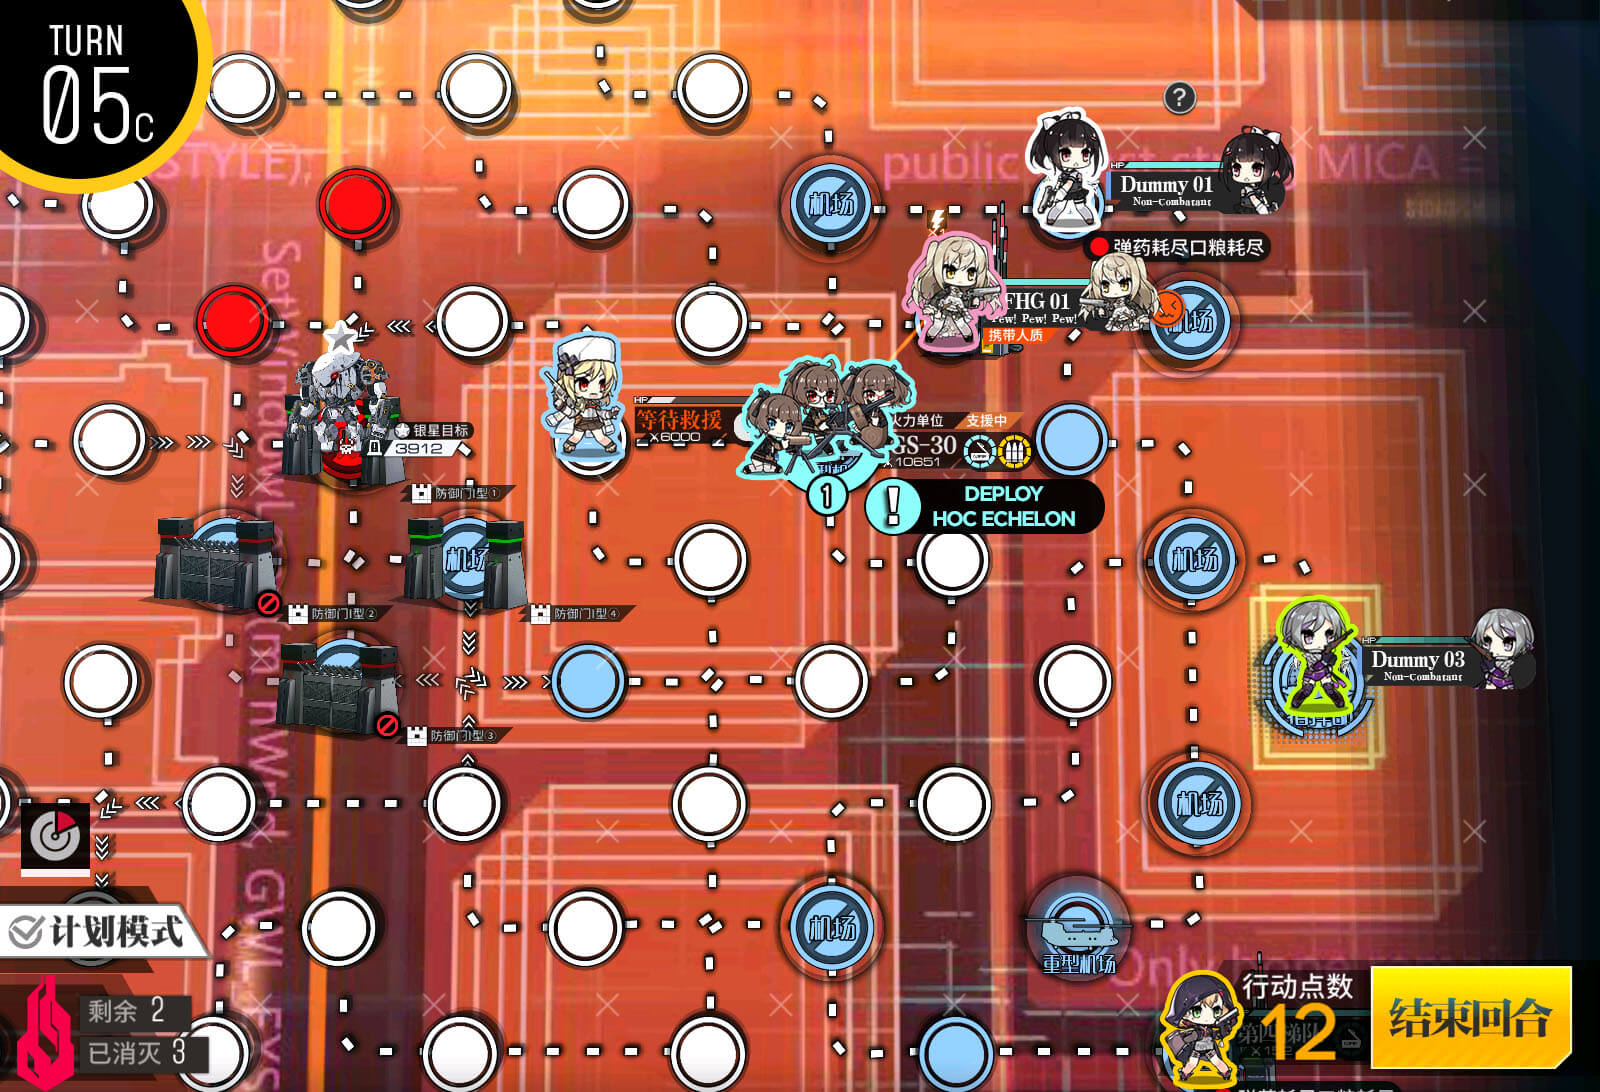
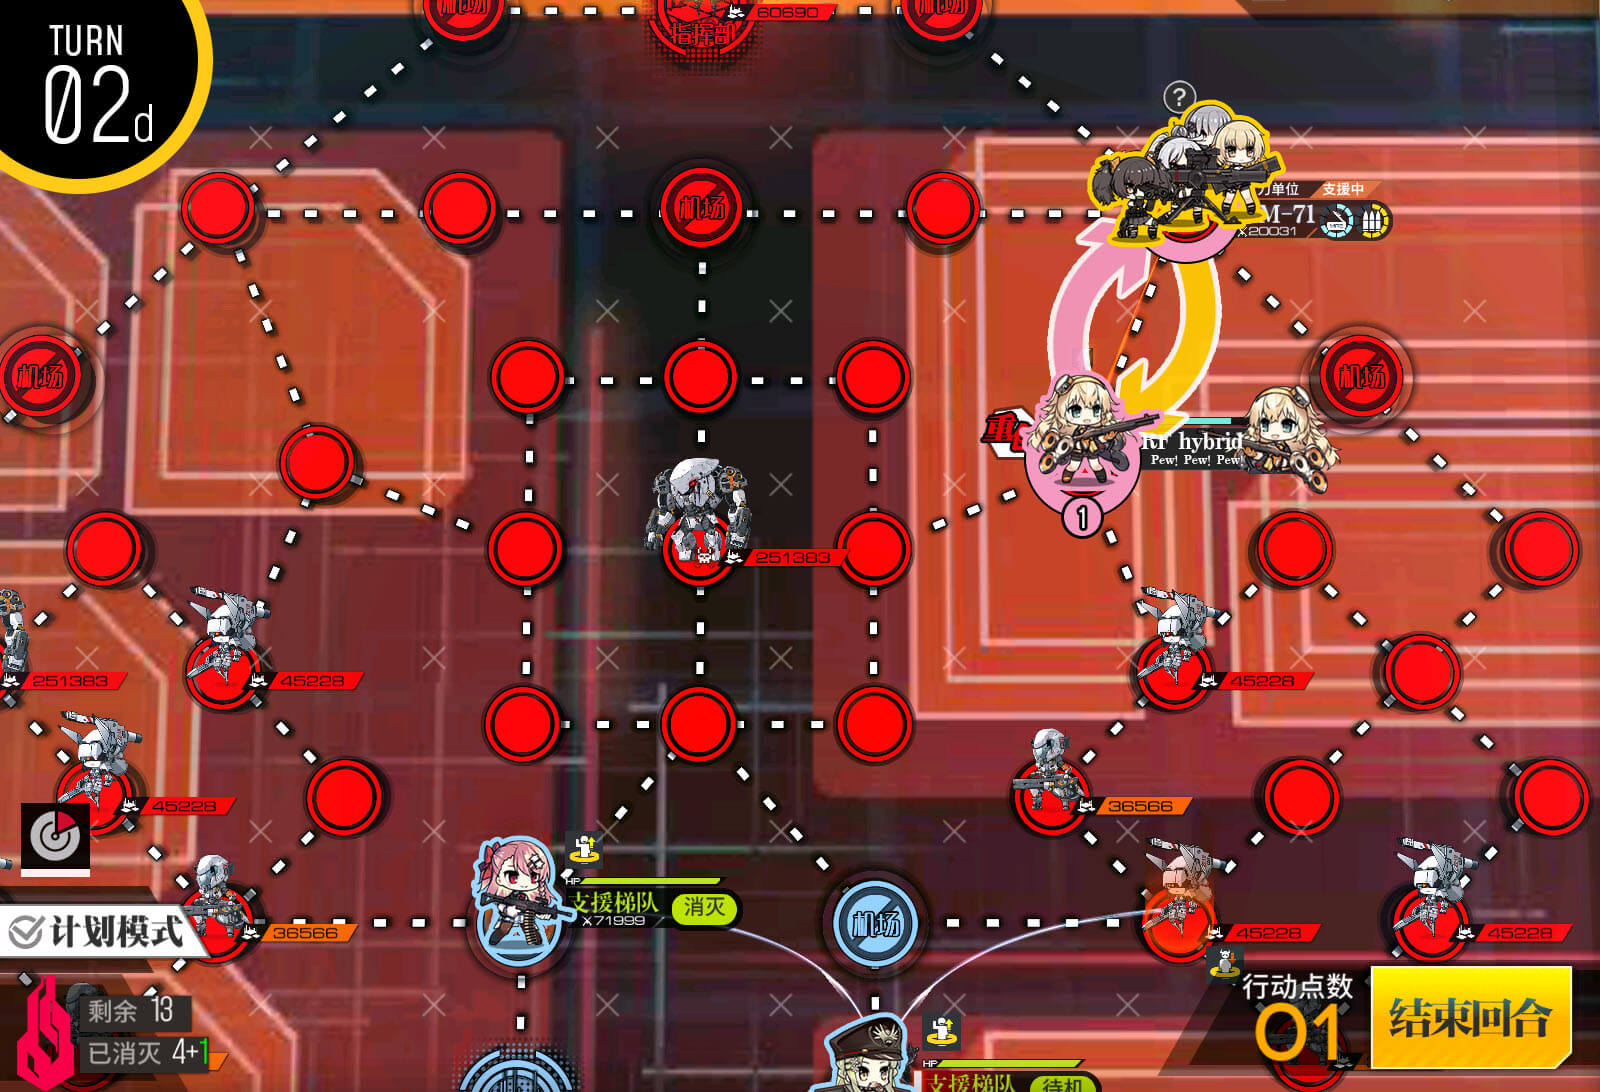
Turn 5 C
Swap chain it downwards.
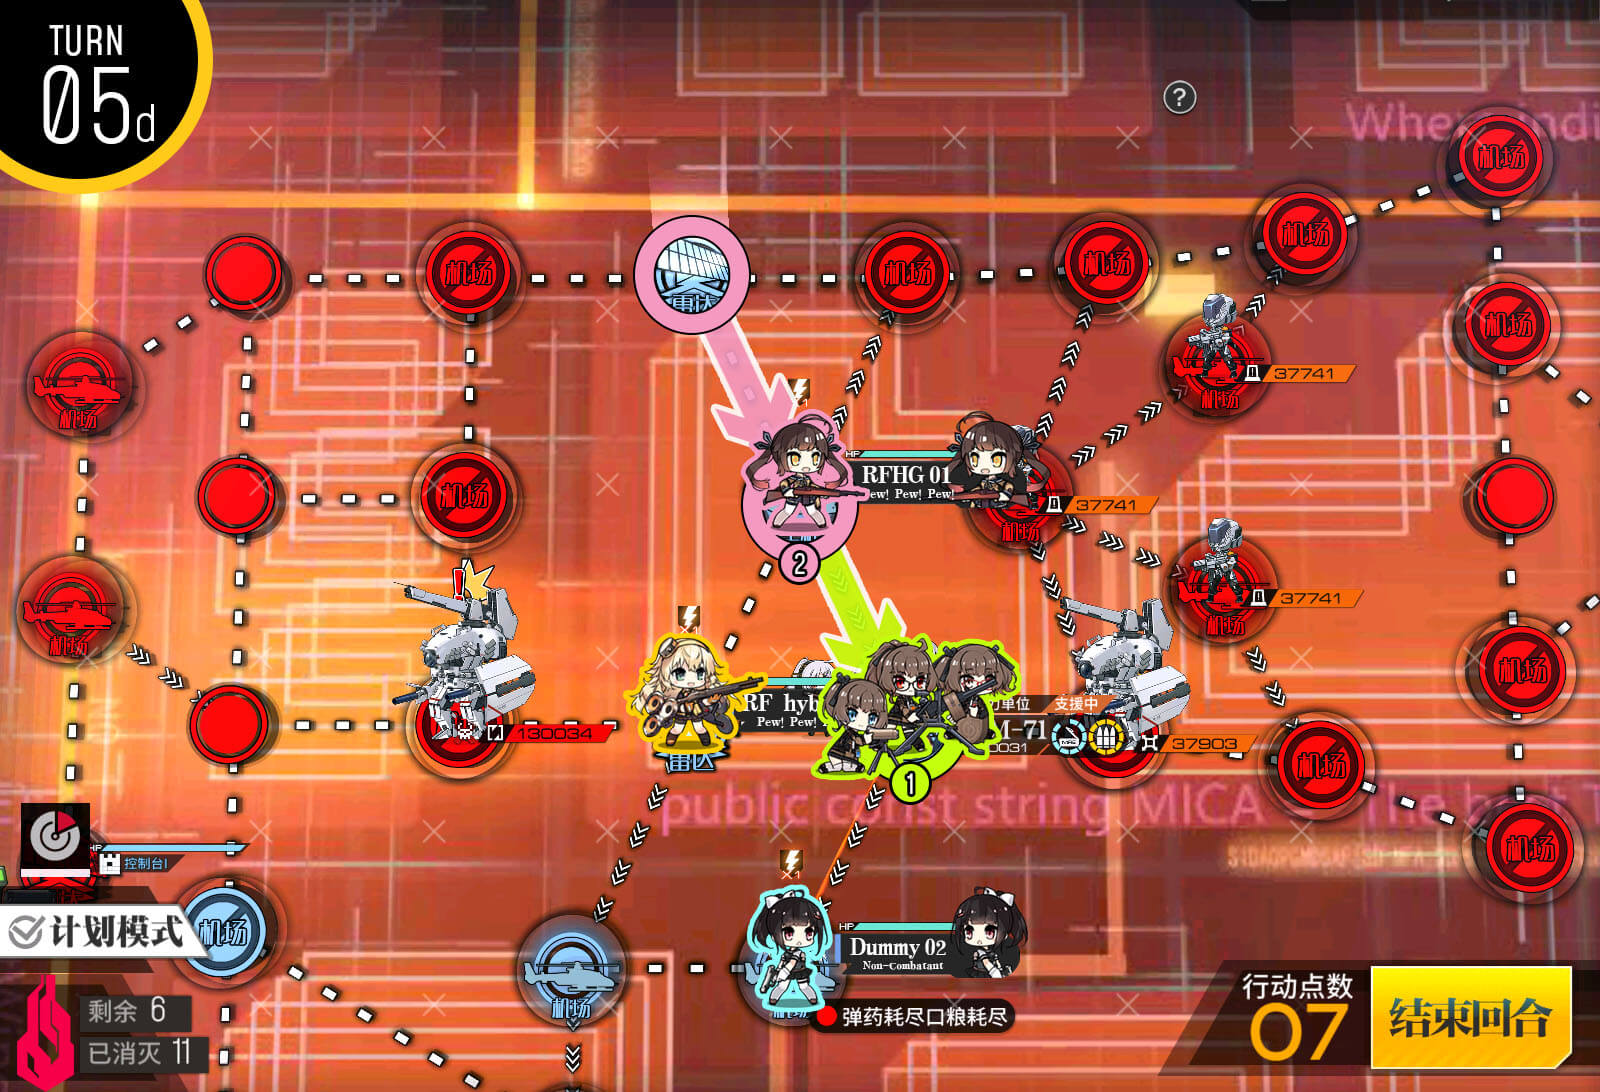
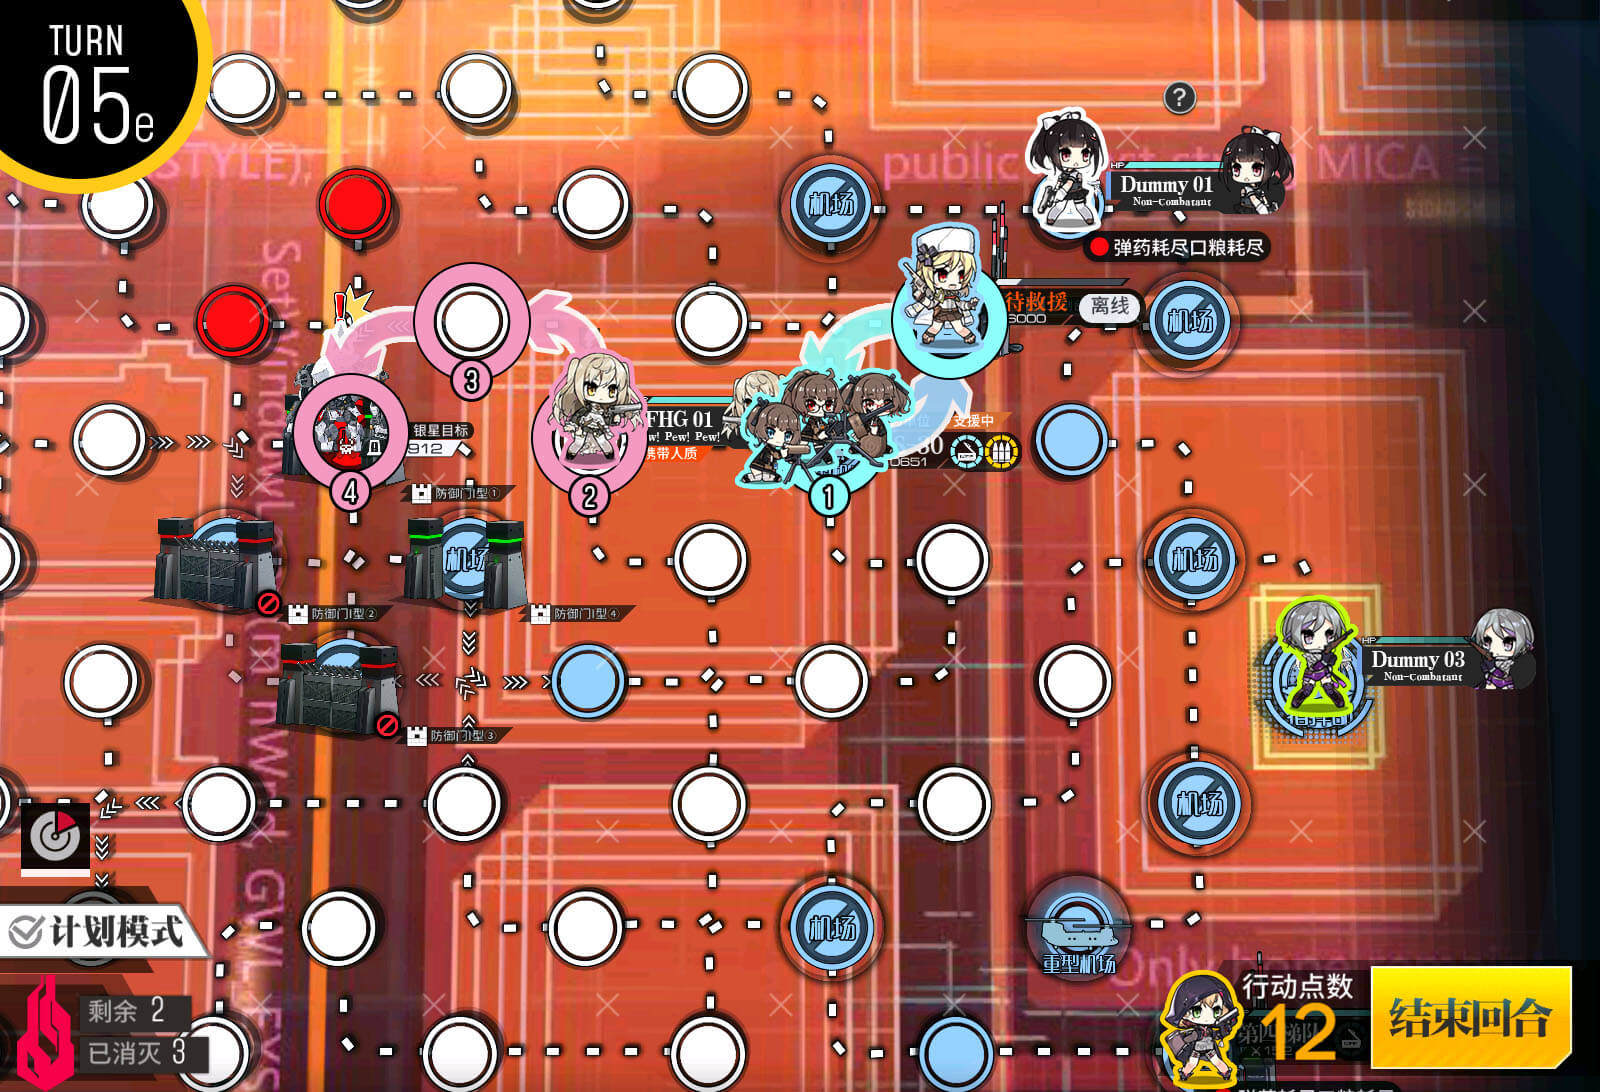
Turn 5 D
Move the HOC down, and then move the RFHG down.
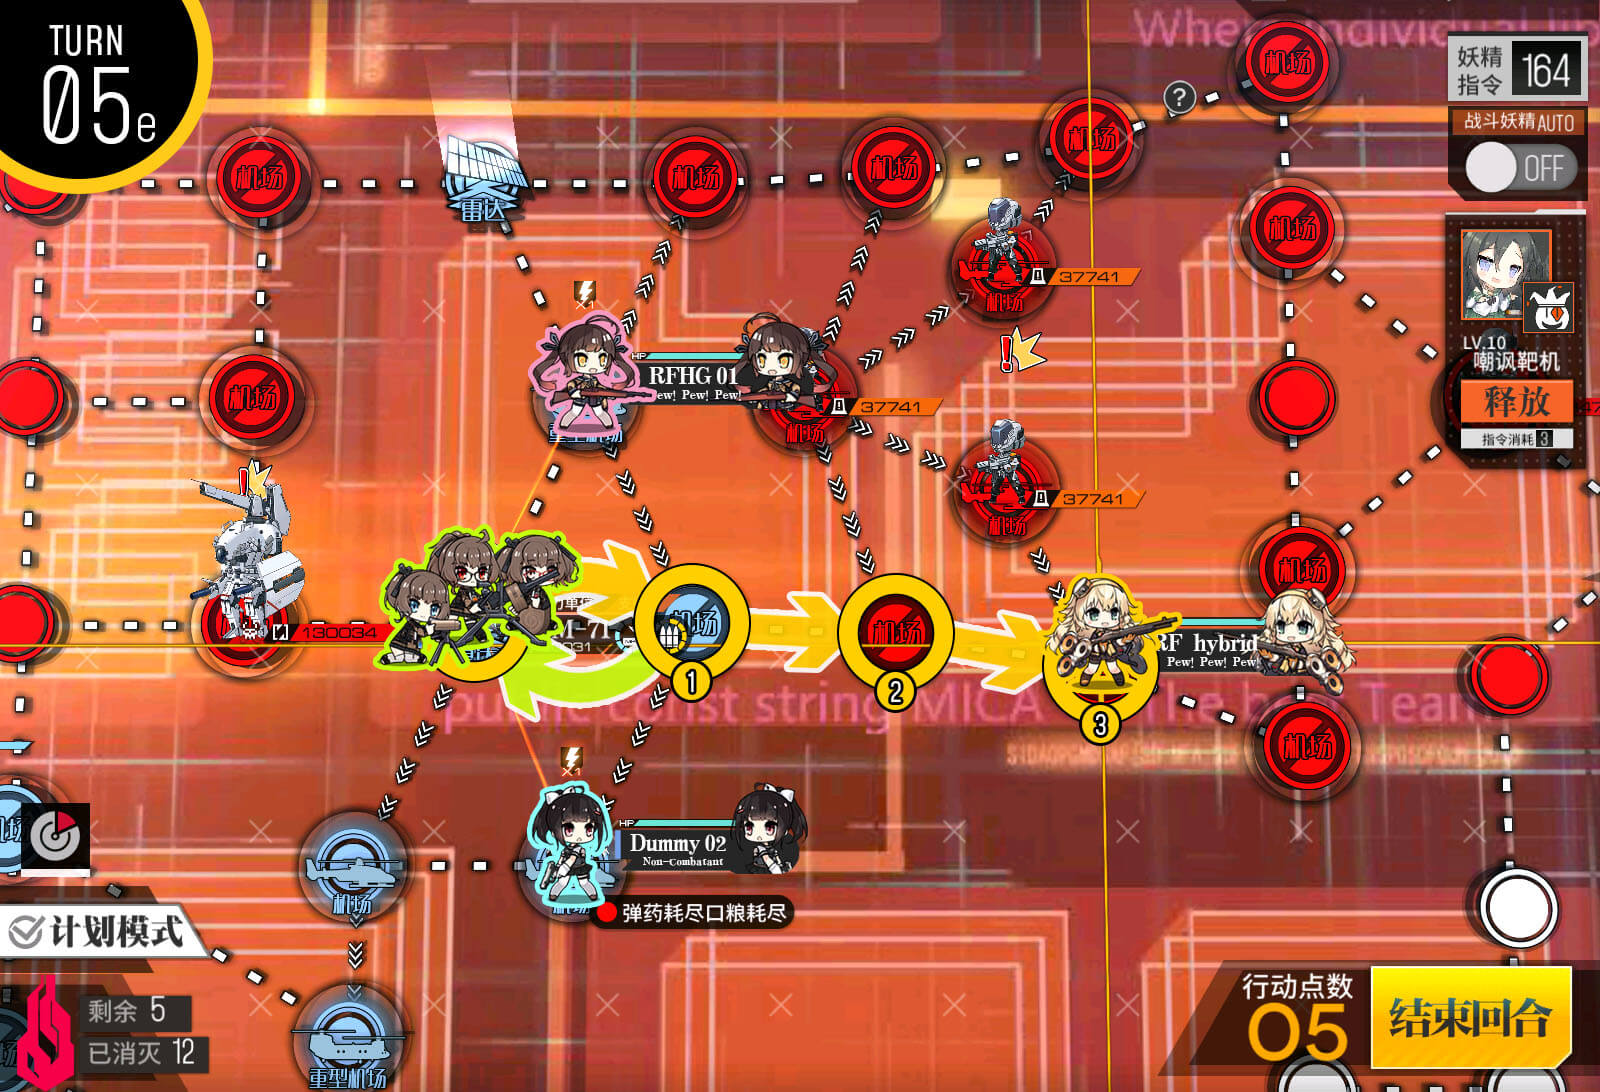
Turn 5 E
Move as indicated.
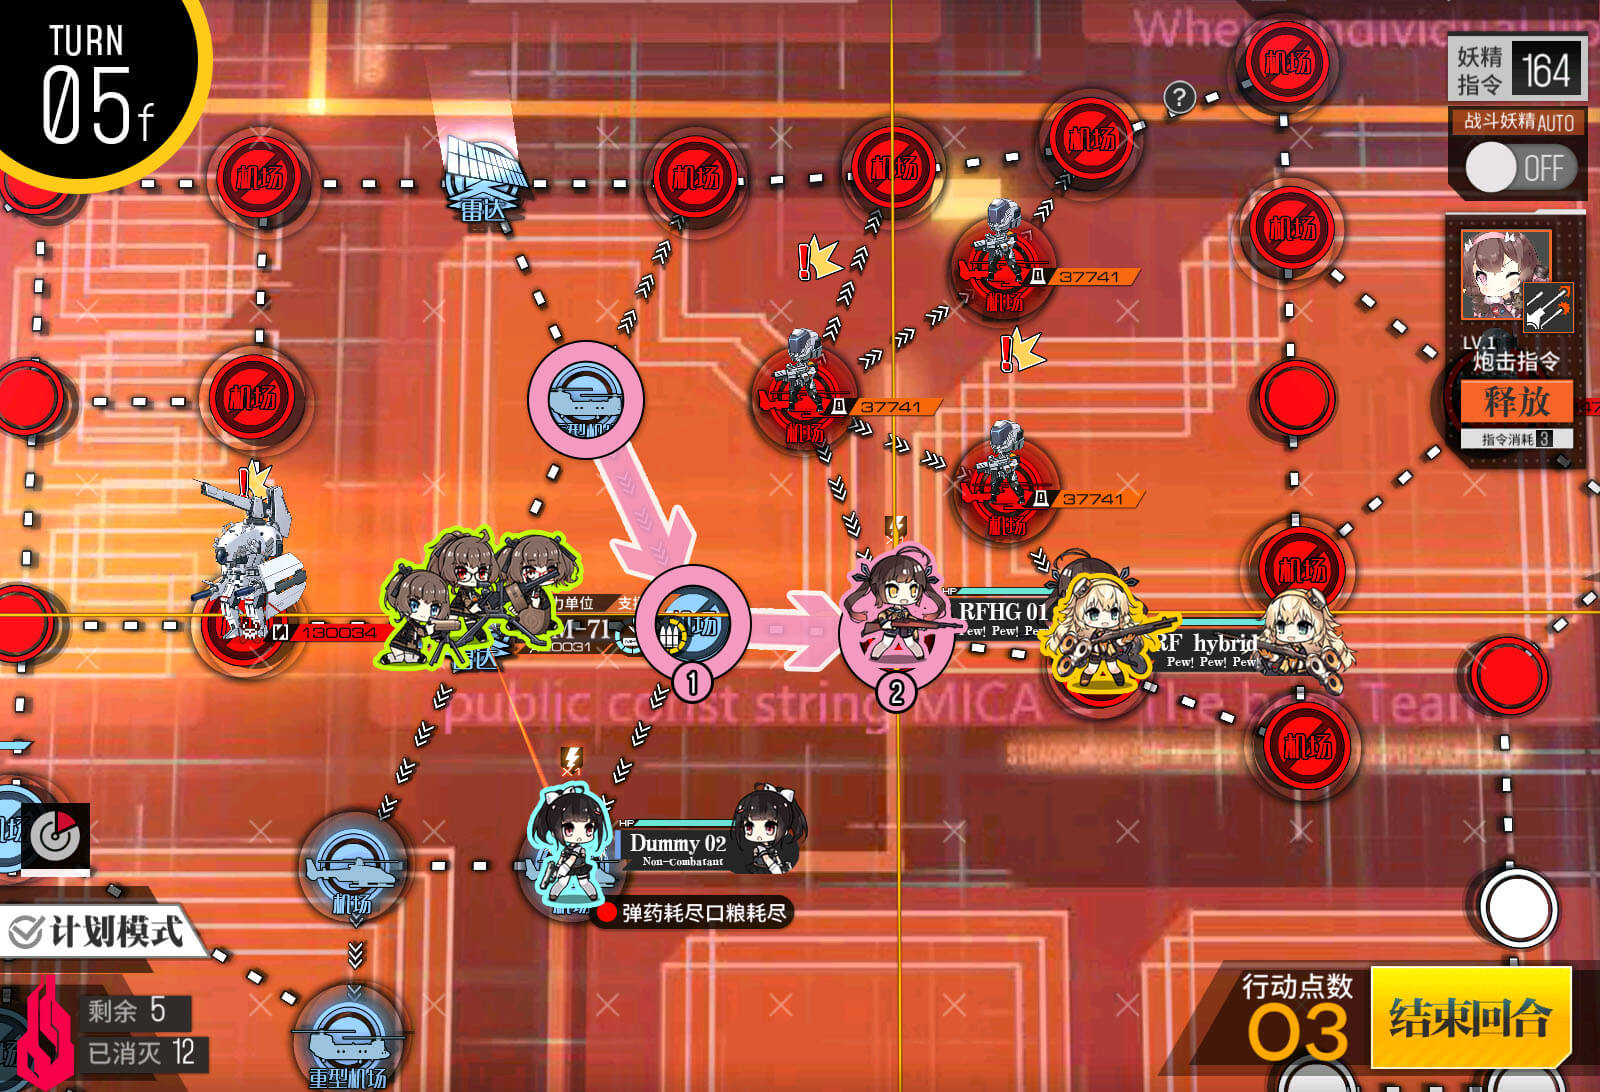
Turn 5 F
Move RFHG as indicated.
Turn 5 G
Move the HOC so that it doesn't get daga kotowaru'd by the Doppelsoldner on the next turn!
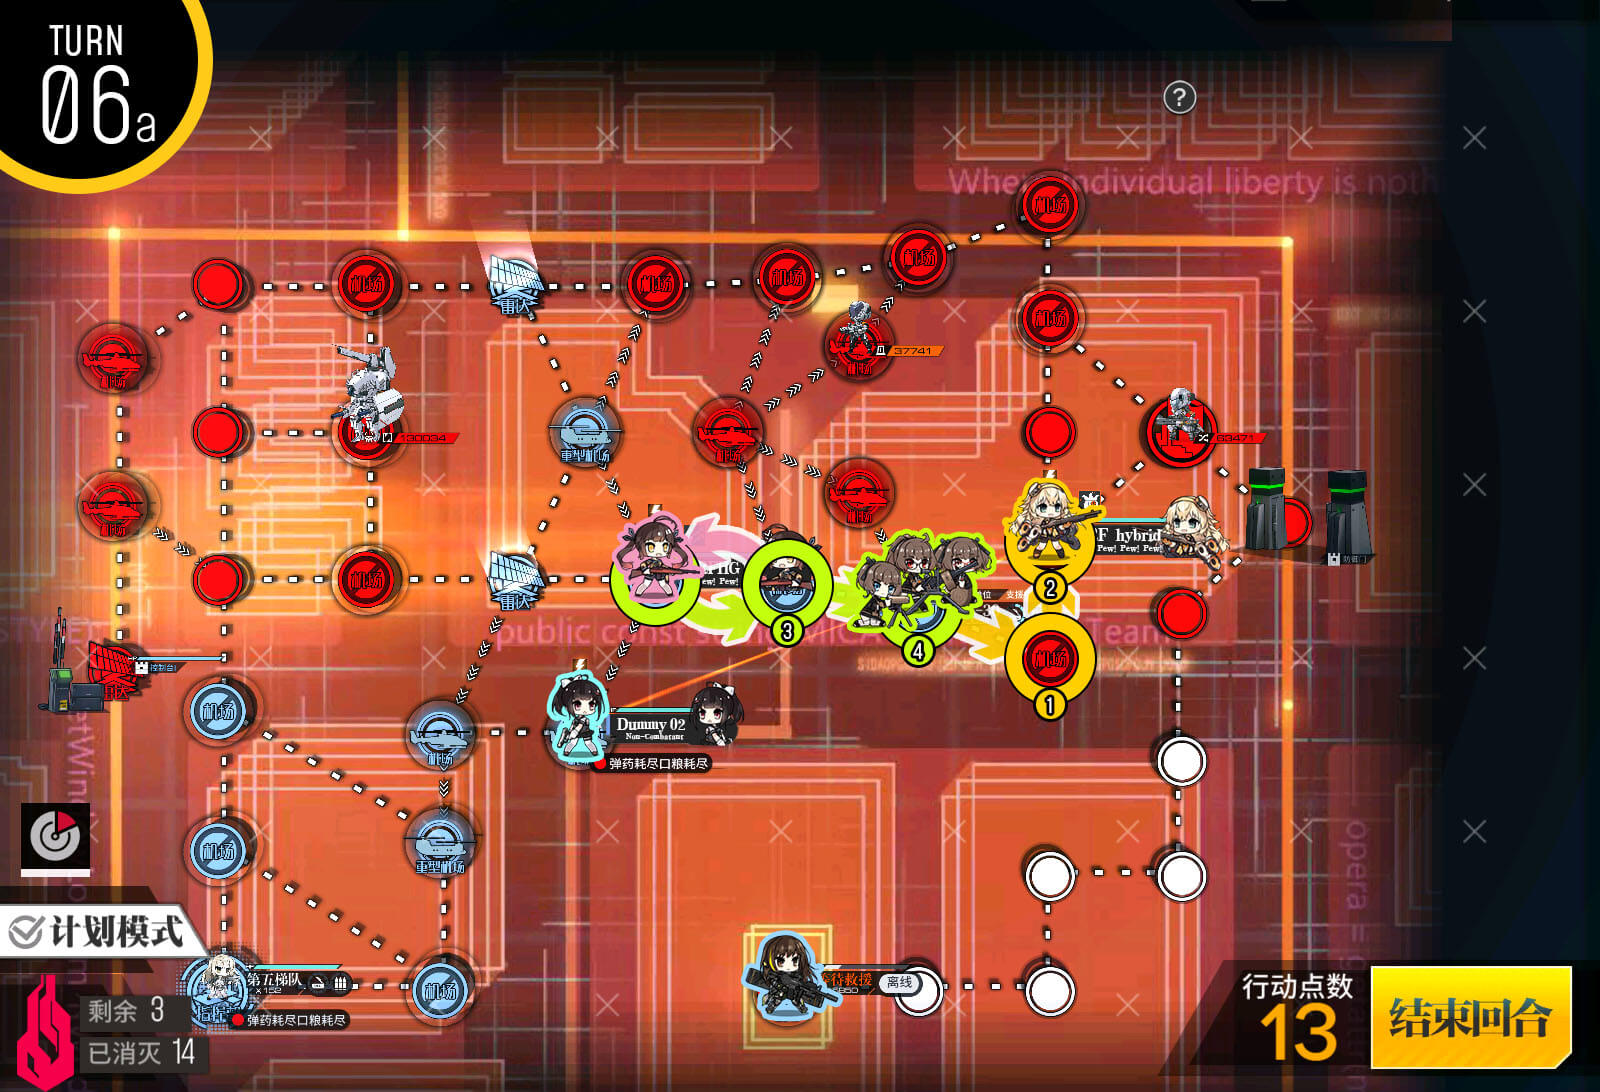
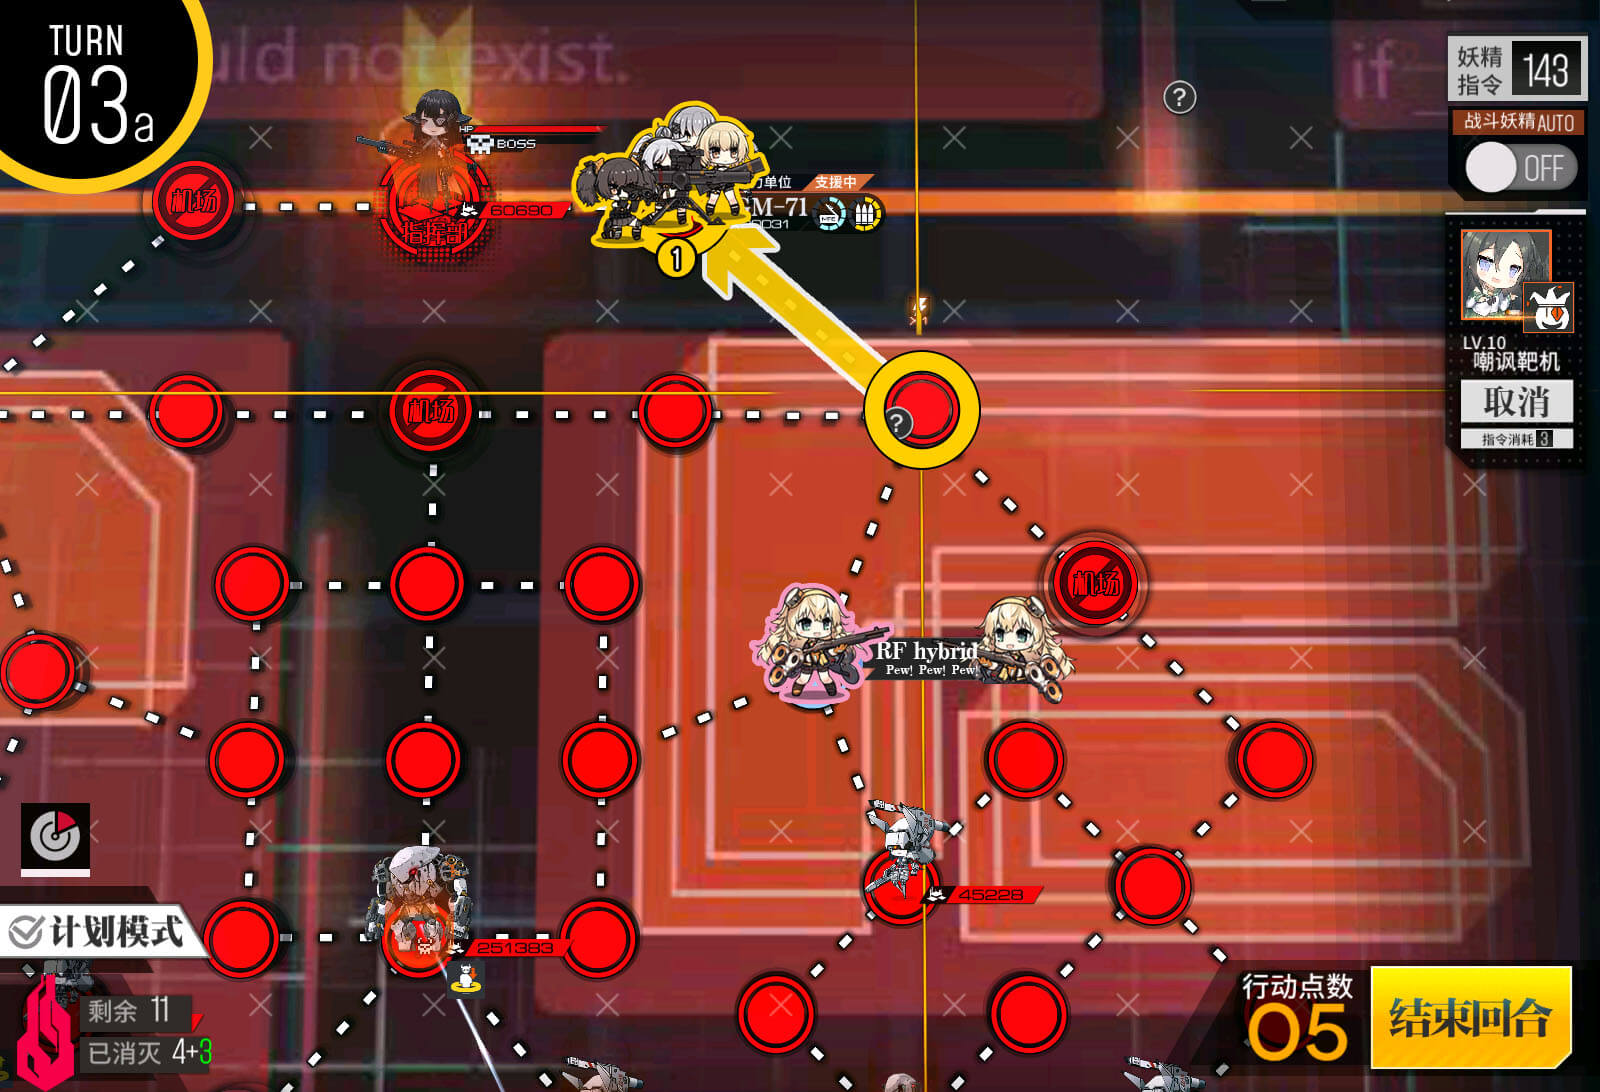
Turn 6 A
Move as indicated, making sure your hybrid team stops before the Gunner unit. Make sure your HOC is supporting this fight.
NOTE: You can also complete the Silver medal objective in this map on this turn. Simply delay Turn 6B and instead end turn with your combat squad on the Supply Line Flag, with the HOC behind it. This allows you to establish the Supply Line.
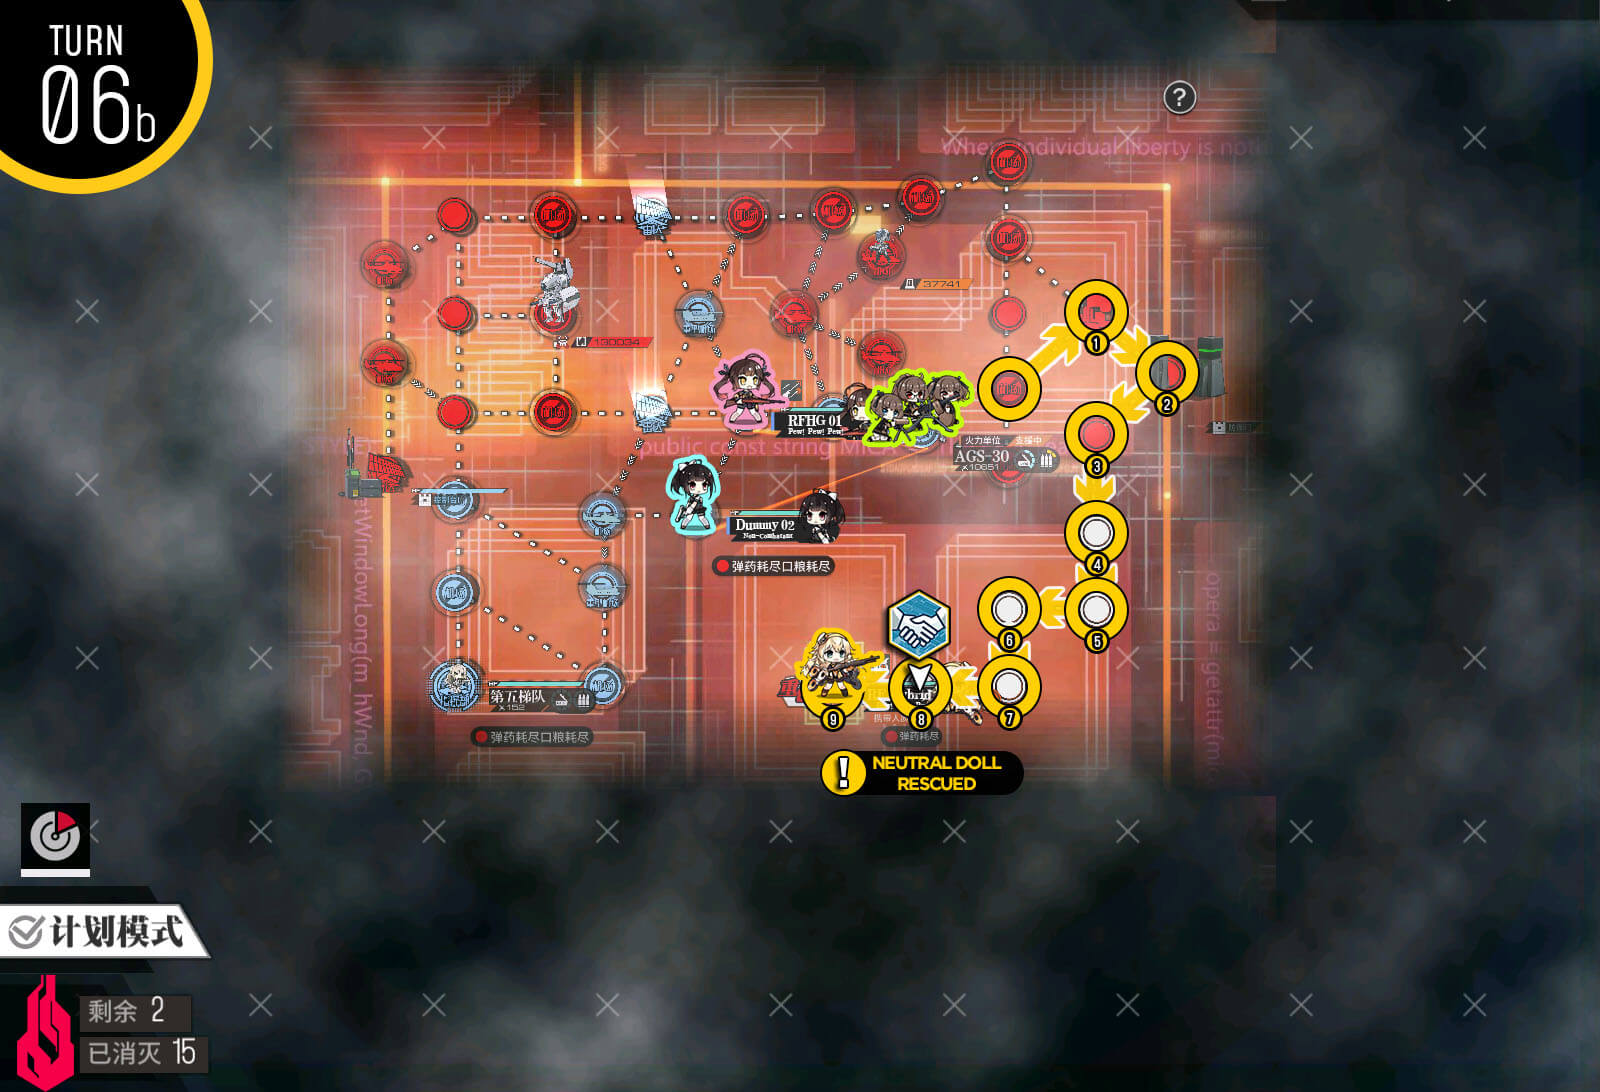
Turn 6 B
Go the long path to rescue the hostage and end on the helipad.
NOTE: This would be Turn 7 if you decided to grab the Silver medal at the same time.
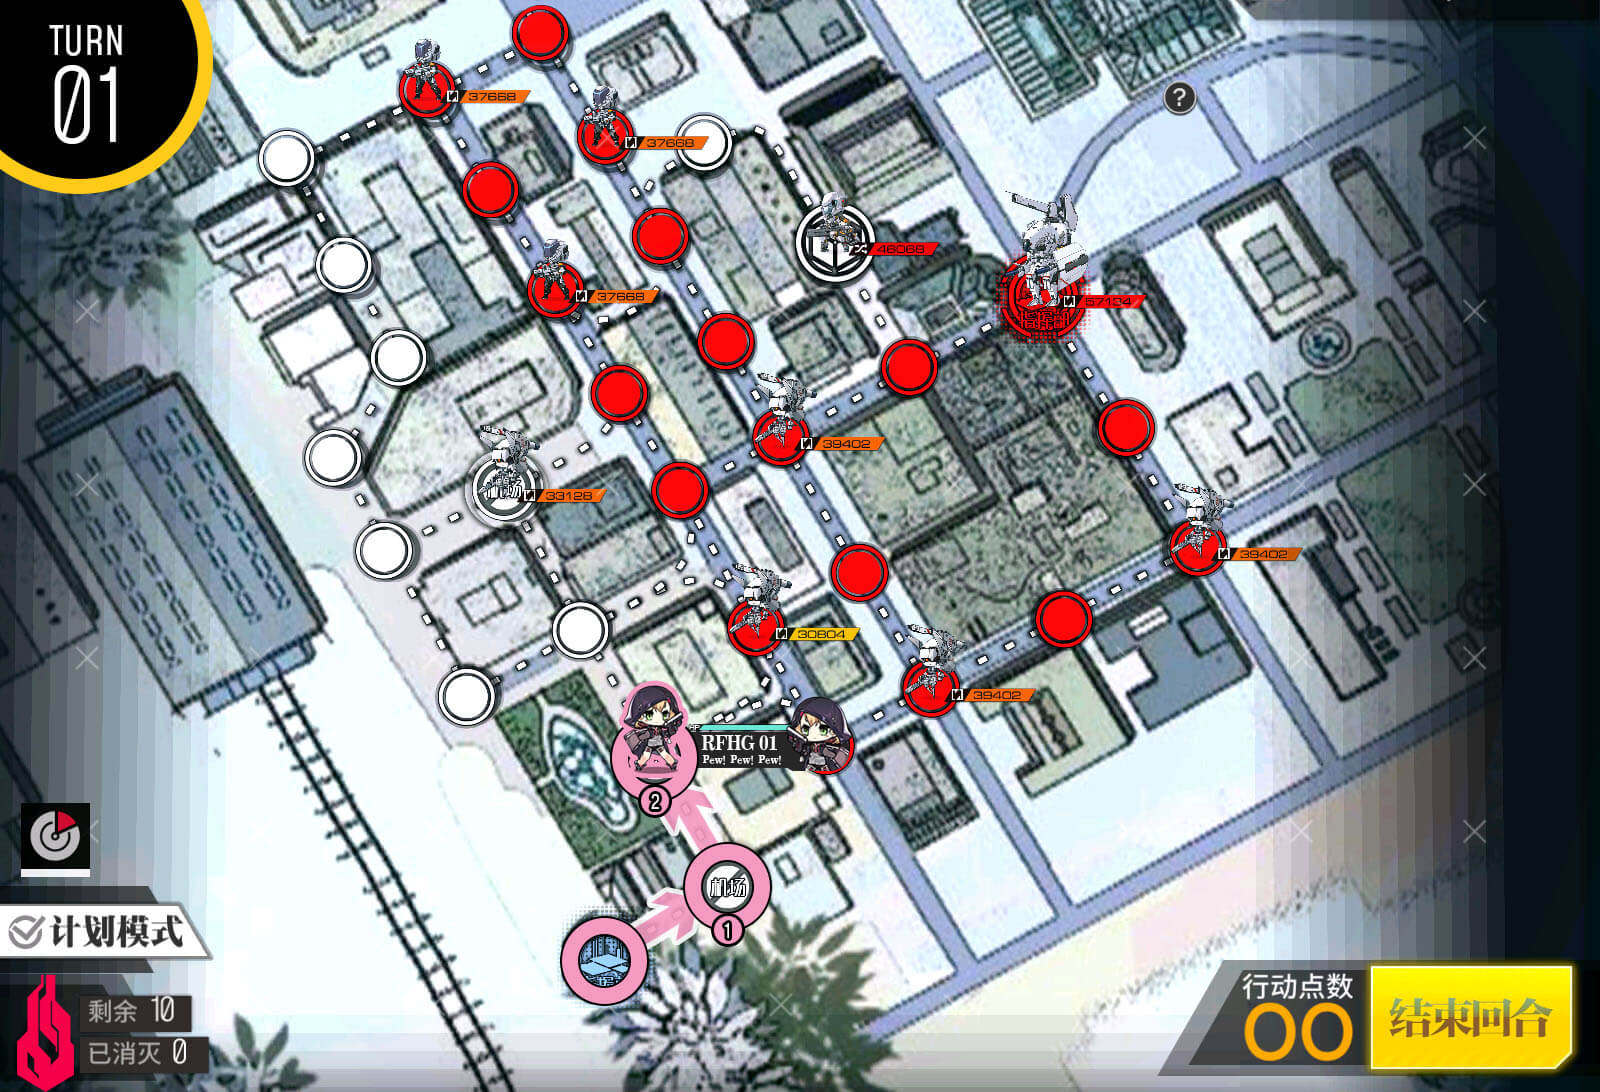
Turn 1 A
Spawn an ARSMG team and move as shown. Spawn a dummy team afterwards.
Turn 1 B
Combat team eliminates the enemy by moving down.
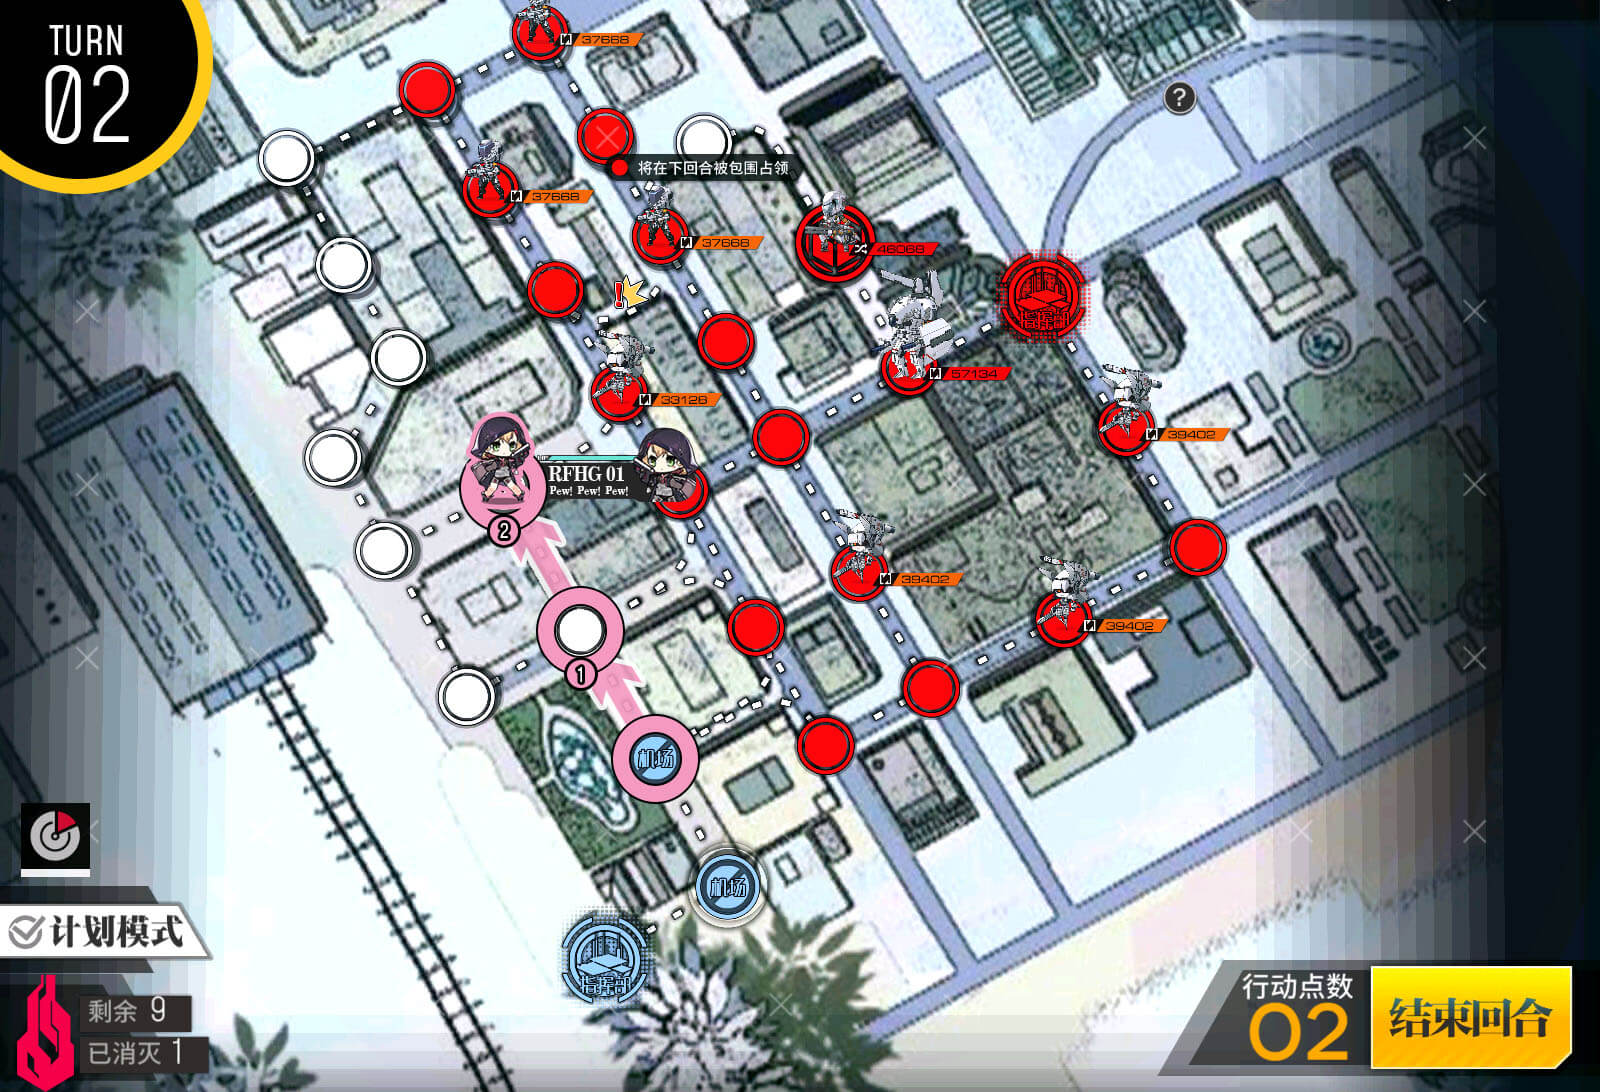
Turn 1 C
Dummy team then moves as shown. Spawn another dummy team on the HQ.
Turn 1 D
Move the second dummy team up. End turn.
Turn 2 A
Dummy team moves as shown.
Turn 2 B
Dummy team moves as shown.

Turn 2 C
Combat team moves as indicated.
Turn 3 A
Dummy team 2 will move to the terminal and then activate it to open the indicated gates.
Turn 3 B
Combat team will move as indicated to rescue hostage.
Turn 3 C
The team will then move likewise to the end position.
Turn 4
Do not do anything this turn; you want the Gladiator to run into the gate.
Turn 5 A
You may try to weaken the Gladiator by smashing its face repeatedly with the gate.

Turn 5 B
Move the combat team to the terminal.
Turn 5 C
Spawn a HOC here. AGS-30 is recommended due to range.

Turn 5 D
Swap echelons as shown.
Turn 5 E
Swap the HOC to be in range of the Gladiator node. Move the combat team to engage the Gladiator.
Turn 5 F
Afterwards, move the combat team to indicated location.

Turn 5 G
Manually extract the doll.

Turn 5 H
Swap with the other hostage, and then rescue it.
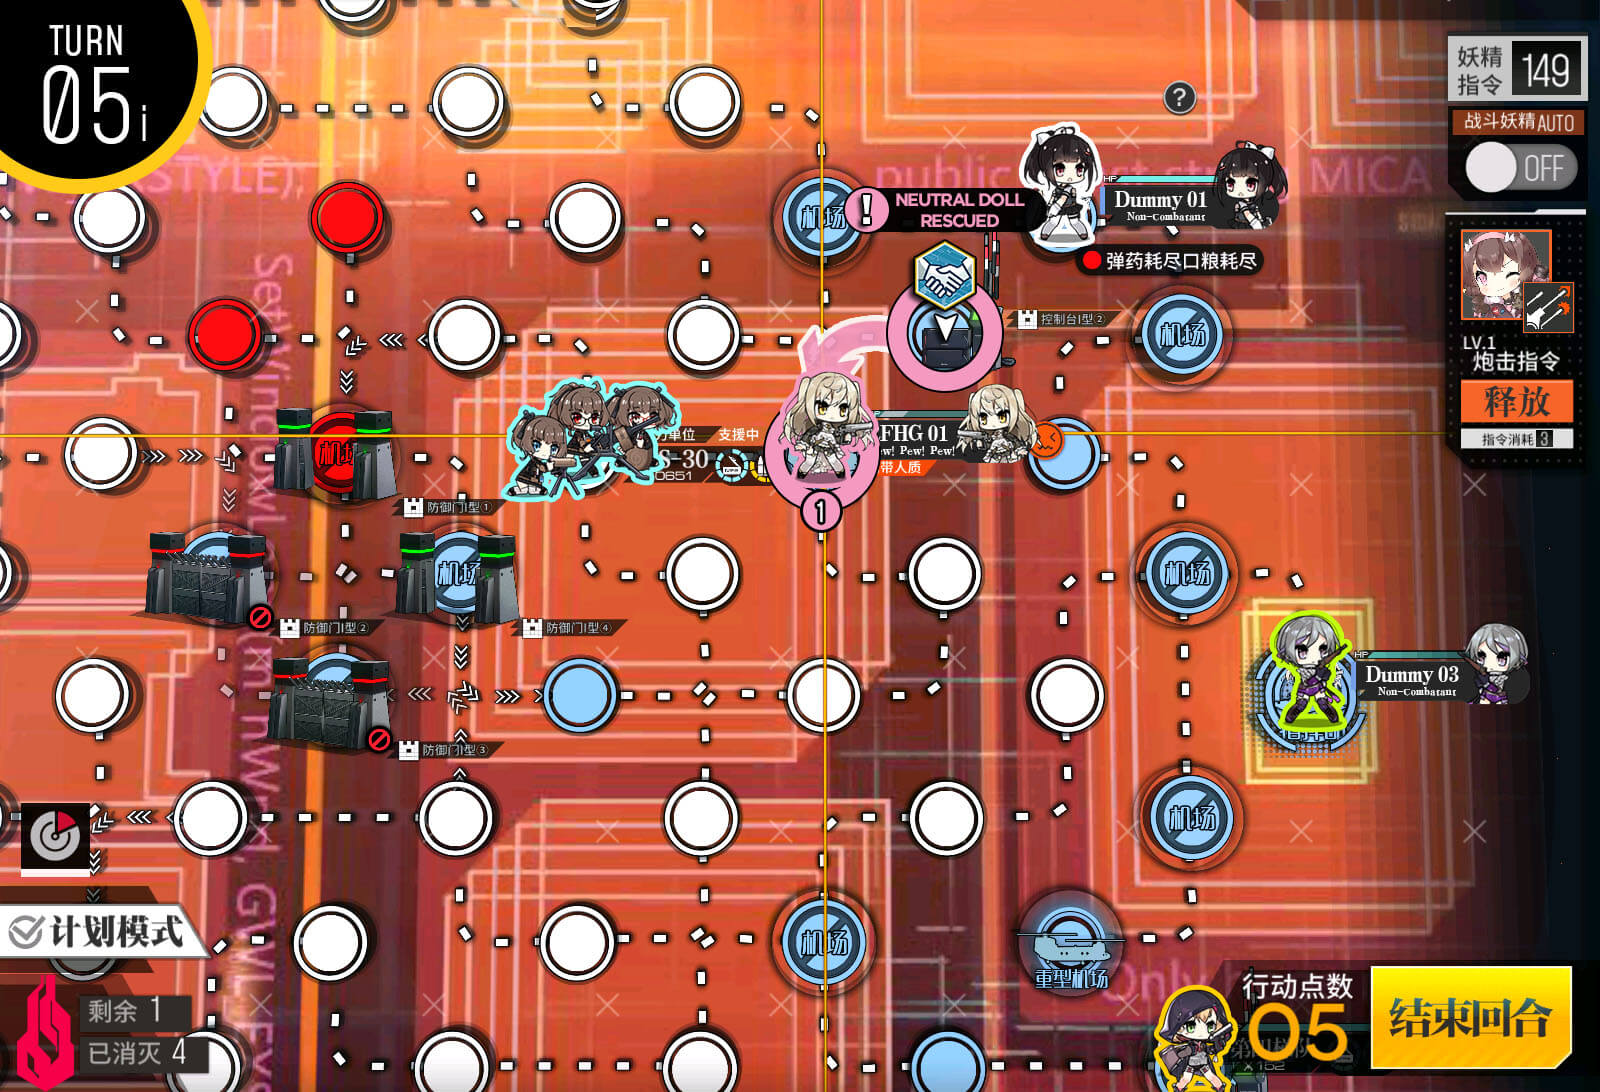
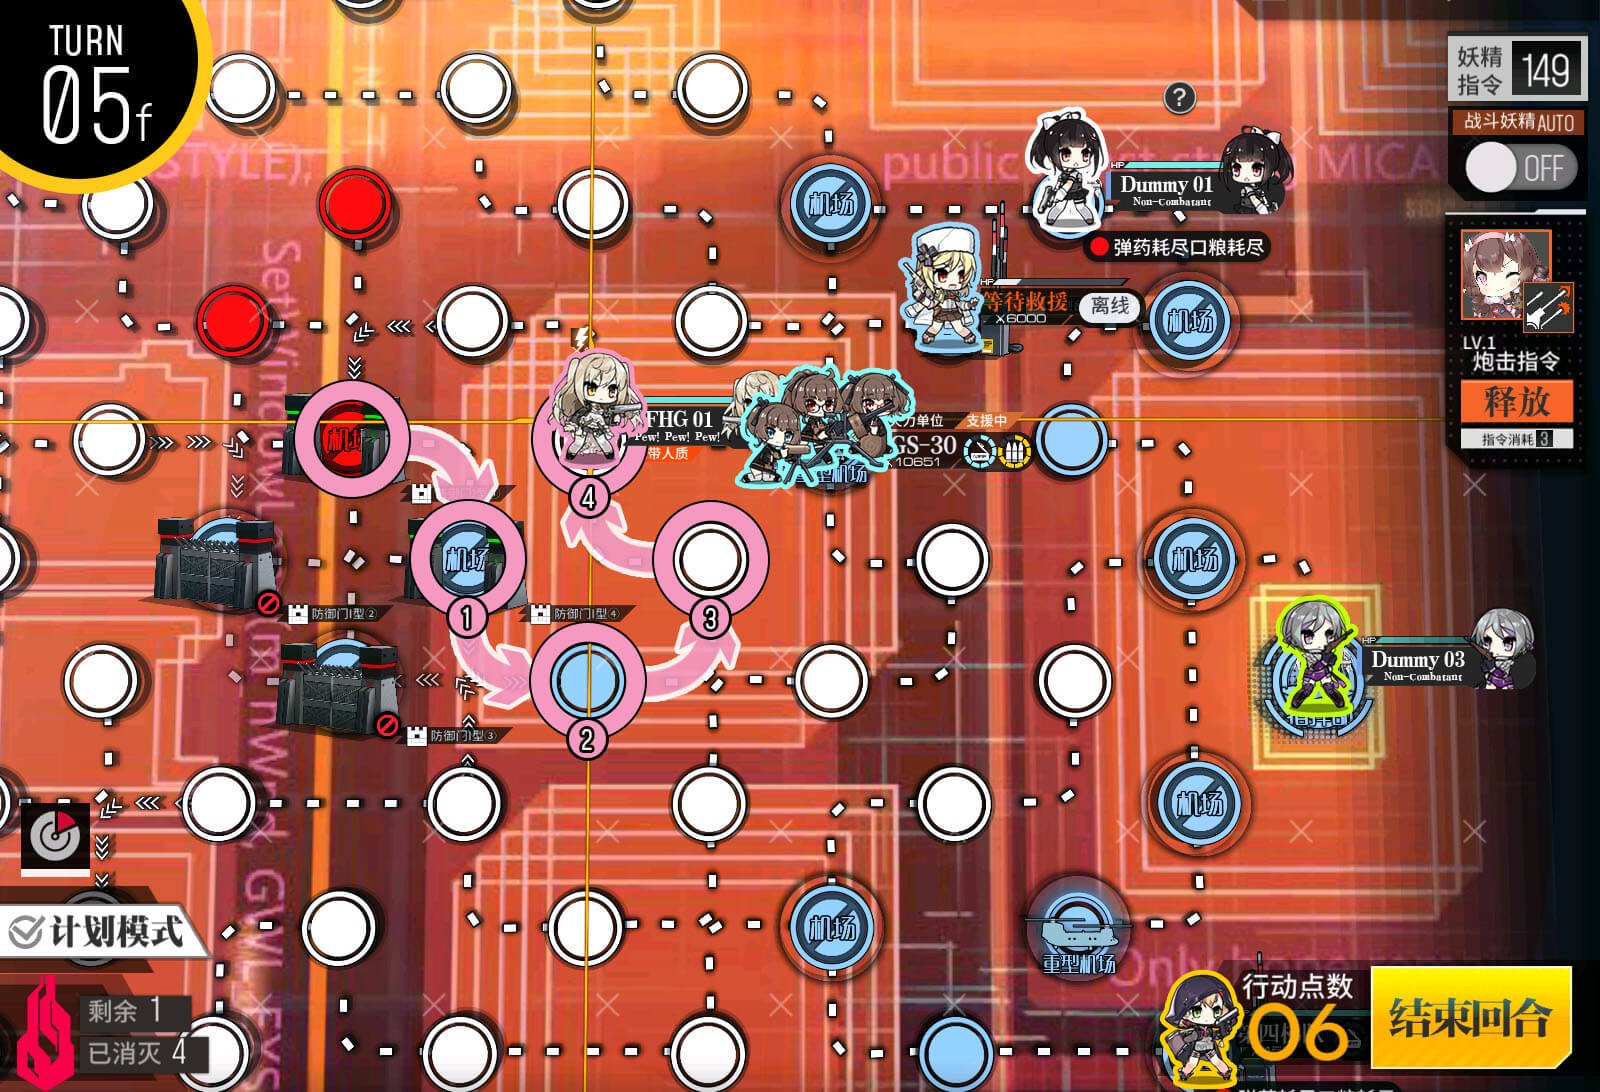
Turn 5 I
Extract hostage manually.
Turn 1
Spawn combat team and move as indicated.
Turn 2
Eliminate the ELID on top of the helipad.
You should aim to eliminate two enemies this turn if possible. If suggested path does not go through two enemies, you can move up and then down to the helipad to meet this requirement.
Turn 3
Move as indicated.

Turn 4
Move to the enemy HQ, eliminating all enemies in the path.
Note: RNG may result in you not having enough AP to do what is shown here. IF that happens, move 2 tiles to the left and end your turn, then do this move next turn.
Turn 1 A
Spawn a team capable of dealing with Gunners on the HQ. RFHG with a shotgun tank is able to work here. Spawn a HOC on the helipad. Move both teams up one node, and then spawn two friend support echelons.
Turn 1 B
Move the combat team as shown. Swap the HOC with friend support afterwards. Make sure to set the left friend support echelon to eliminate, and the right one to standby.

Turn 2 A
Swap the HOC, and then move the combat team up. After that, the HOC will follow and end on the node the combat team was at.
NOTE: If an enemy is on the node marked '3', your combat team needs to eliminate it first. Swap chain to resupply the team afterwards, and then return to the turn.
Turn 2 B
The combat team continues to move, this time to the right. Remember to make sure your HOC is able to support the team in every fight.
Turn 2 C
Move HOC to behind the combat team.
NOTE: If you follow this path, remember to never stop the HOC next to a hostile enemy.
Turn 2 D
Swap the HOC and combat team.
Turn 3 A
Now you have to eliminate the boss. This is one way to set up your team and HOC, but you only have to make sure that your HOC is supporting the team assaulting Nyto.

Turn 3 B
Turn 3 C
Swap combat team with the HOC, move on to the boss node. Hit end turn after eliminating the boss.
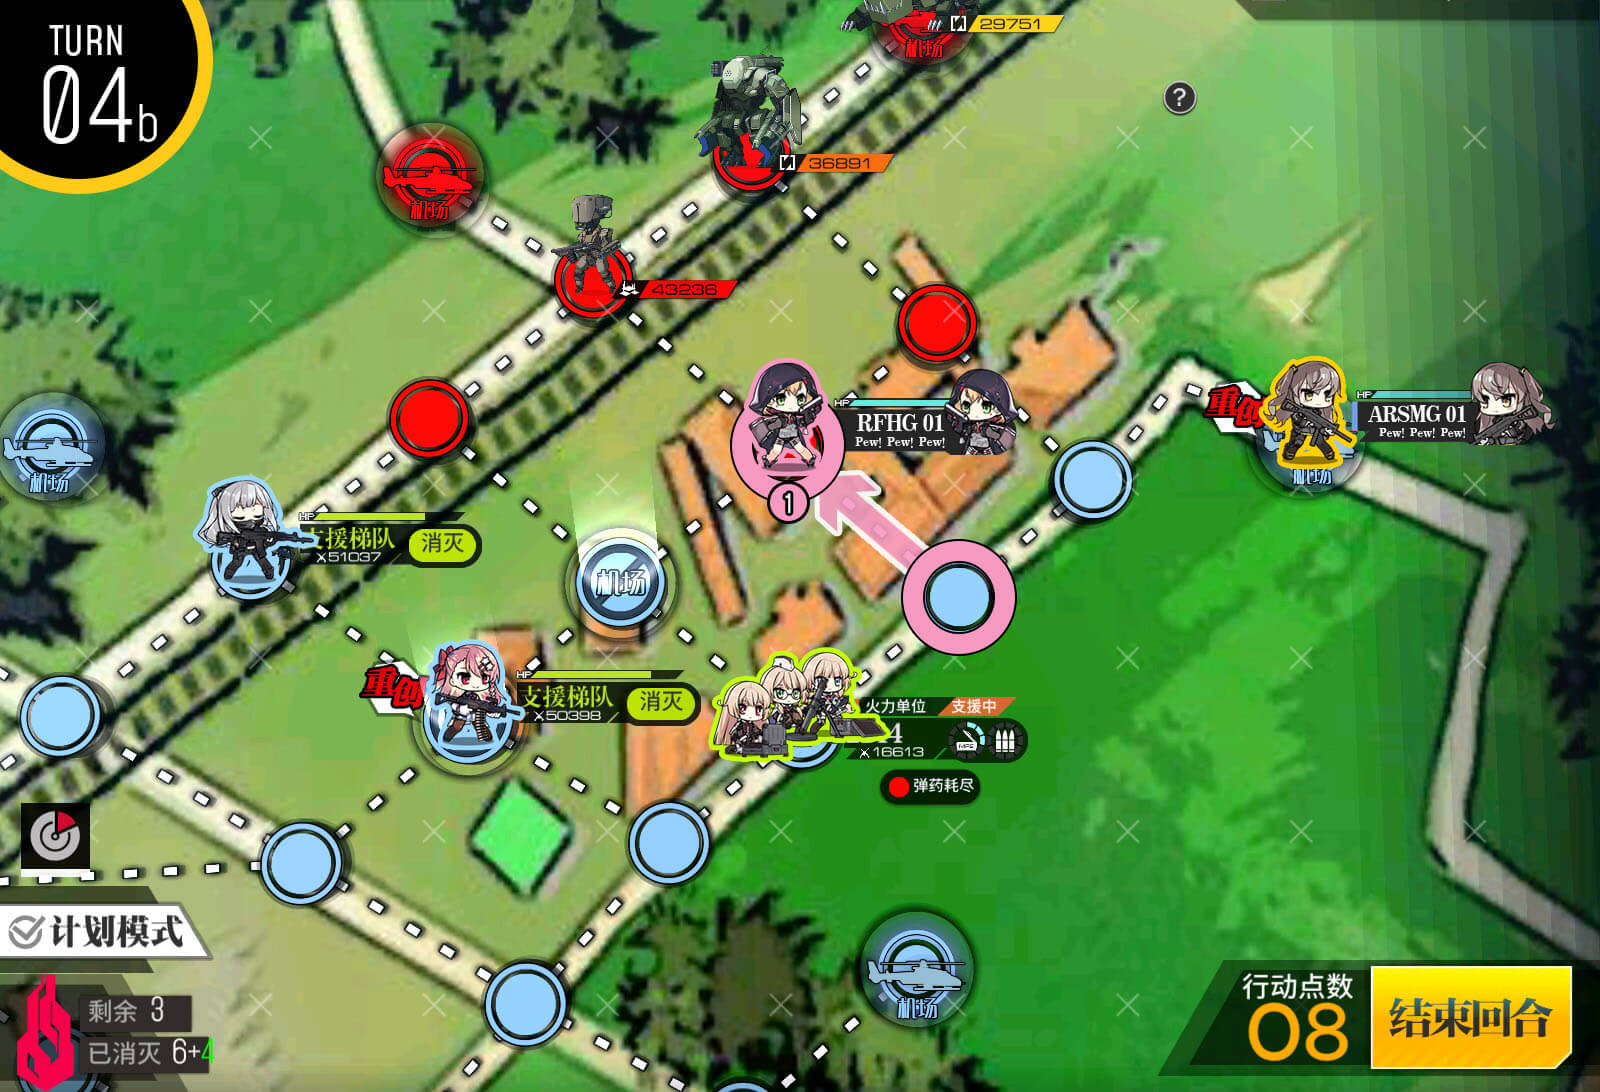
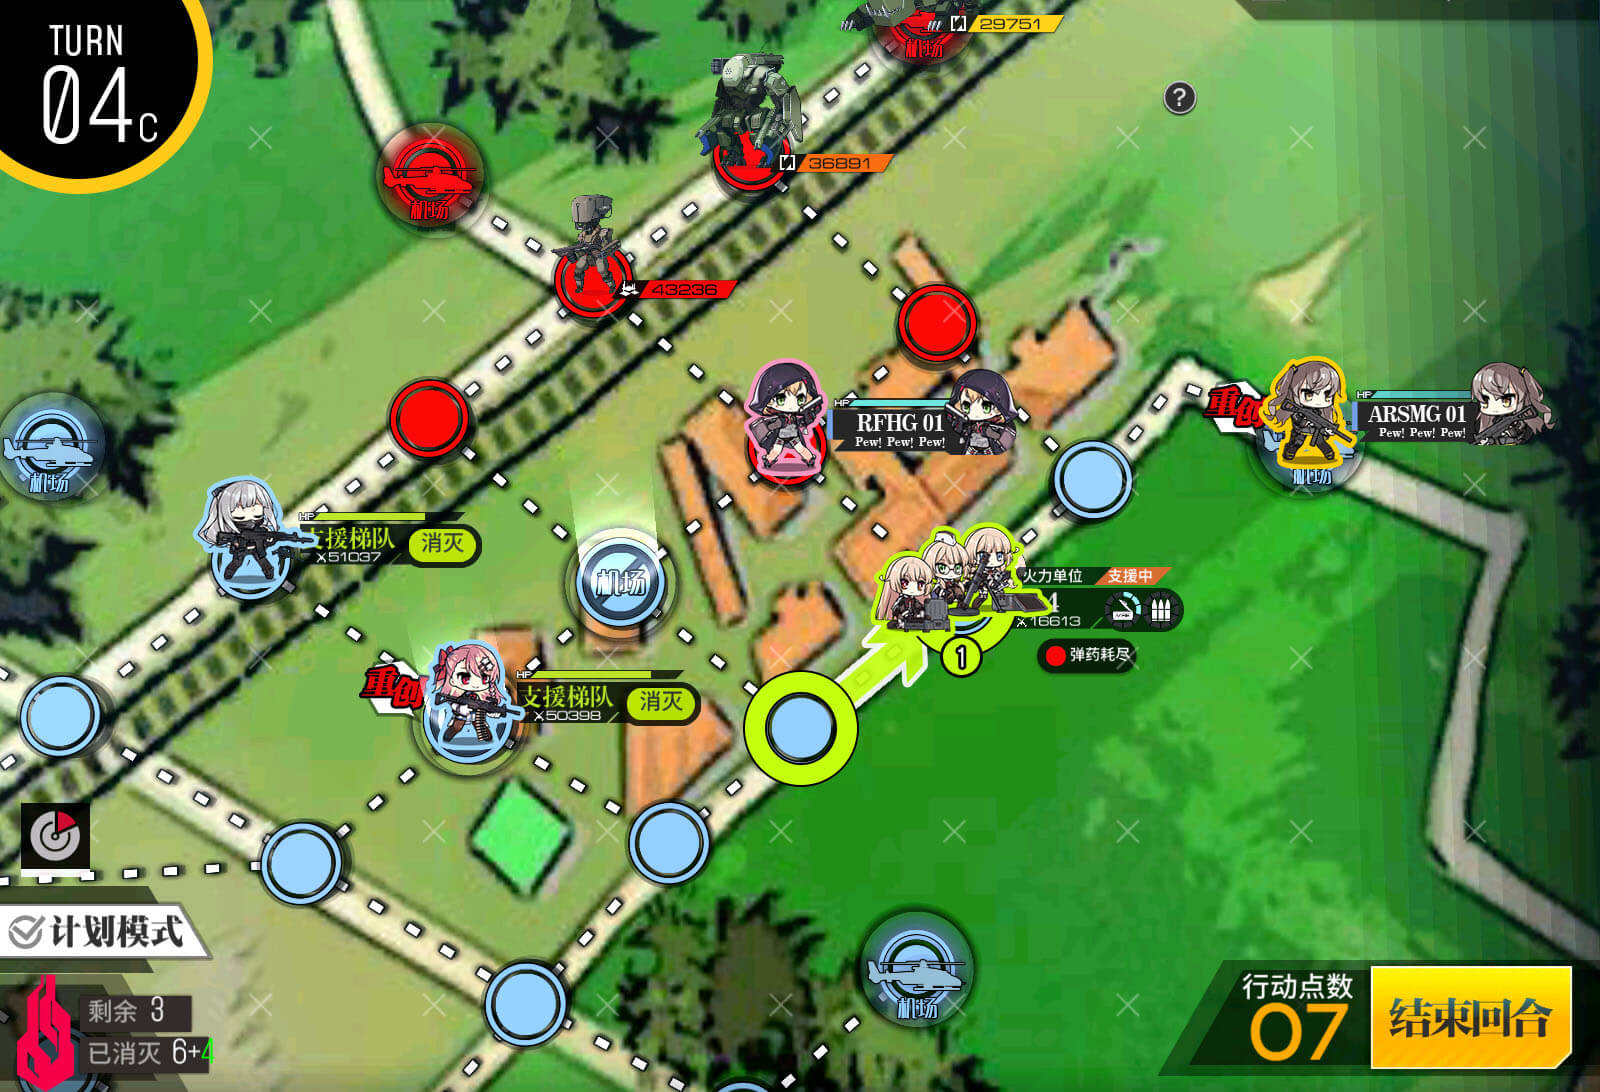
Turn 1 A
Spawn two combat teams (preferably one ARSMG and one RFHG). Move them up, and then spawn 2 friend support echelons.
Turn 1 B
Swap both sides, and then set both friend support echelons to 'Eliminate'.
Turn 1 C
Move the ARSMG team as indicated.
Turn 2 A
Move the RFHG team up one, and then spawn a HOC. It is highly recommended that the HOC is a 2B14, otherwise another 3-range non-shield piercing specialist HOC can be used such as AGS-30 or M2.
Turn 2 B
Move the RFHG to before the ARSMG. The HOC will follow it.
Turn 2 C
Swap the ARSMG and the RFHG, and then move the RFHG to engage the enemy.

Turn 2 D
Move the ARSMG behind the RFHG, and then swap depending on the type of enemy nodes that are around these two teams (for example, armoured nodes will want the RFHG next to them rather than the ARSMG).
Note: It is fine if there's an extra enemy next to your HOC this turn. The support echelon will move up to protect it after you end your turn.
Turn 2 E
Move the HOC as indicated.
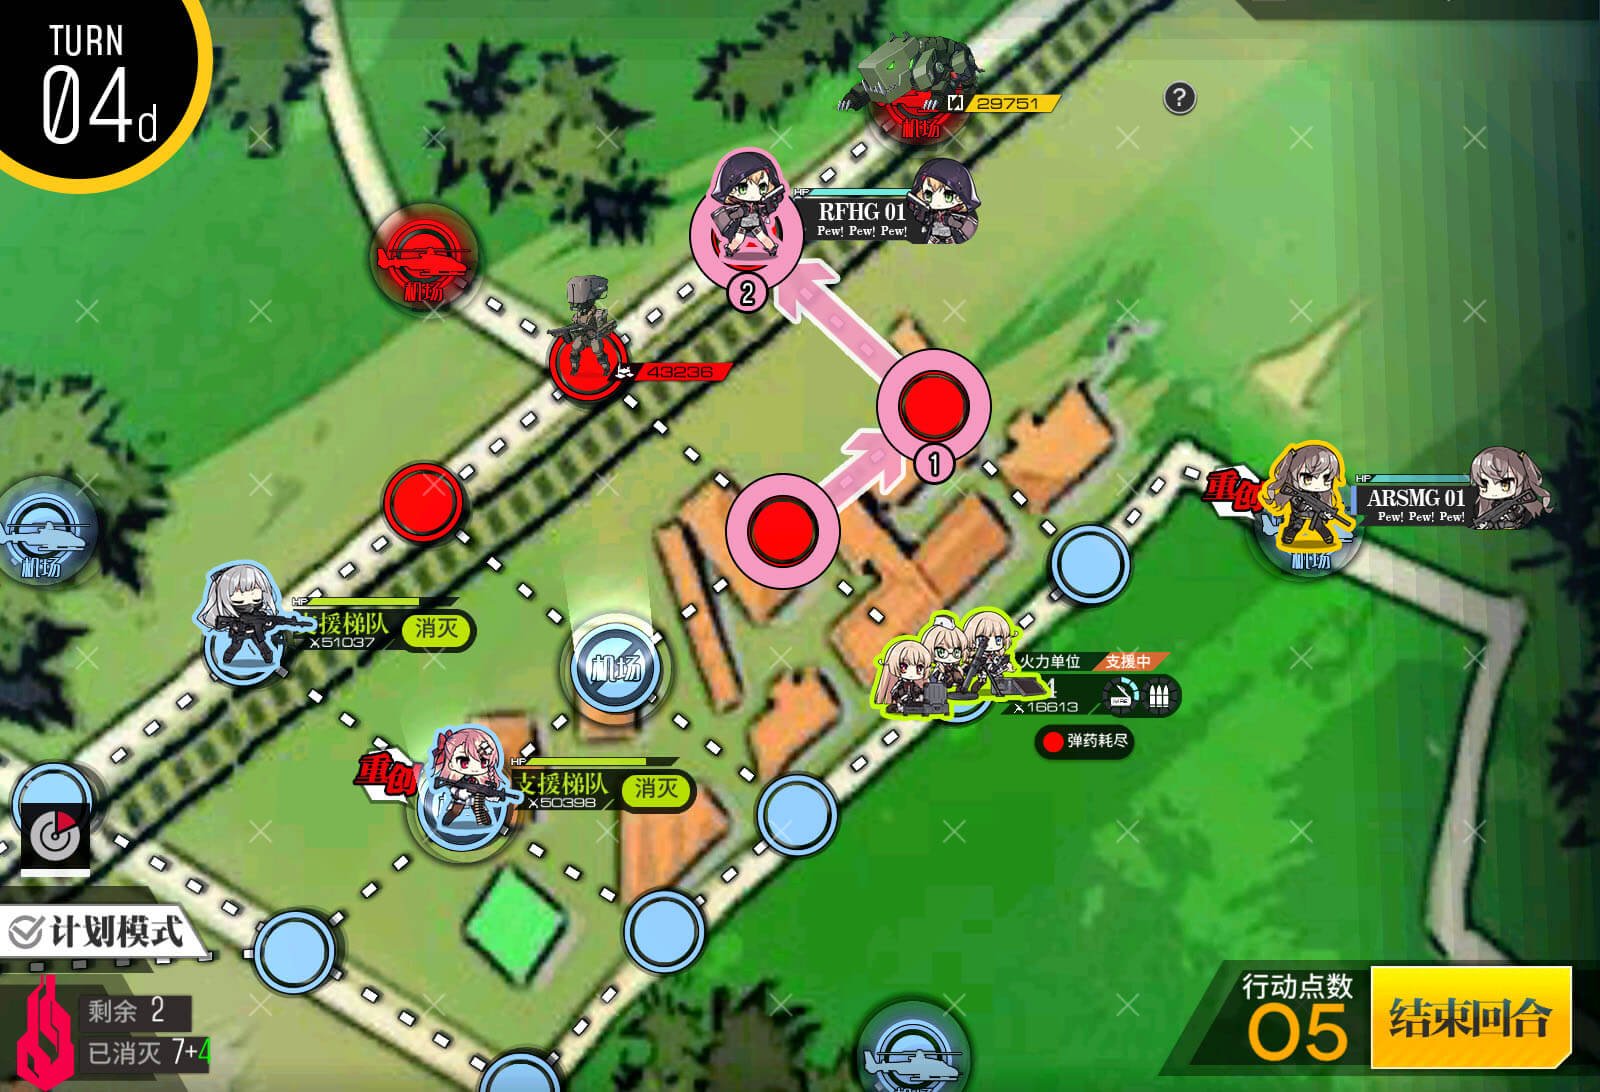
Turn 3 A
Move the ARSMG as shown.
Turn 3 B
The RFHG will move and engage the Reccecentre. Afterwards, the HOC will swap with the nearby friend support unit, and then move next to the ARSMG.

Turn 3 C
Move the RFHG as shown.
Turn 3 D
These enemies are much better suited for your ARSMG, so this move will move your ARSMG team to abuse swapping mechanic.
Turn 3 E
Move your HOC up one spot.

Turn 4 A
Eliminate the enemy on top of the helipad. Make sure to resupply afterwards!
Turn 4 B
RFHG will move to the left.
Turn 4 C
Move the HOC up one node. At this point, your HOC might not have ammo left. In which case, you do not need to move it anymore.
Turn 4 D
Move RFHG to take out the Minotaurus node.
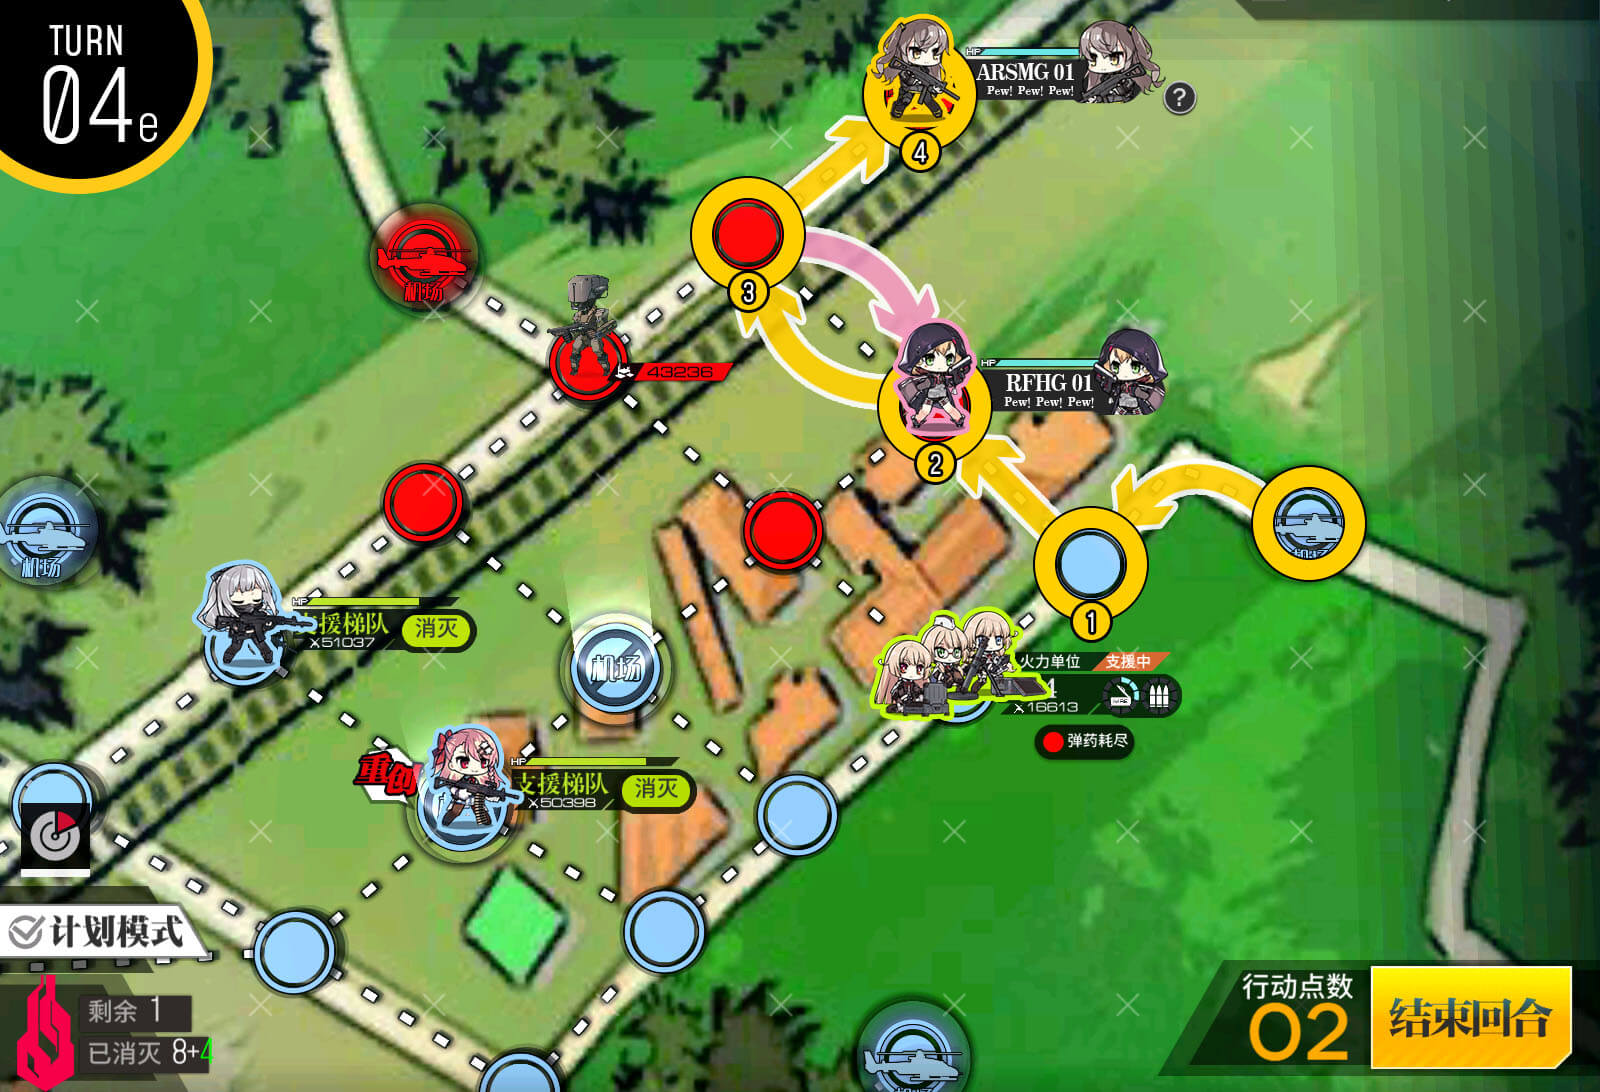
Turn 4 E
Move the ARSMG as shown, swapping with the RFHG, and taking out the enemy on the helipad.
Turn 4 F
With your remaining AP, take out the last enemy.
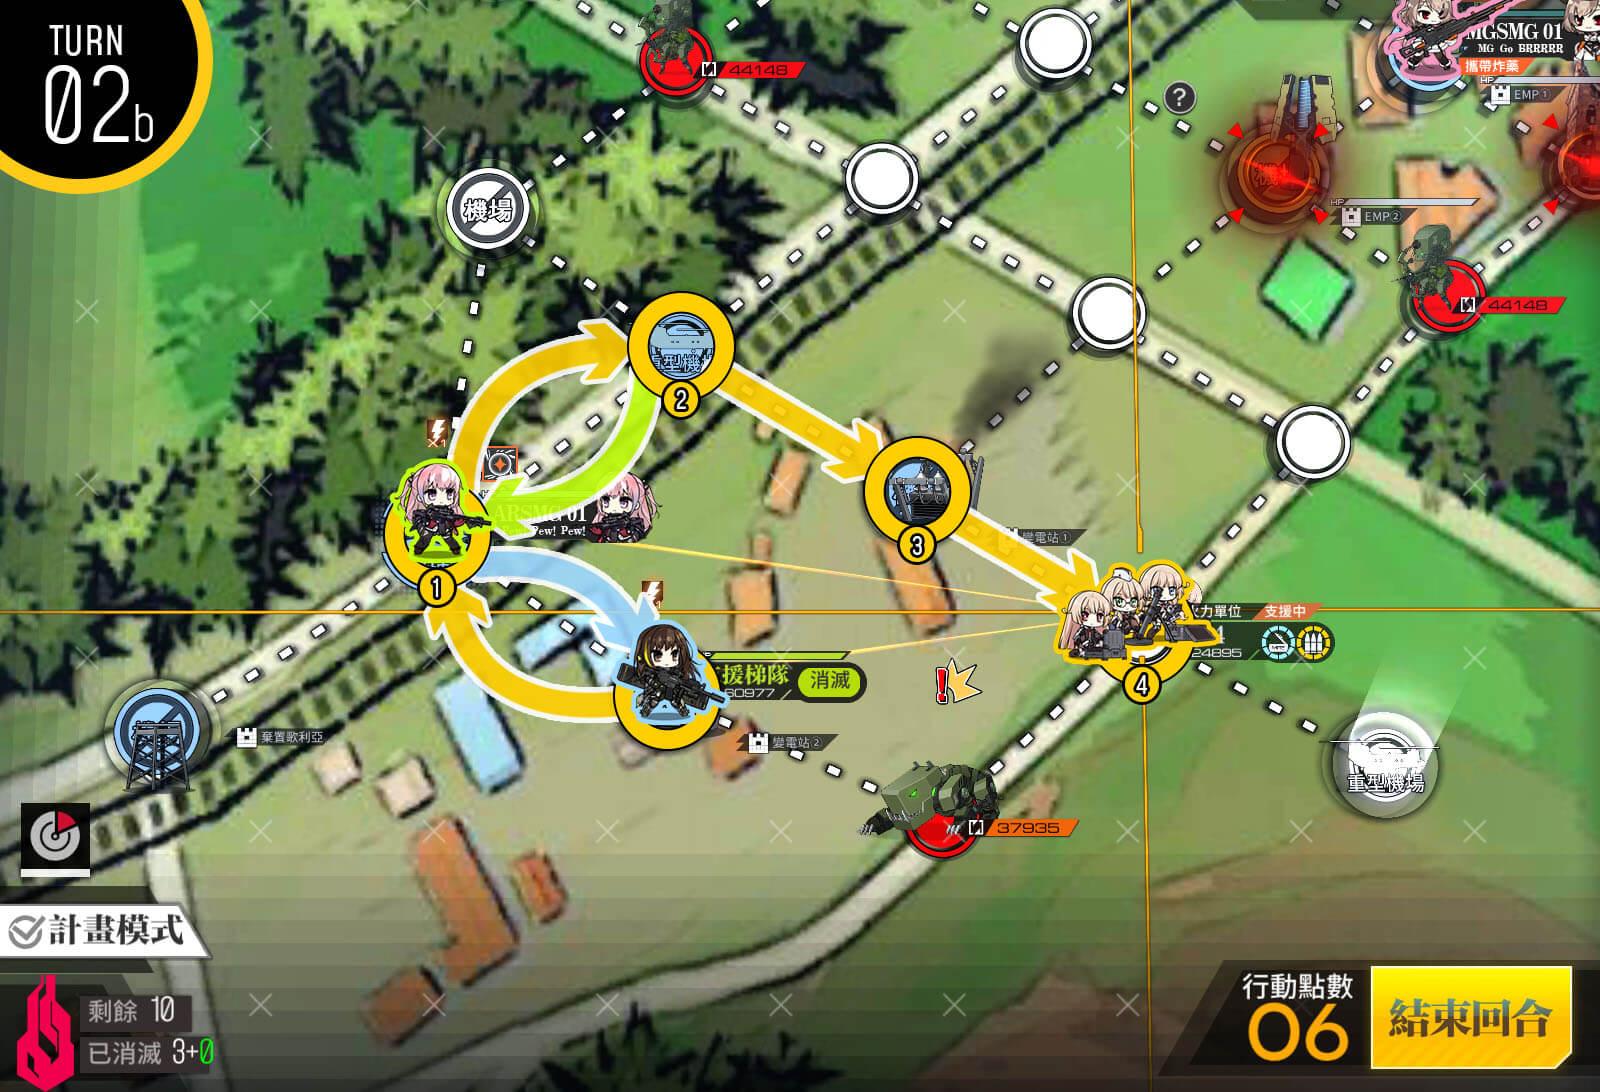
Turn 1 A
Spawn an ARSMG or a gunboat echelon that is capable of dealing with KCCO doggo enemies. Spawn 2B14 on the helipad. Move the combat echelon to pick up the bomb.

Turn 1 B
Spawn an ARSMG echelon.
Turn 1 C
Swap chain the bombing echelon as shown.
Turn 1 D
Move the bombing echelon on to the substation. Activate it.
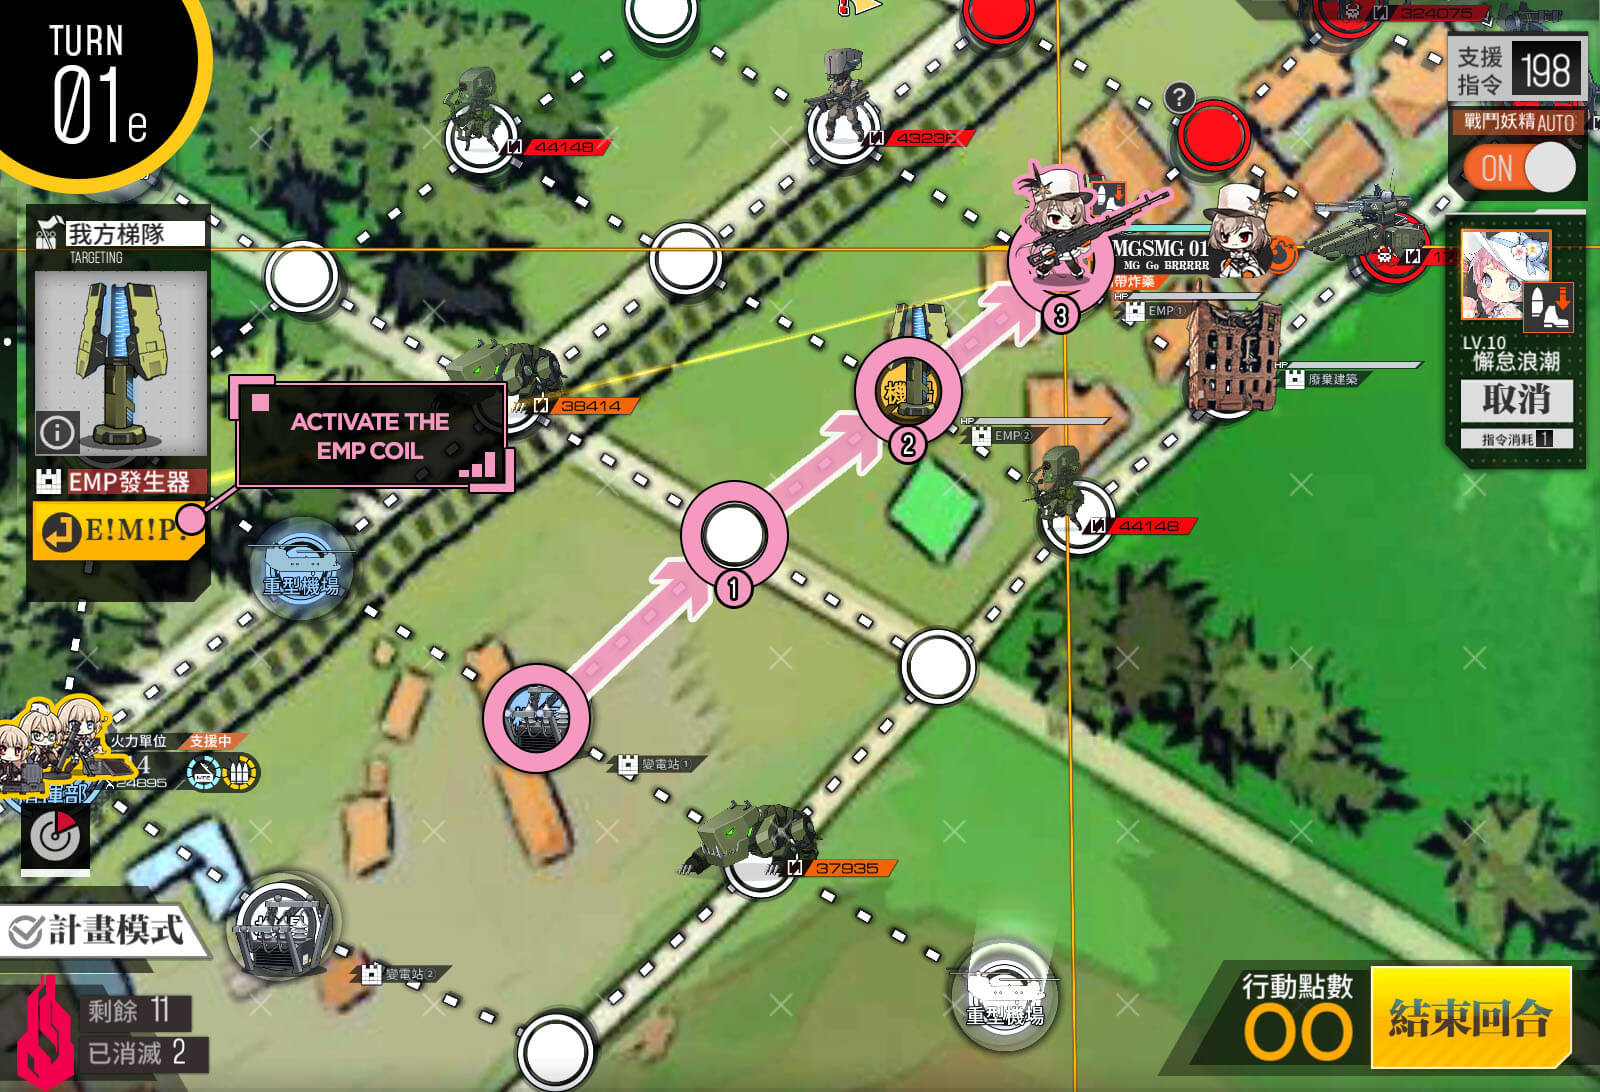
Turn 1 E
Move the bombing echelon to the second EMP. Activate the EMP.
Turn 1 F
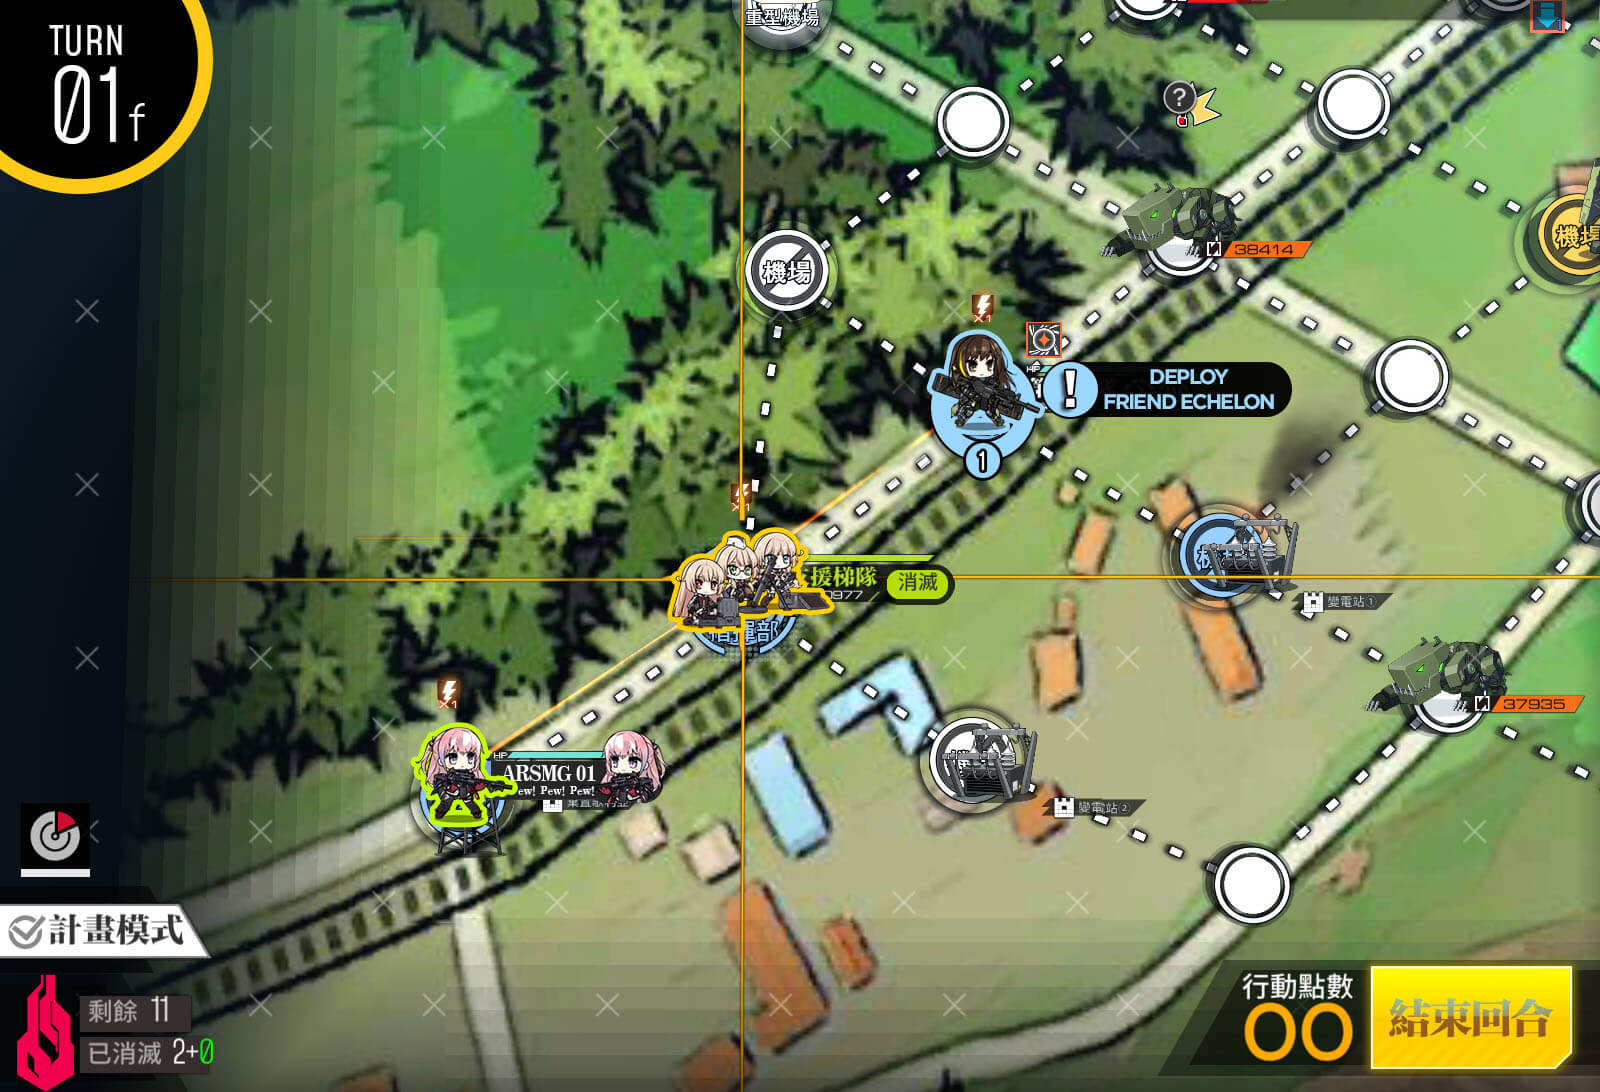
Deploy a friend support echelon.
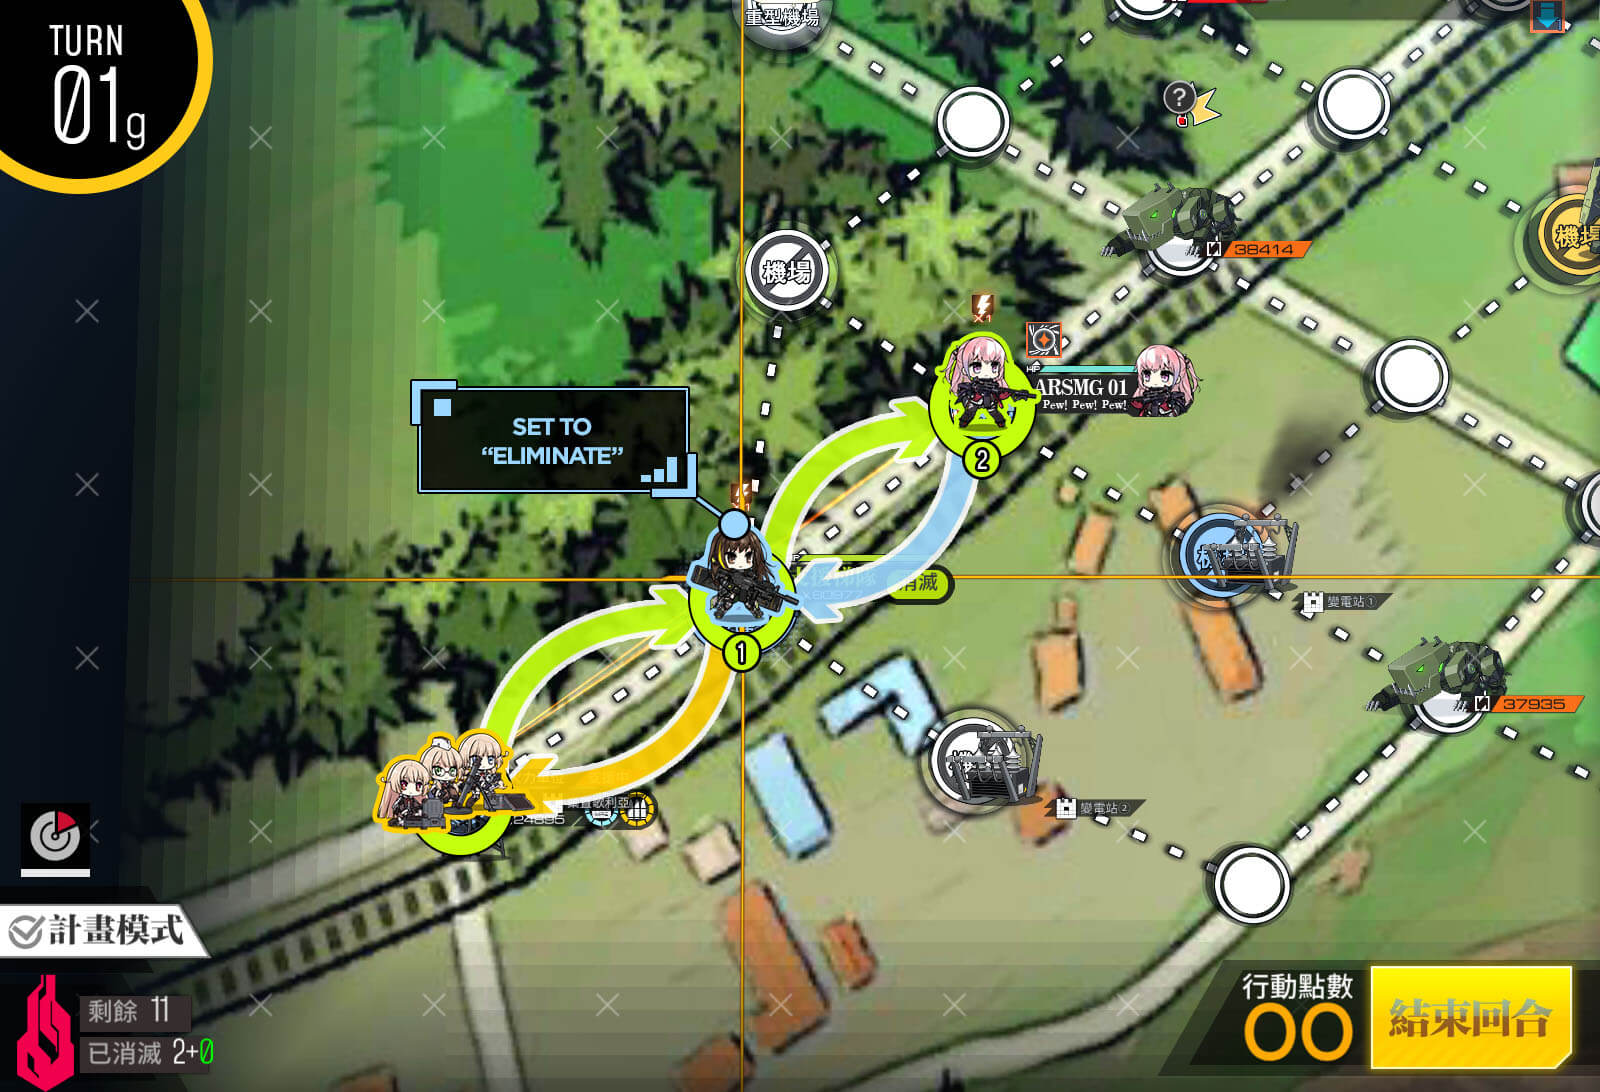
Turn 1 G
Swap until the HOC is on the helipad and the friend support is on the HQ. Set it to 'Eliminate'.
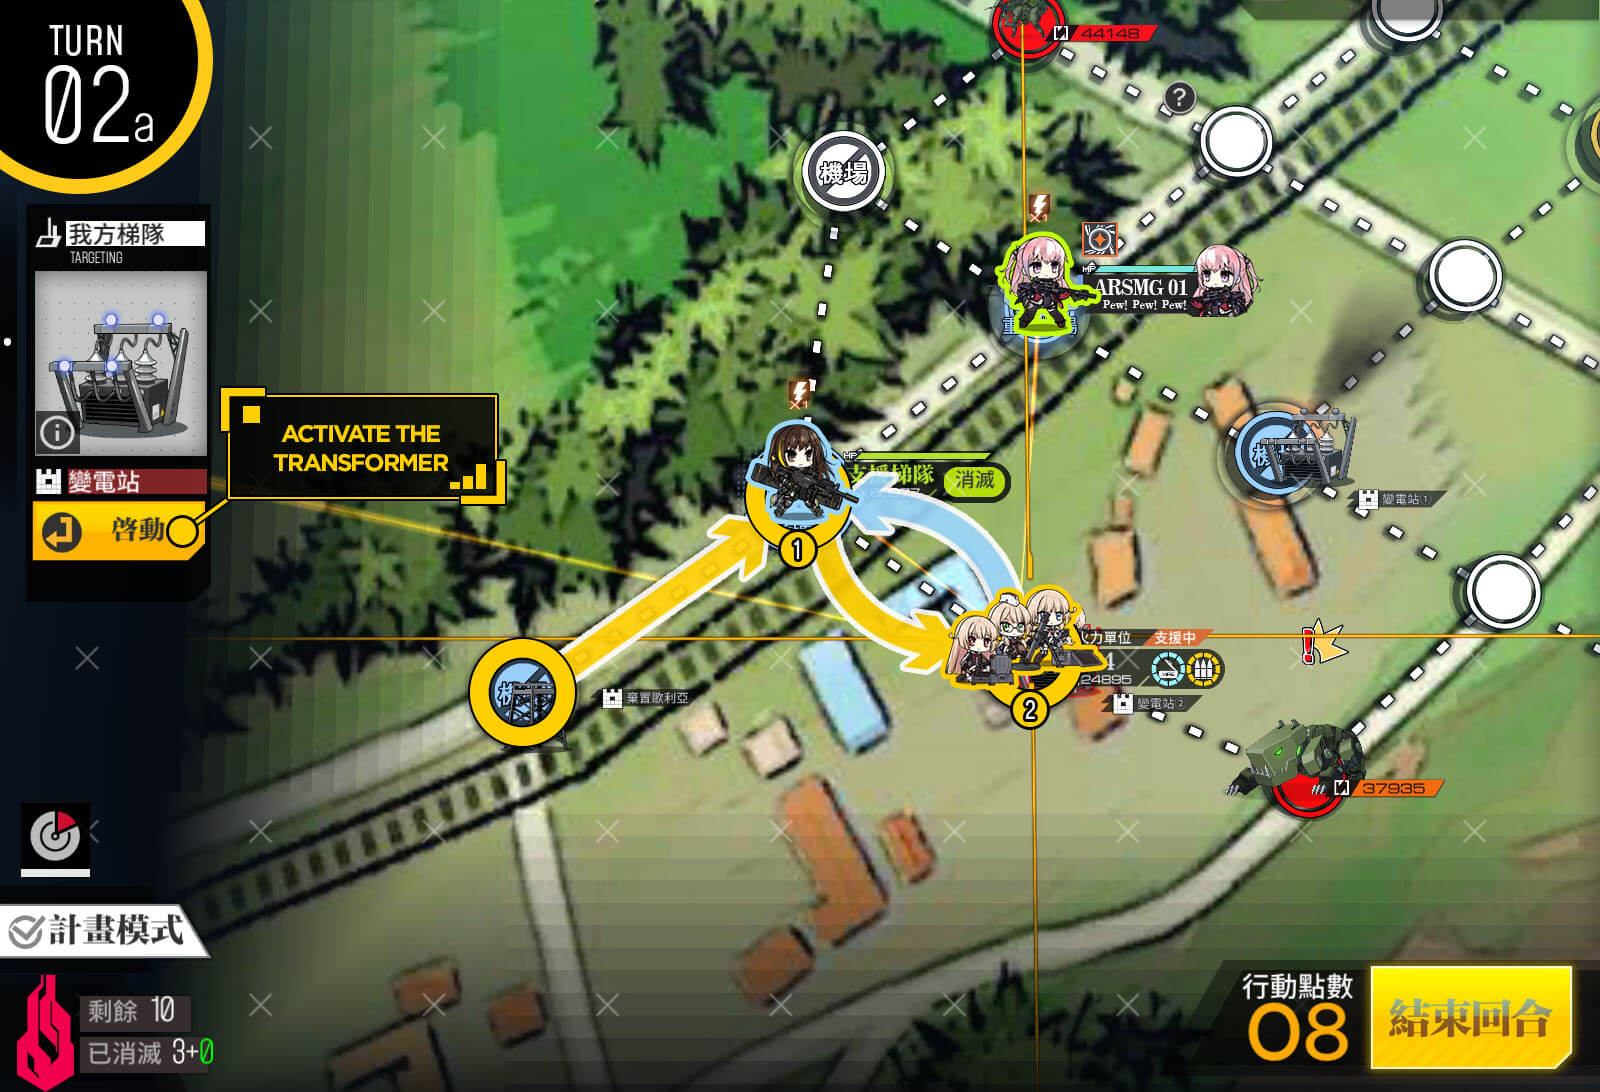
Turn 2 A
Move the HOC and swap with the friend support unit. Activate the substation.
Turn 2 B
Swap chain the HOC and then move it to the indicated position.
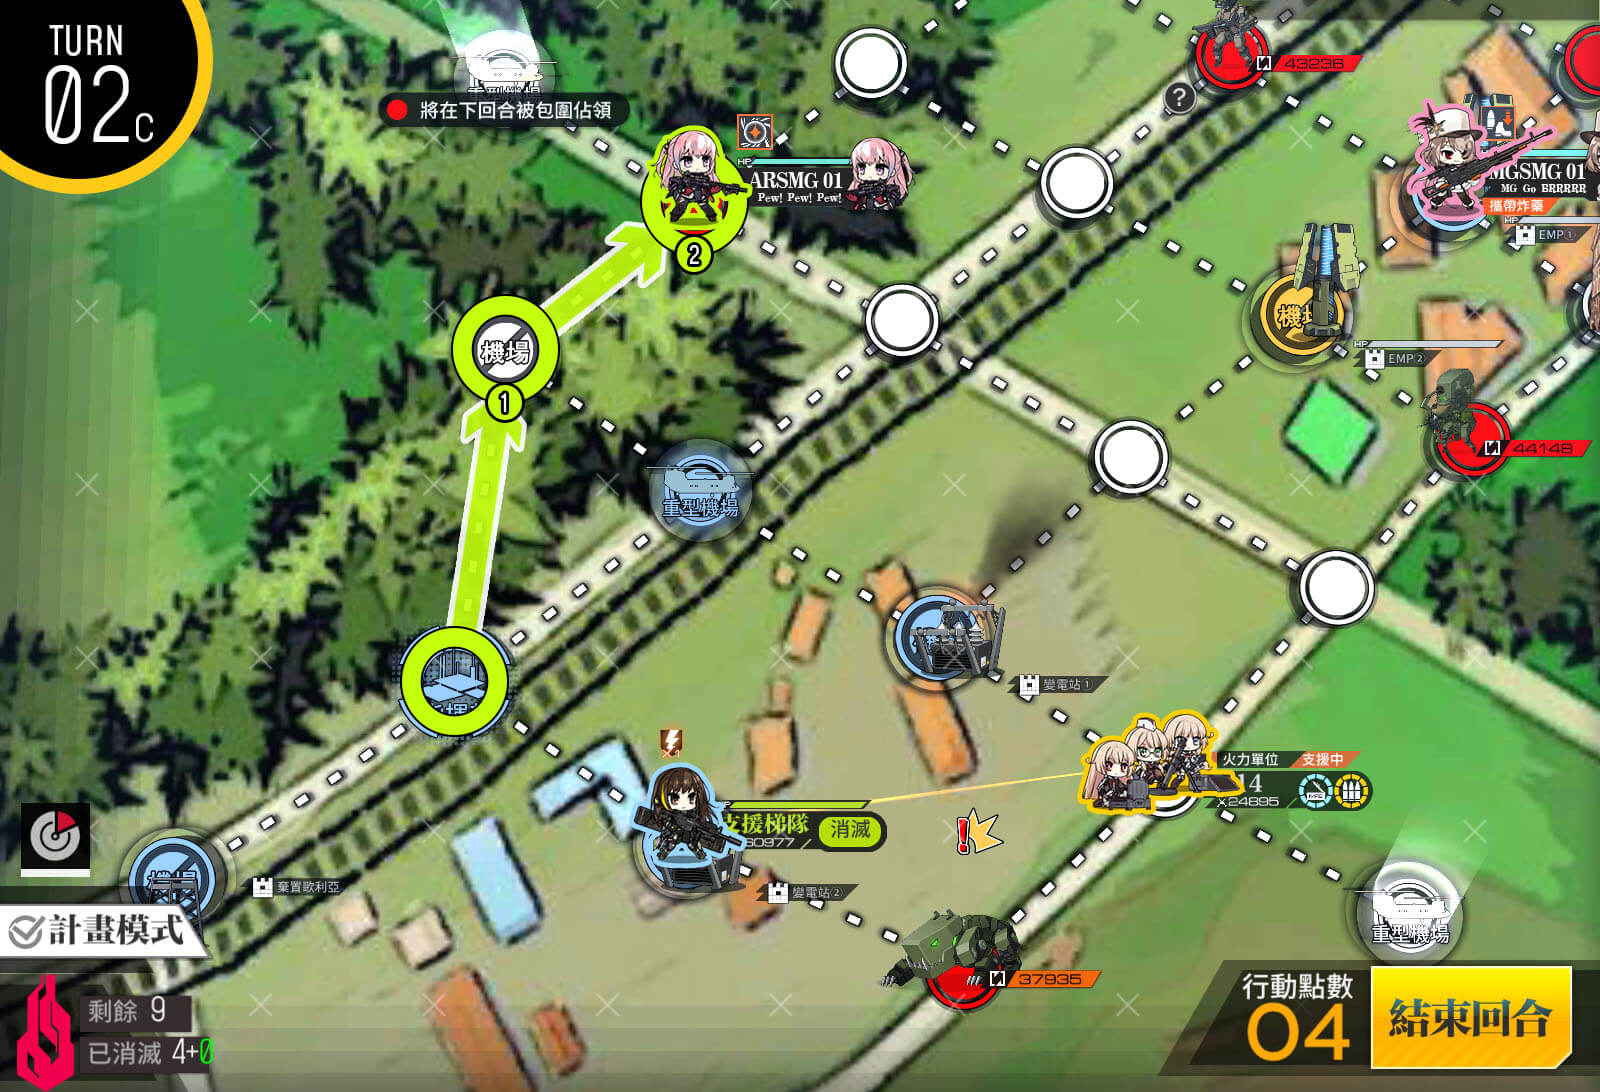
Turn 2 C
Move your ARSMG to deal with the enemy indicated.
Turn 2 D
Move the bombing echelon on to the abandoned building, and then deploy the bomb. A detonator should appear afterwards.
Turn 2 E
Move the bombing echelon on to the lower EMP, but do not activate the EMP yet.
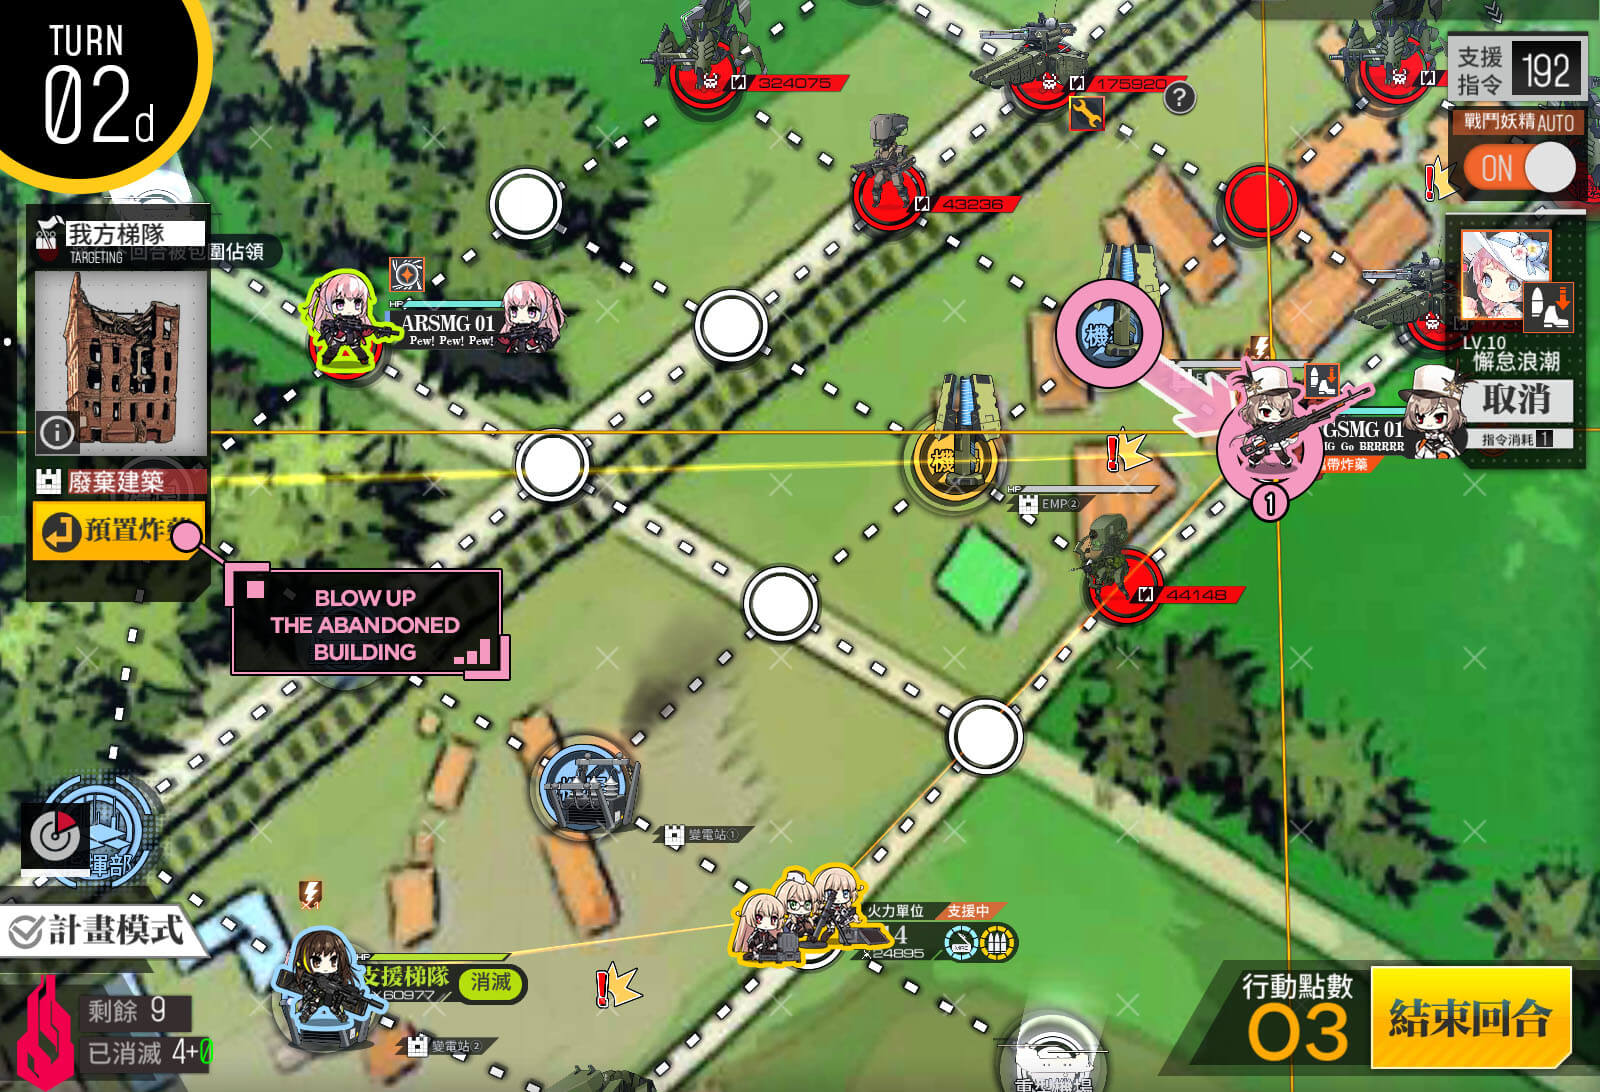
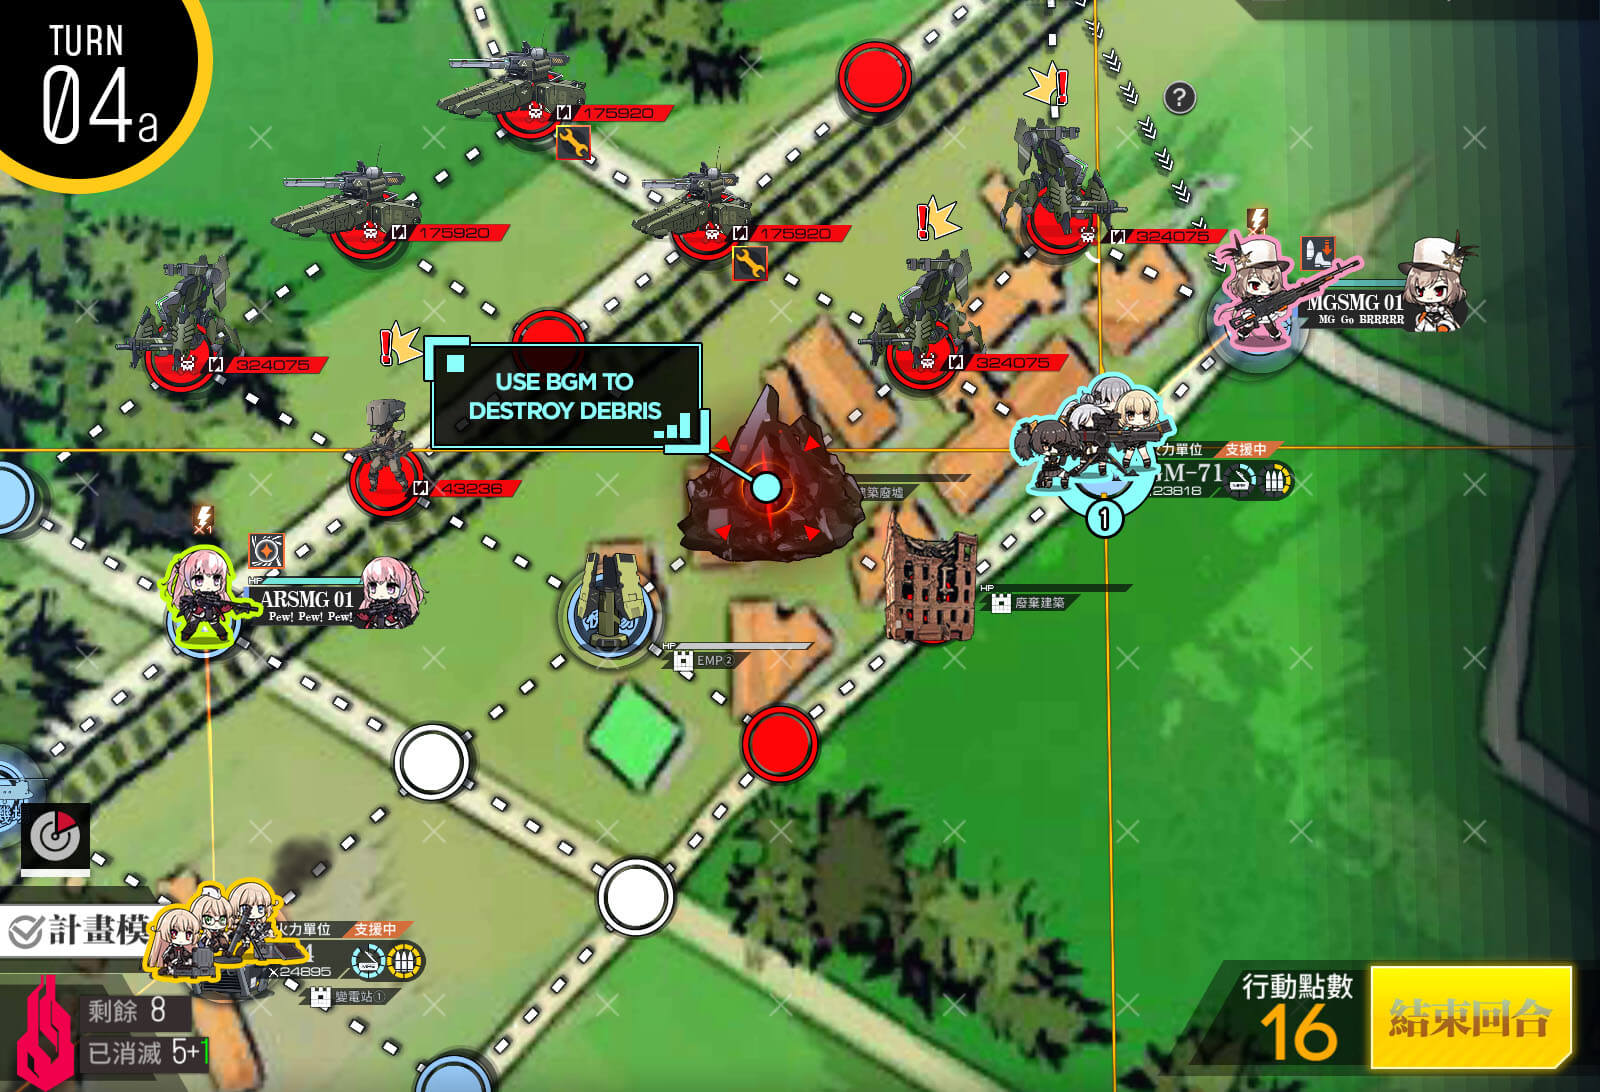
Turn 3 A
Deploy BGM-71. Another HOC is able to be used, but it will take more shots to destroy the rubble.
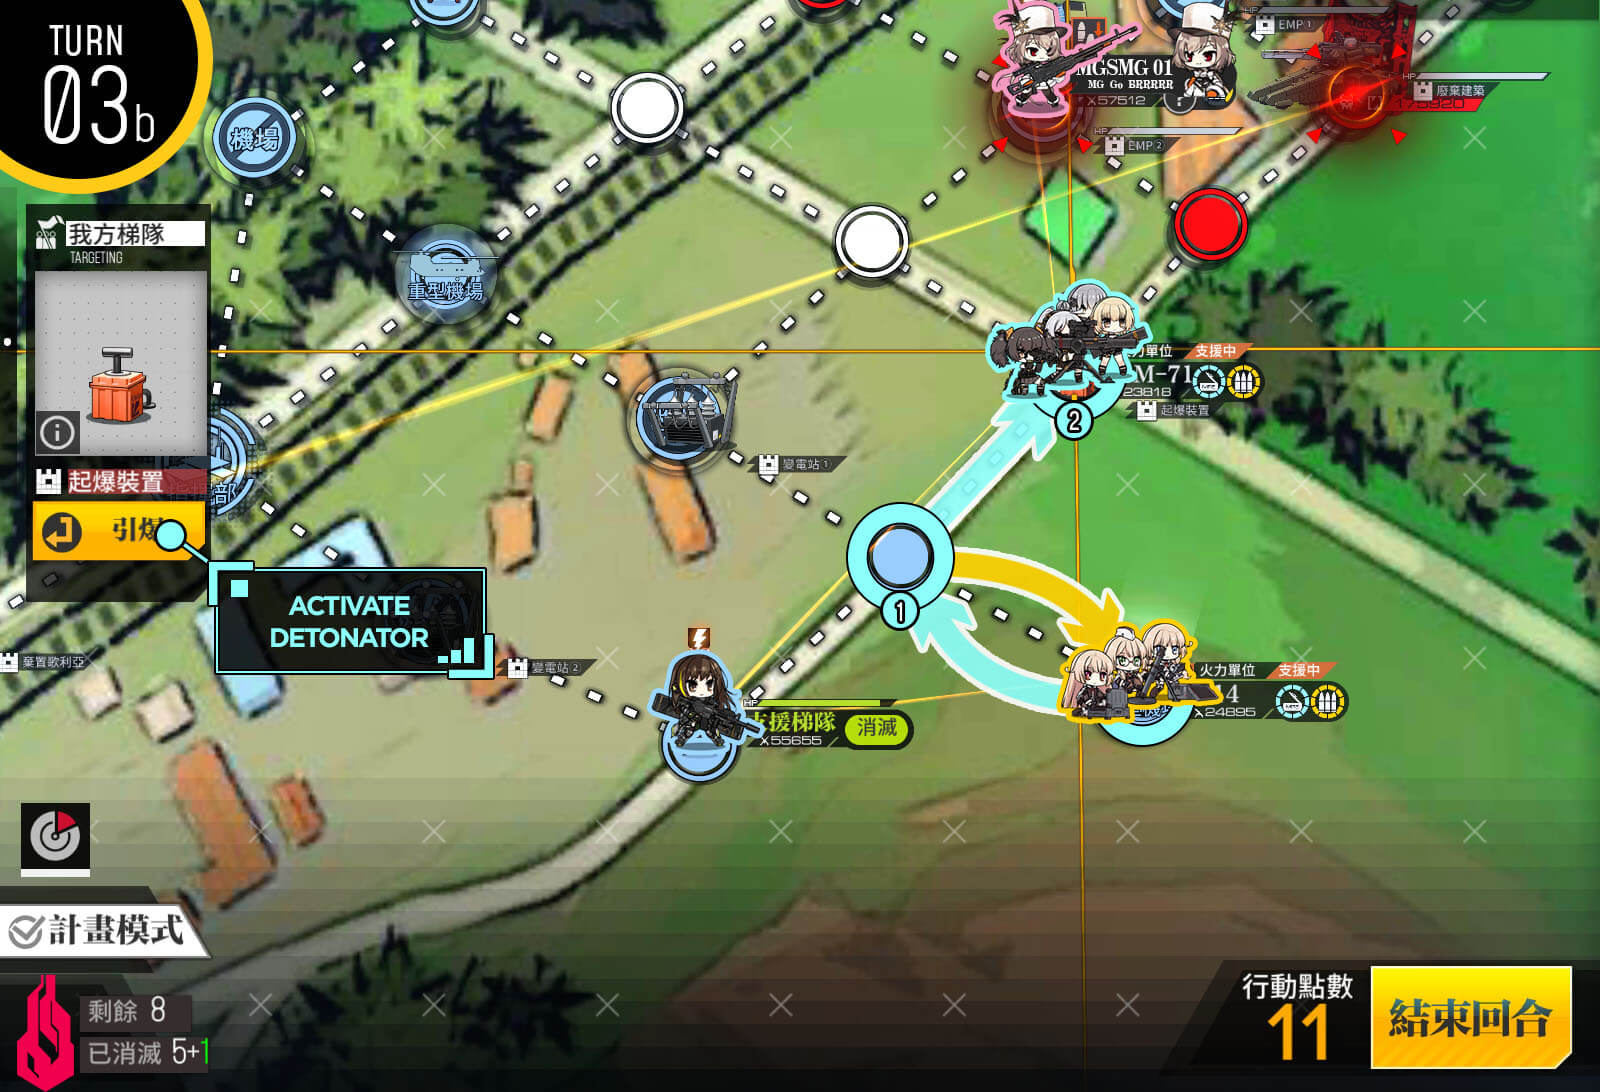
Turn 3 B
Swap the rock breaker HOC to the detonator and then activate it.
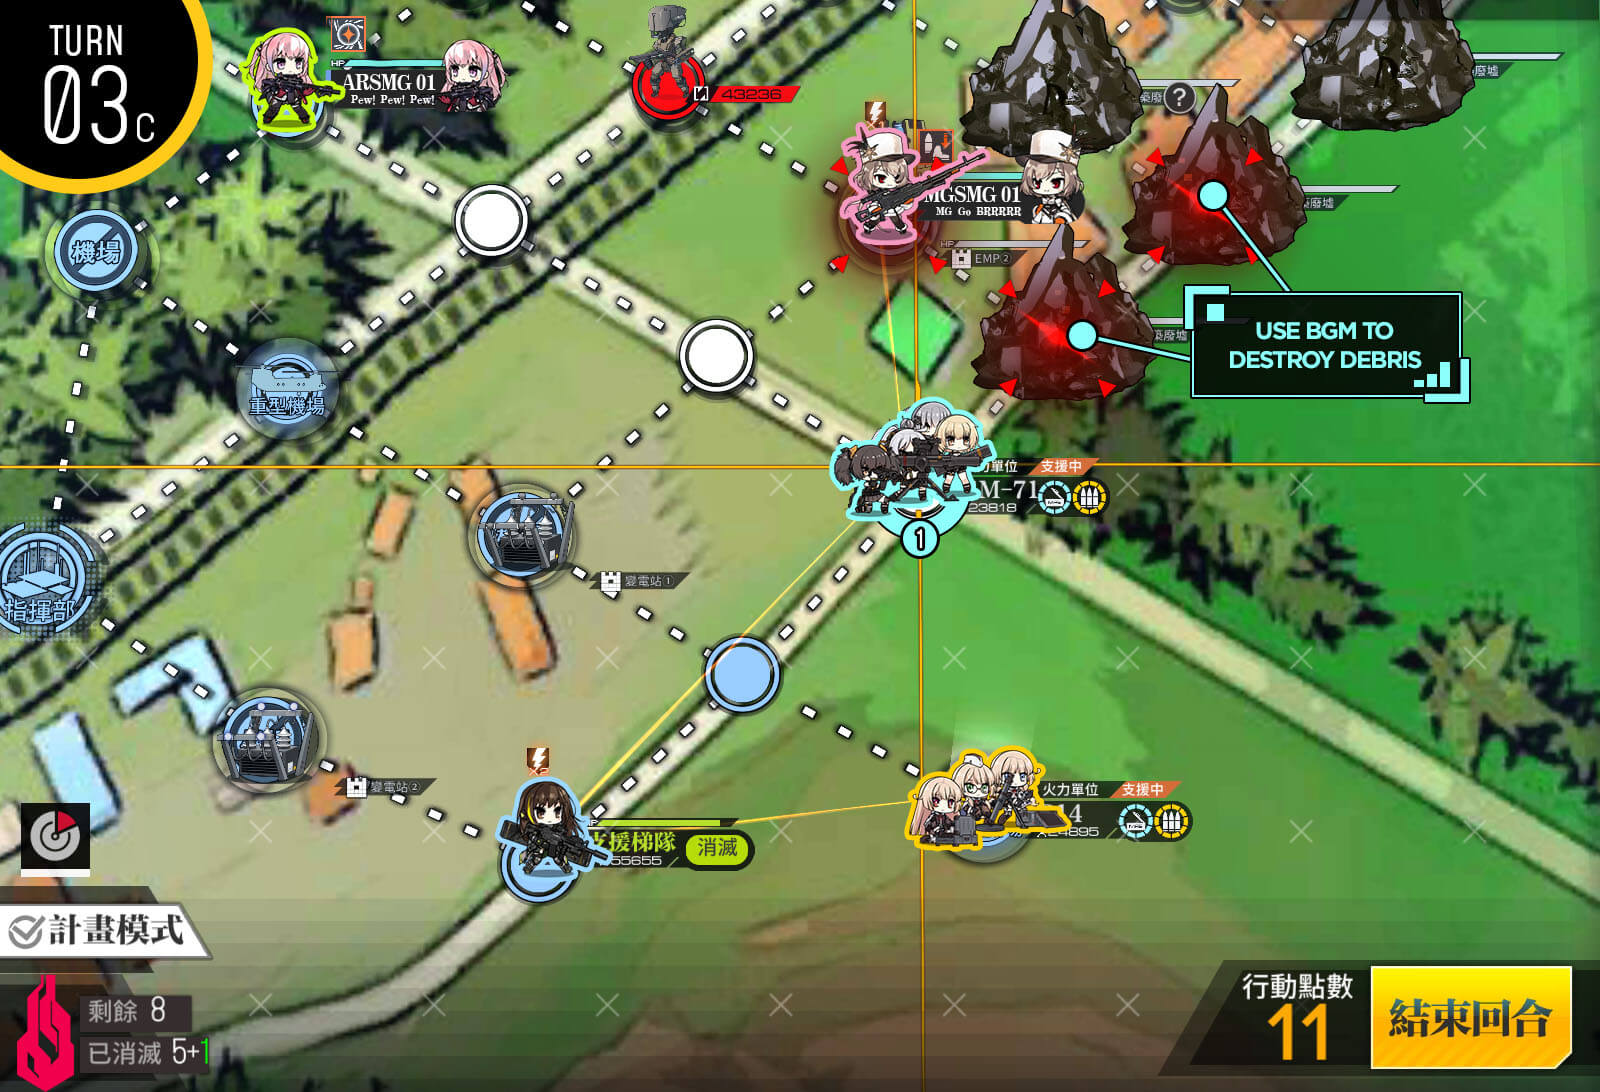
Turn 3 C
Use your rock breaker HOC to break the two indicated rocks.
PLEASE NOTE: If you are unable to target specific rocks with your HOC, you will need to restart your client. This usually fixes that issue.
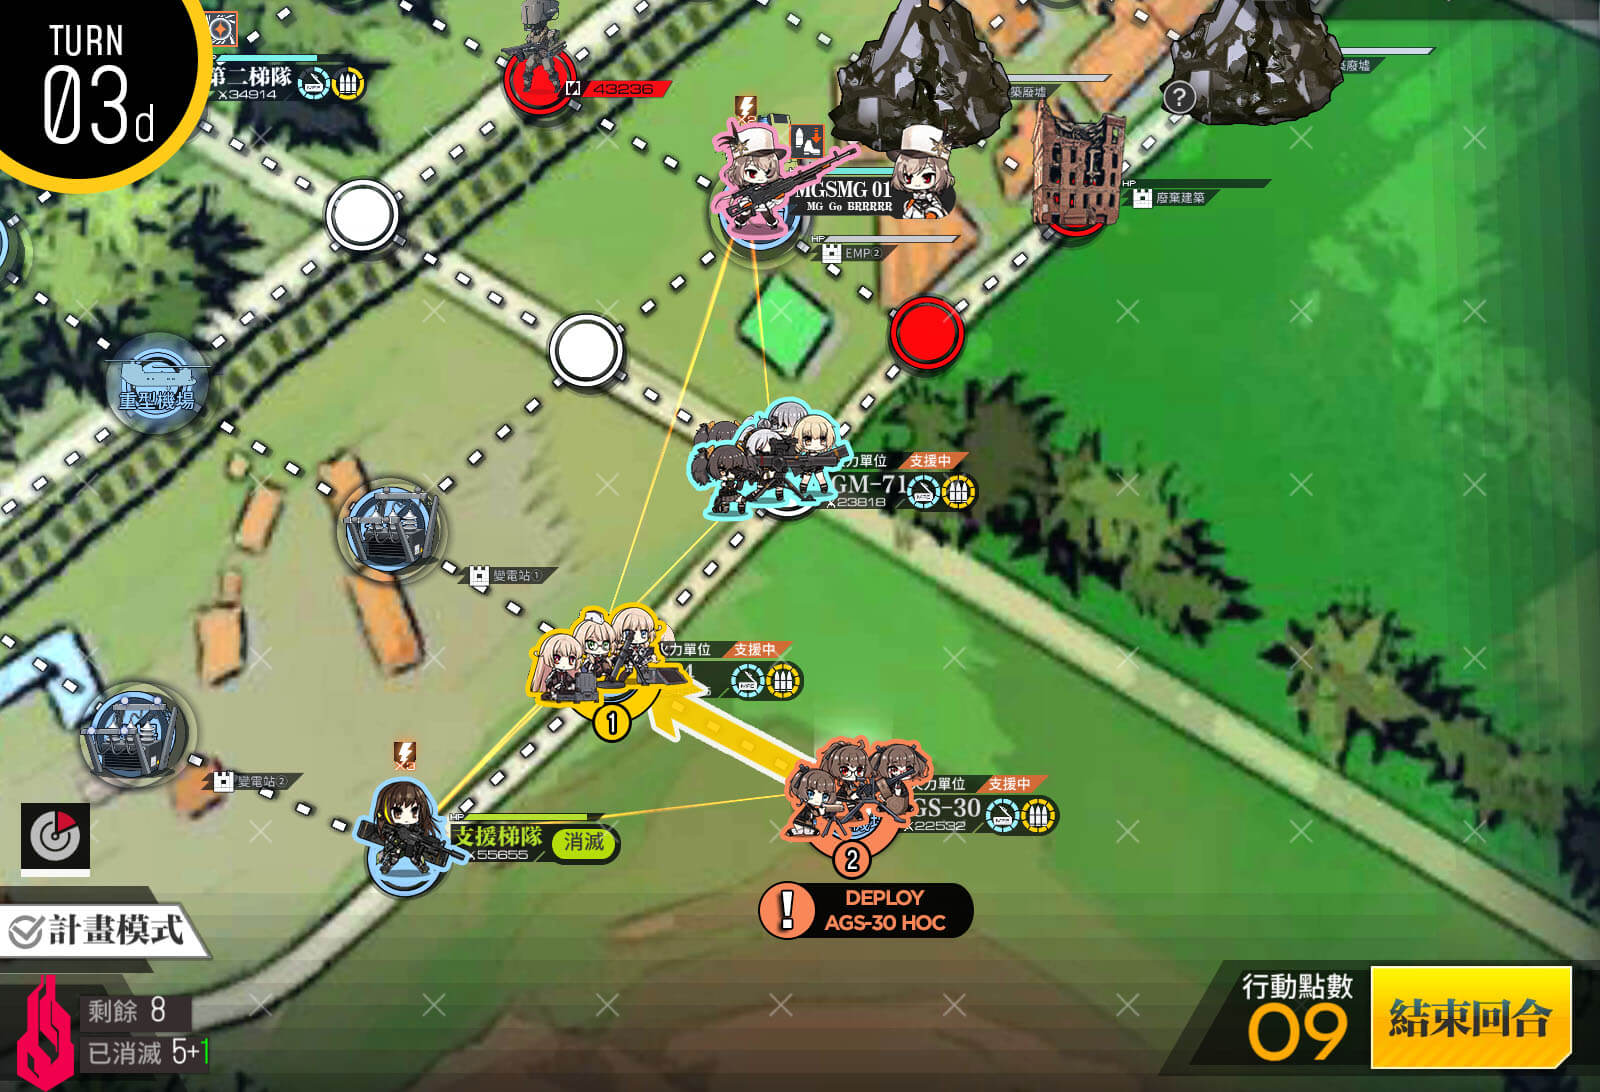
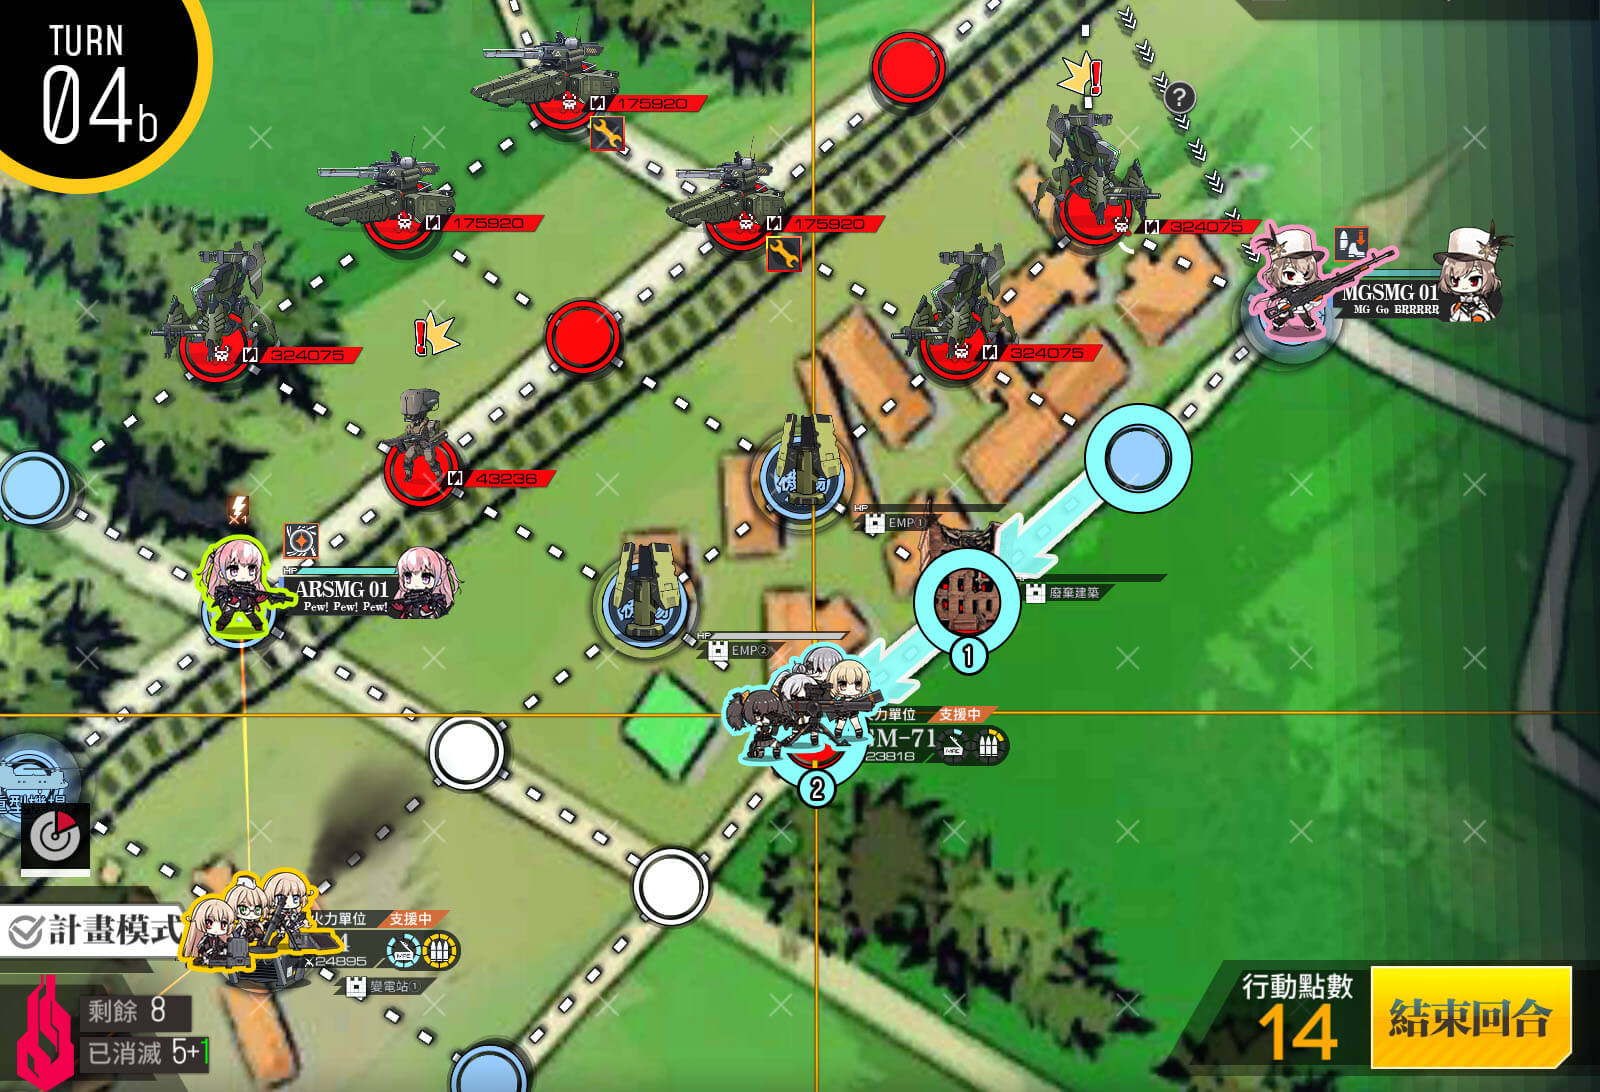
Turn 3 D
Move the other HOC, and then deploy another HOC on the helipad. Swap chain to resupply your rock breaker HOC.

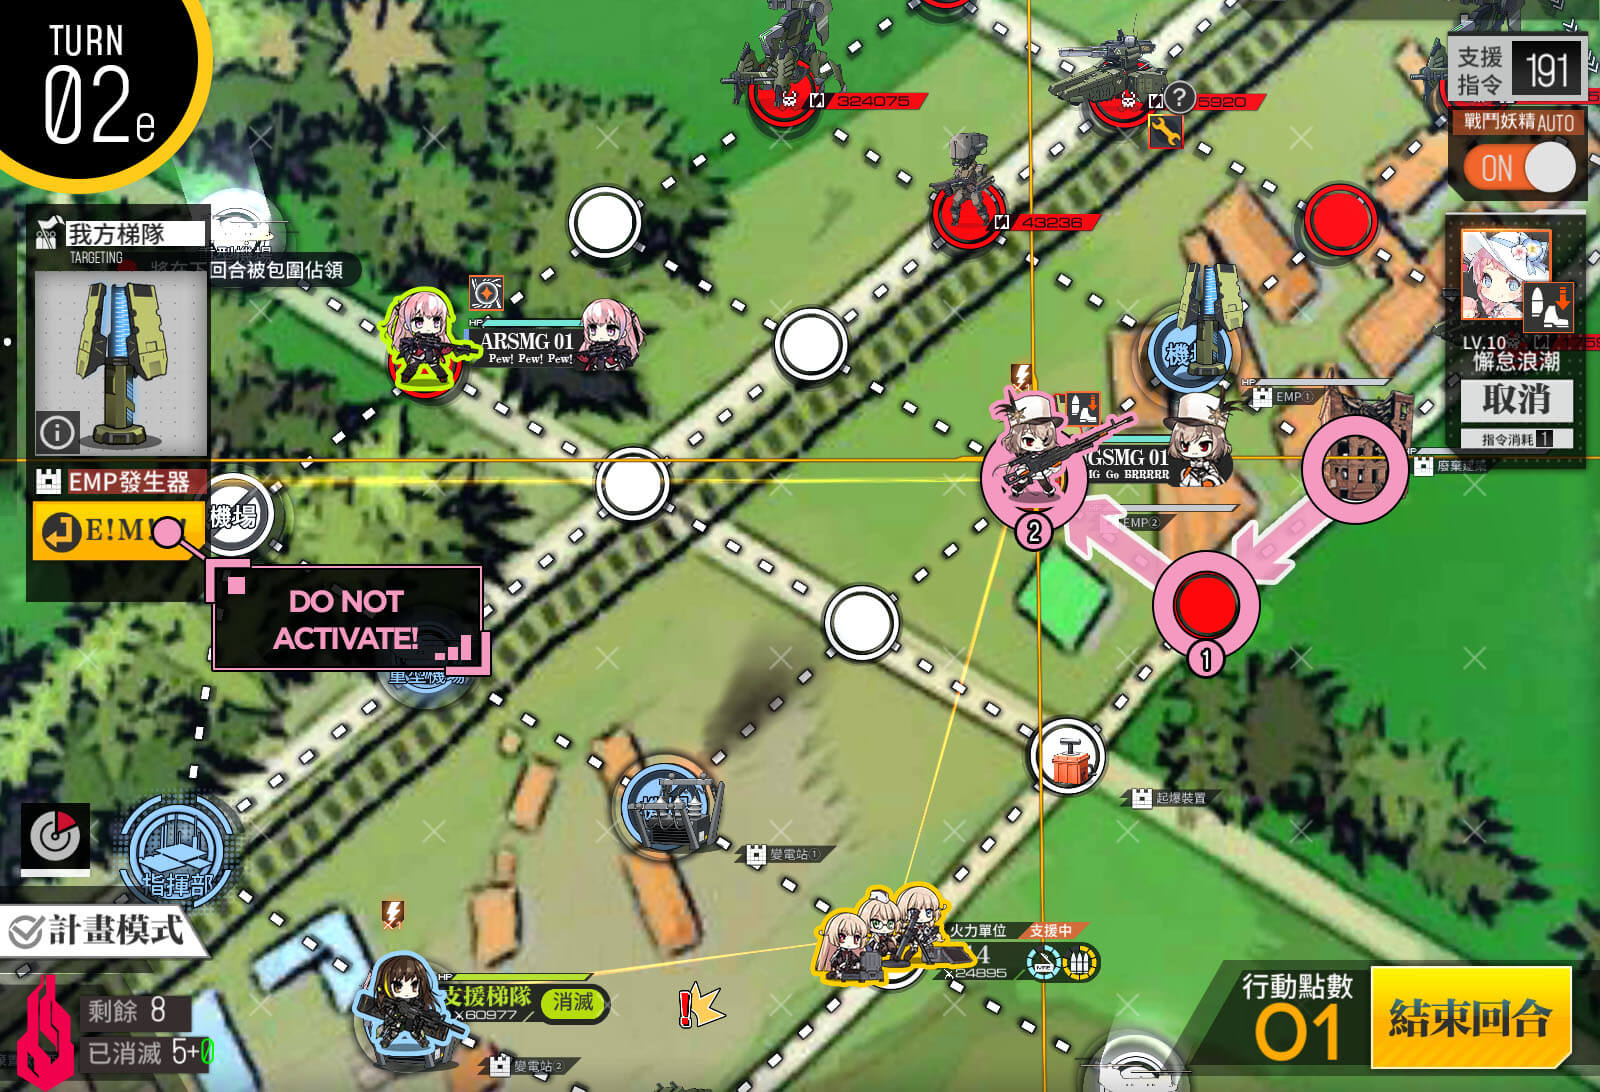
Turn 3 E
Move a HOC on to the upper substation and activate it.
Turn 3 F
Once both substations have been activated, the EMP will convert into EMP!EX. Activate it once it has been converted.
Turn 3 G
Move the bombing echelon as indicated.
Turn 3 H
Move the rock breaker HOC up, and then destroy the rock blocking the echelon's path.
Turn 3 I
Move the echelon on to the enemy helipad.

Turn 3 J
Rock breaker HOC will move up behind the combat team.

Turn 3 K
The other combat team you have deployed may have a deathstack next to it. You will not survive a deathstack encounter, so you will use your remaining AP to move out of the way.
Turn 4 A
At the start of this turn, use your rock breaker HOC to destroy the last rock.
Turn 4 B
The HOC will then move downwards two nodes.

Turn 4 C
The bombing echelon will move likewise. End your turn.

Turn 5
Move your bombing echelon all the way to the enemy HQ. End turn.
Turn 1
Spawn your RFHG and move as indicated.
Turn 2
Move as indicated.
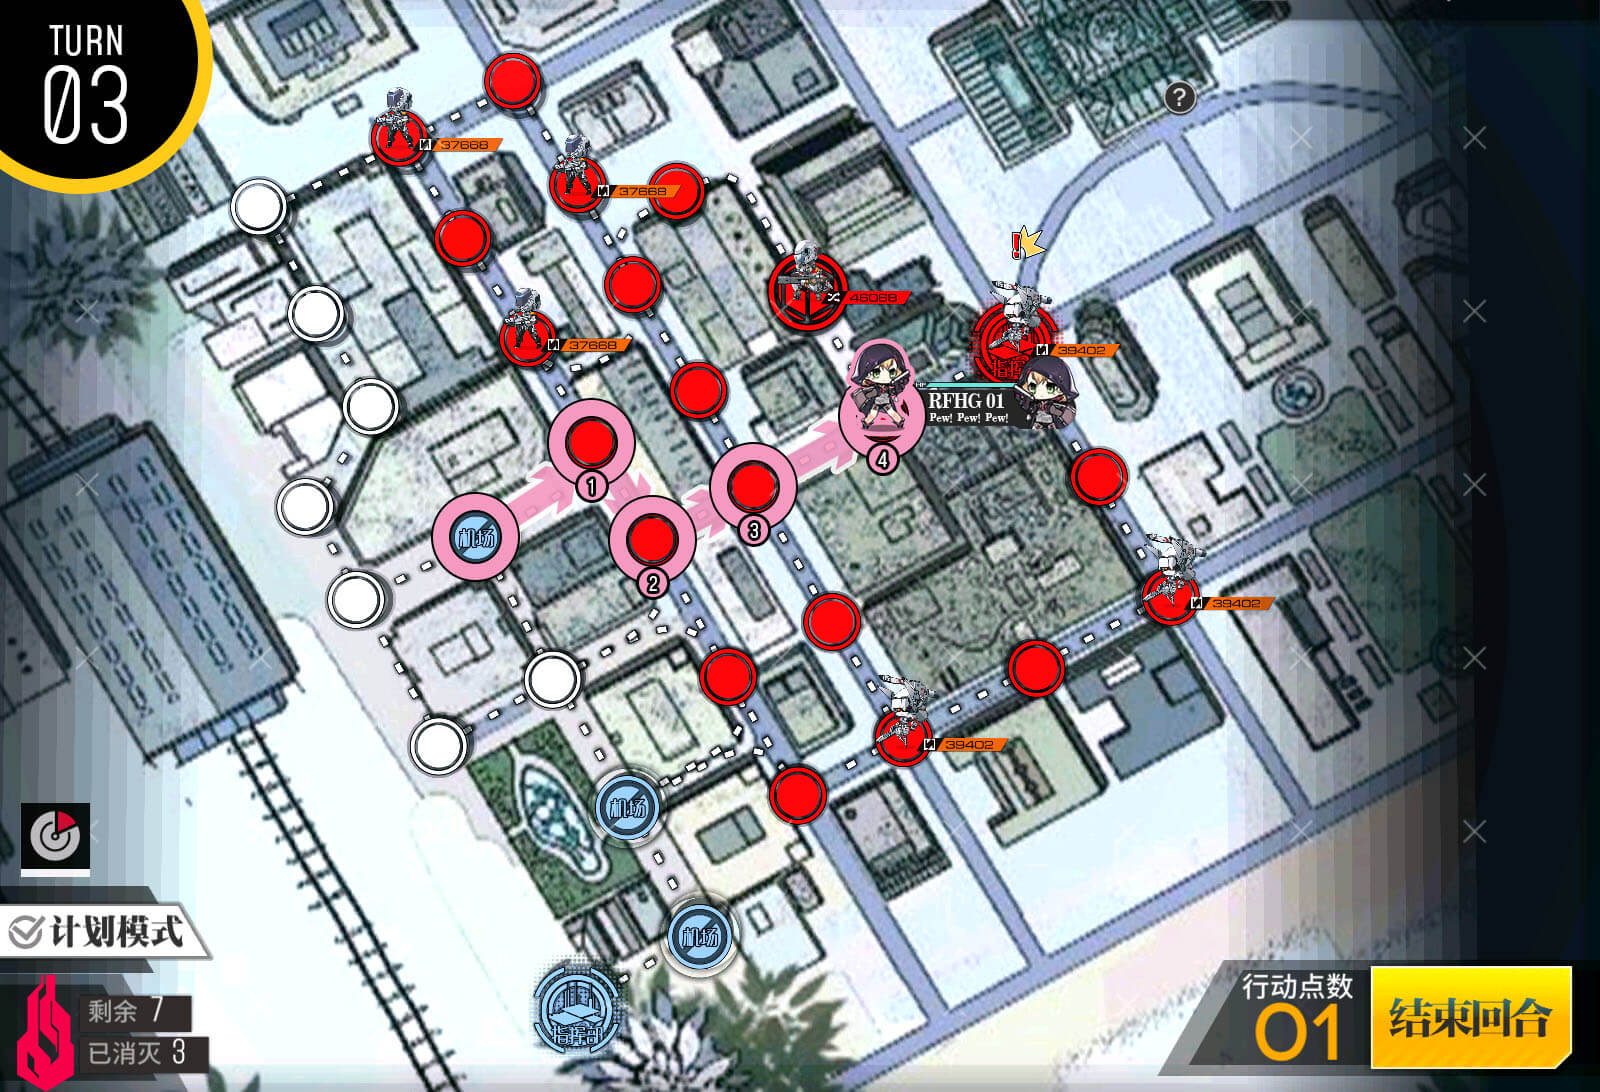
Turn 3
Move as indicated.
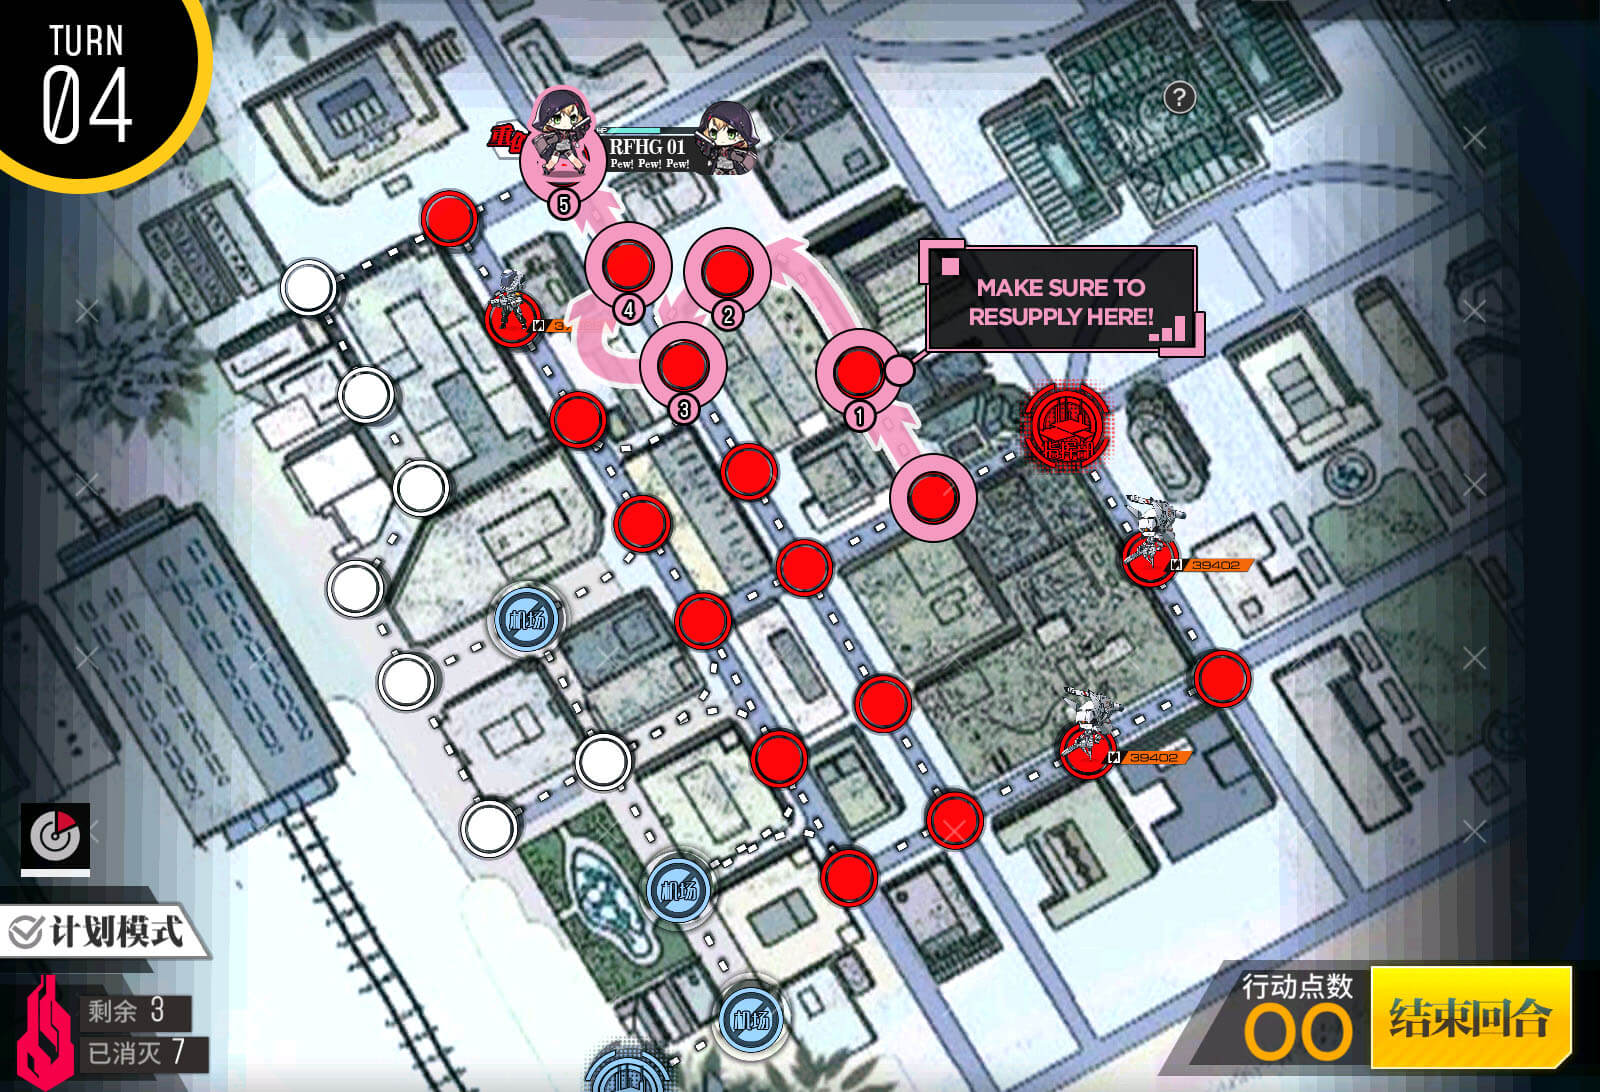
Turn 4
Move as indicated. You need to resupply on the crate or else you will run out of supplies.
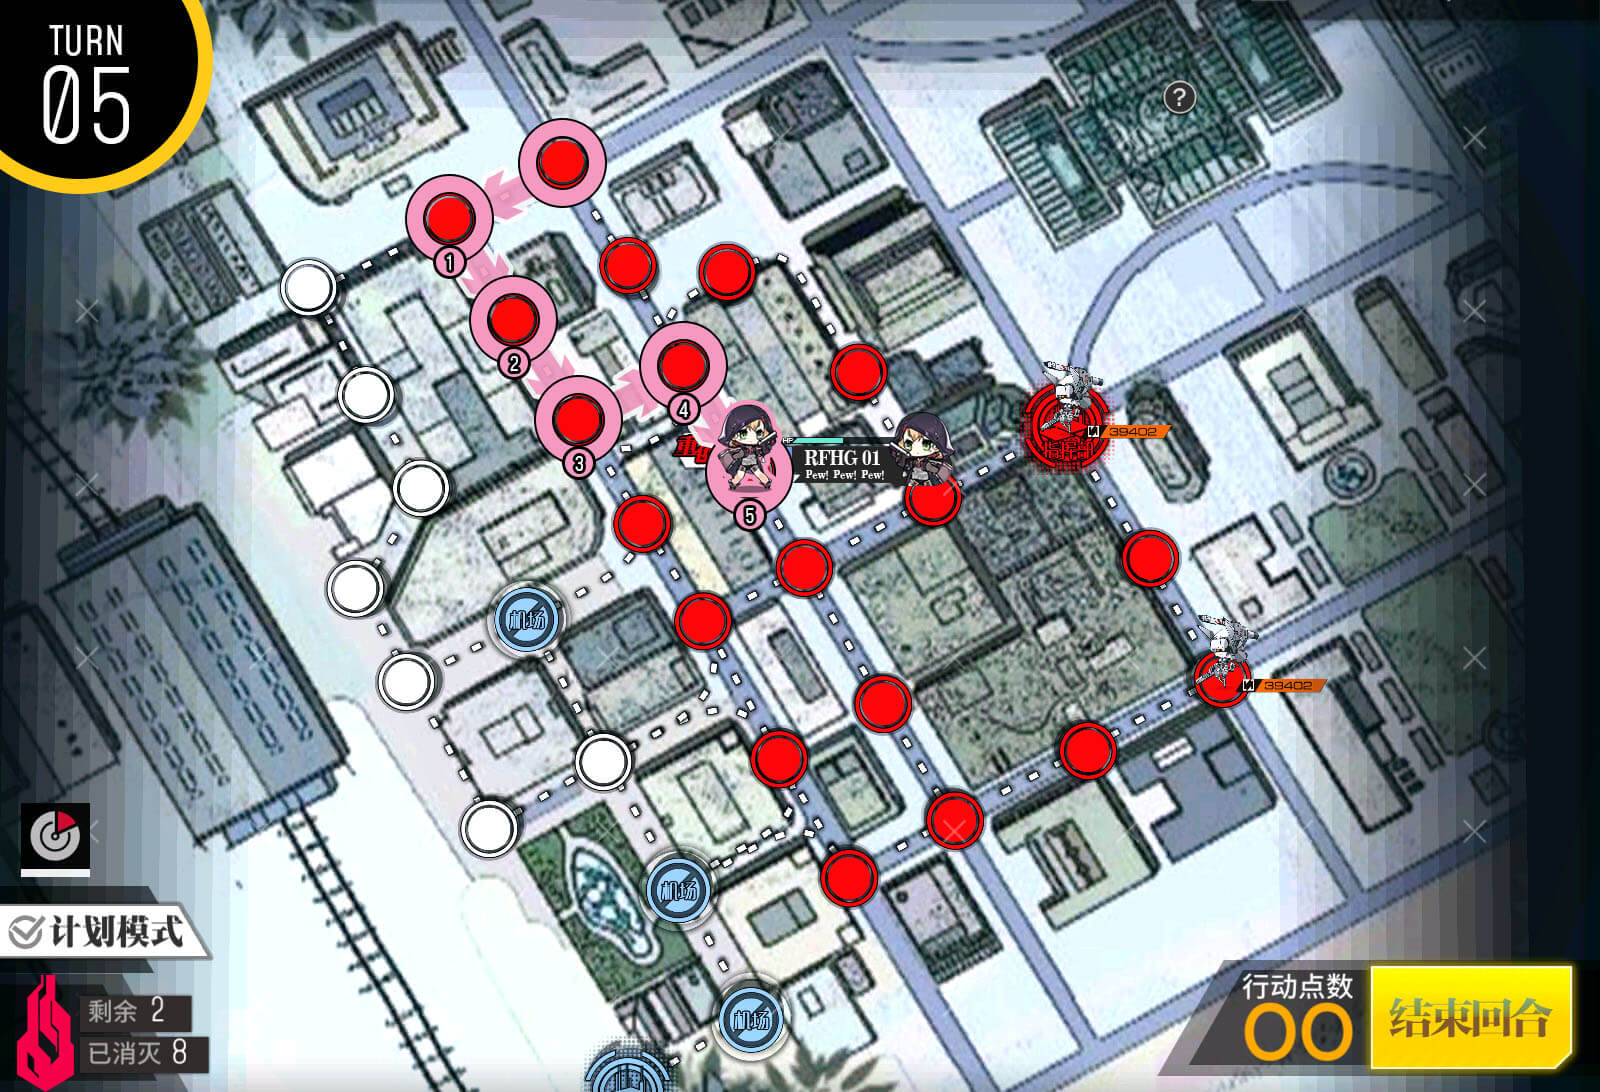
Turn 5
Move as indicated.
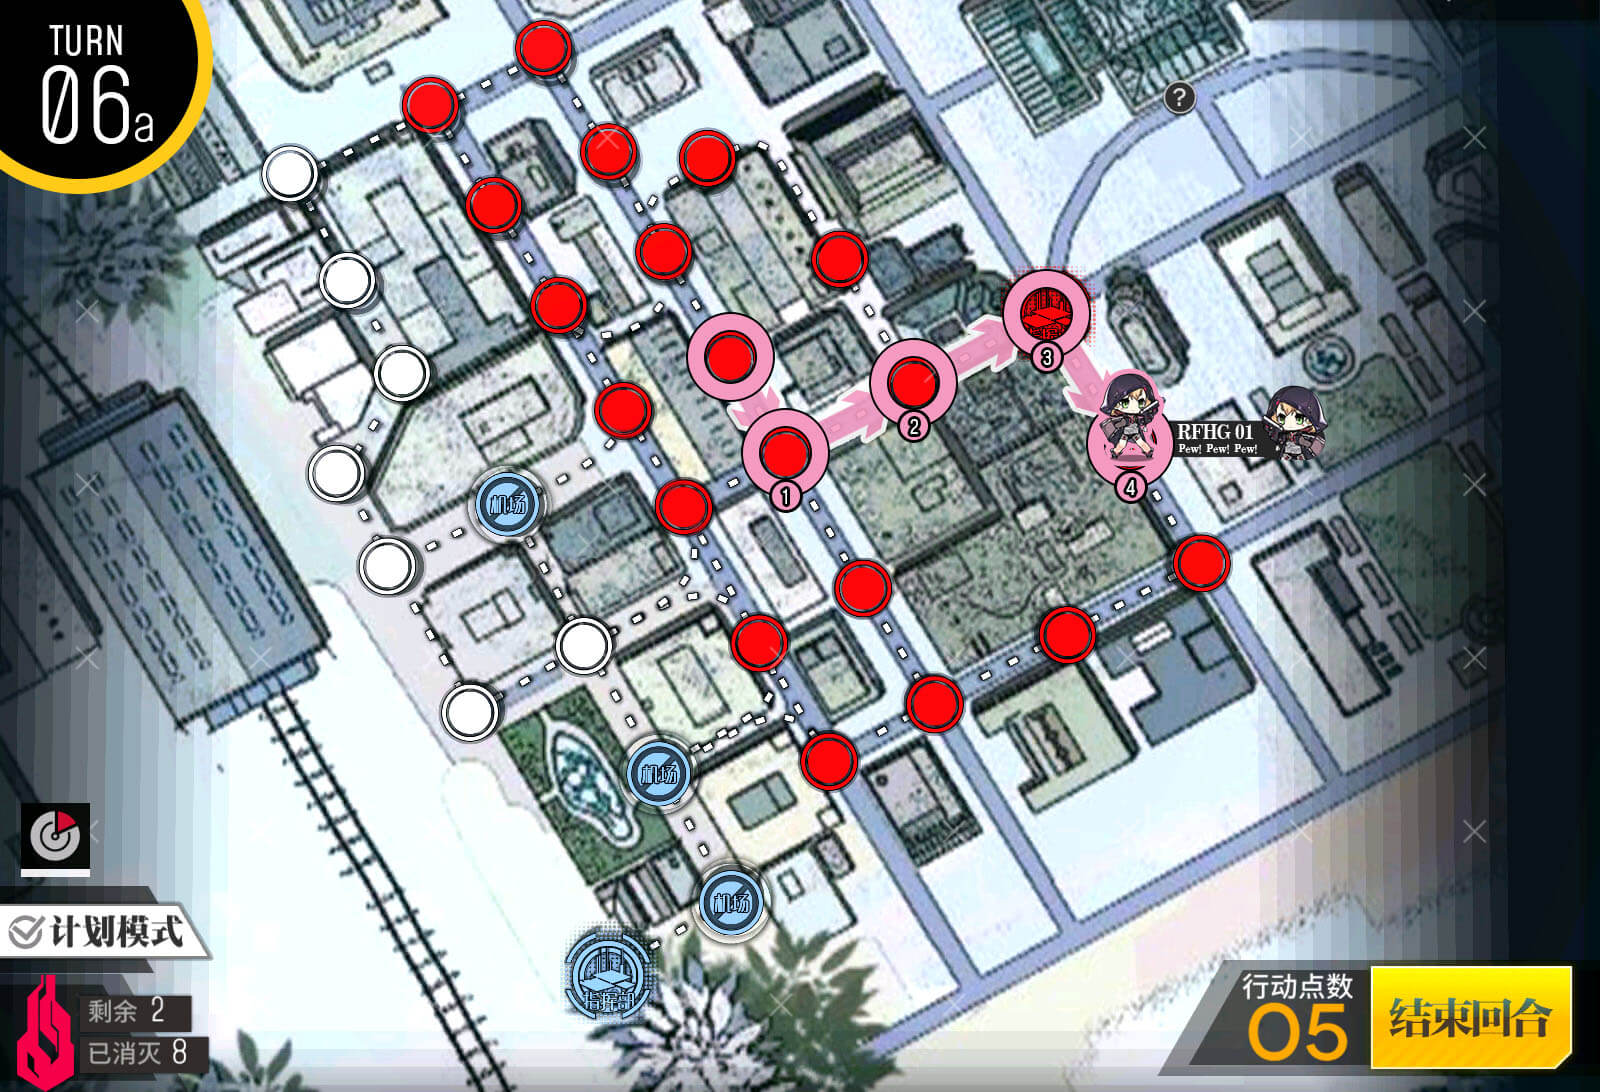
Turn 6 A
Move as indicated.

Turn 6 B
End turn on the enemy HQ once you have killed all enemies on the map.
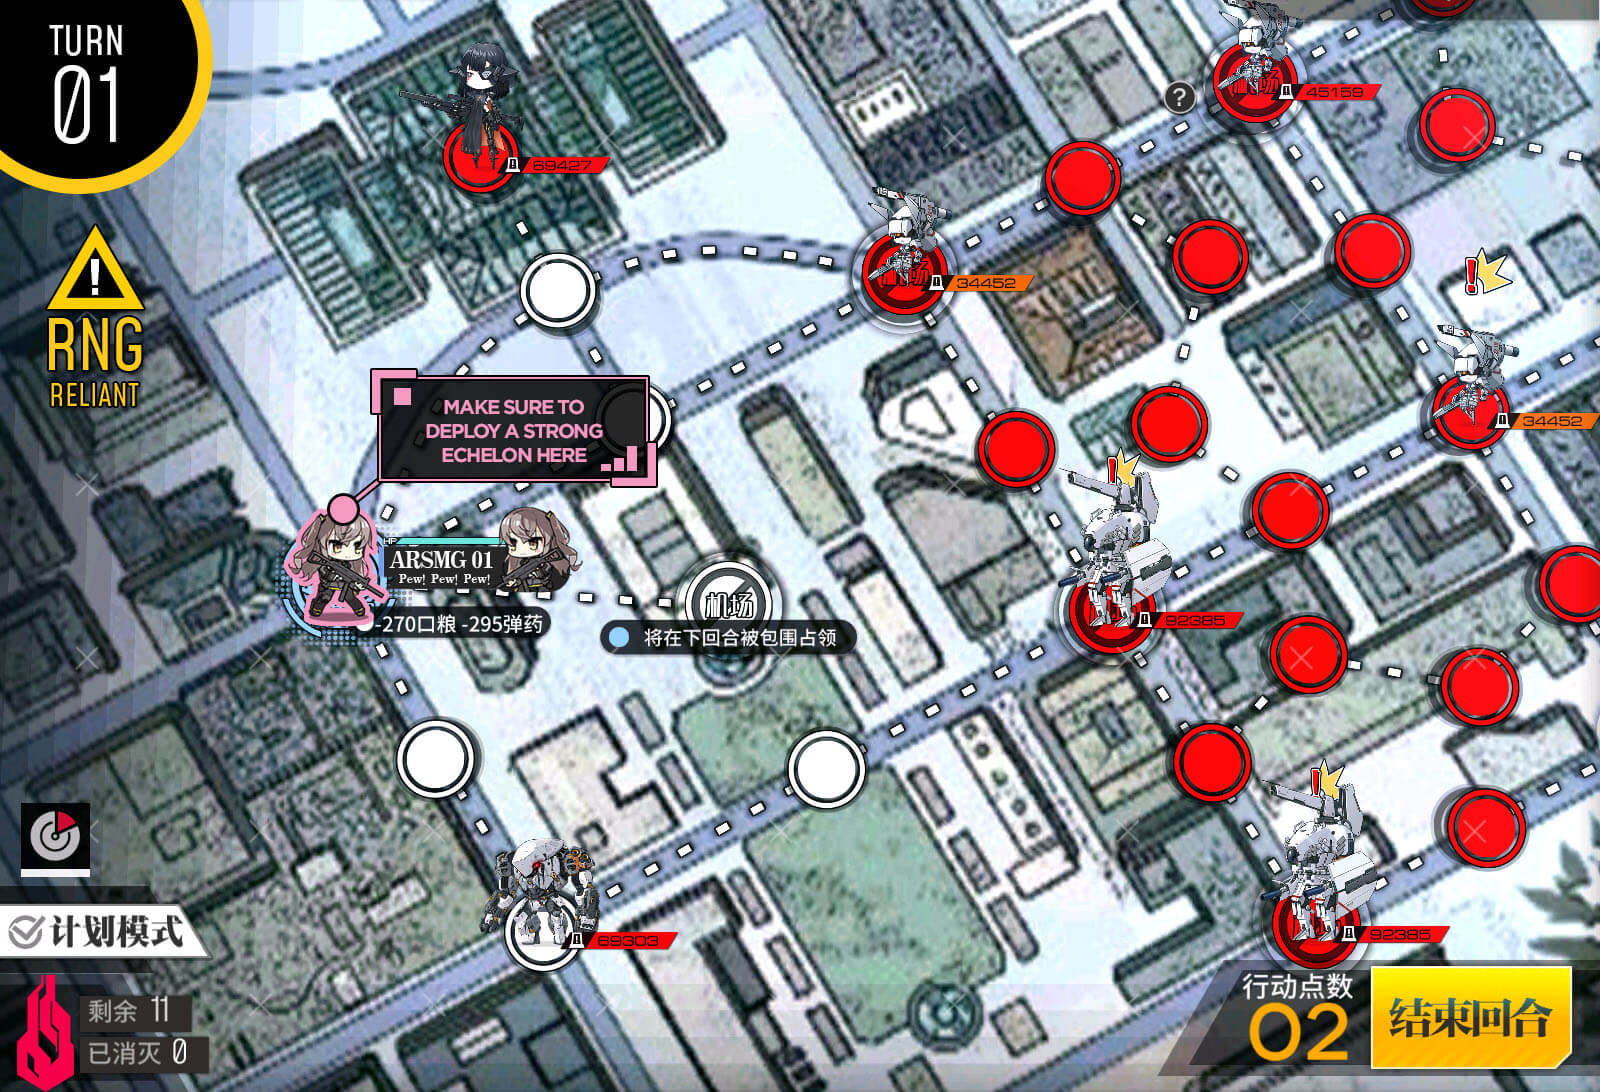
Turn 1
Deploy a strong echelon here that is able to deal with a variety of enemies on this map. ARSMG or RFHG are both okay, although with ARSMG, you may want to bring something that makes quick work of Doppelsoldners.
Turn 1 A
Move as shown.

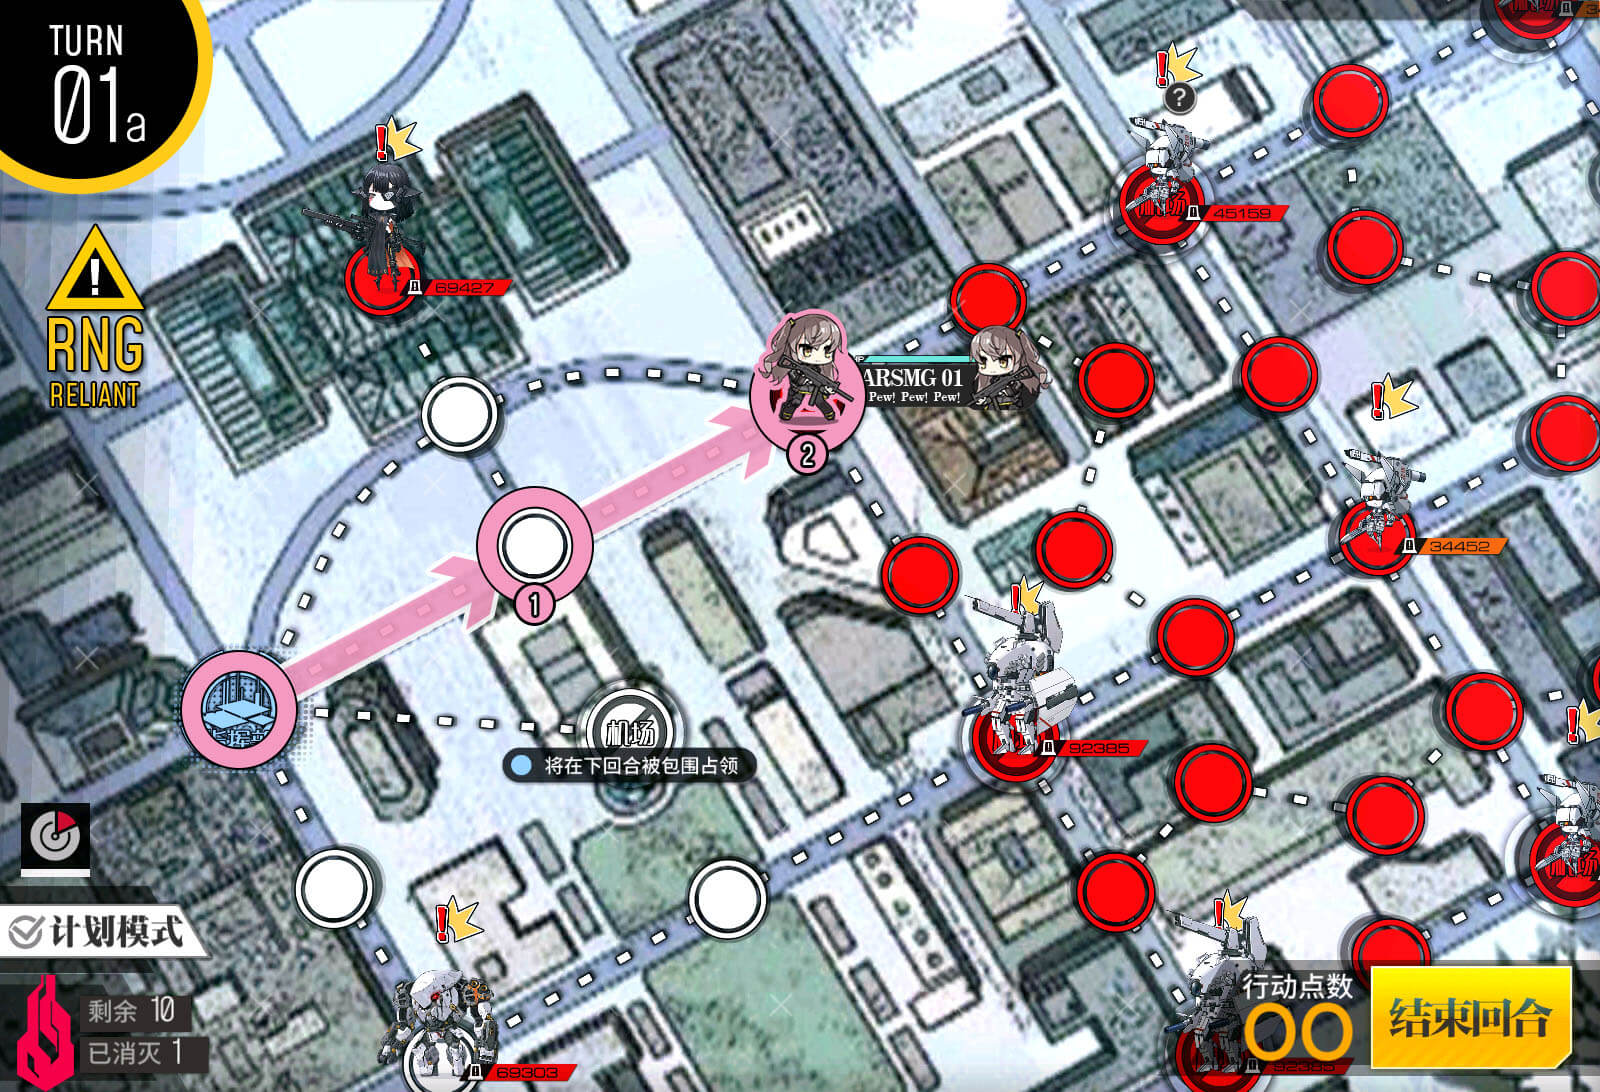
Turn 2
Move as shown. This should provide you with an optimal position to start taking fights you can win and a position where you can easily hide away from fights you can't win.
Turn 1
Oops, you finished the map.