


 Cost – 1588
 Cost – 1588
 NORMAL

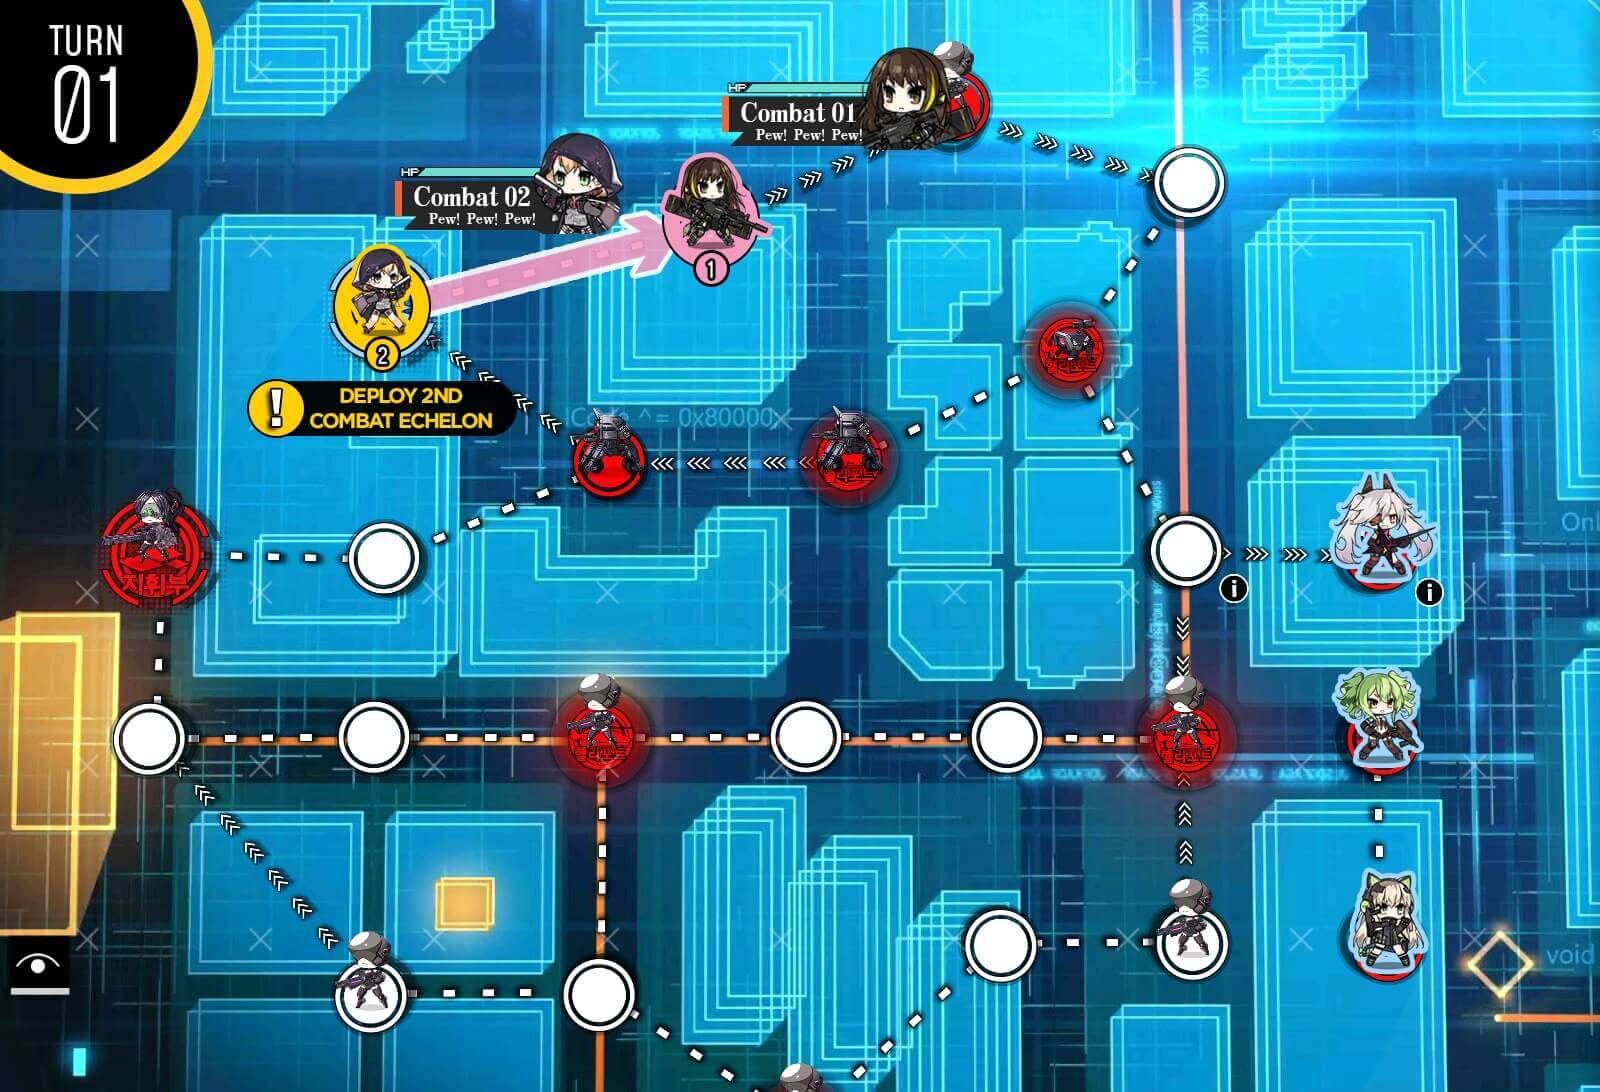
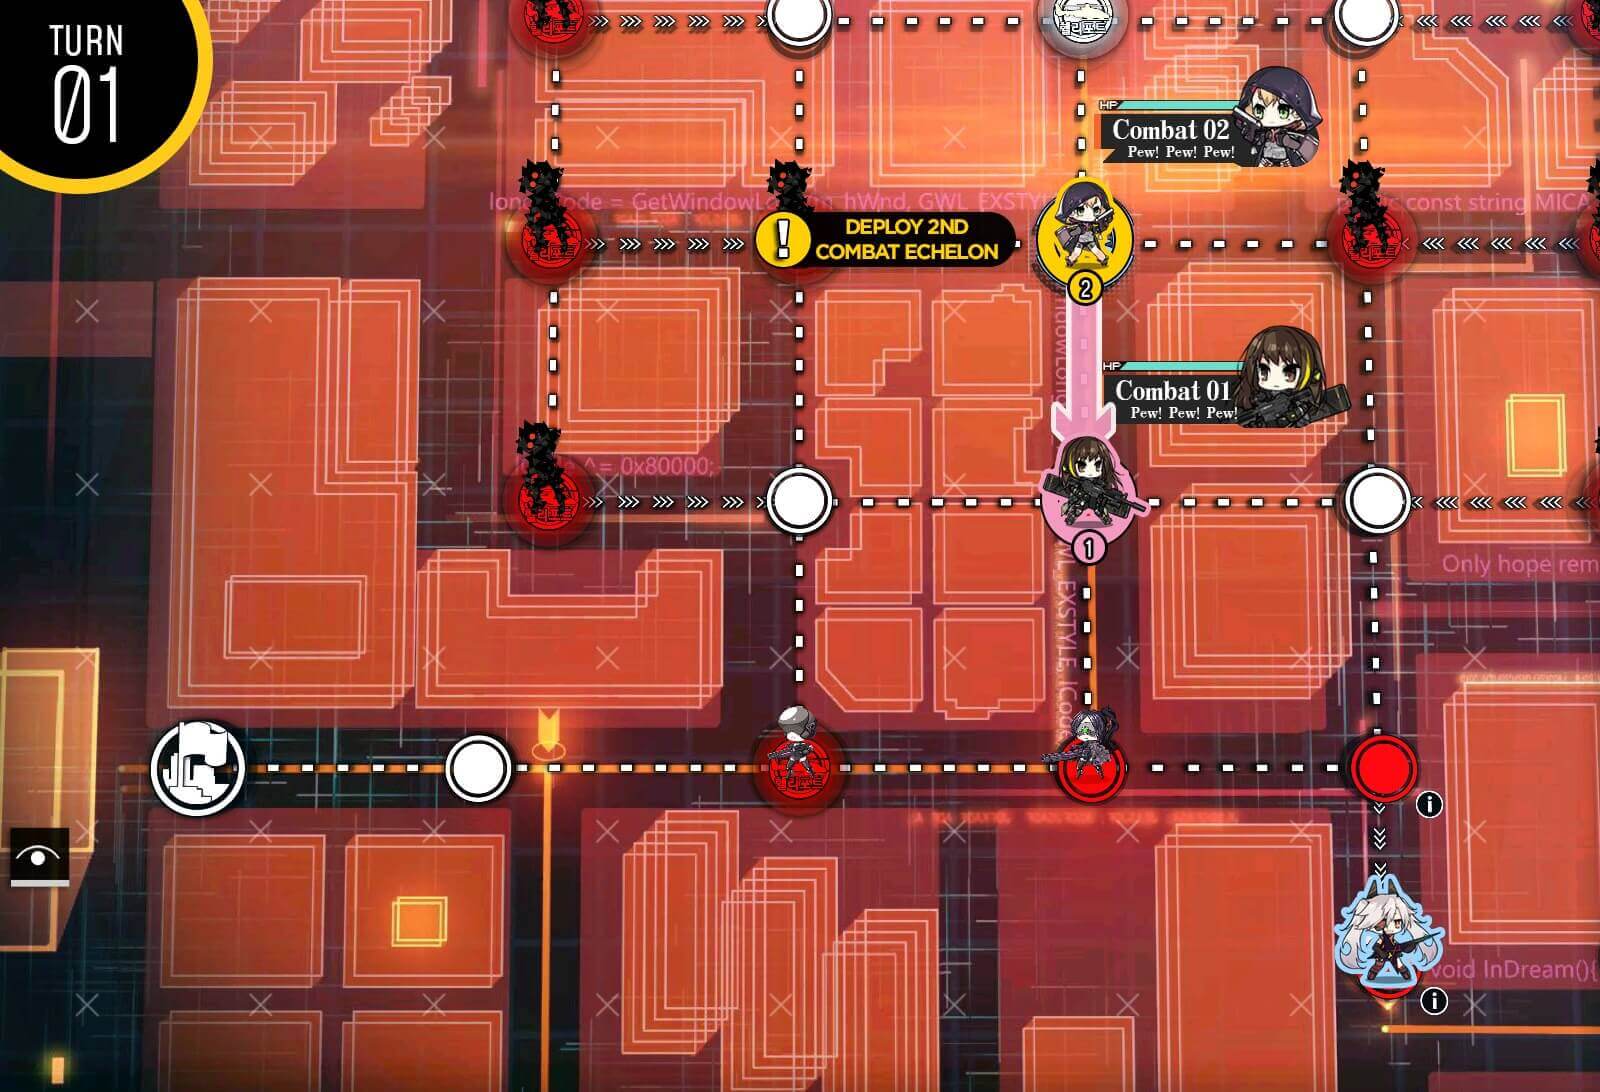
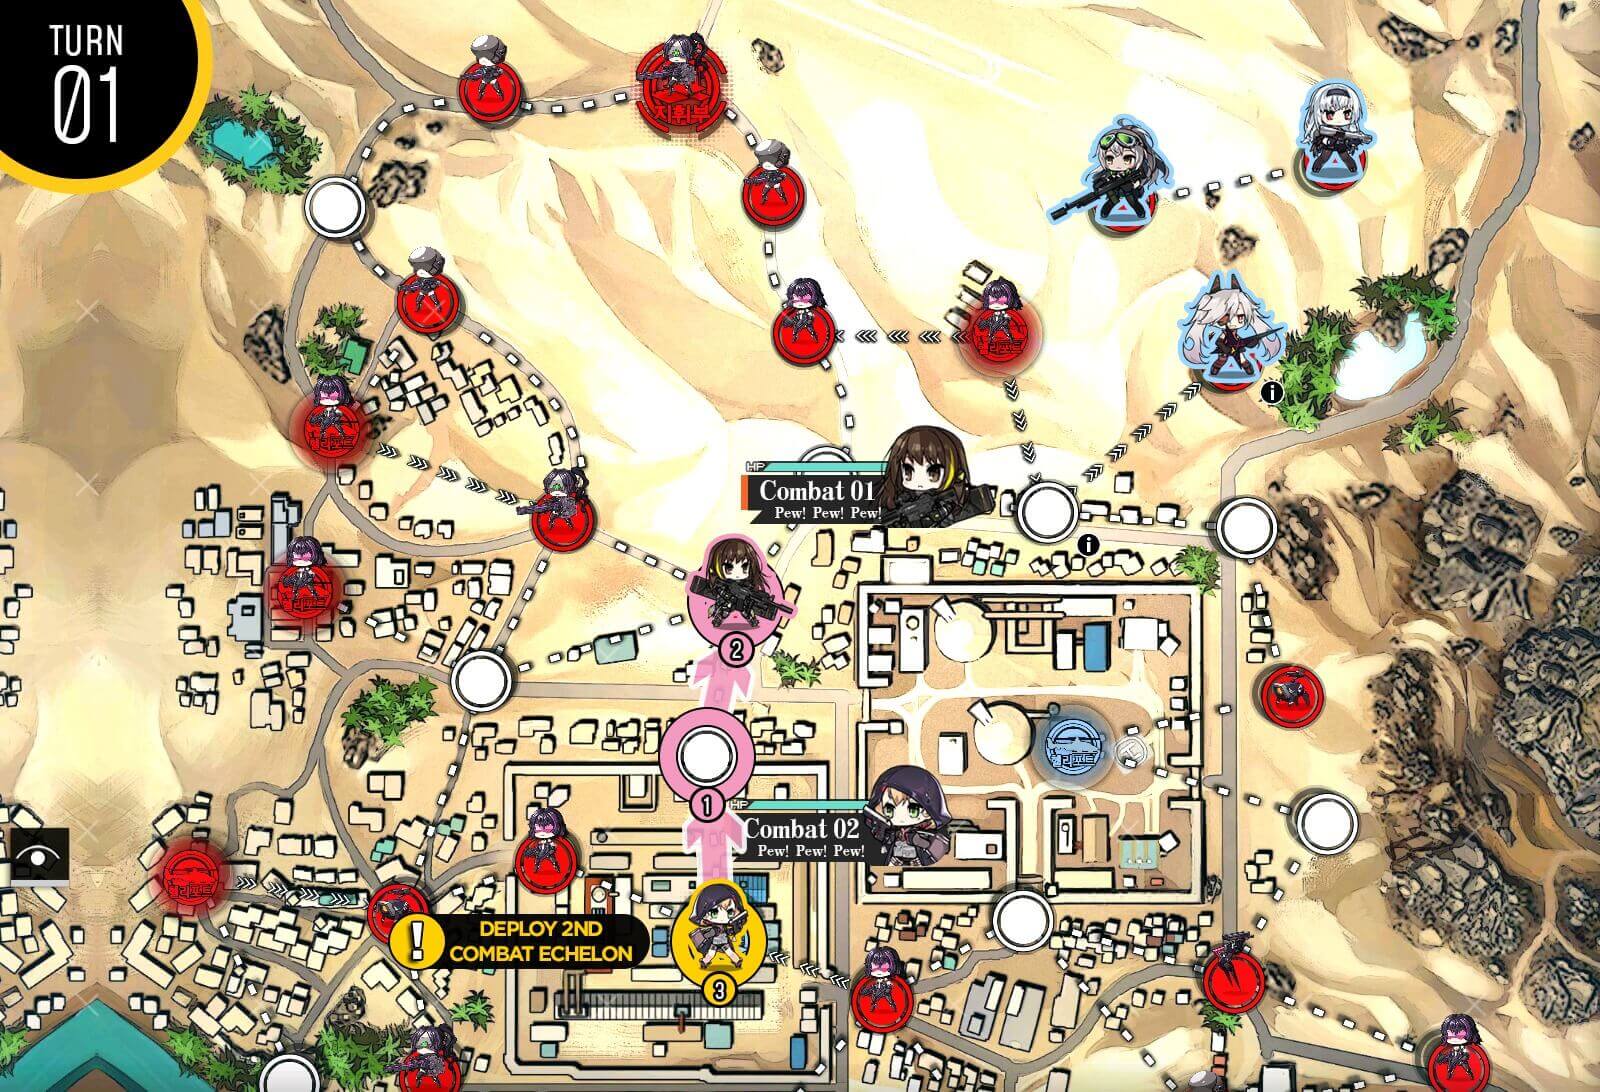
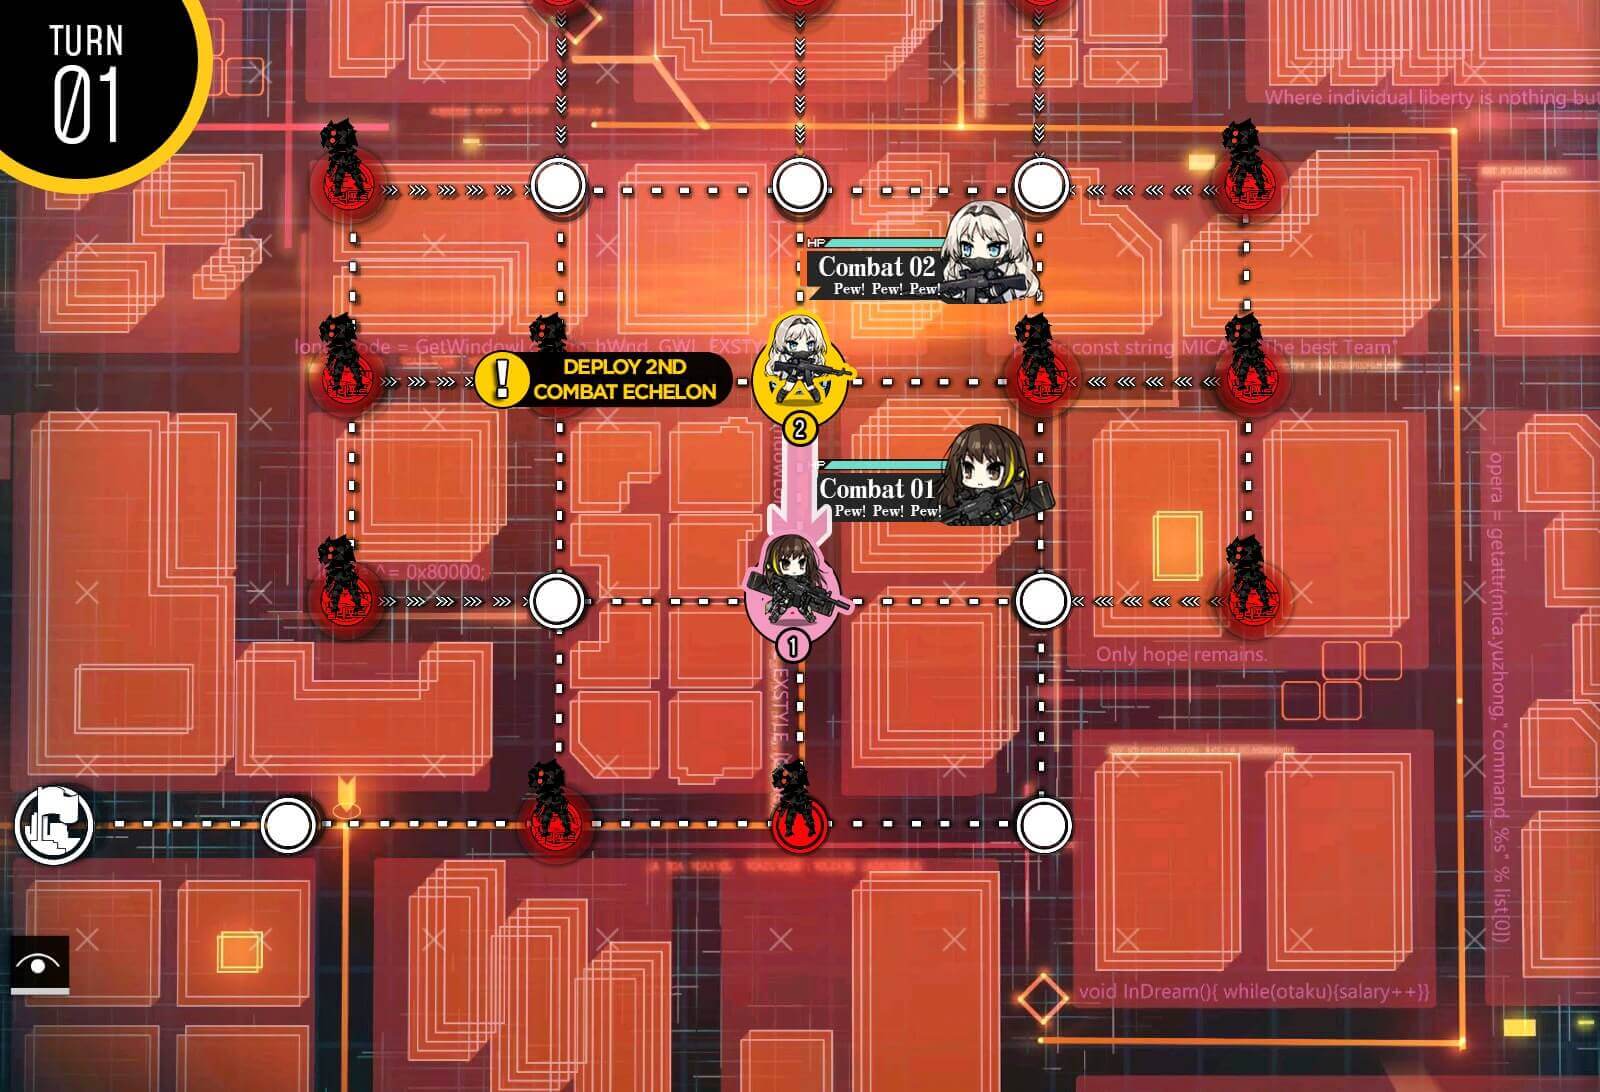
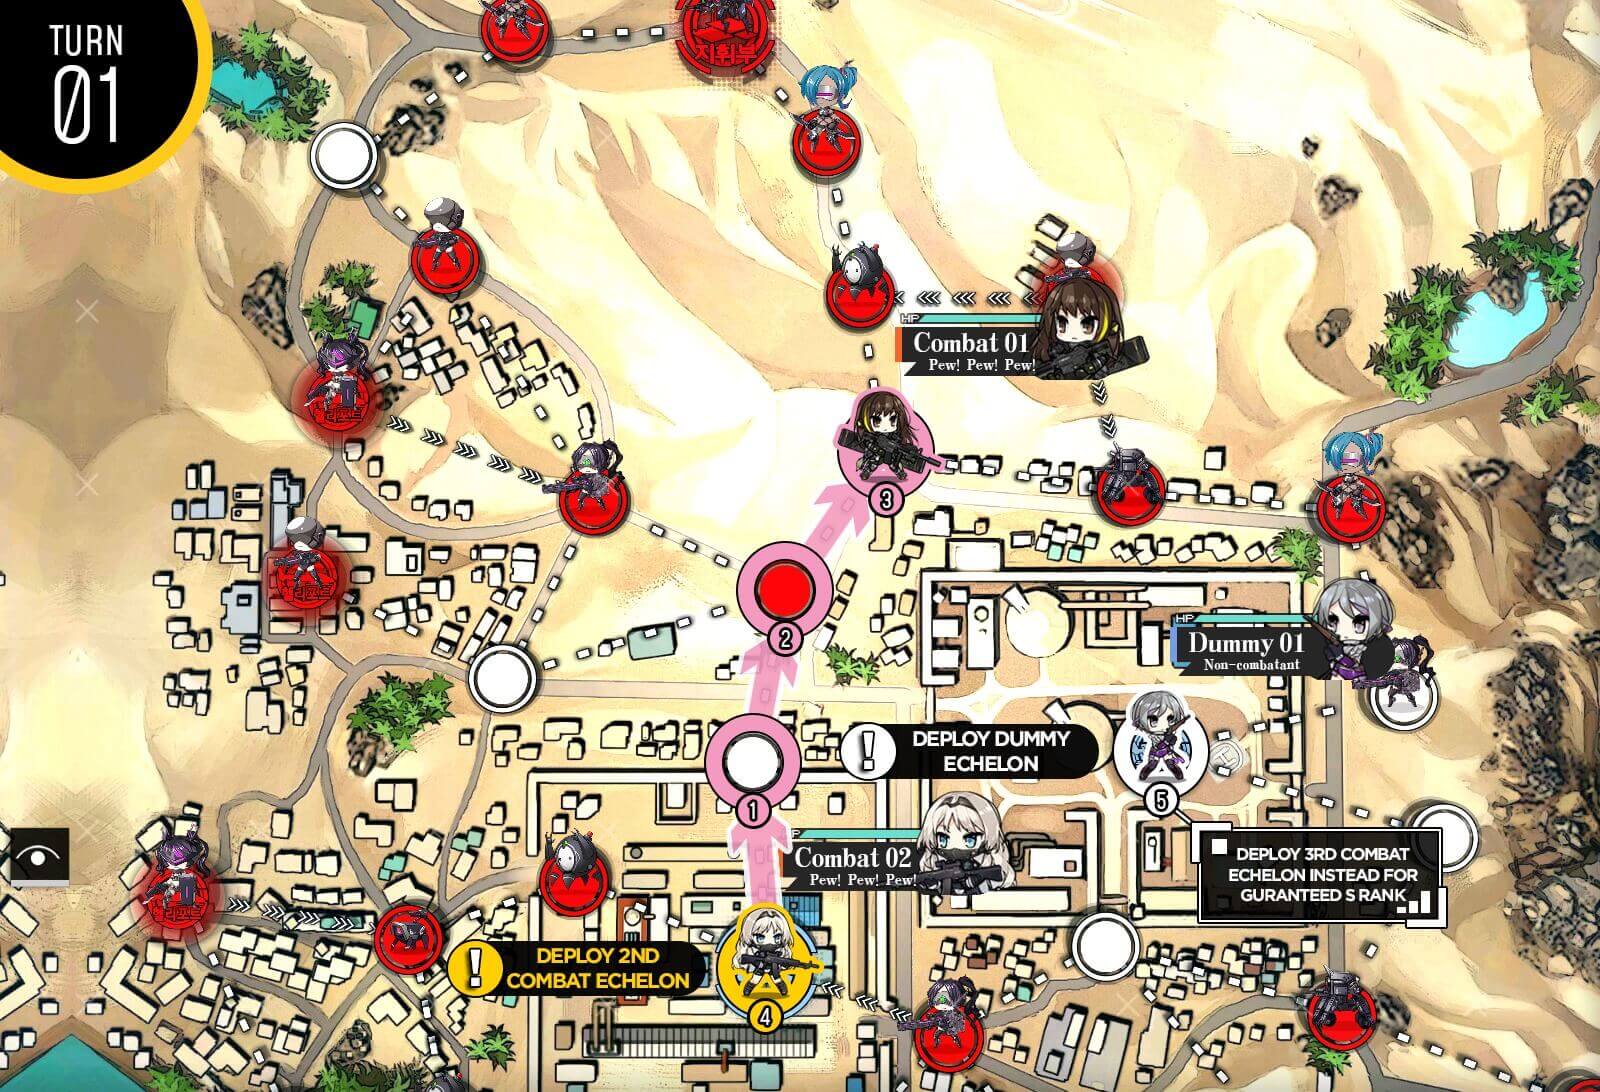
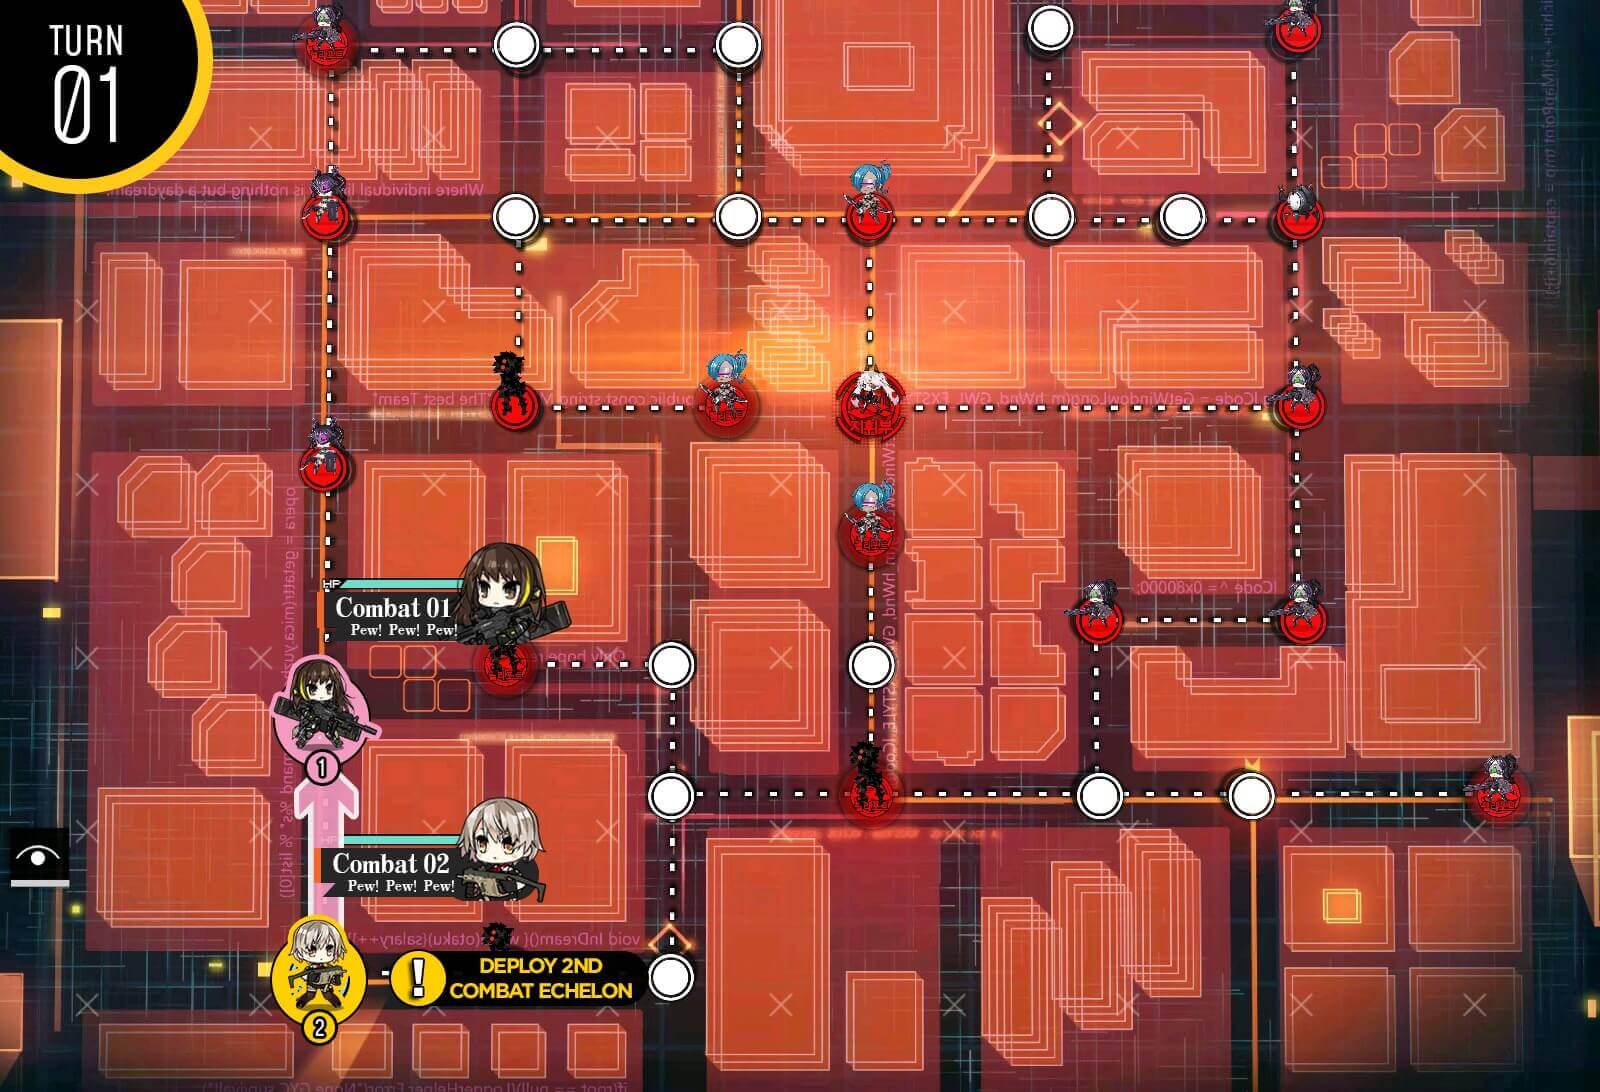
Turn 1
Start with your stronger combat echelon on HQ. After moving to the right, deploy your second combat echelon to defend HQ.
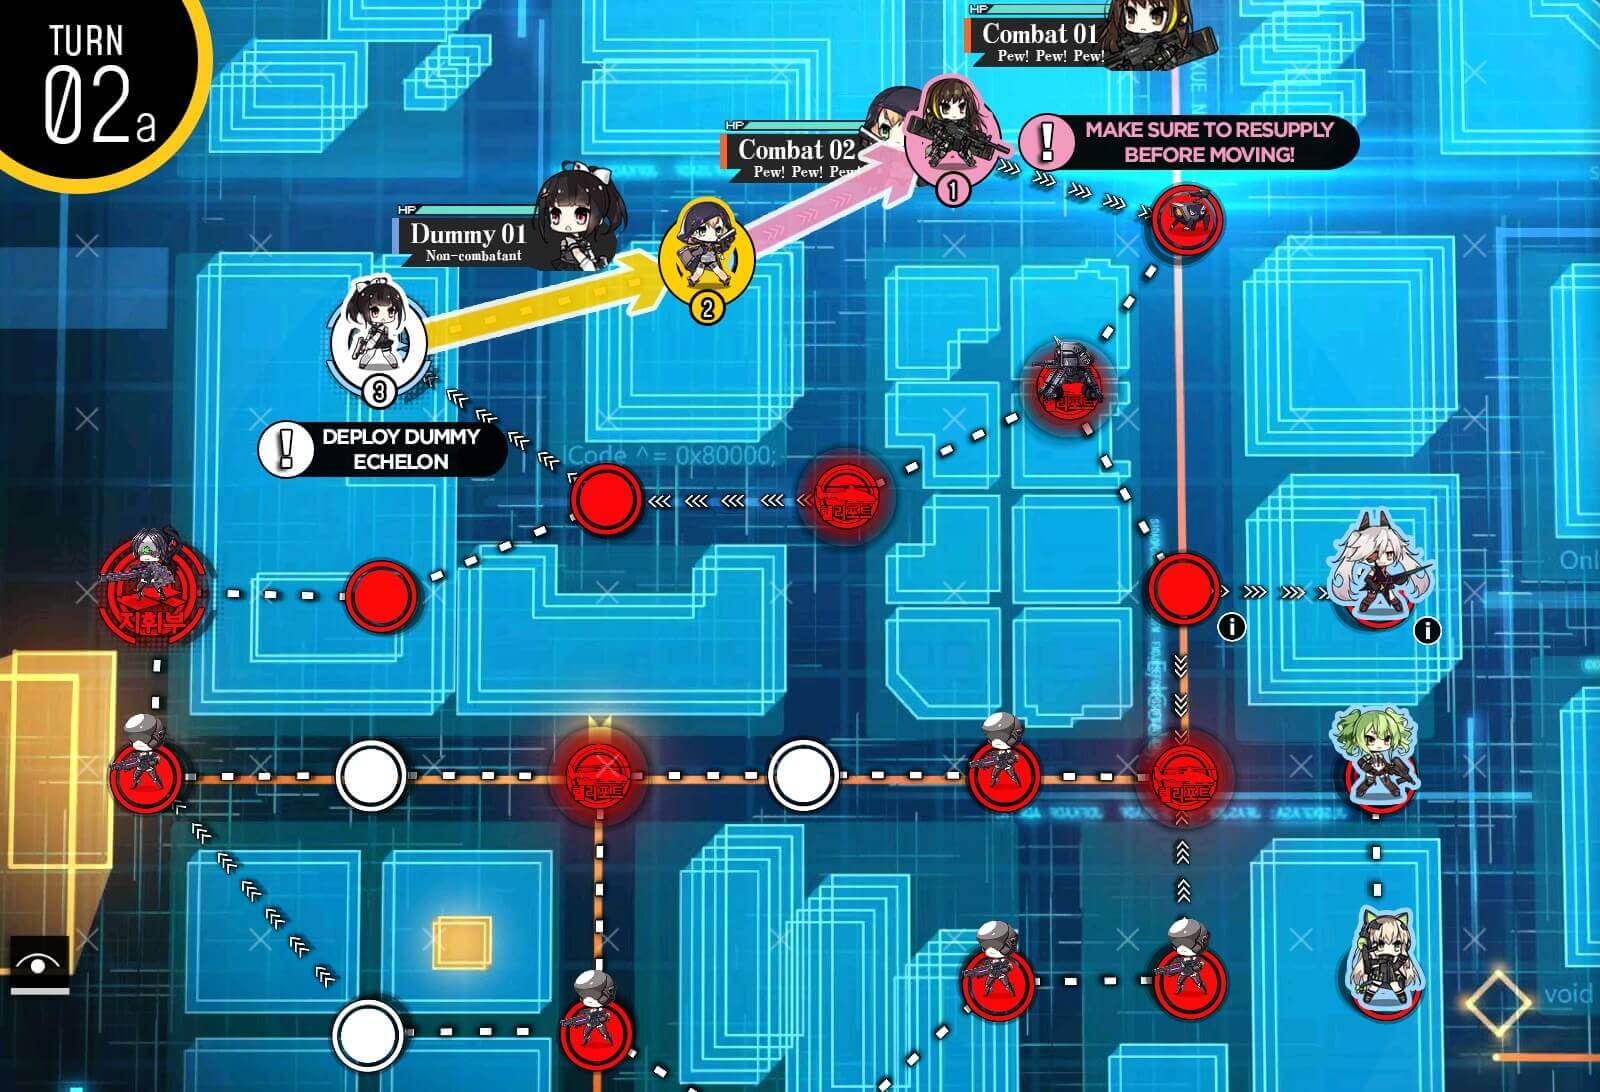
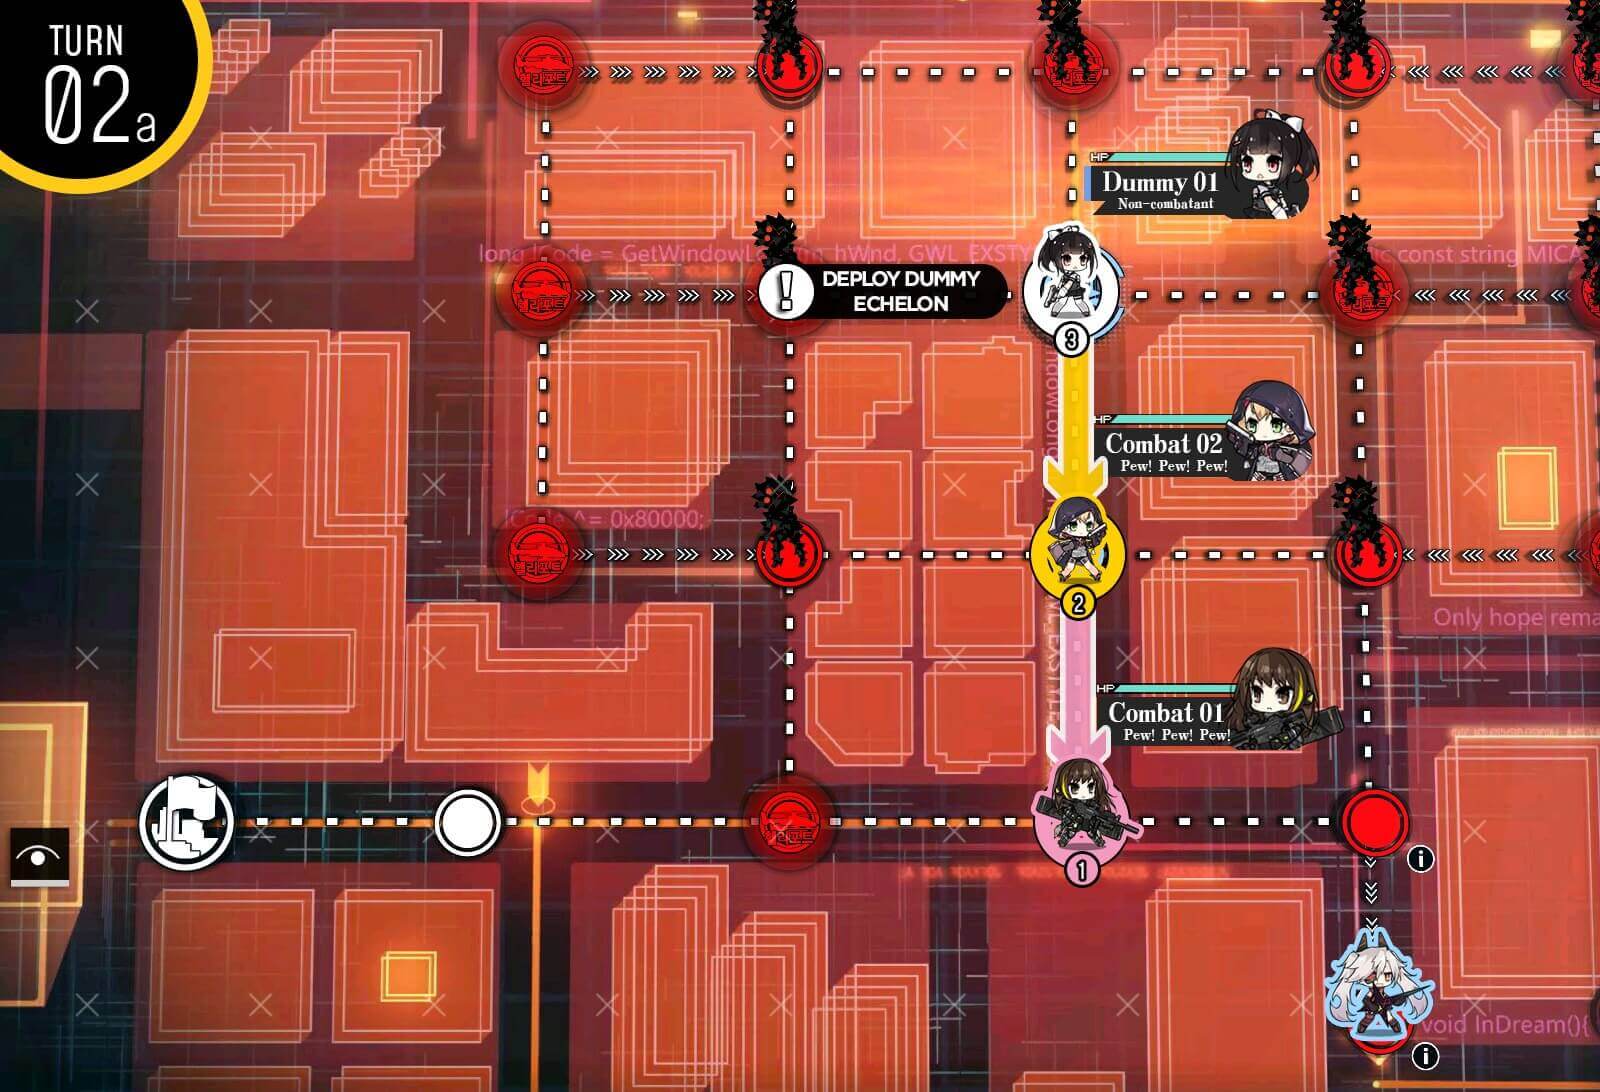
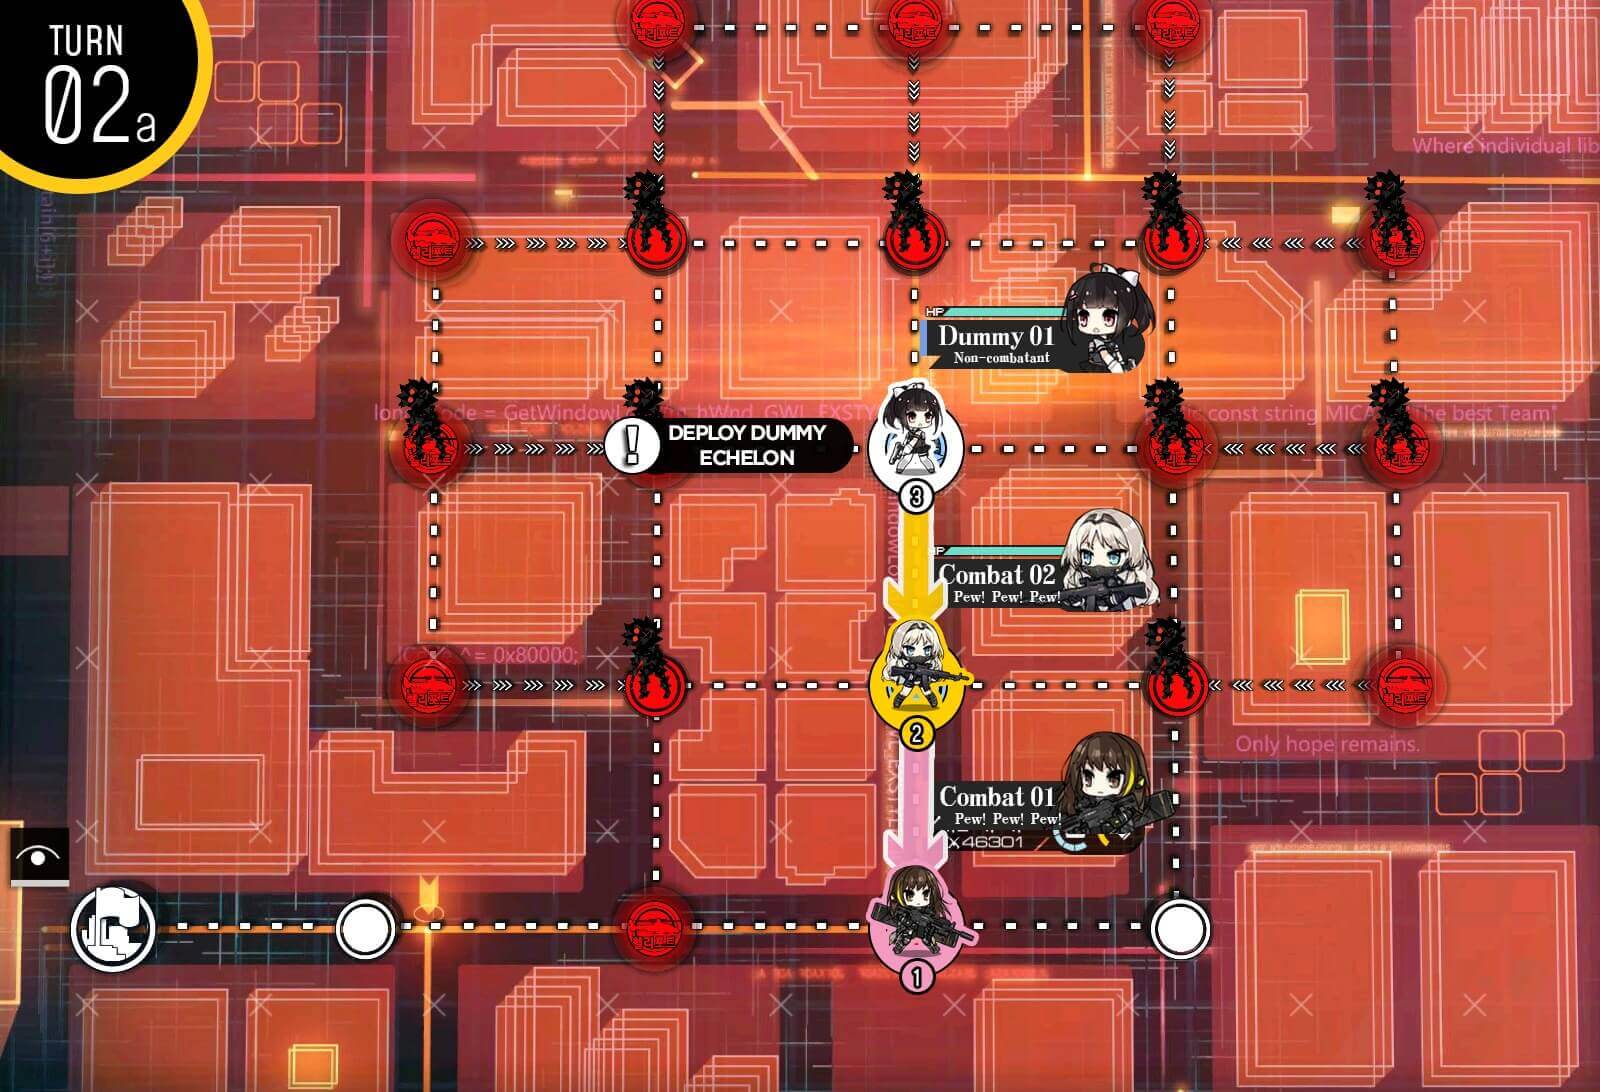
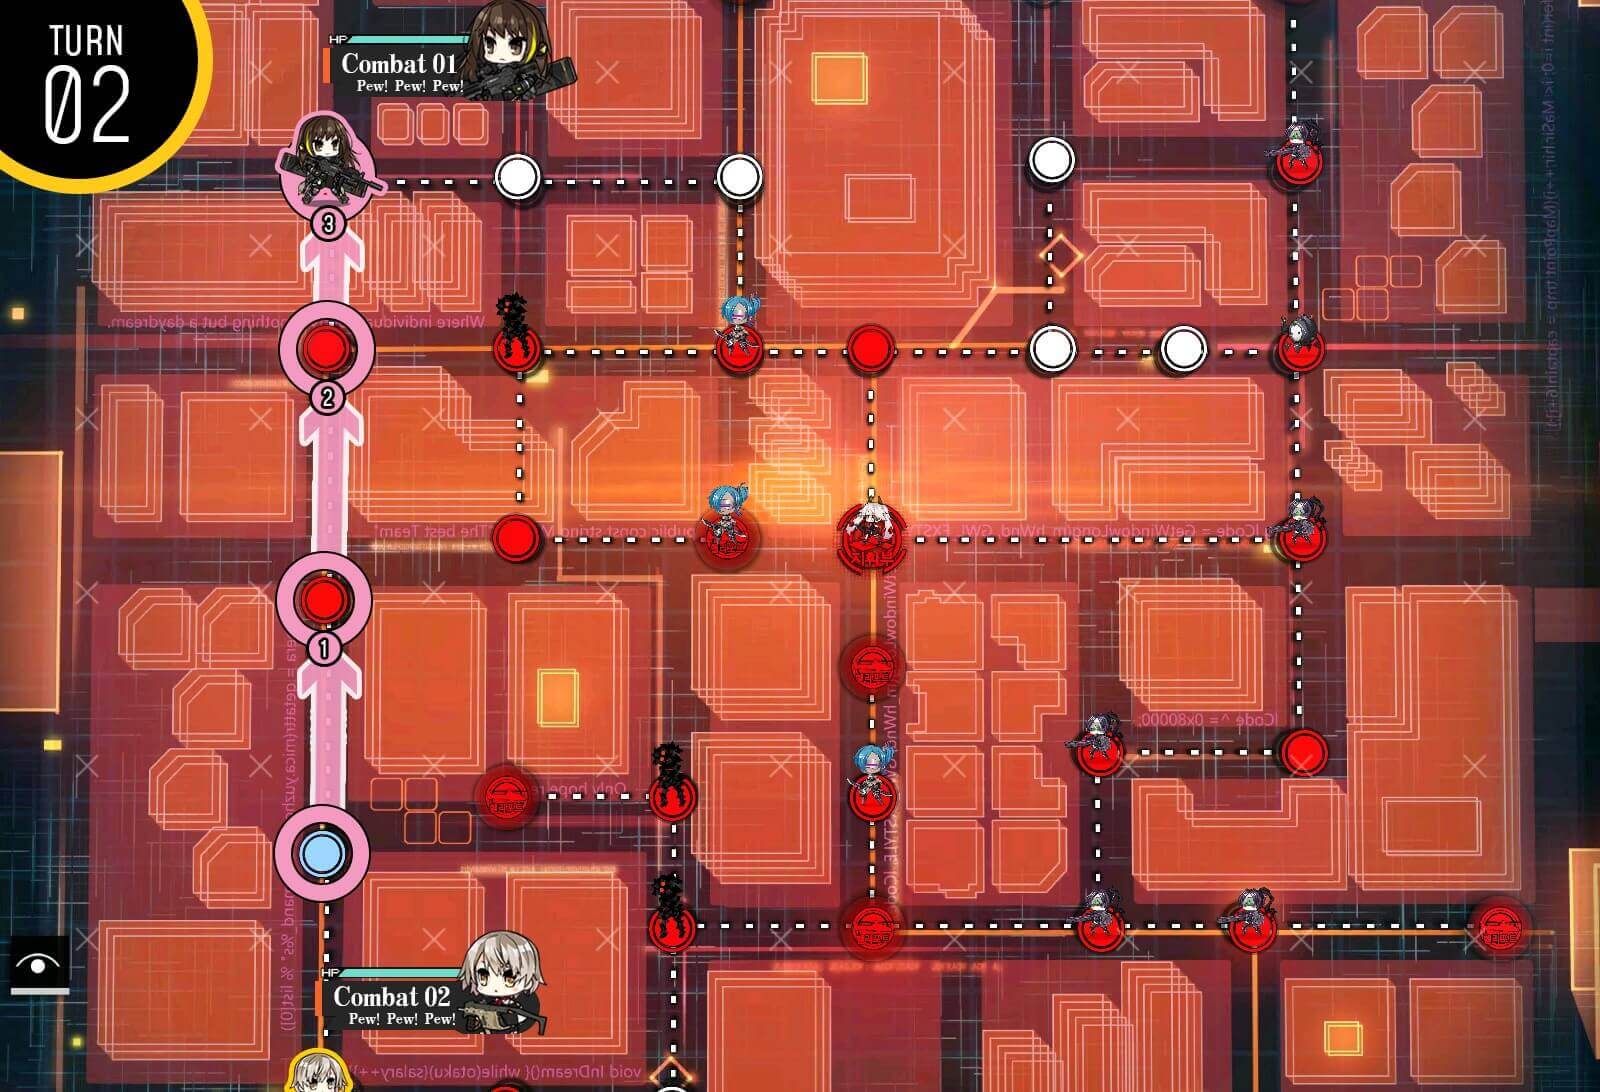
Turn 2a
Make sure to resupply combat echelon to the right prior to going over the one-way path. Shift your echelons one node to the right and deploy dummy on the HQ.

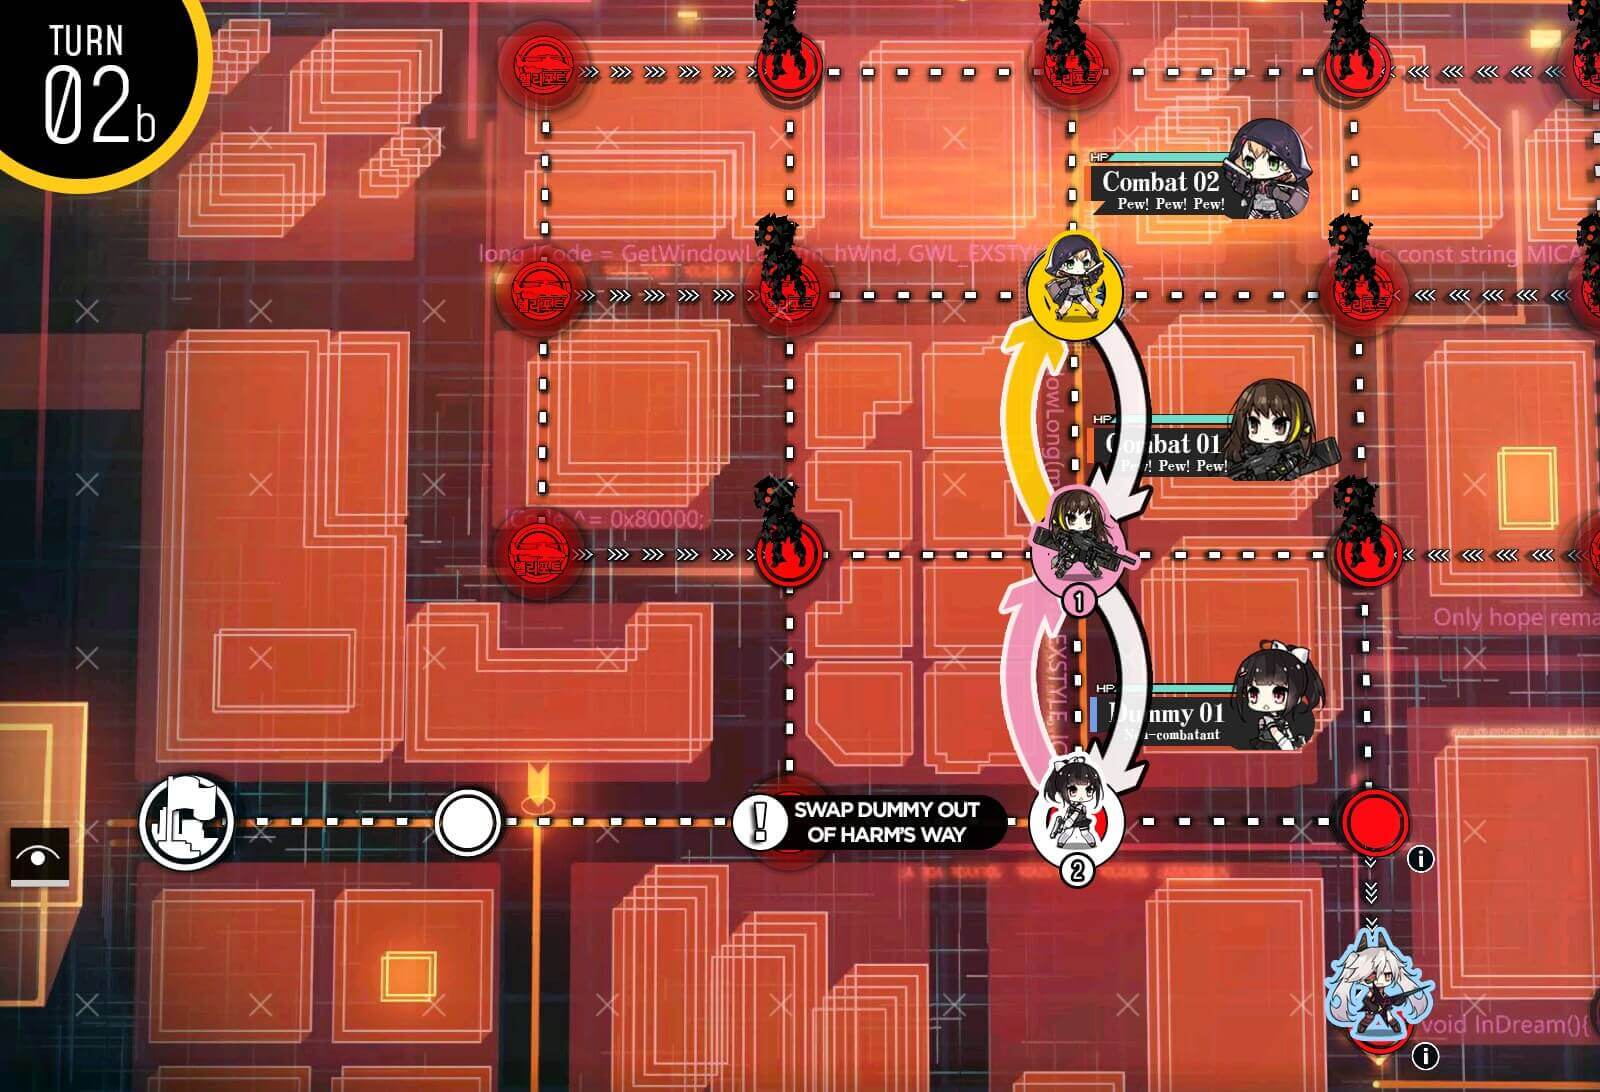
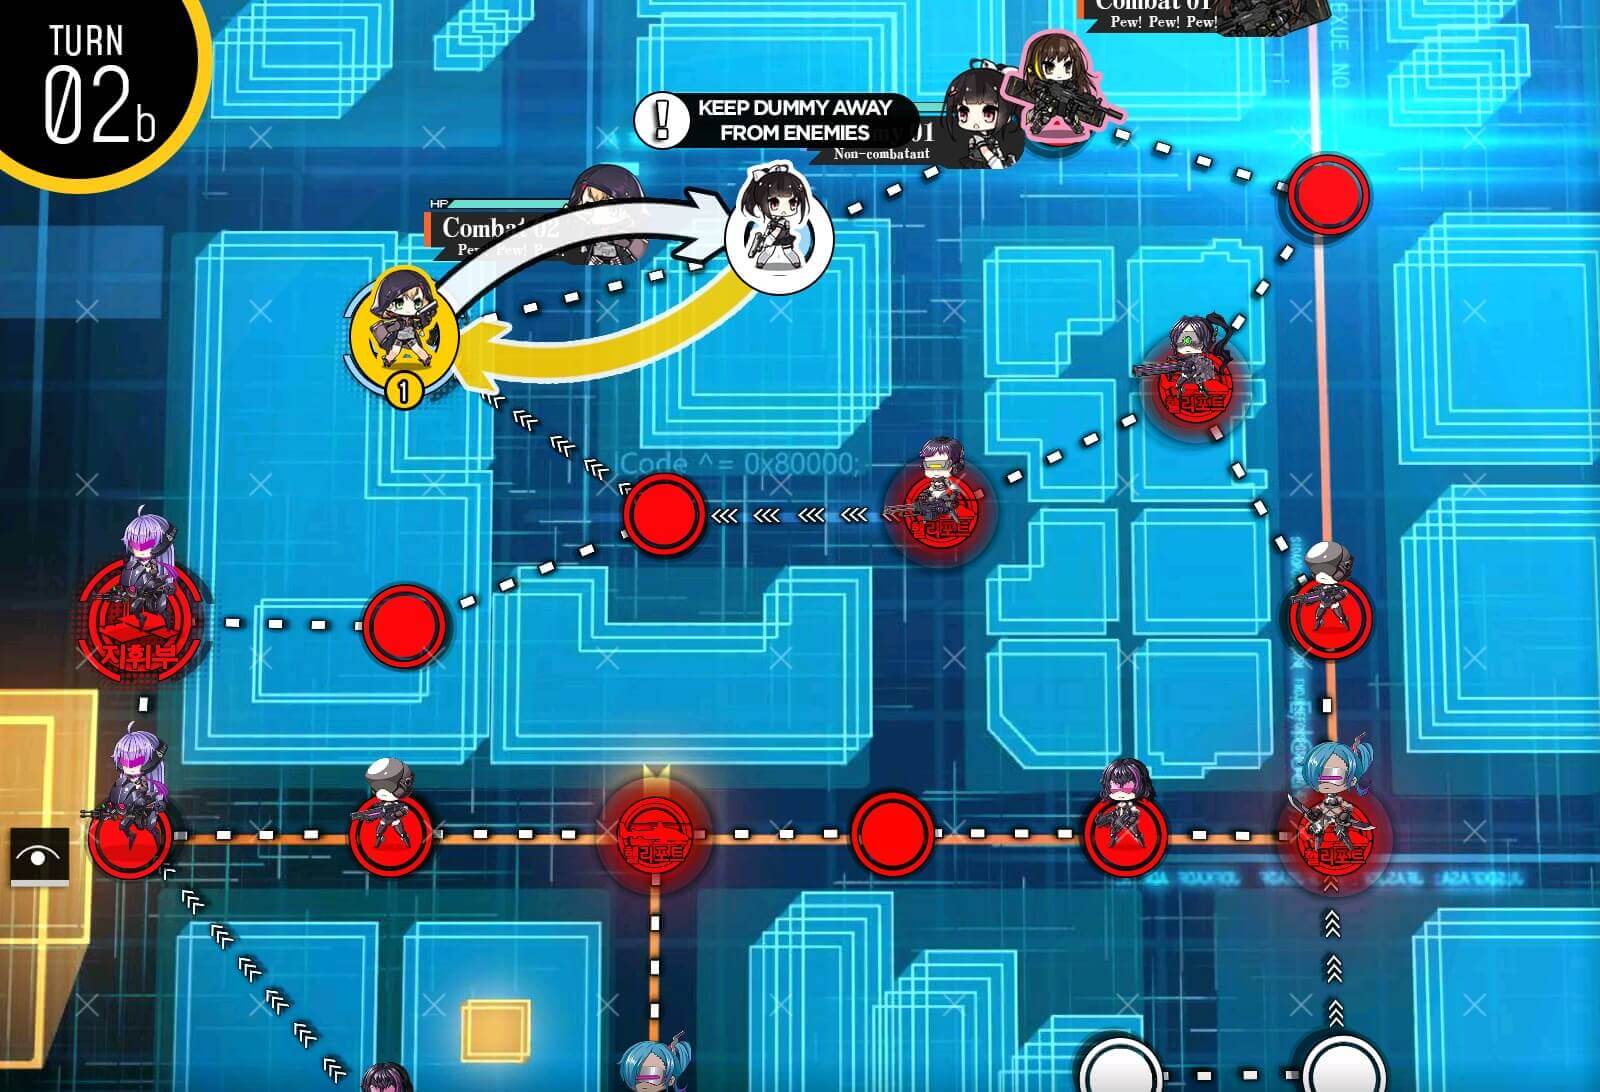
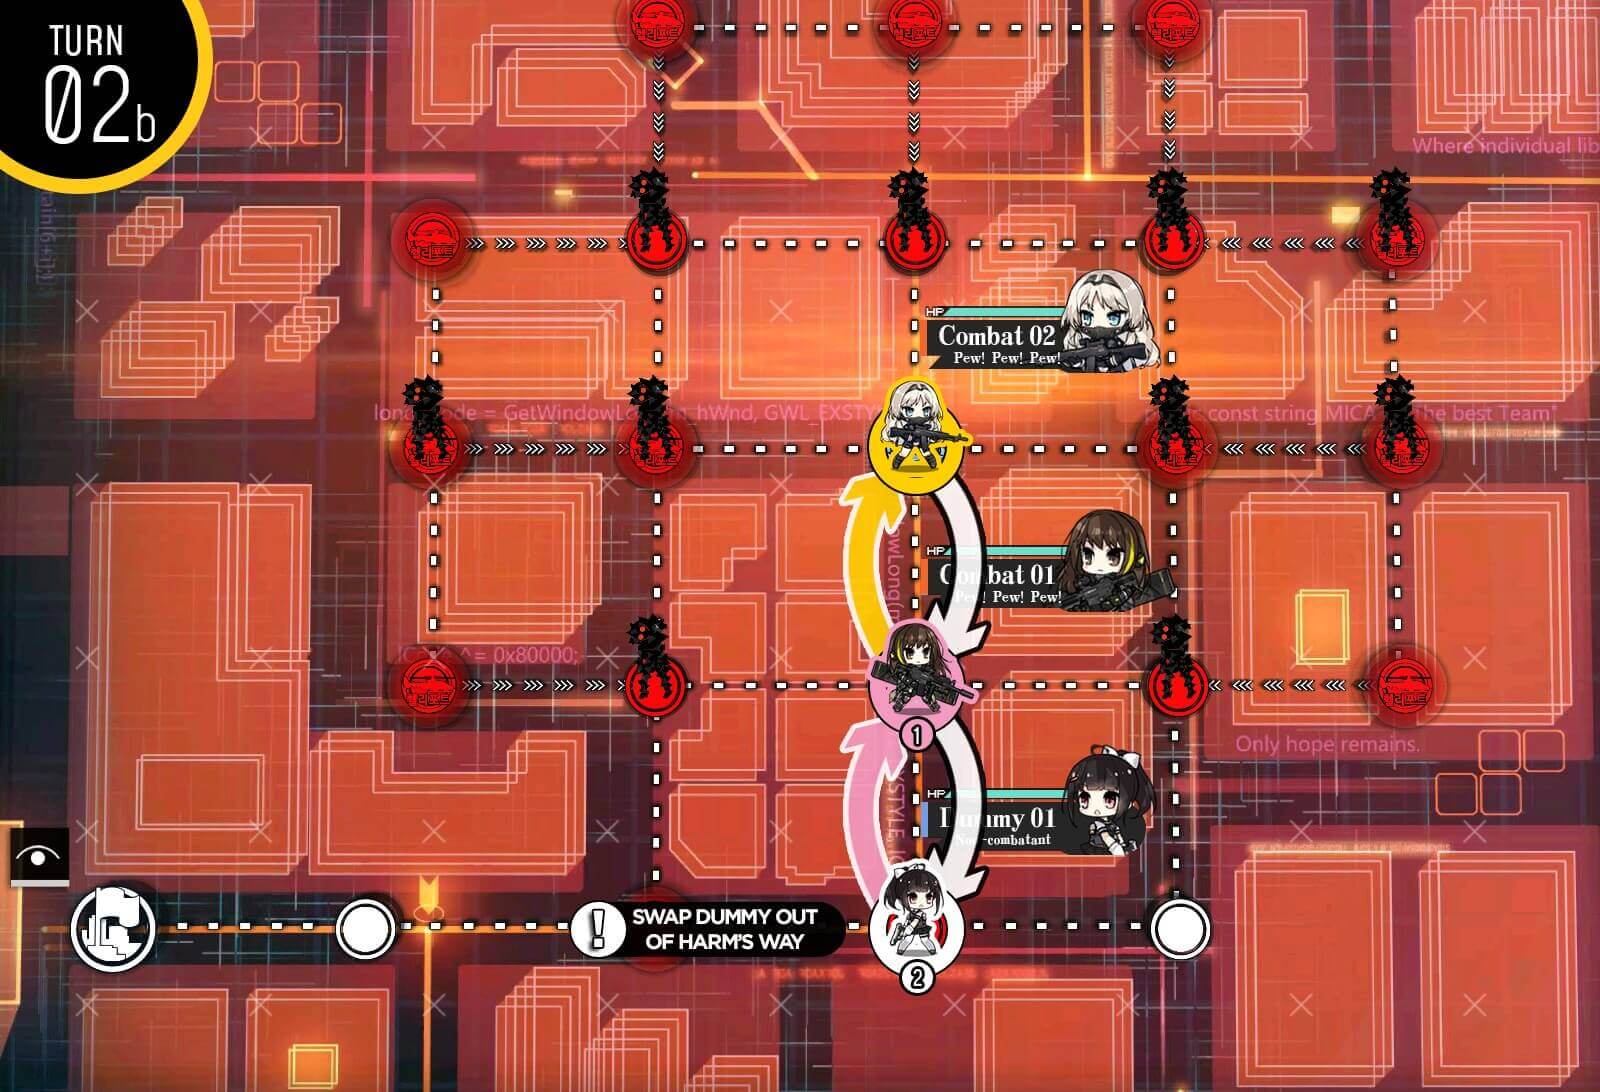
Turn 2b
Then swap dummy and second combat echelon so that HQ is safe from further attacks.
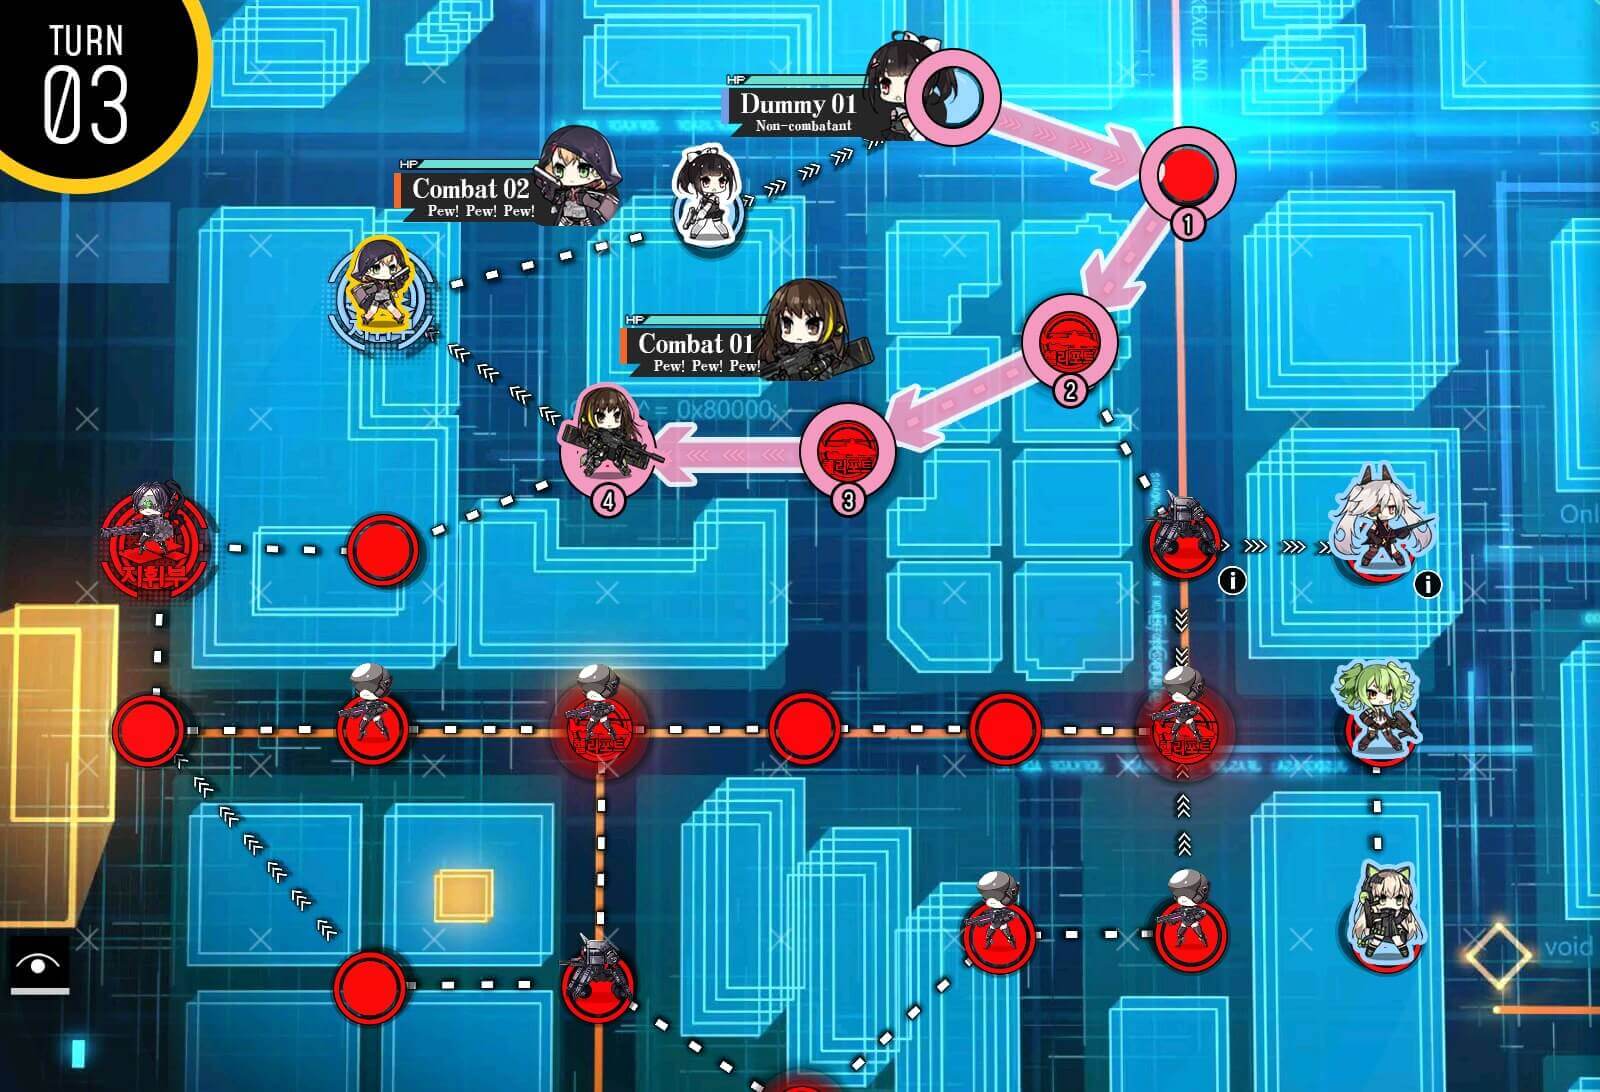
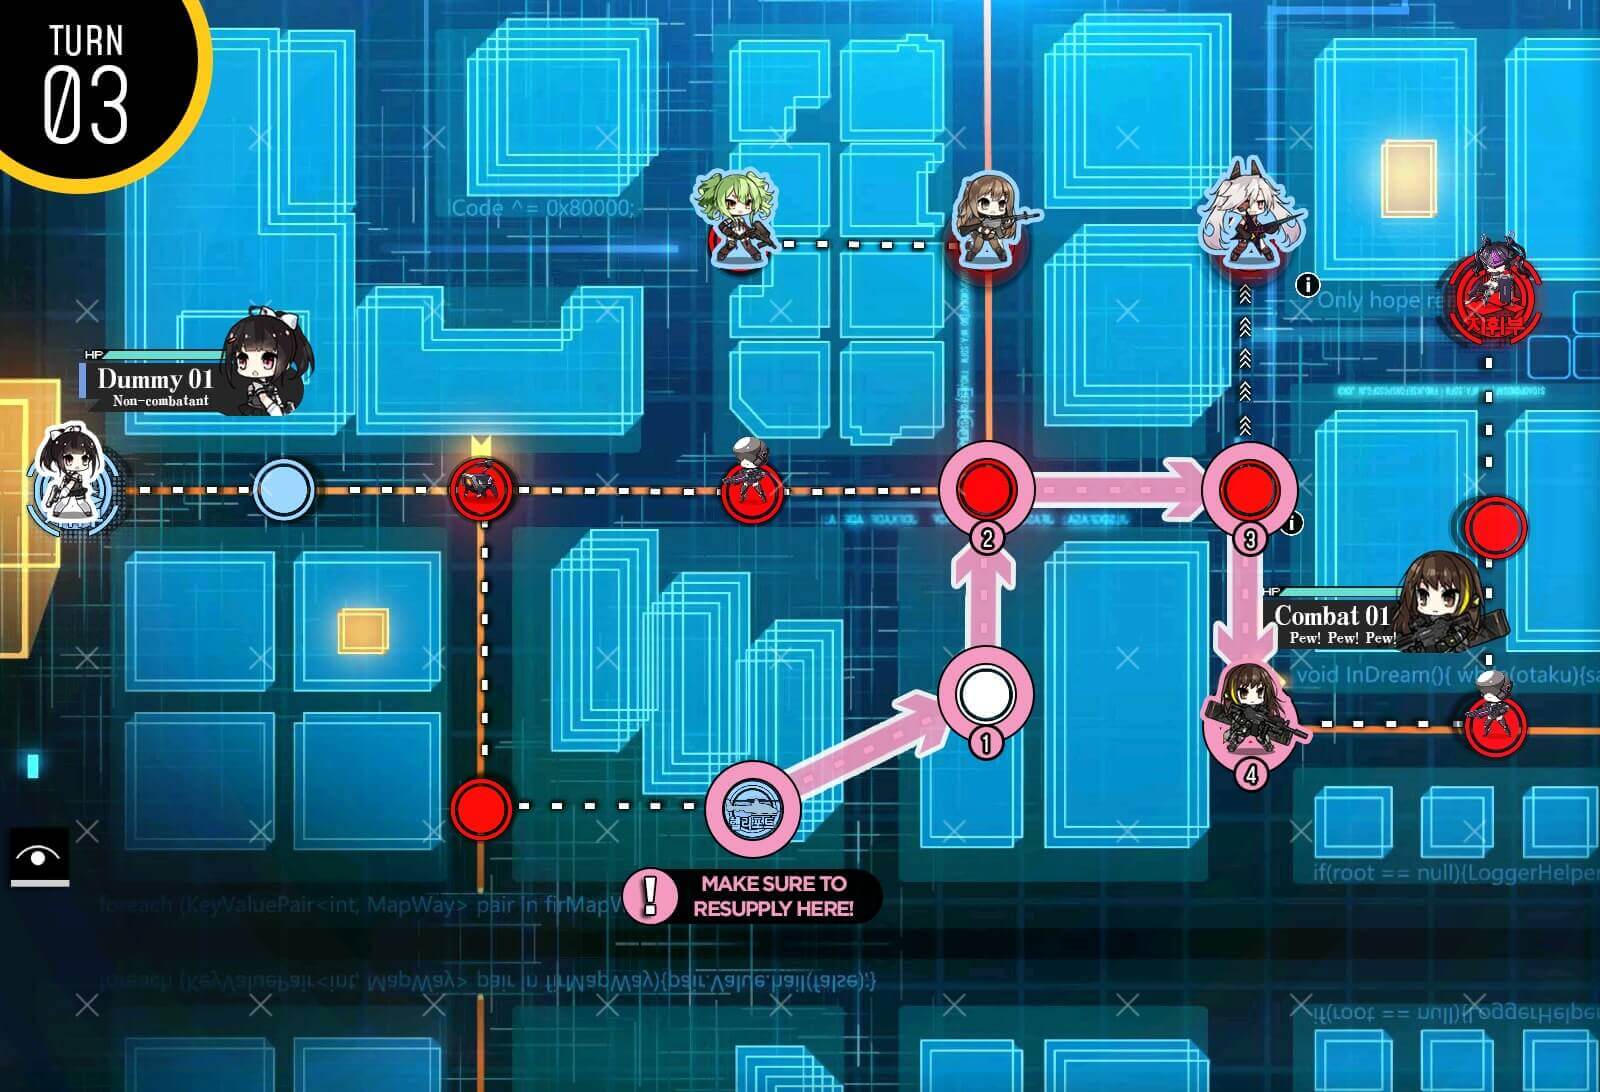
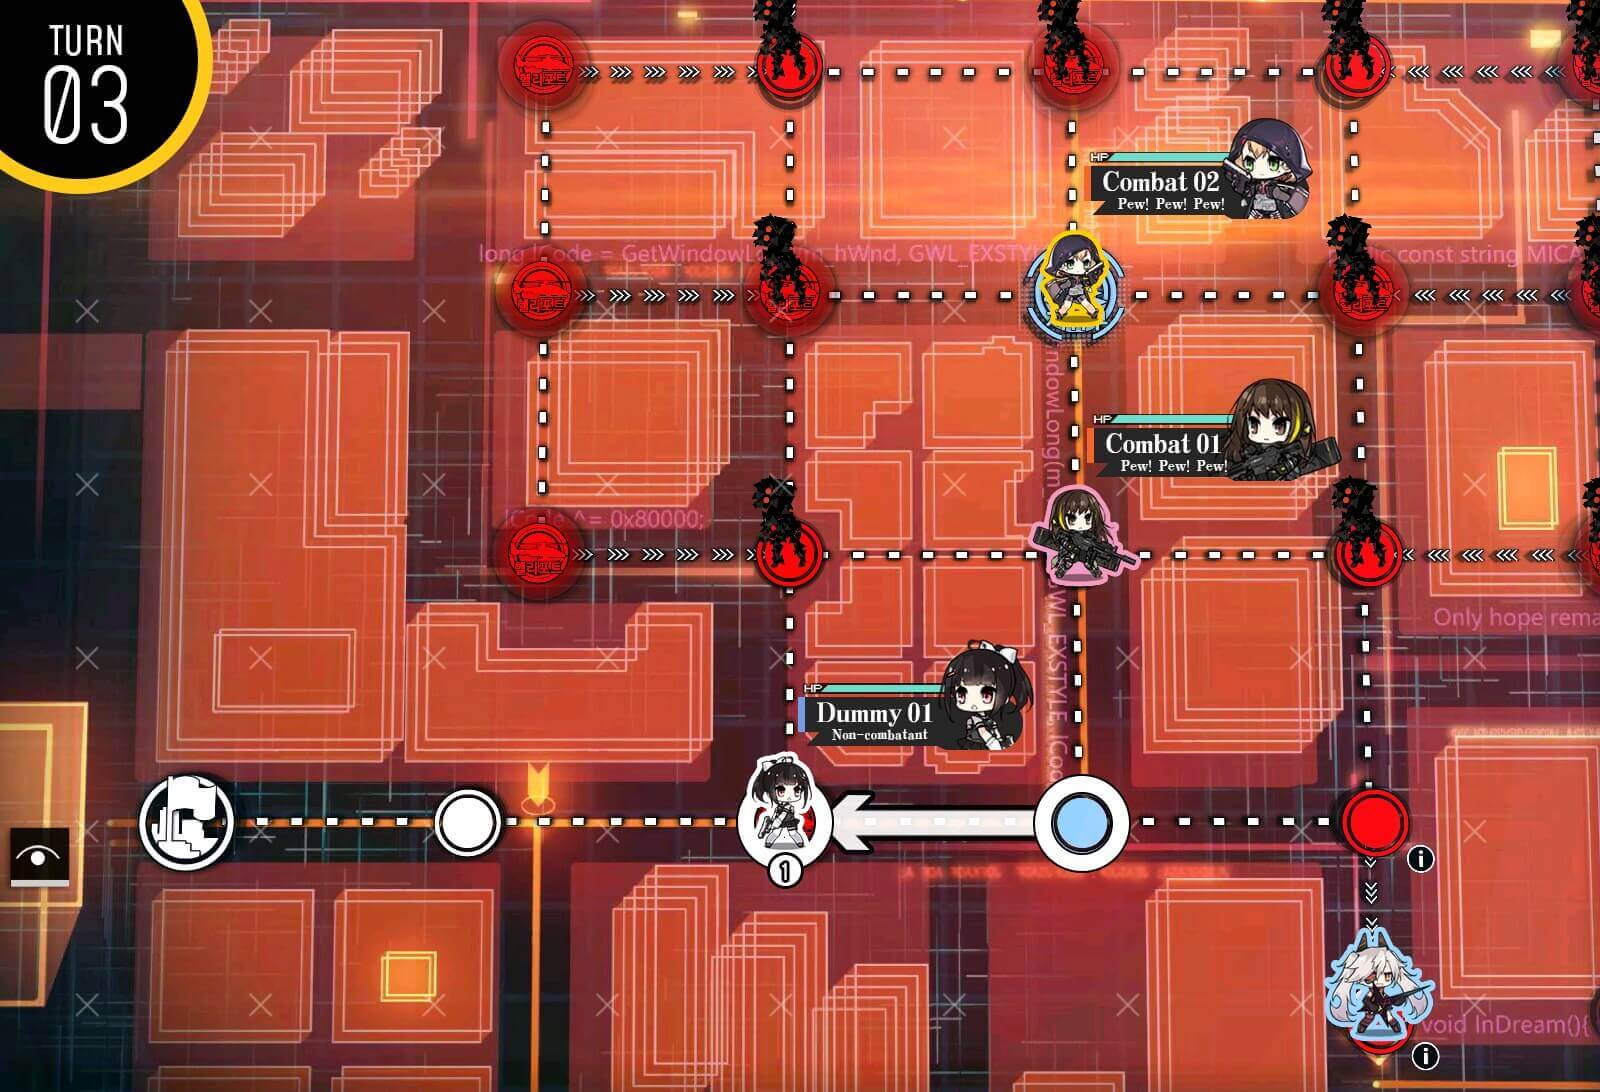
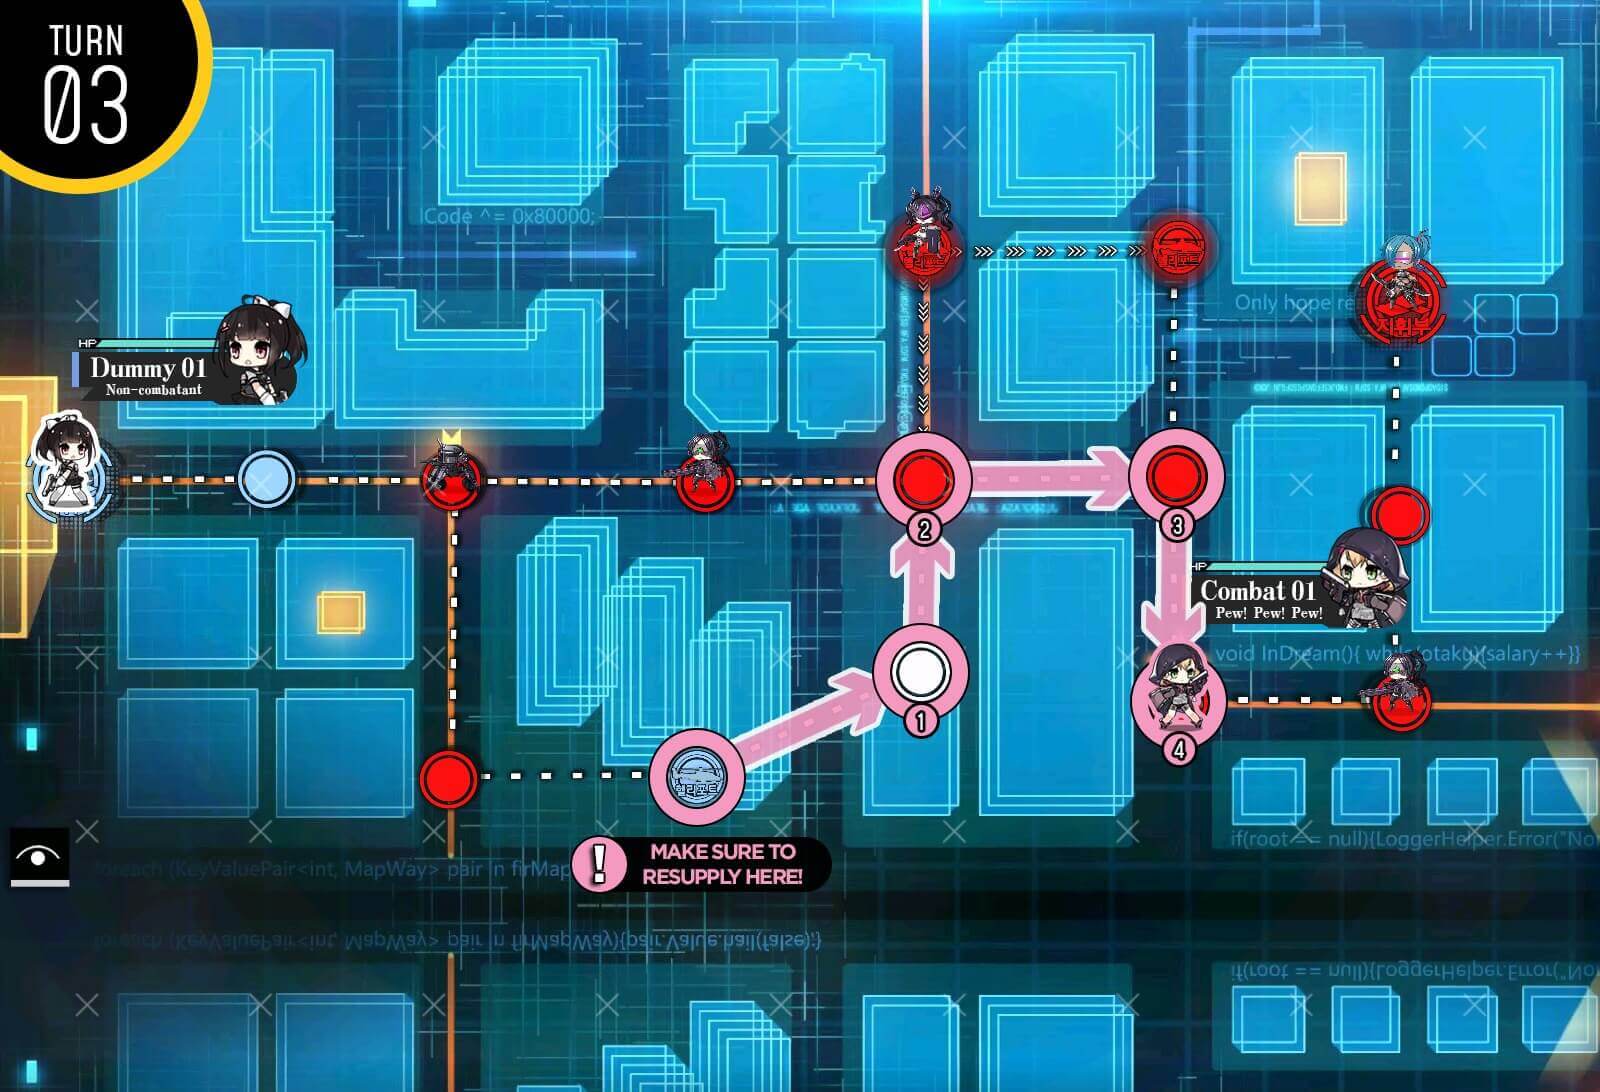
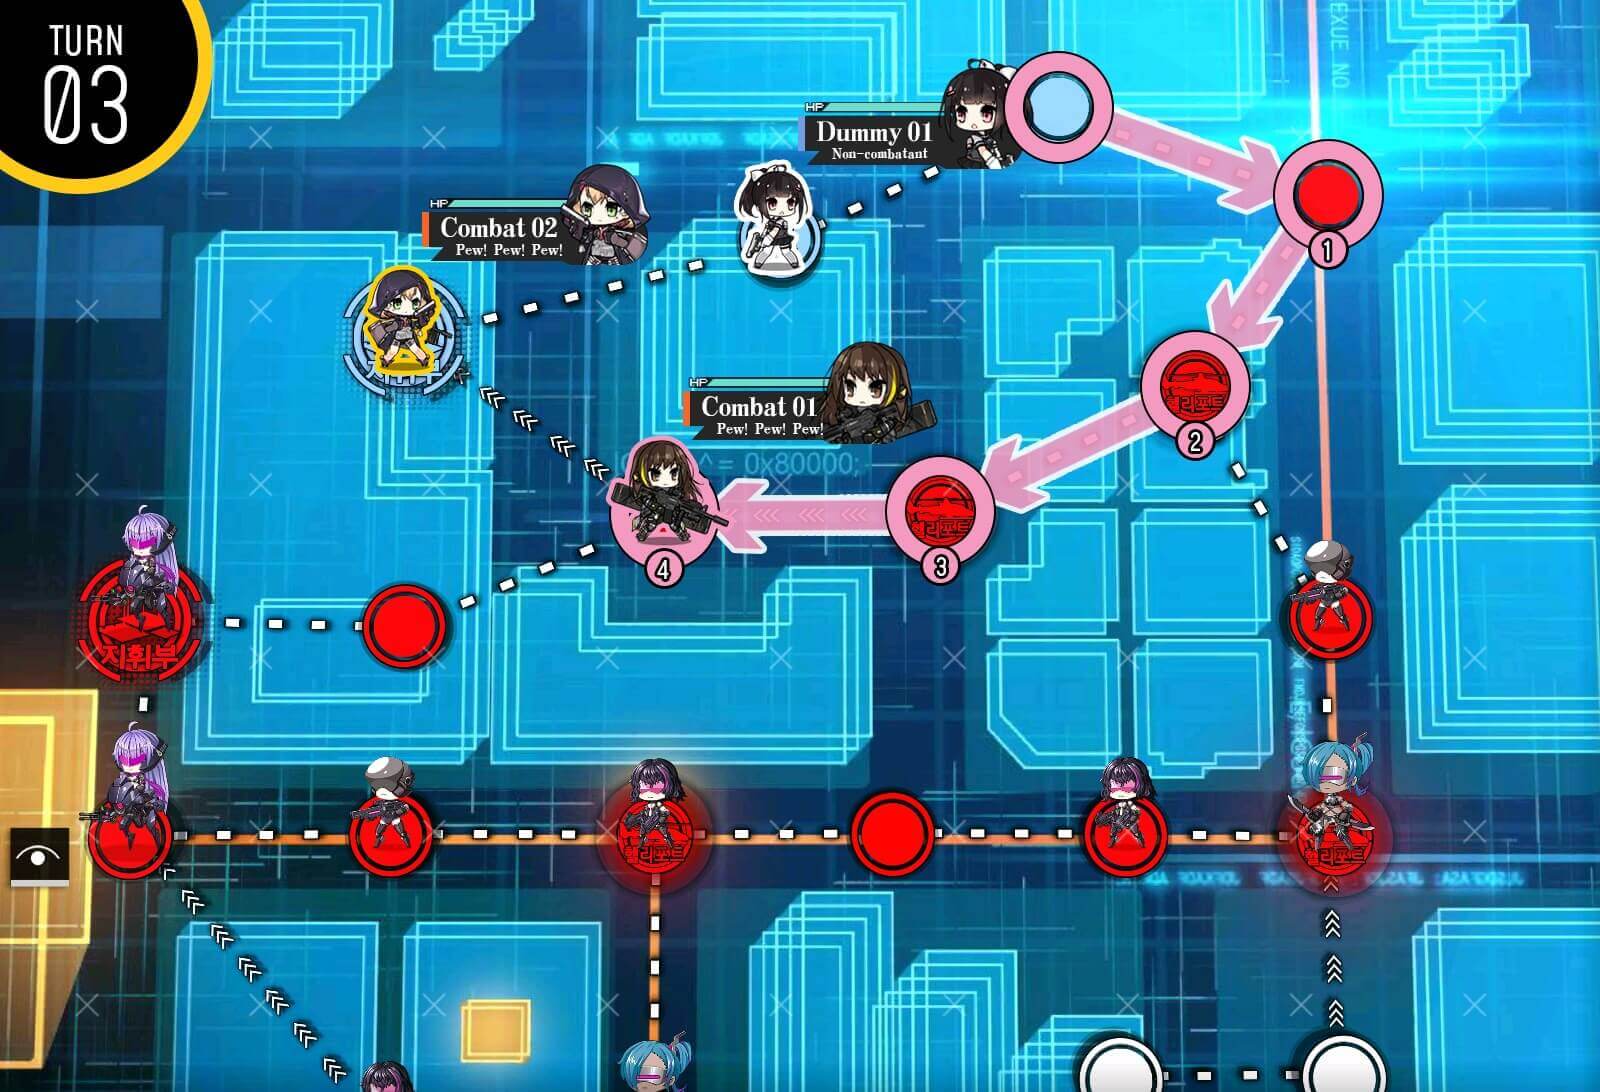
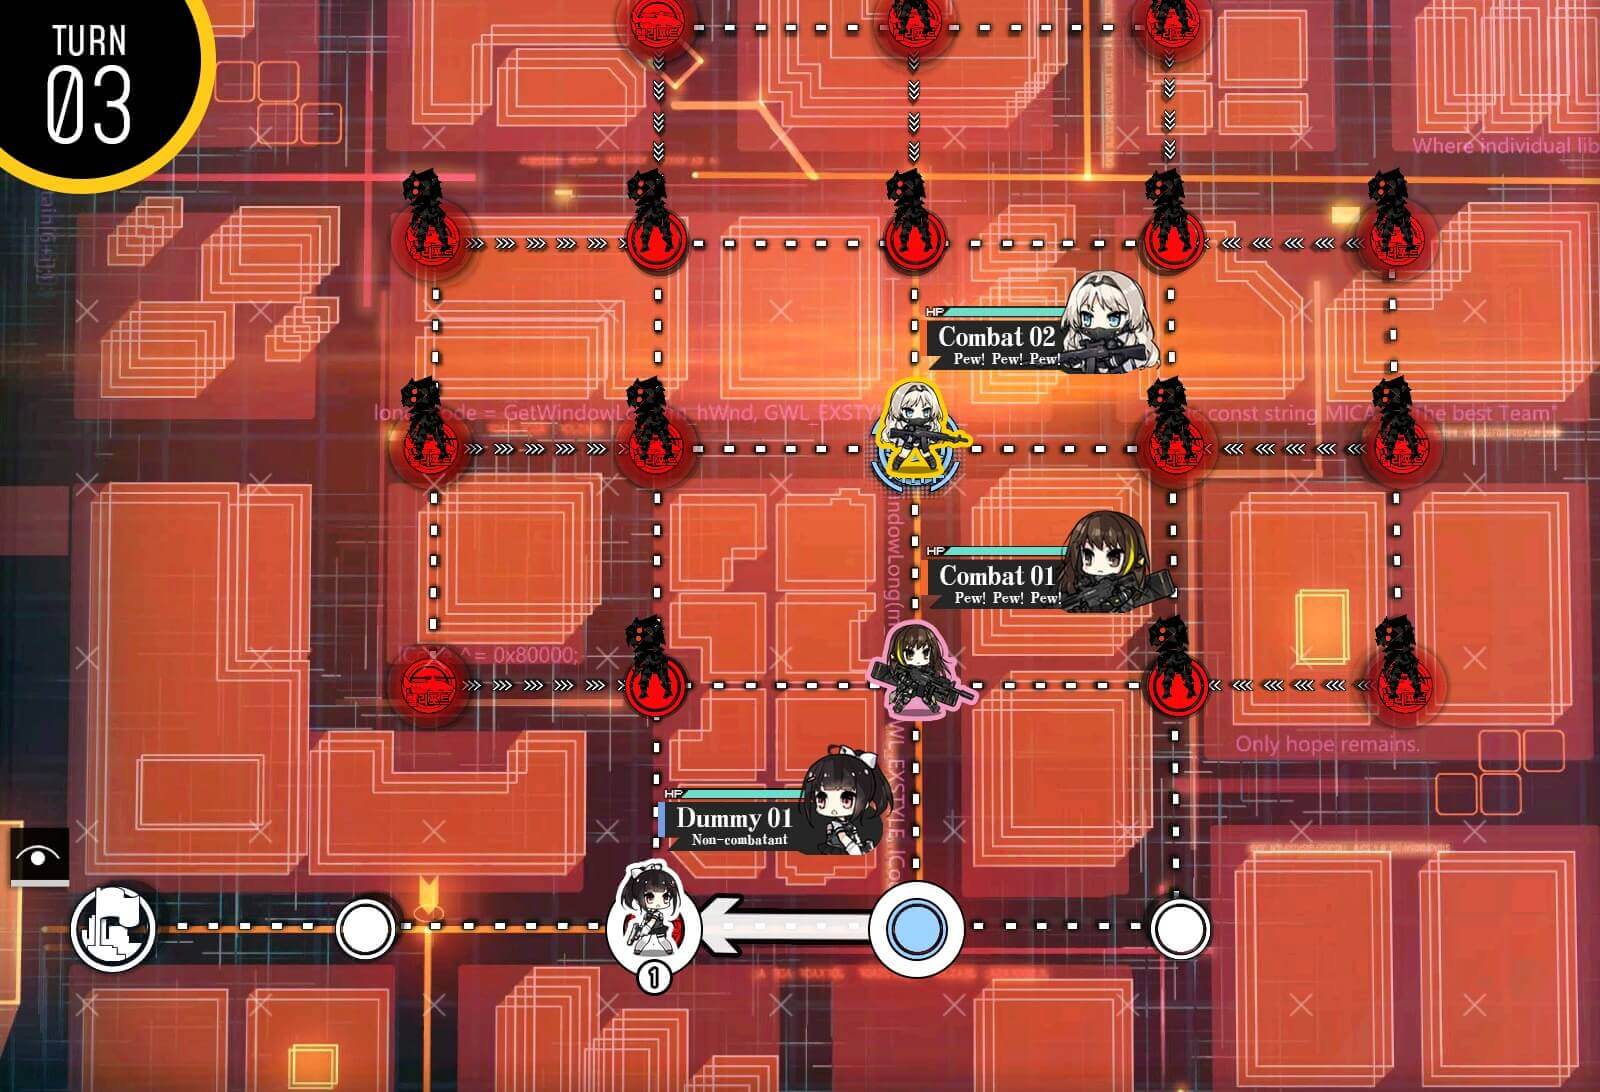
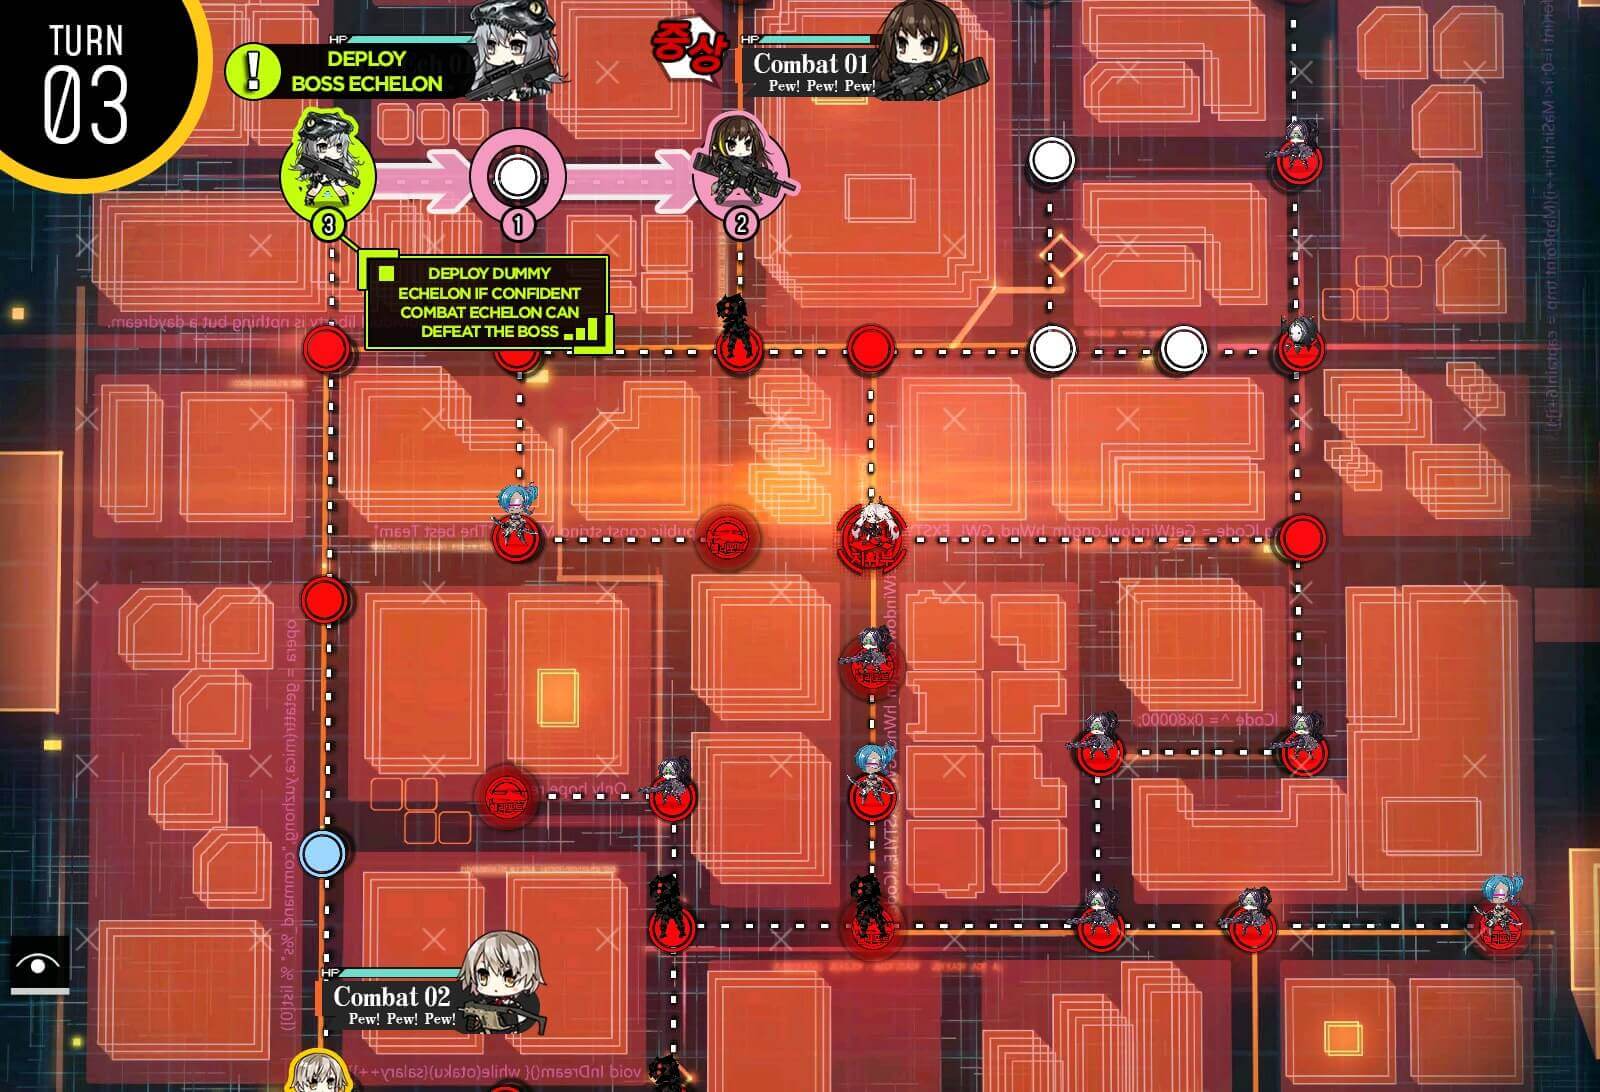
Turn 3
This is the bit where the first combat echelon may encounter more enemies than they can fight on their way to the HQ due to RNG, and would require a retry if you are aiming for the S-rank clear. If this is the case, all you have to do is send the second combat echelon behind the first combat echelon and take the HQ more slowly.
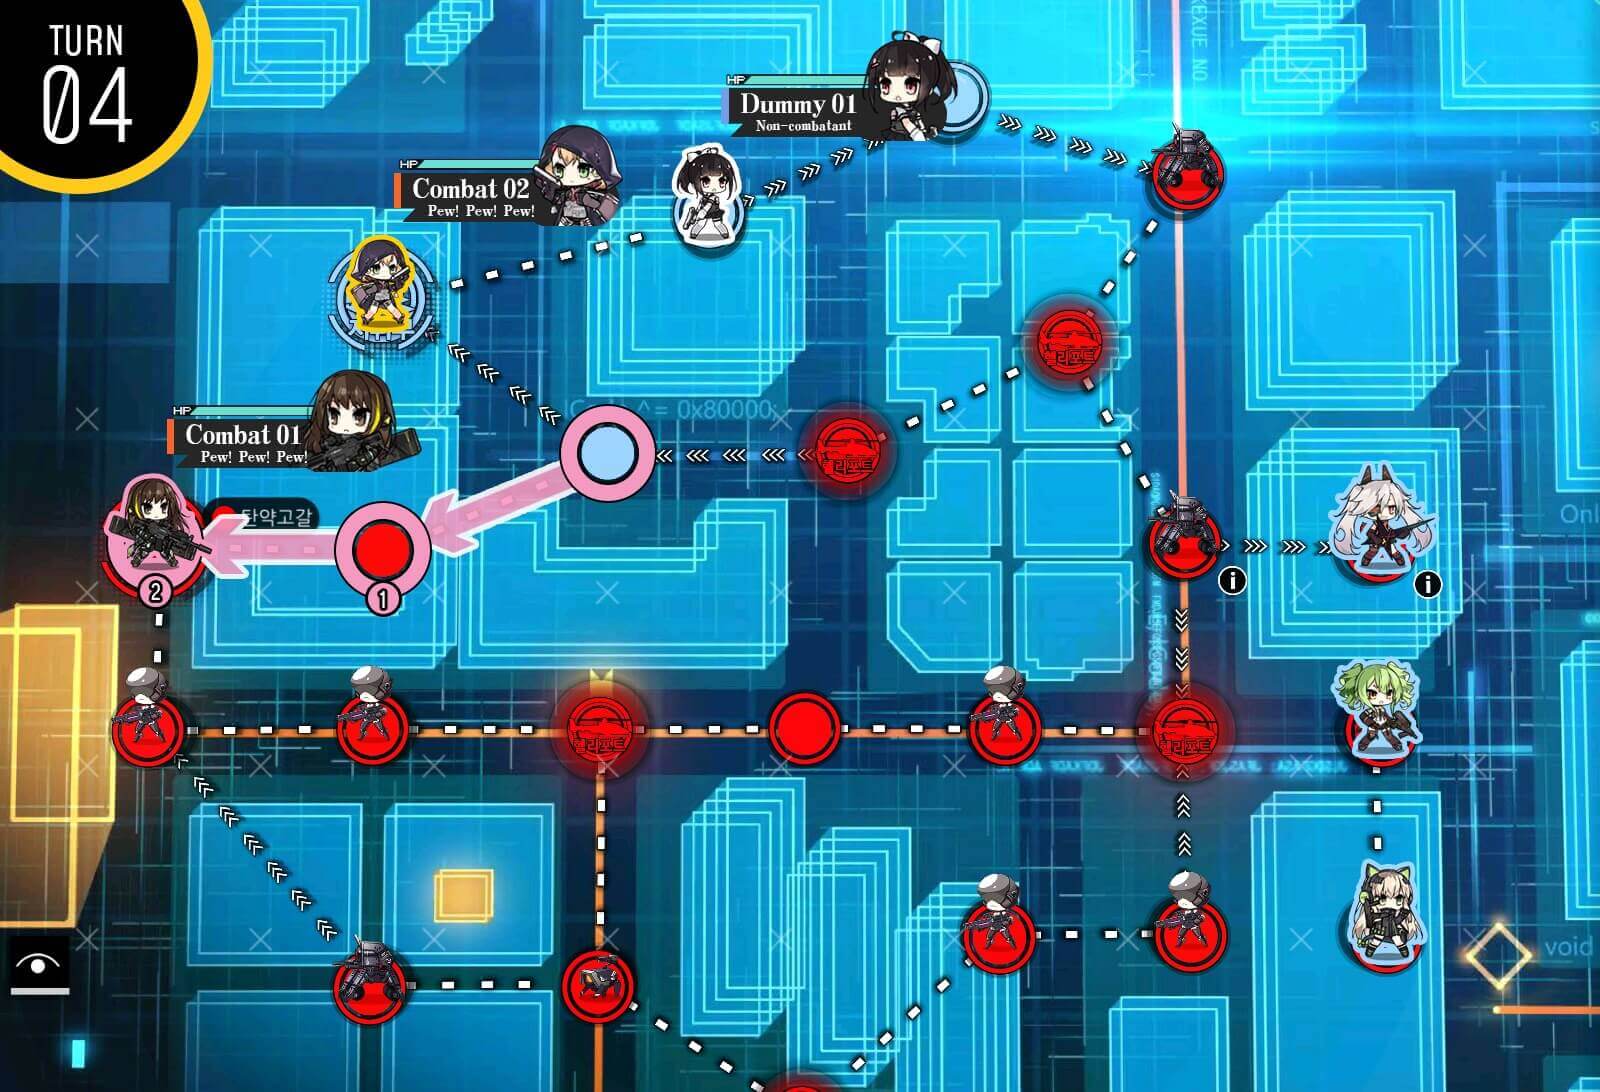
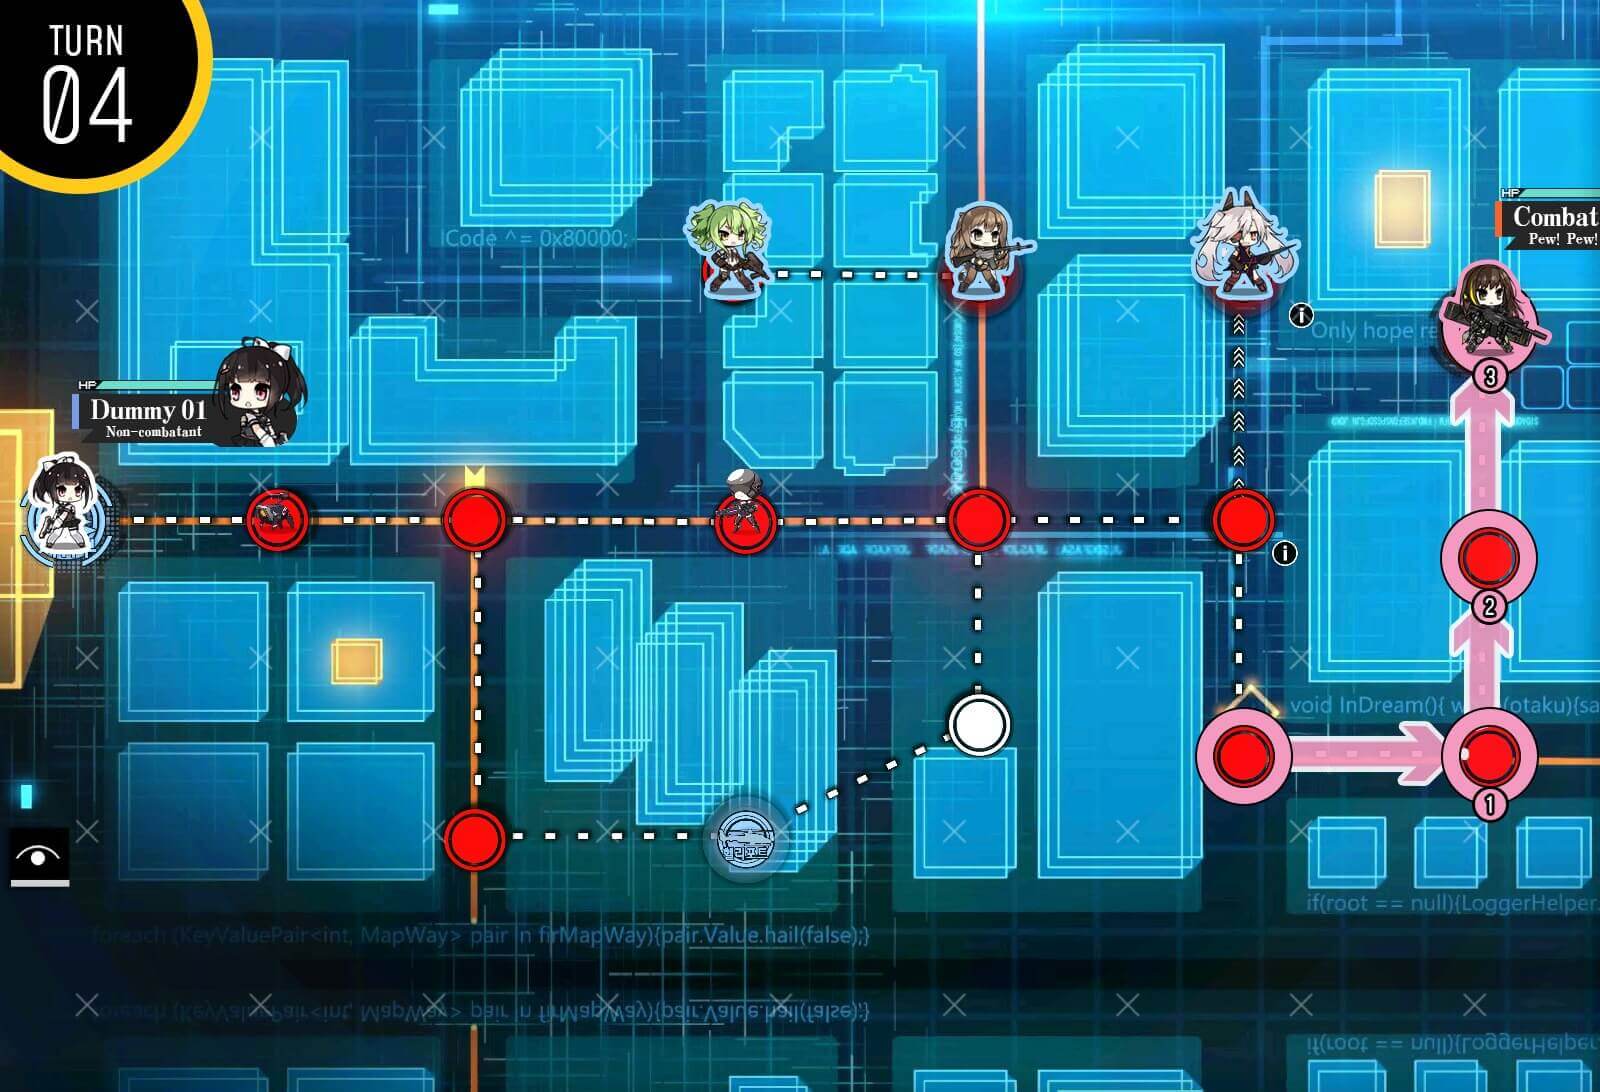
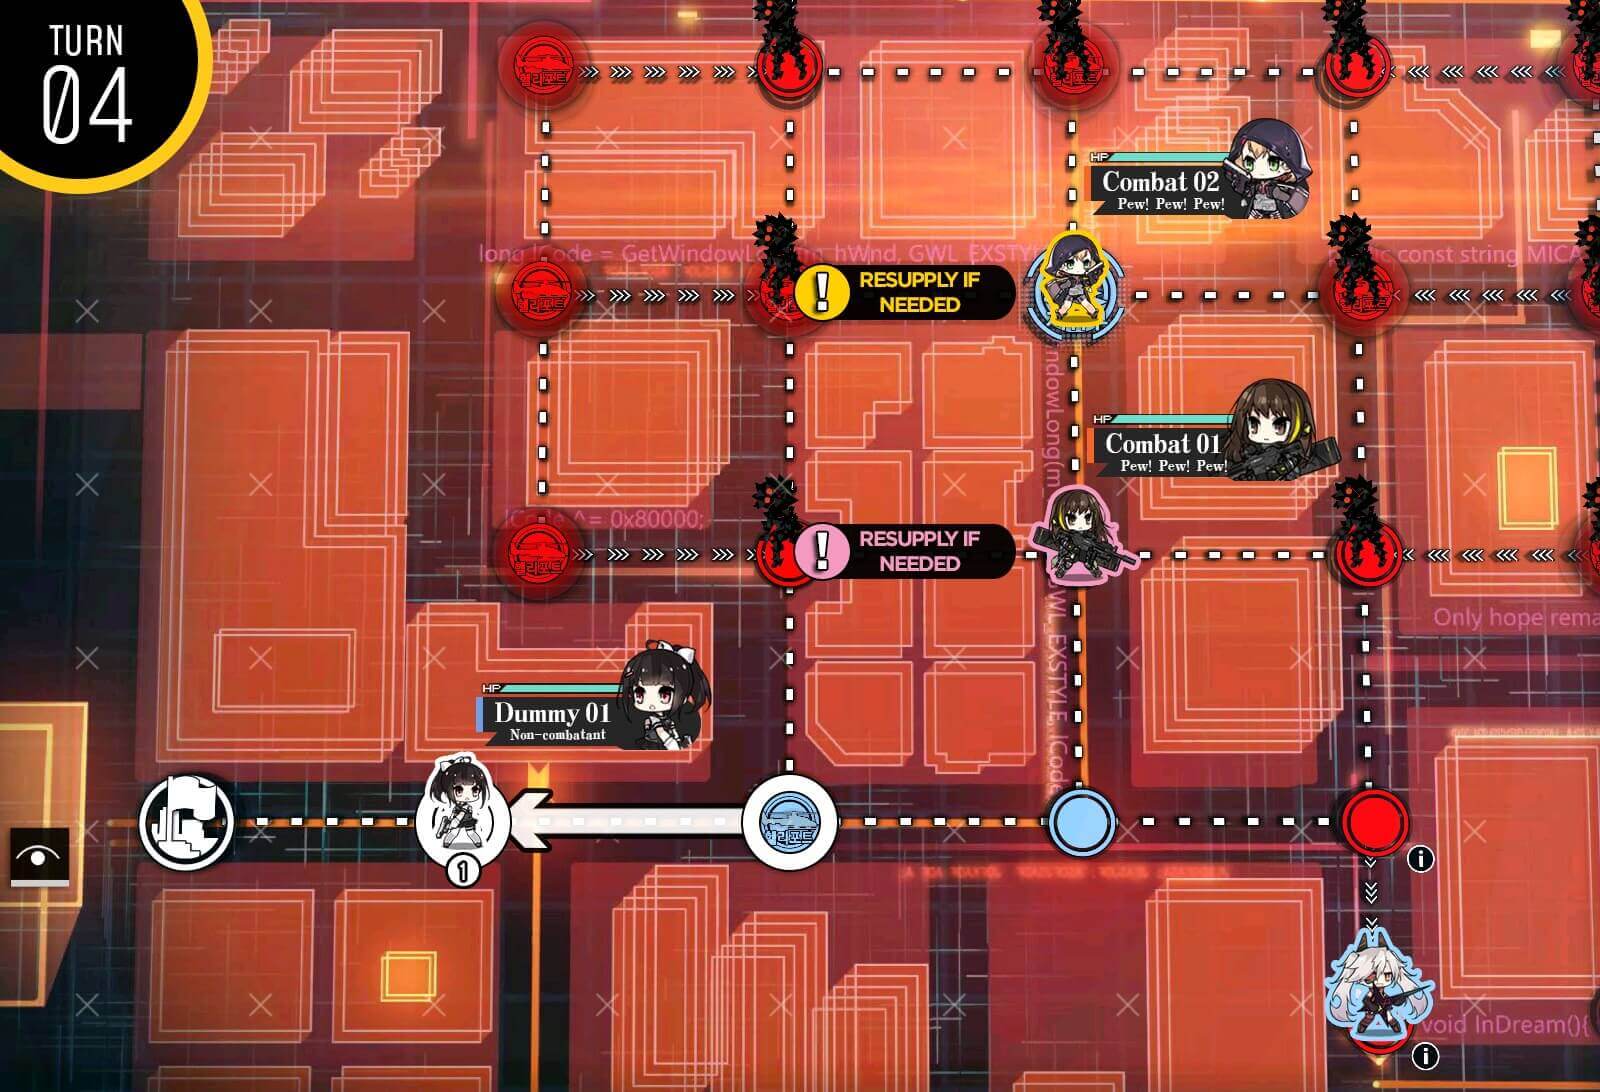
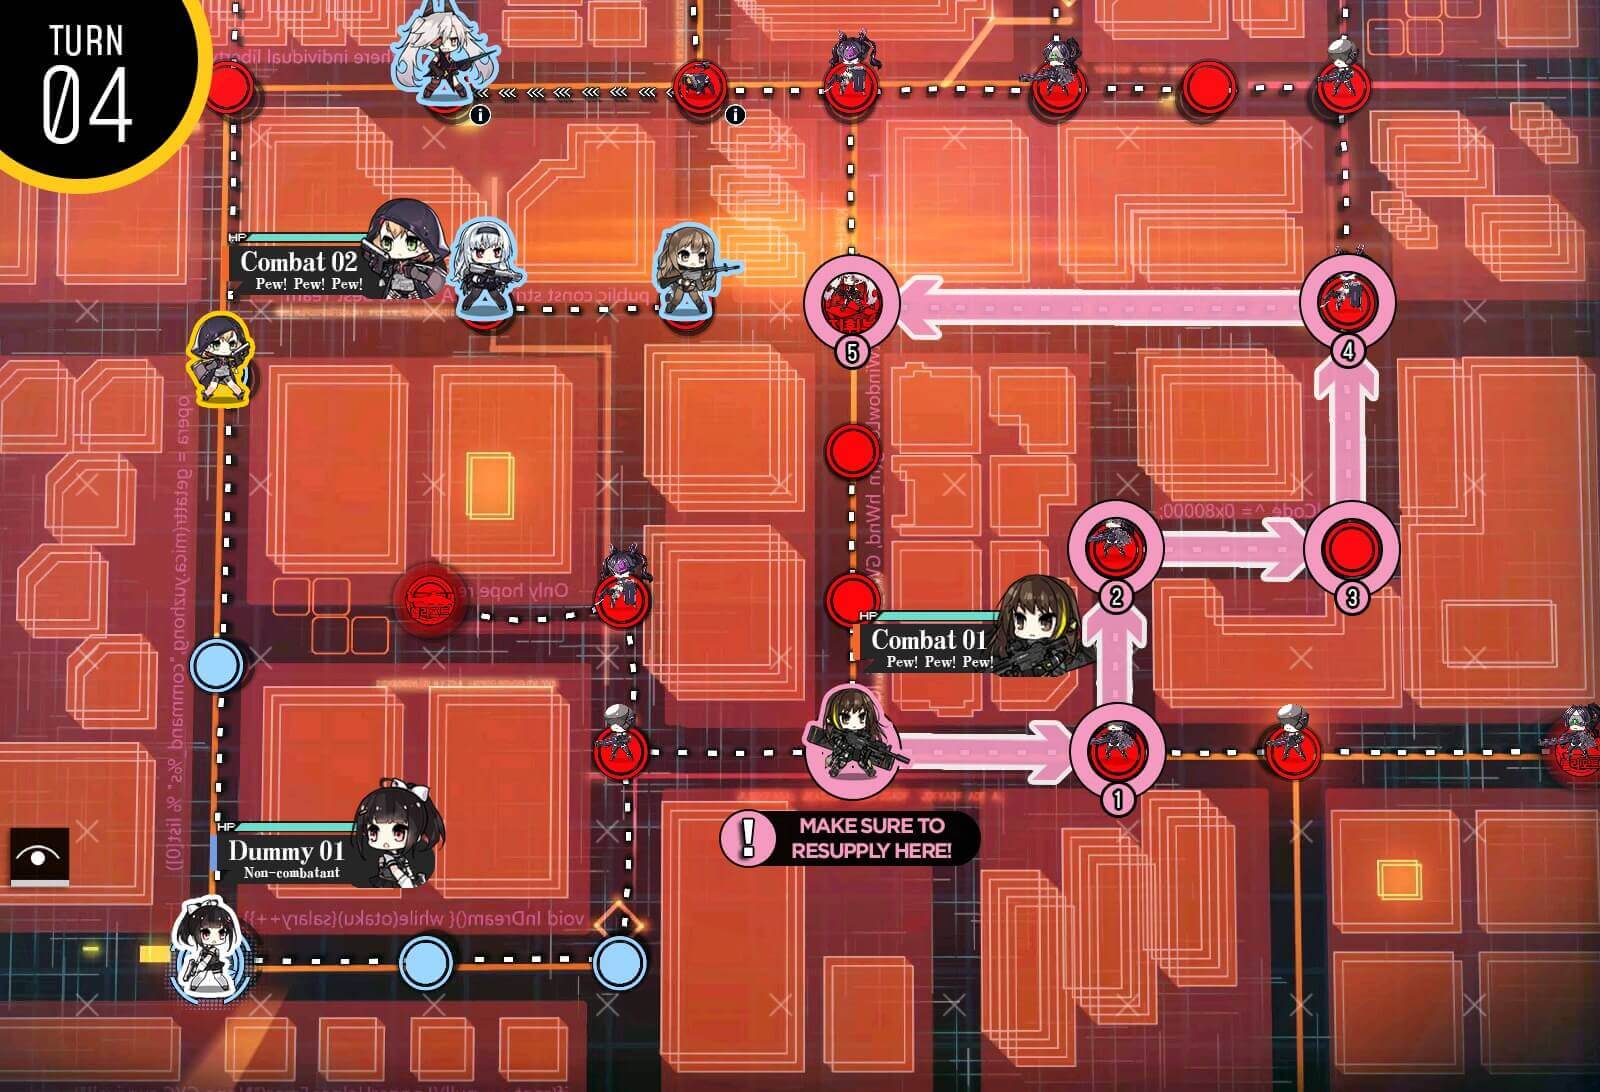
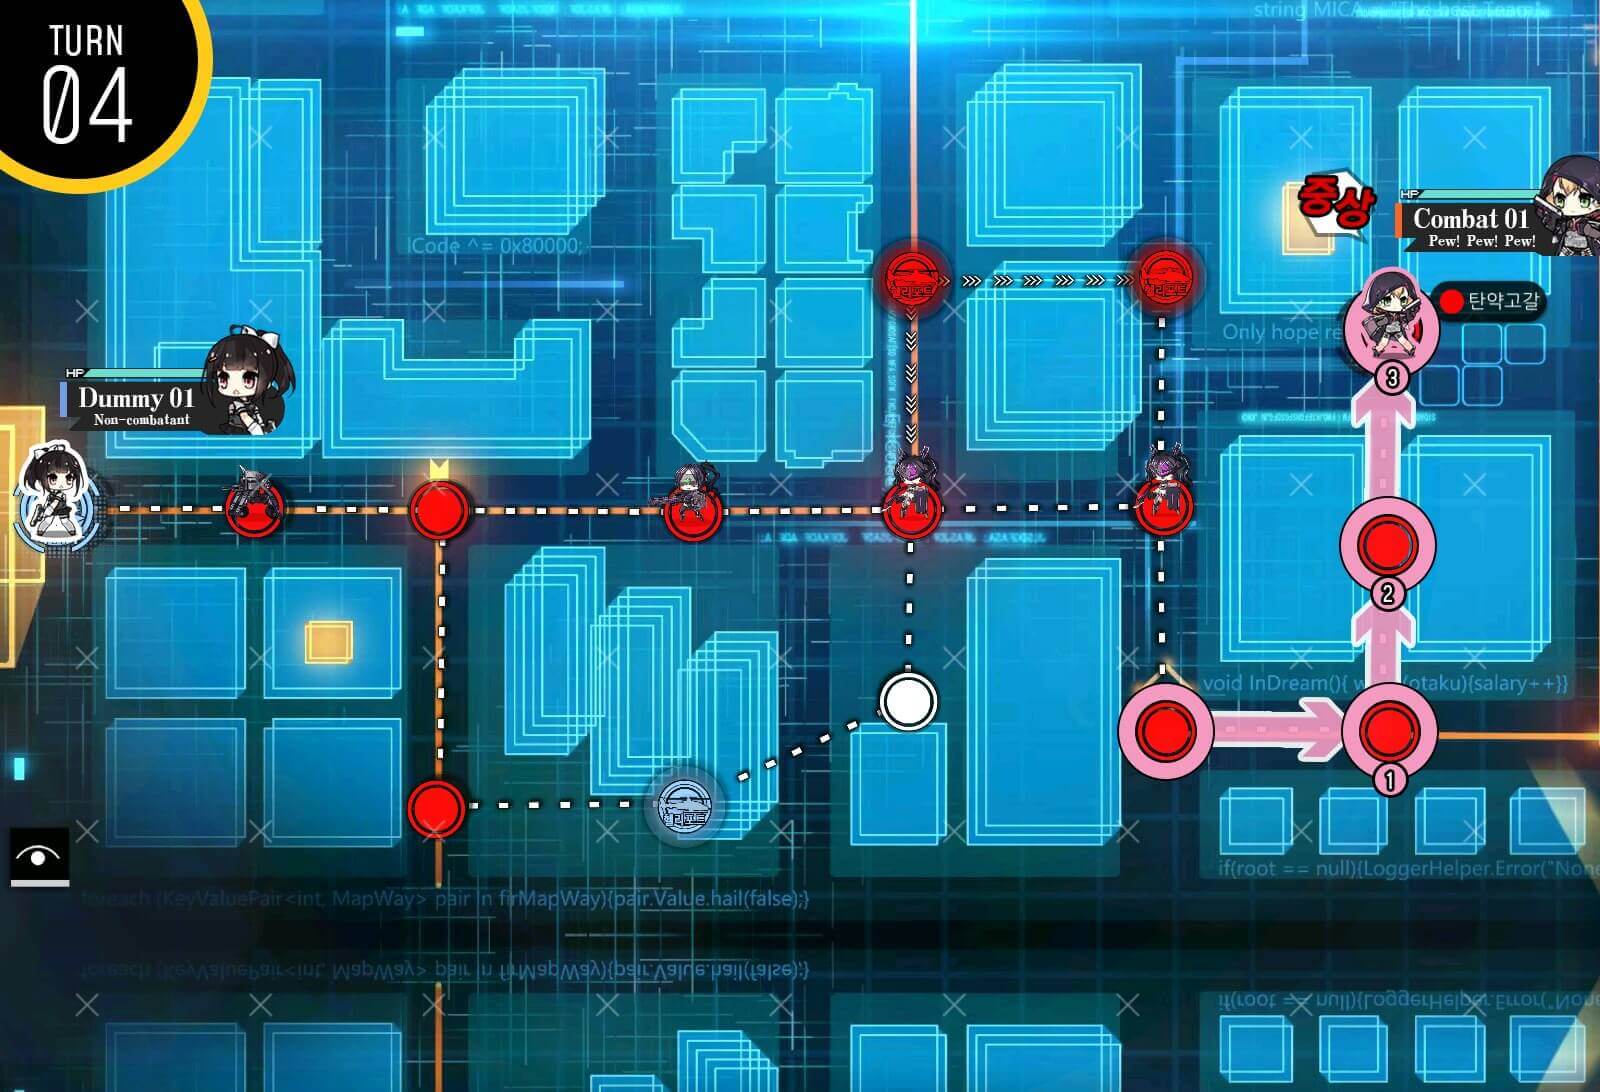
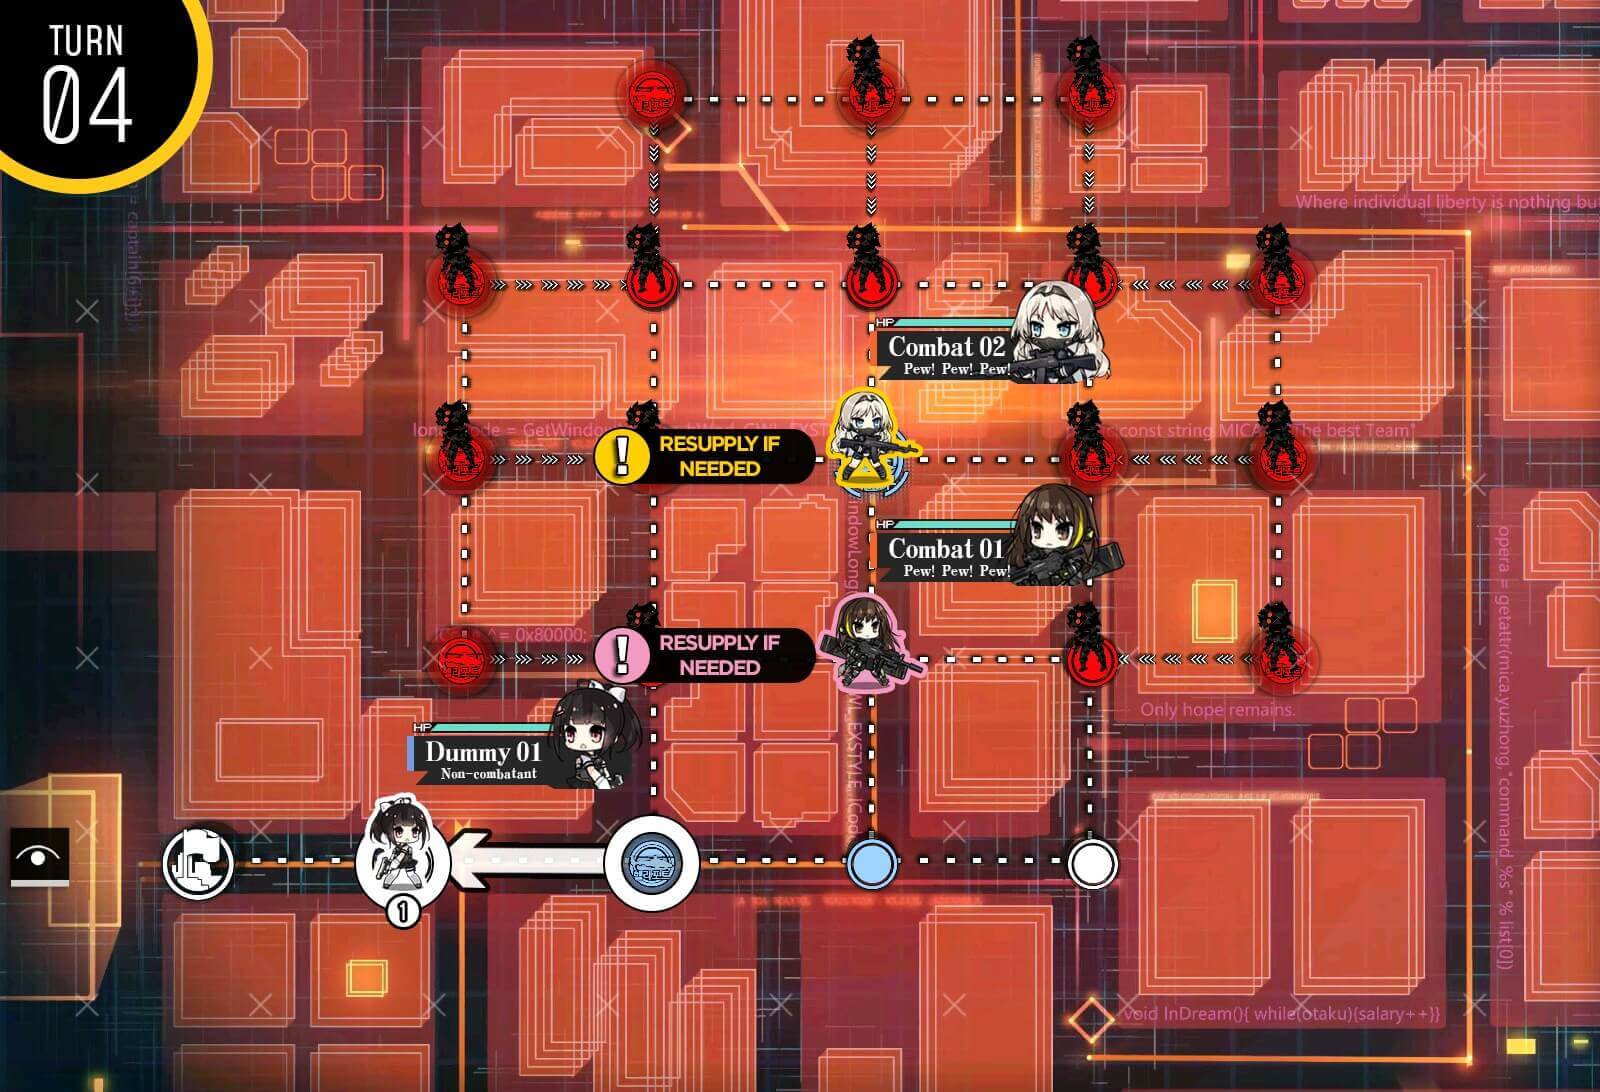
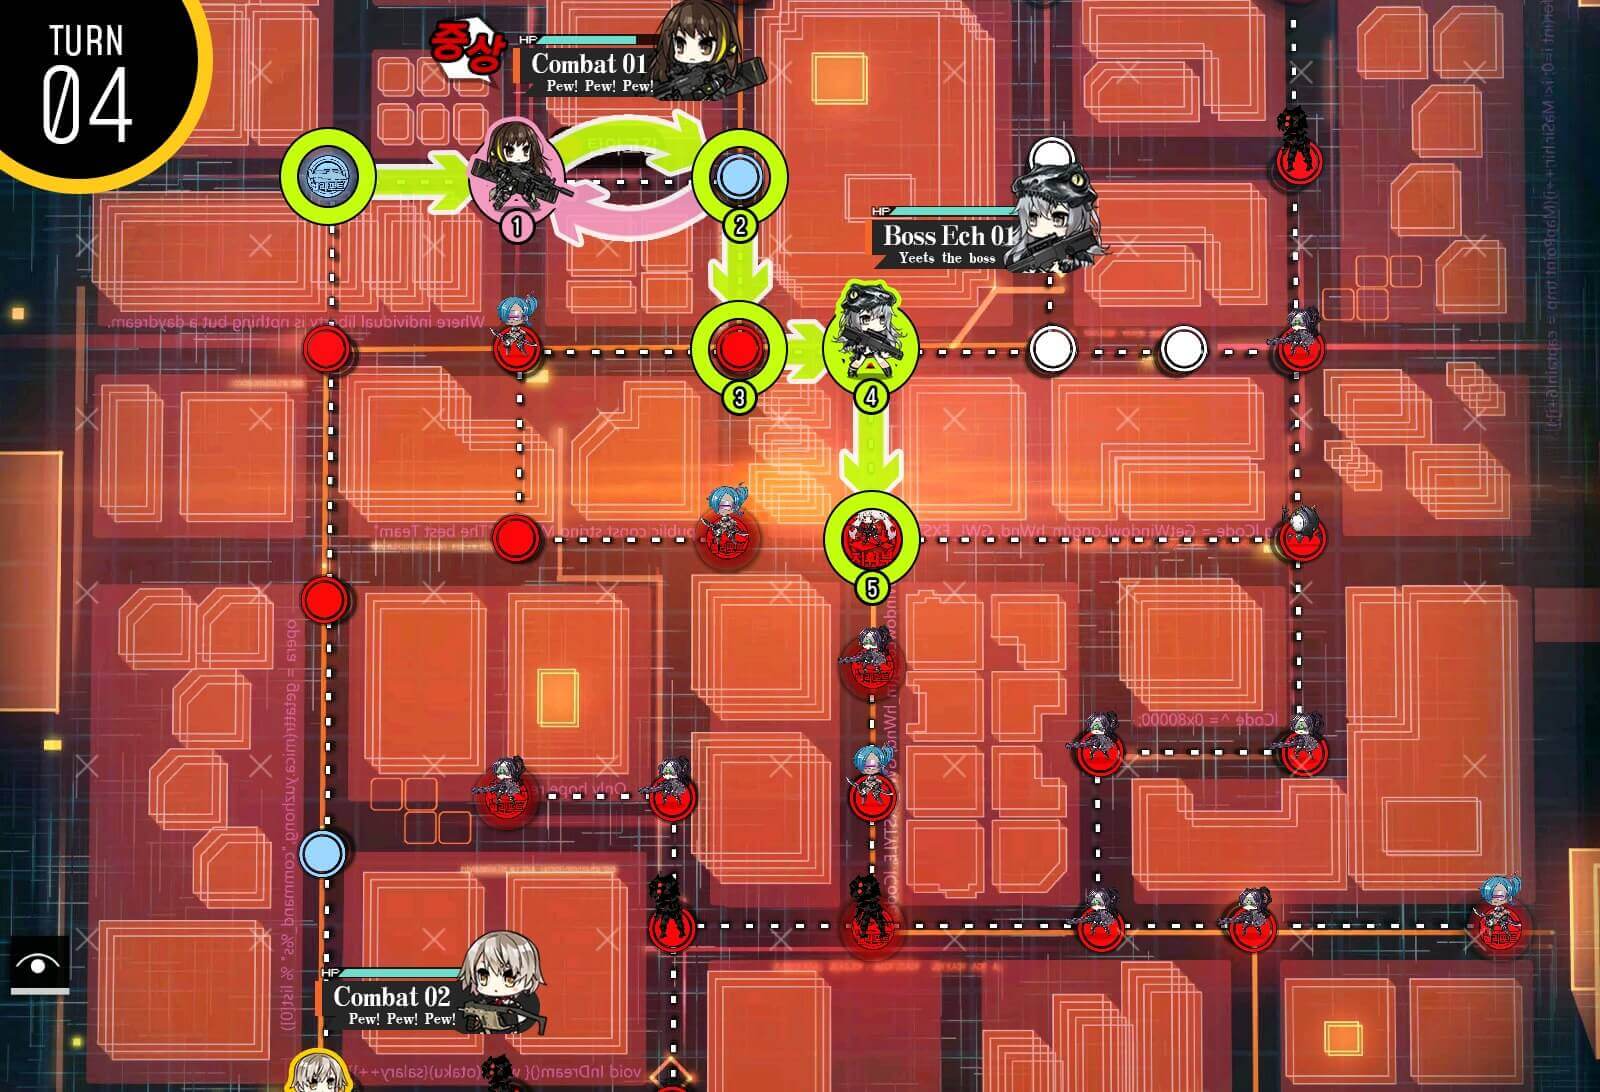
Turn 4
If you have enough ammo to take the HQ, go for it.
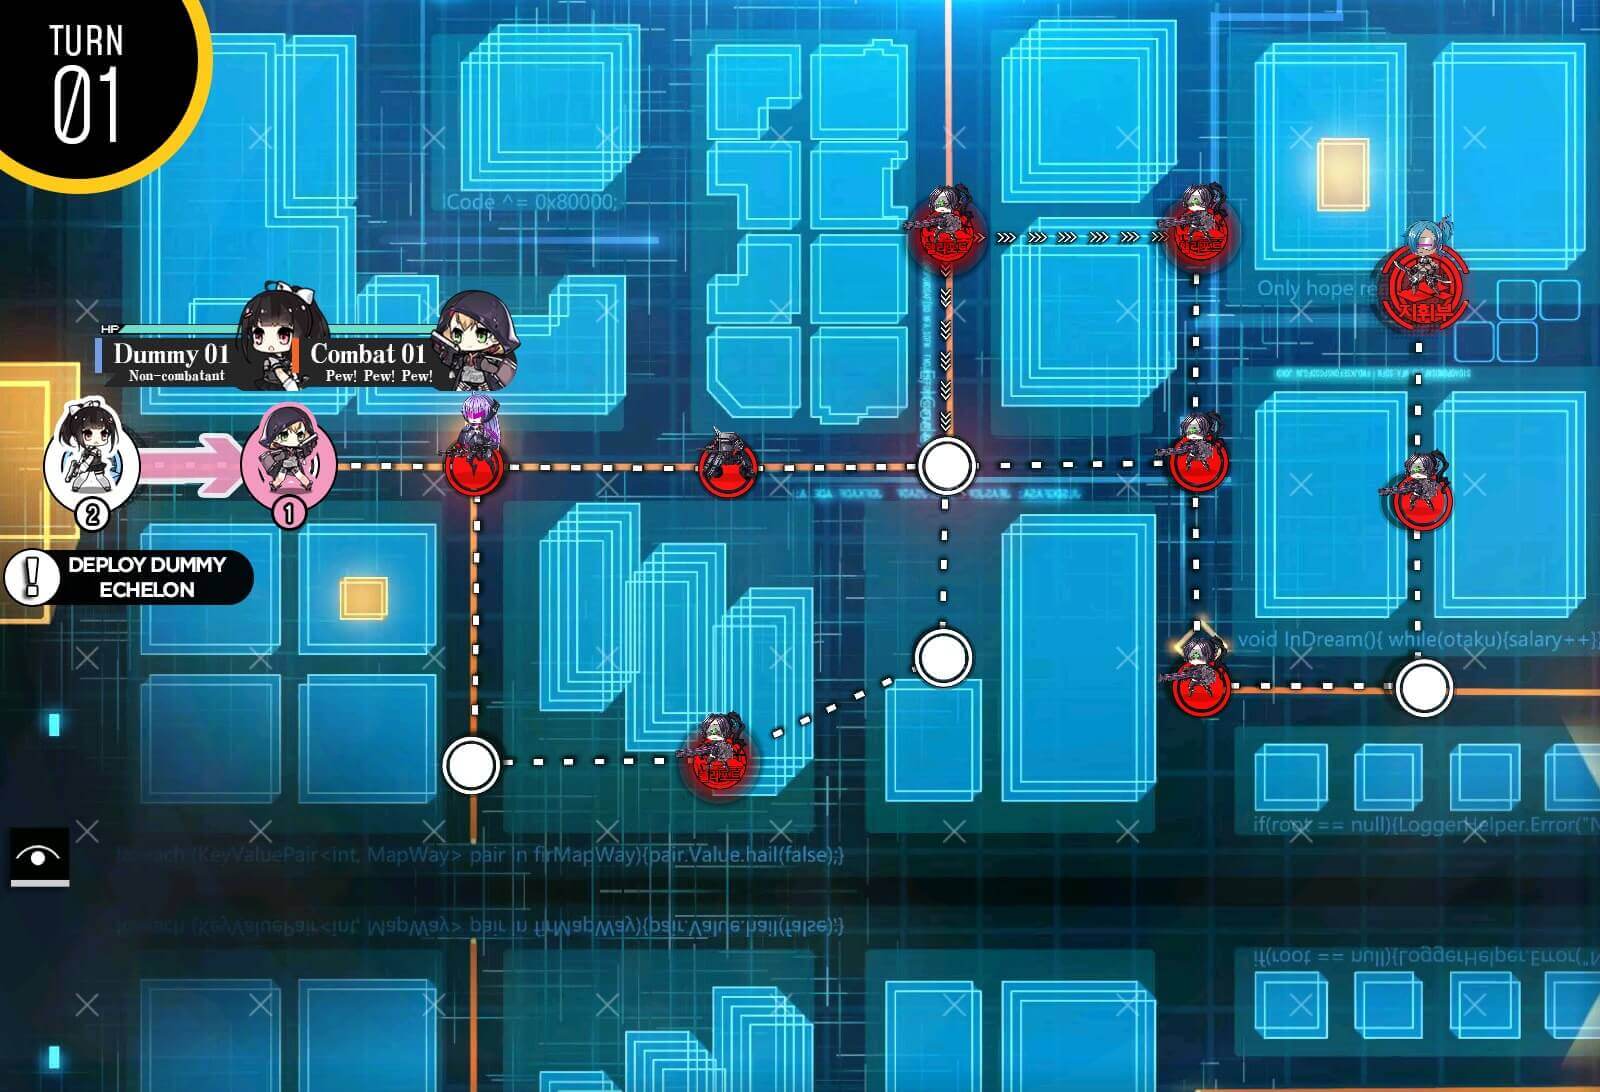
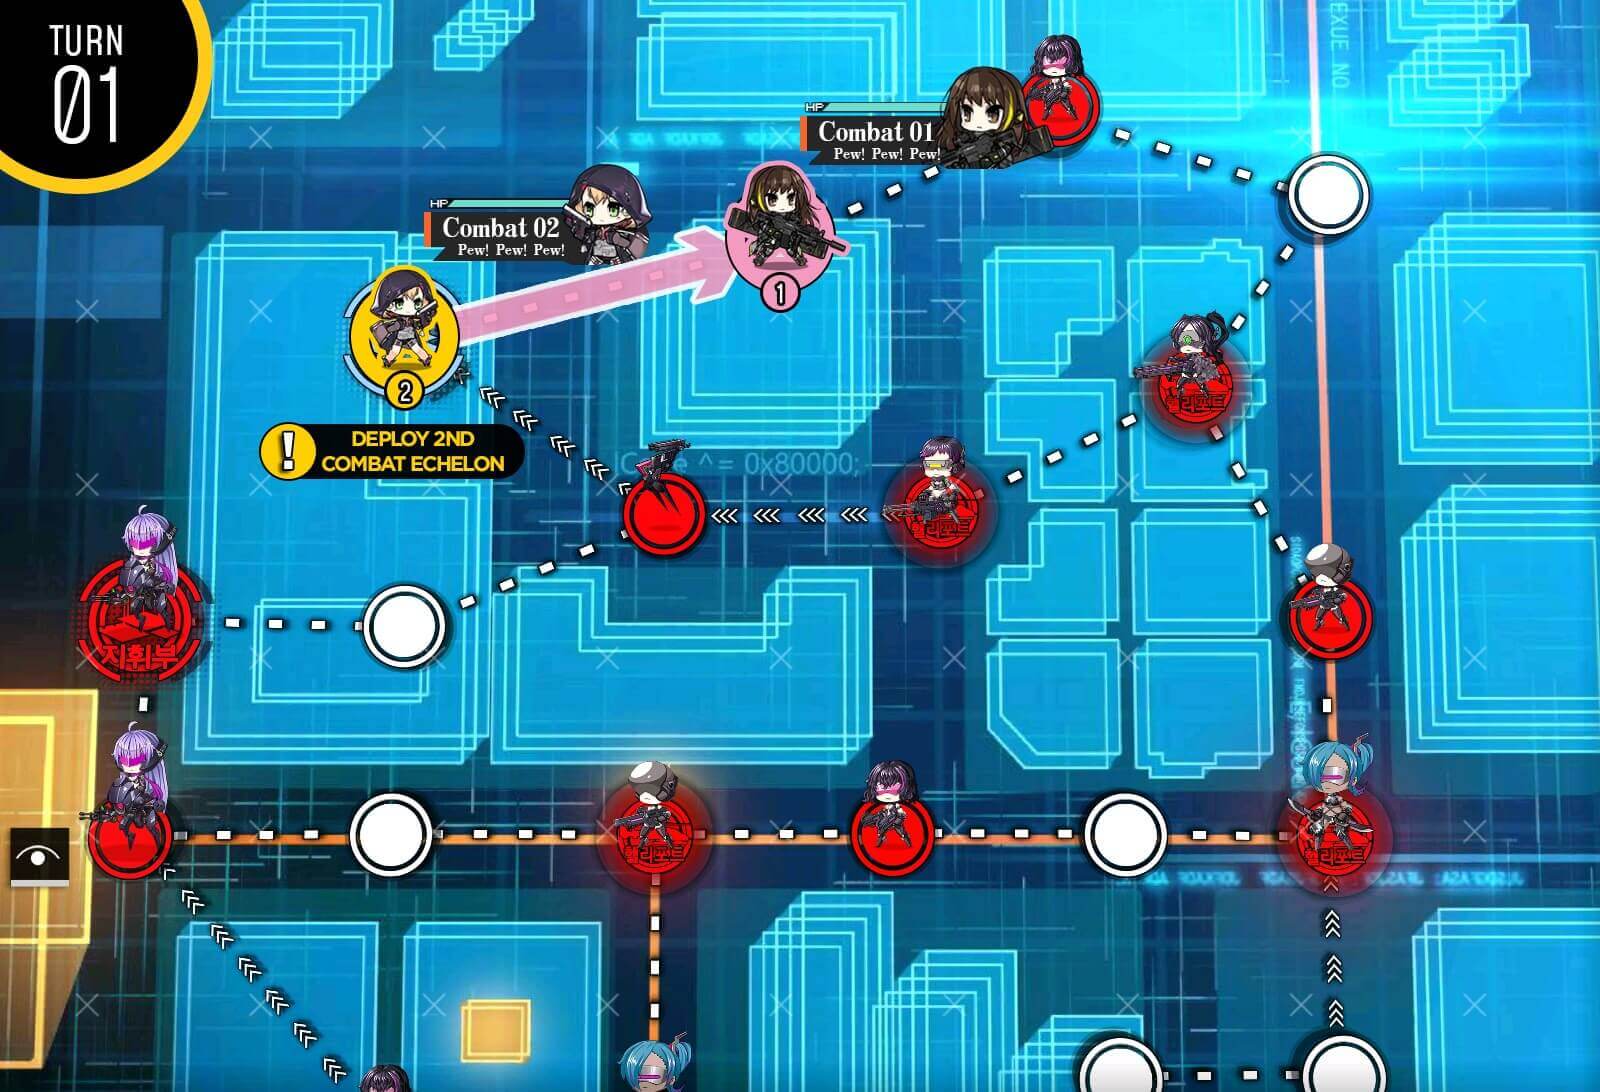
Turn 1
This map has a continuous spawn of enemy units heading towards the HQ but no spawns from the bottom area. Start with combat echelon at the HQ and move down one node to deploy the second combat echelon on the HQ.
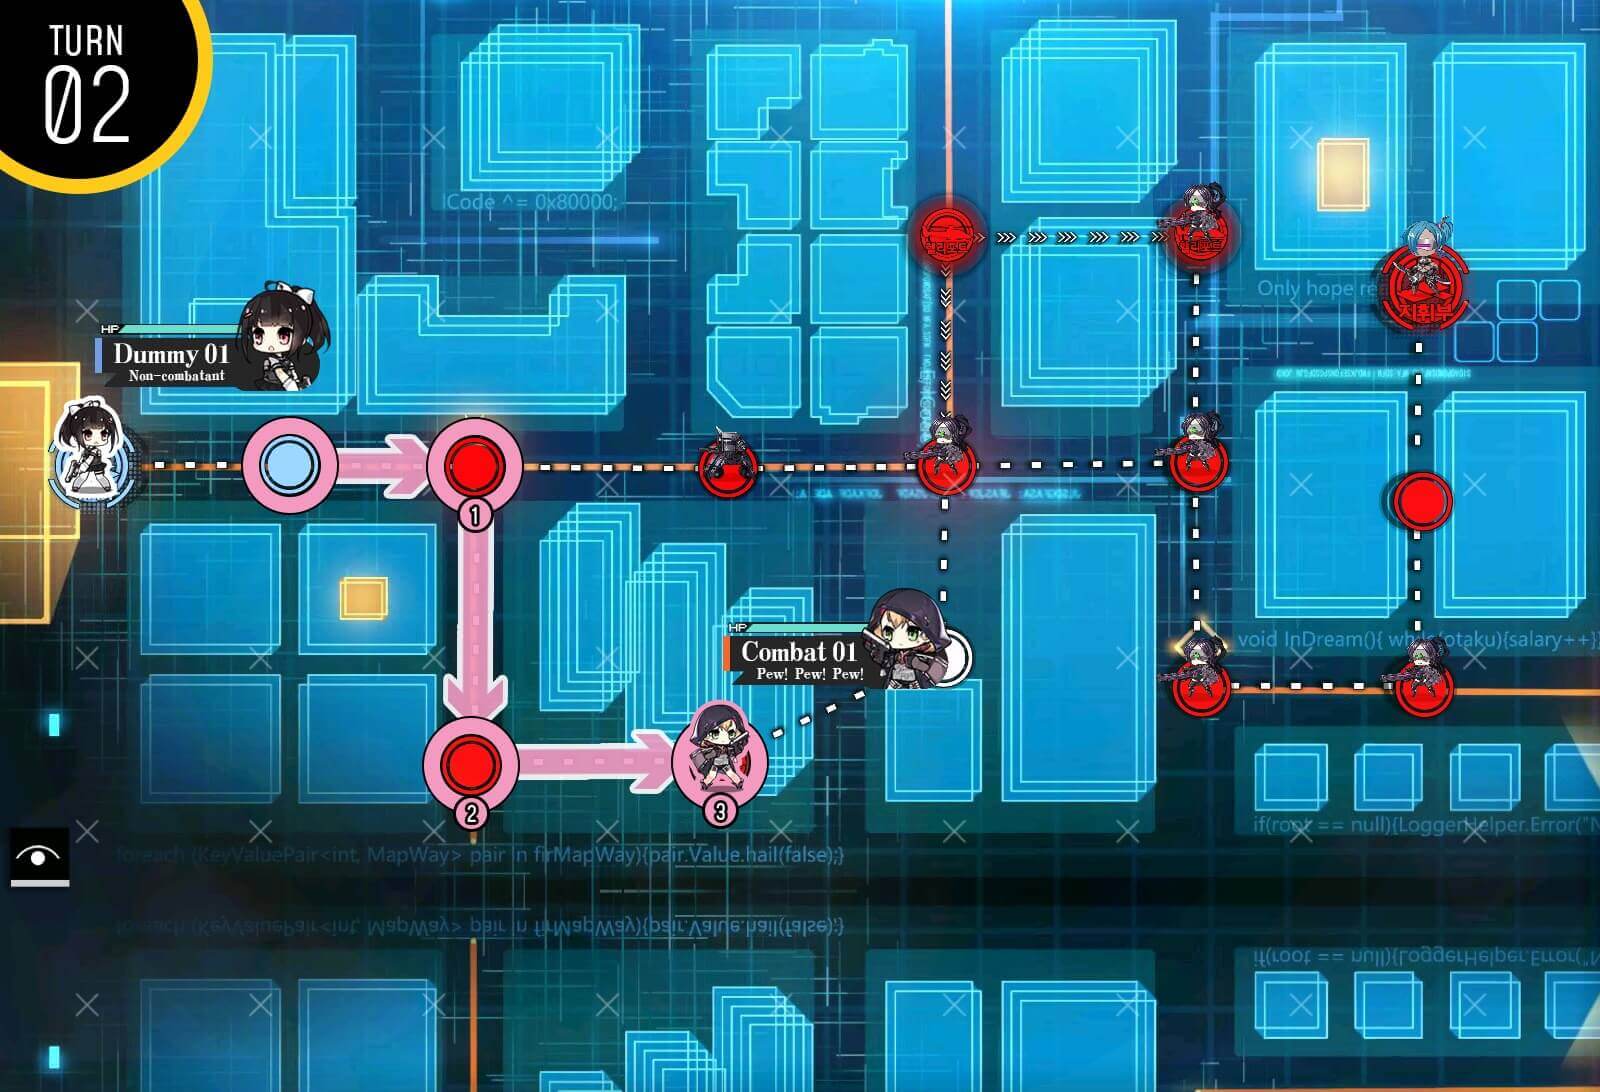
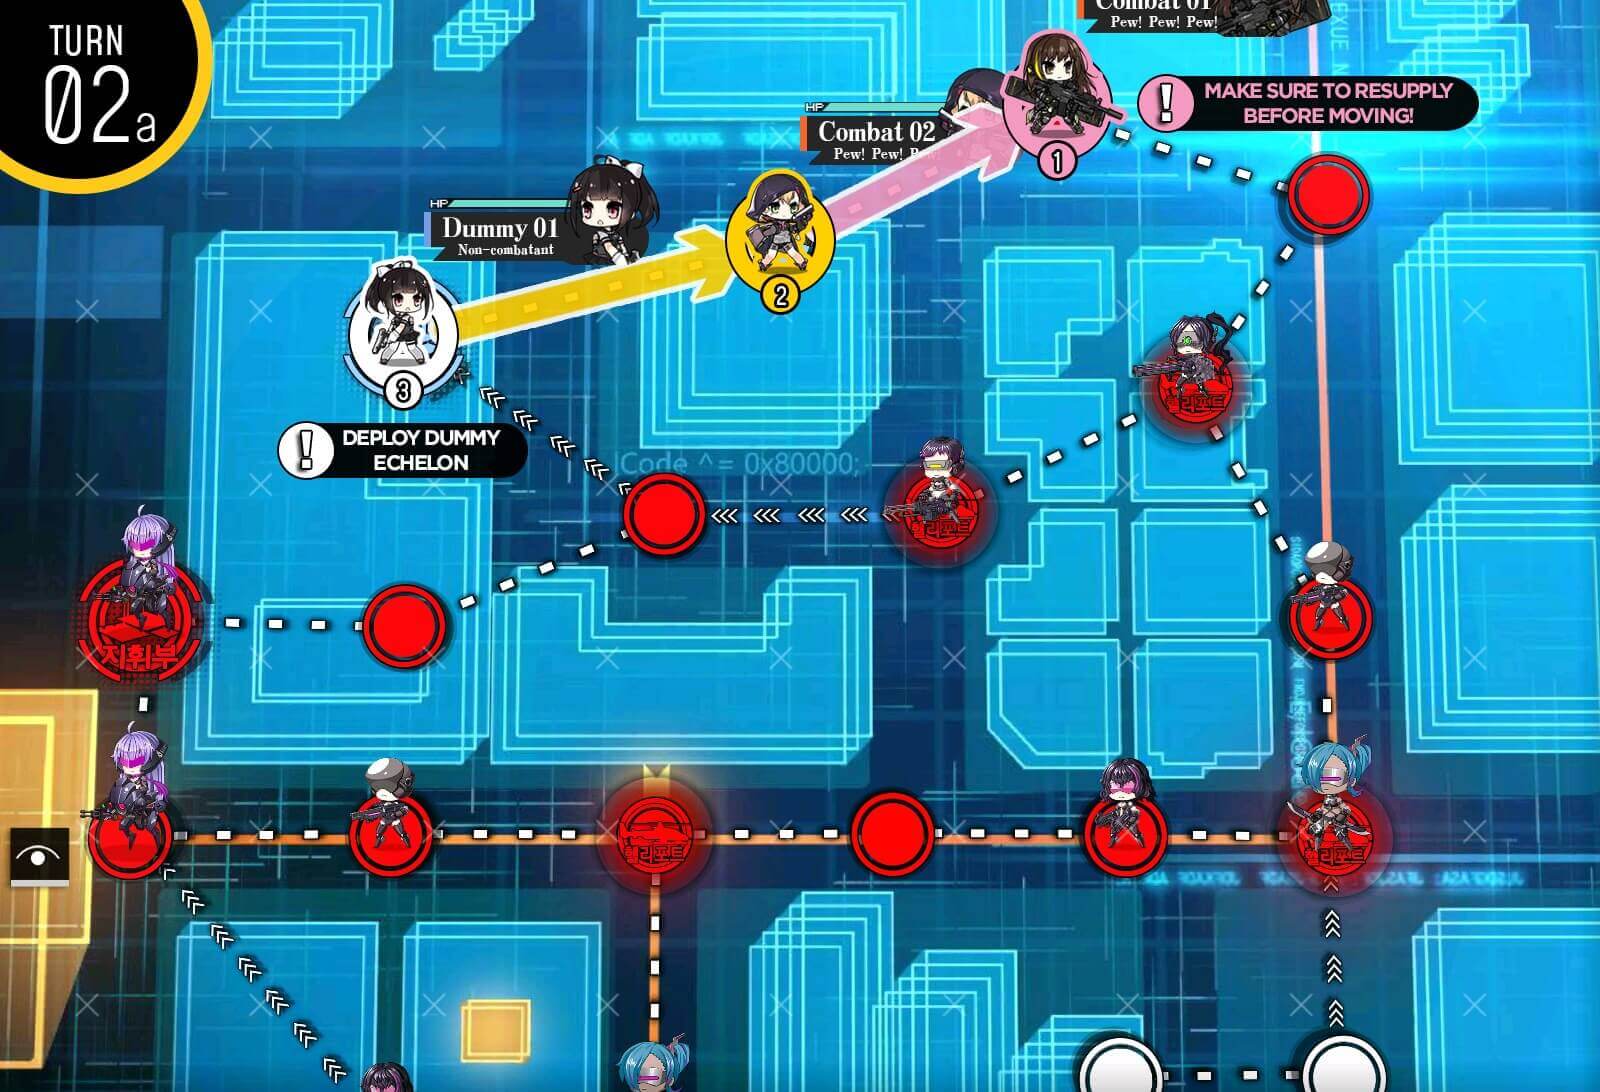
Turn 2a
Beginning of turn 2, move combat echelons down one each then deploy dummy echelon on the HQ. At this point there should be no enemy units left on the bottom row leading to the rally point.
Turn 2b
Swap dummy echelon all the way to the bottom row and leave two combat echelons defending the two nodes attacked by the enemy units.
Turn 3
All that's left to do is keep in mind of combat echelon's supply and health while dummy echelon connects the supply route.
Turn 4
Dummy echelon moves one node at a time and connects the route. Again resupply the combat echelon so that they can fight least 3 more times.

Turn 5~7
Mash that lik-end turn button. Just make sure your echelons have enough supplies.
Turn 1
Start with main combat echelon on the HQ. Move up two nodes then deploy second combat echelon. Second combat echelon will only fight two enemies at most.
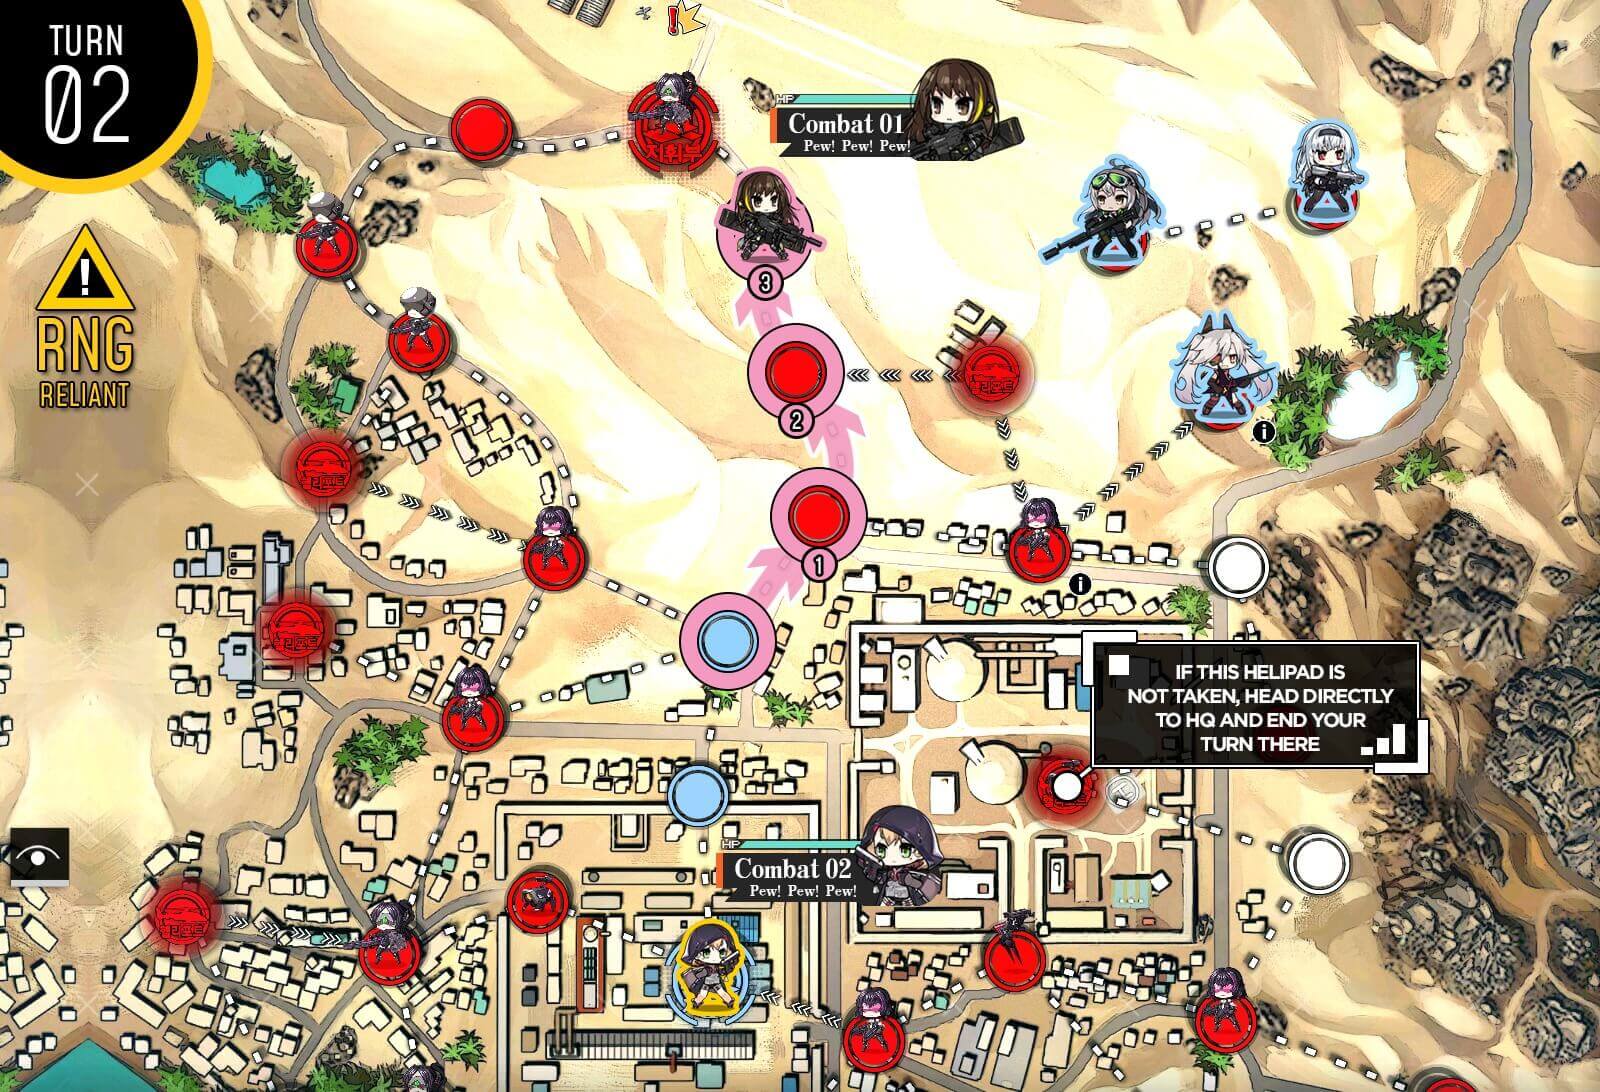
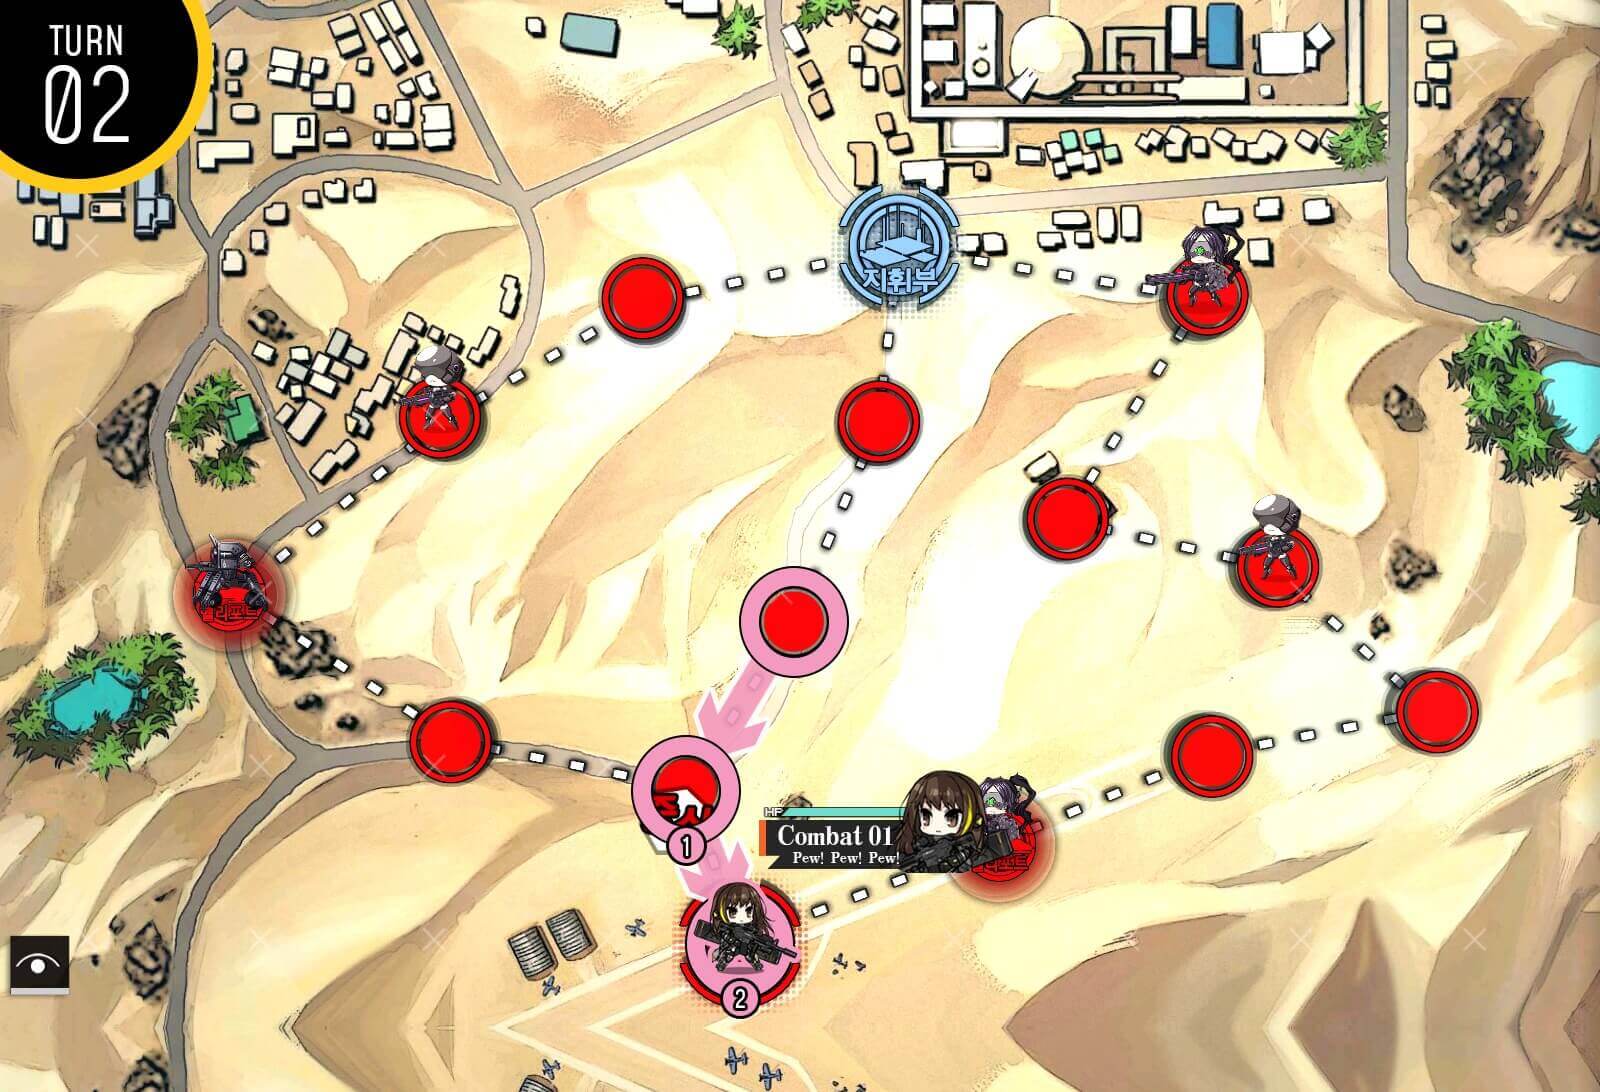
Turn 2
If the helipad to the bottom right has not been taken, you have enough move points to take HQ this turn. If not, take HQ next turn.
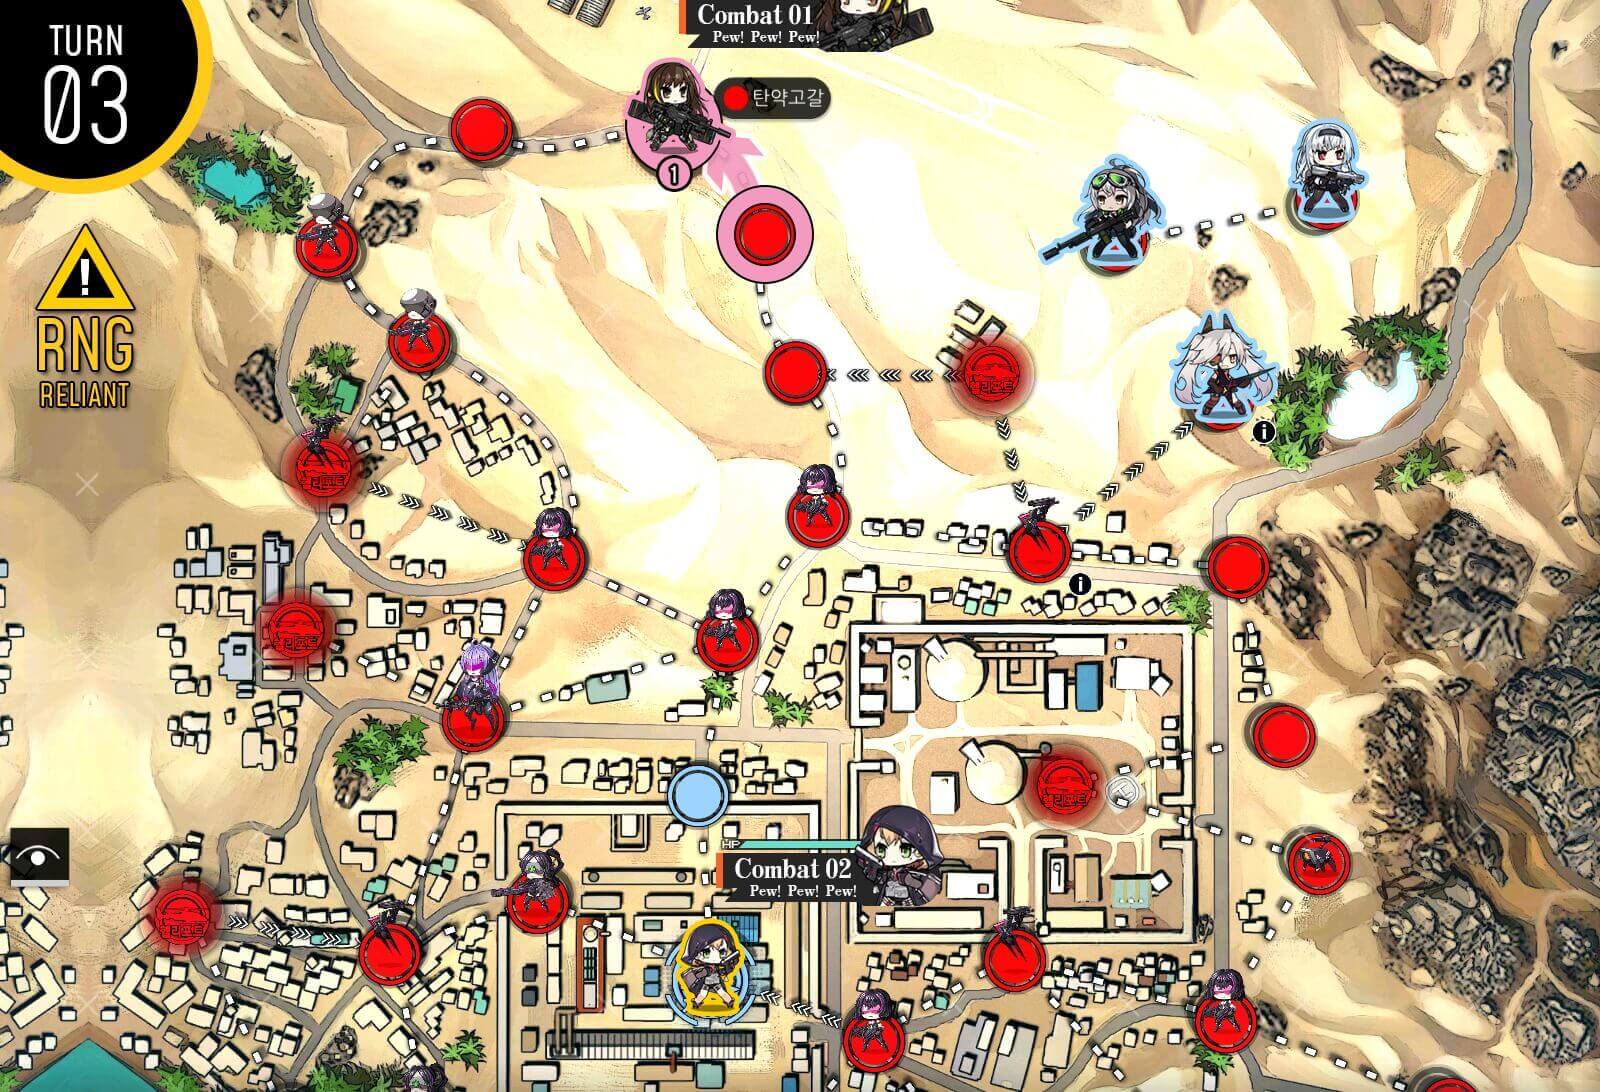
Turn 3
For my case the helipad was taken so I took the HQ the following turn. S rank in this map is rather tedious task requiring 18 kills within 6 turns so I have skipped the steps for it..
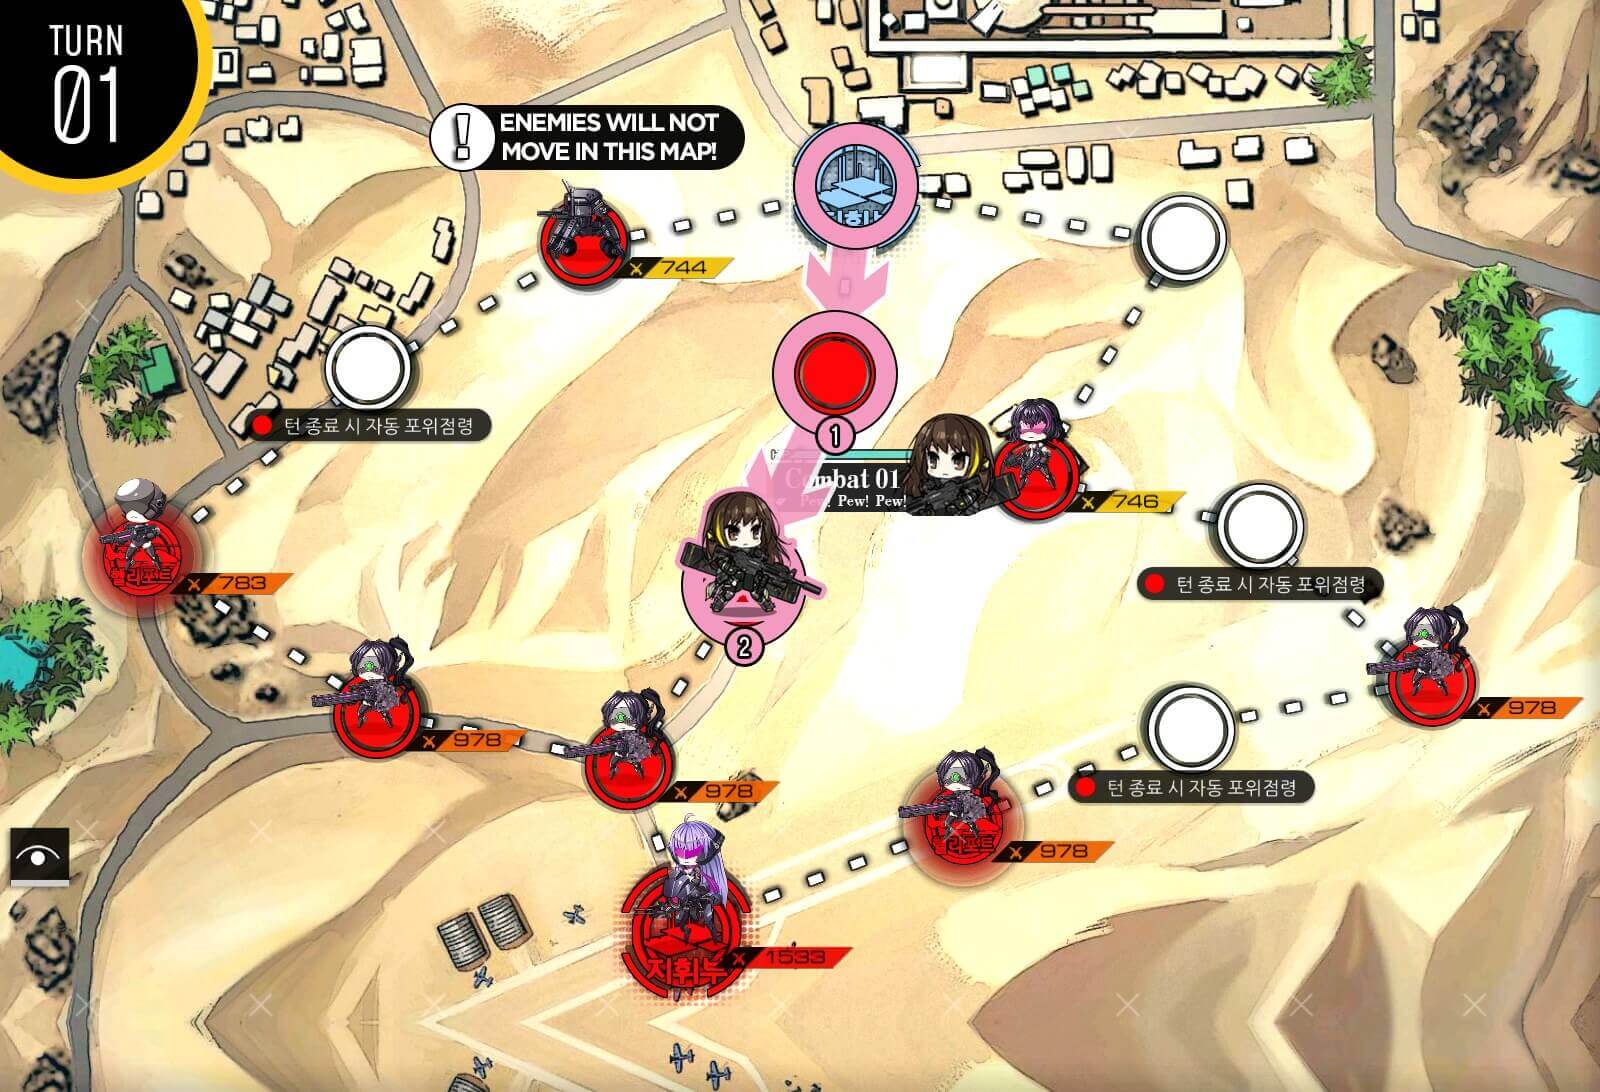
Turn 1
Normal Boss is relatively easy but still requires a fair bit of levels. Start with combat echelon that will fight boss on the HQ. Move one node to the right then deploy second combat echelon that will defend the HQ.
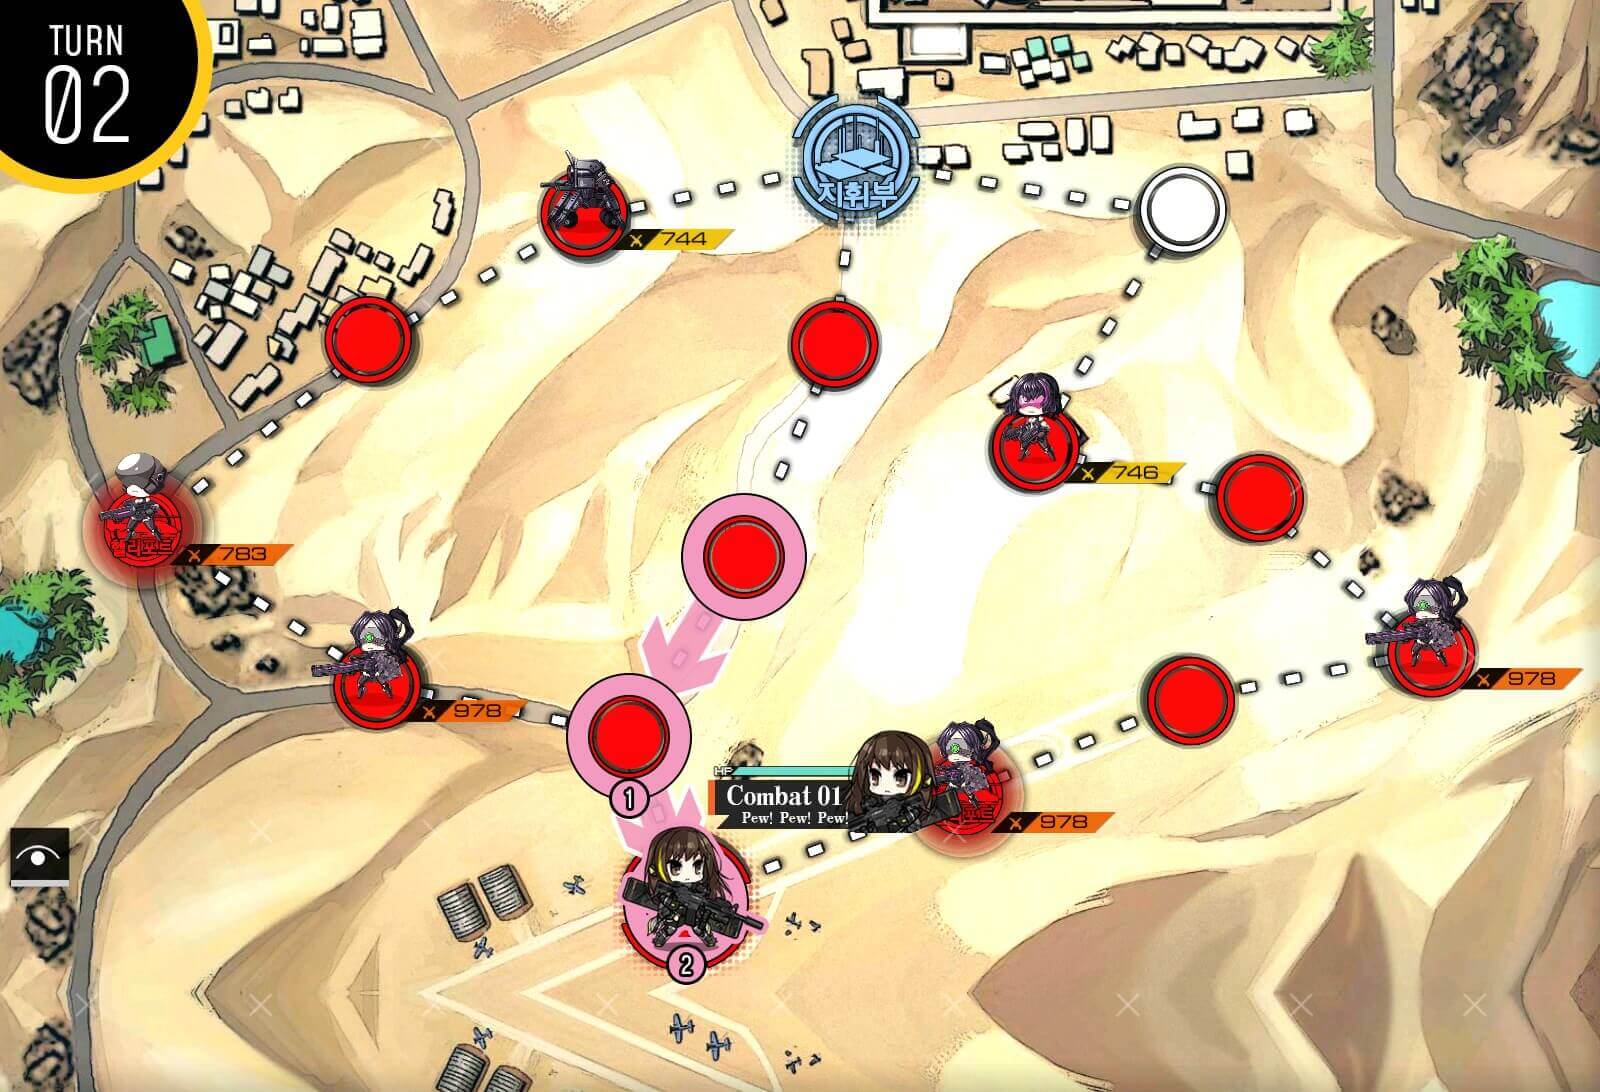
Turn 2
Move the second combat echelon up one node. The first combat echelon moves right up to the T-junction.

Turn 3
Deploy dummy echelon on the HQ. If you want to aim for S-rank clear, move second combat echelon up one more node for additional kill. Then, first combat echelon moves one node to right to take helipad.
Turn 4
After resupplying, move straight for Fail in the center of the map.
EX

Turn 1
Solution again is identical as the normal map however with stronger enemy units. Running high burst DPS ARSMG or RFB to target backline will minimize repair cost later. Running RFHG echelon with Taunt Fairy is good for all enemies except for the unit on the HQ. Deploy combat echelon on the HQ, move to right then deploy dummy echelon.
Turn 2
Move combat echelon to the helipad at the bottom.
Turn 3
After resupplying, make your way to the enemy HQ.
Turn 4
Ez.
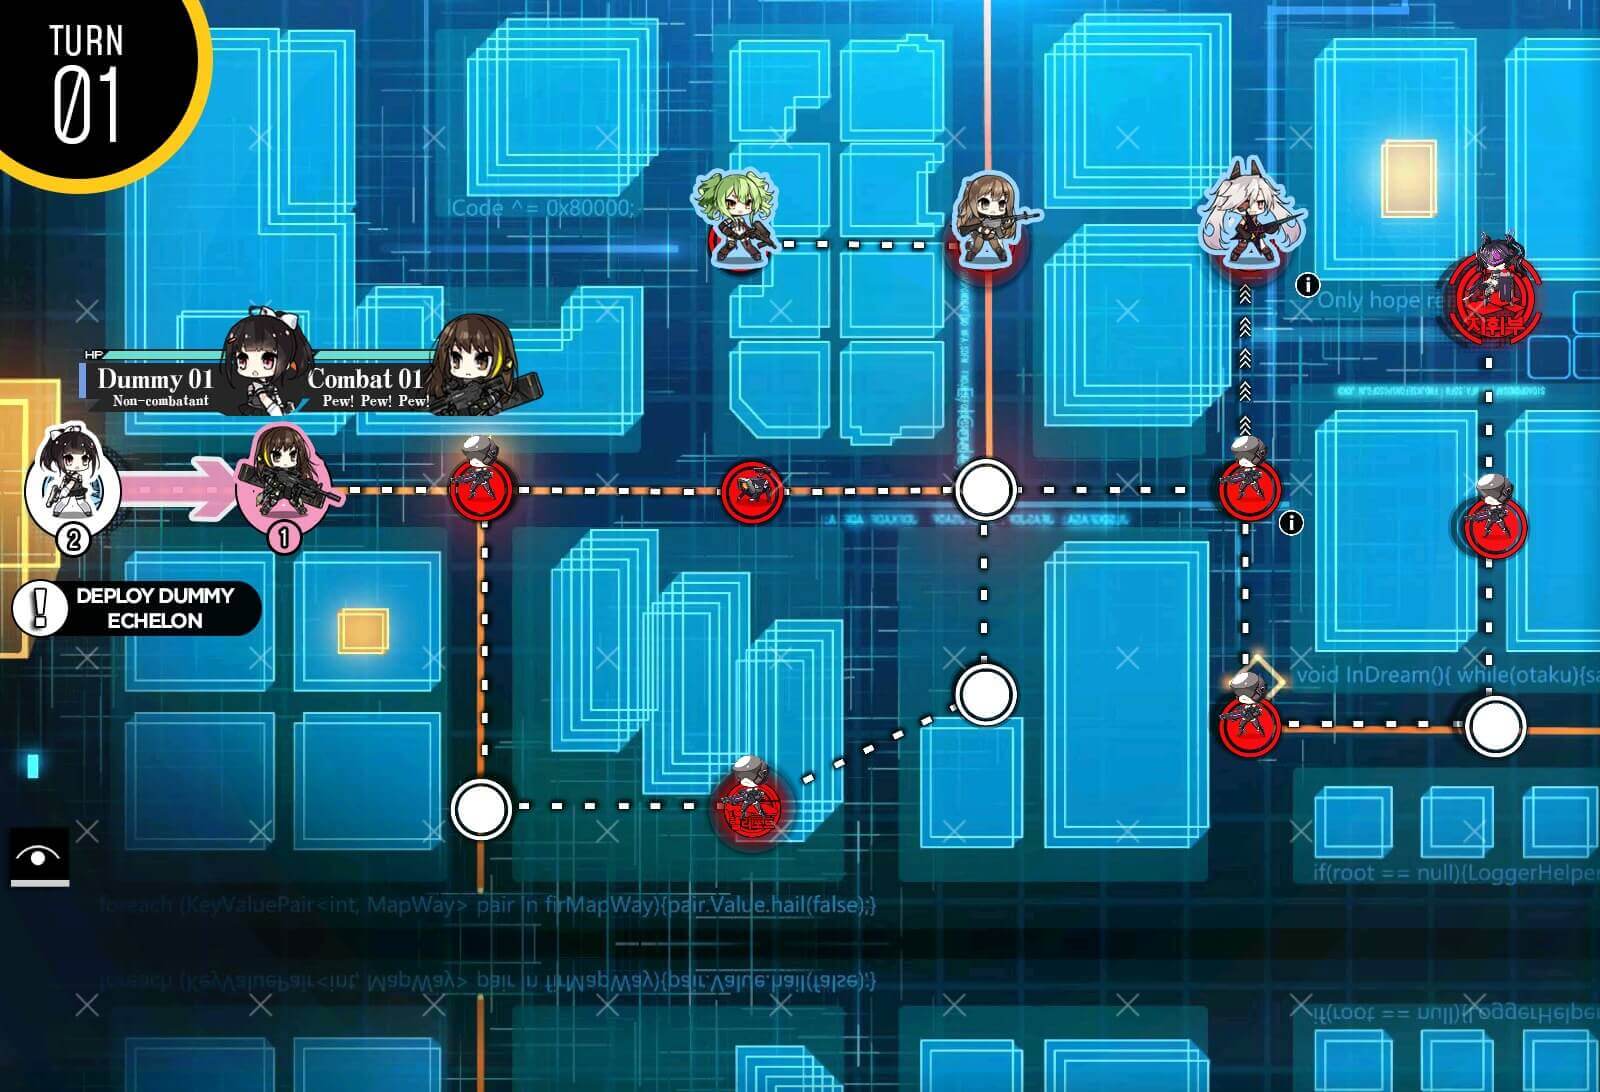
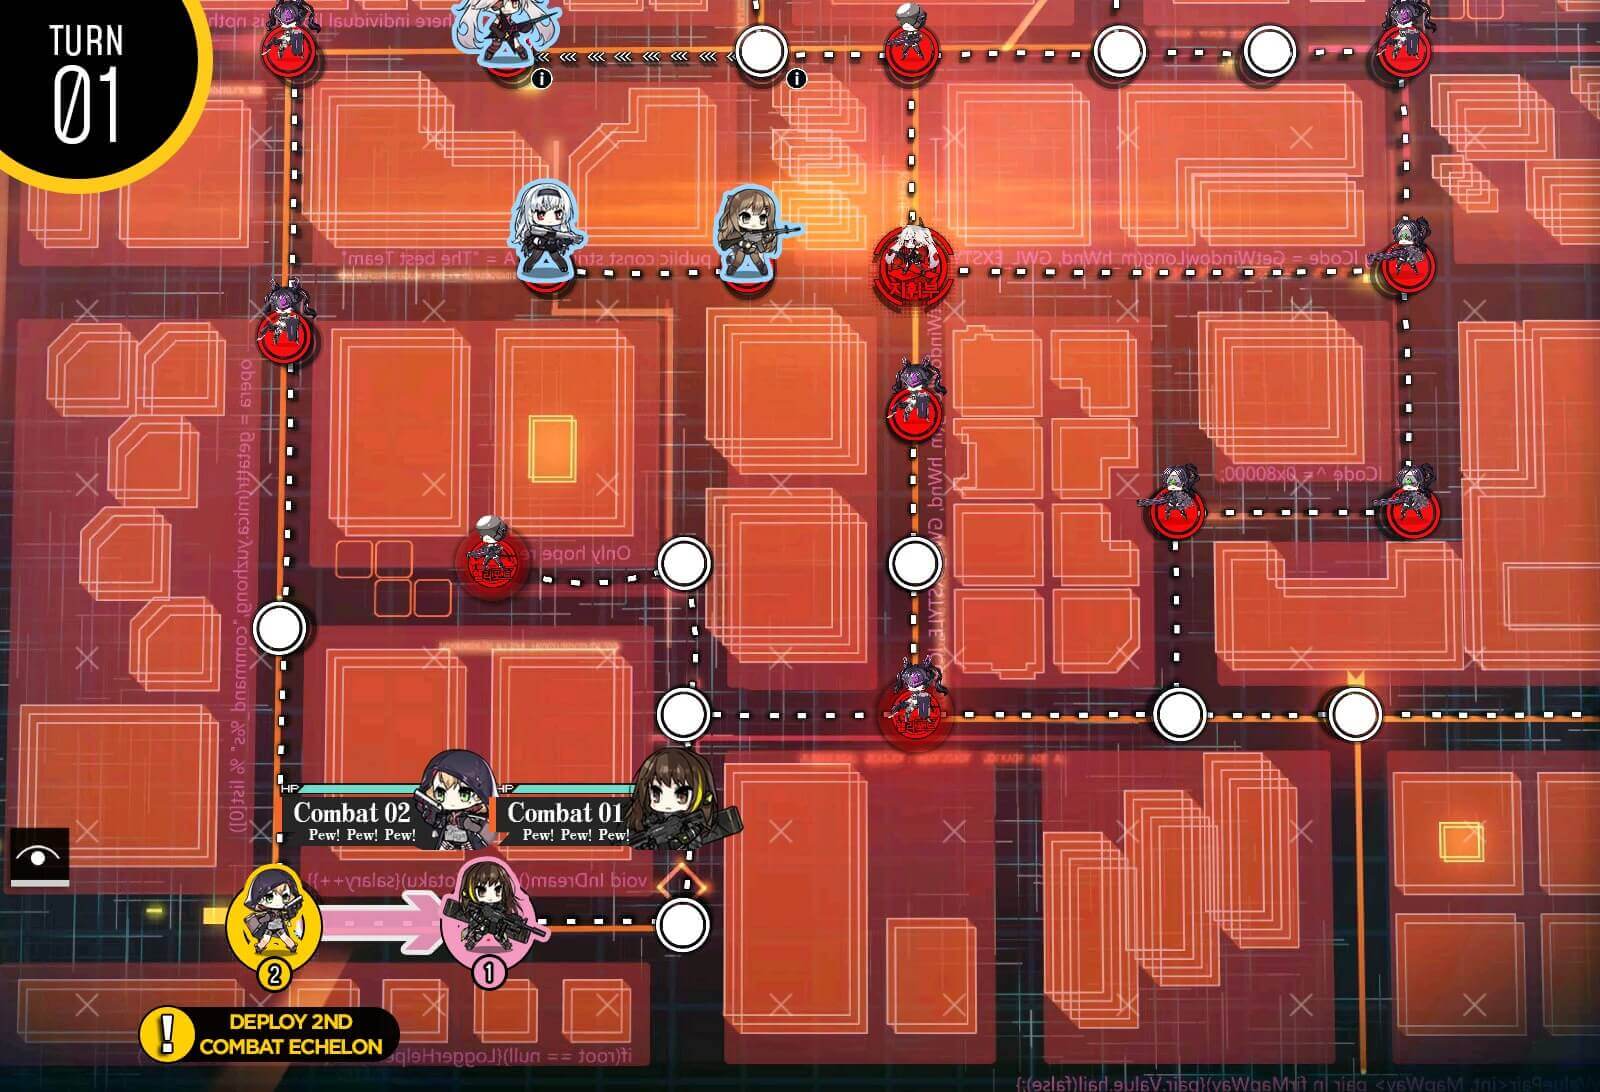
Turn 1
Again, solution is identical to the normal version of the map but with more difficult enemy units along the way. Recommend ARSMG echelon for the task of reaching enemy HQ. Start by deploying 2 combat echelons on the first turn.
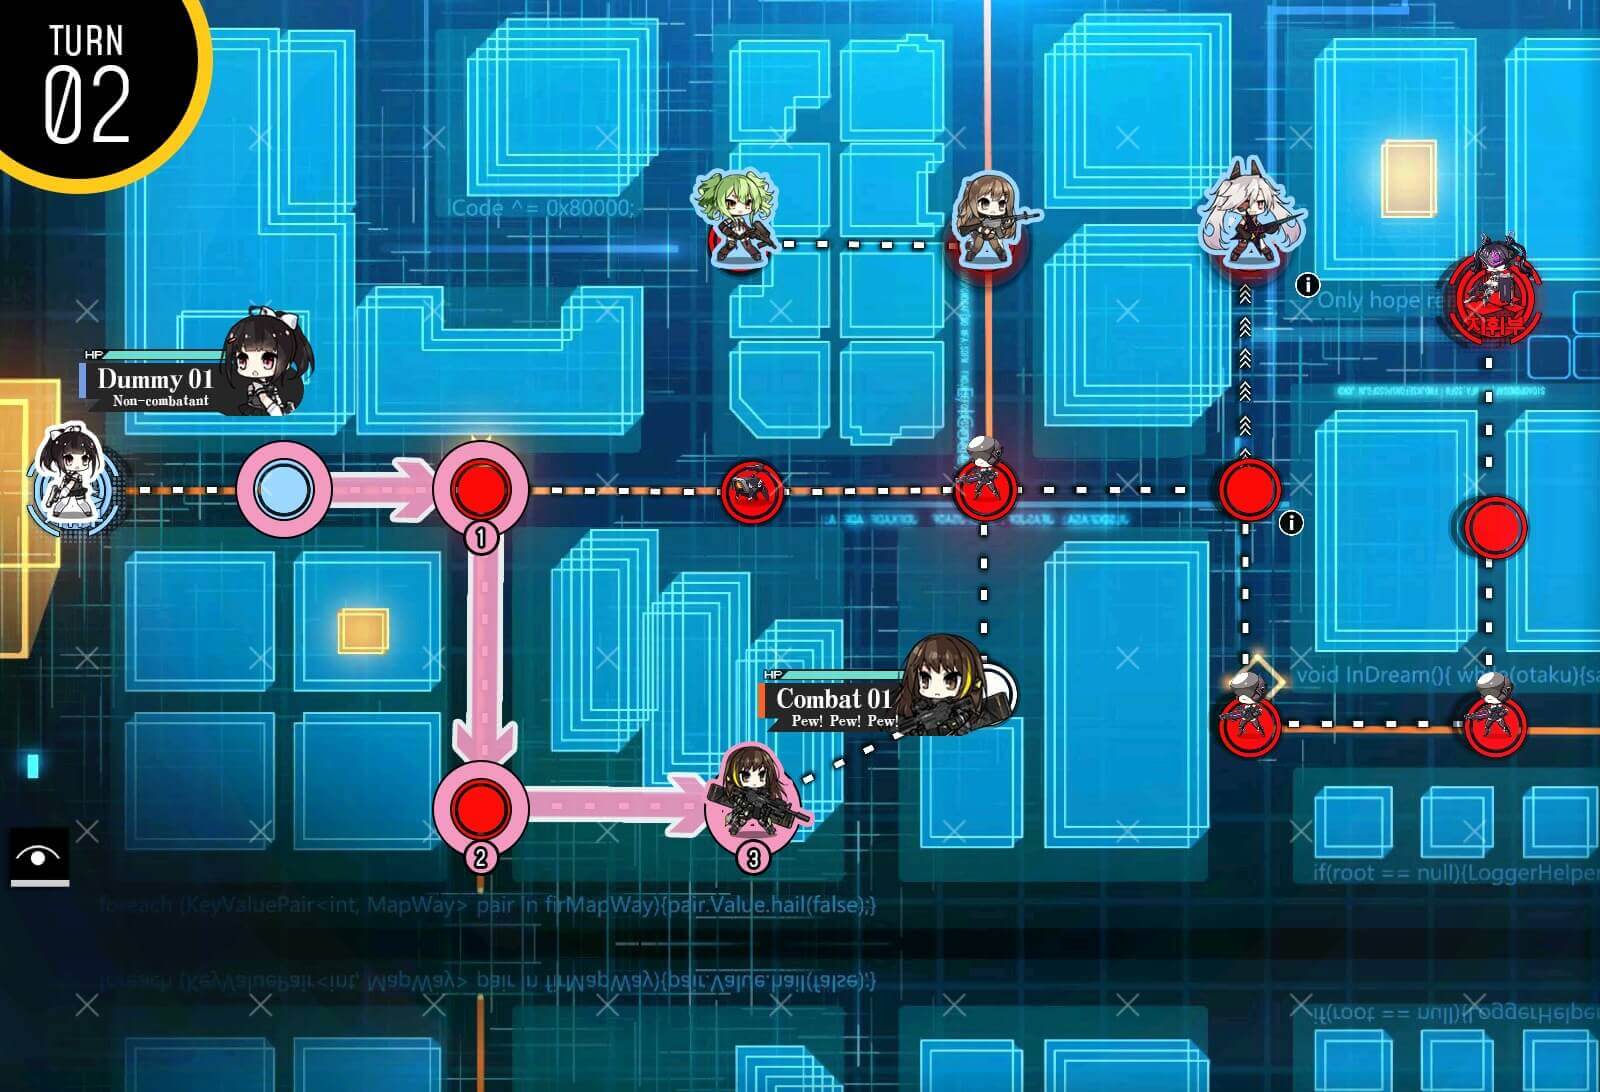
Turn 2a
Shift echelons right one node each then deploy a dummy echelon to buy more move points later.
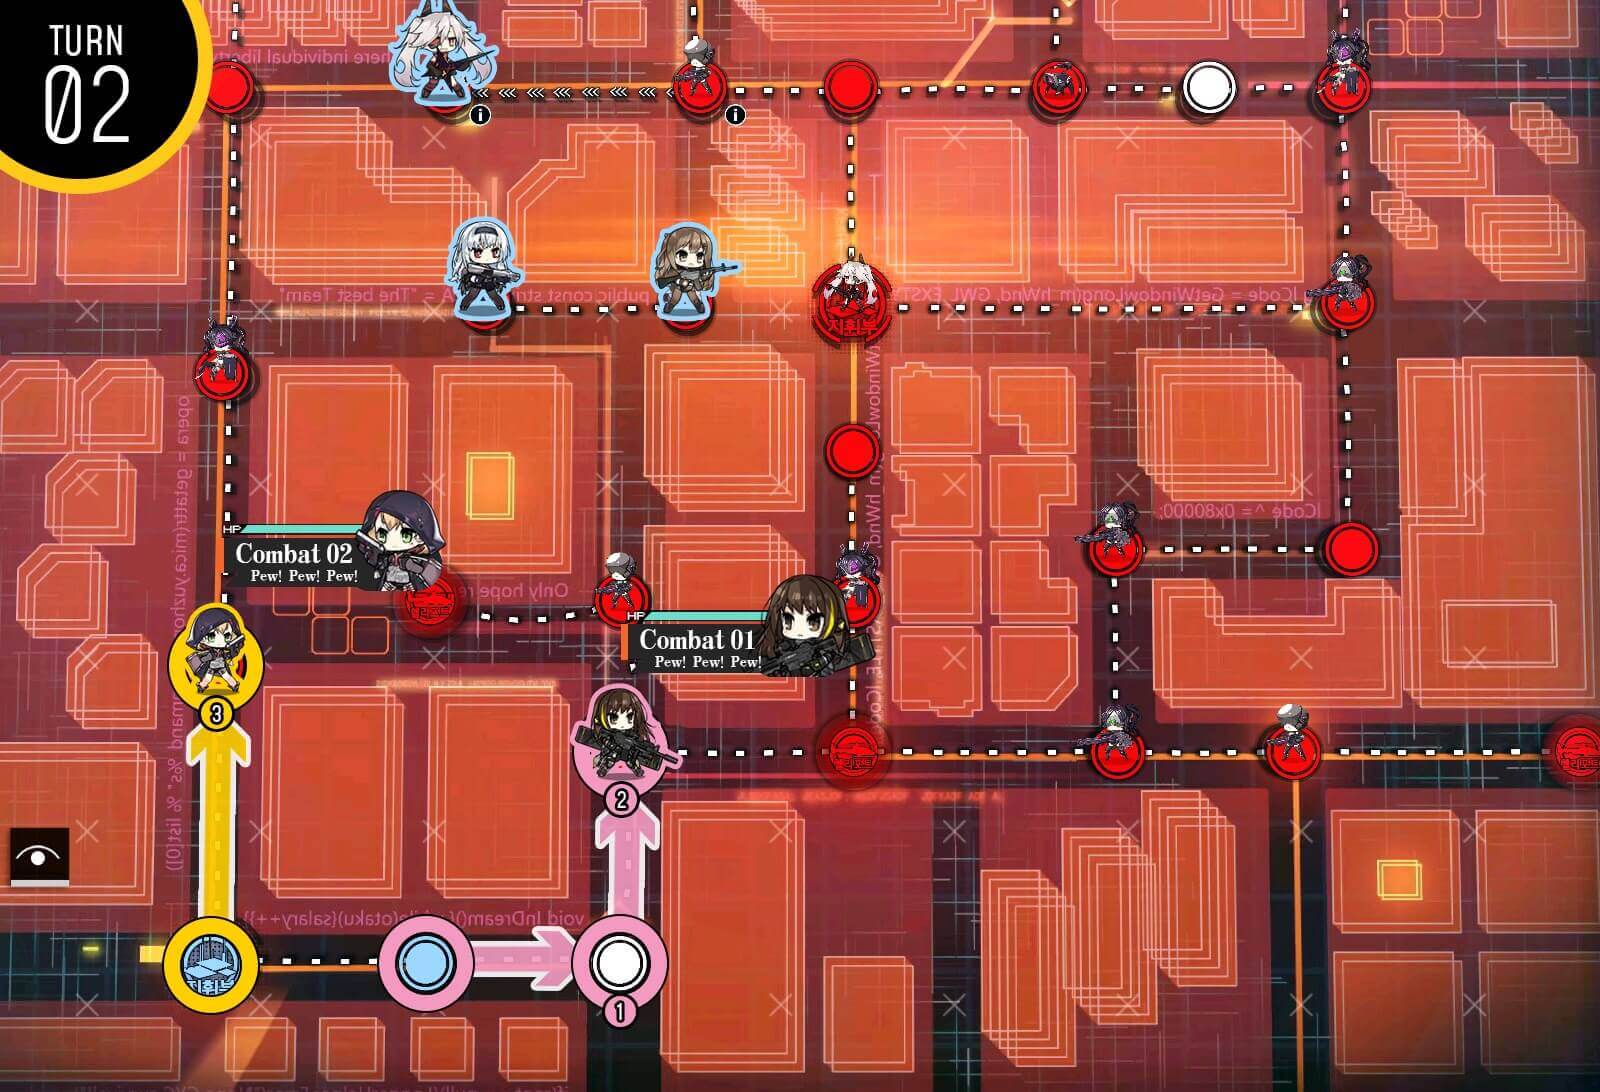
Turn 2b
Dummy swap.
Turn 3
Now that we are not restricted by the one way path, resupply first combat echelon by swapping it back to HQ prior to moving in a big circle.

Turn 4
Take HQ and you should be done. If you are short one enemy unit for the S-rank, dragoons unit below enemy HQ is an option but not recommended if your frontline is in critical condition.
Turn 1
Again same concept as the normal version with 2 combat echelons defending HQ and the node to the south while dummy echelon connects rest of the way to the rally point. Start with 2 combat echelon heading south.
Turn 2a
Shift combat echelons down then deploy dummy echelon on HQ.
Turn 2b
Swap back combat echelons back to their original position.
Turn 3
All that's left to do is keep in mind of combat echelon's supply and health while dummy echelon connects the supply route.
Turn 4
Use dummy echelon to connect the path to the rally point, keep an eye on the combat echelons' supplies.

Turns 5-7
Once all the paths are connected, all you have to worry about is the combat echelon being able to defend their nodes.
Turn 1
Just as you guessed, solution to EX map is identical just against harder enemies than normal. But to make it a 2 turn instead of 3 turn, we are adding either a dummy or third combat echelon that we deploy at the start on the helipad to the right. Just as we did before, move up combat echelon 3 nodes then deploy your second combat echelon that will defend the base. Recommend running ARSMG echelons.

Turn 2
Combat echelon pushes to the enemy HQ and ends turn.
Turn 1
We start with our combat echelon moving up north and placing a second combat eche. First combat echelon is going to be the one with most fights in this map so make sure it's well equipped and skilled.
Turn 2
First combat echelon pushes to helipad on the top left corner. This is where we will spawn the boss kill echelon.
Turn 3
If you are limited to the number of echelon, I recommend repairing here, forfeiting of S-rank clear and deploying a dummy instead to buy a move point.
Turn 4
All you have to do is now go straight for Fail.