


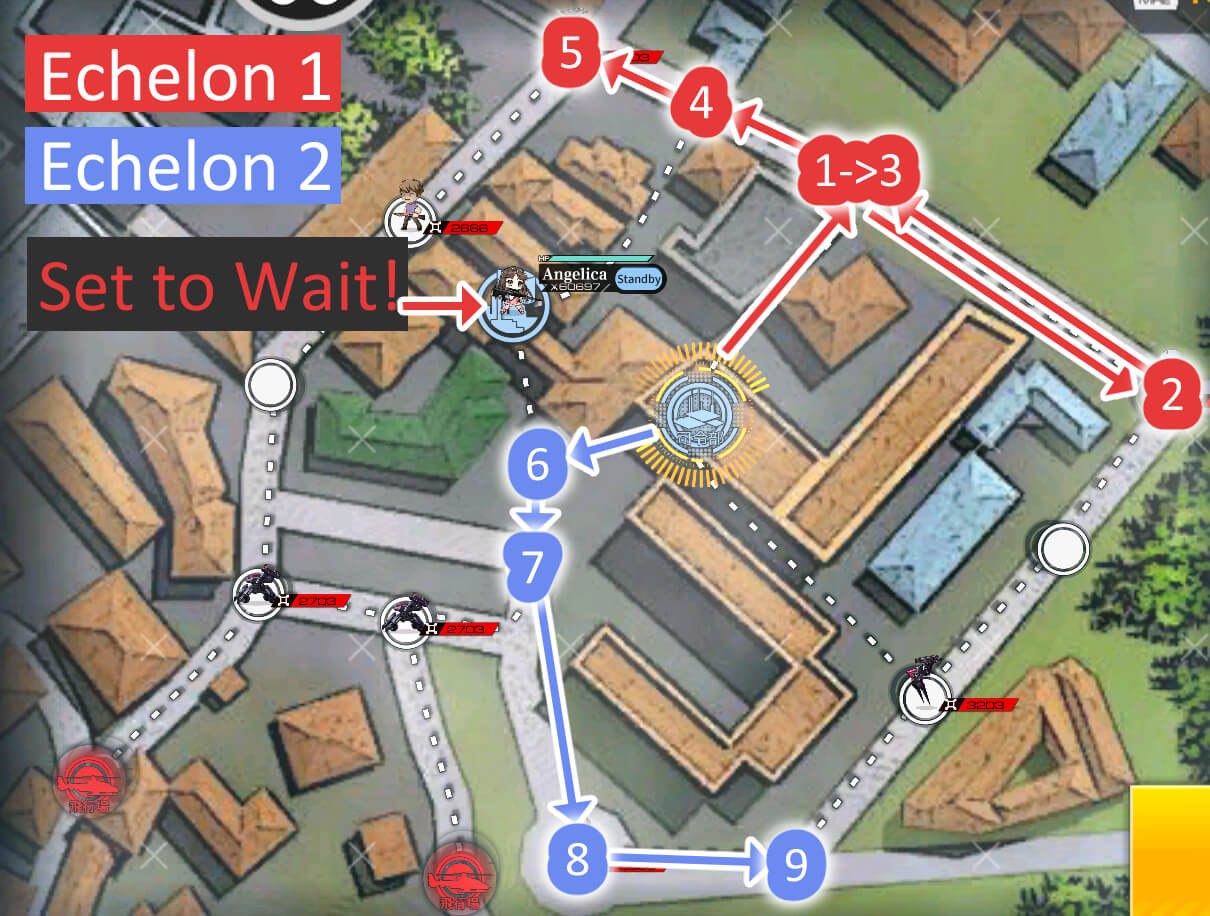


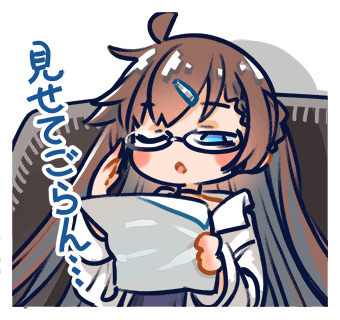
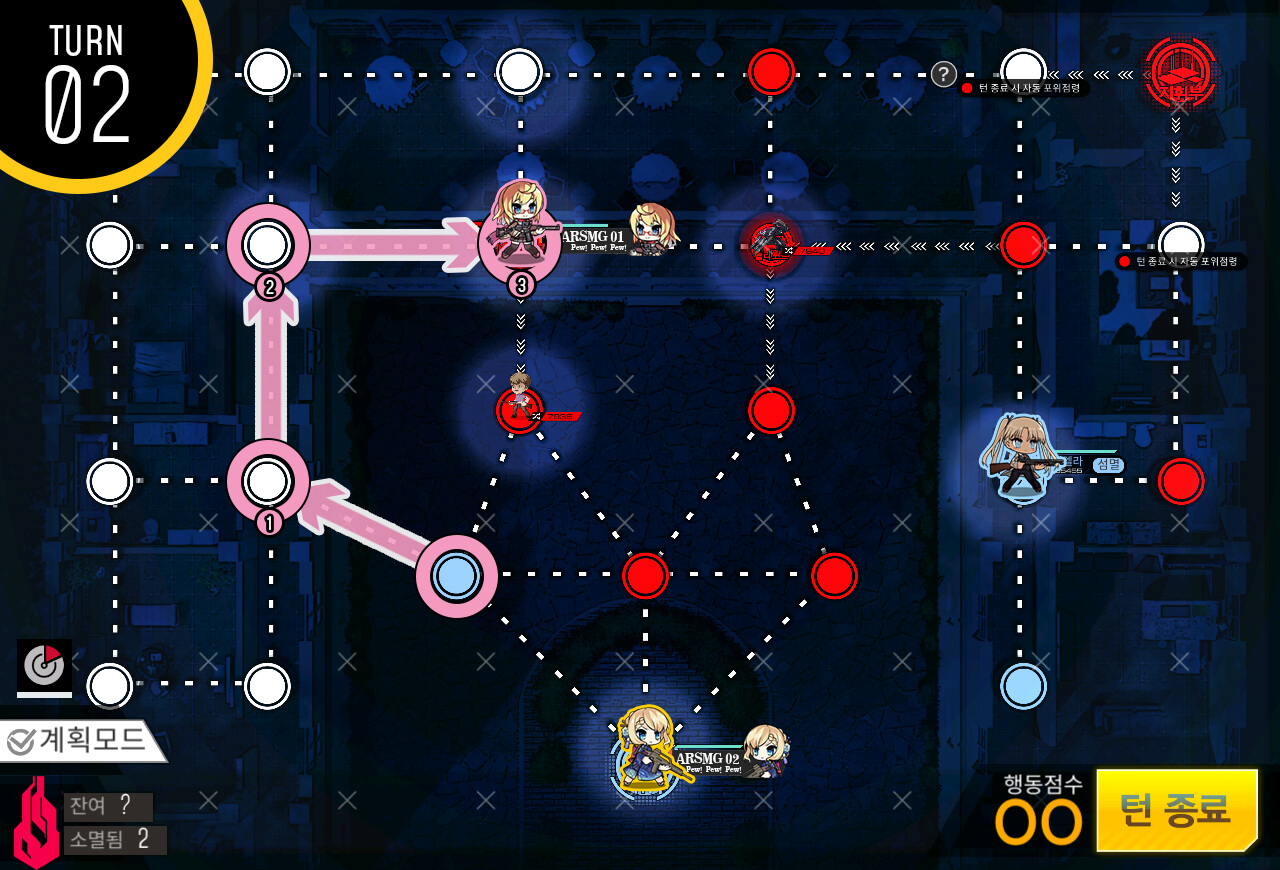
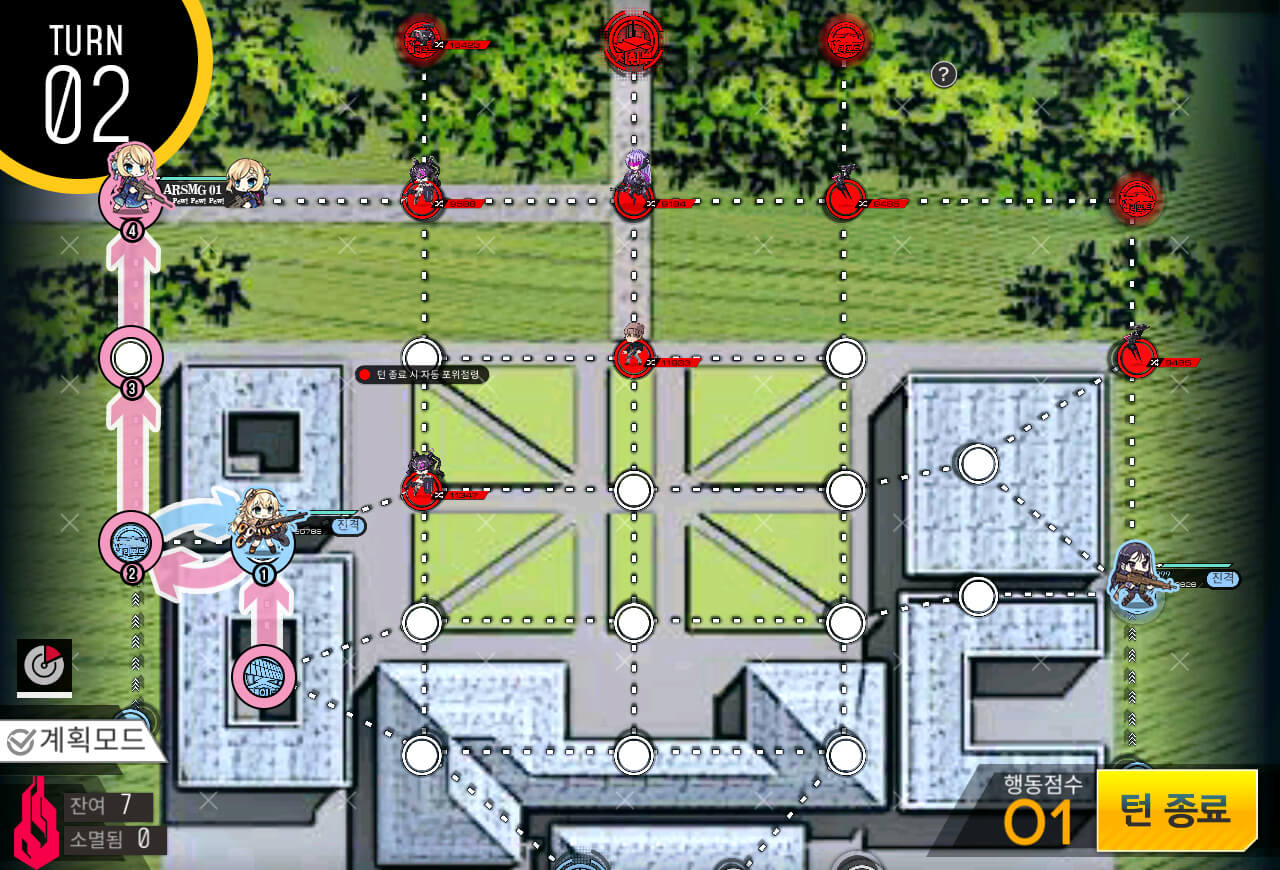
This map is straightforward and can be beat with a single echelon. Make sure to set Angelica to 'Wait'. For experienced players, a single AR and HG at 5x links with appropriate equipment are sufficient to clear this map. If you don't want to move for the rest of the map, you can just deploy 2nd echelon to the left of the HQ and defend all points.
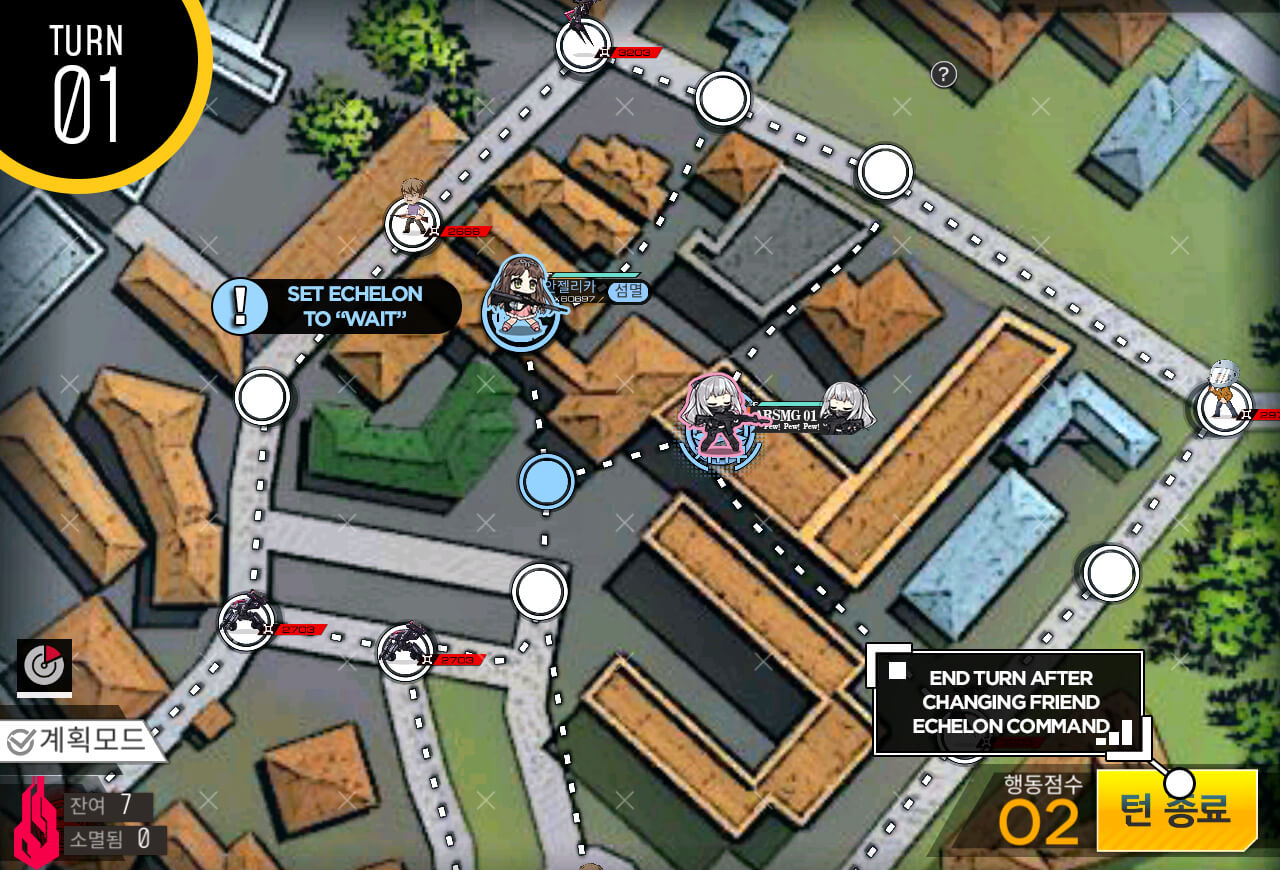
We also skip the 2nd turn with no moves done.

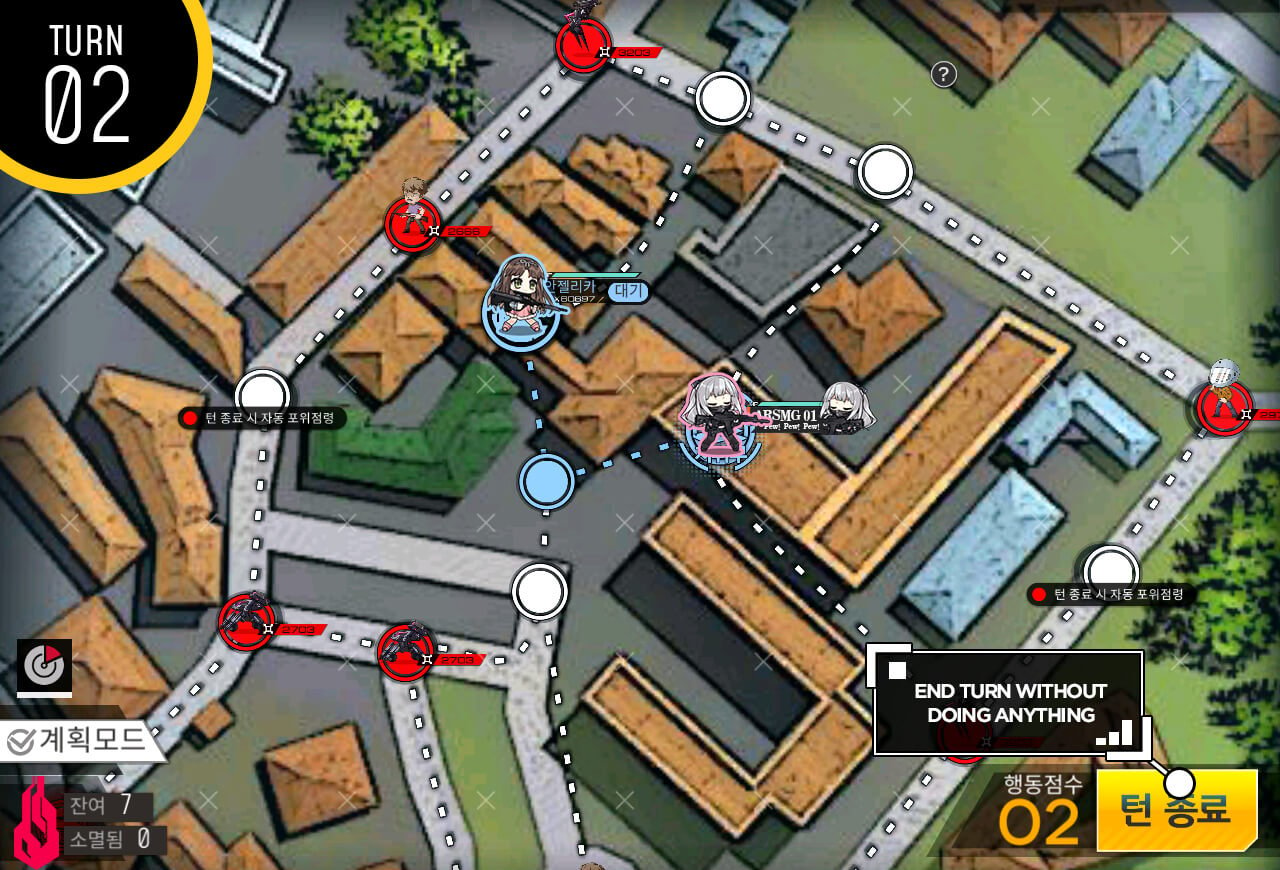
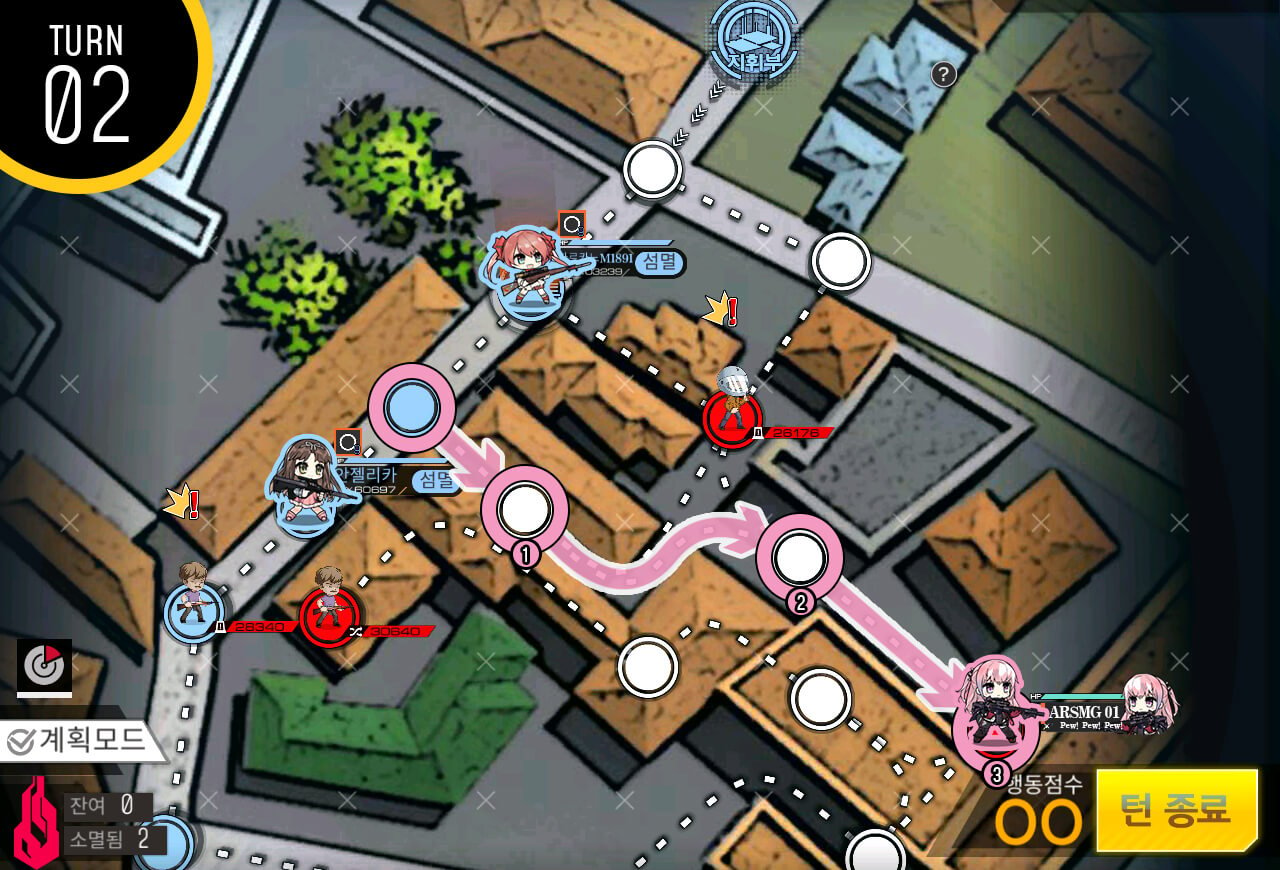
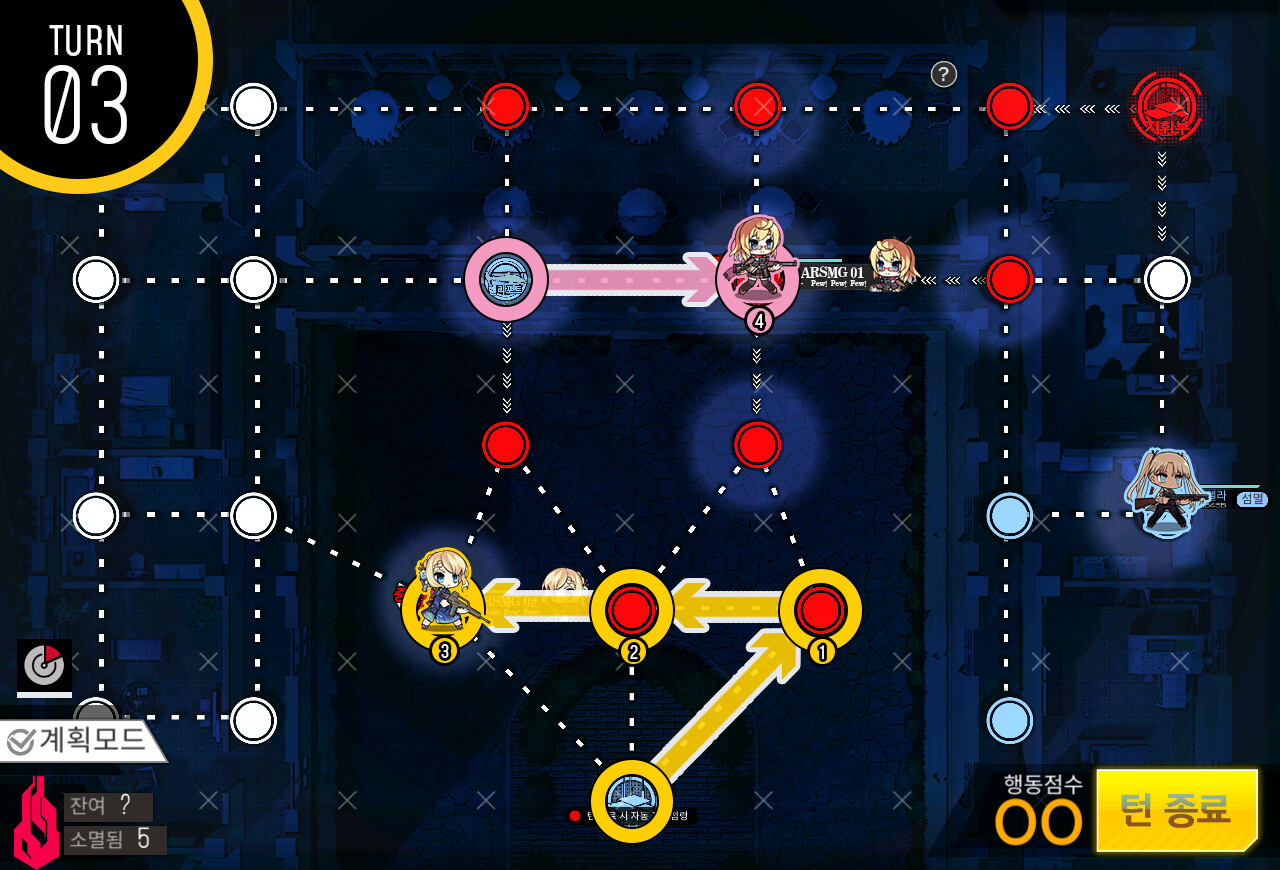
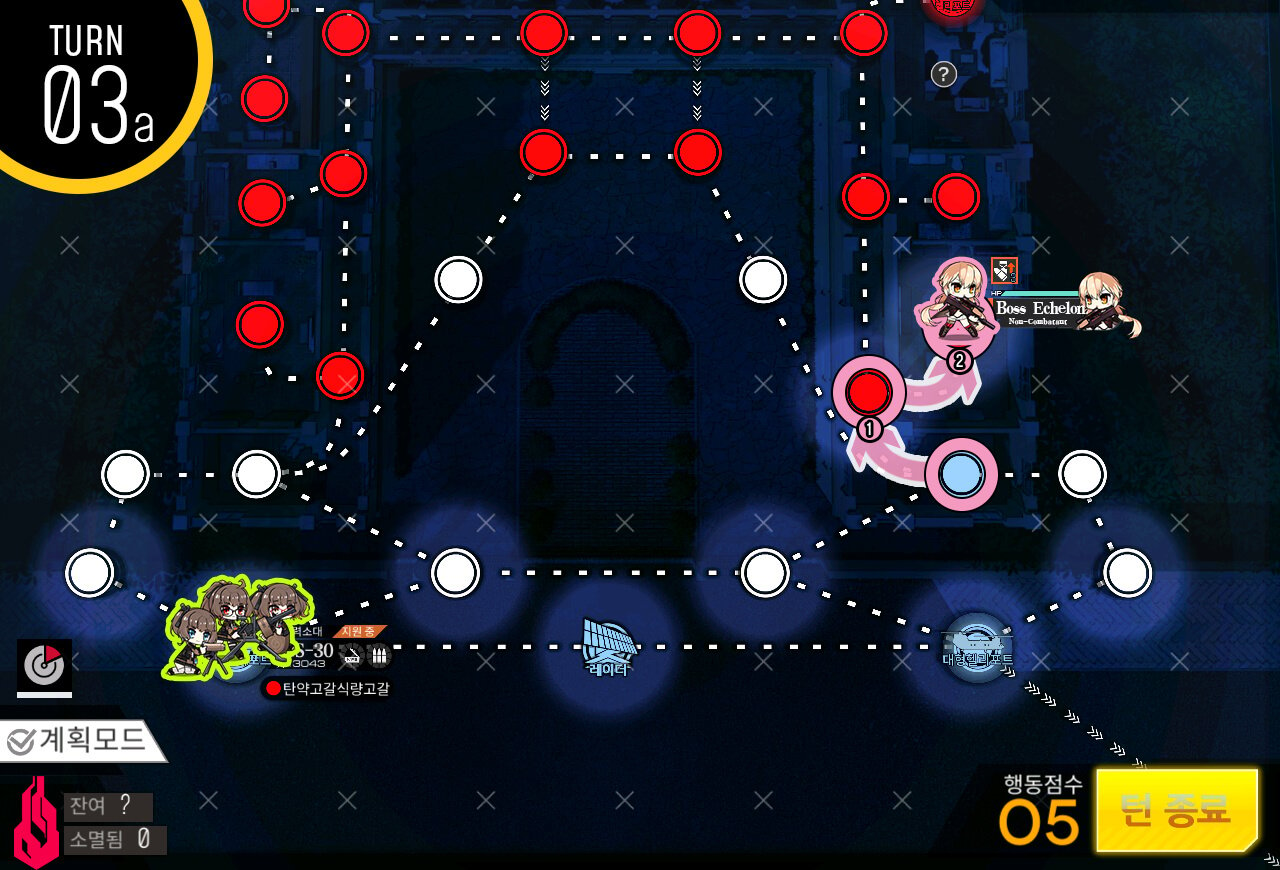
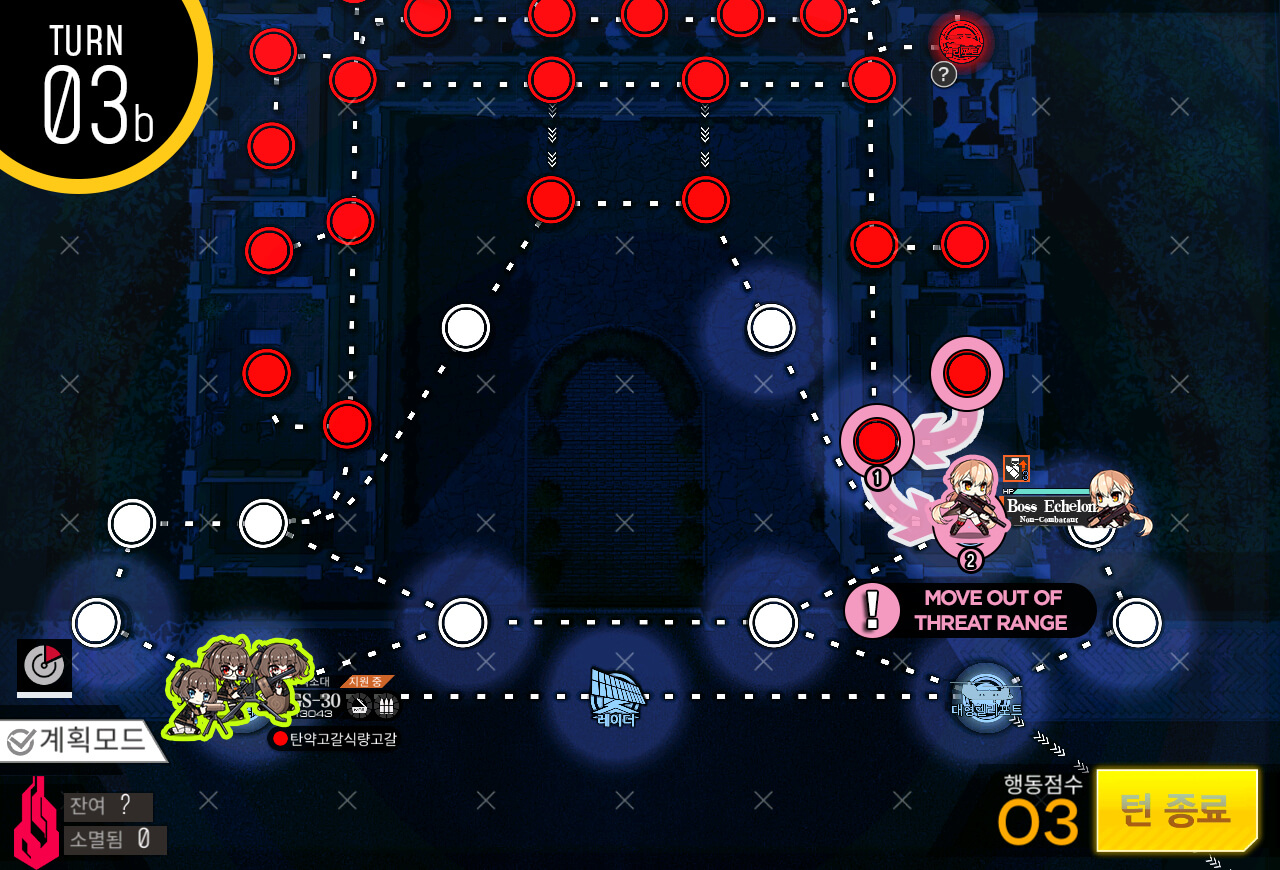
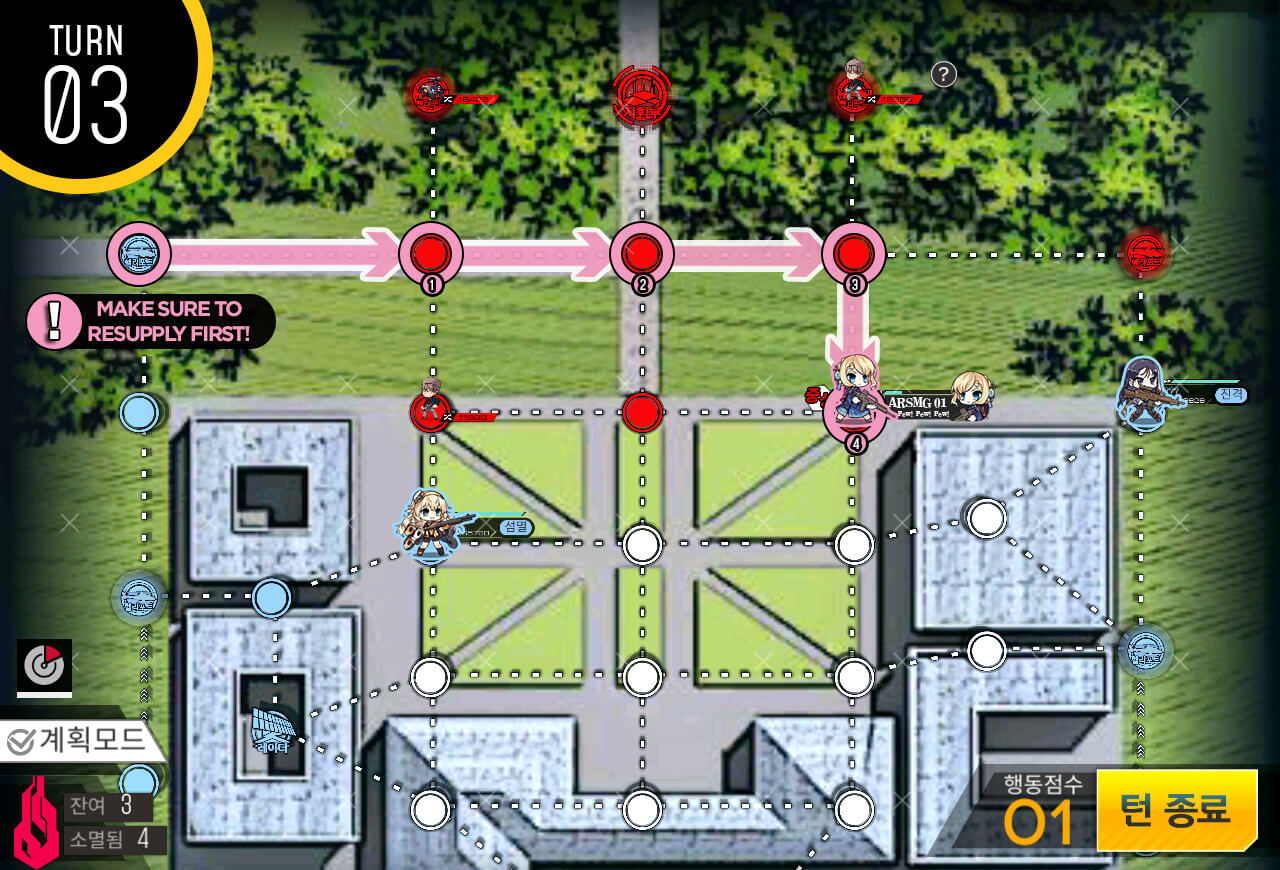
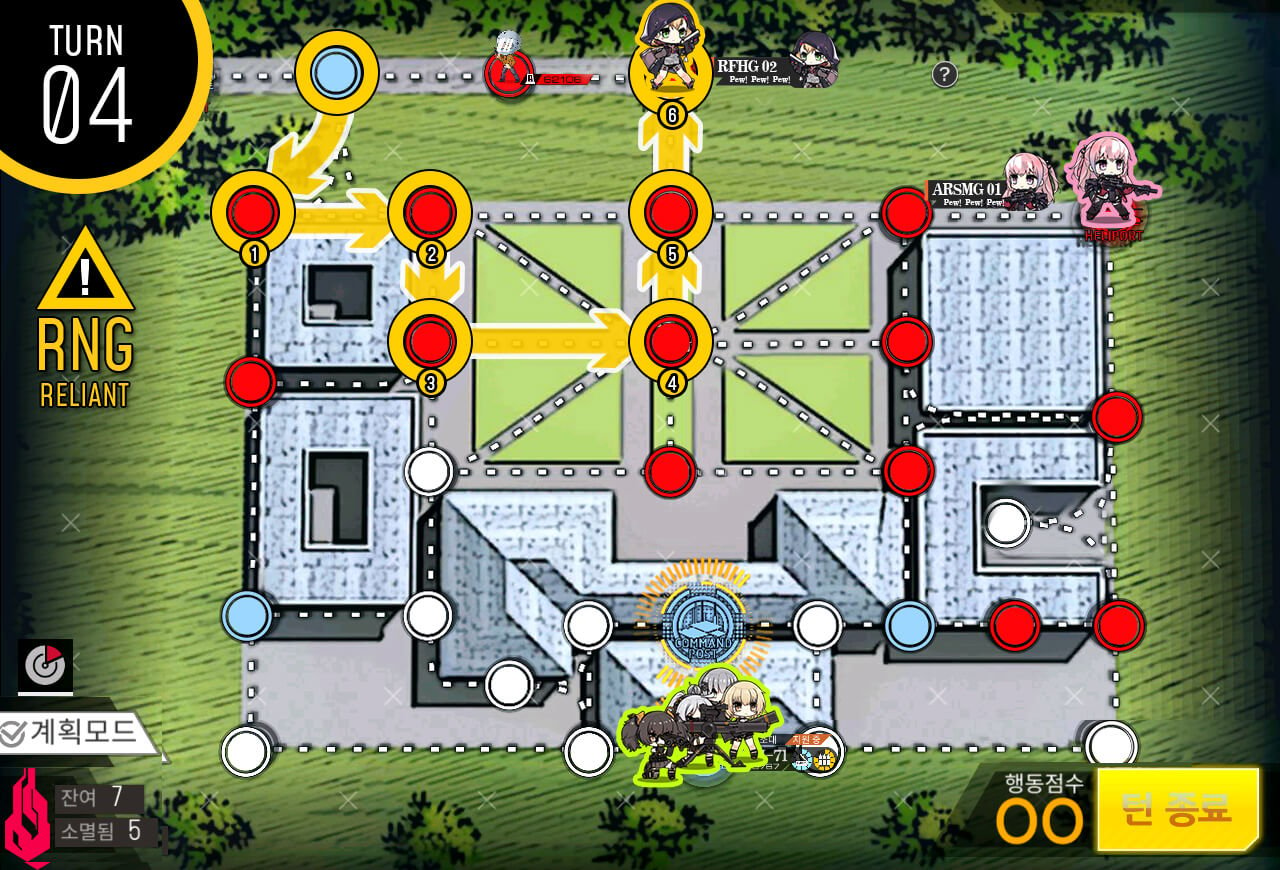
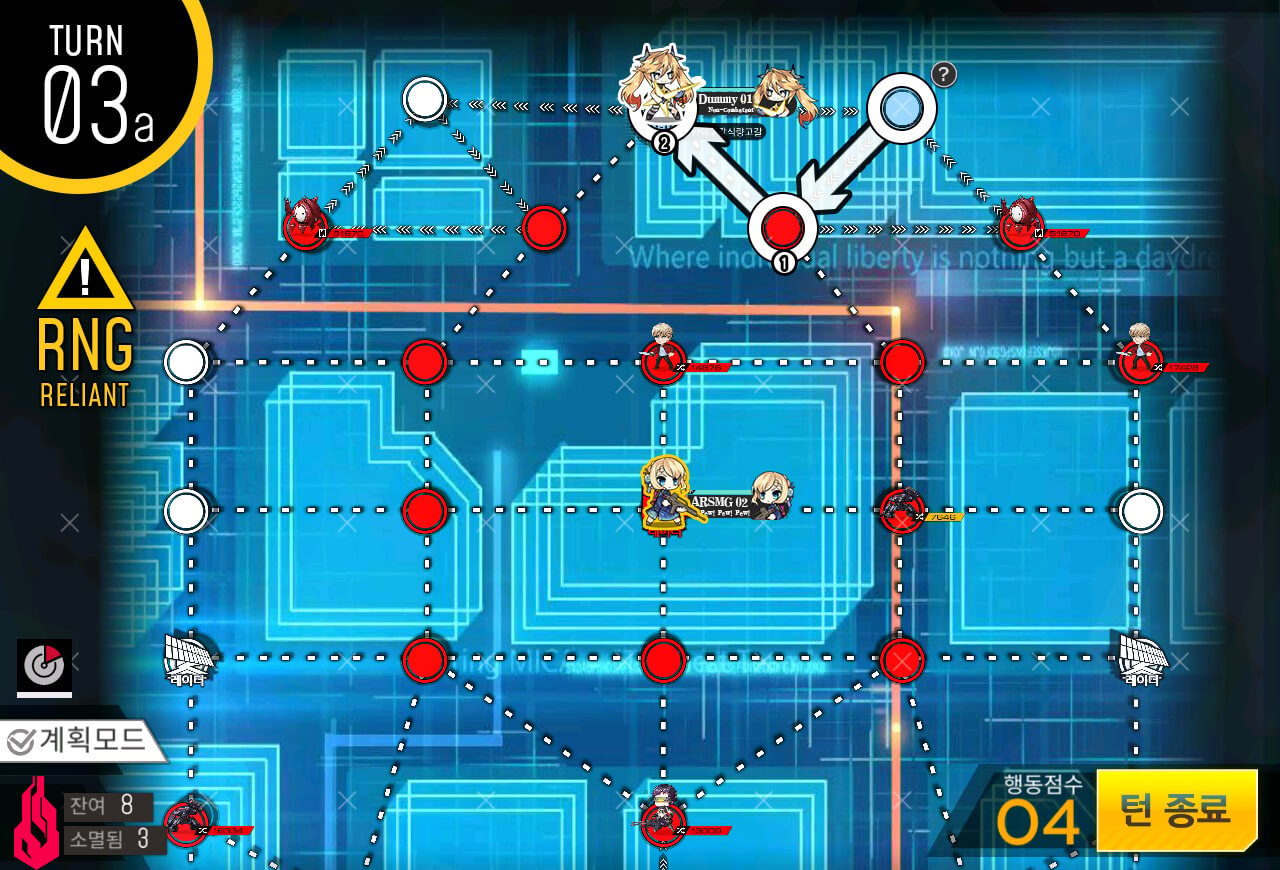
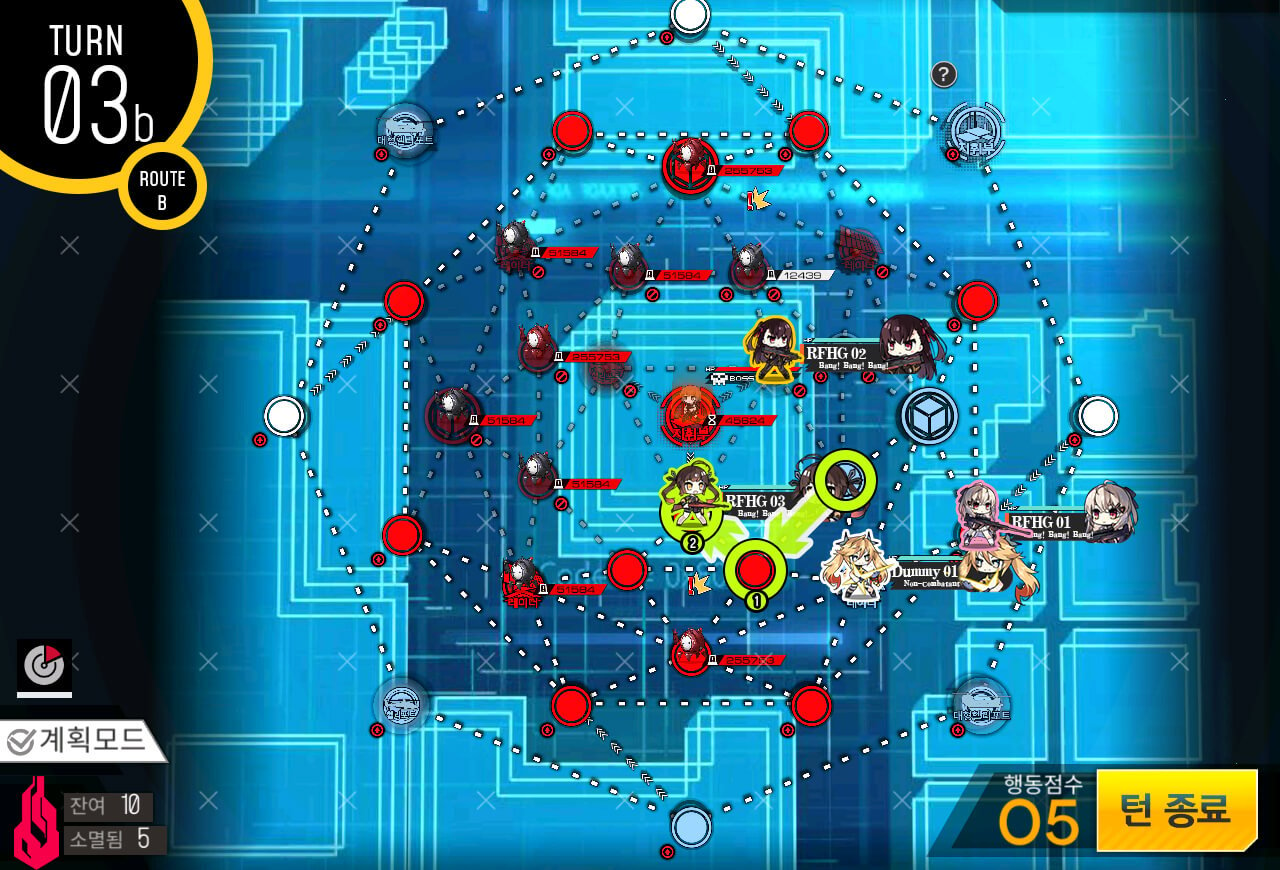
On Turn 3 all we have to do is to change the Angelica's AI to 'Eliminate' and clear out the enemy units on the top right of the map near the HQ and the rally point.

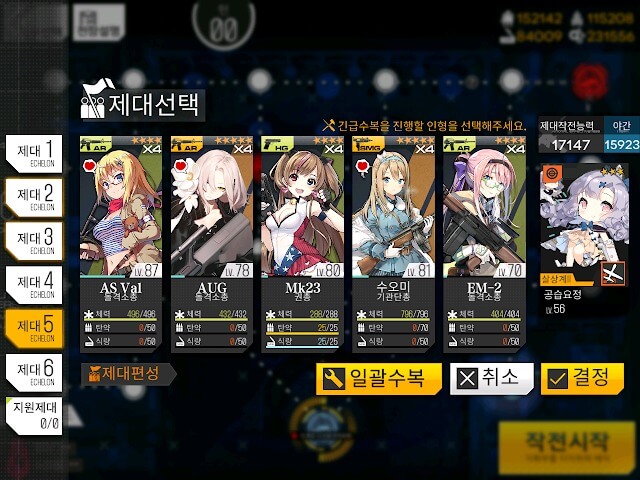
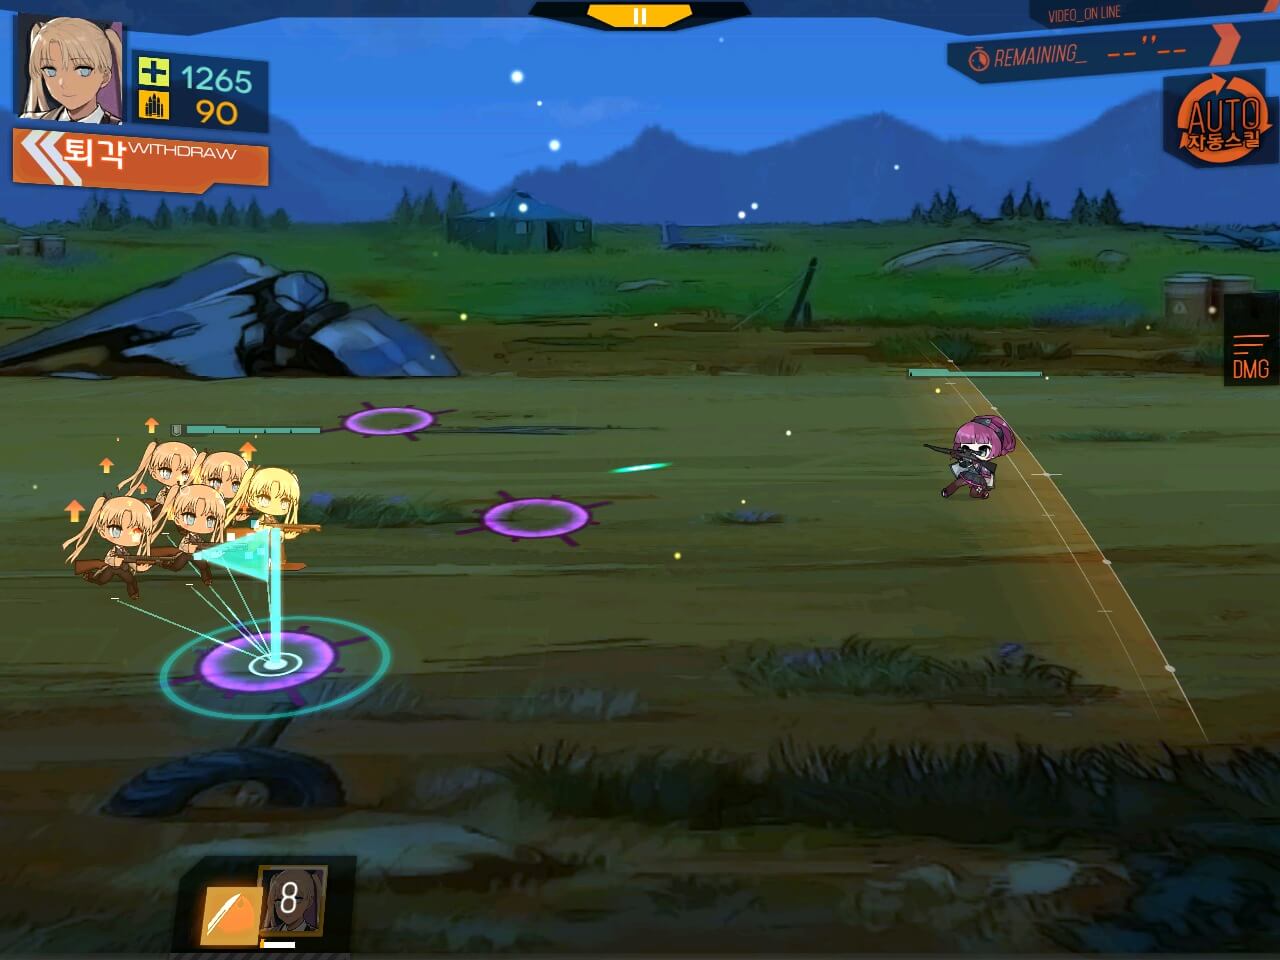
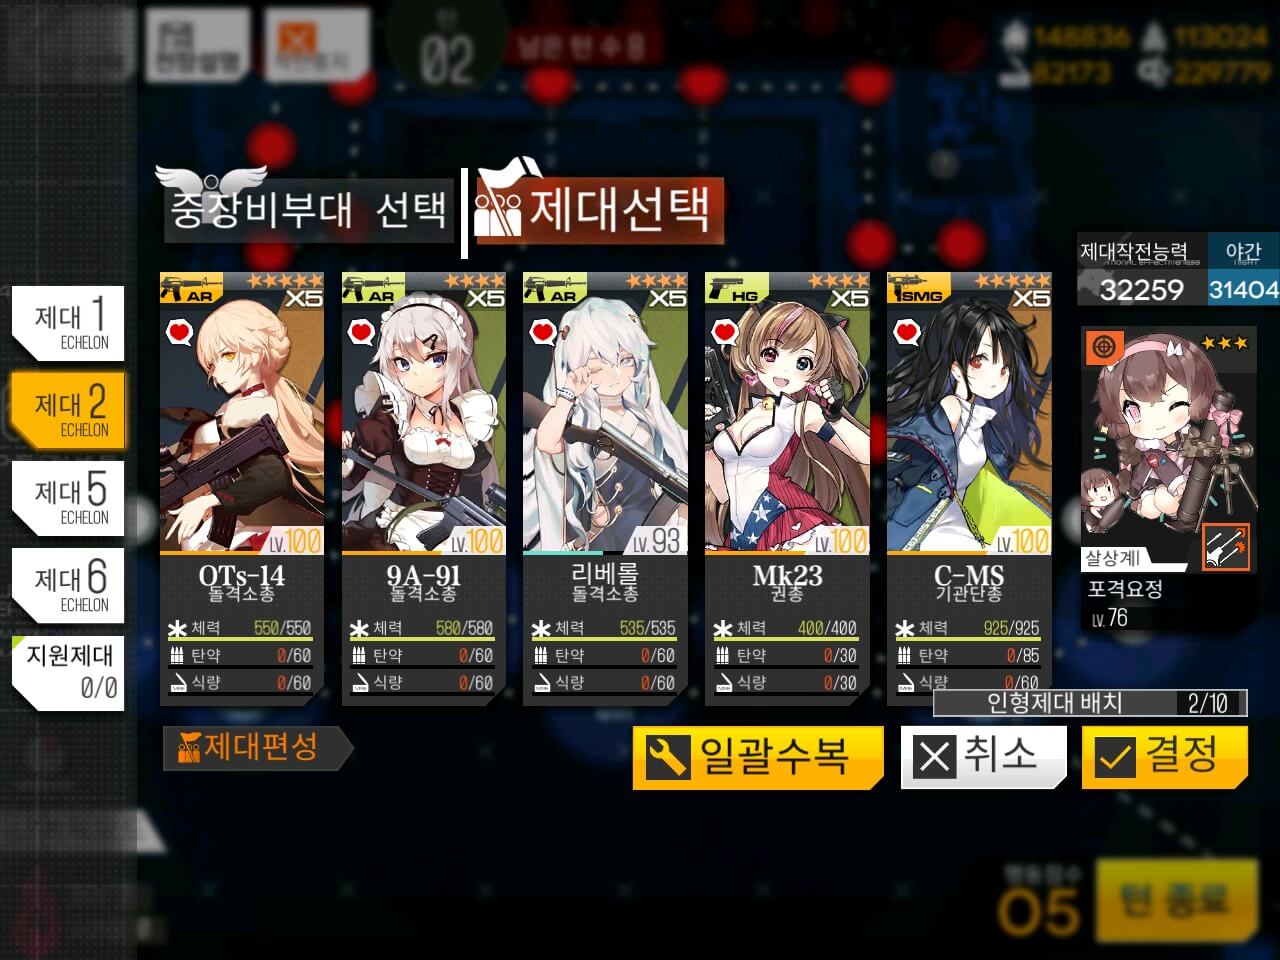
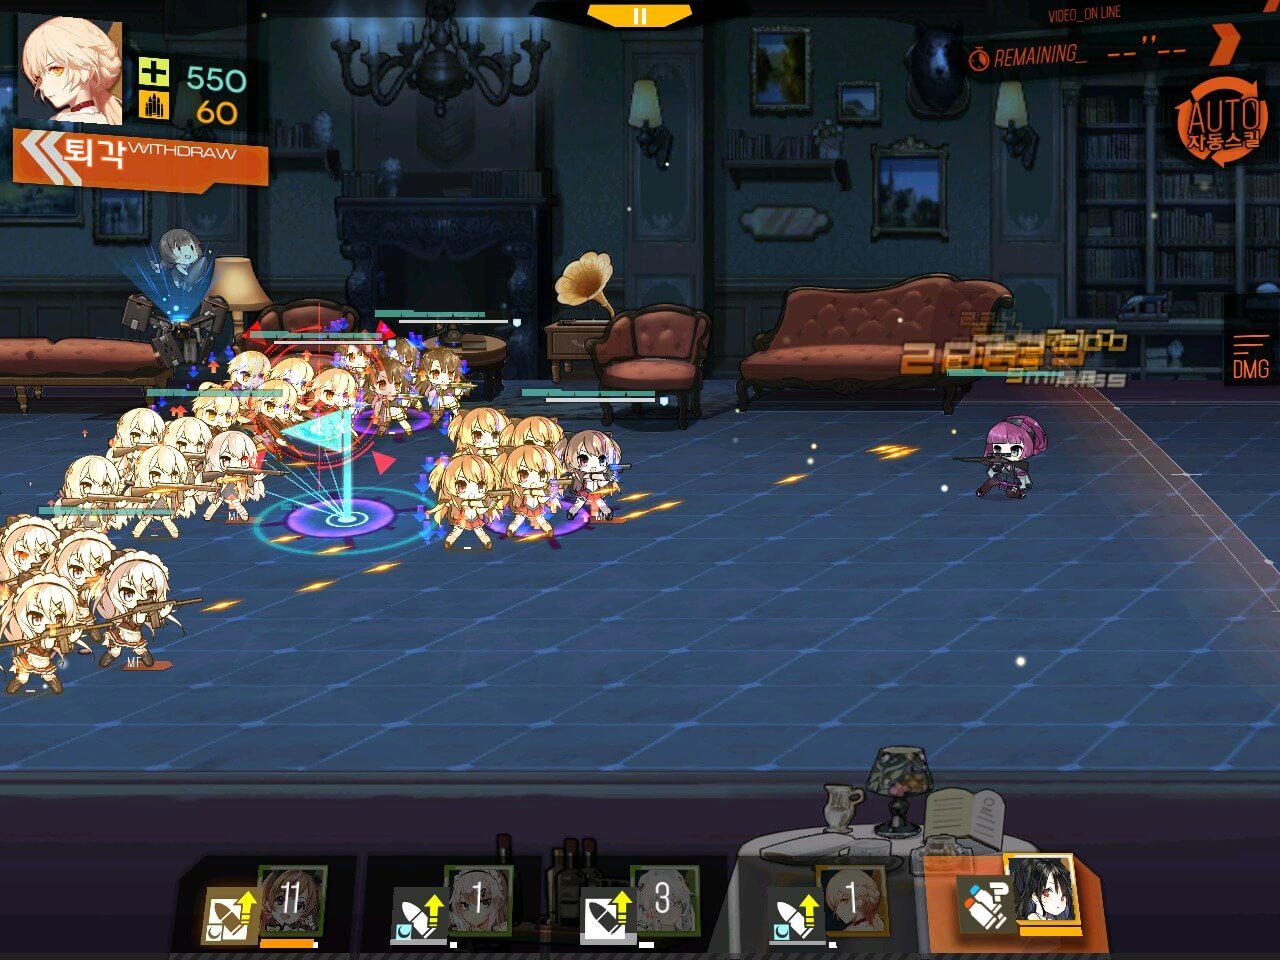
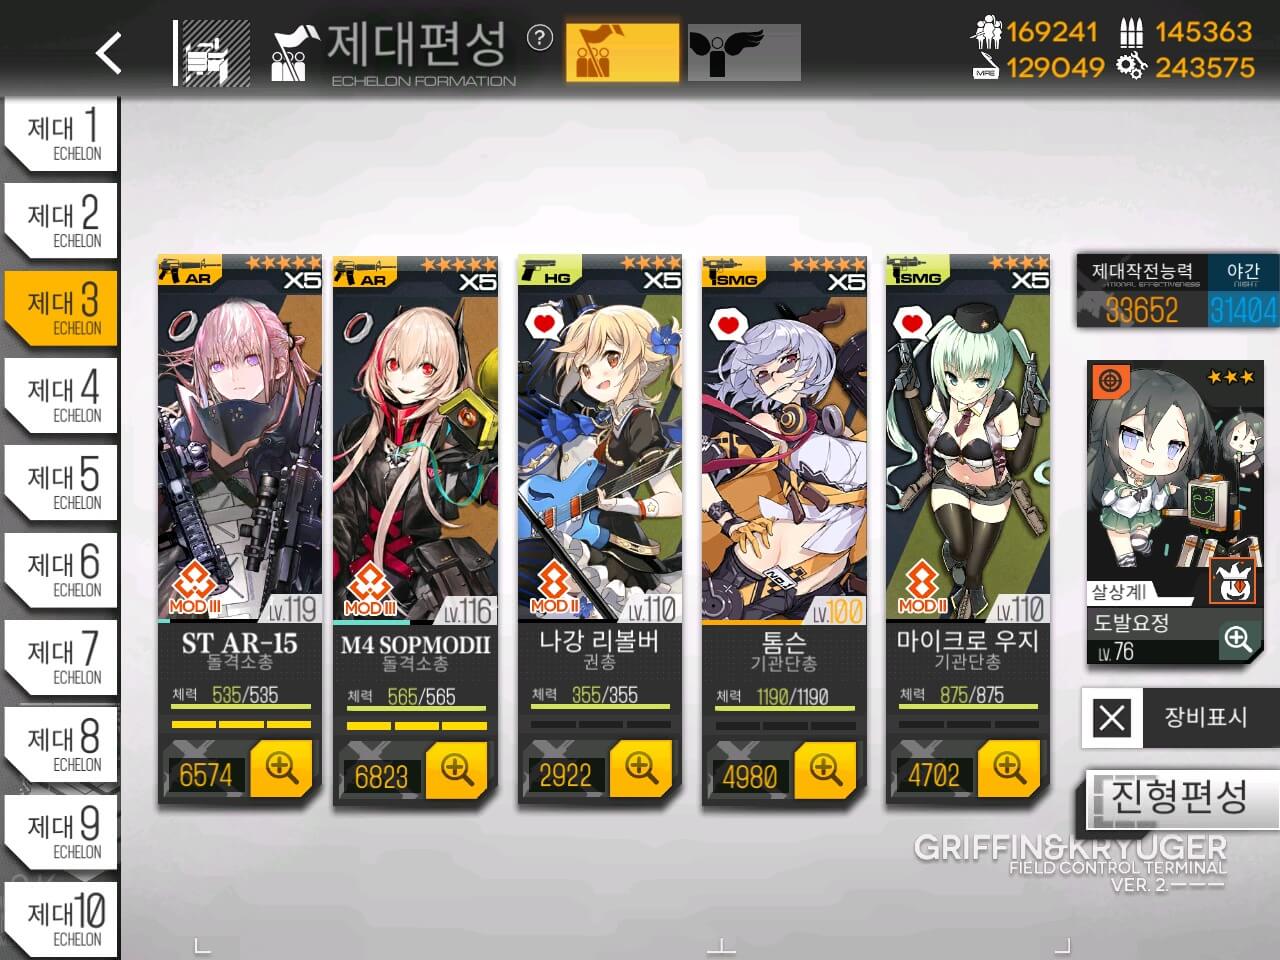
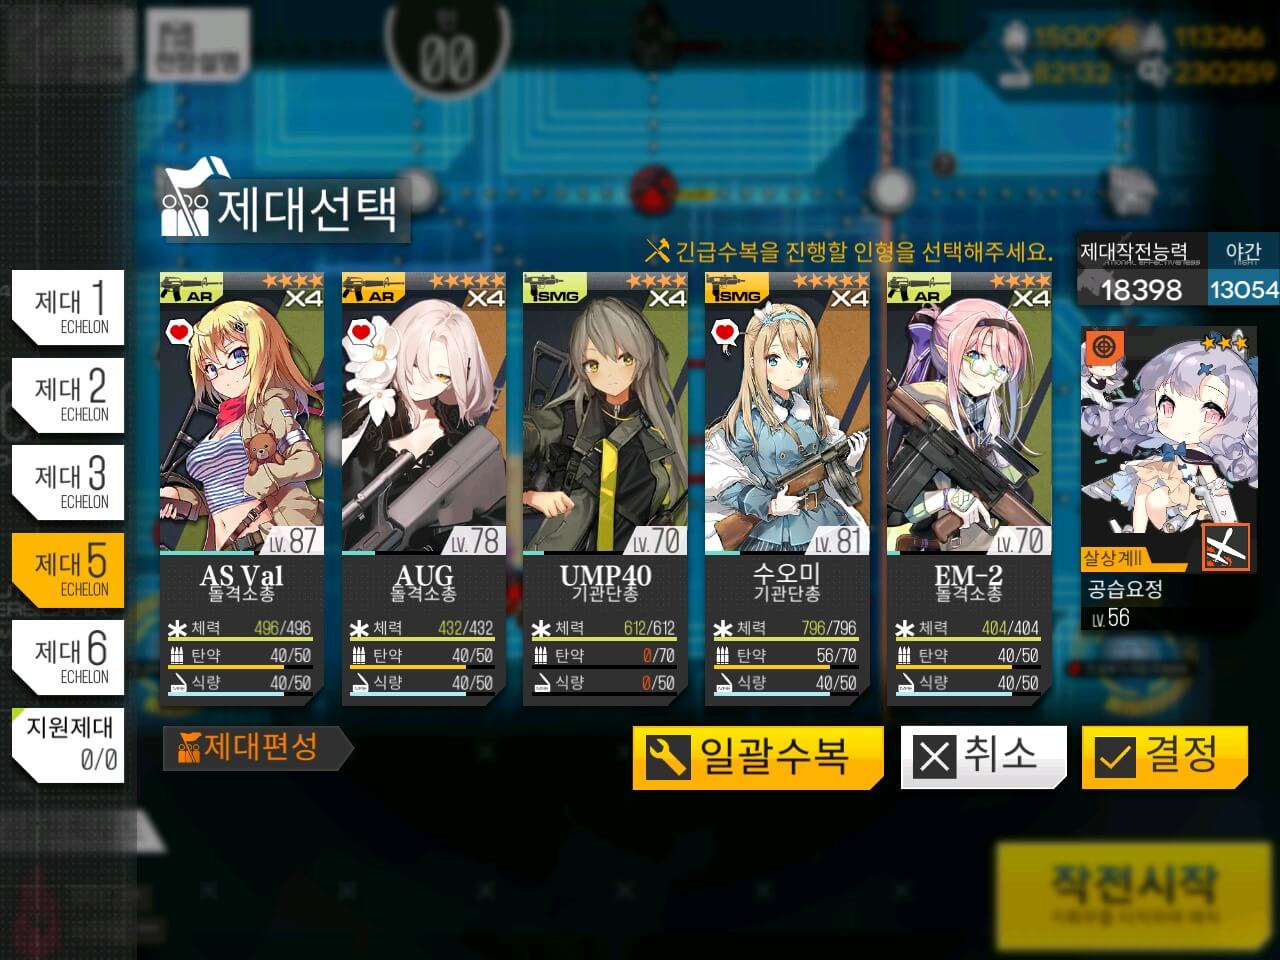
Here is the echelon I used for this EX map. Standard ARSMG works as well and use of either Shield HG or AoE skills [nade AR, SMG, or Airstrike] helps to take out high HP enemies.
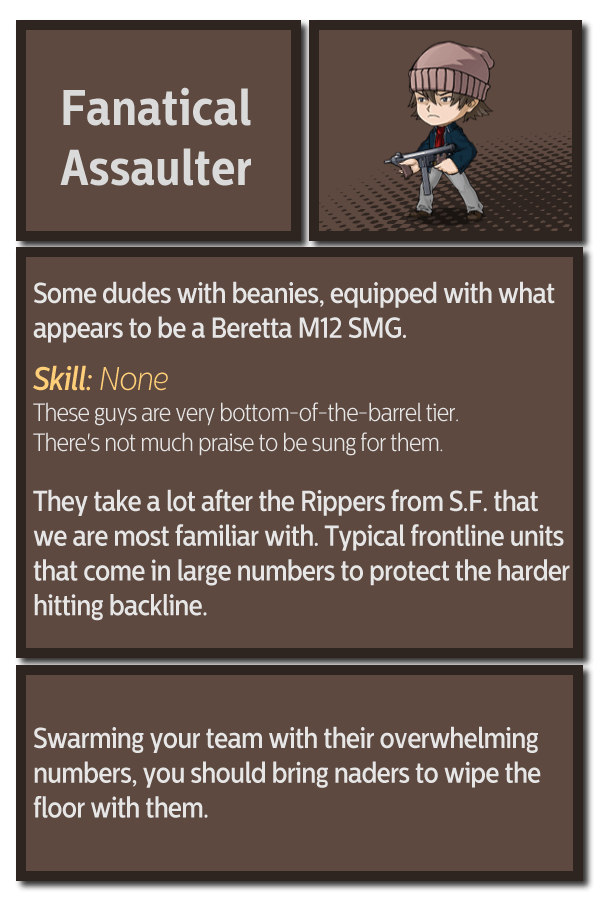
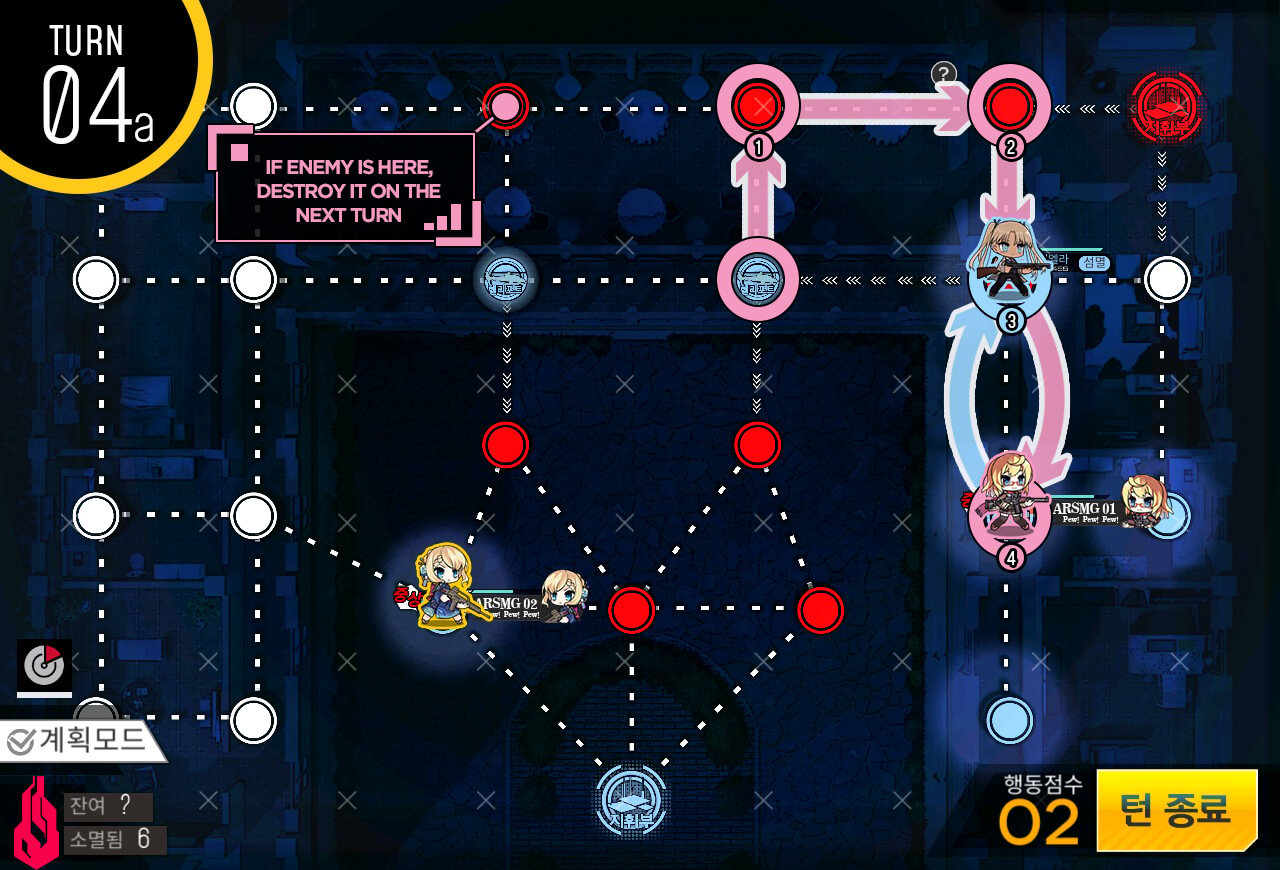
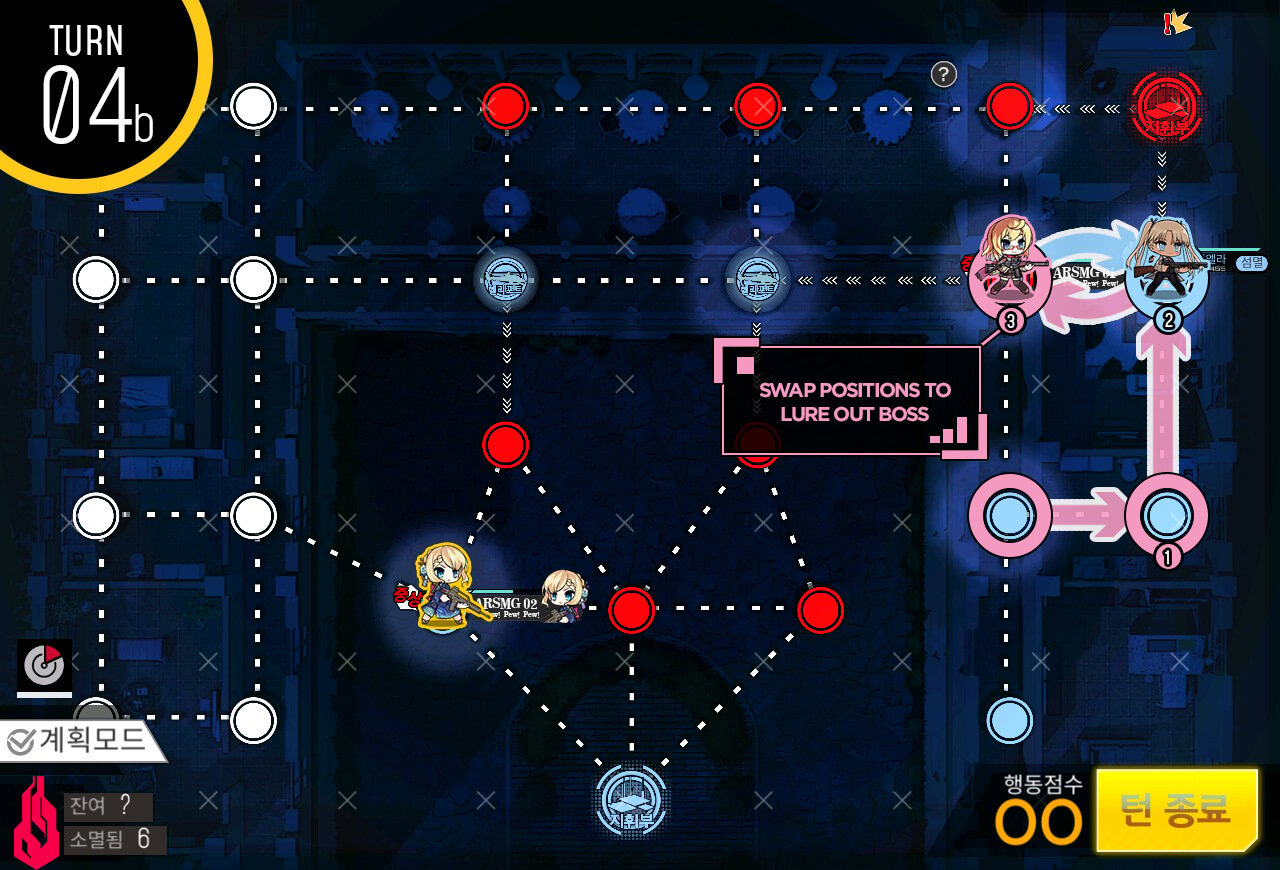
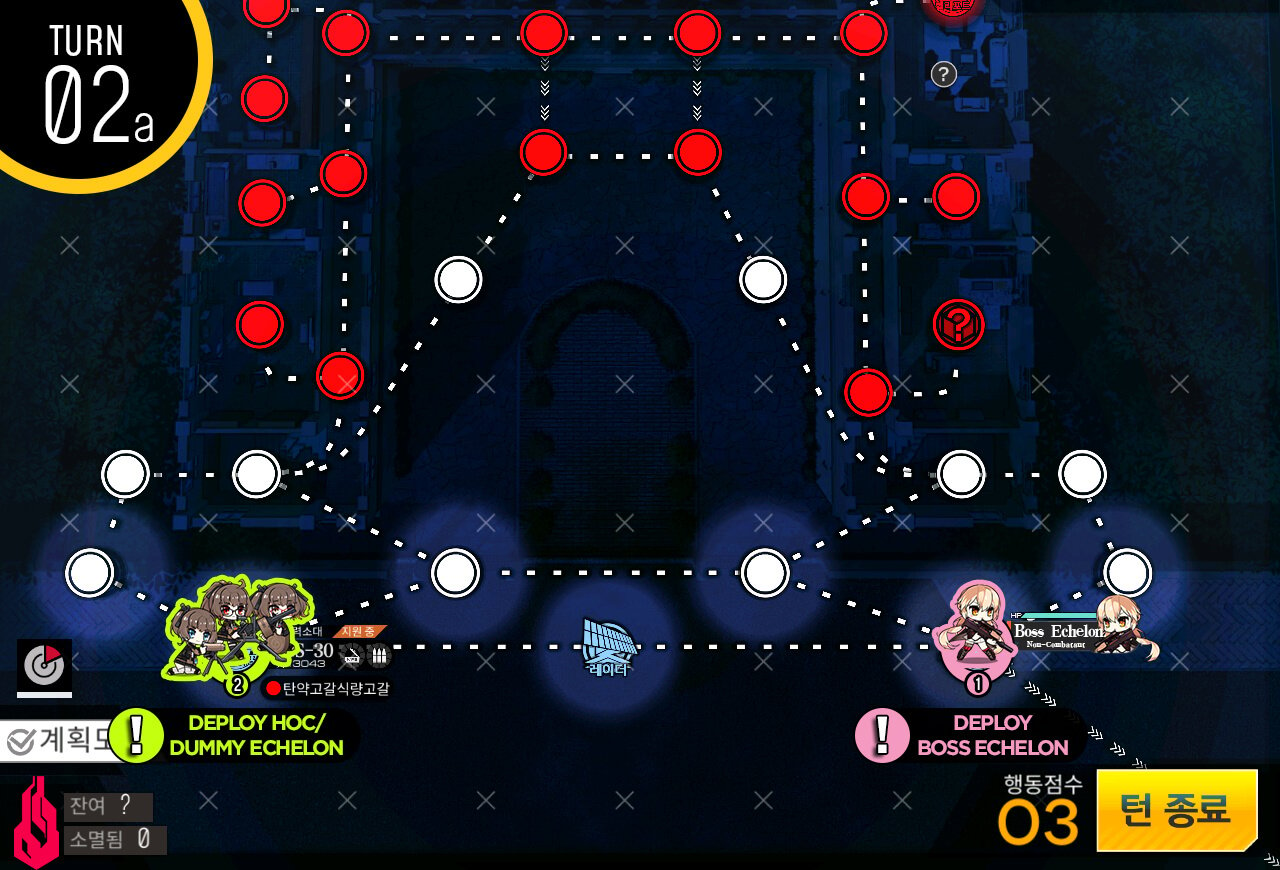
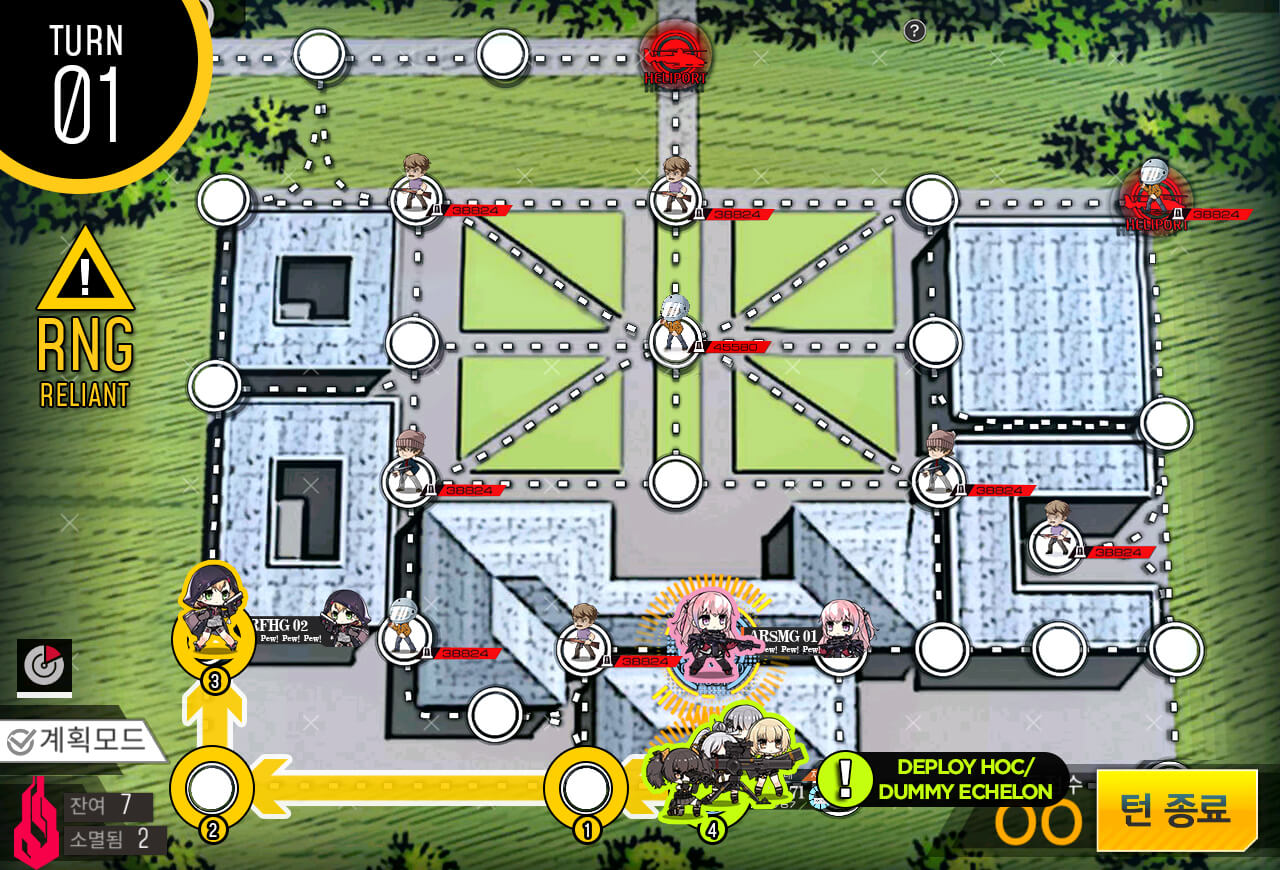
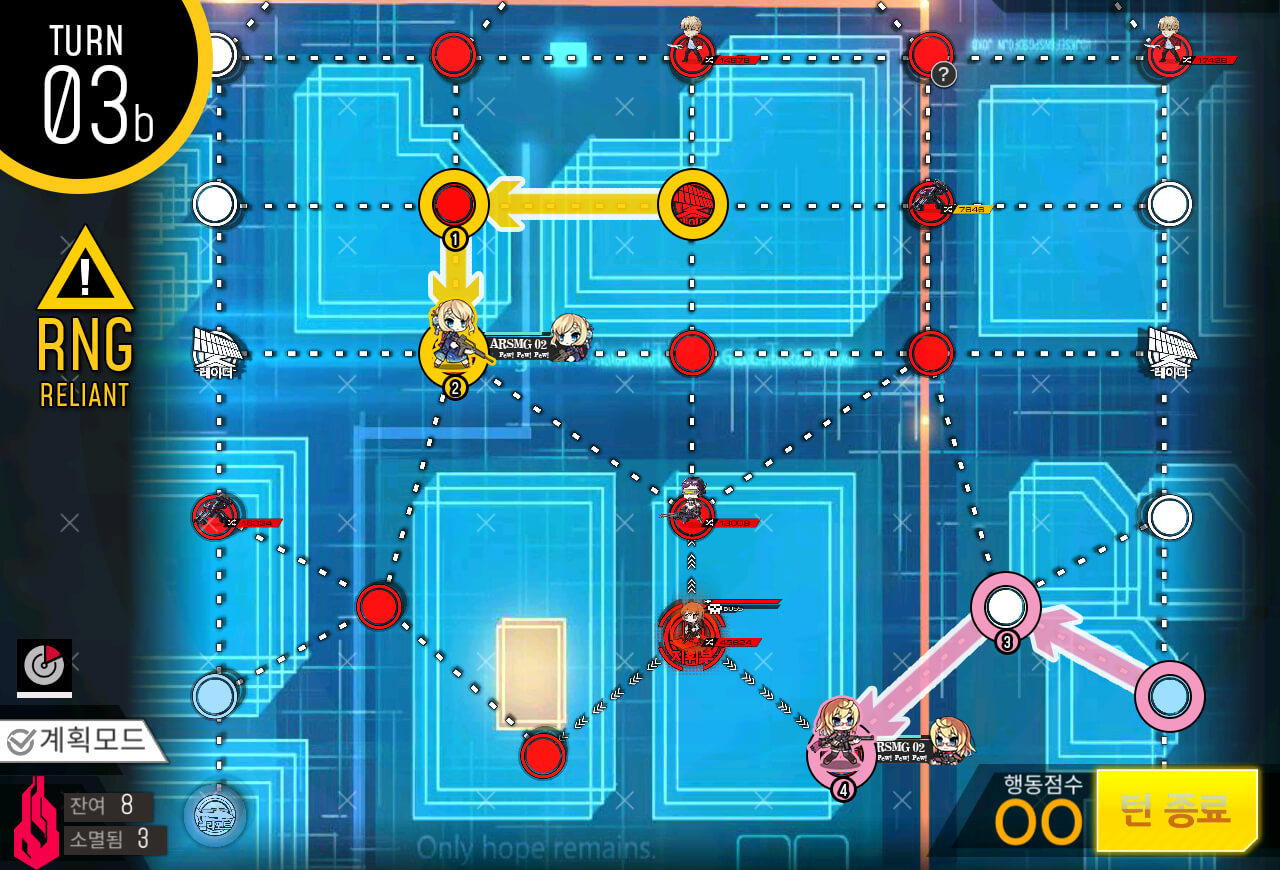
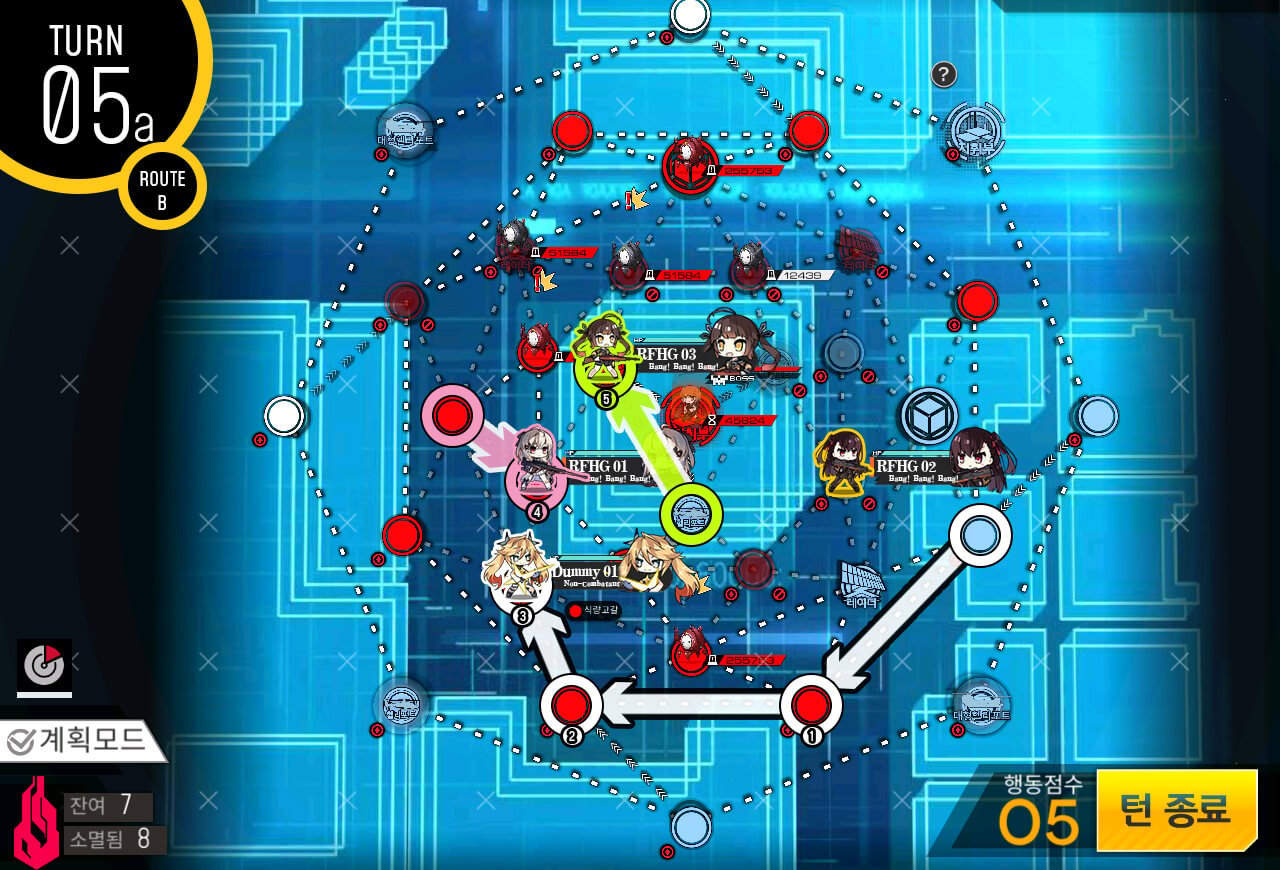
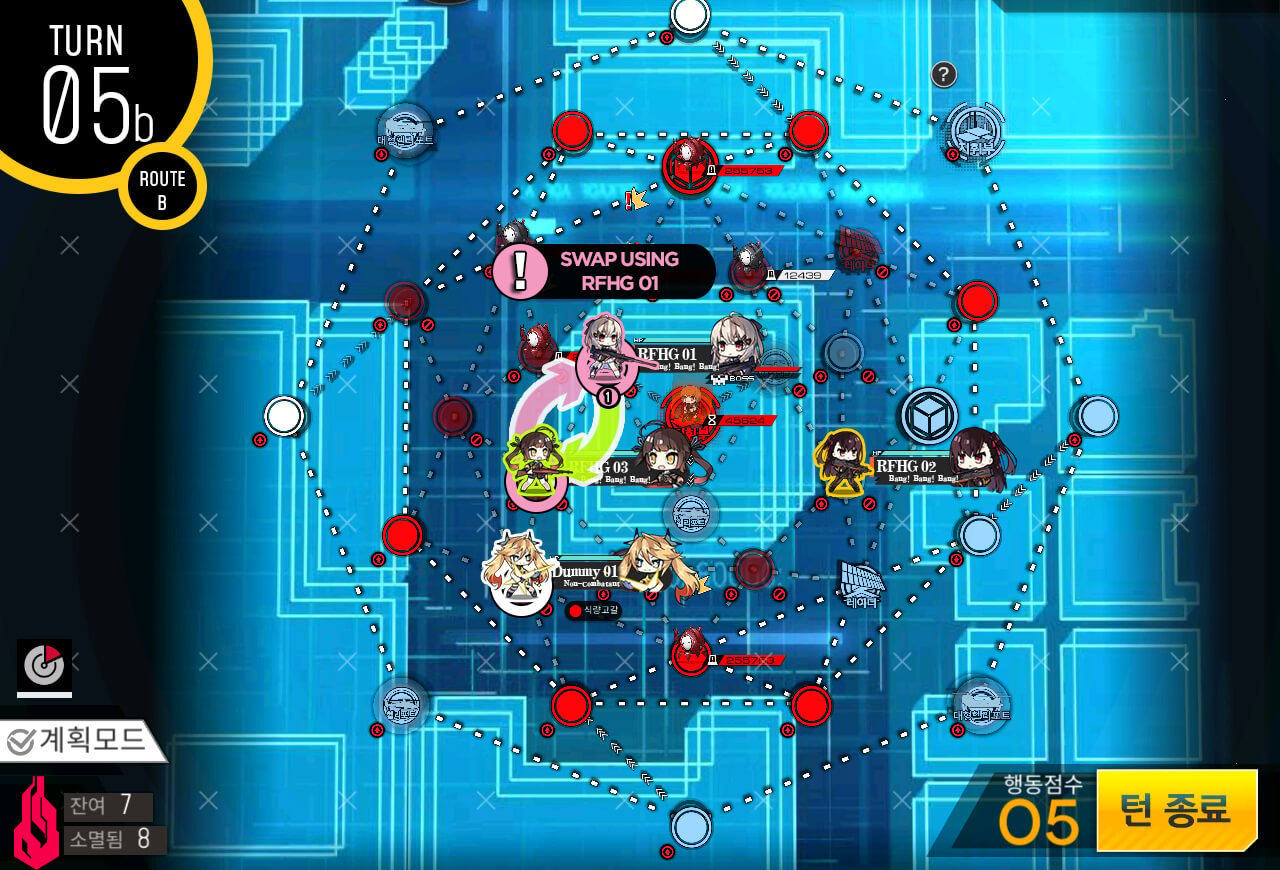
Simply move combat echelon to the marked location then swap with Pink Cano once enemy units are revealed on the map. Pink Cano should have no issue taking out the pesky helmet units.
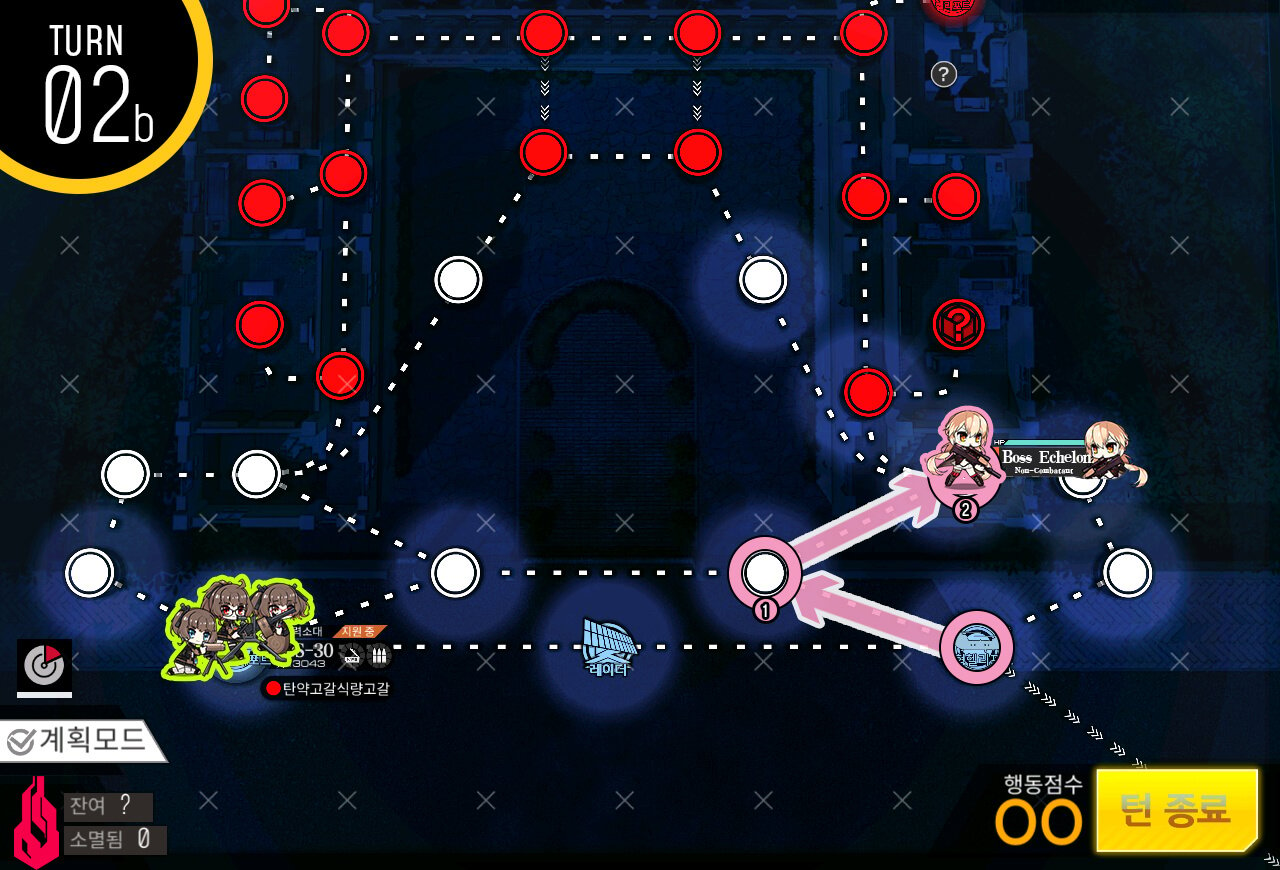
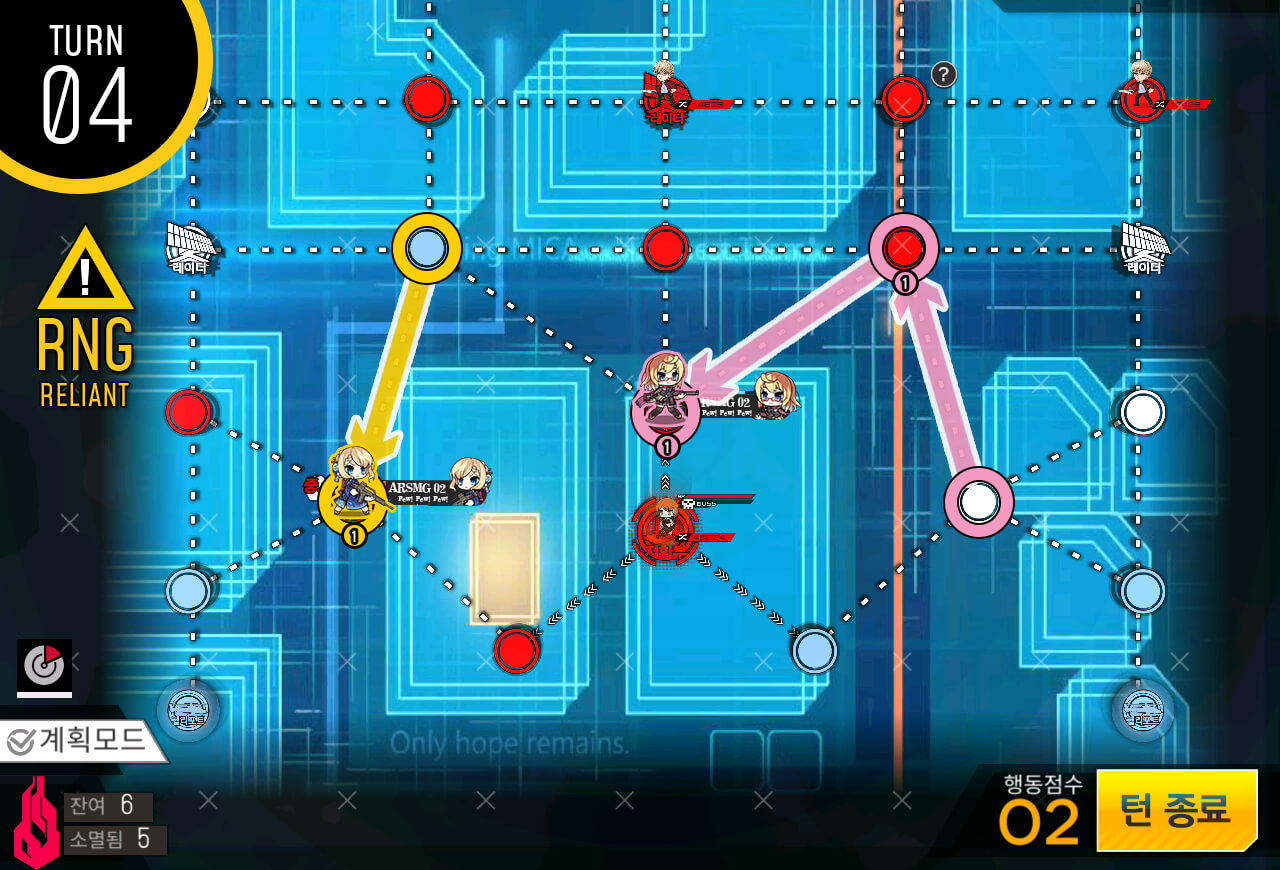
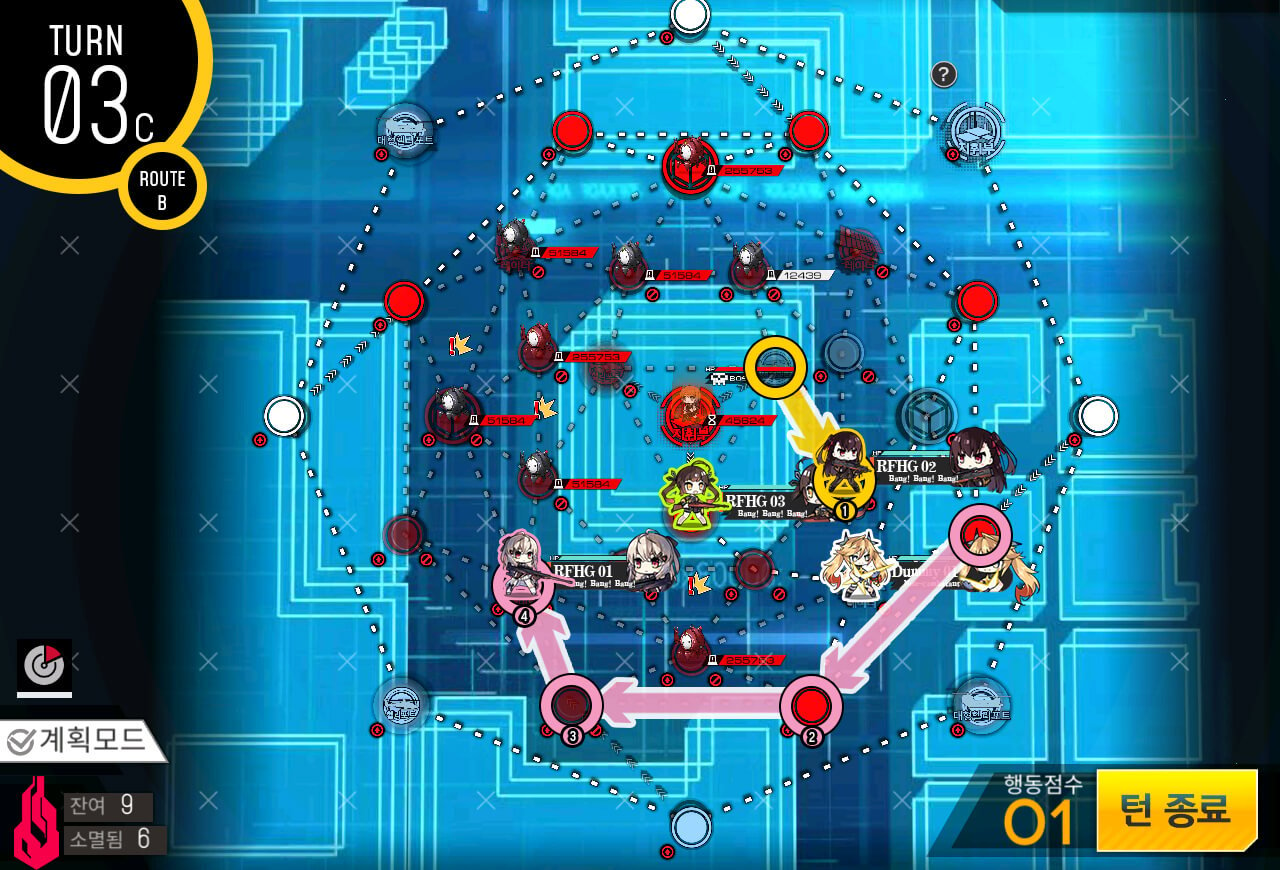
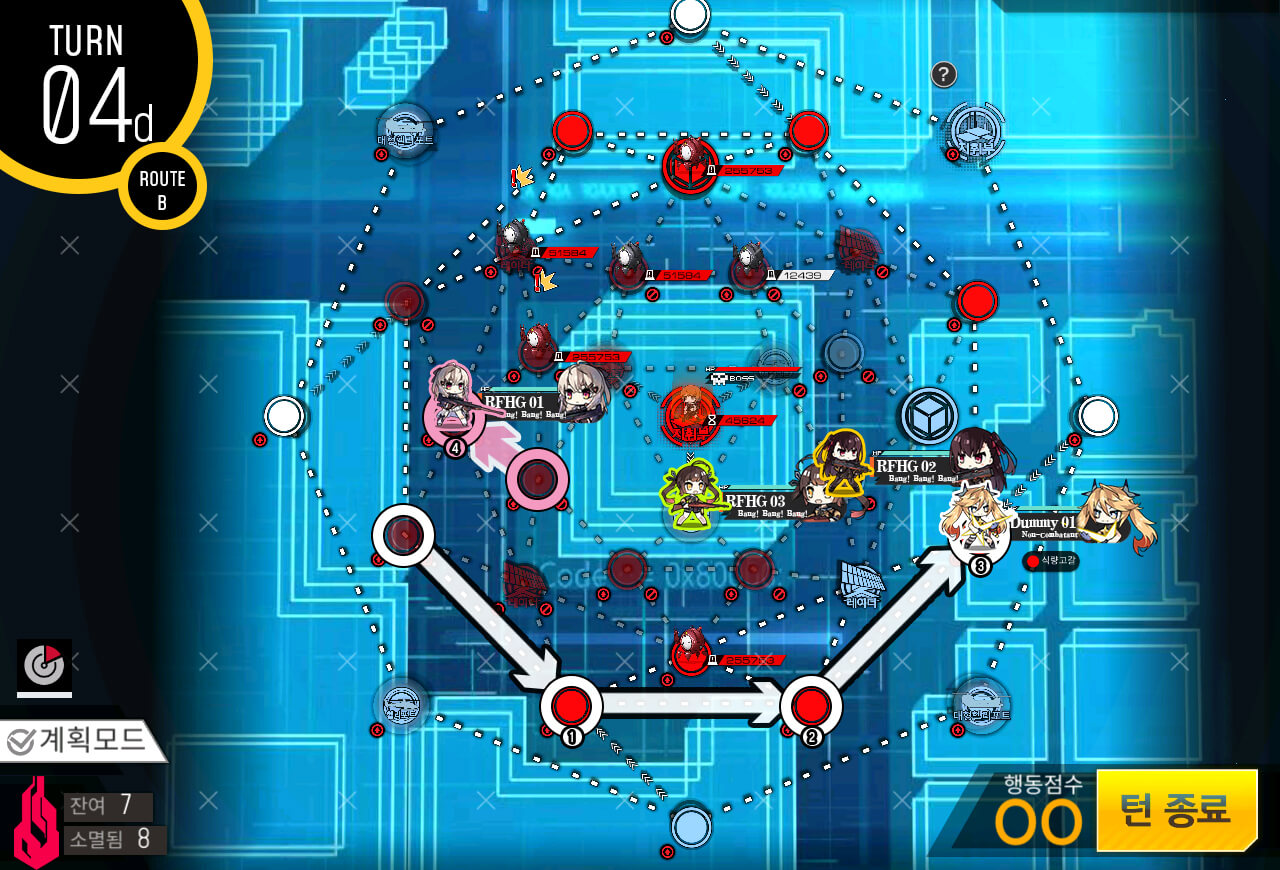
Our job is to clear out the enemies far away while allies units clear the enemies nearby. Move to the bottom right of the map then end turn.

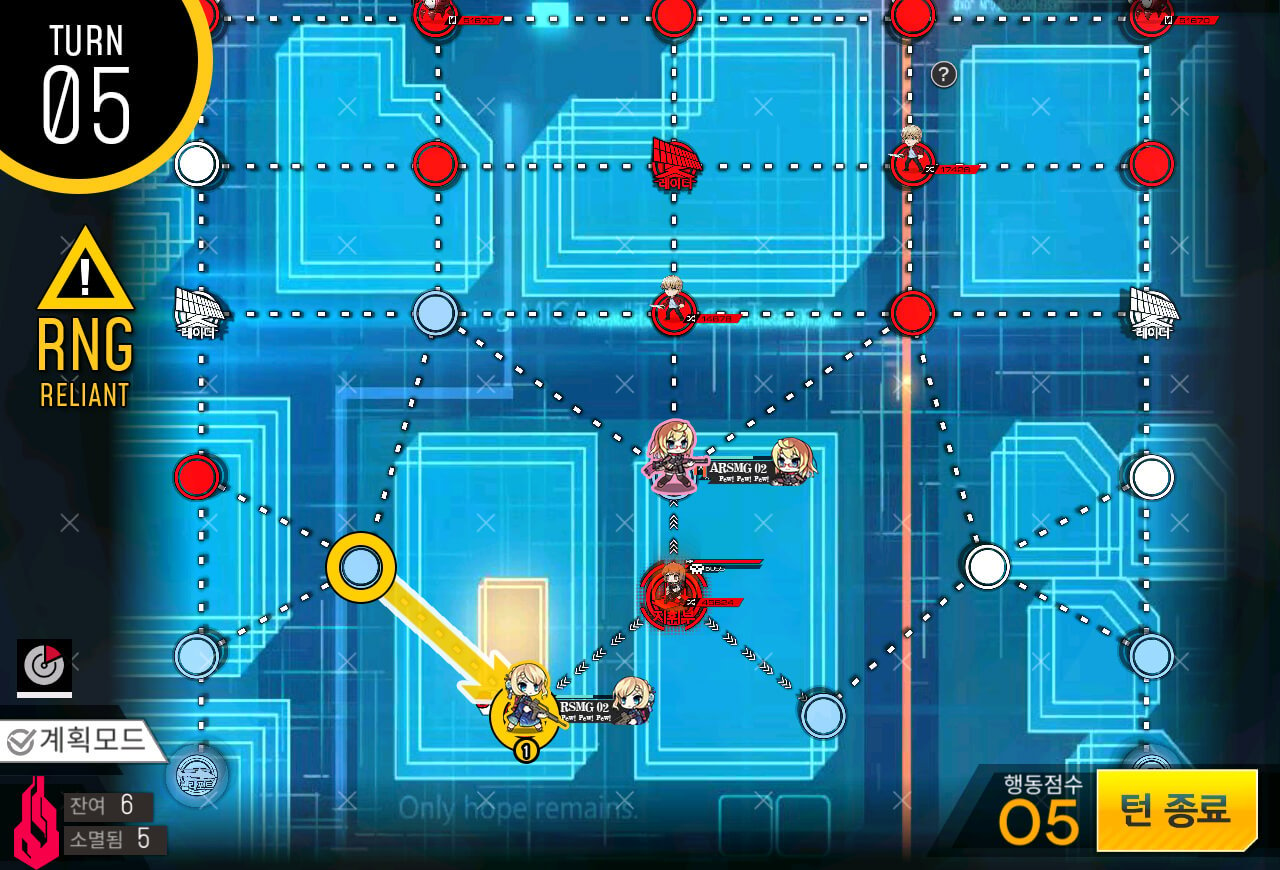
All that's left is the single enemy unit to clear the mission.
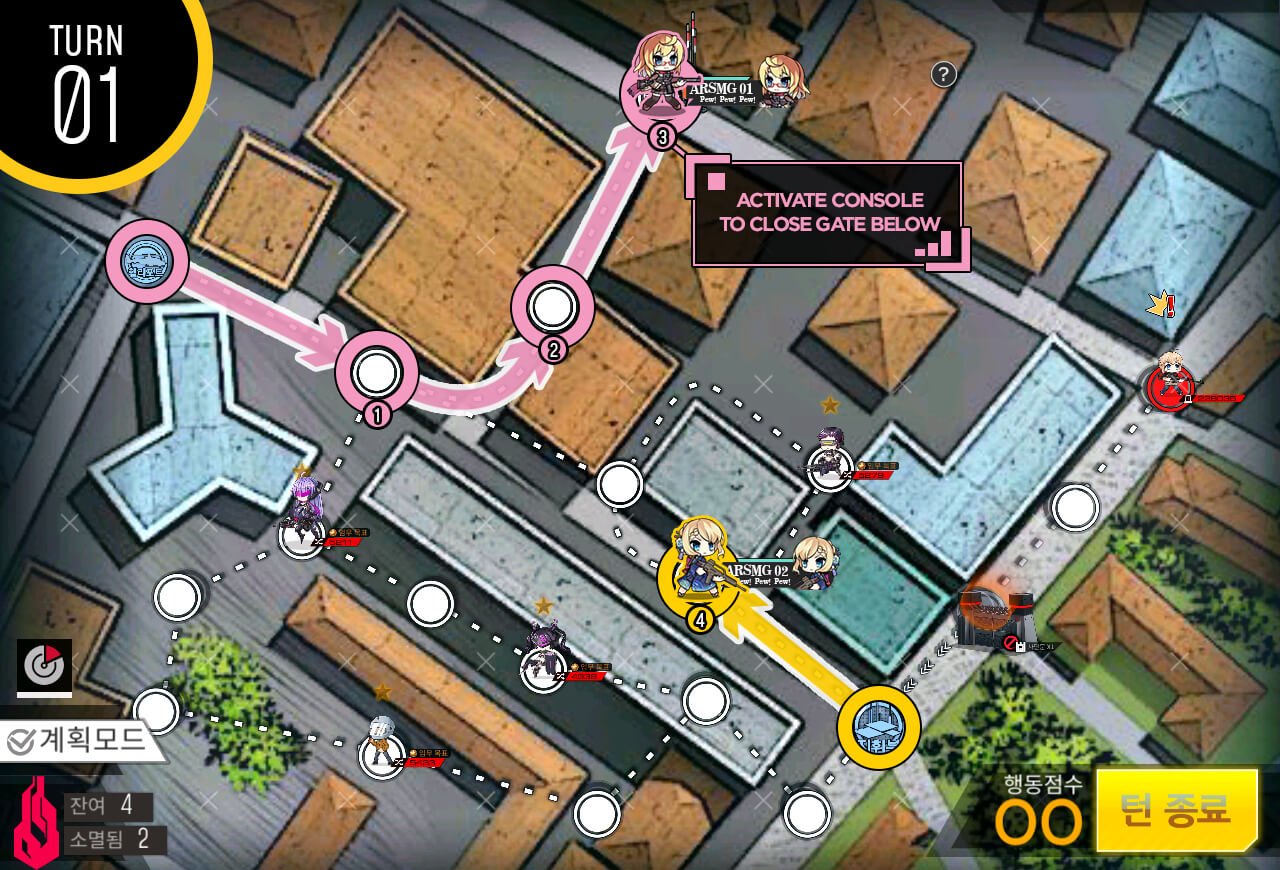
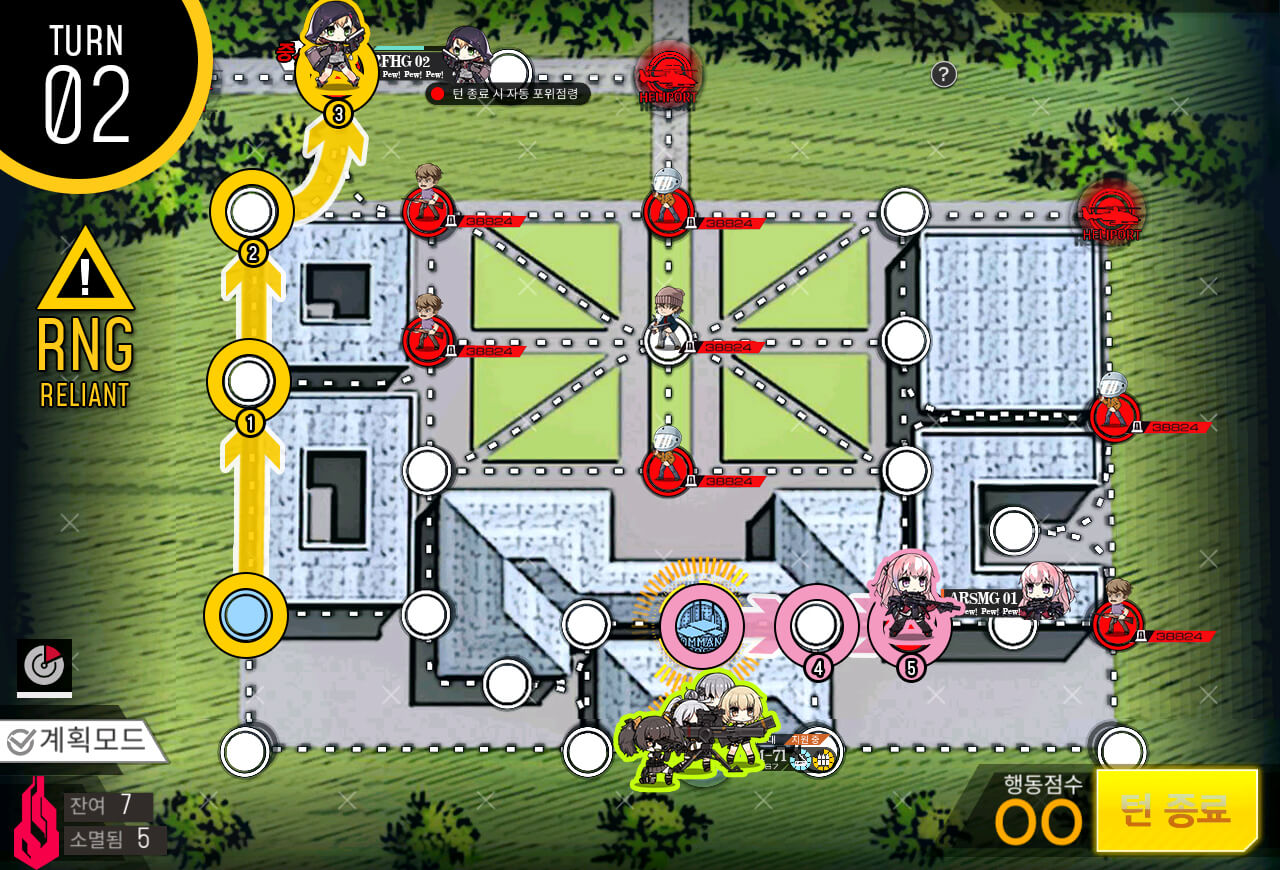
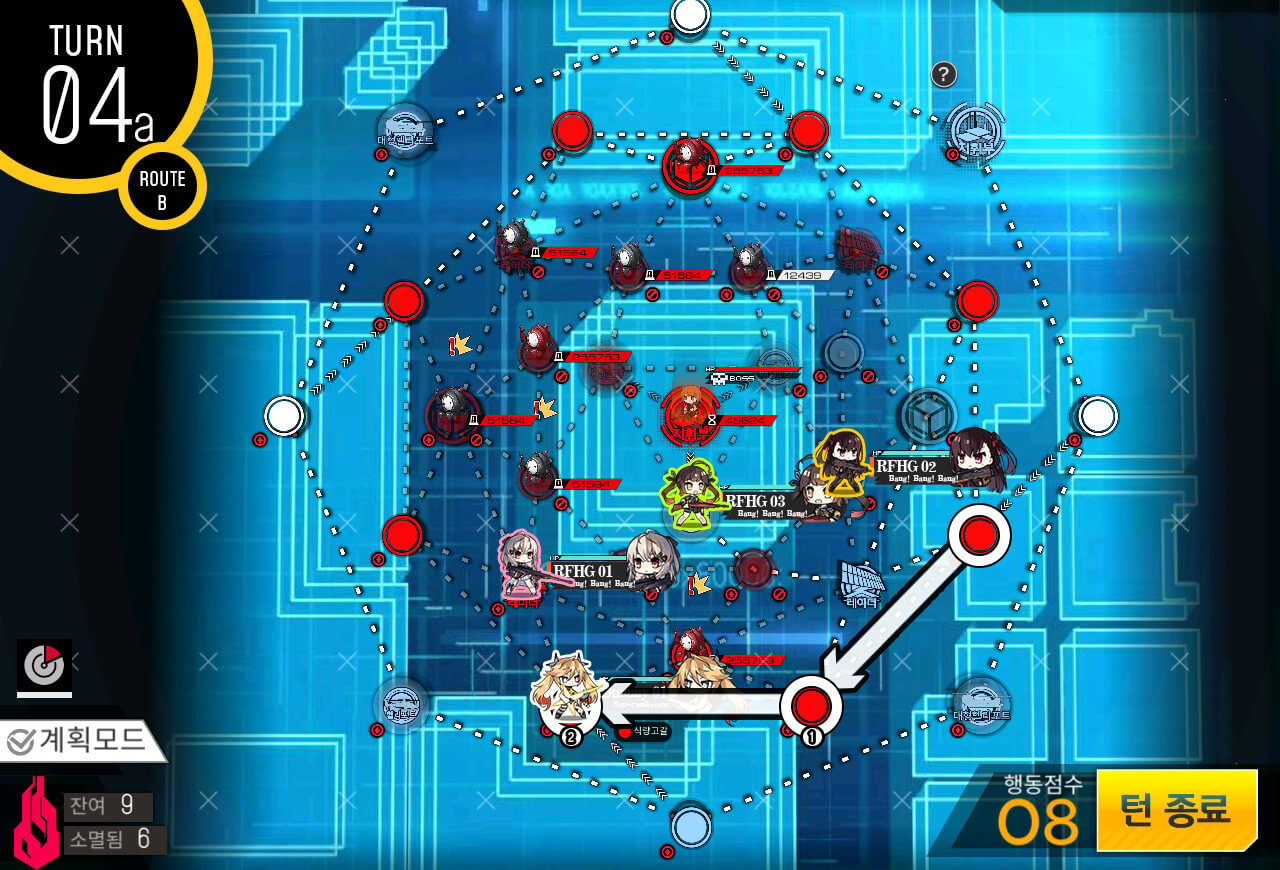
Move combat echelon on helipad straight to the control panel on the top of the map to close the gate. Then, the combat echelon at HQ moves up to the left.

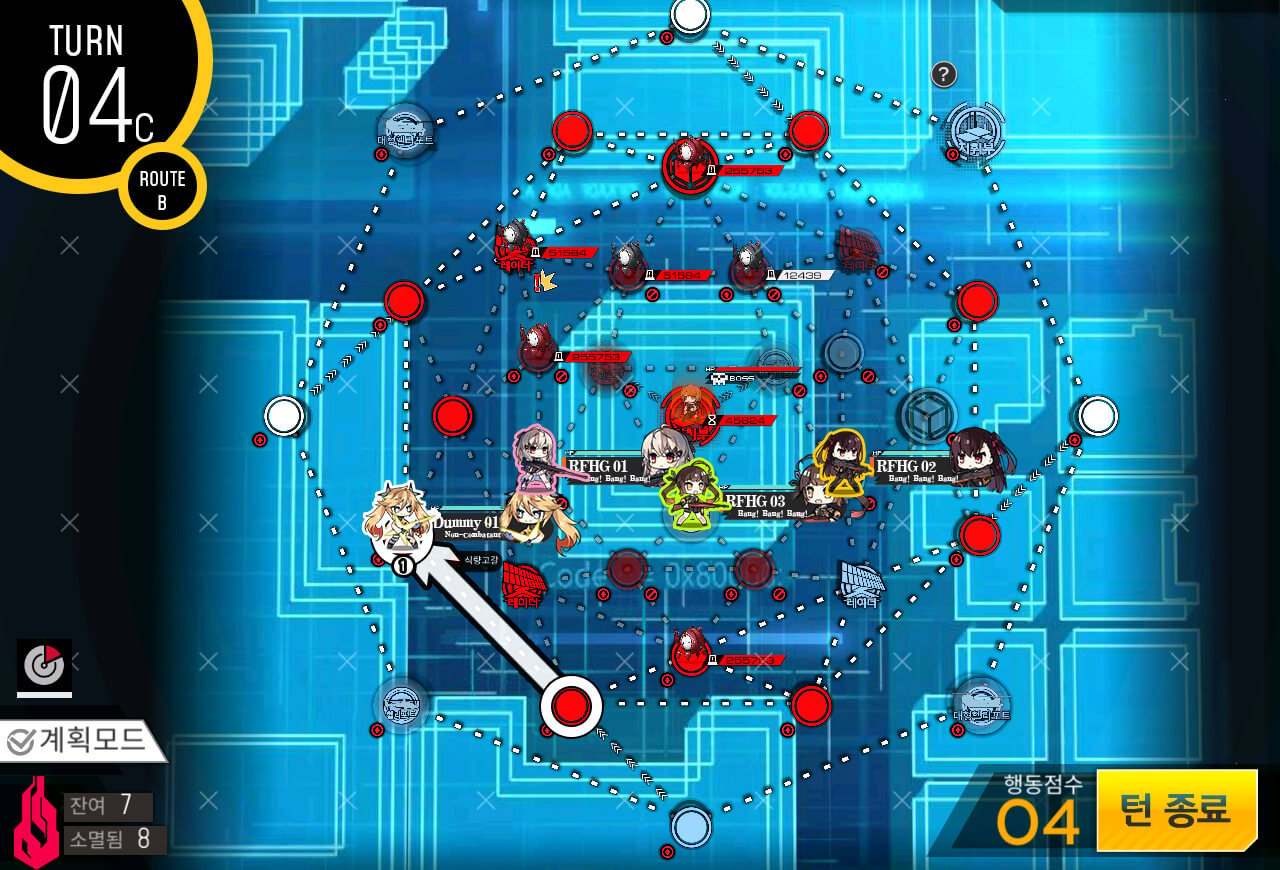
Now all we have to do is to clear the enemies off the map and depending on where the center unit moves, alter the routes slightly to compensate for RNG.
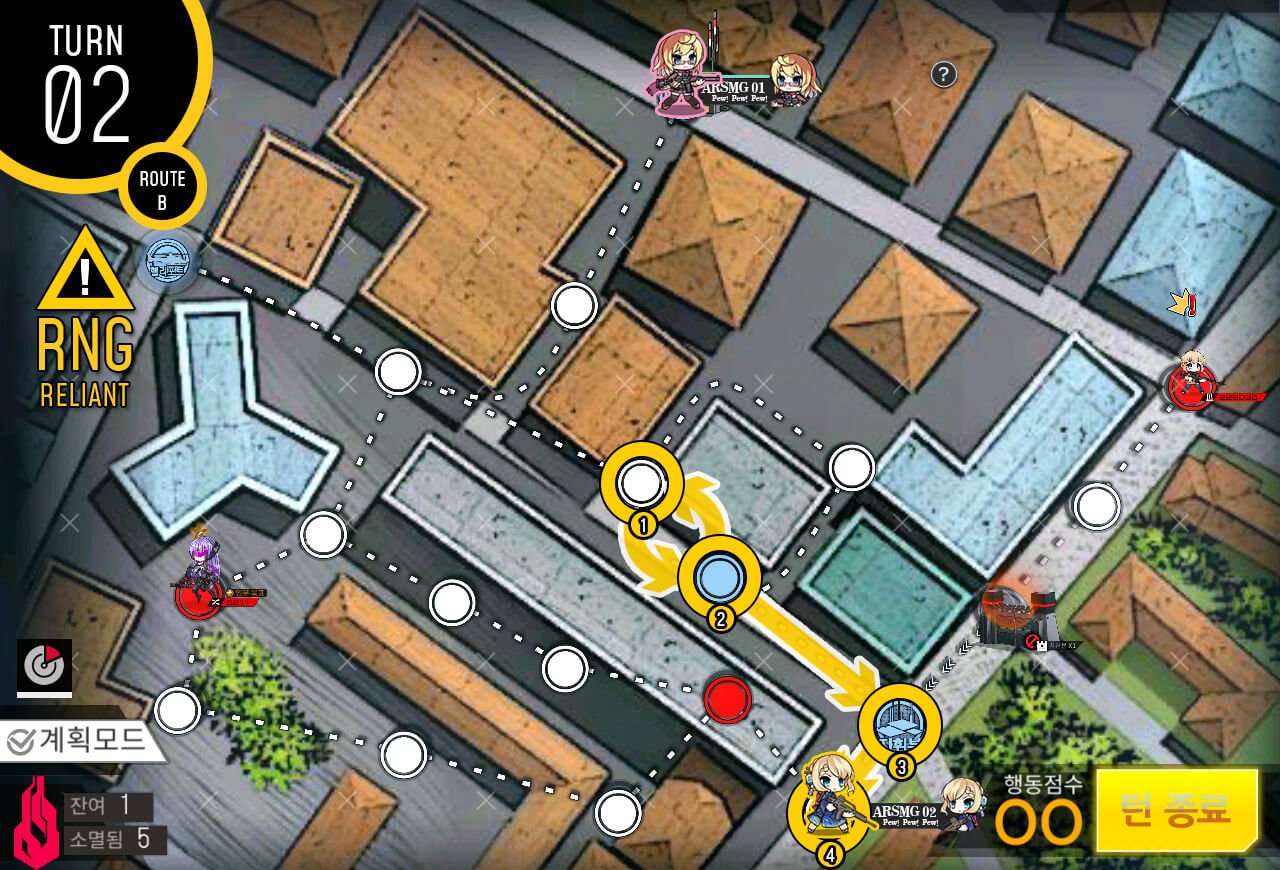
This is the alternative route when enemy unit at the center did not move into the combat echelon near the HQ.
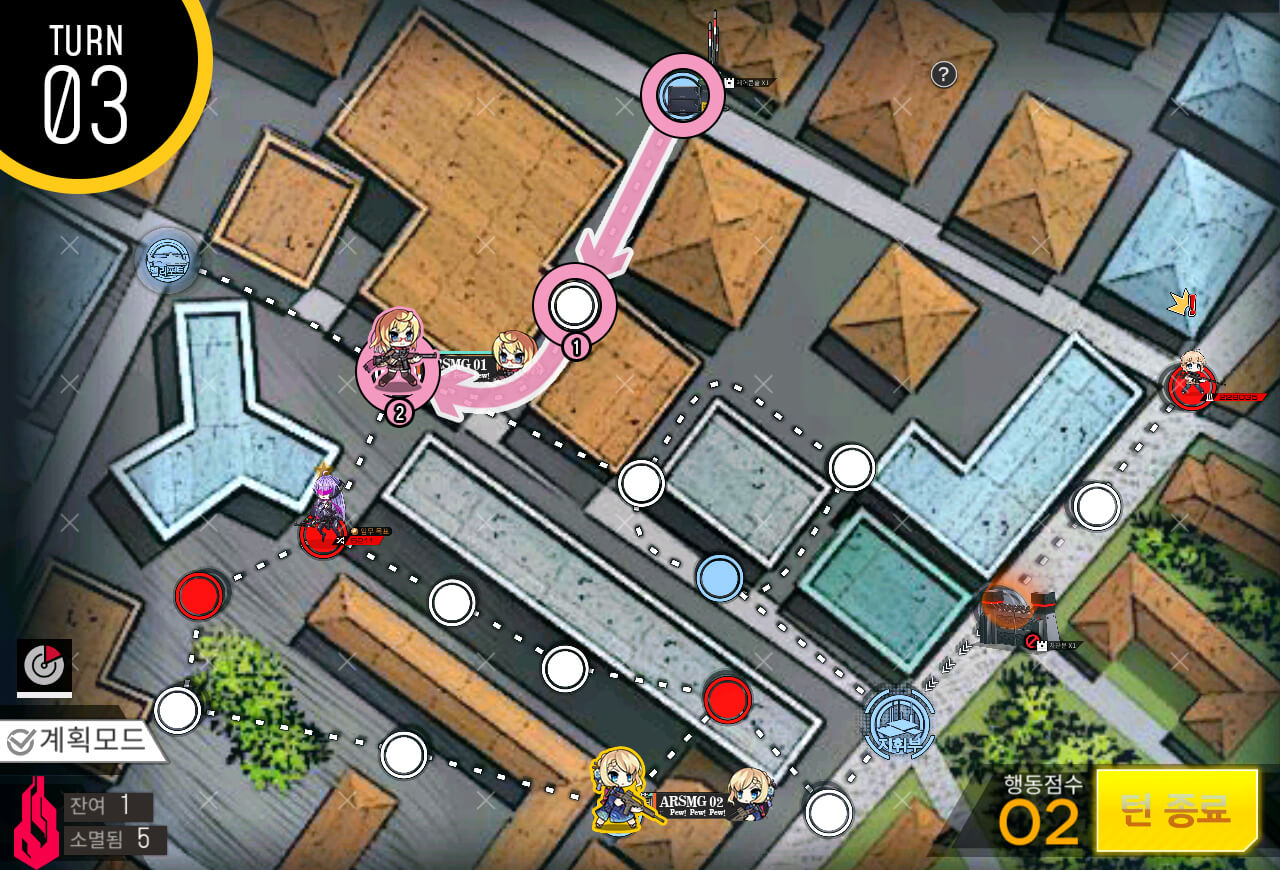
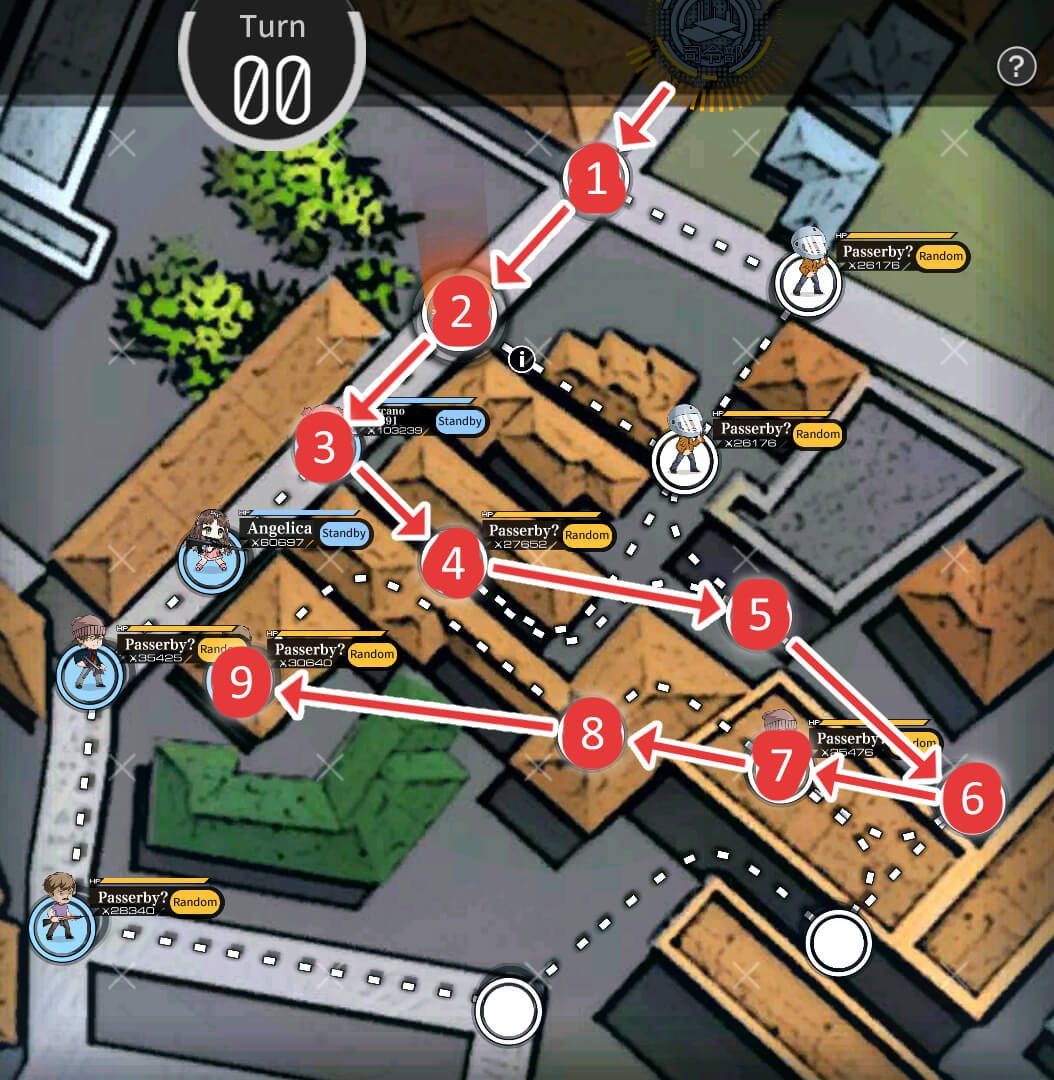
By Turn 3 all enemy units should be within your range of movement; If not, just take additional turn to clear but it just won't be an S clear.
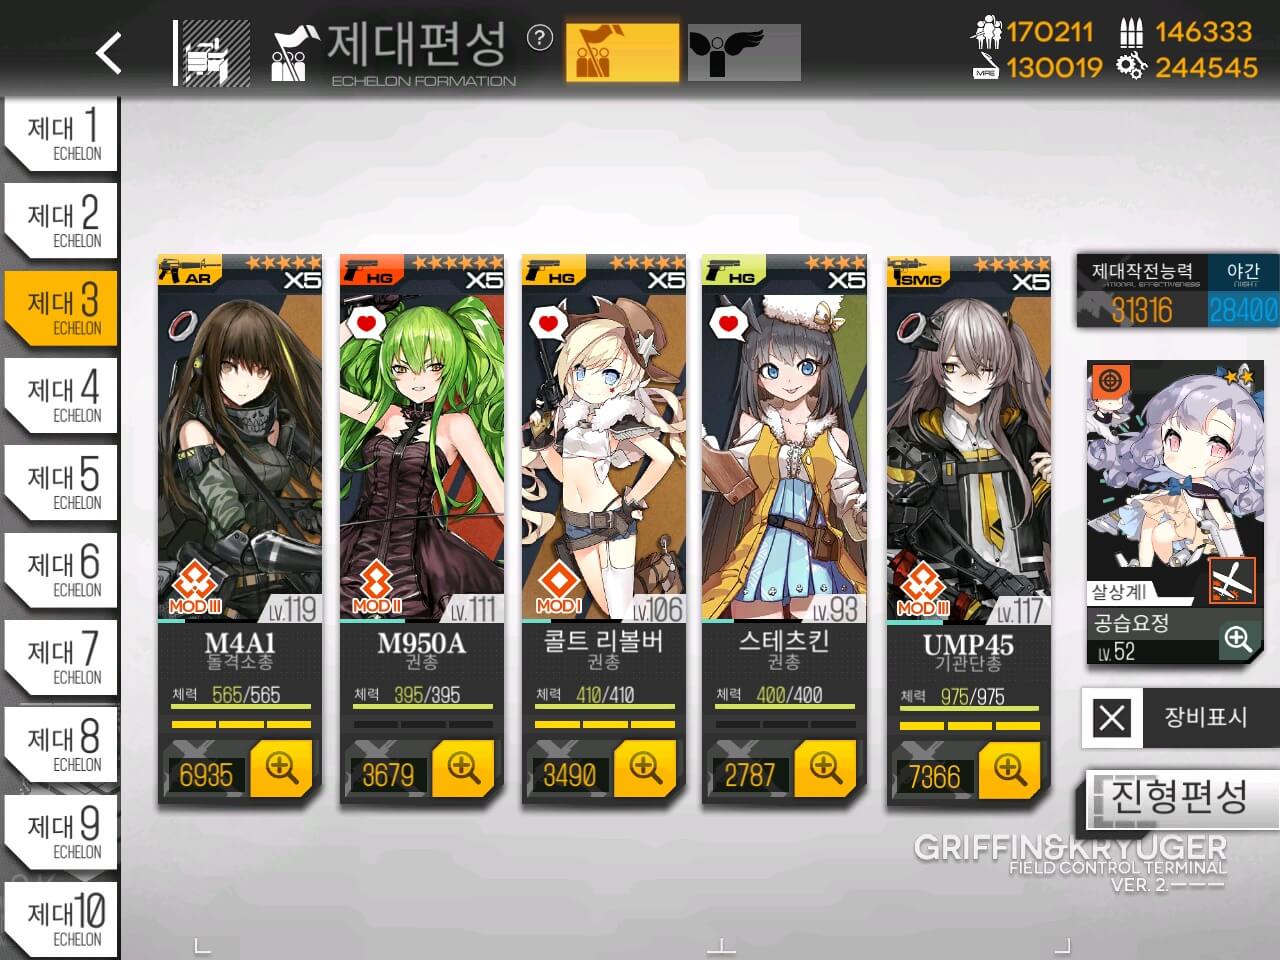
We are using same echelon from the first EX map which will likely be badly damaged regardless of Fairy or the T-doll involved. I do recommend Taunt or Twin Fairy if you want to minimize the cost of repair slightly.

The 2nd echelon is RFHG echelon with Taunt or Twin fairy. I elected to use HS2000 for the additional protection, but other HG like PX4 works instead. Clear can be swapped out for Calico and Hoxy can be replaced with Stechkin. Other RF/HG combinations may also work.

Start with AR echelon on the HQ and move to the left. Then deploy 2nd combat echelon on the HQ. I recommend leaving Auto-Fairy Command Use on as those are pretty much mandatory on the map.
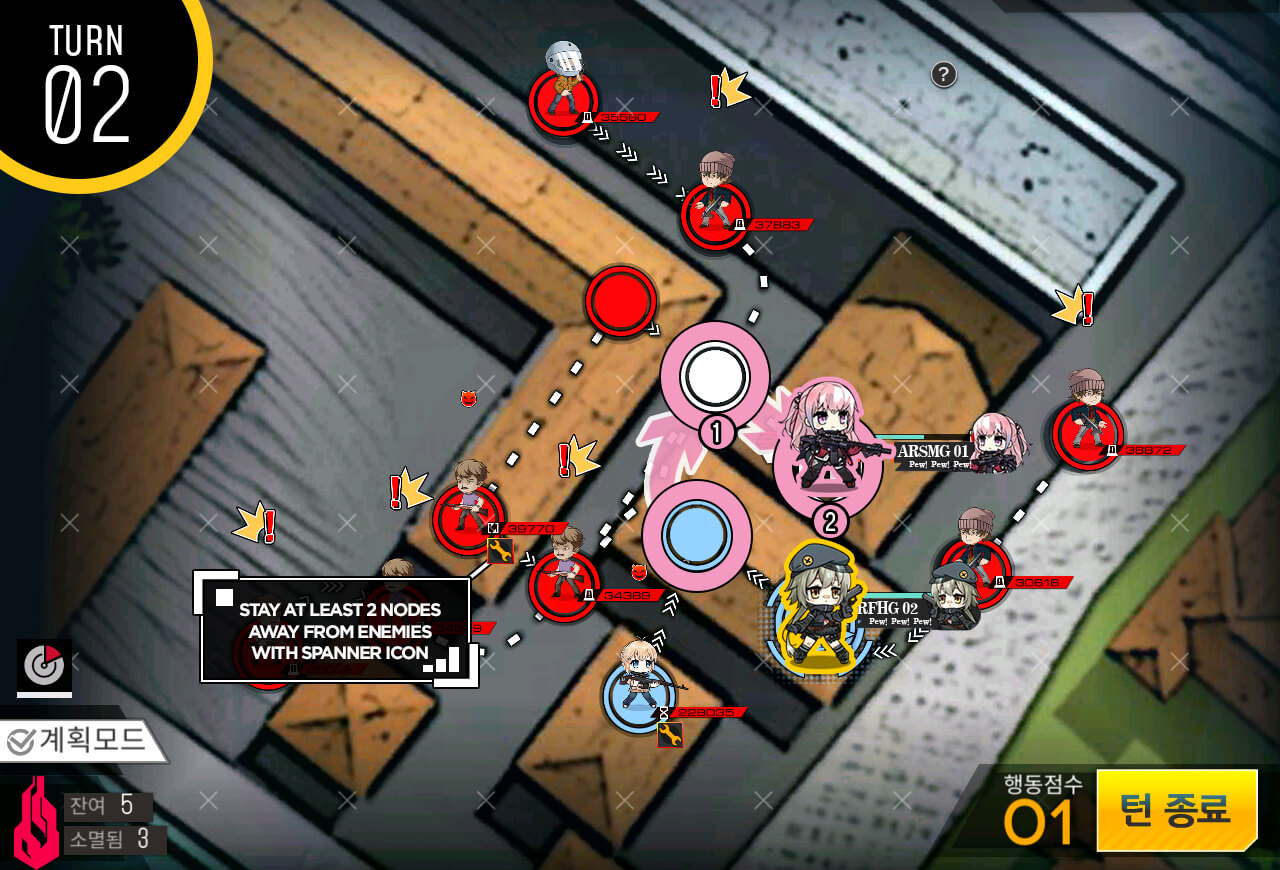
On Turn 2 you will see two enemy units with spanner icon under their CE, which indicates that they will heavily damage any friendly echelon adjacent to it. So it is important that you move your first combat echelon to a safe location above 2nd combat echelon. The enemy unit between the spanner icons will not move, effectively blocking the path to the HQ and preventing surround capture.
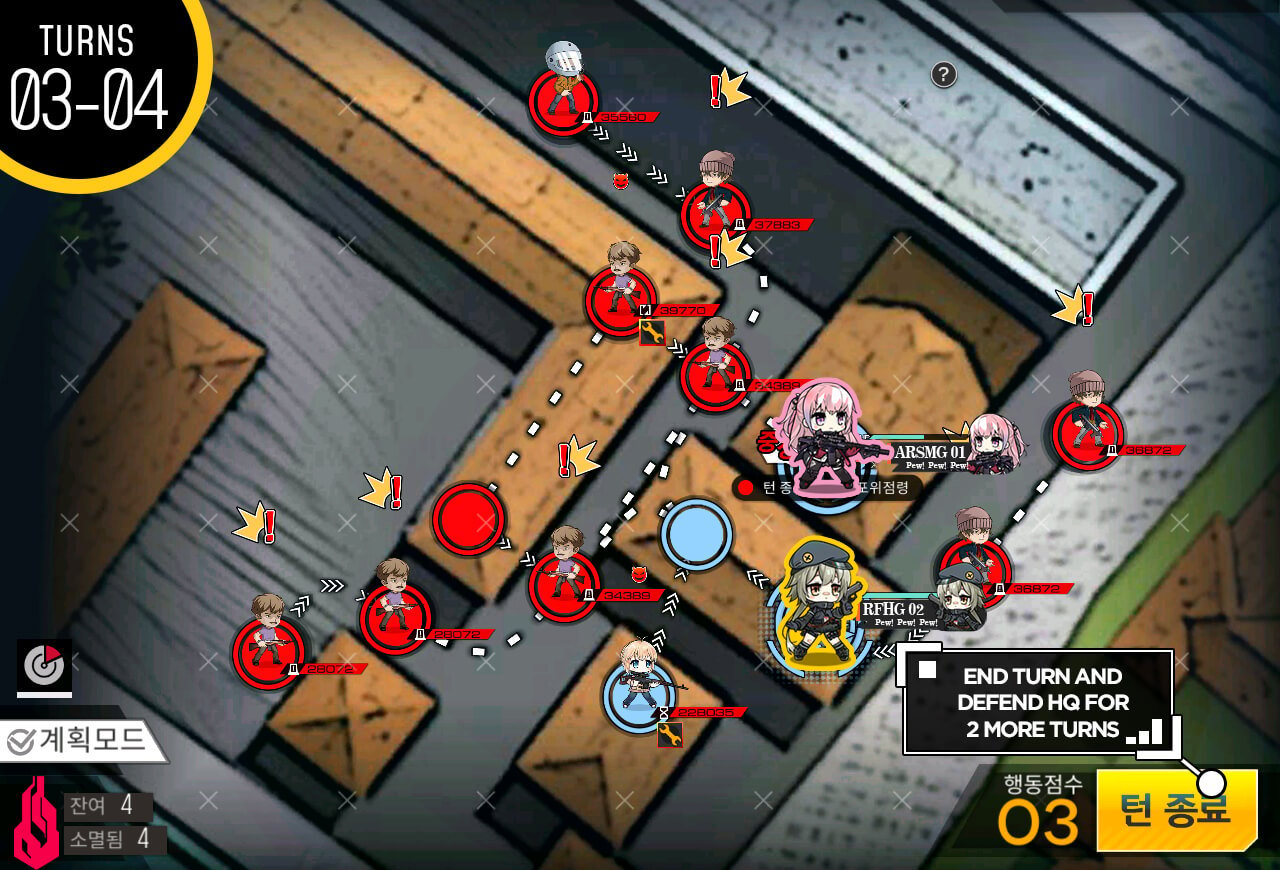
All that's left to do now is to stay in place and make sure the echelon on HQ is well-supplied and repaired if needed between battles. If 1st combat echelon is in bad shape, just retreat them to save repair cost.
This is one of the night ARSMG echelon used to clear the enemy units on the map. I strongly recommend SMG to be at least level 80 to get the benefit from the 3rd equipment slot. Use standard F formation with HG as off-tank in position 8.

This map will require each echelon to take multiple battles in a turn so make sure to resupply at any given opportunity. PEQ equipment for AR is also a must. Move combat echelon to the left then deploy 2nd combat echelon. You must have a HG or Illumination Fairy to provide vision on HQ in order to deploy 2nd echelon. 2nd combat echelon does not require a HG.
Resupply combat echelon via swapping and move to take left helipad above.
2nd Combat echelon needs to clear out the enemy near the HQ and prevent it from being surround captured. Sweep all 3 nodes adjacent to the HQ and stopping on the left. Combat echelon at the center moves to capture helipad to its right.
Depending on RNG, there may be 1 or 2 enemy units left on the map, which they can be beaten first or after the boss unit depending on if they are threatening your helipad or the HQ. If you cleared out all enemy units, all you have to do is put the allied echelon adjacent to the enemy HQ node.
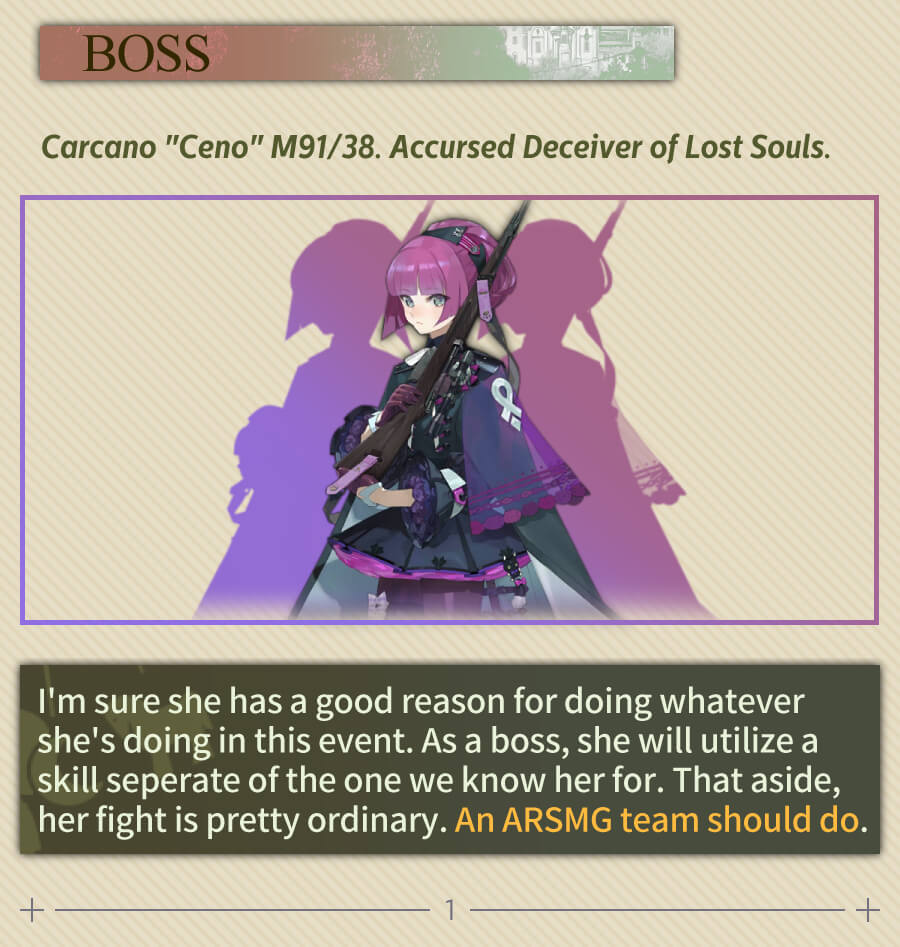
Once allied echelon is near the enemy HQ, just end turn and fight the Purple Cano boss. IF there are any enemy units left other than the boss, make sure to change AI command to "Standby".
When Purple activates her sniper skill, make sure to put the targeted T-doll in one of the three marked nodes in purple. Stepping on the purple node makes T-dolls have protection against her skill and attack.
This is the combat echelon I used to clear the Boss unit. Standard F formation with HG off-tank in position 8. Boss battle is not difficult to fight if you understand the mechanic, which is identical to the normal version.

Start with dummy echelon on the HQ. Move to the right and deploy 2nd dummy echelon on the HQ then end the turn.
Now that we have vision on two helipads above, deploy combat echelon on the right side and dummy or a HOC on the left side.
Combat echelon move up just below the red node and end the turn. This way you do not interrupt the enemy patrol pattern.
Combat echelon moves up to the "?" node to gain a buff that lasts to the boss fight at a cost of resources. I strongly recommend picking it up to gain an edge in the long fight.
Move back down to starting position and end turn.

Now all you have to do is move up as all the enemy units have moved out of the way to the Boss fight.
I like to keep front two T-dolls in the two of the three marked nodes and leave 3rd empty. Once purple Cano designates the target for the skill, move marked T-doll [in this case Groza] to the 3rd marked node. Repeat this process until you win.

Here is the echelon used to clear this map but with significant damage done to SMGs due to lower levels. I would recommend SMGs least having level 80+ in order to benefit from the additional evasion from 3rd equipment slot.

This map has a trick with the radar node so that's the first thing we will do. Step on the radar and set the AI of both ally echelons to "HQ".
Swap with the allied unit on the left. Resupply at the helipad then take the enemy helipad on the top left. There is minor RNG where you won't be able to capture the helipad this turn, in this case just deploy another combat echelon at the helipad below.
All that's left is to clear out the enemy units on the map that are not in the path of allied units. Some RNG will be involved but not to a degree that will make the clear impossible. With two enemy units on board that are blocking the reinforcement, there should be one or no fights left for the combat echelon.

Hitting end turn here should be fine, but if you are uncertain about the AI of allied units, manually change them to 'Eliminate' and this should remove any RNG involved with enemy units surviving.
This map is extremely difficult and I only found it somewhat manageable with specific team comp with help of Dalao brainstorming. M4 Mod team with UMP 45 as tank and Taunt/Twin fairy worked the best. [Picture has Airstrike fairy but recommend Taunt fairy or Twin fairy].

You want to retreat two of the HGs so that M4's cannon skill activates ASAP. You can set M4's skill to manual and activate all HG's skills prior to retreating.
2nd Combat echelon is also ARSMG but with Uzi Mod and STAR mod. Thompson helps with survival with force field. For formation it's standard F formation but STAR's and SOPMOD's position can be changed if you think 2nd AoE skill is overkill during the battle.
This map might require few restarts to get the favorable enemy spawn if you are looking to S-clear, but other wise you generally want fewer enemy units on the right side. Start with two echelons with M4's echelon at the bottom helipad and other echelon at the HQ. Combat echelon at the bottom helipad moves to the left side. Deploy HOC at the bottom helipad.
Combat echelon moves up to surround capture the enemy helipad. Combat echelon at the HQ moves two nodes to the right.

Combat echelon near the HQ moves up and right to helipad to block further reinforcements. Combat echelon at the top left resupplies and repairs if needed.
All that's left to do is to sweep the map and take out the remaining units and blocking of the top center helipad.
The echelon shown are the ones used to clear the map but at significant damage taken. I recommend at least level 90+ with 5x links in order to minimize repair costs. You also do not have to fight the Boss unit at the HQ so don't worry about it. Additionally, I used a dummy echelon at the HQ instead of a 3rd combat echelon, but if you want to minimize RNG ruining your day, 3rd combat echelon is my recommendation as HQ can be threatened by RNG enemy movement around Turn 5.
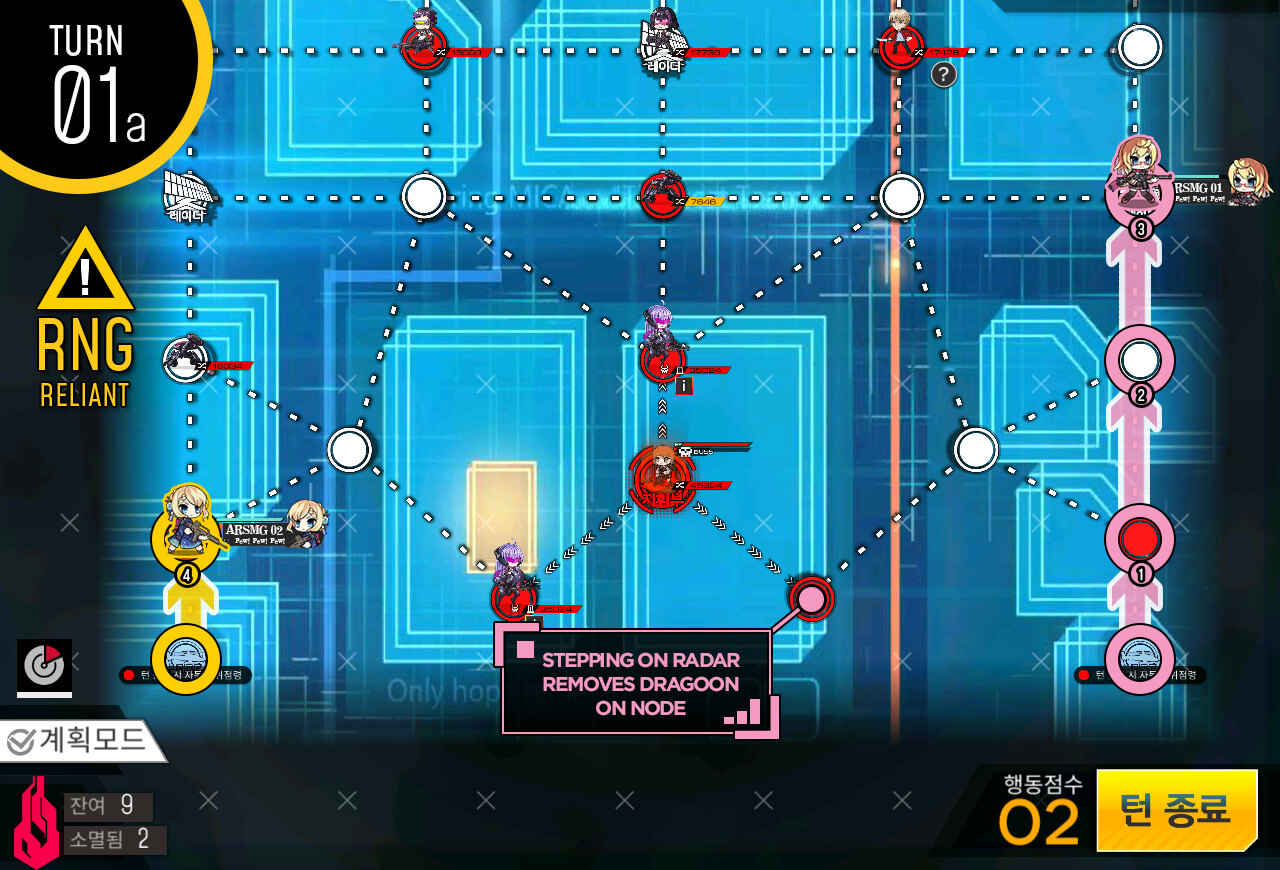
Start with two combat echelons at the bottom helipads and dummy echelon on the HQ. It's important to prevent helipads from being taken. Move both combat echelon up one then use remaining moves to step on the radar on either side. This removes one of the Strong Dragoon units near the enemy HQ.
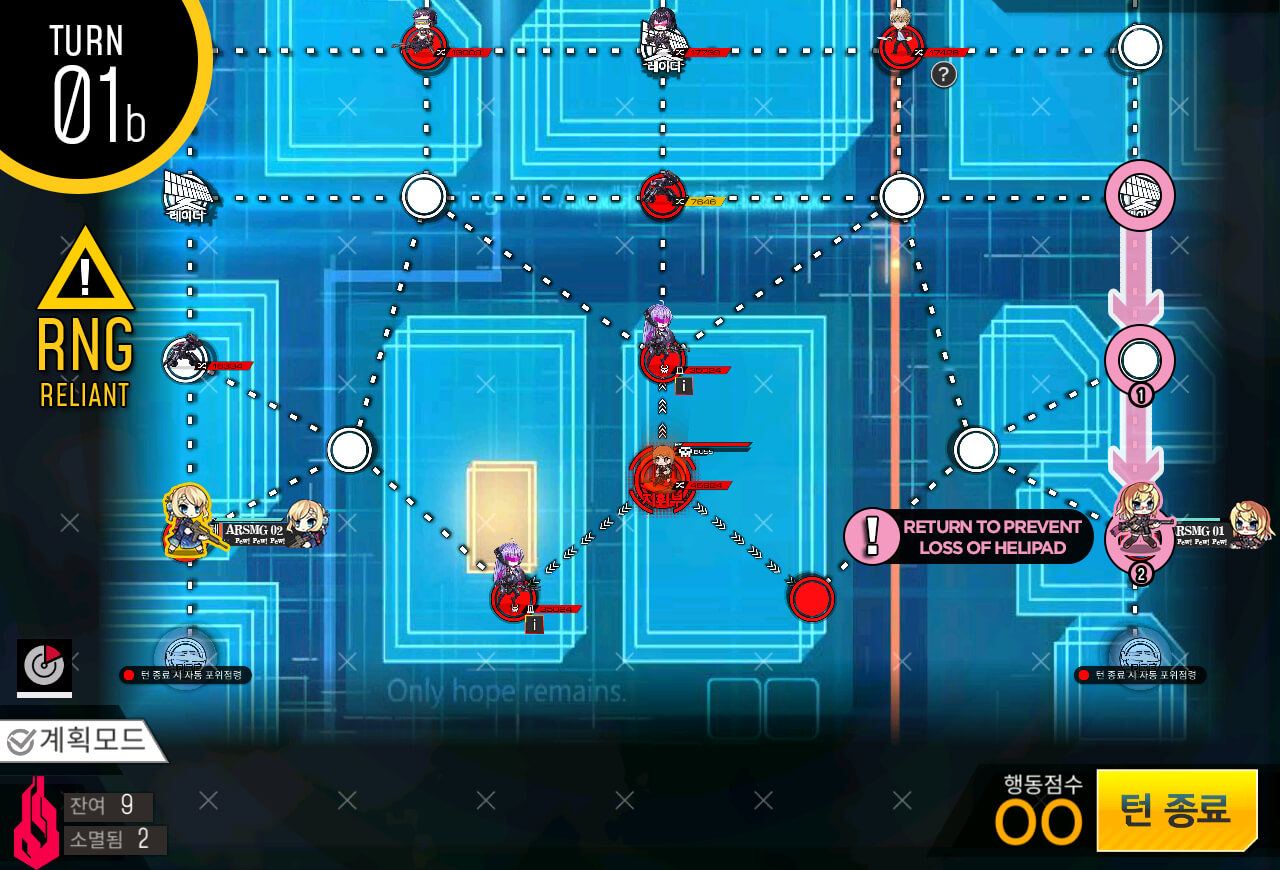
Move back down to keep helipad under ally control.

On Turn 2 we are triggering the other radar nodes to remove the remaining Dragoon units near the enemy HQ. Be careful dealing with Jaguar mortar units during the battle as they can be deadly if they hit.

You probably noticed Goliath Plus units near the HQ. Just simply sidestep to either left or the right.
Return Dummy/3rd combat echelon back on to the HQ.
Now all we should focus on is capturing nodes surrounding the enemy HQ. If you have nodes captured by all sides like shown above, work your way in from the edge where you can capture. If not, move directly into the node adjacent to HQ.
Continue to move and capture nodes needed for surround capture of enemy HQ. If echelons are badly damaged or out of ammo, simply move back to nearby helipads and resupply.
Once you capture all 3 nodes near the enemy HQ, simply end turn and clear the mission.
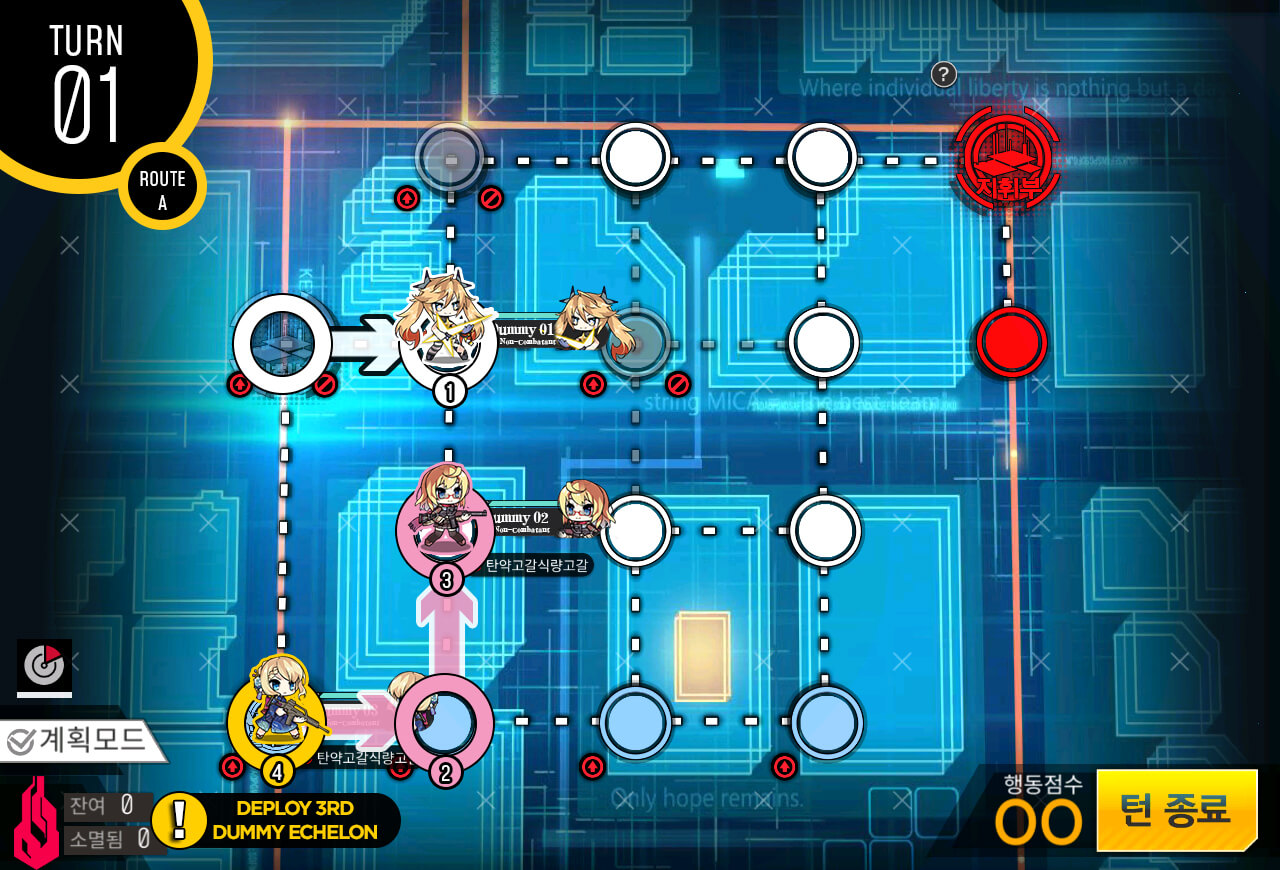
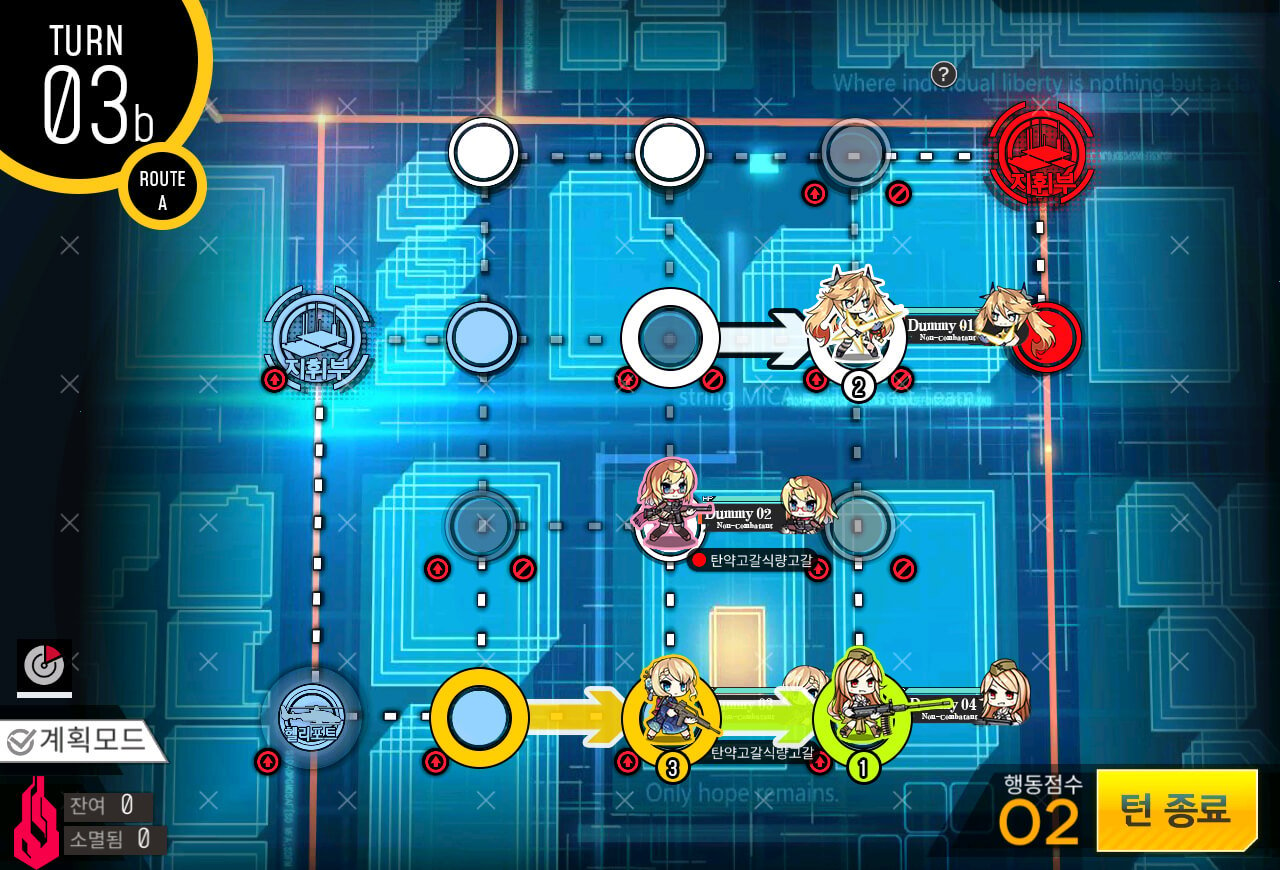
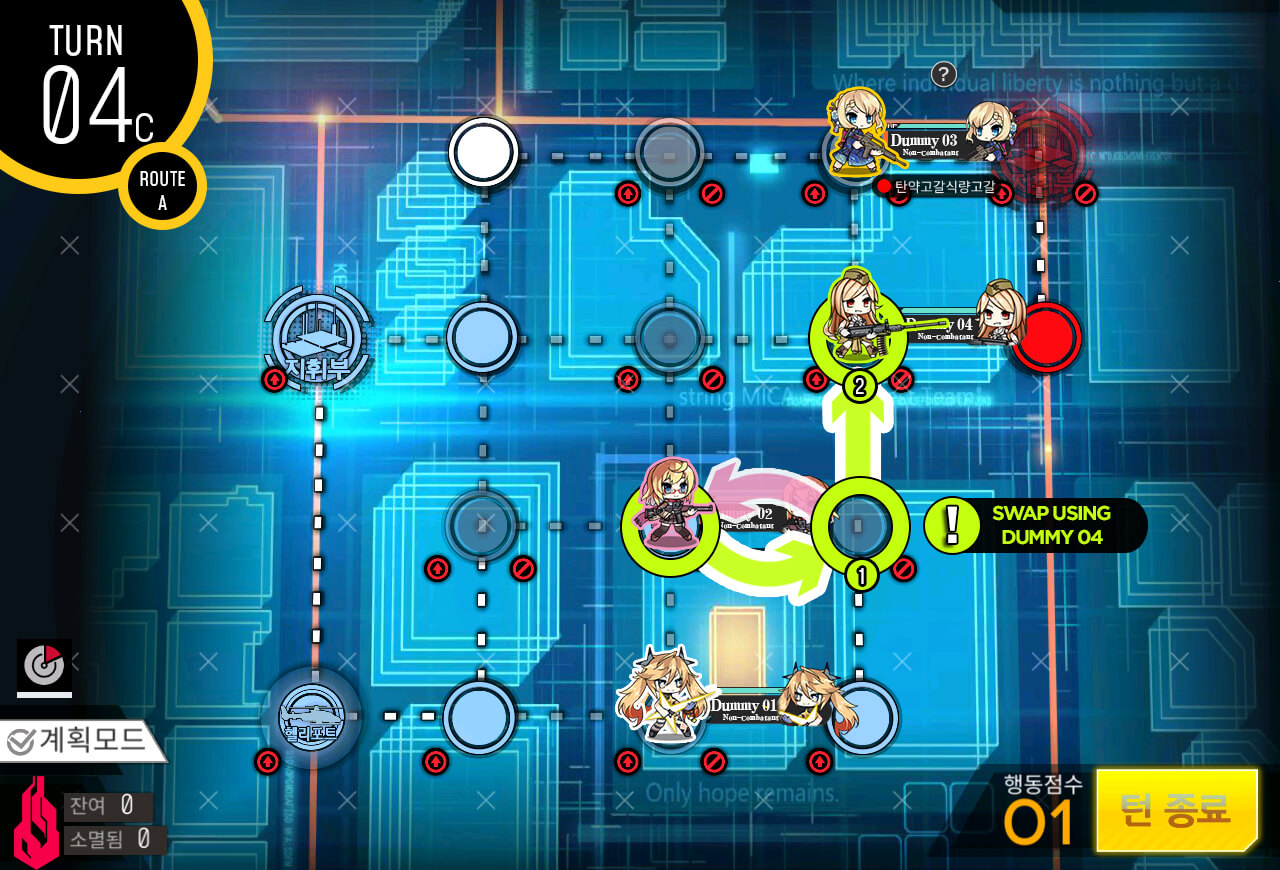
Disclaimer: The solution requires very specific moves and intentional choice of echelon swapping with other echelon. There are no battles so any echelons will do. Start with two dummy echelons on spawn locations. 1st dummy (white) on the HQ moves to the right and 2nd dummy (pink) on the bottom moves to the right then up one node. Deploy 3rd dummy (yellow) on the bottom helipad then end turn.
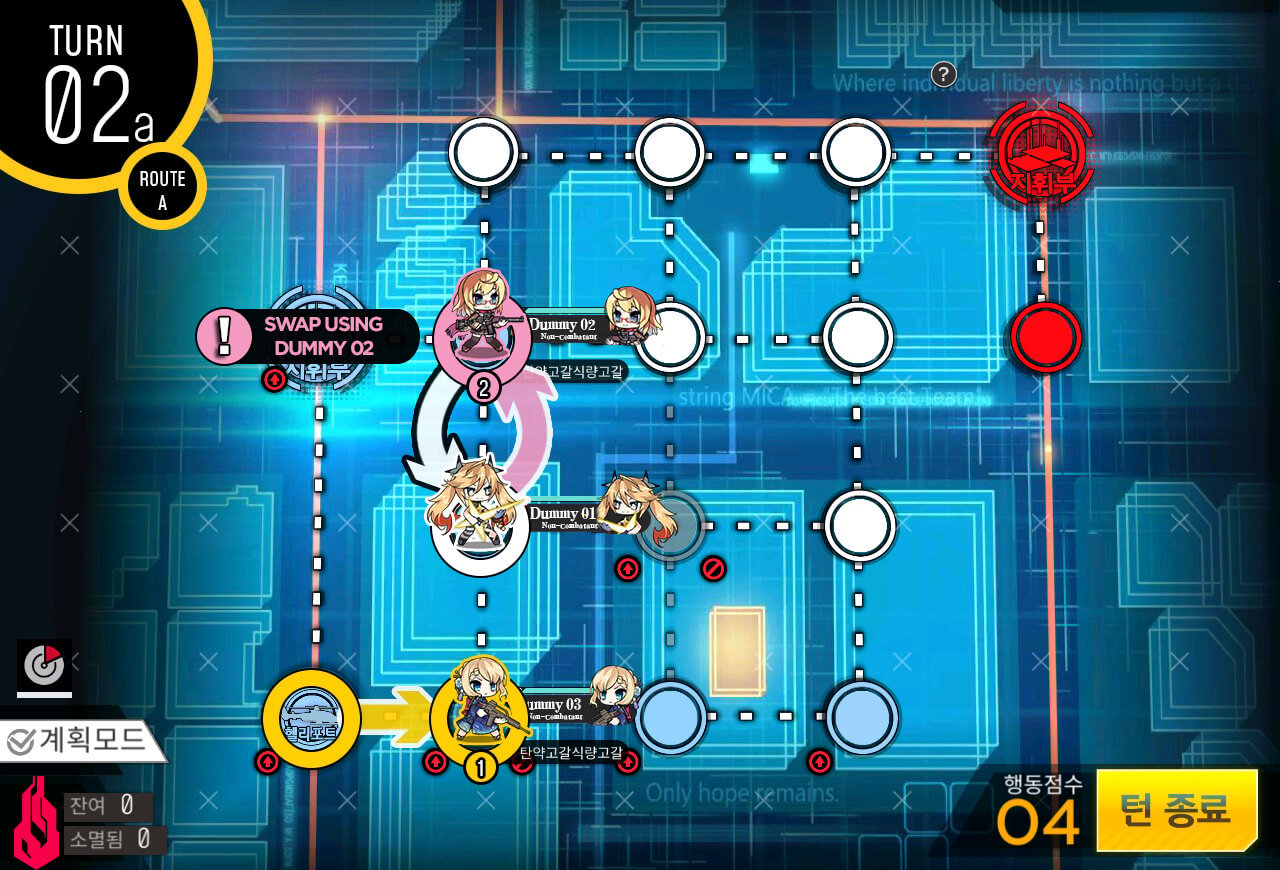
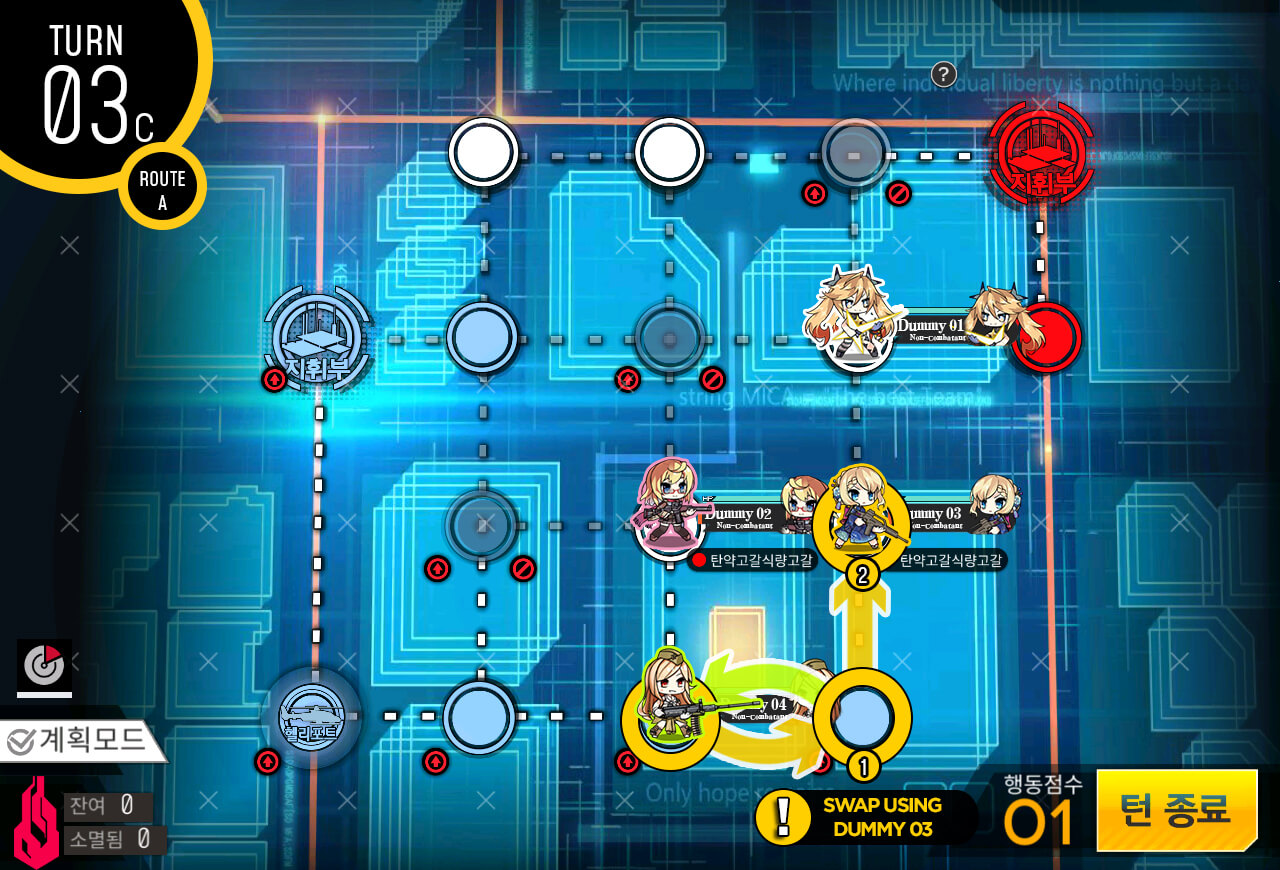
Move 3rd dummy (yellow) two nodes to the right. Initiate swap using 1st dummy (white) on 2nd dummy .

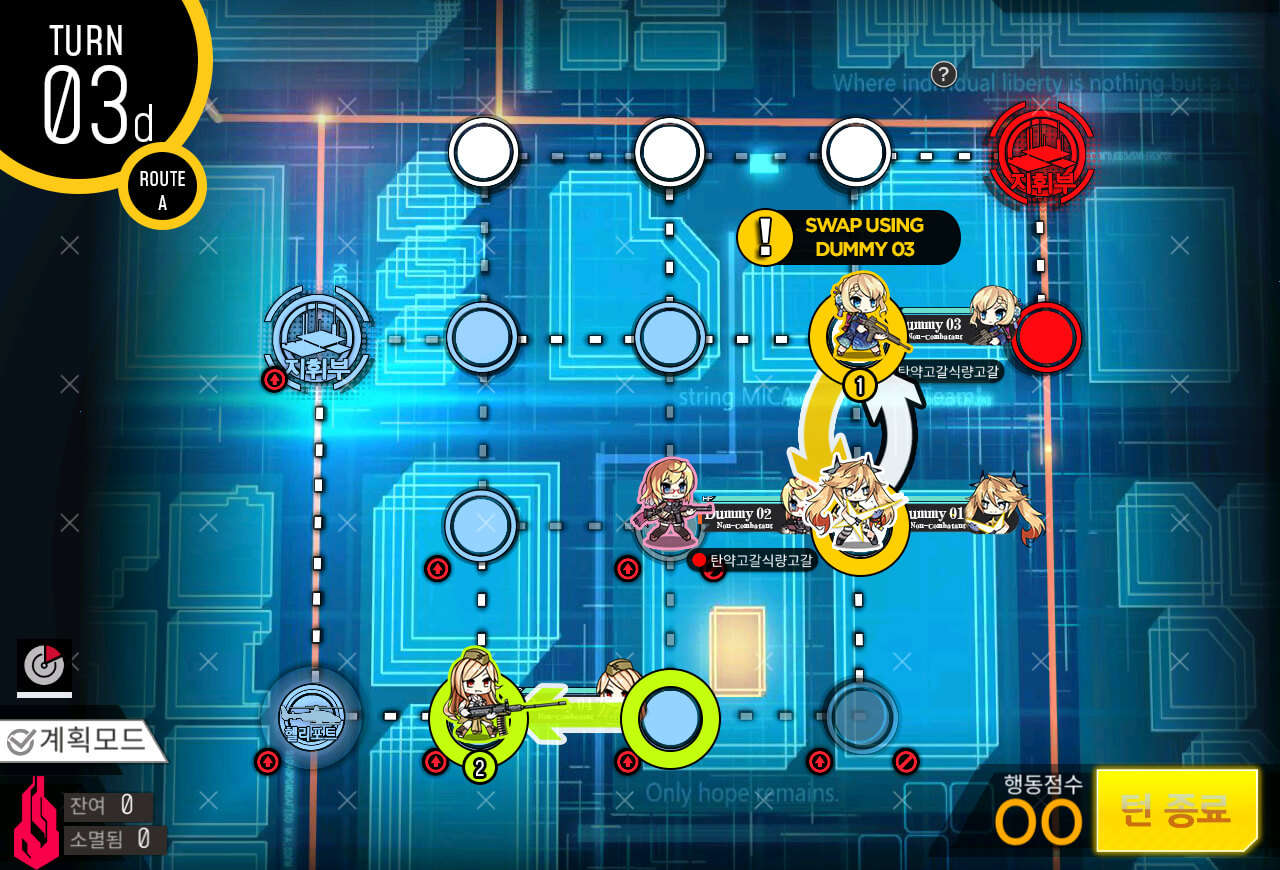
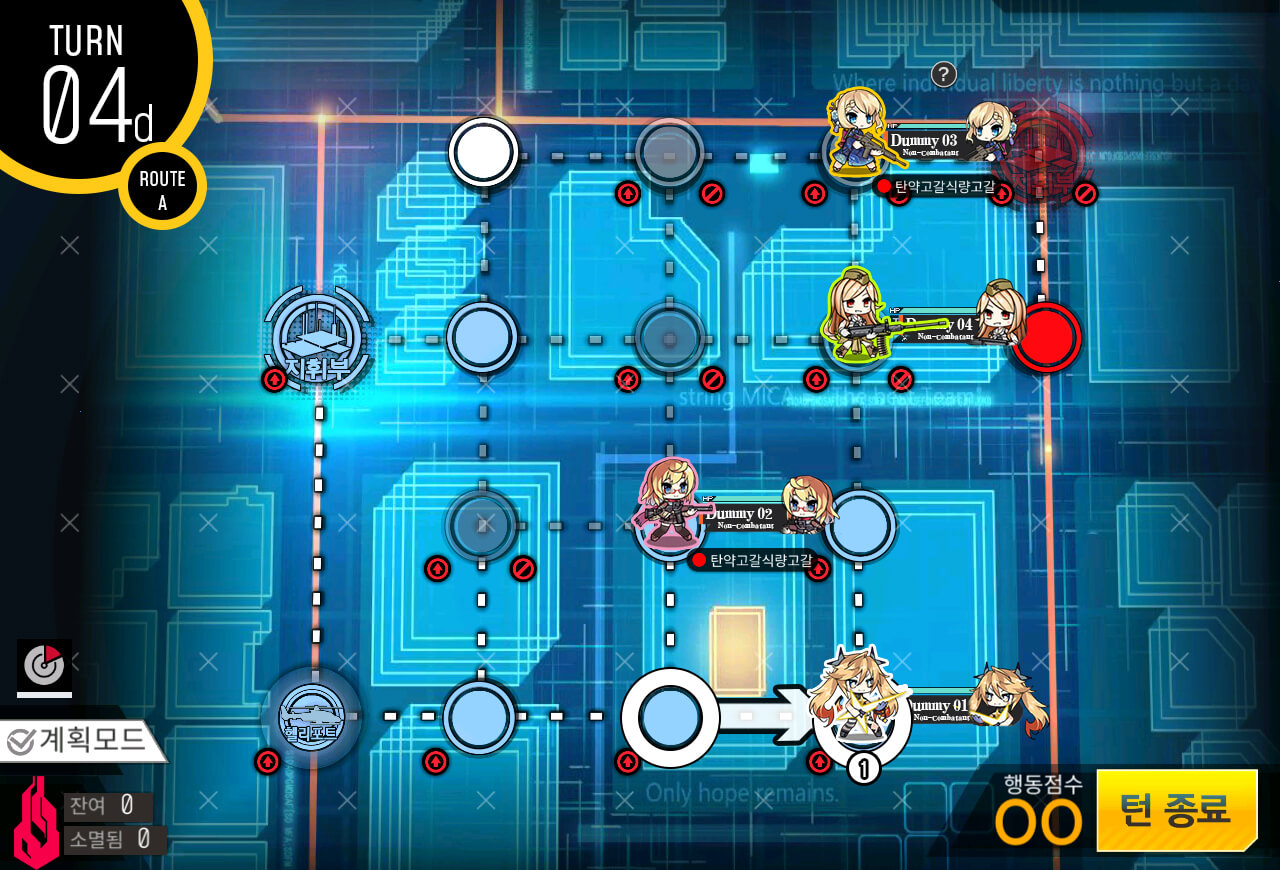
Move 2nd dummy (pink) to the right one node, then deploy 4th dummy (green) on the bottom helipad.
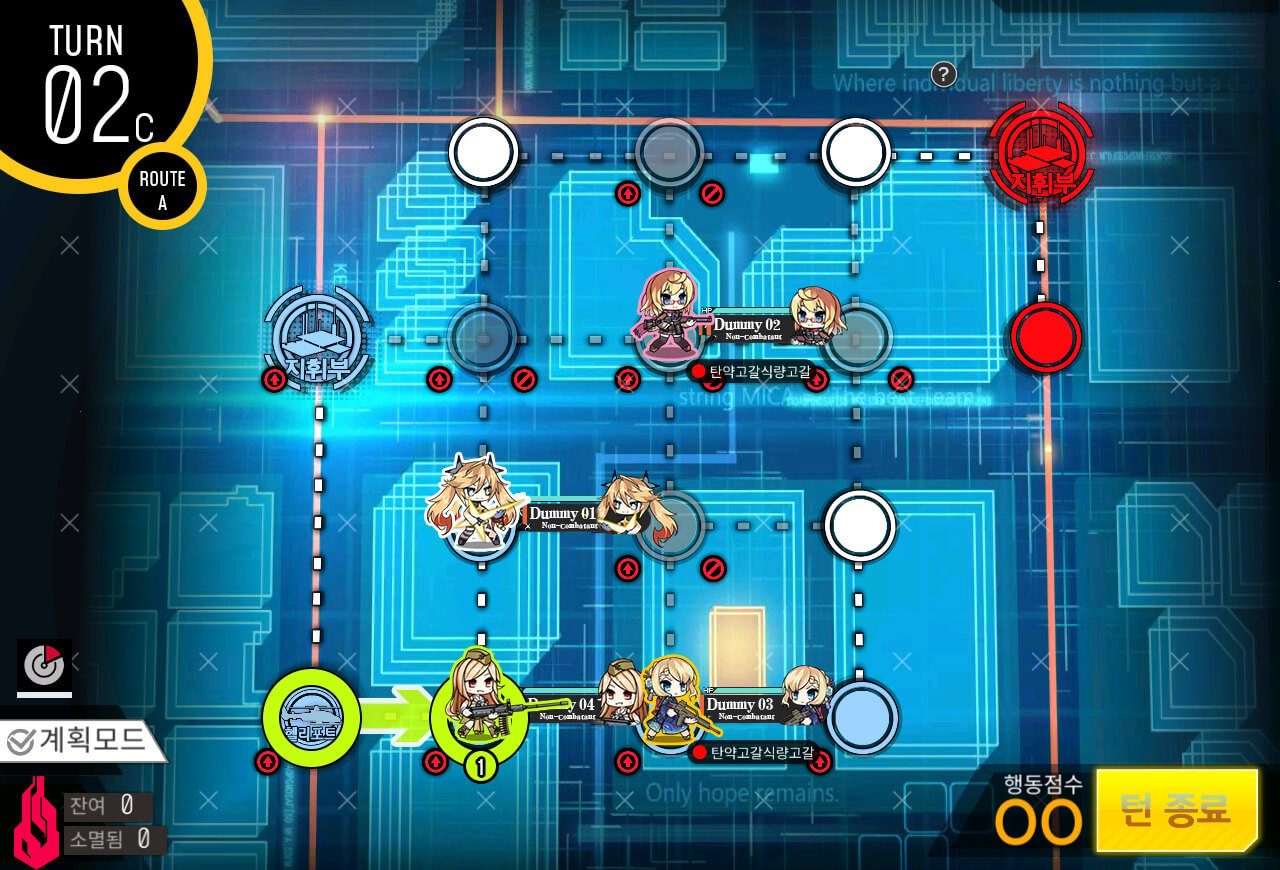
Move 4th dummy (green) right one node then end turn.
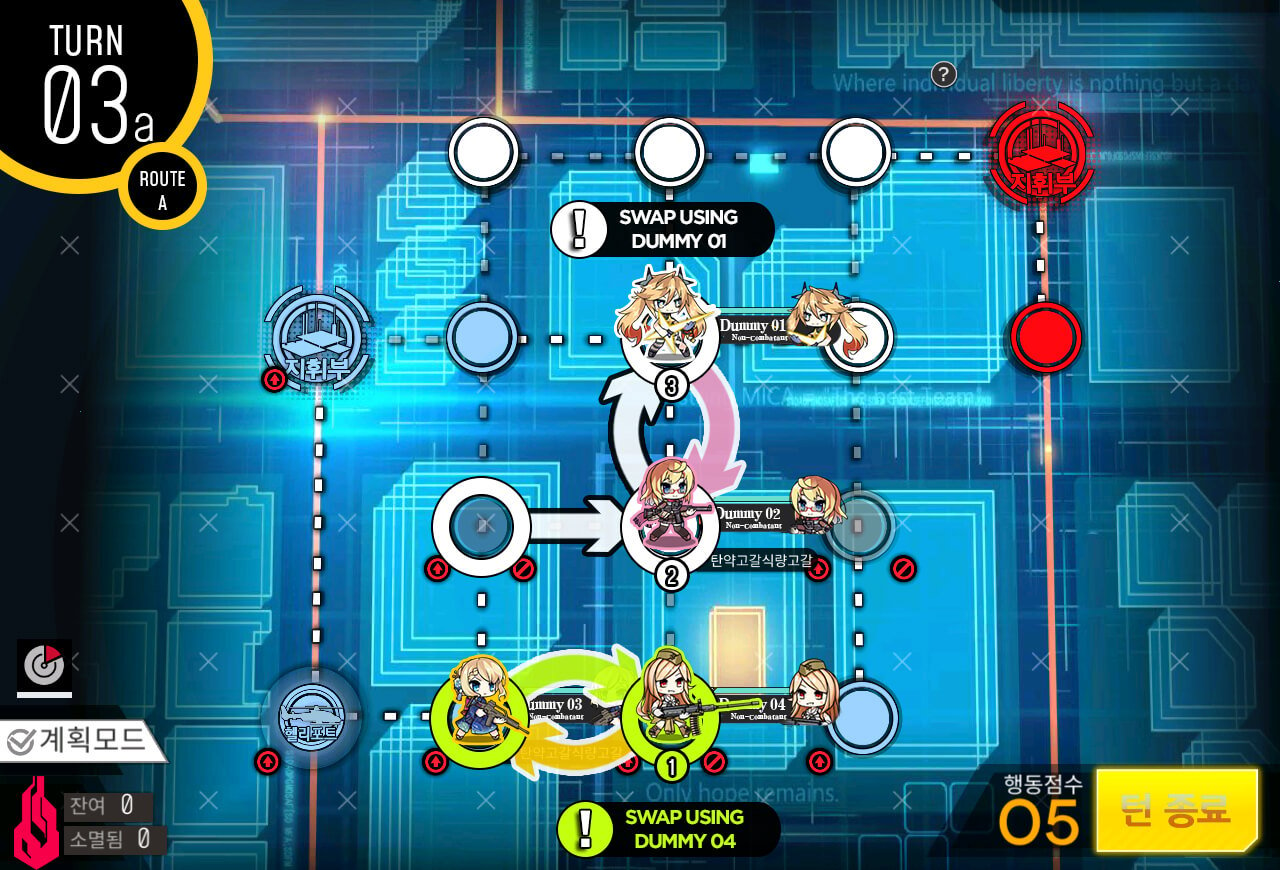
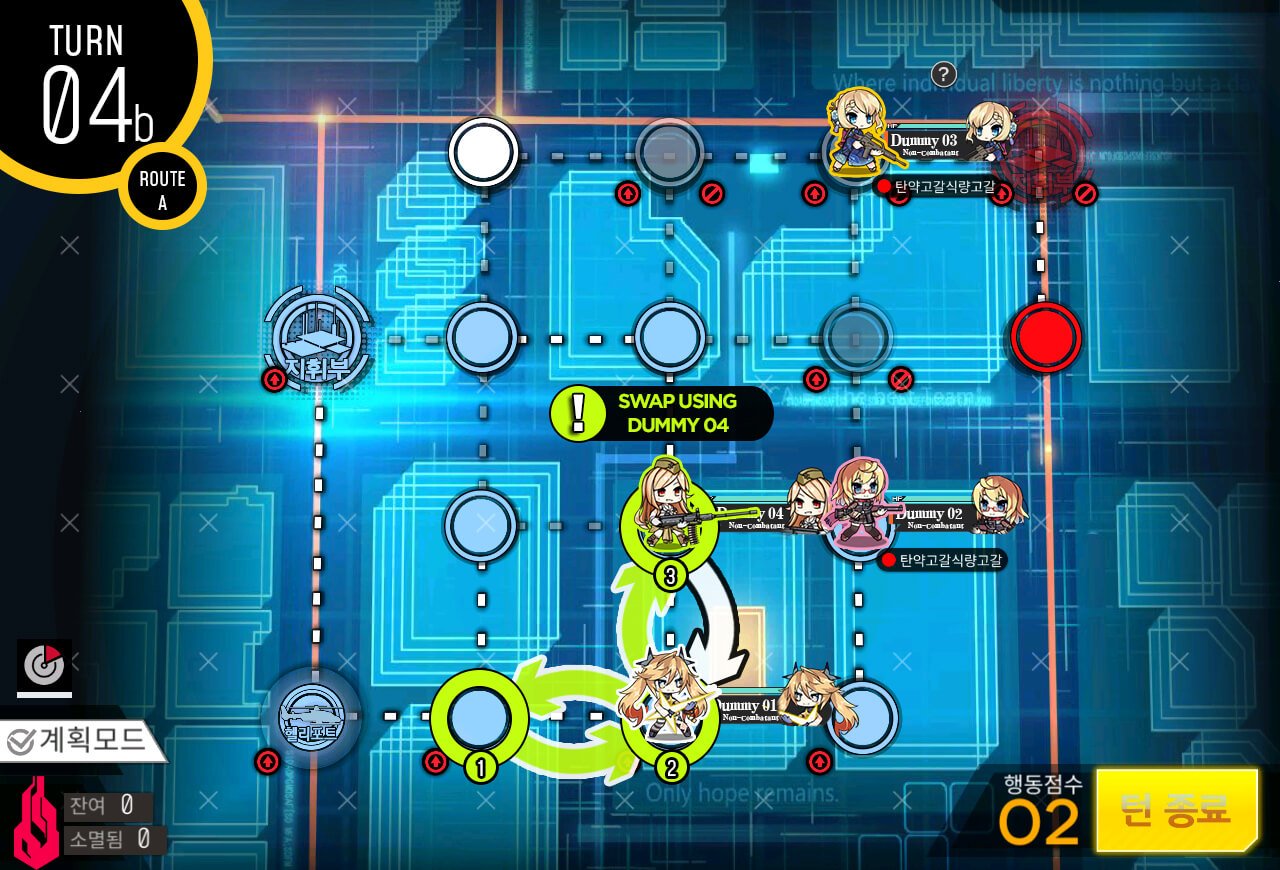
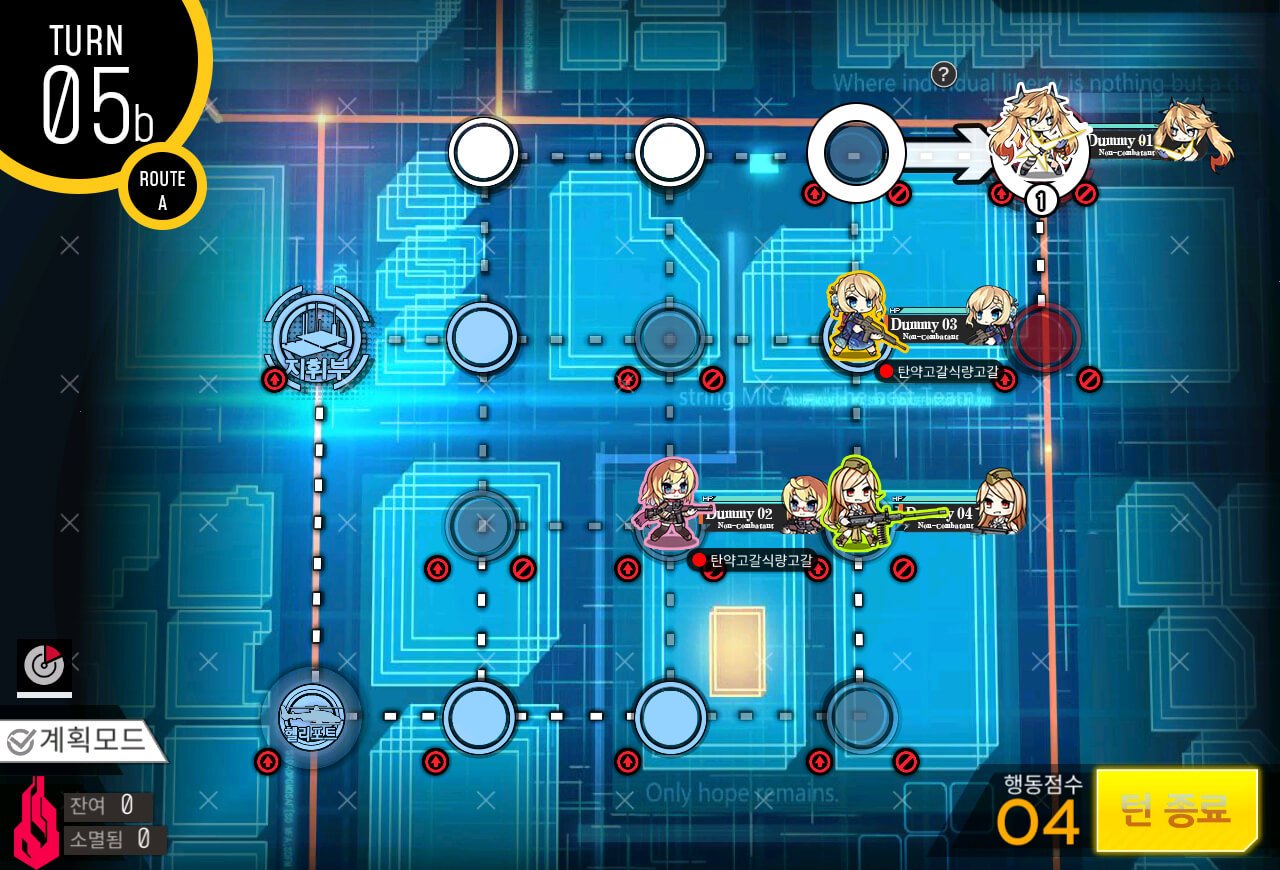
Swap 3rd dummy (yellow) using 4th dummy (green) then move 1st dummy (white) right one node. Initiate swap using 2nd dummy (pink) on 1st dummy.
4th dummy (green), 1st dummy (white), and 3rd dummy (yellow) all move one node to the right in that specific order.
Initiate swap using 3rd dummy (yellow) on 4th dummy, then move 3rd dummy up one node.
Initiate swap using 1st dummy (white) on 3rd dummy. 4th dummy (green) moves one node to the left.

4th dummy (green) moves one node to the right. Initiate swap using 1st dummy (white) on 2nd dummy . 3rd dummy (yellow) moves up one node.
4th dummy (green) moves one node to the left then back to the right. Then initiate swap using 1st dummy (white) above on 4th dummy .
Initiate swap using 2nd dummy (pink) on 4th dummy. After that, move 4th dummy one node up.
1st dummy (white) moves one node to the right.

1st dummy (white) moves up one node. Initiate swap using 4th dummy (green) on 1st dummy.
Initiate swap using 3rd dummy (yellow) on 1st dummy. After that, move to the enemy HQ and end turn to clear the mission.
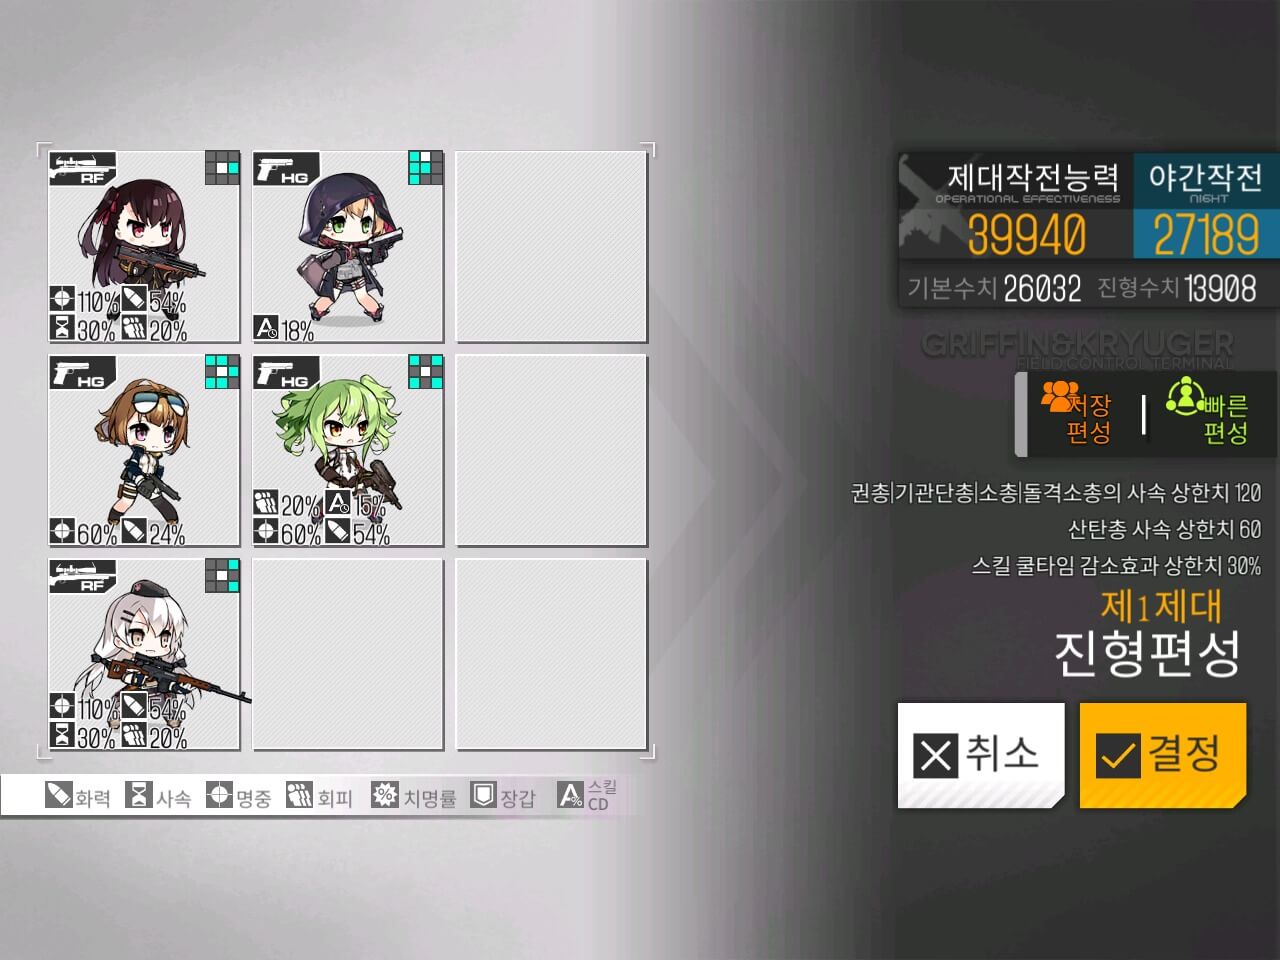
Here are the examples of the RFHG echelons used for the mission. There was no significant challenge to the battle itself compared to 4th EX map so I think you will be fine with taking any conventional RFHG echelons.
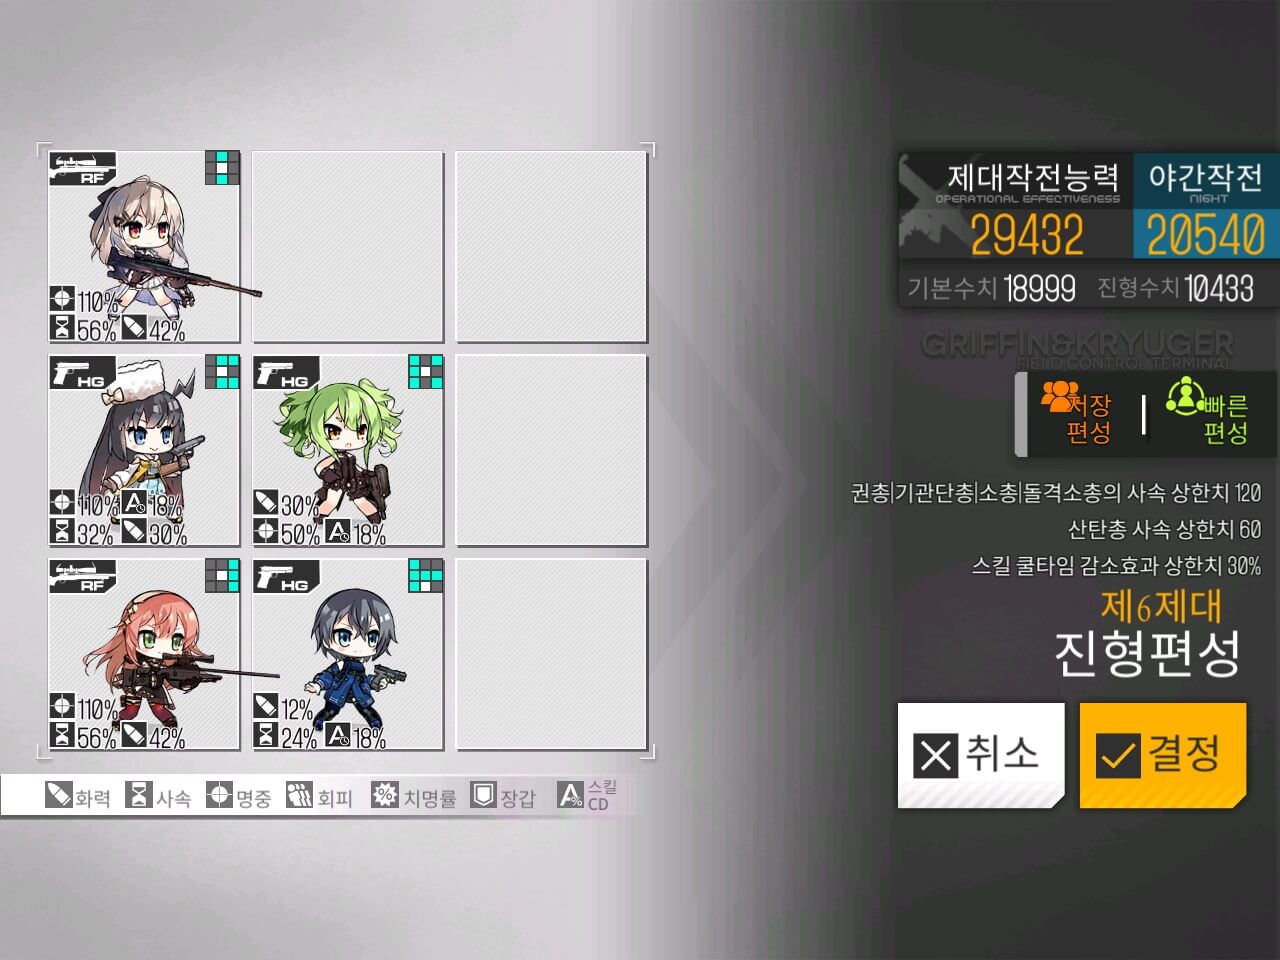
If you have 2 Parachute Fairies, just airdropping them to the 3 helipads adjacent to the enemy HQ then redeploying one of them few turns later can also do the job. But if you don't have the fairies, guide below shows how to clear it.
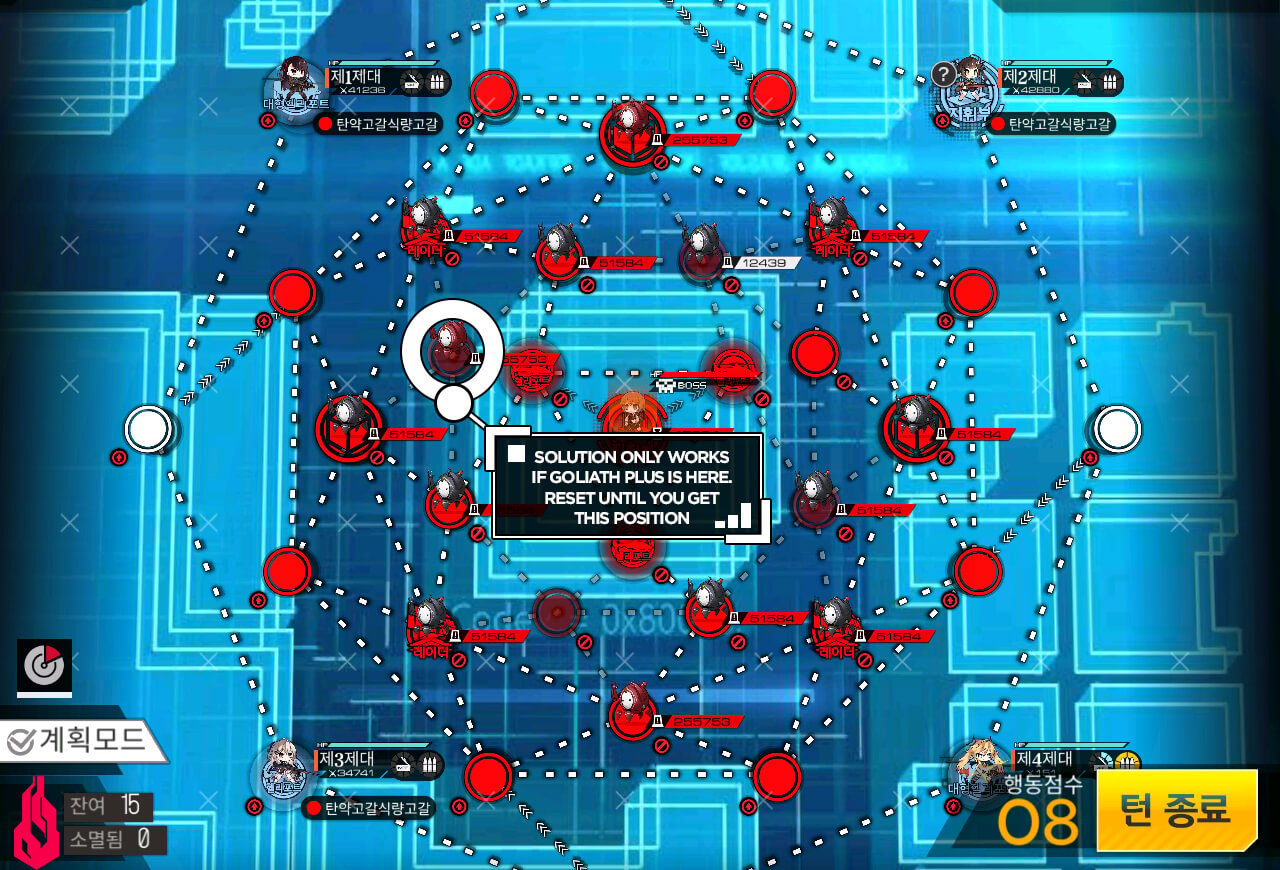
This clear guide only works if you have starting location of Goliath Plus on the upper left location near the enemy HQ. Deploy dummy echelon on the bottom right helipad and combat echelons on other 3 spawn locations.

Start from top right, move echelons in counter clockwise order. Since we are using the same rule for the movements and puzzle from map 1, it is important to keep the order specific. All the enemy units here have armor save for the Goliath so I recommend RFHG echelons.
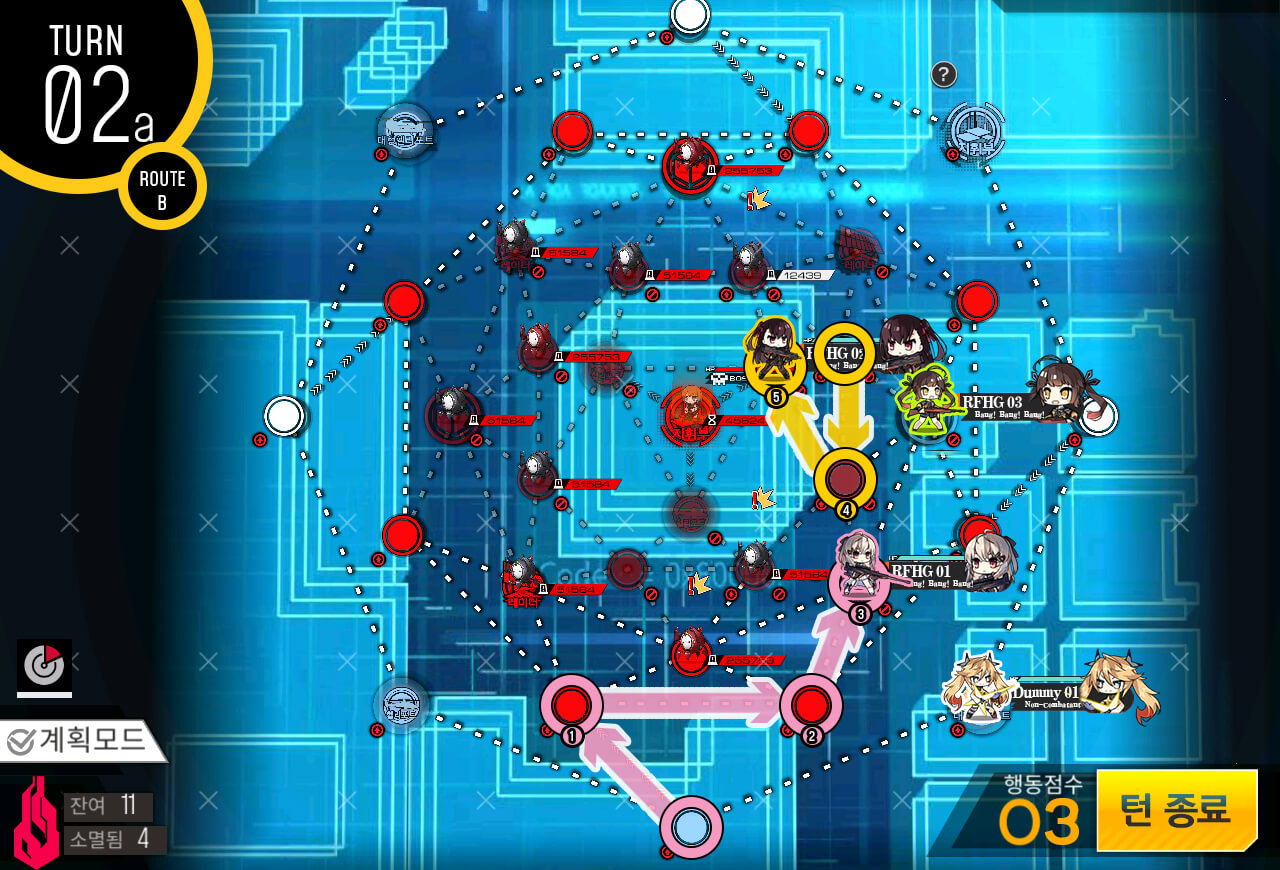
We are moving to capture the first of the three nodes surrounding the enemy HQ. Move 1st combat echelon at the bottom to the node below the 3rd, then 2nd combat echelon moves adjacent to the enemy HQ.
3rd combat echelon moves down one node adjacent to 2nd combat echelon.

Then move 1st combat echelon one node to the right then back to original spot to lock out path for Goliath plus unit.

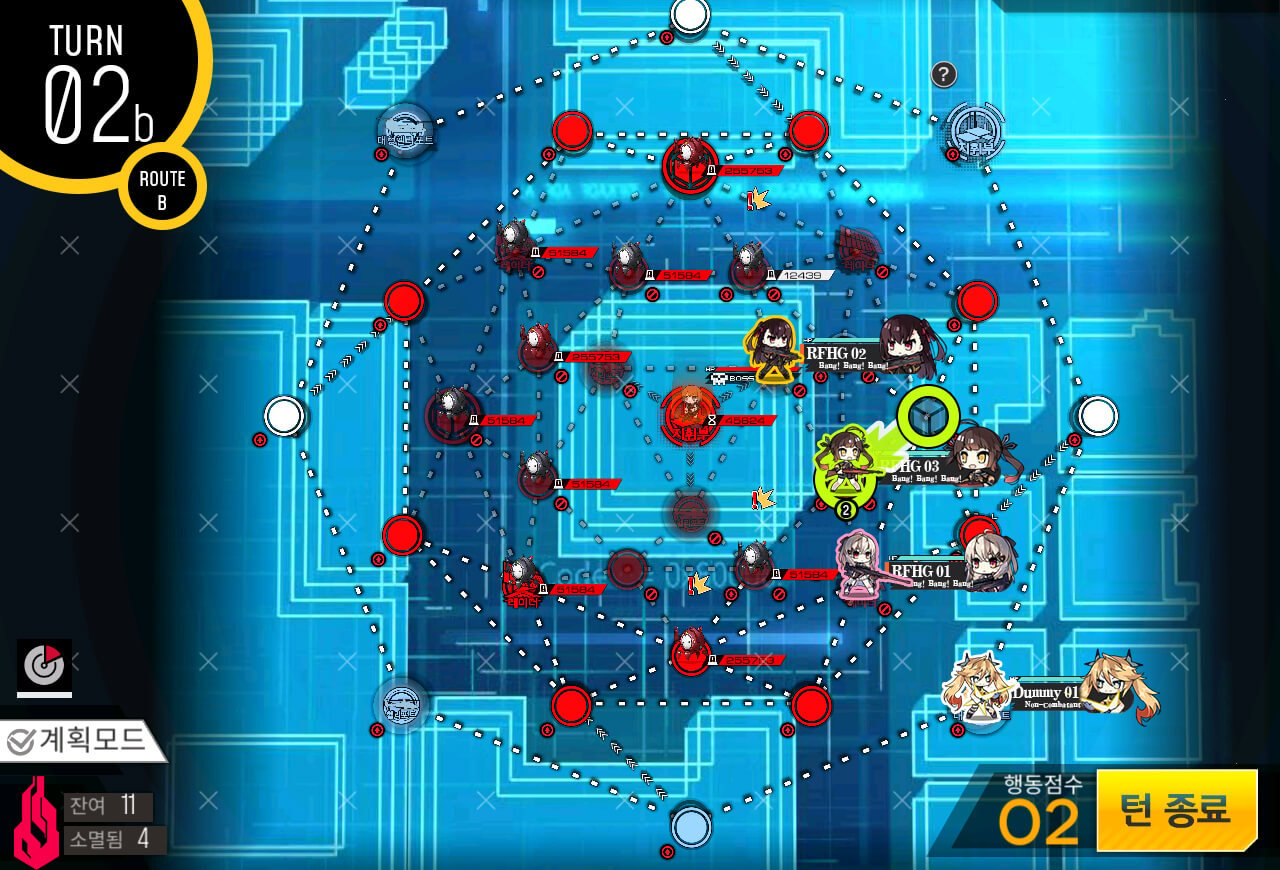
Dummy echelon moves to the right then swaps with 1st combat echelon.
3rd combat echelon moves to the next adjacent node to enemy HQ at the bottom side.
2nd combat echelon moves down one to where 2nd echelon was, then 1st combat echelon moves to the left side of the map around the Goliath plus.
Dummy echelon moves around the Goliath Plus.

1st echelon move in clockwise direction and resupplies at the node in the middle.
Dummy echelon moves behind the 1st combat echelon.
1st combat echelon then moves back to keep the Goliath plus on the left side locked in while dummy echelon moves back to the right side to lock the bottom side.
Dummy echelon move back towards the 1st combat echelon. Then 1st echelon moves to the right. 3rd echelon then moves to the last node adjacent to the enemy HQ.
Finally swap 1st echelon with 3rd to lock out movements so that Goliath Plus cannot run into combat echelons.