


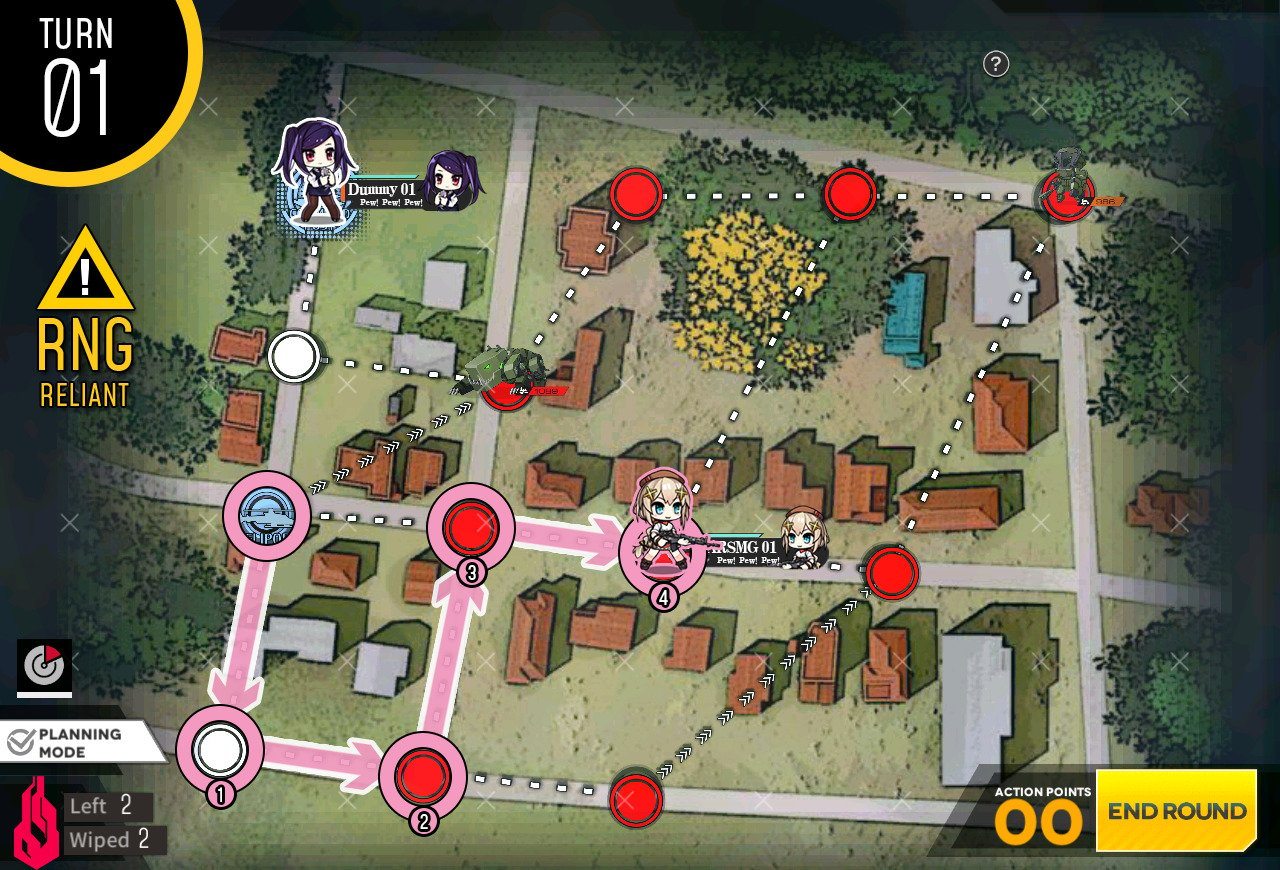
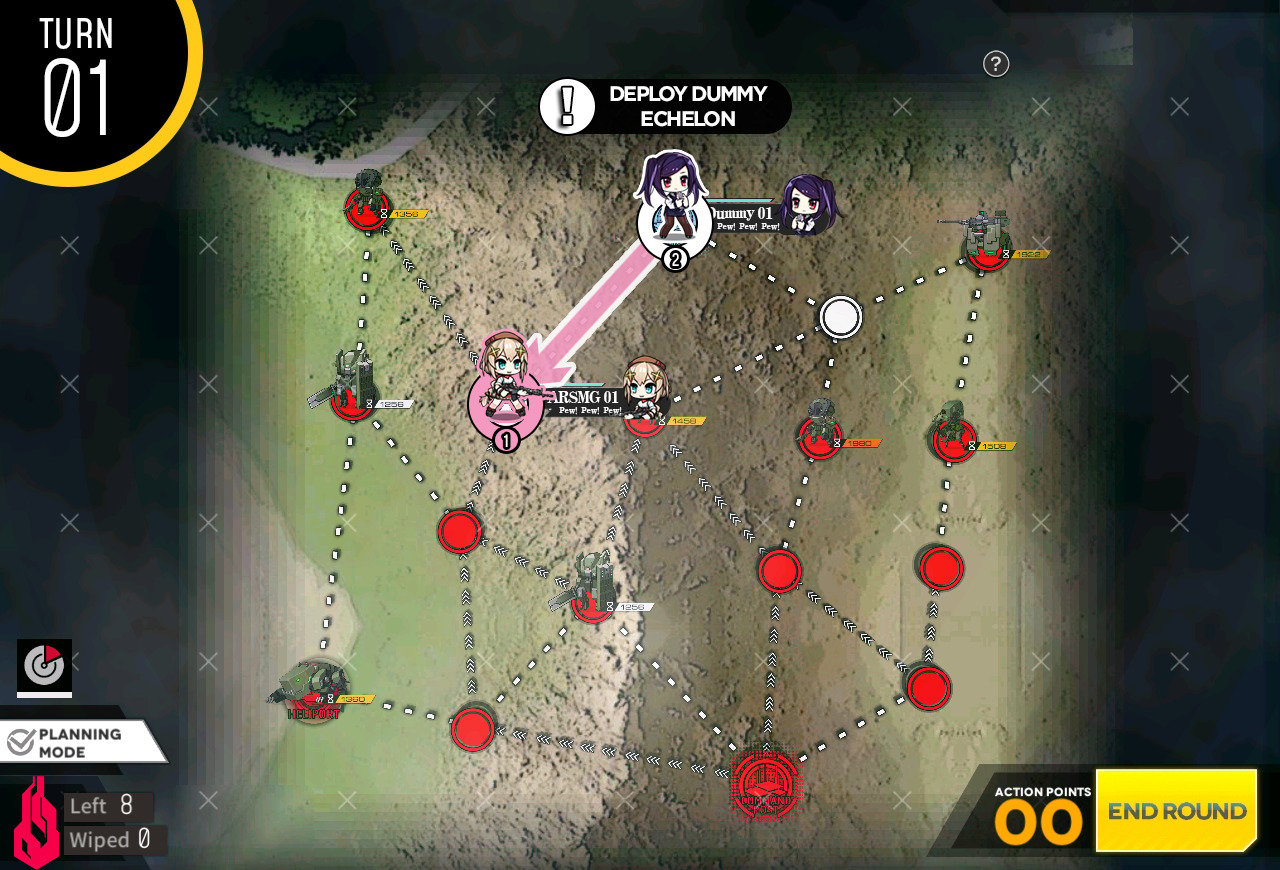
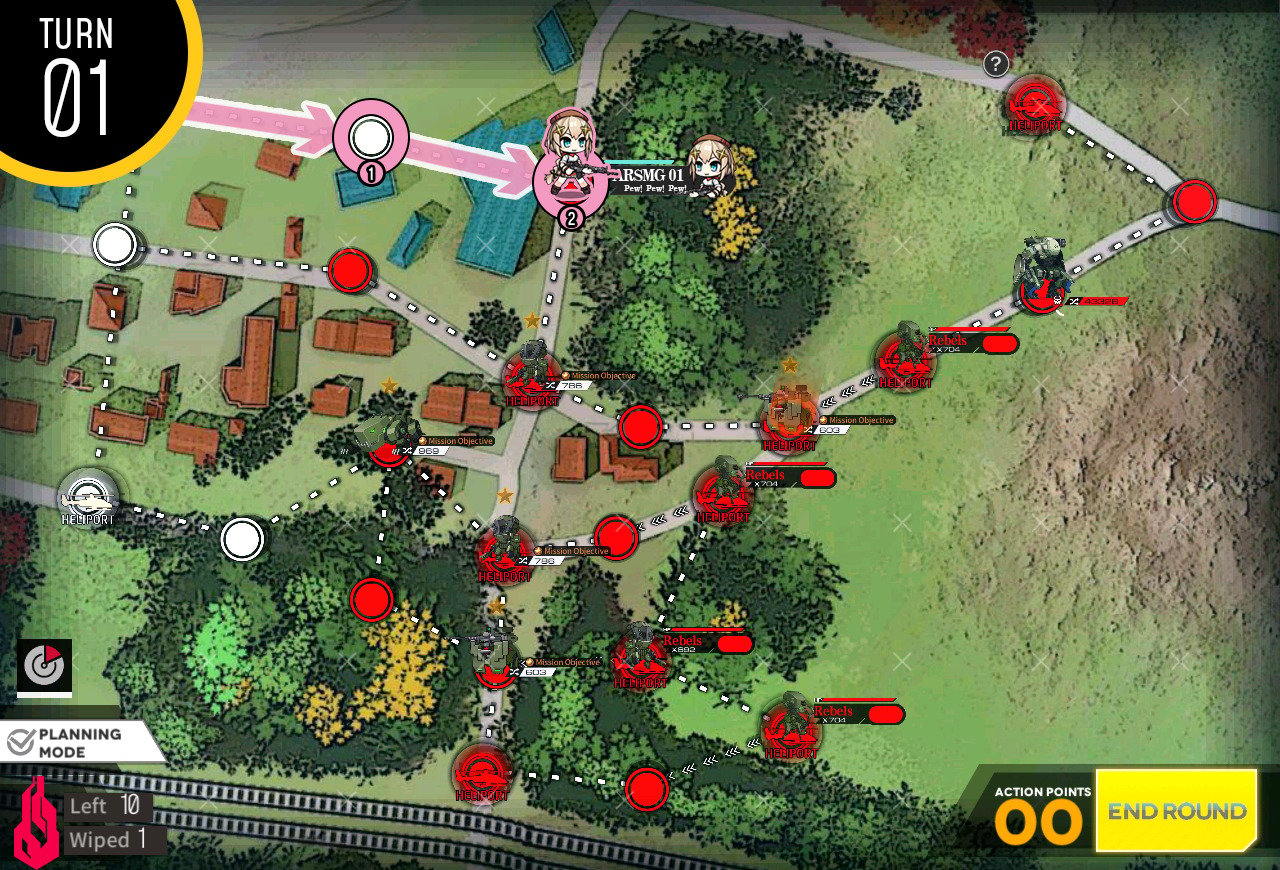
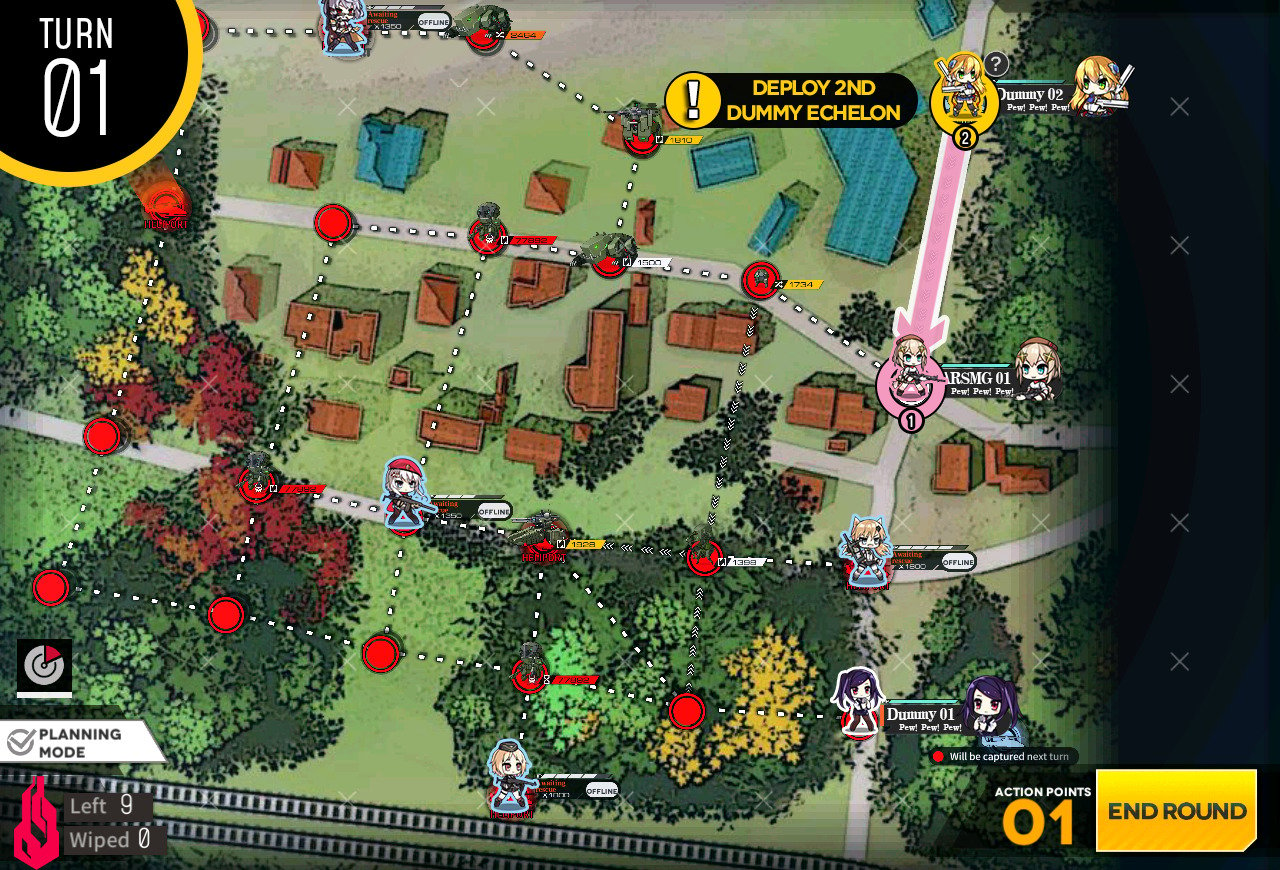
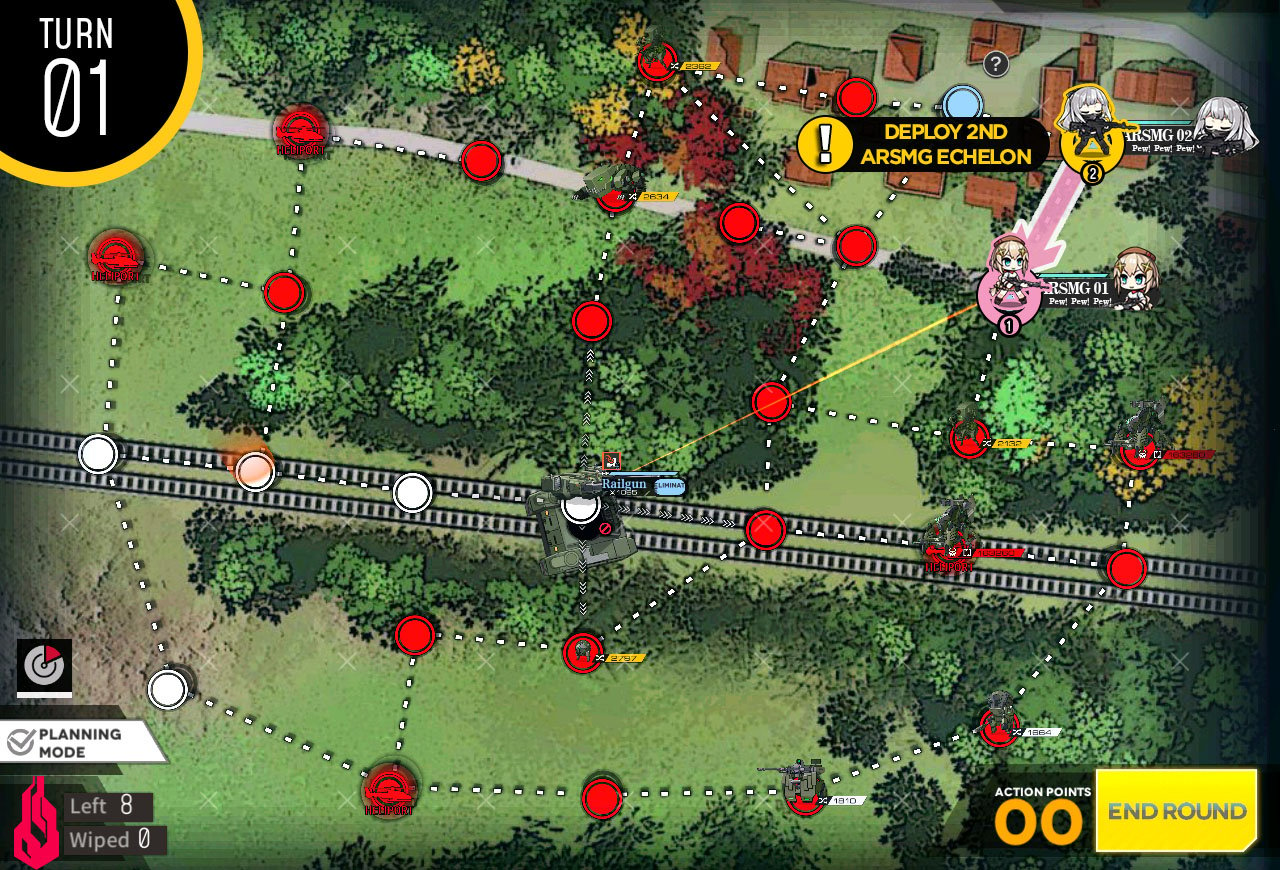
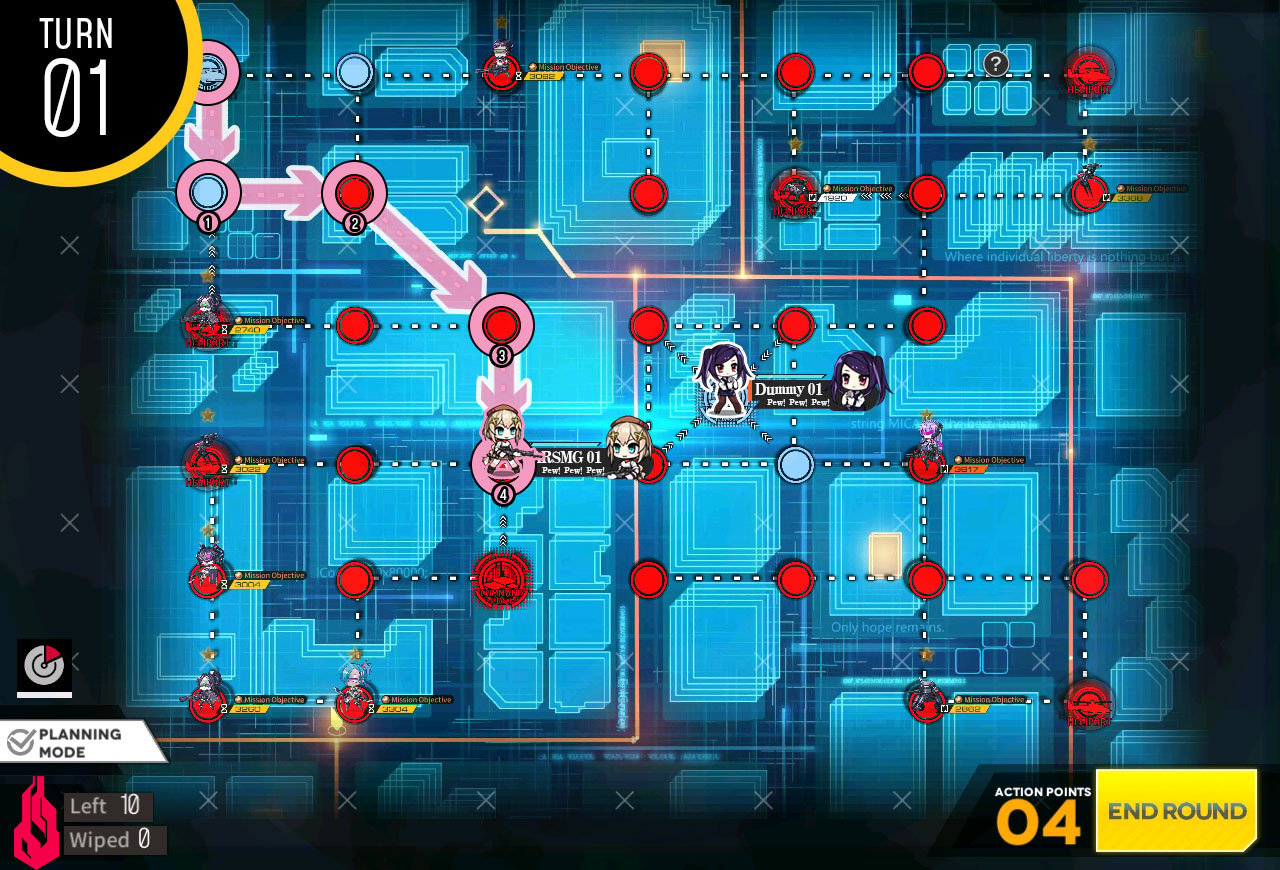
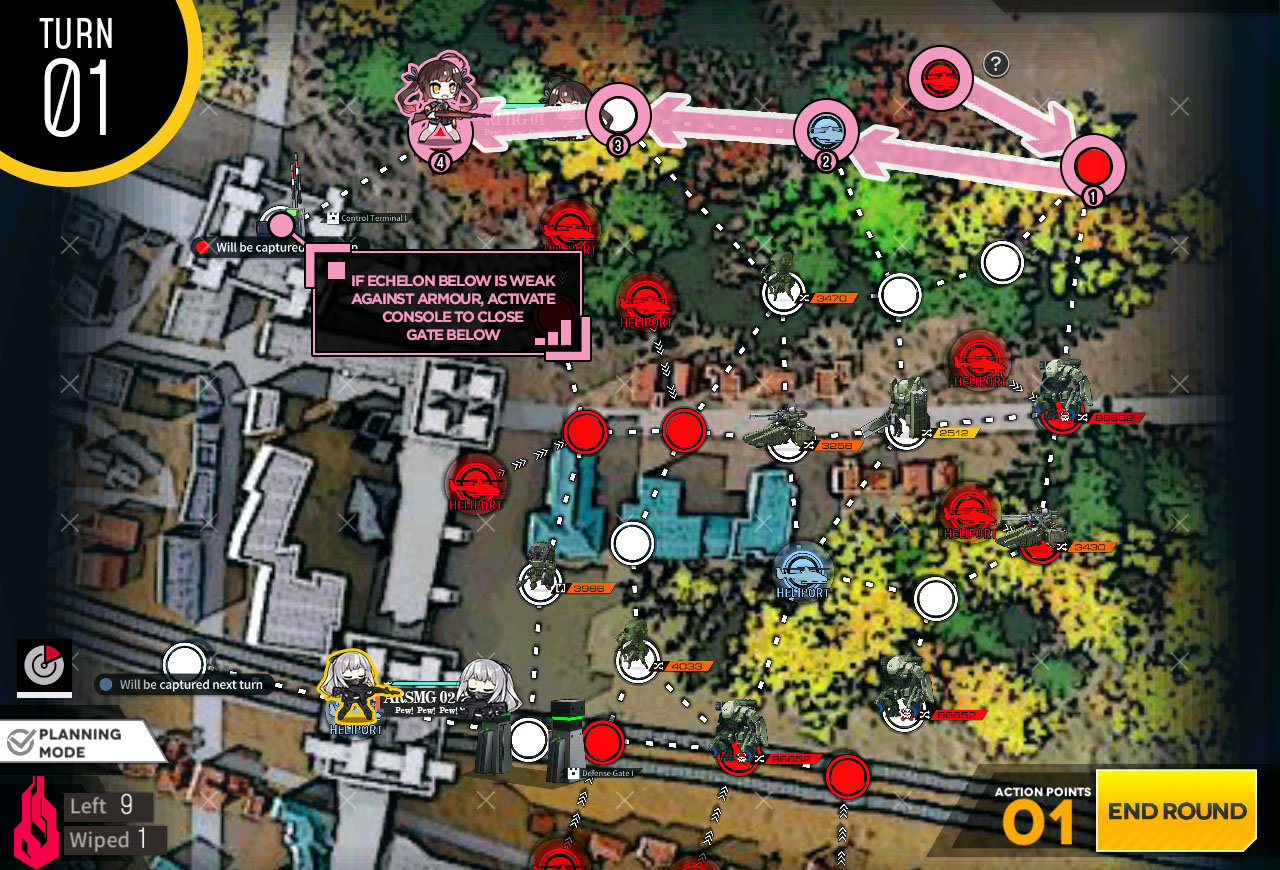
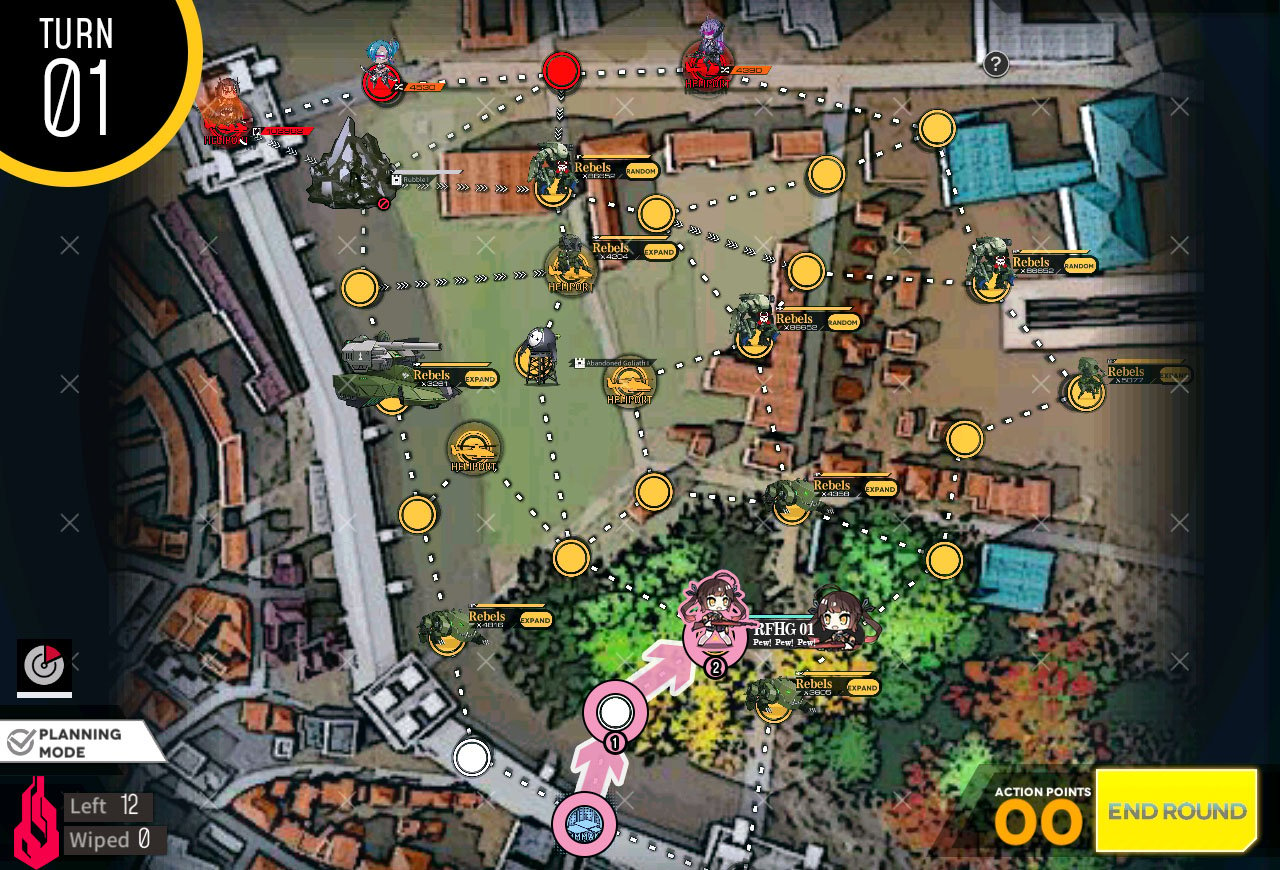
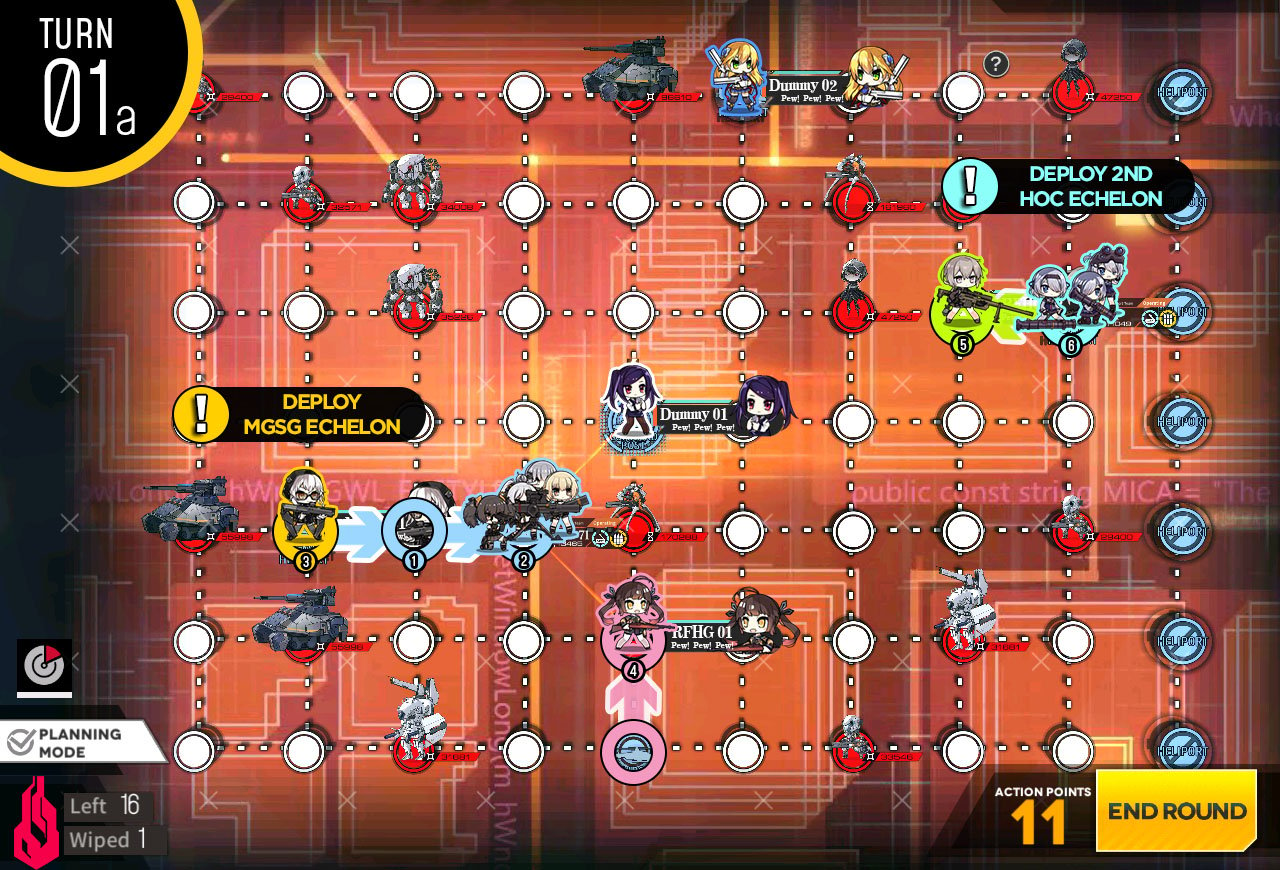
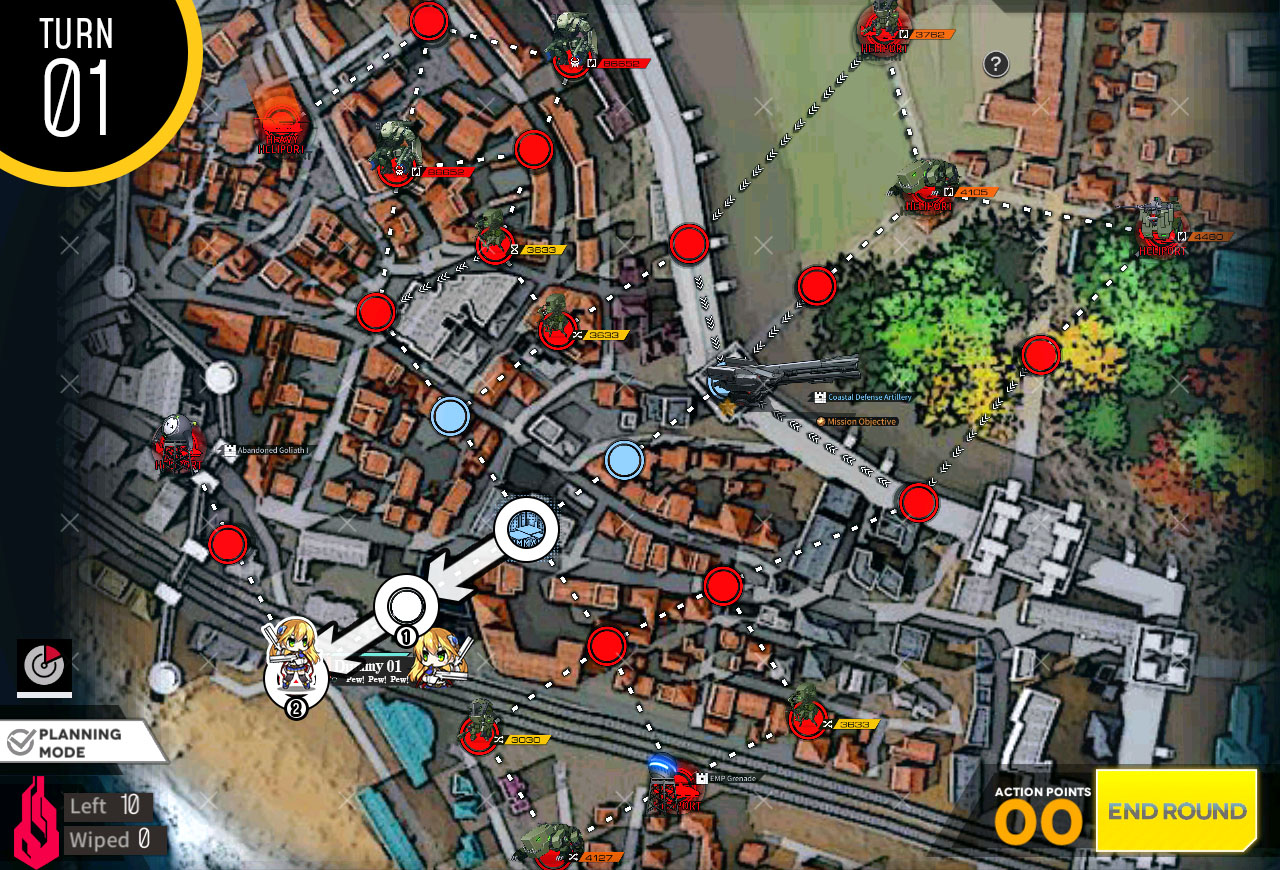
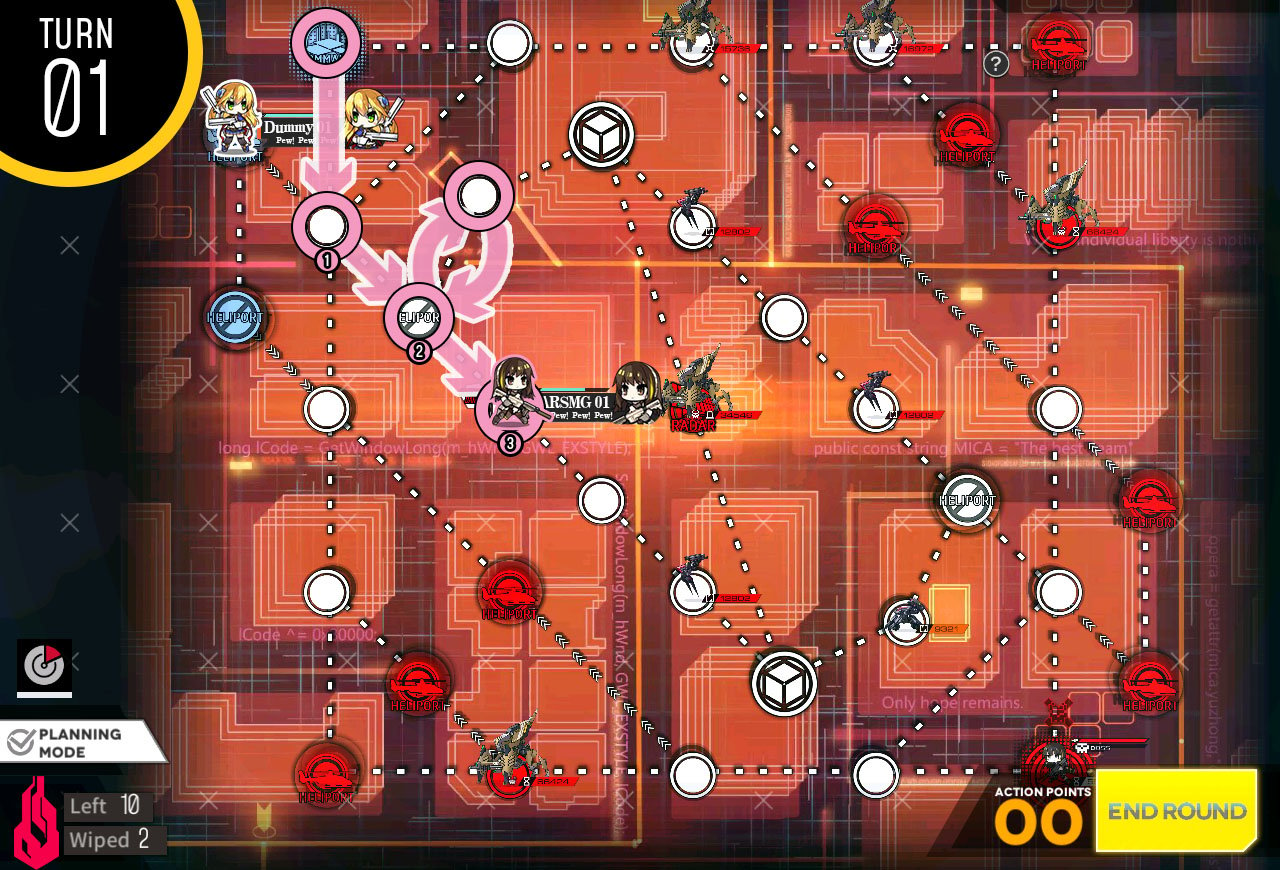
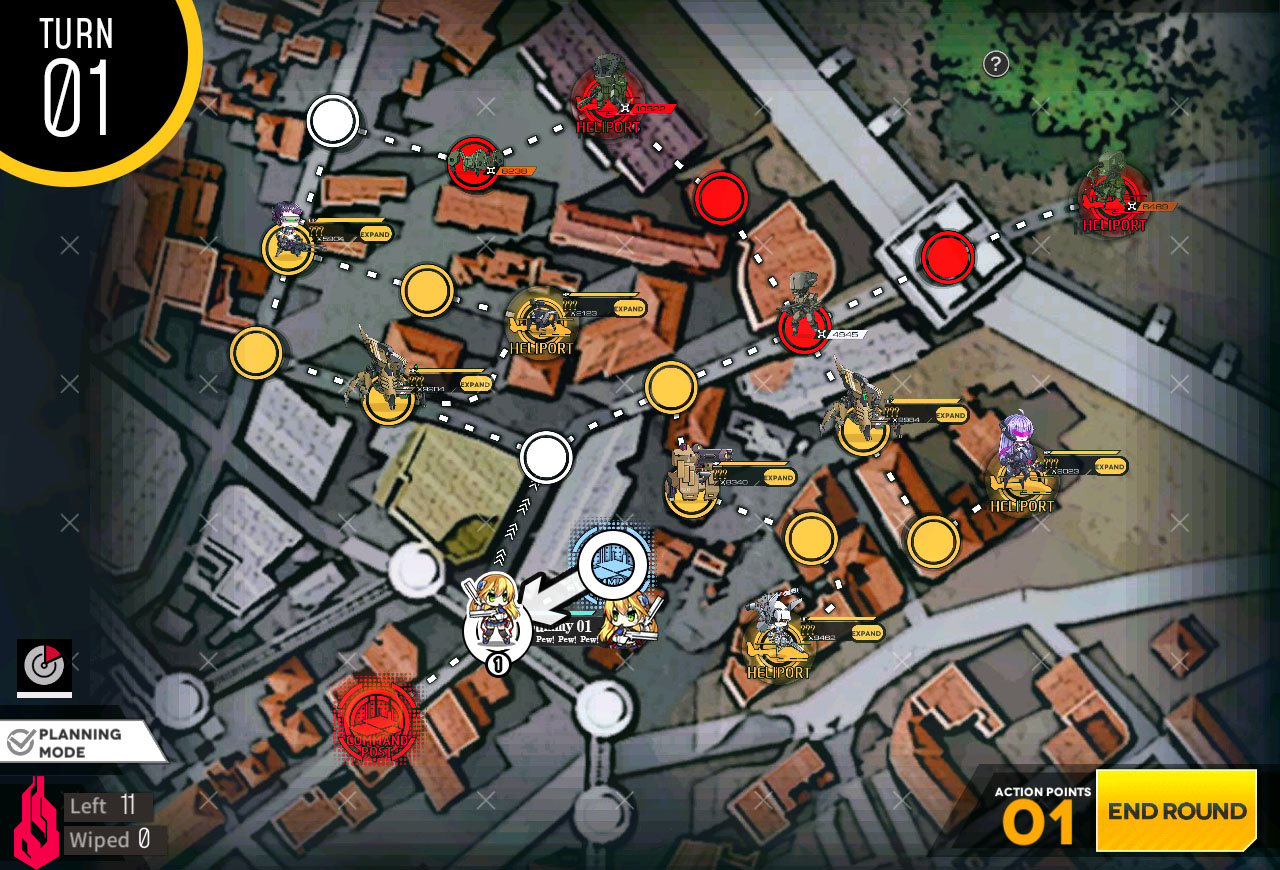
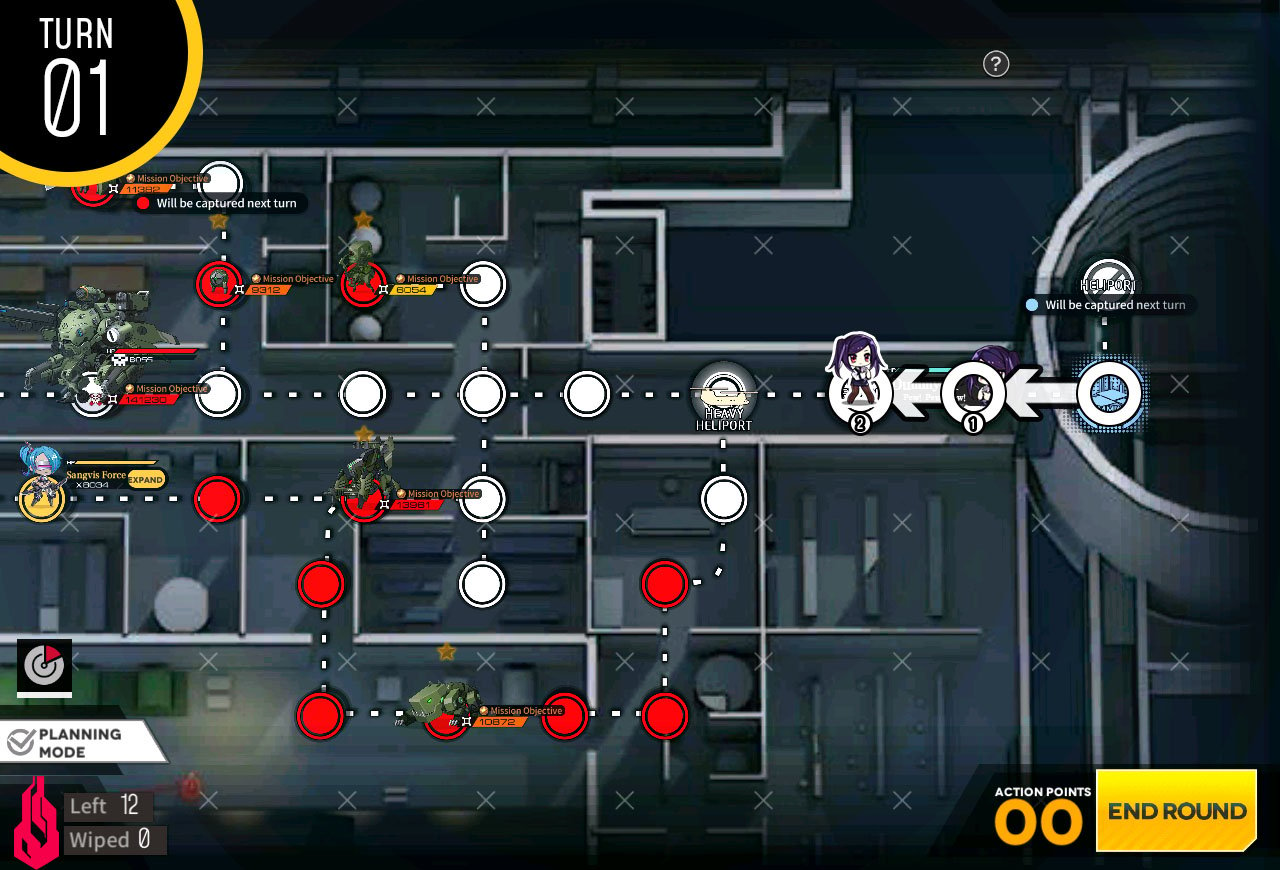
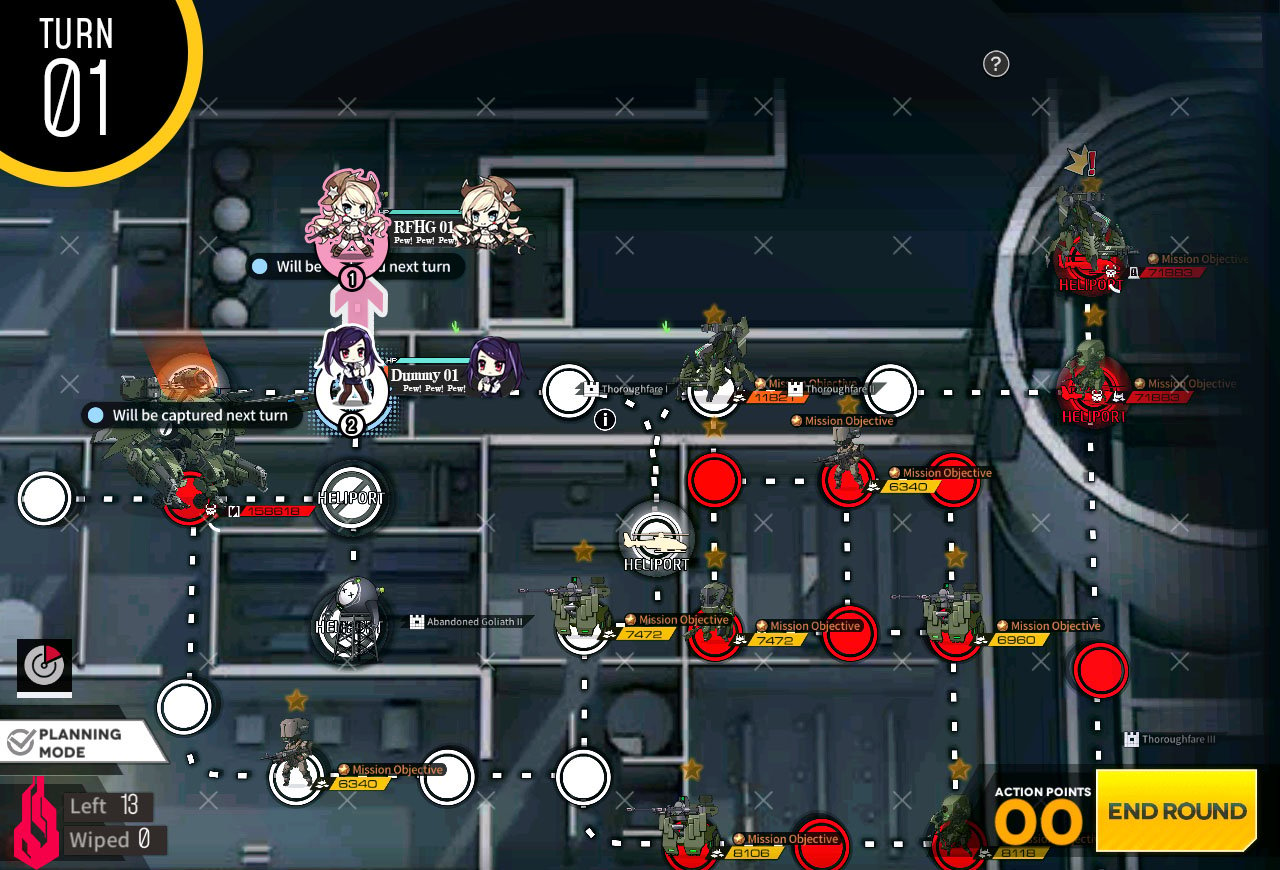
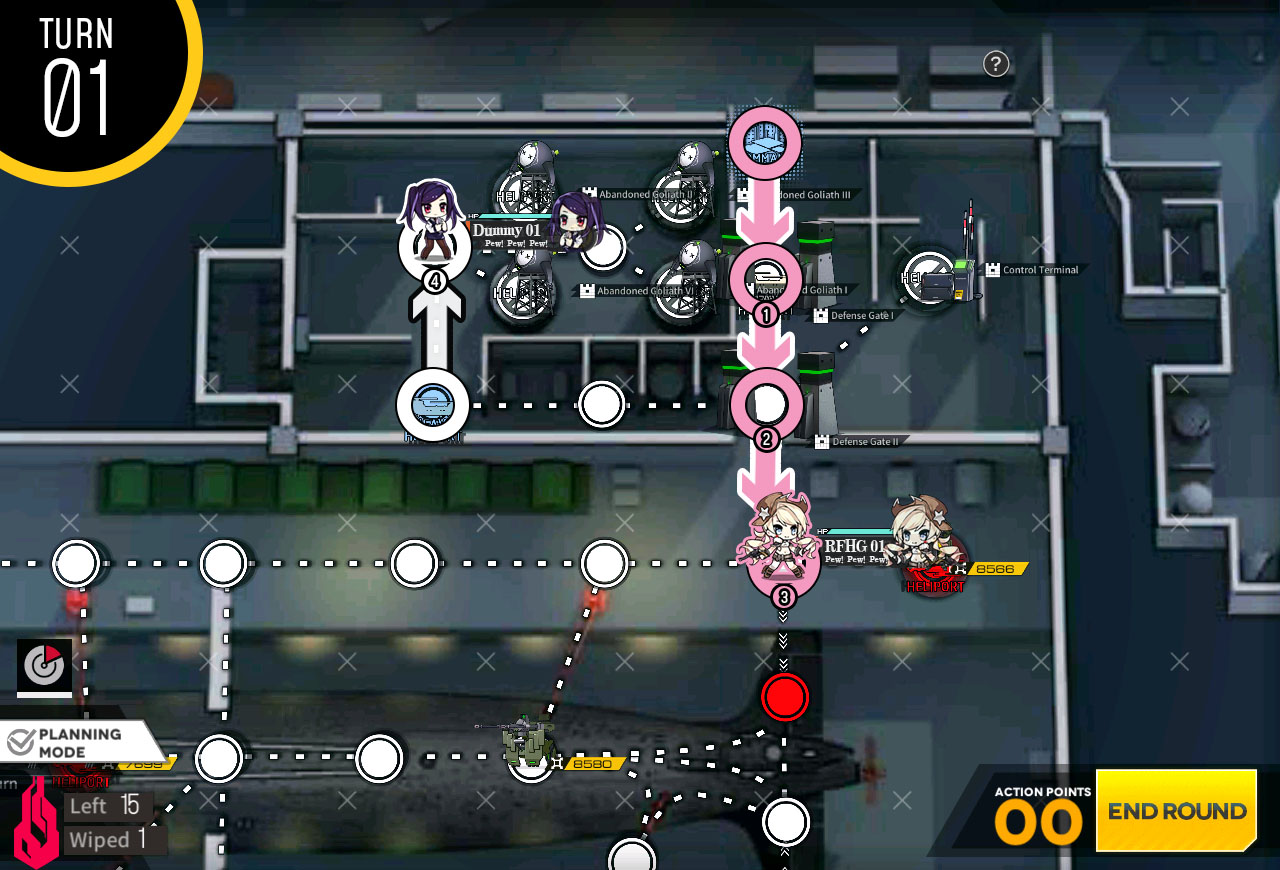
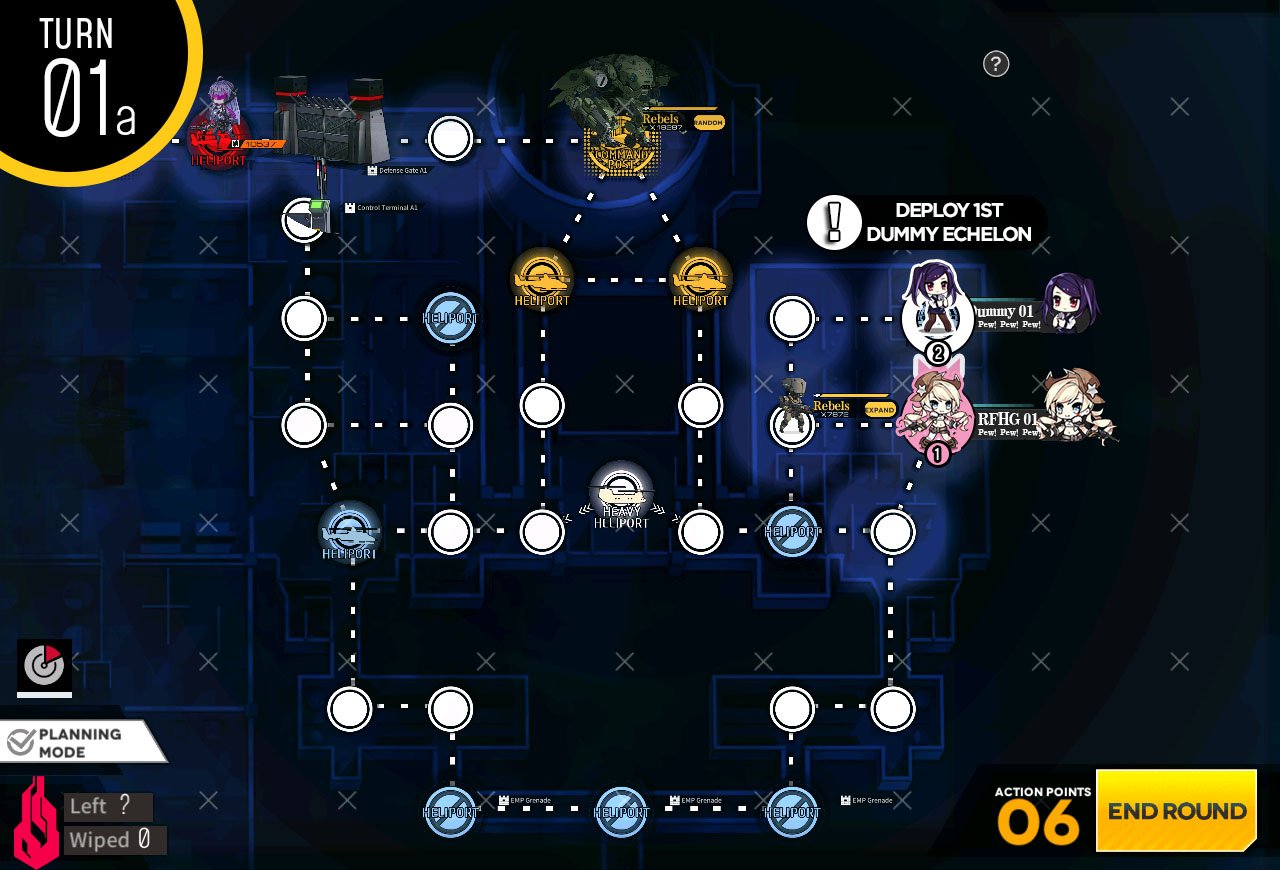
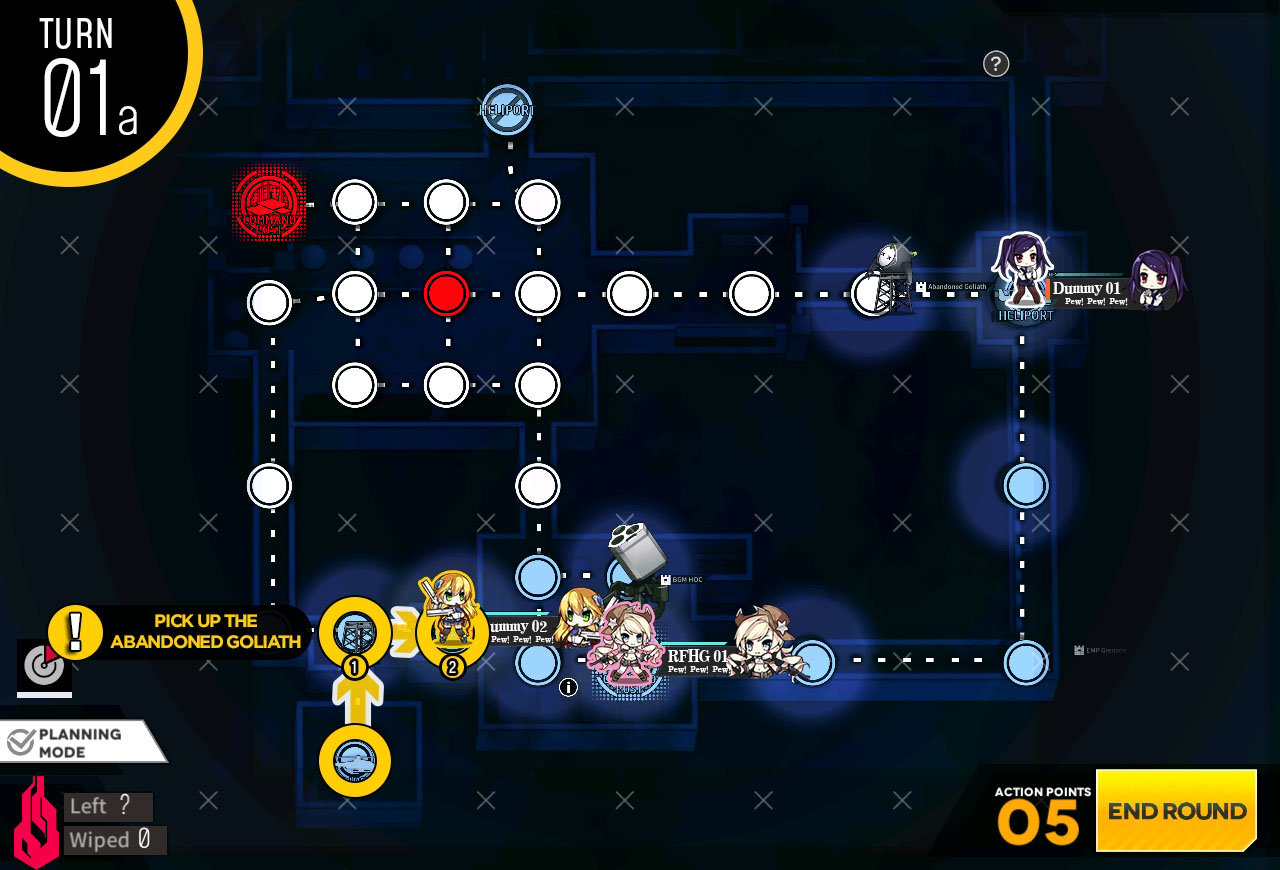
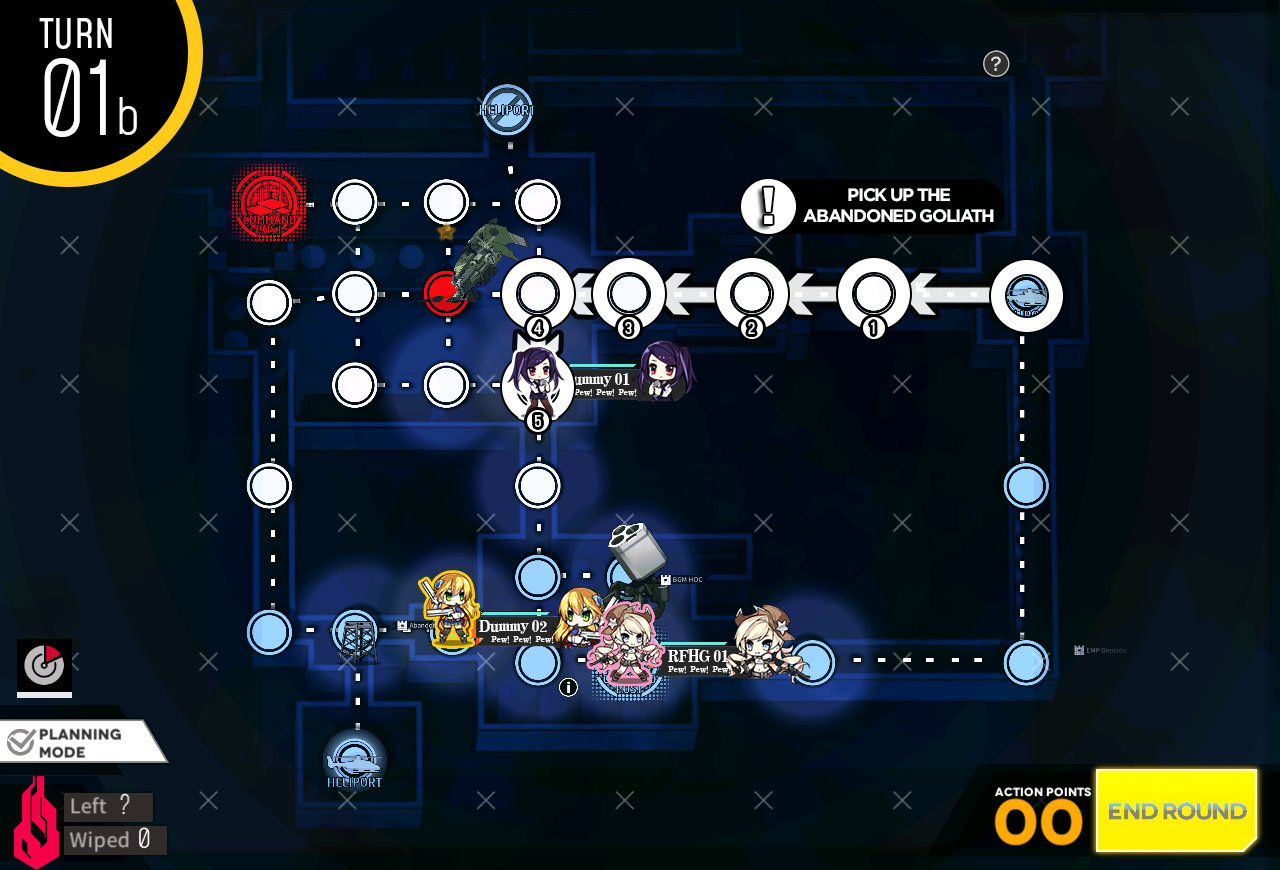
Start with dummy on HQ and combat echelon on the helipad below. Wipe out the enemy units at the bottom.
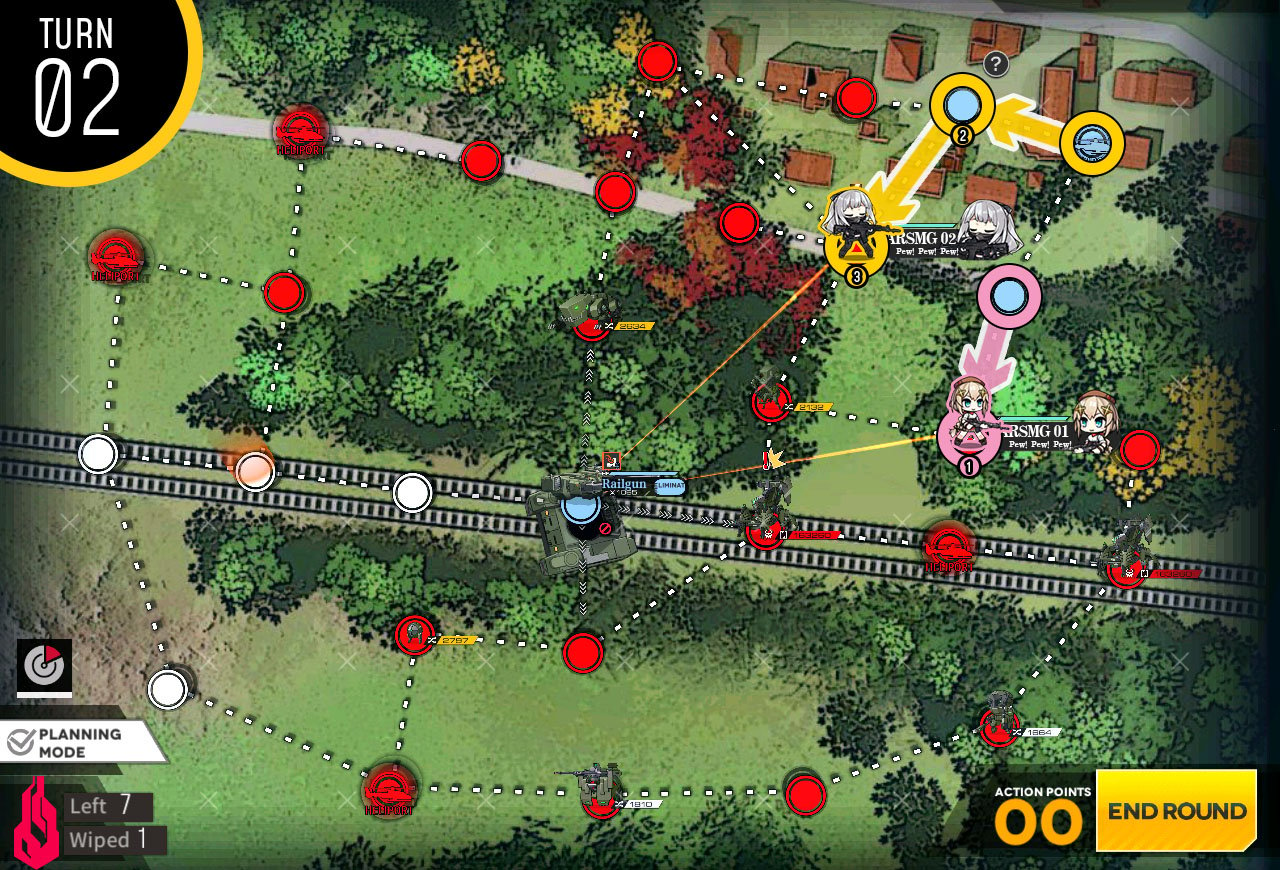
Move towards the HQ to kill all units and clear the mission.
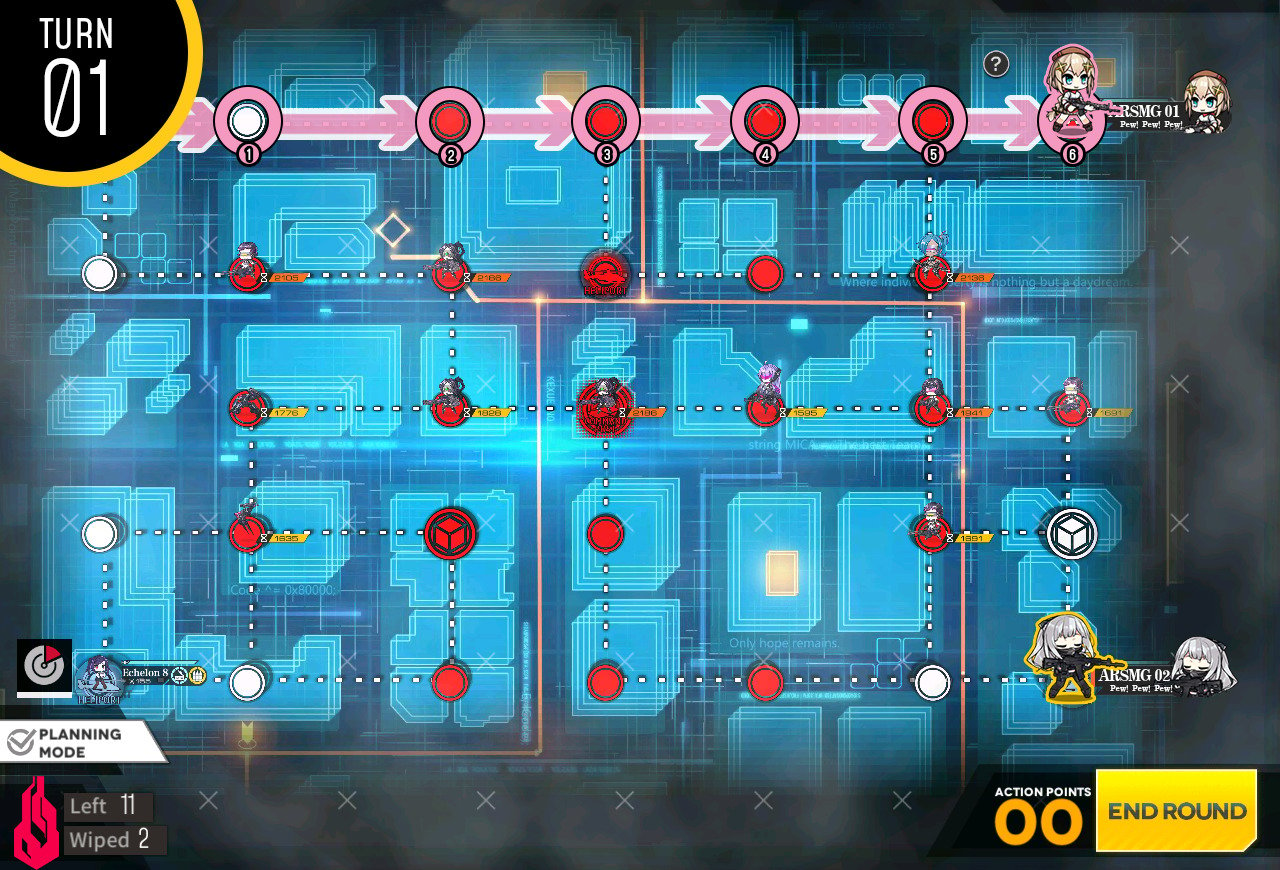
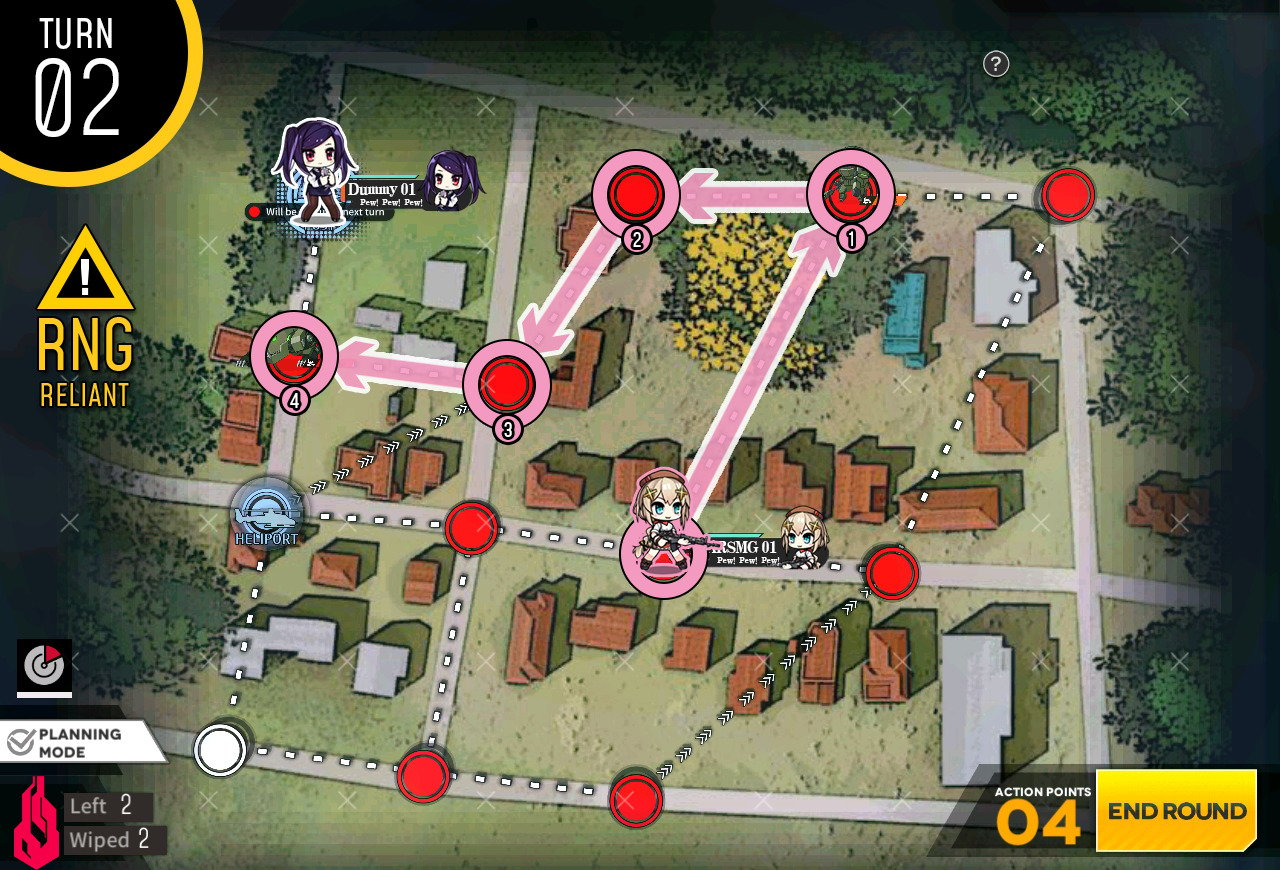
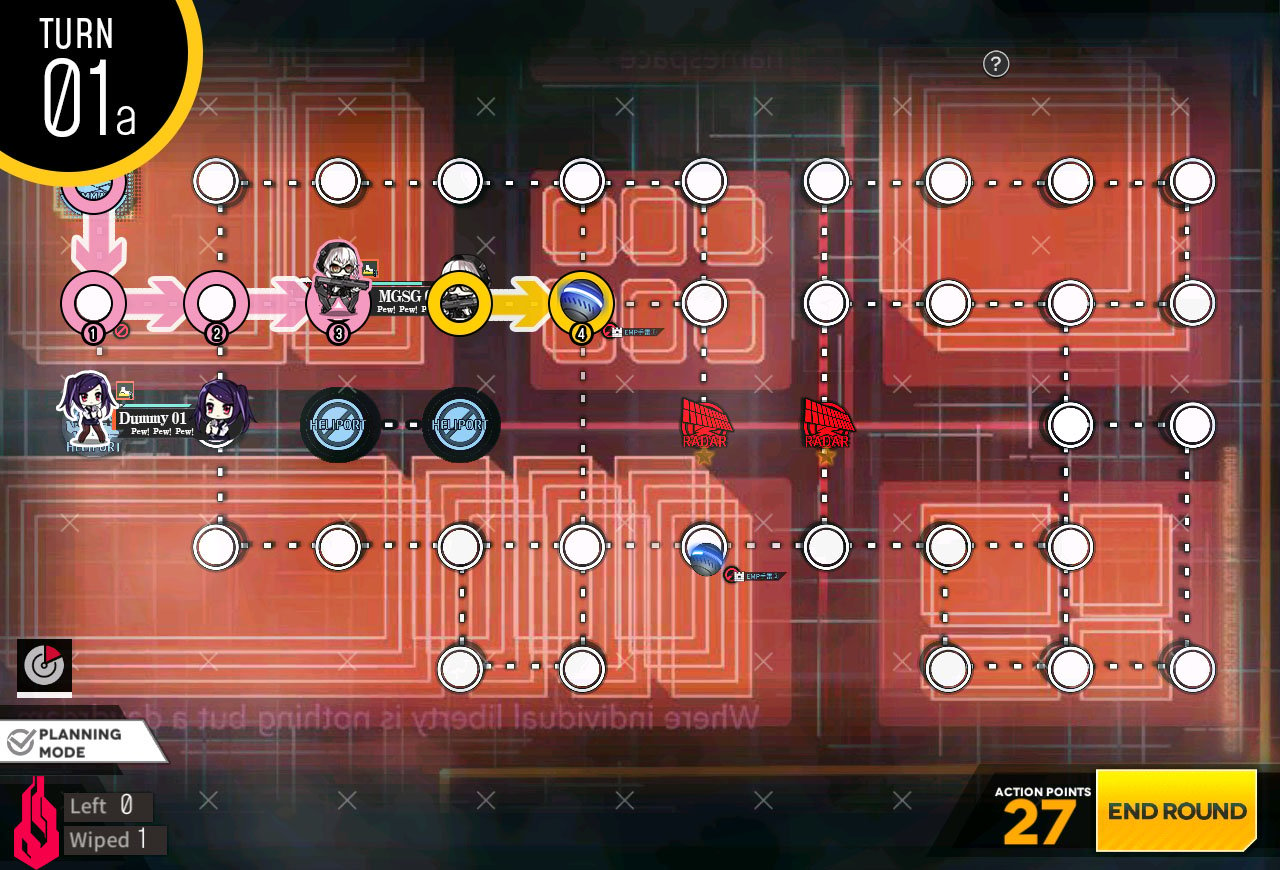
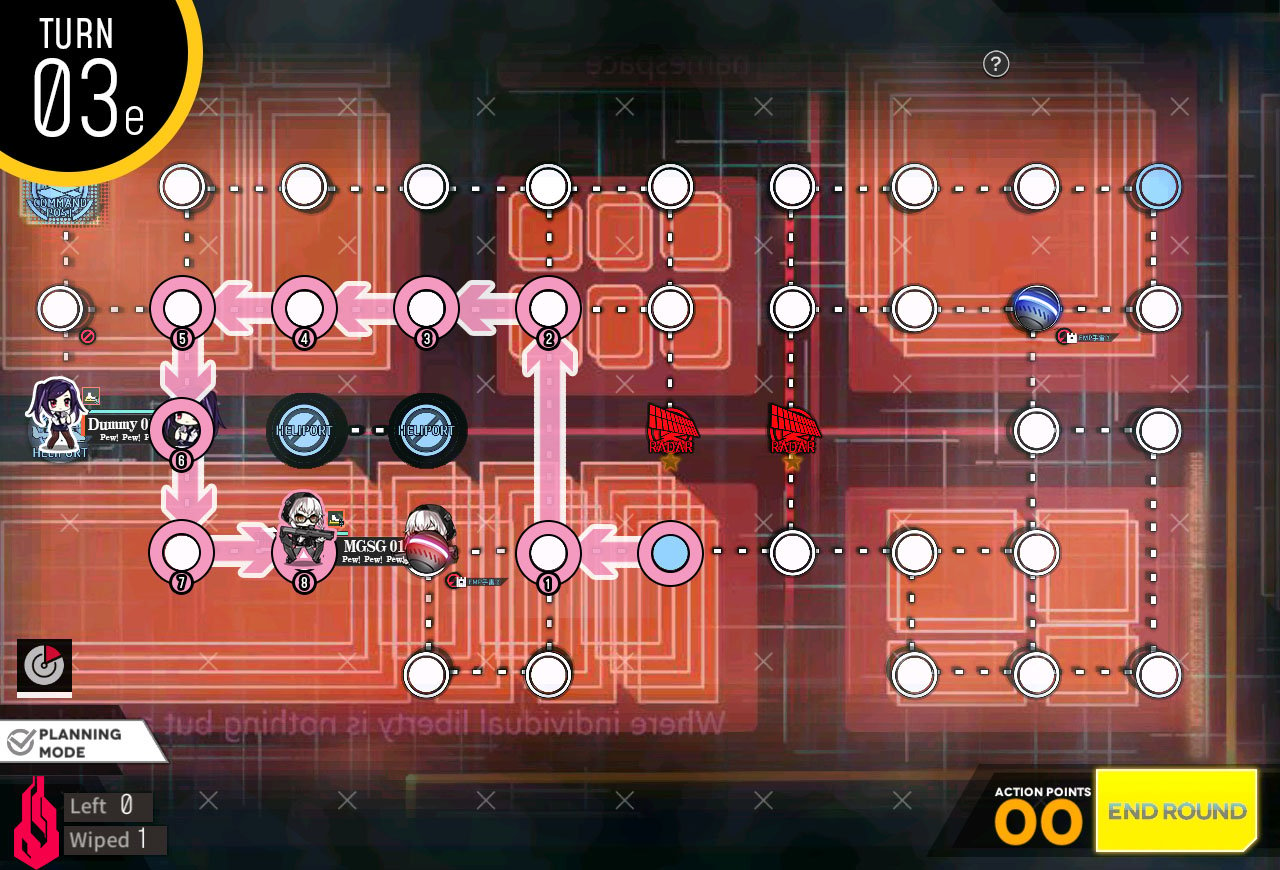
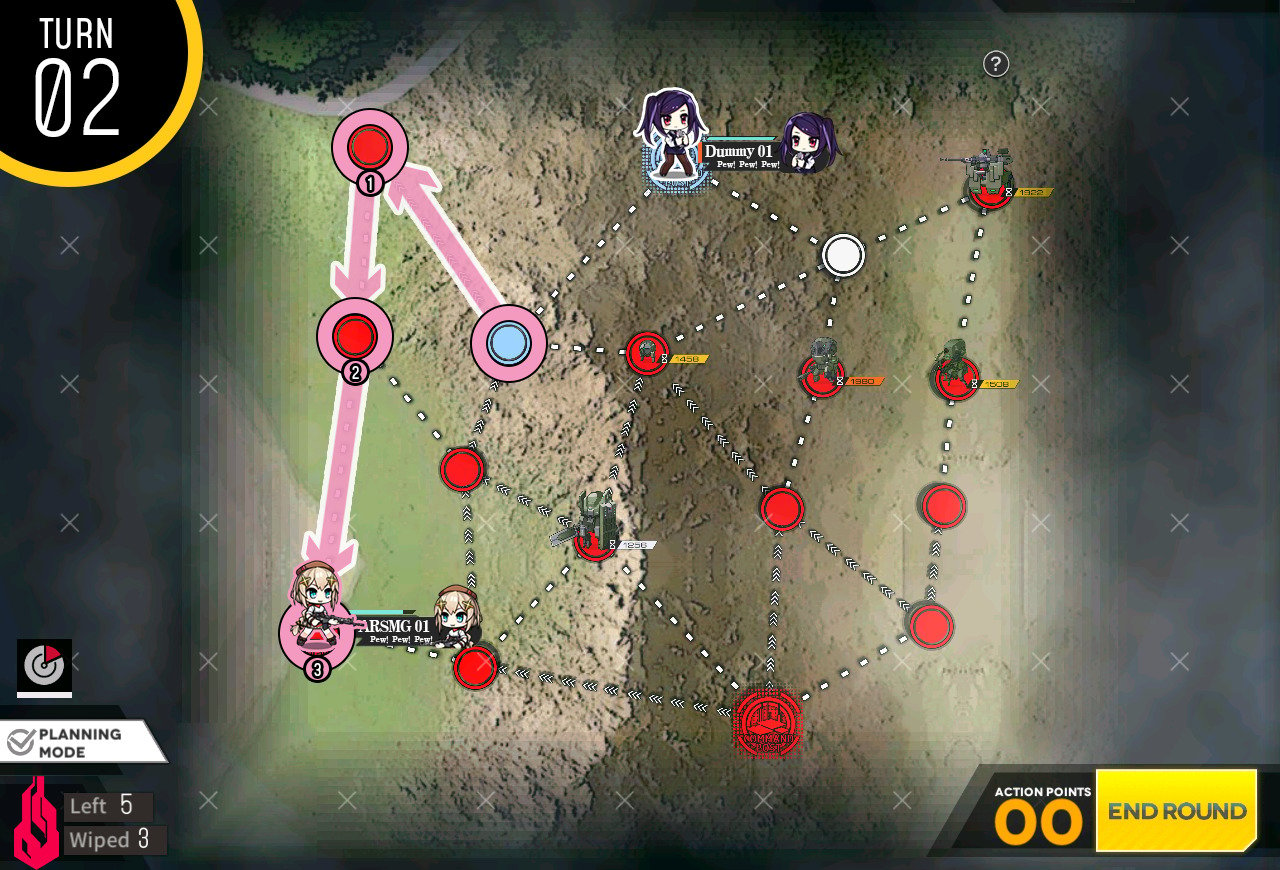
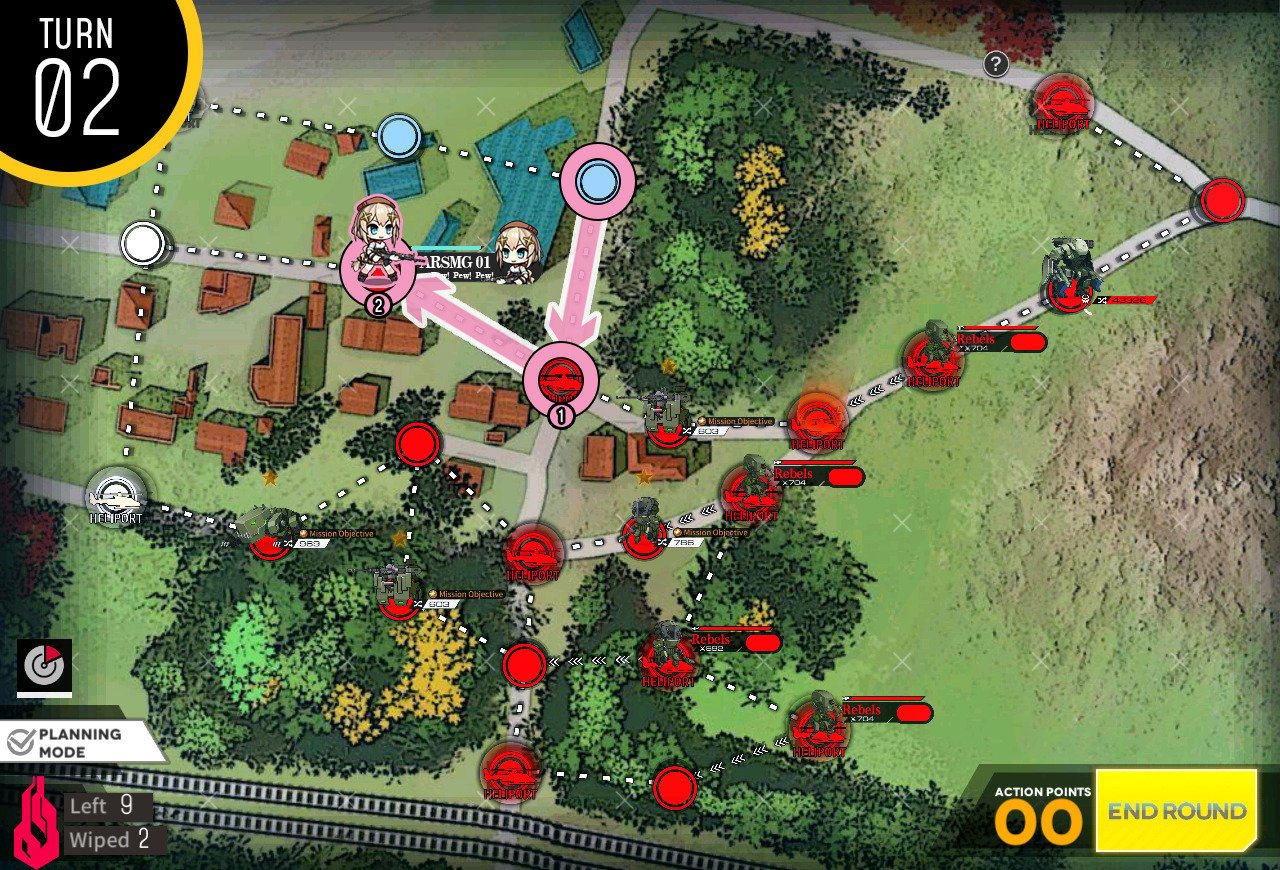
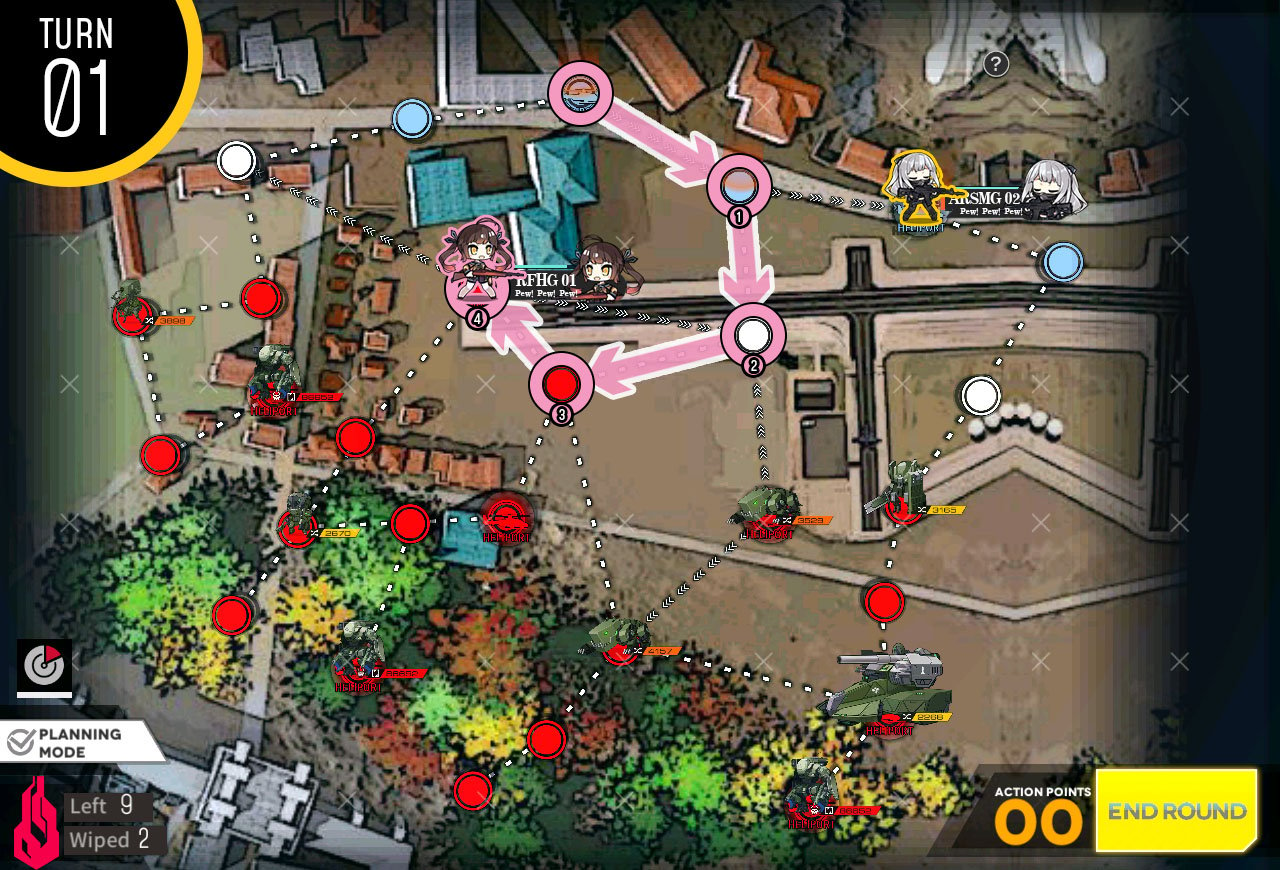
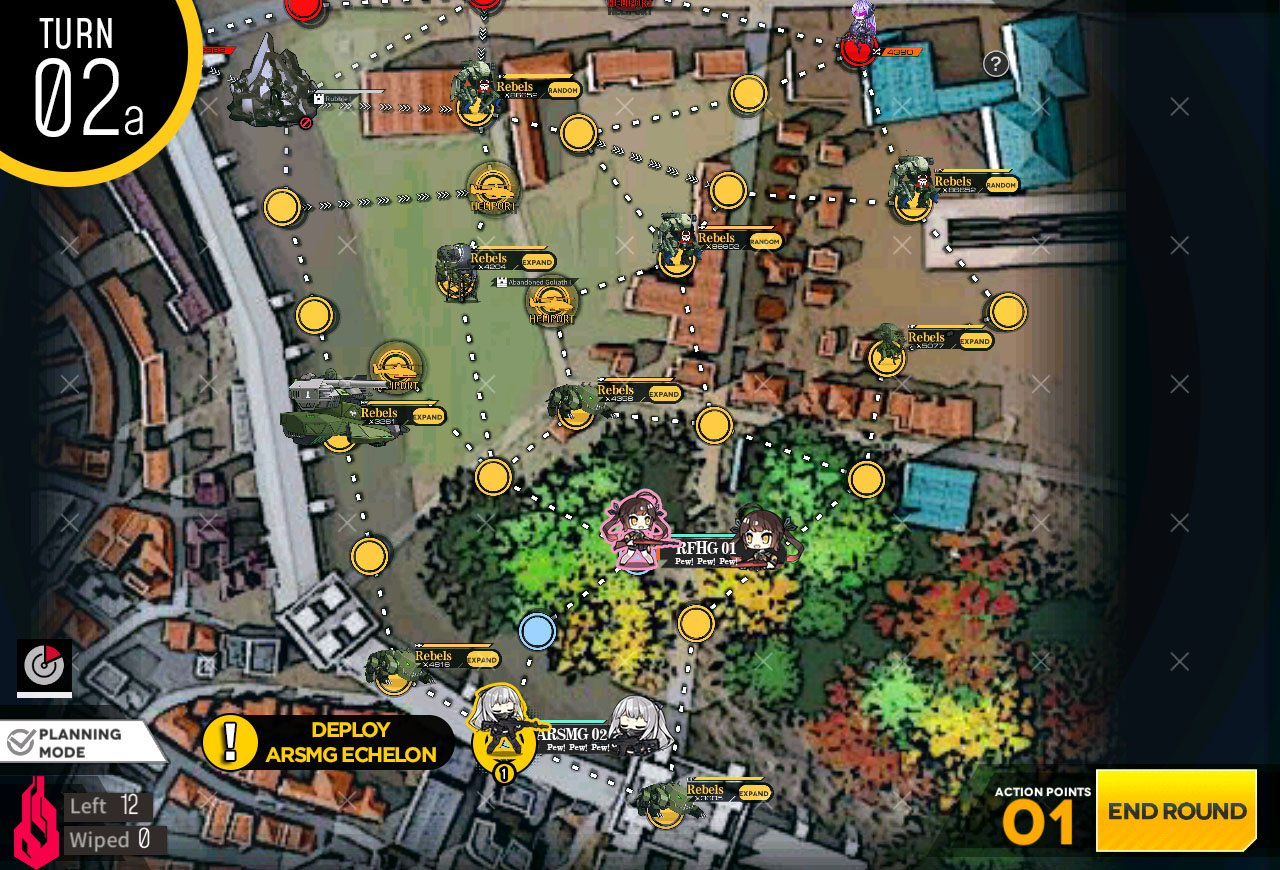
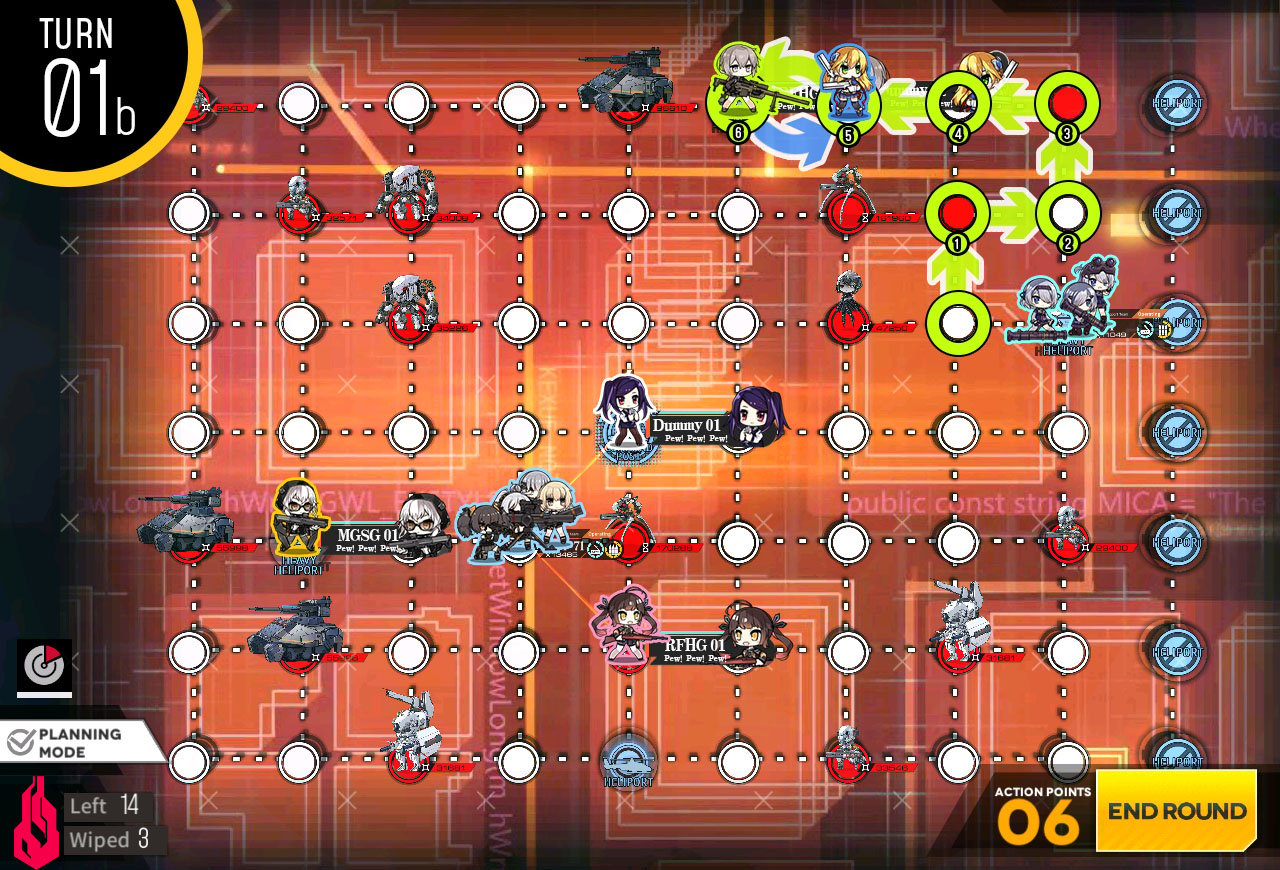
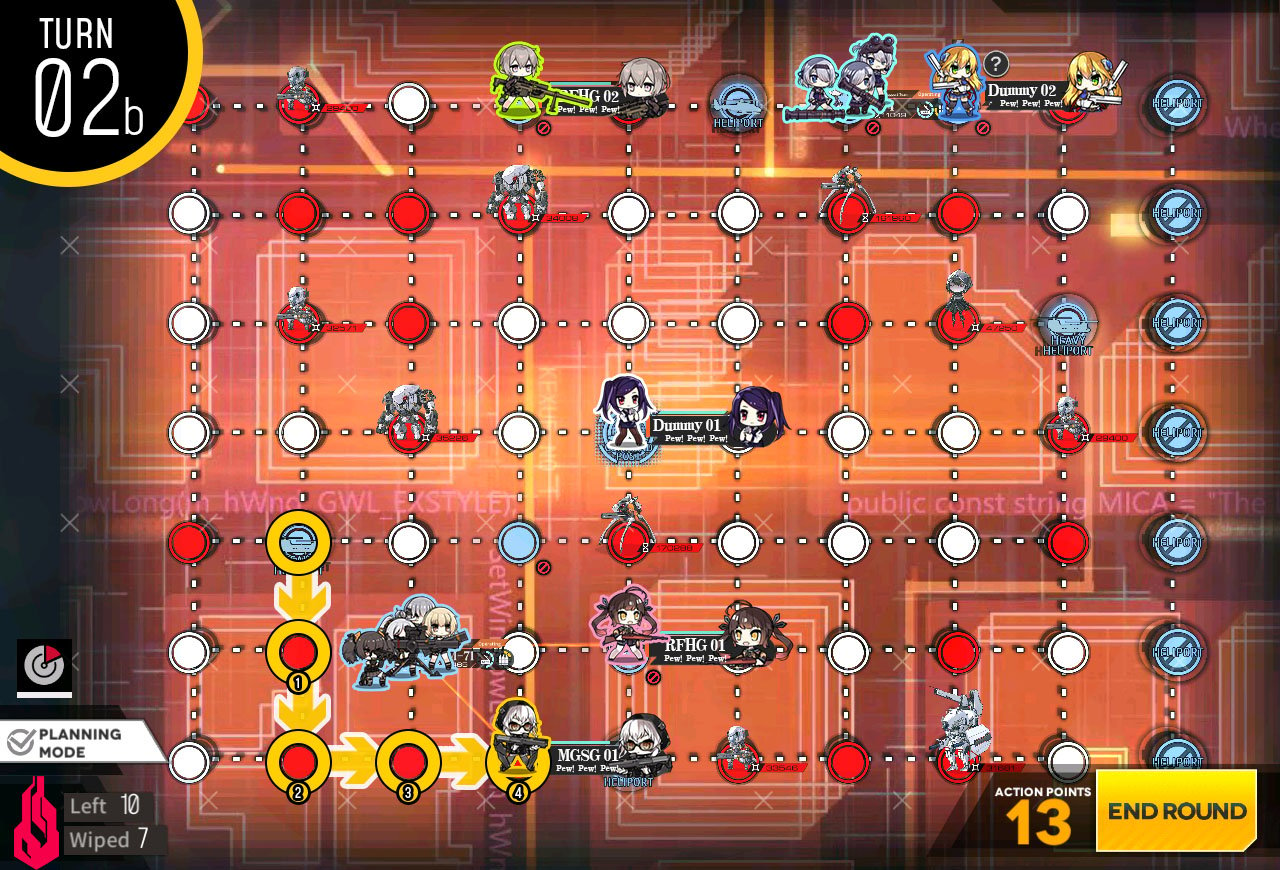
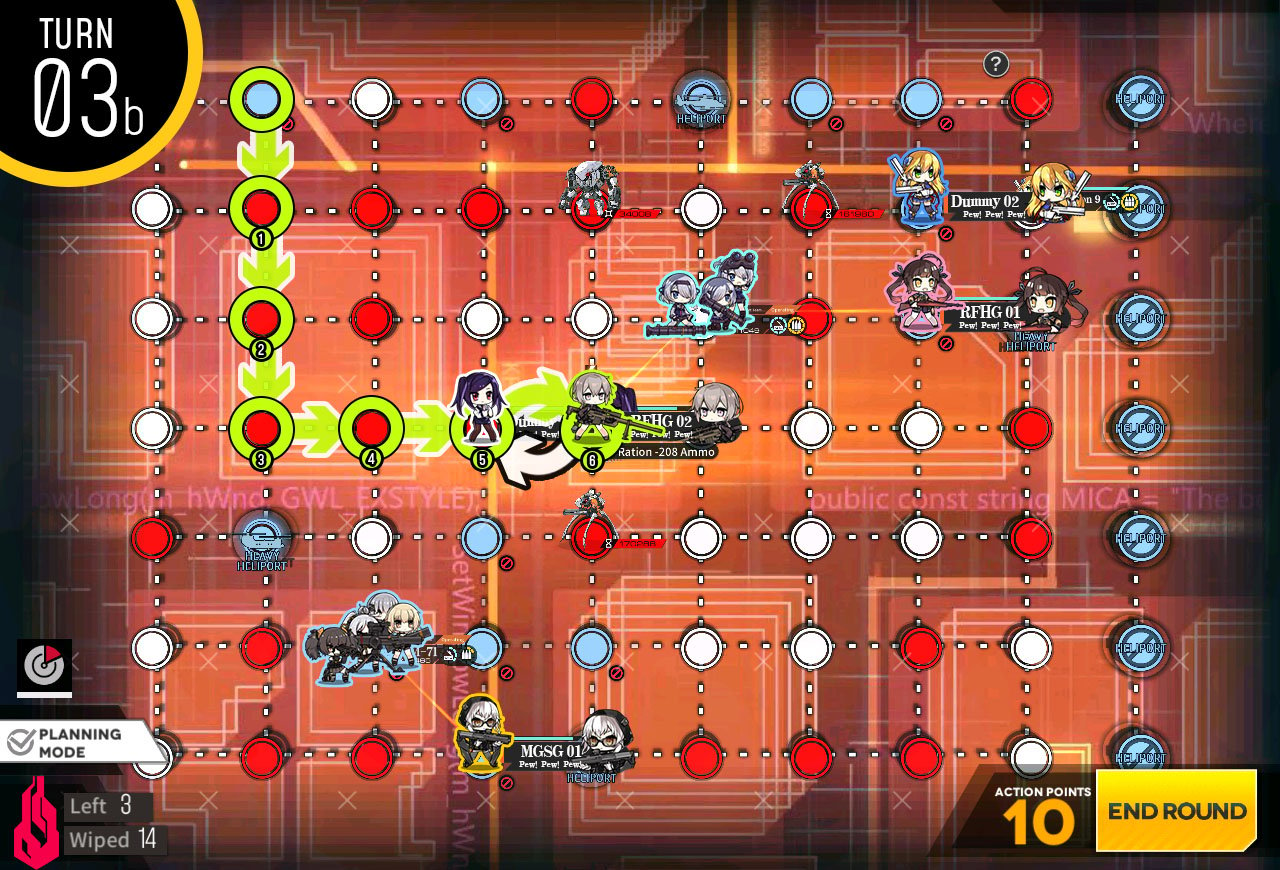
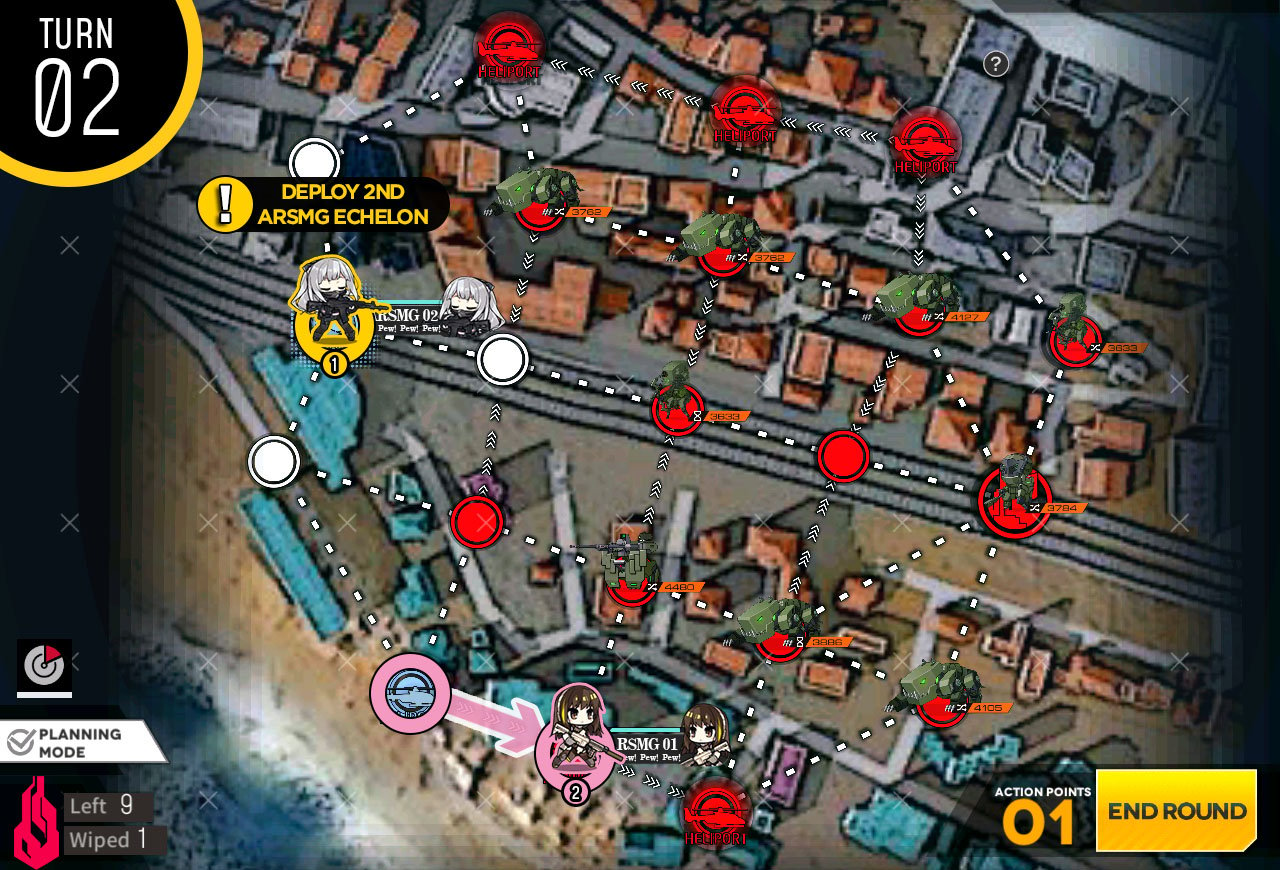
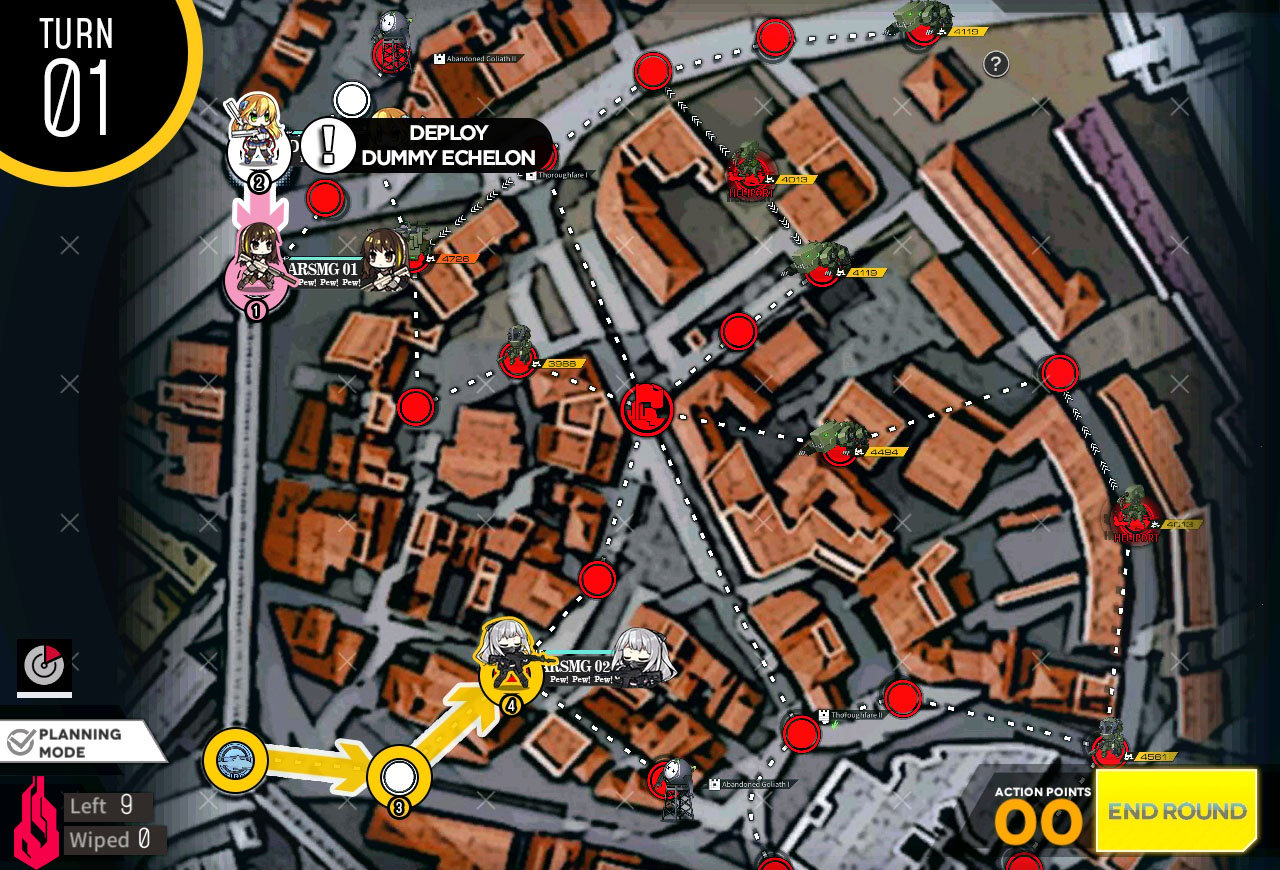
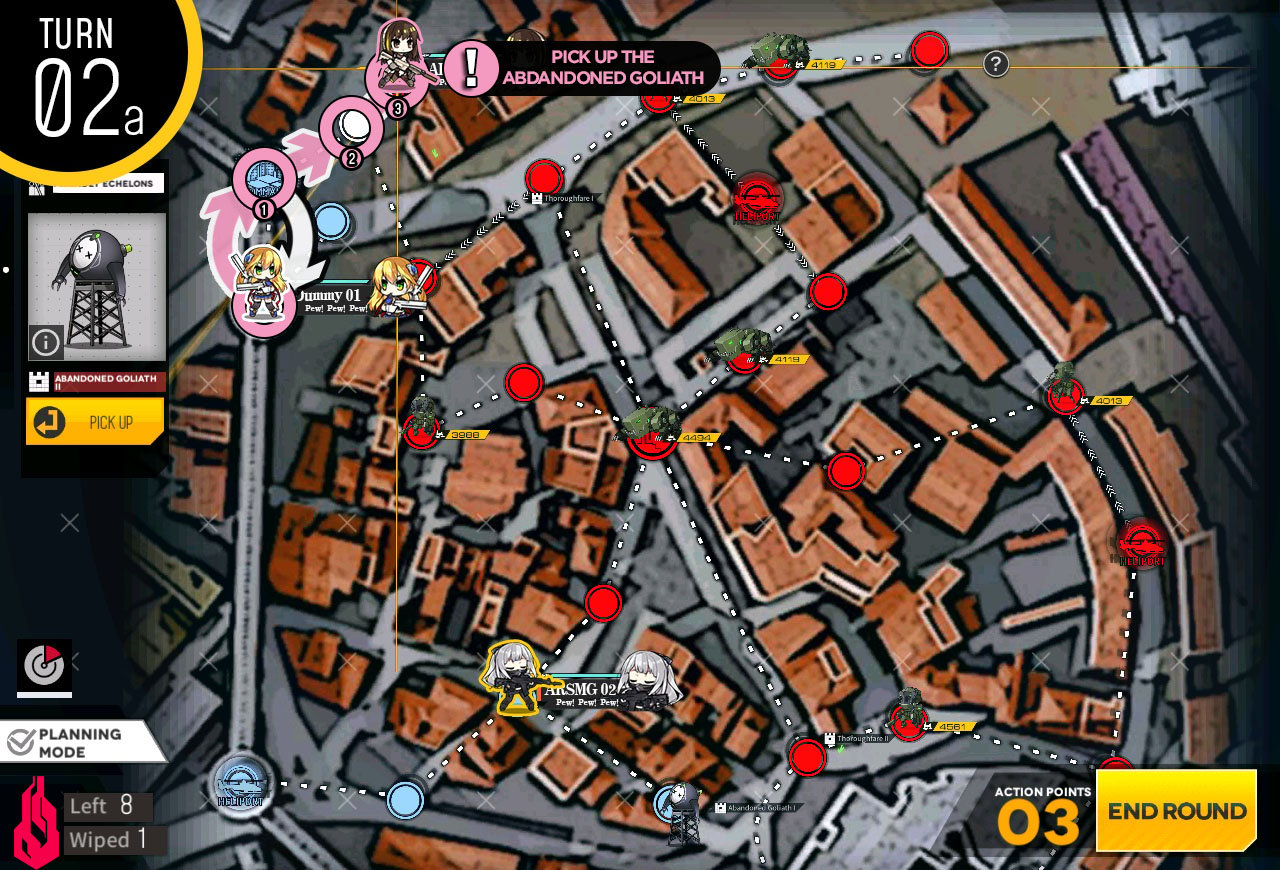
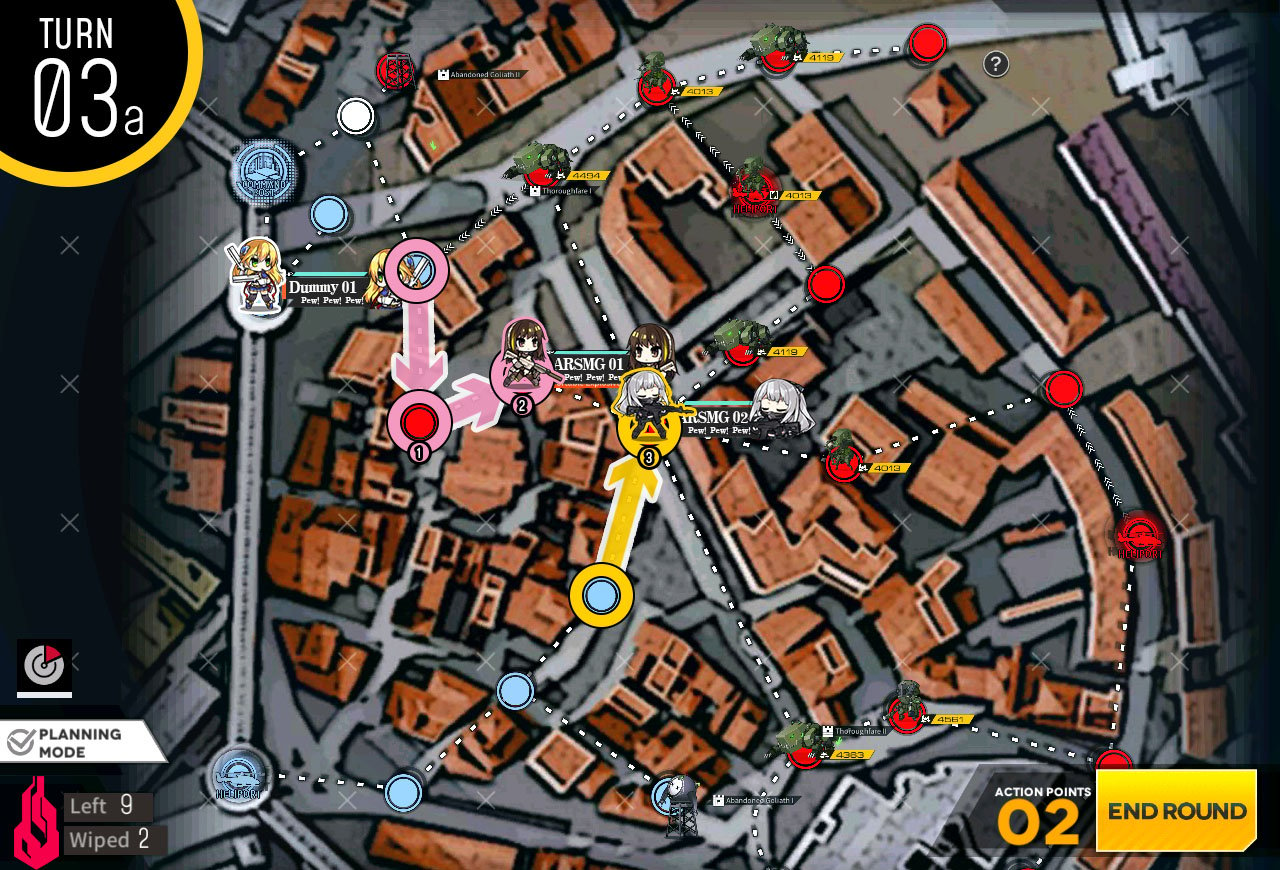
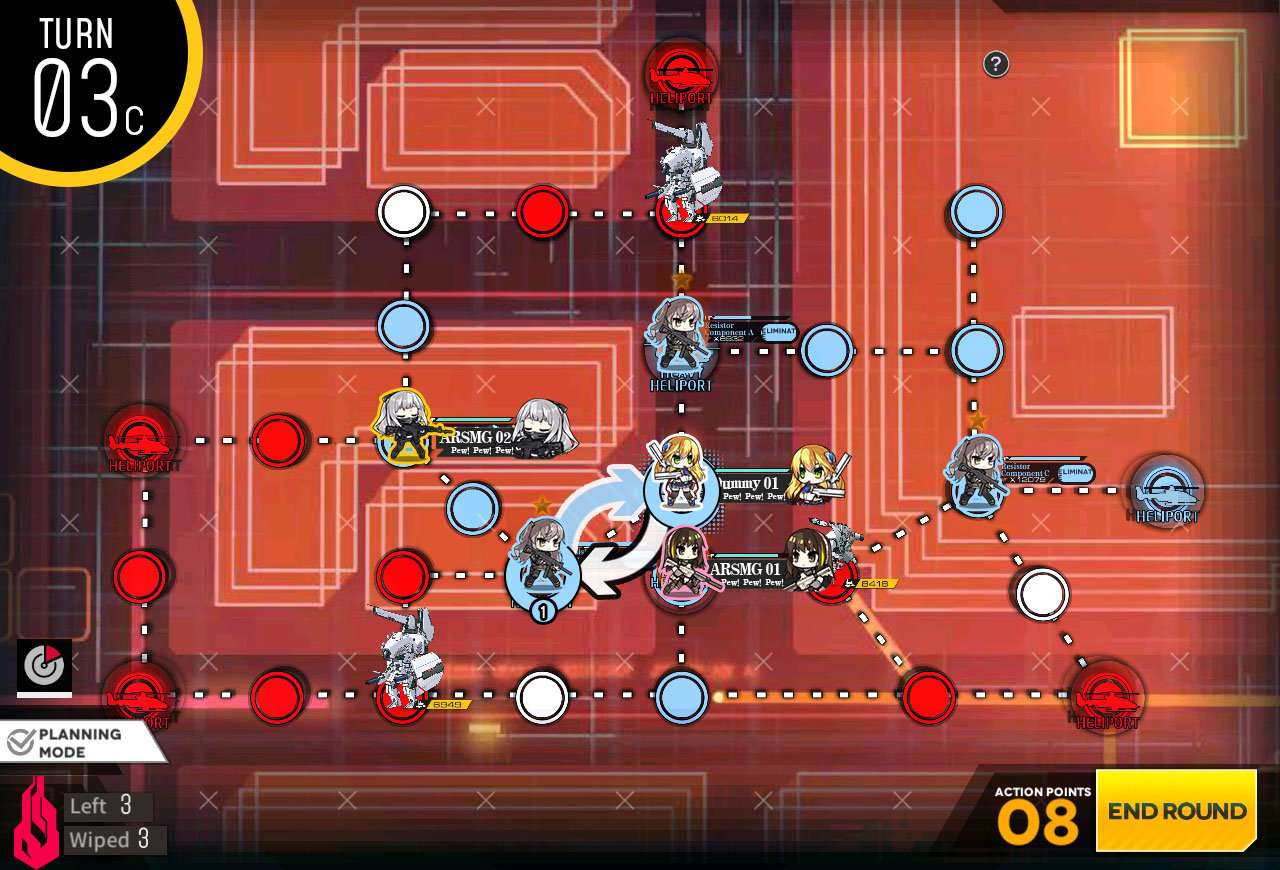
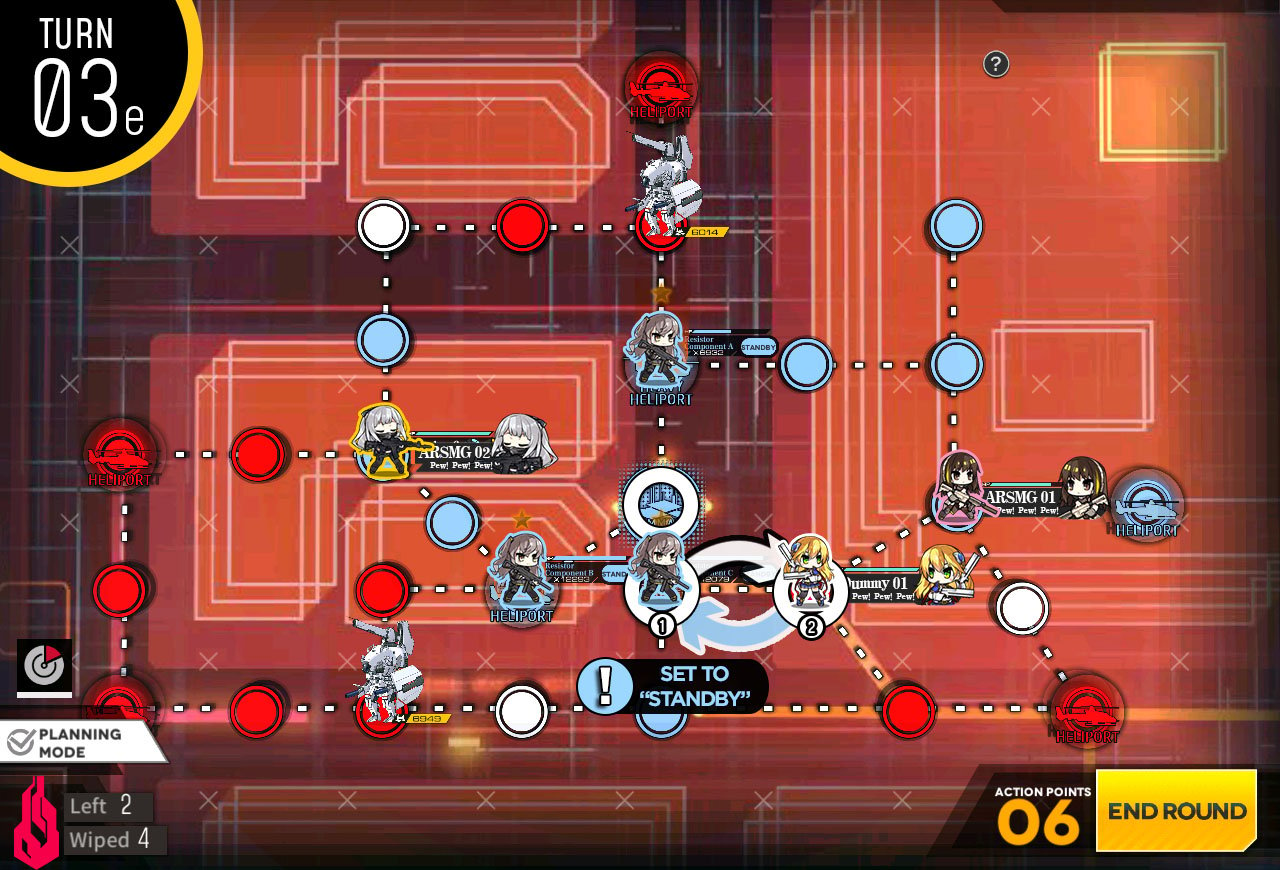
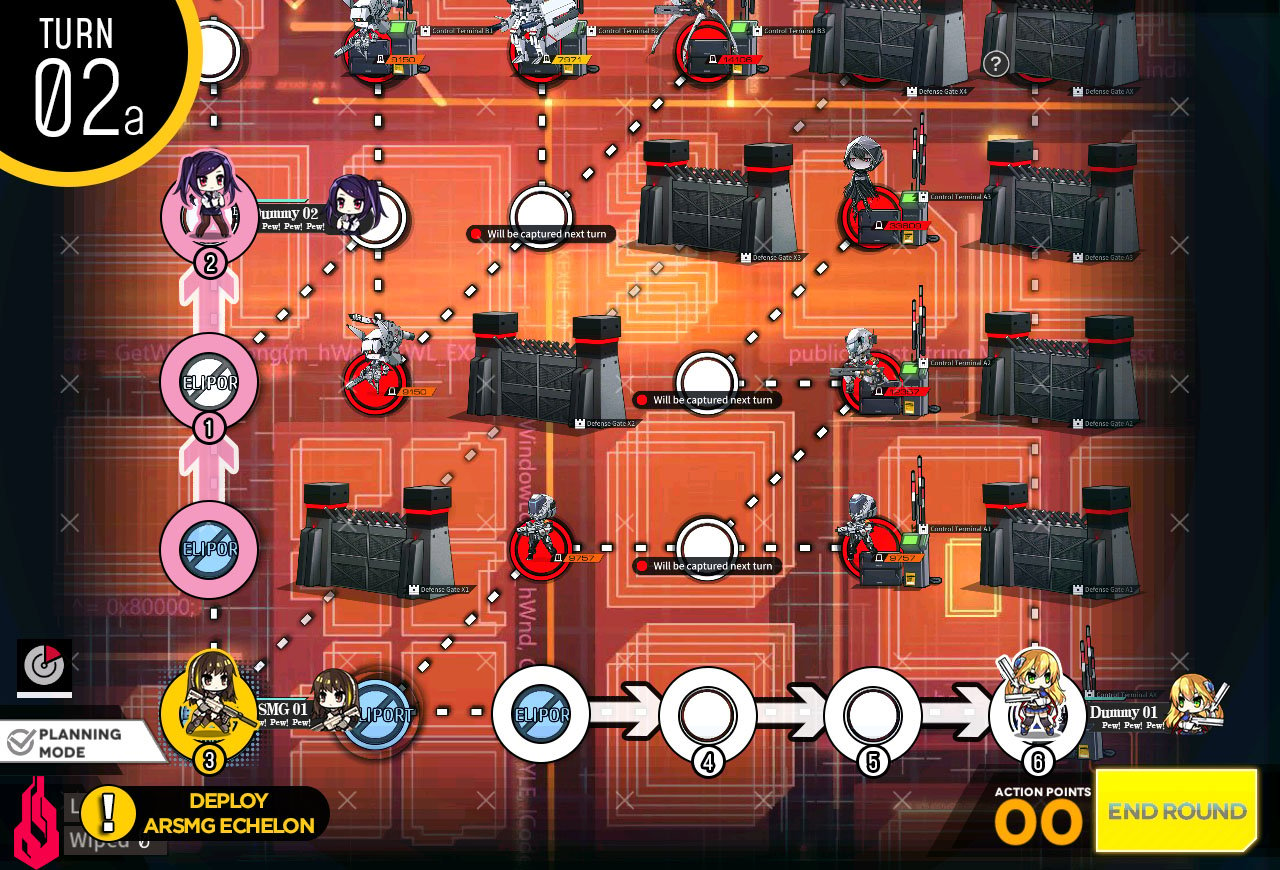
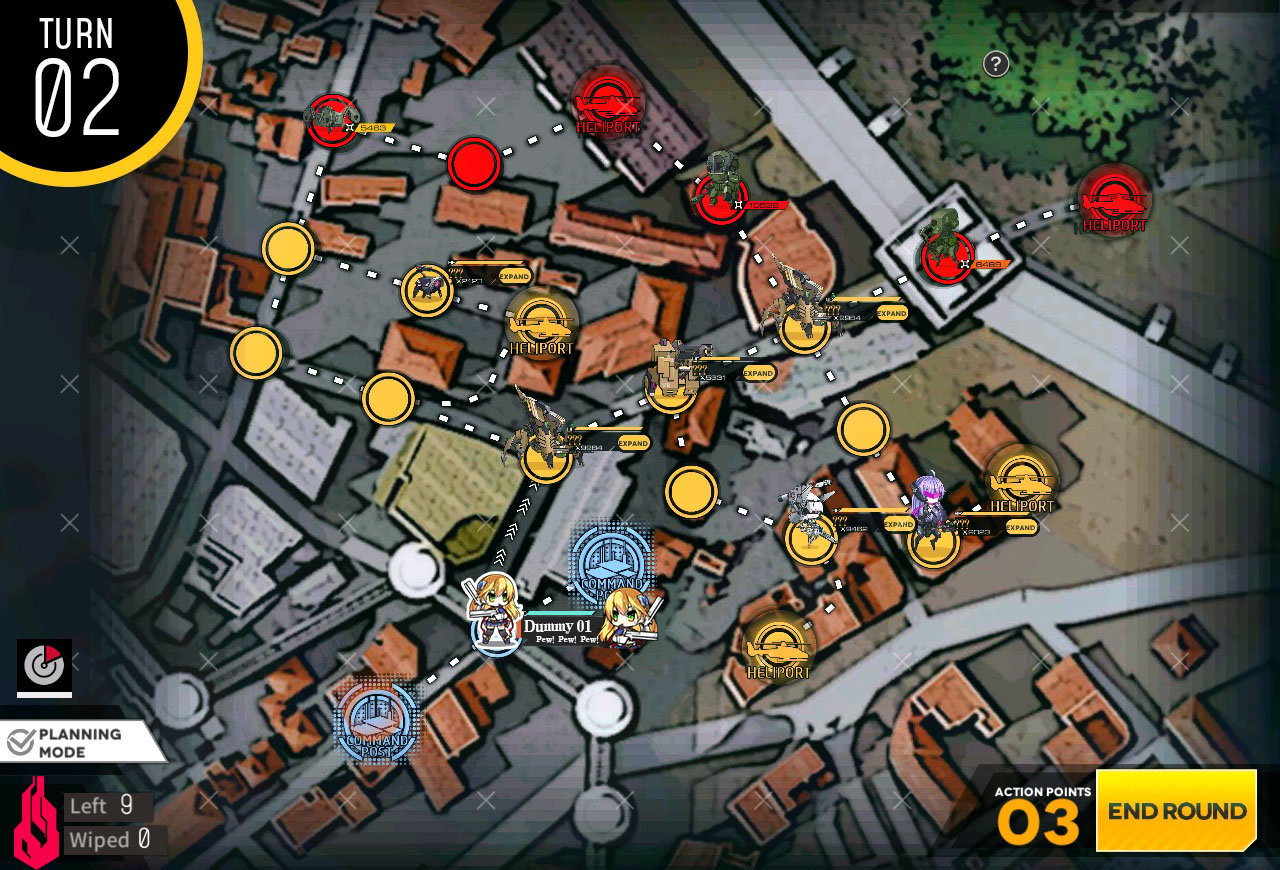
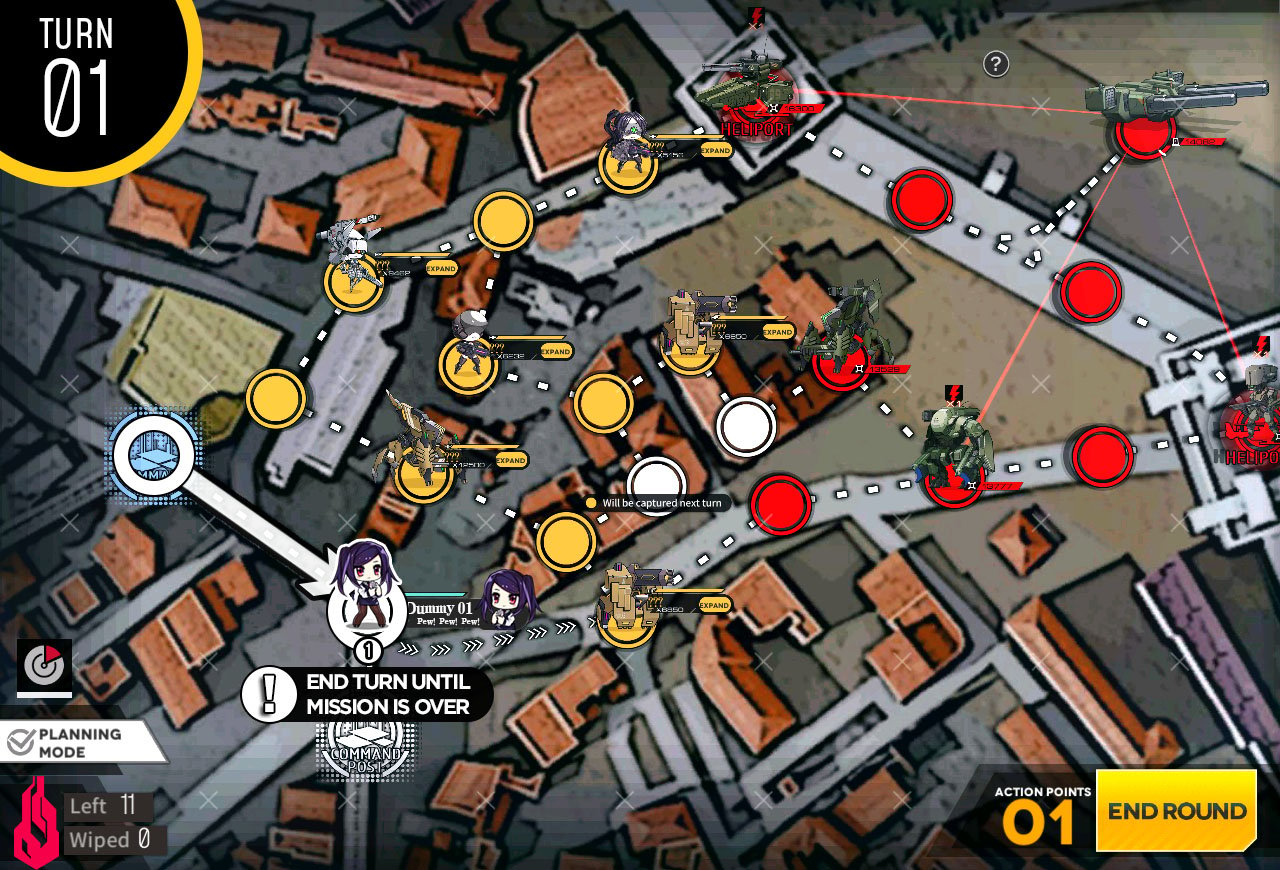
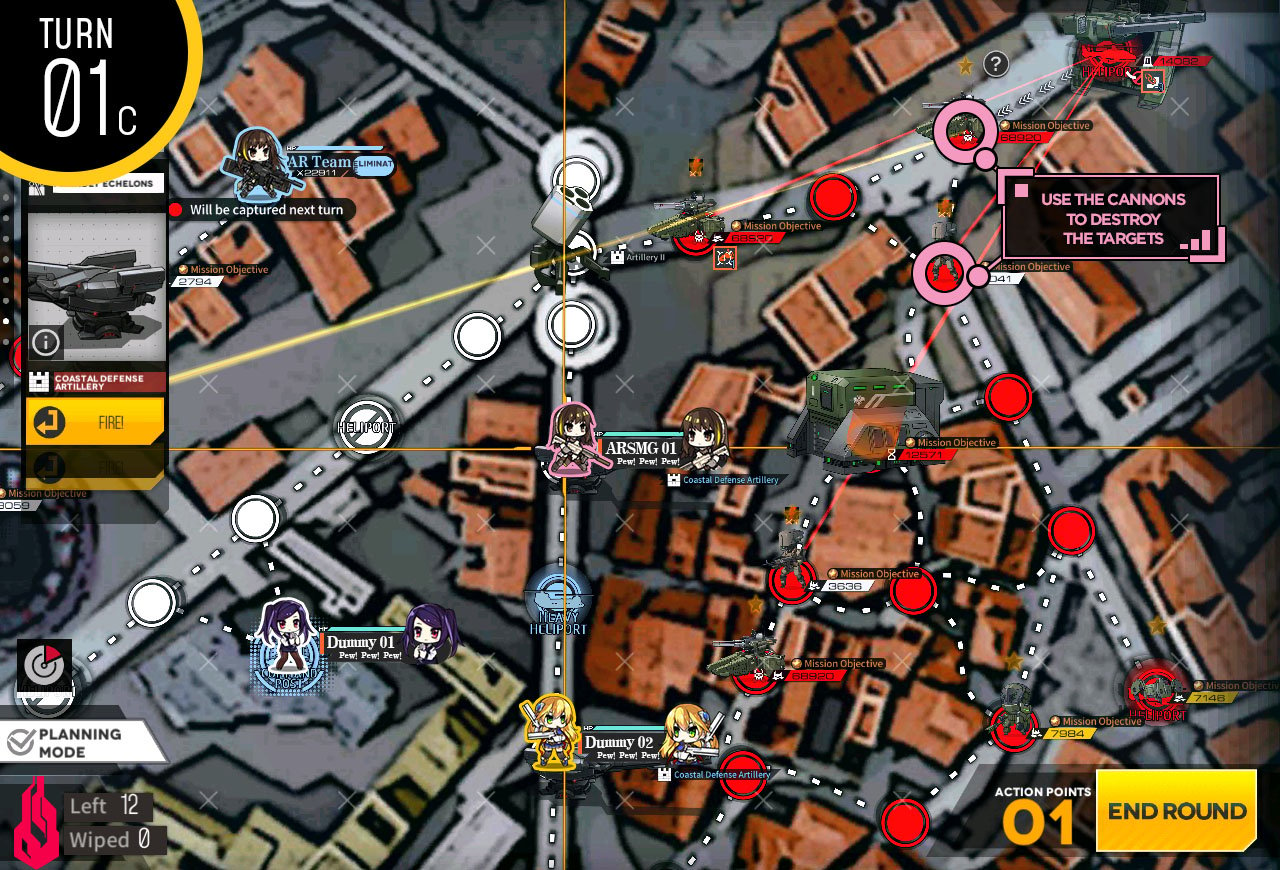
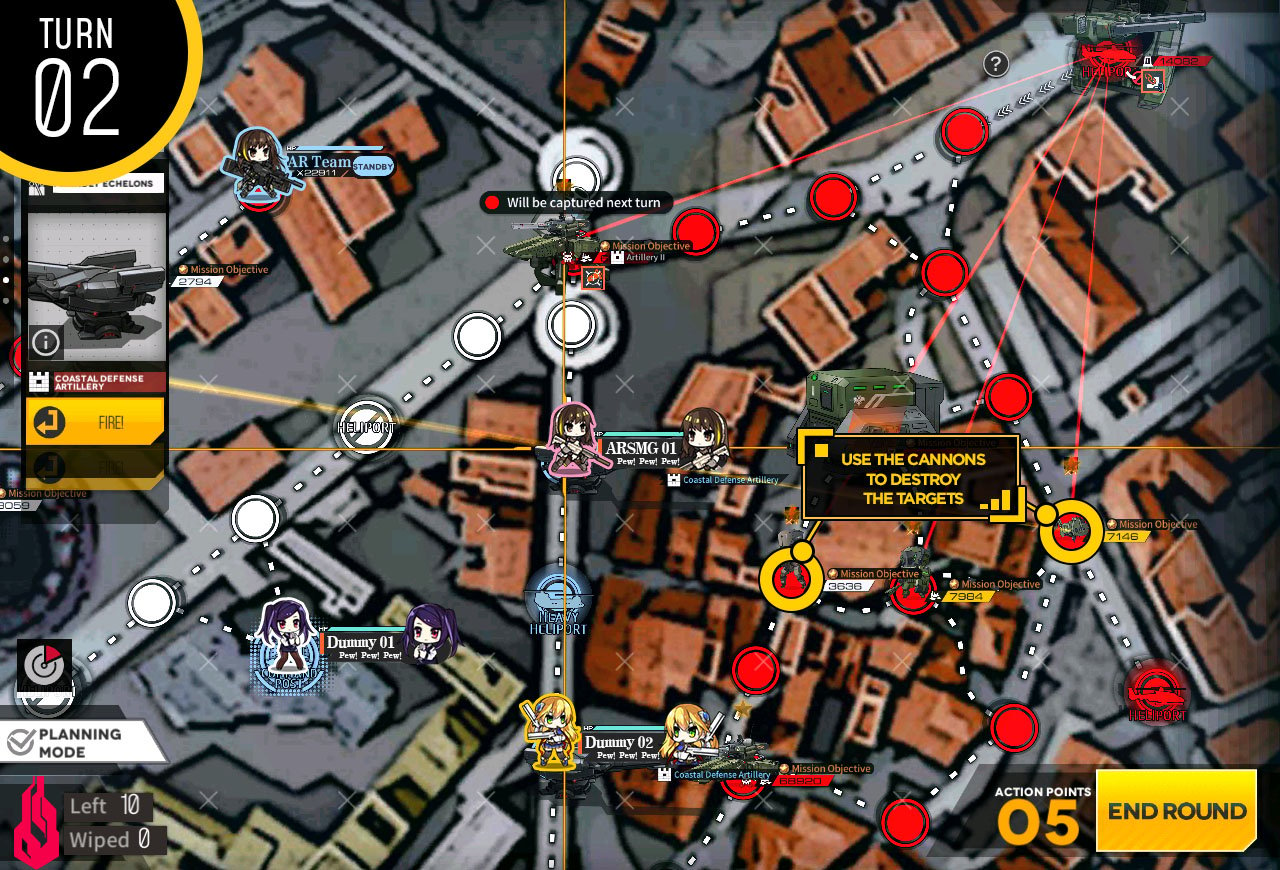
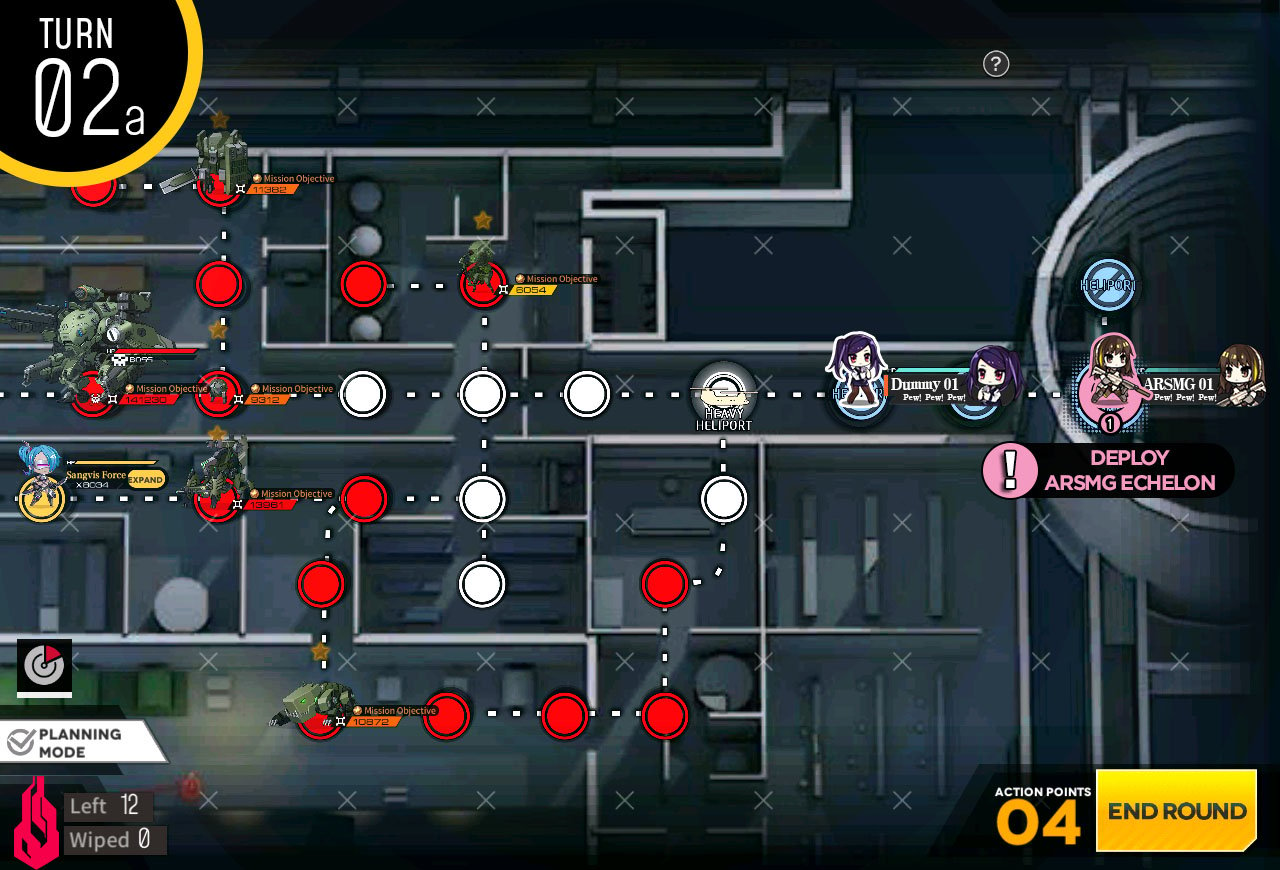
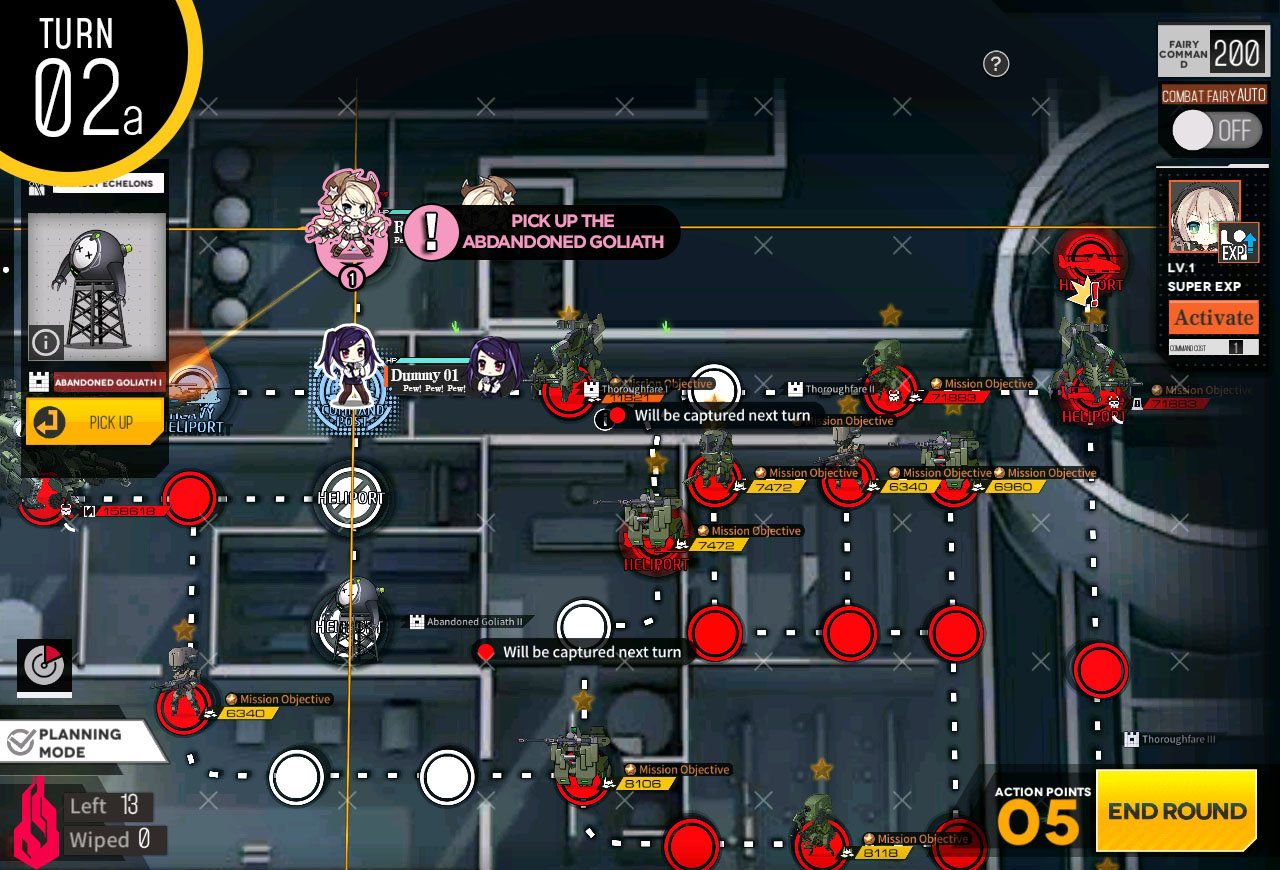
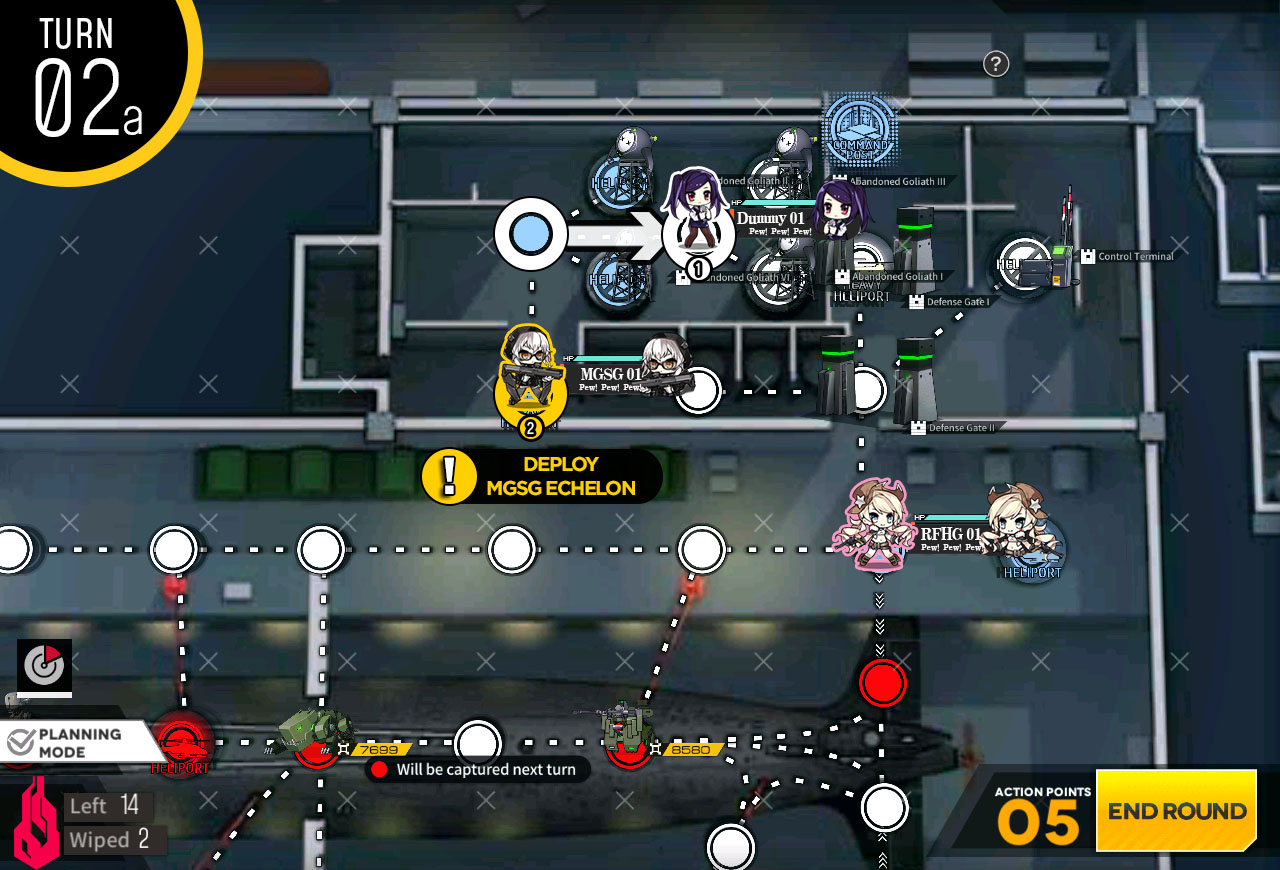
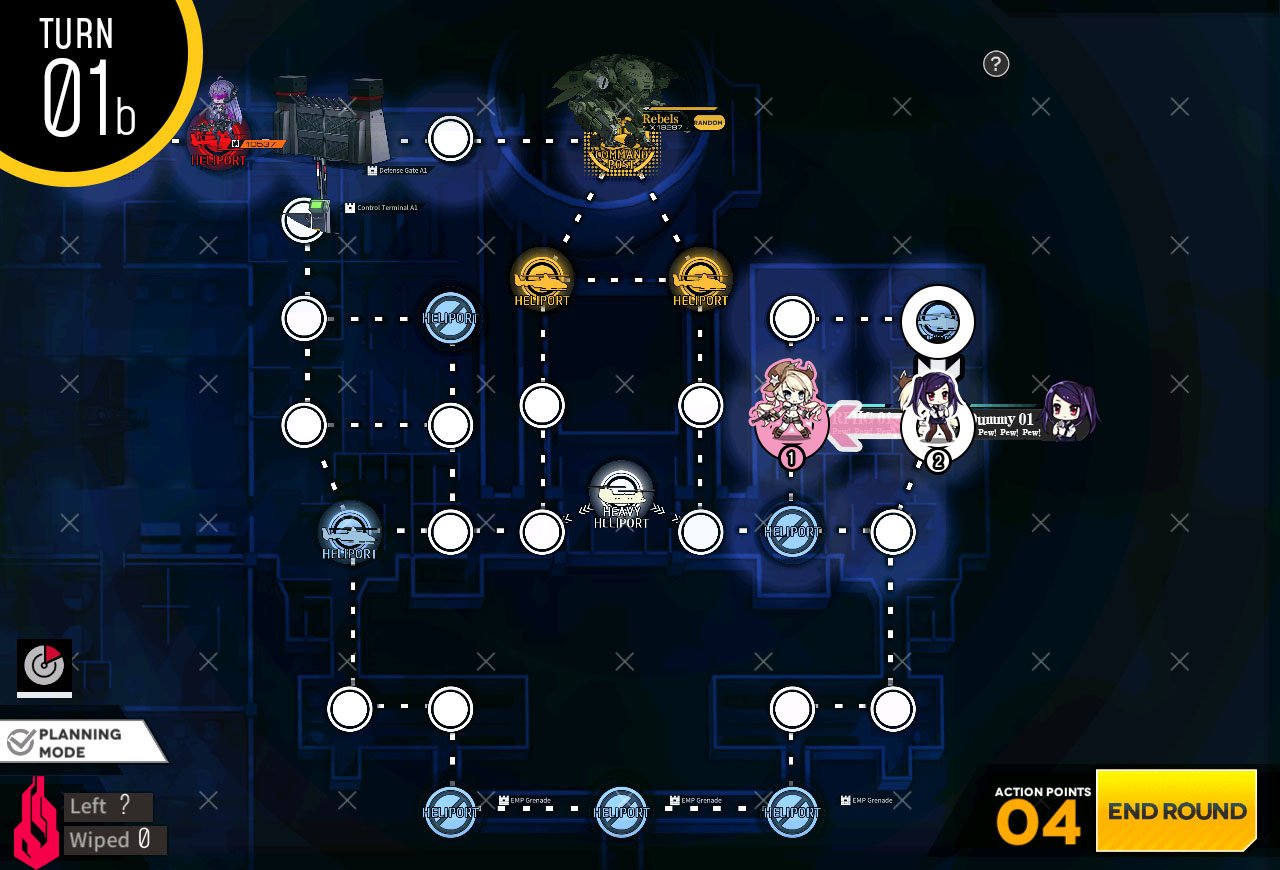
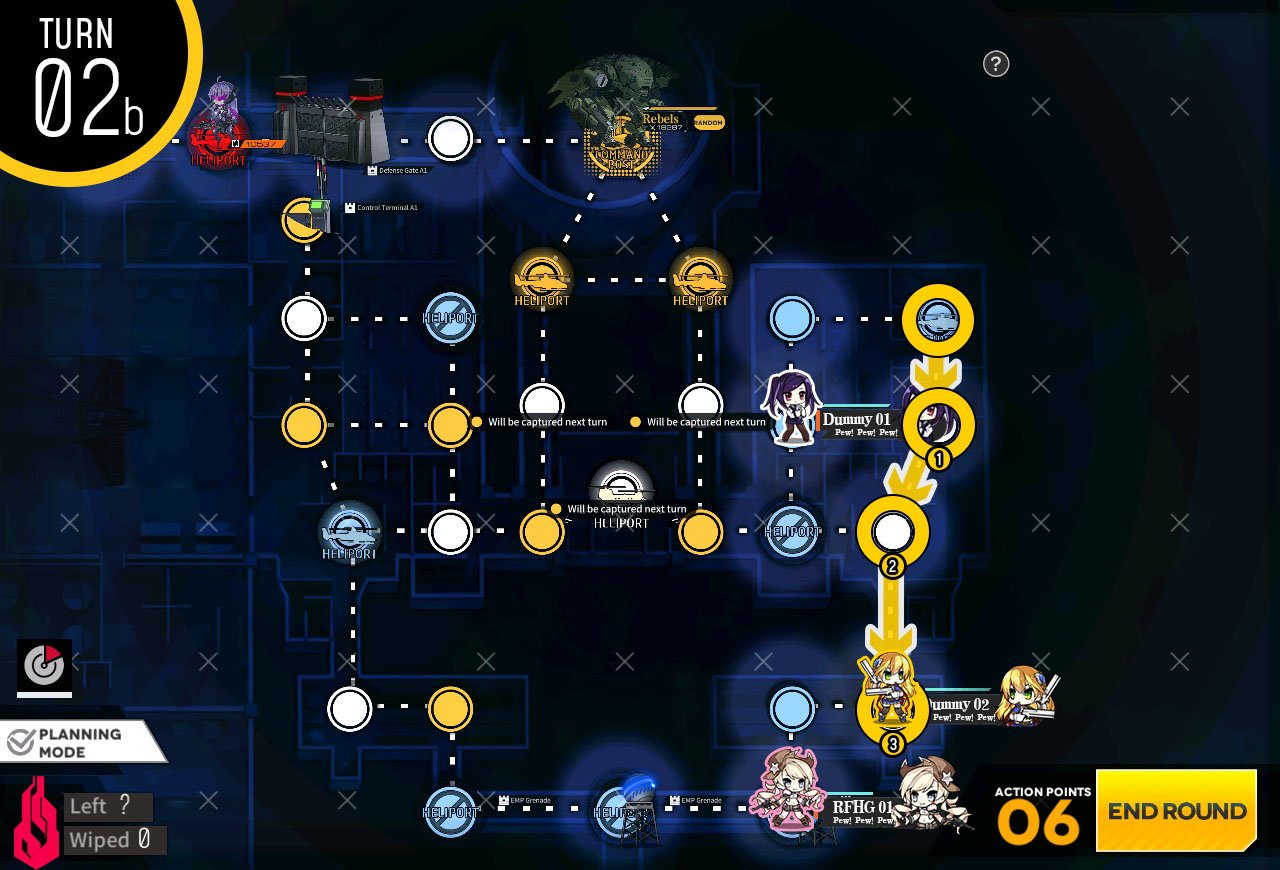
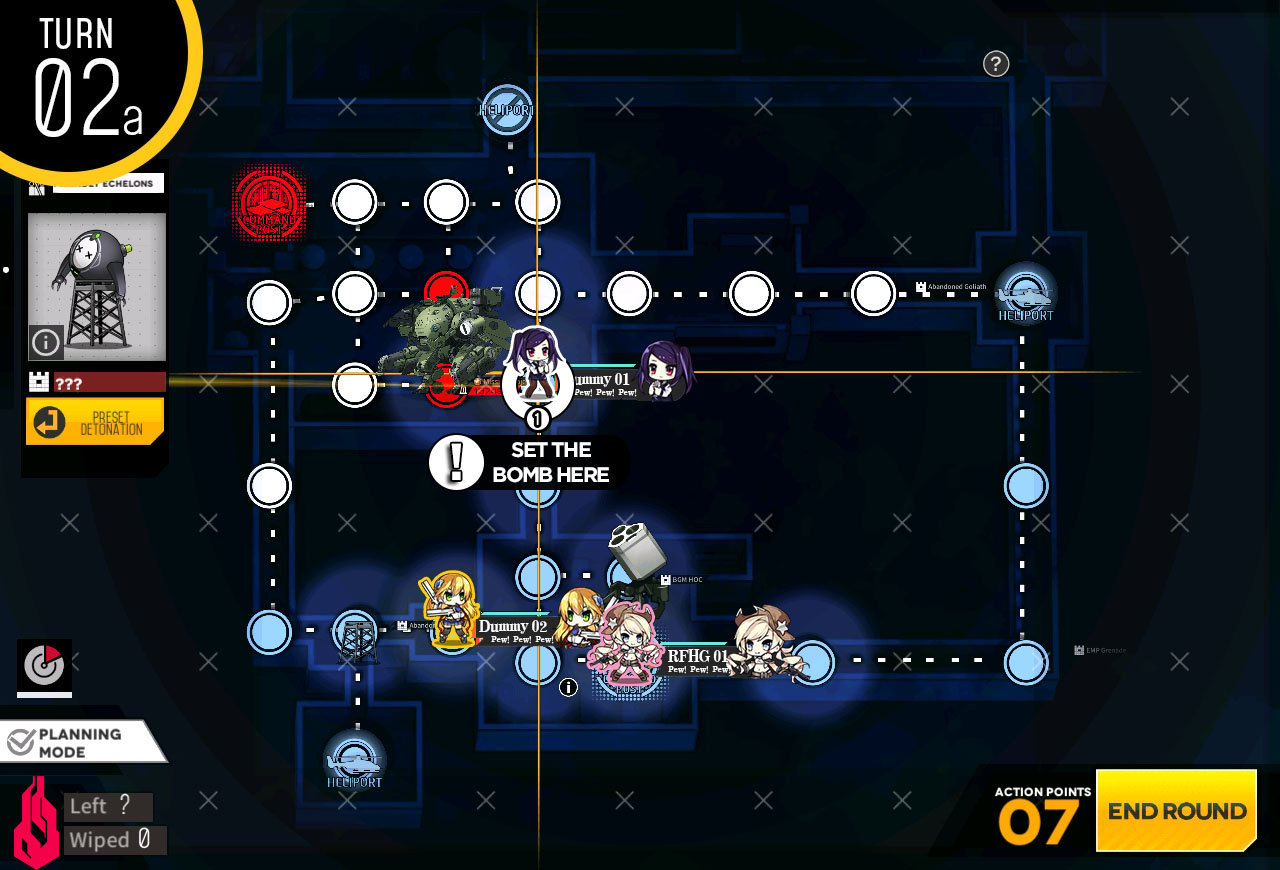
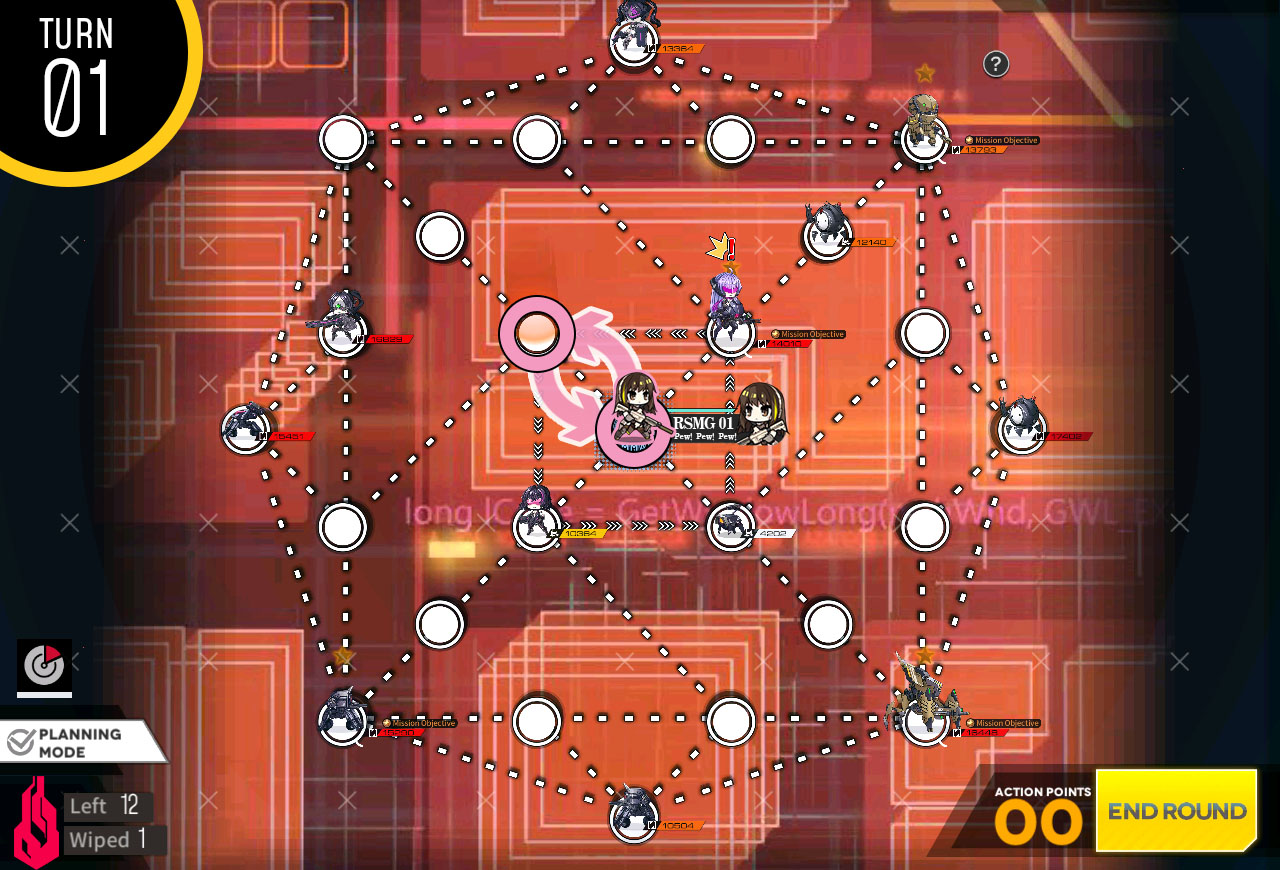
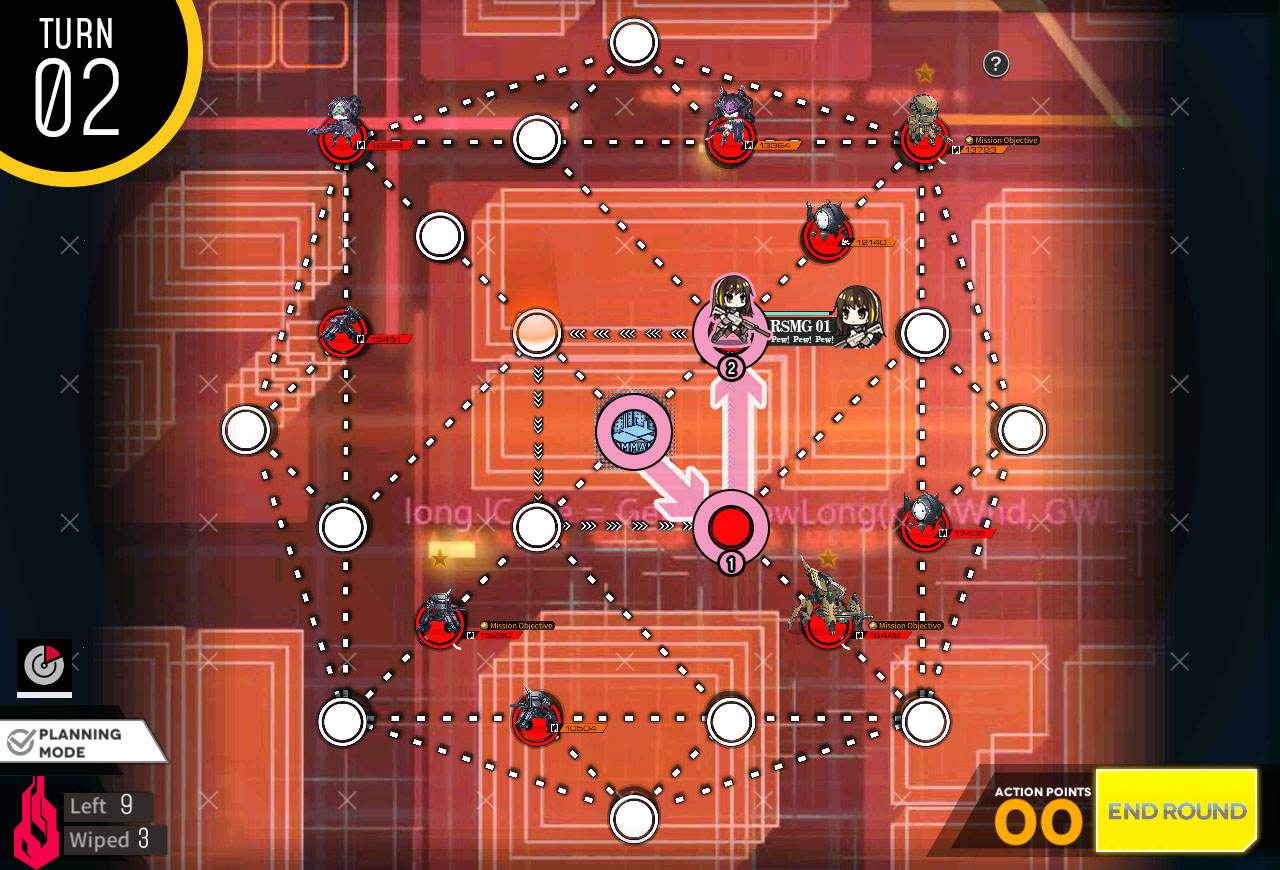
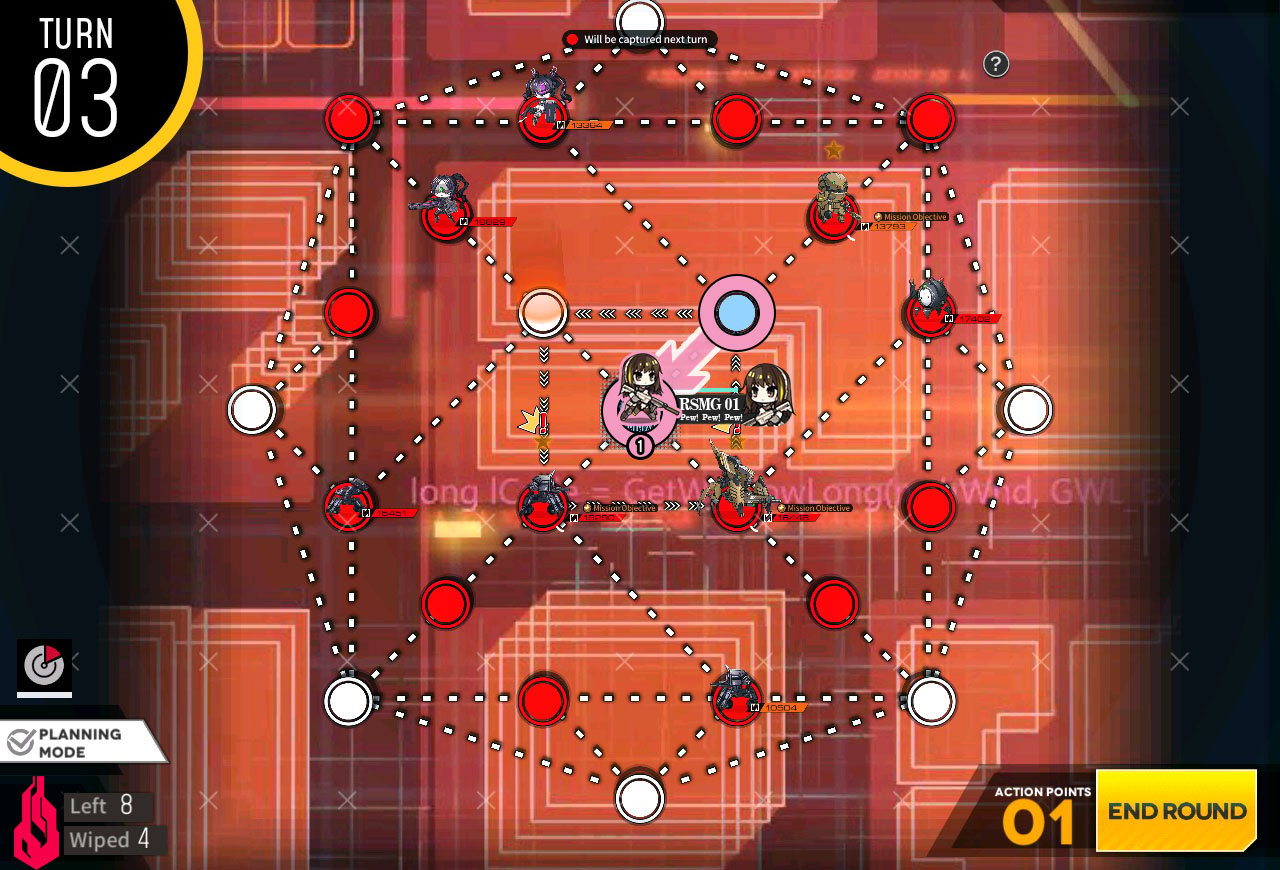
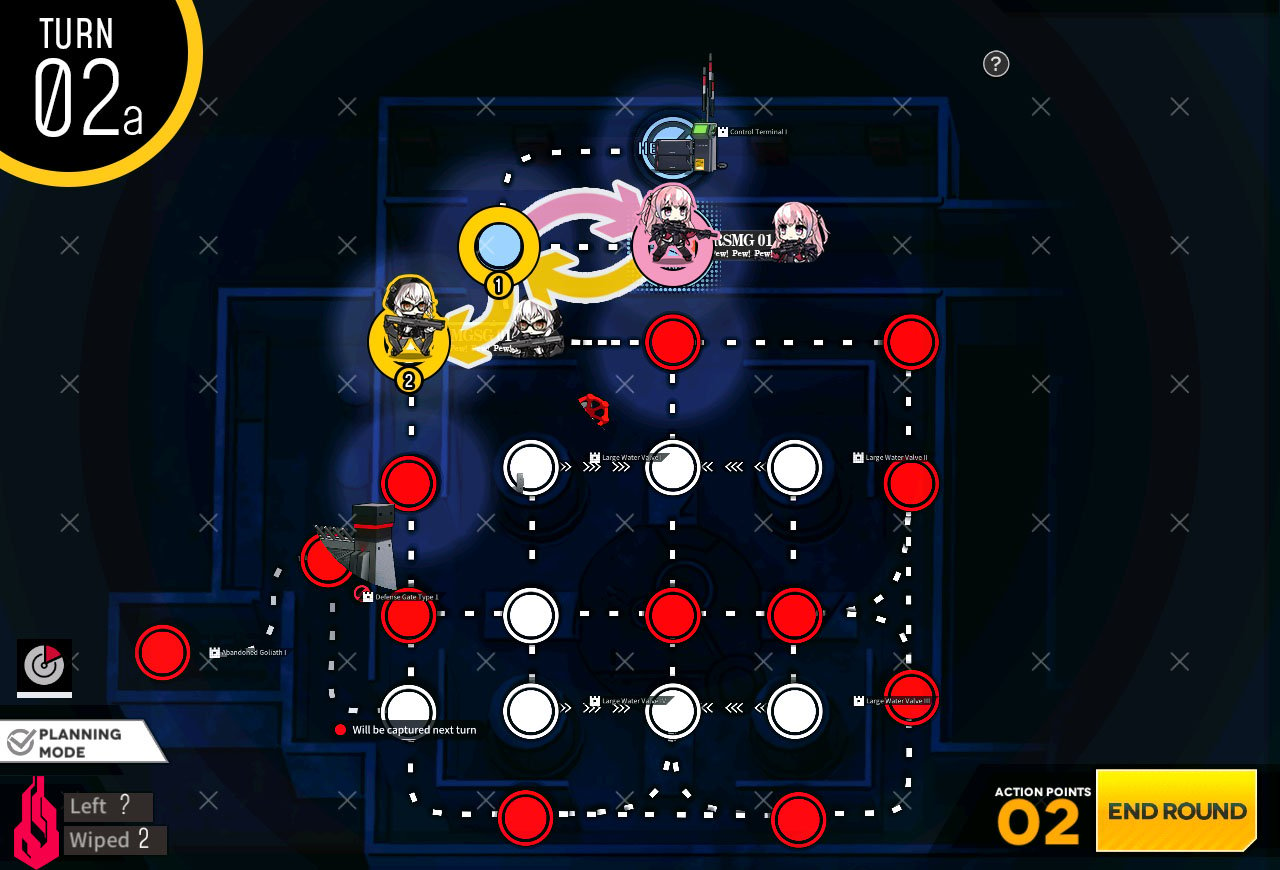
Start with Dummy echelon on bottom left helipad and combat echelon on other corners of the map. Then combat echelon at the top moves across the map to the right to step on random node. This removes some units on the map.
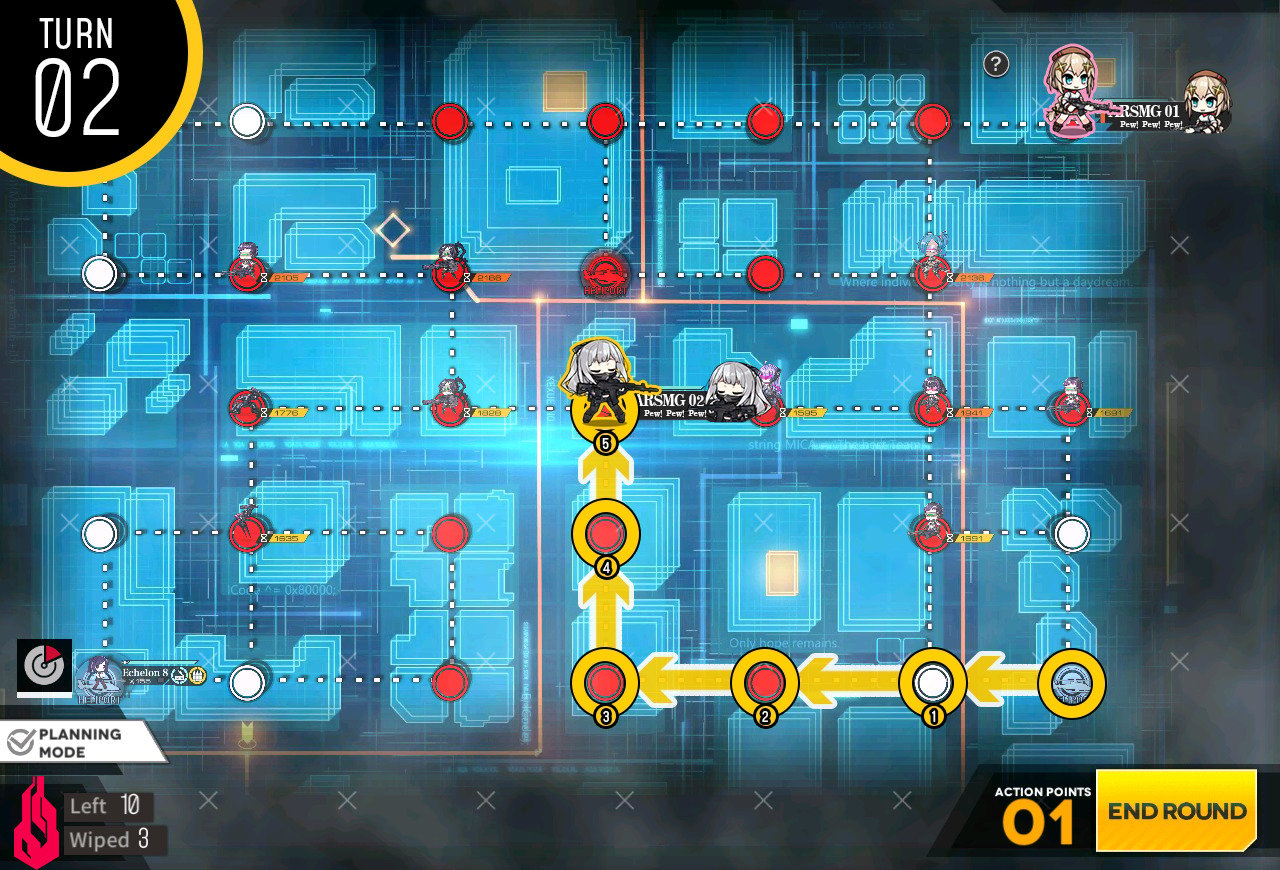
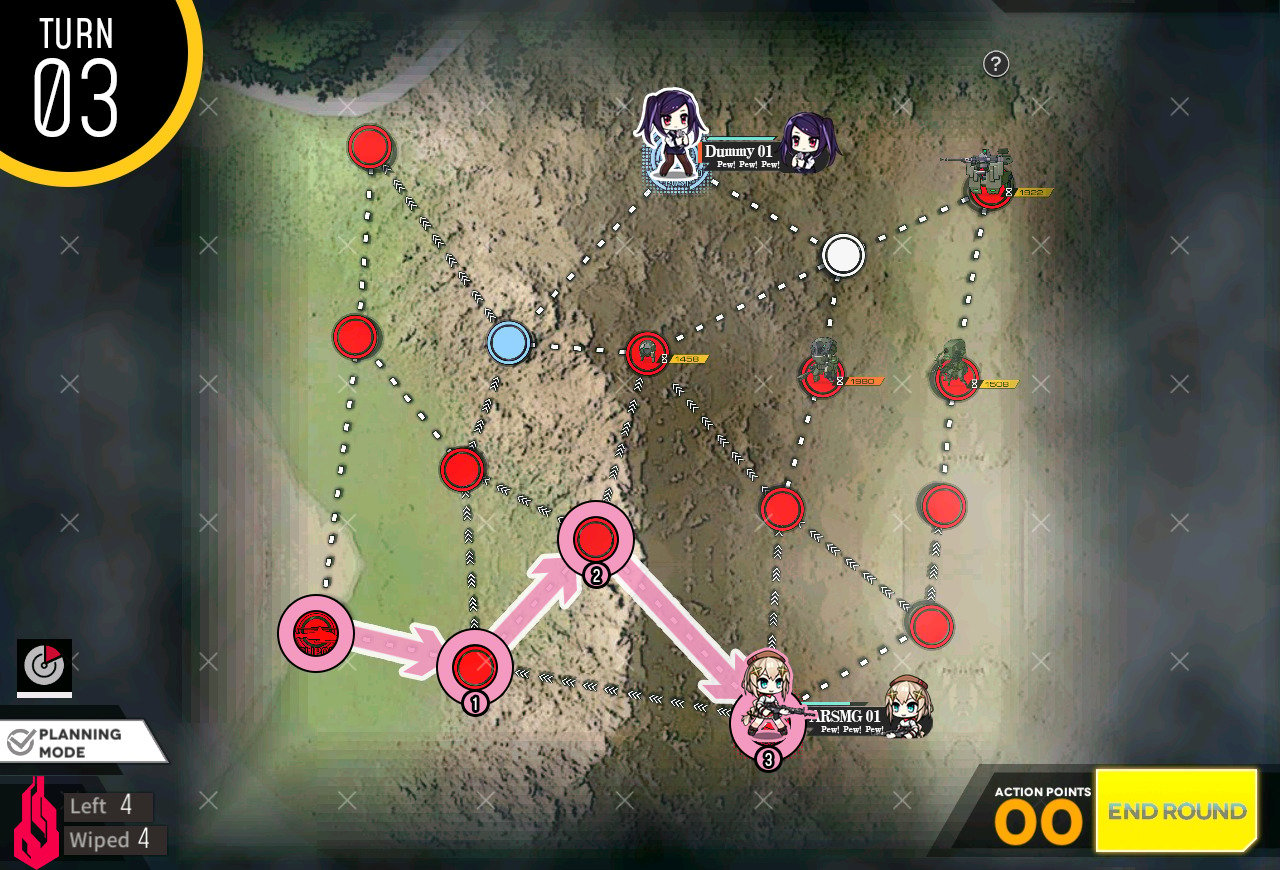
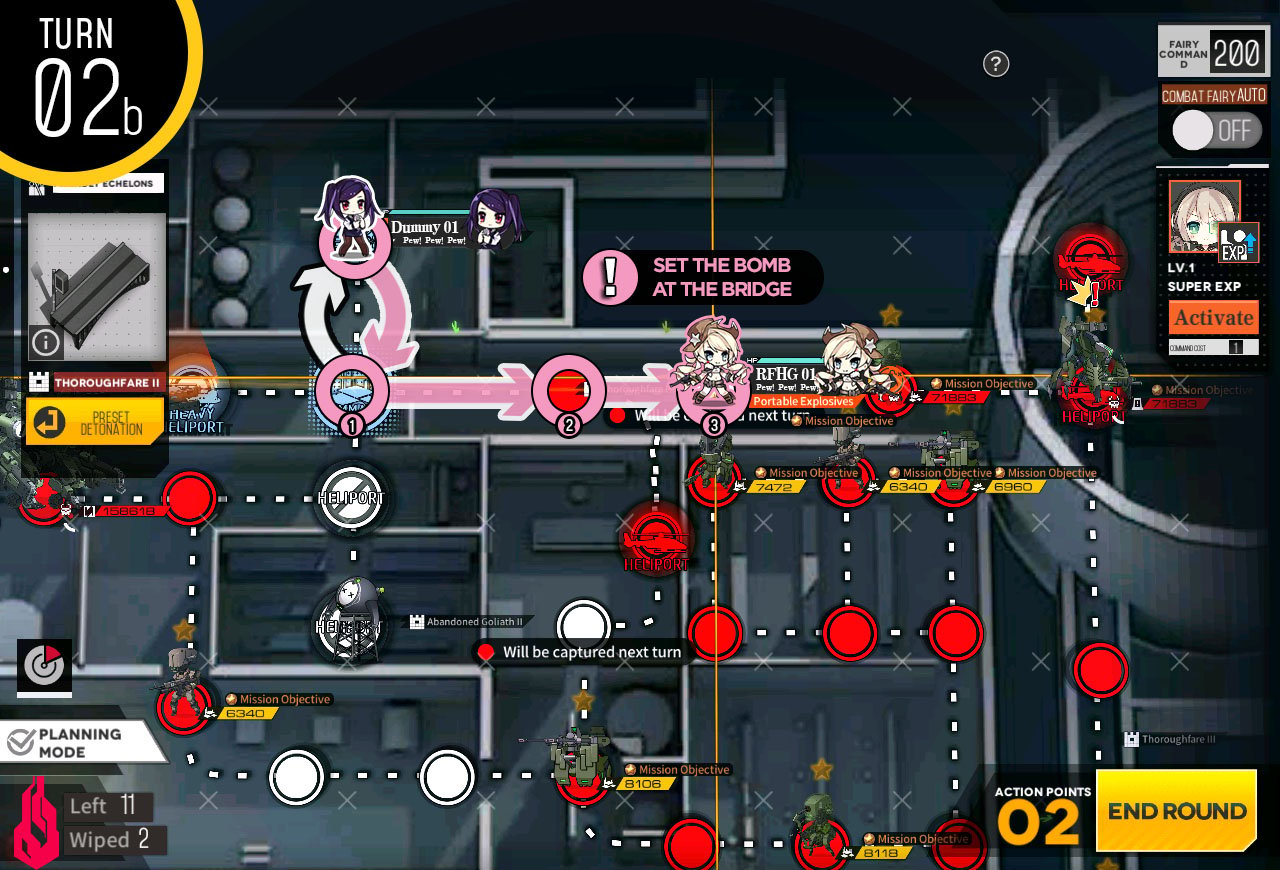
Use the bottom combat echelon and take the bottom right to the HQ to clear the mission.
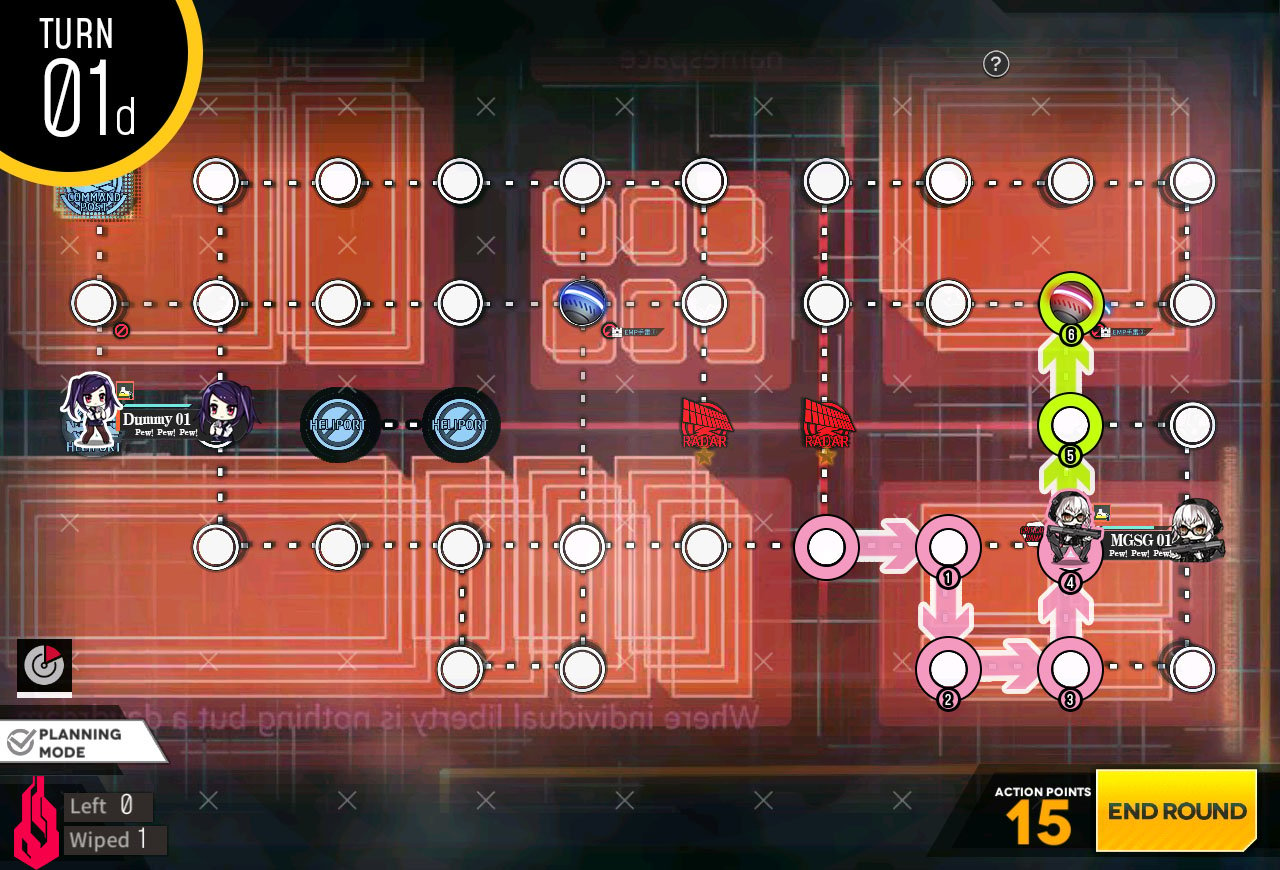
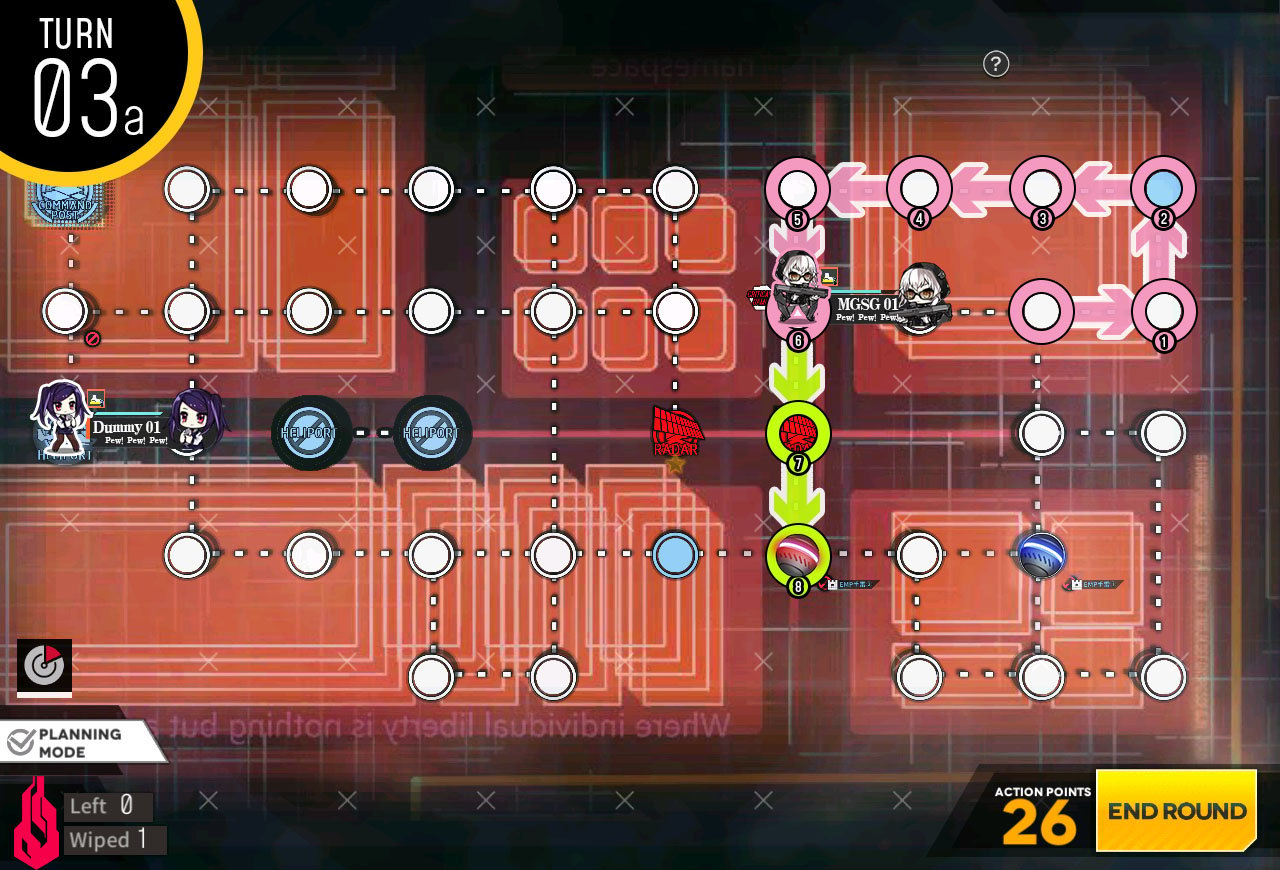
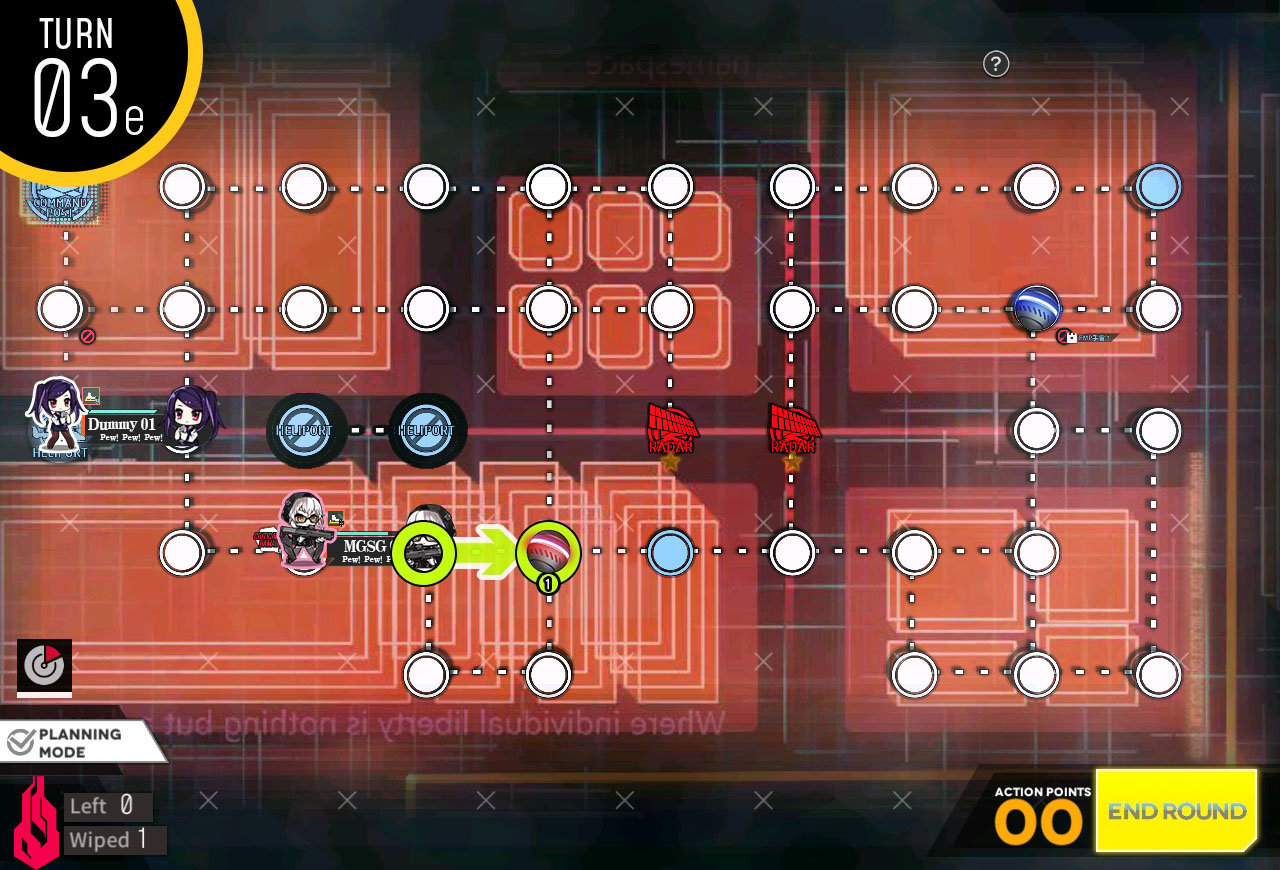
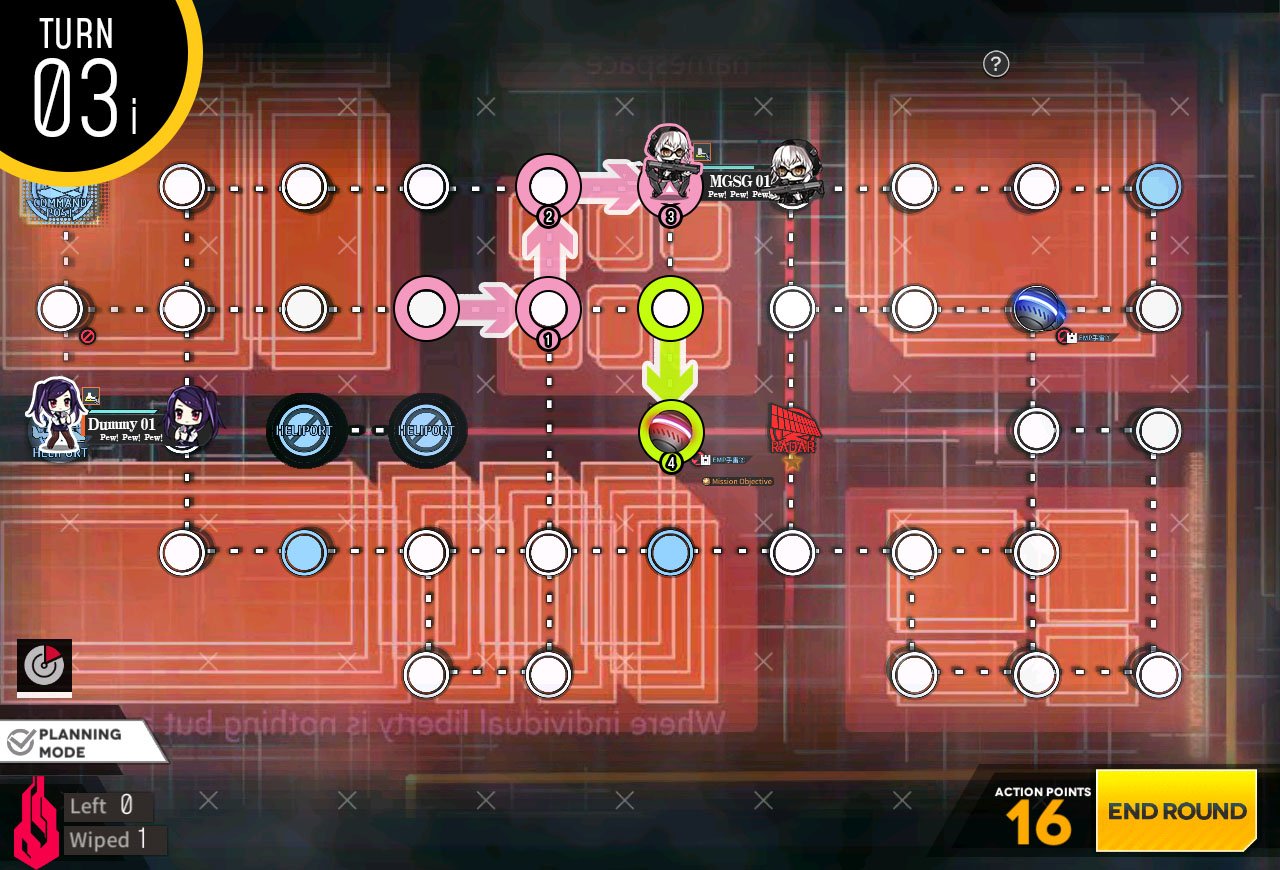
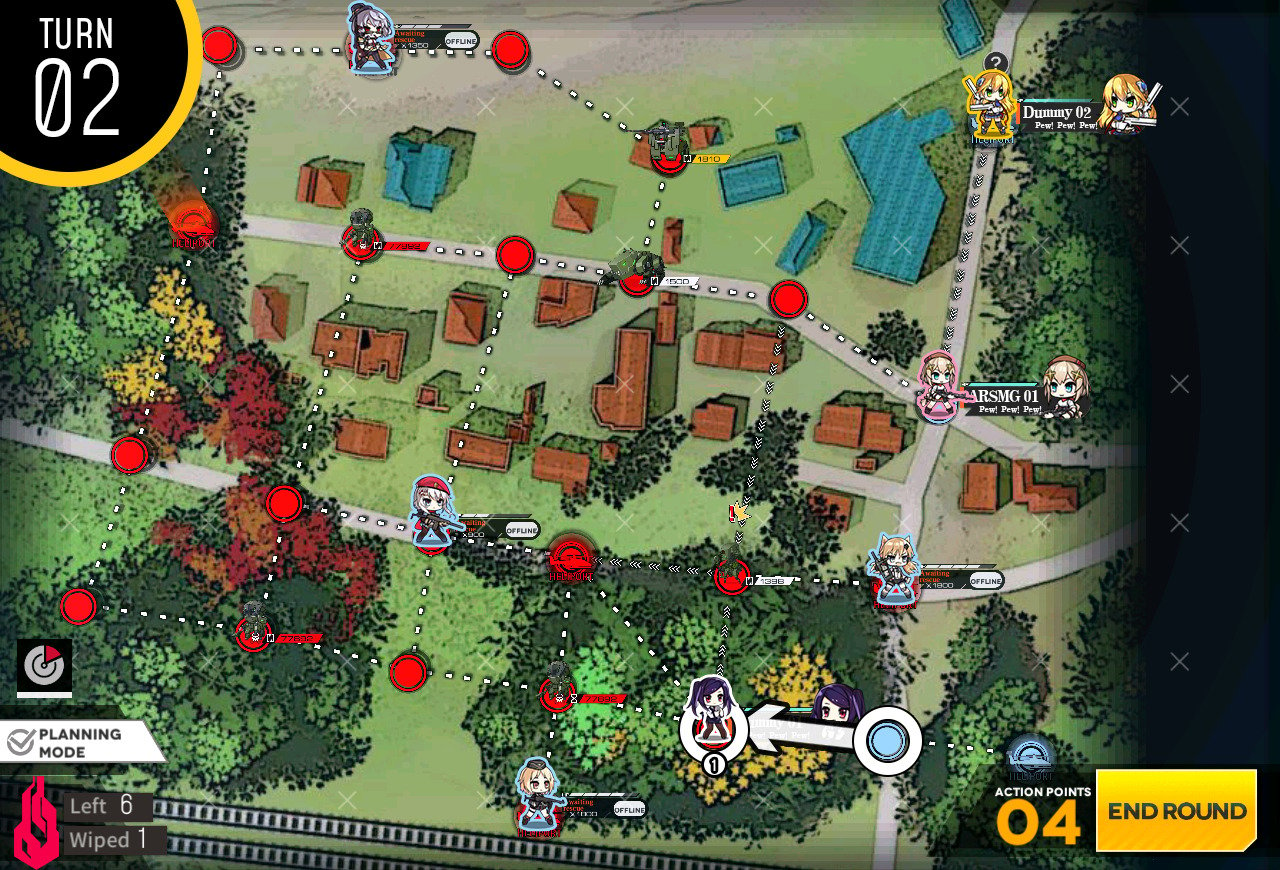
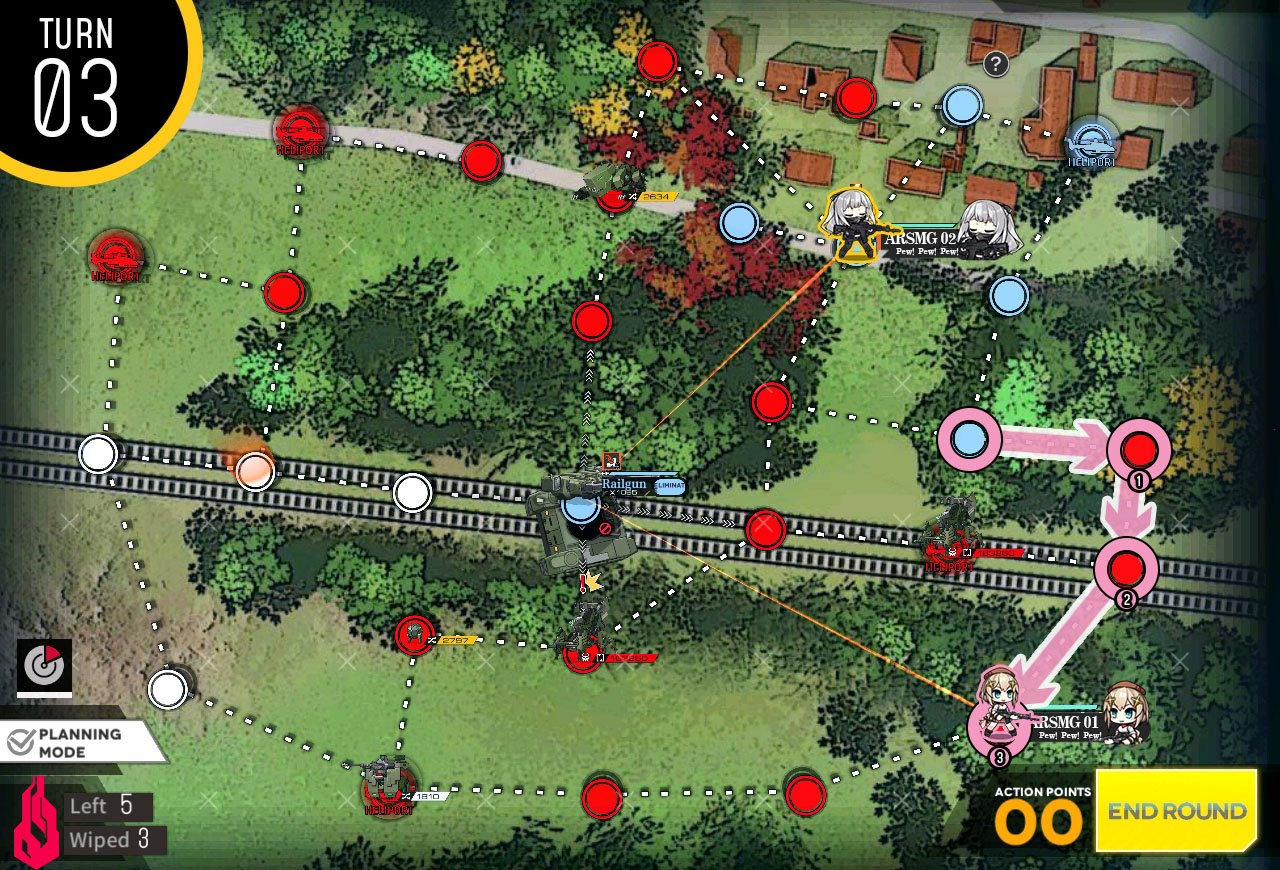
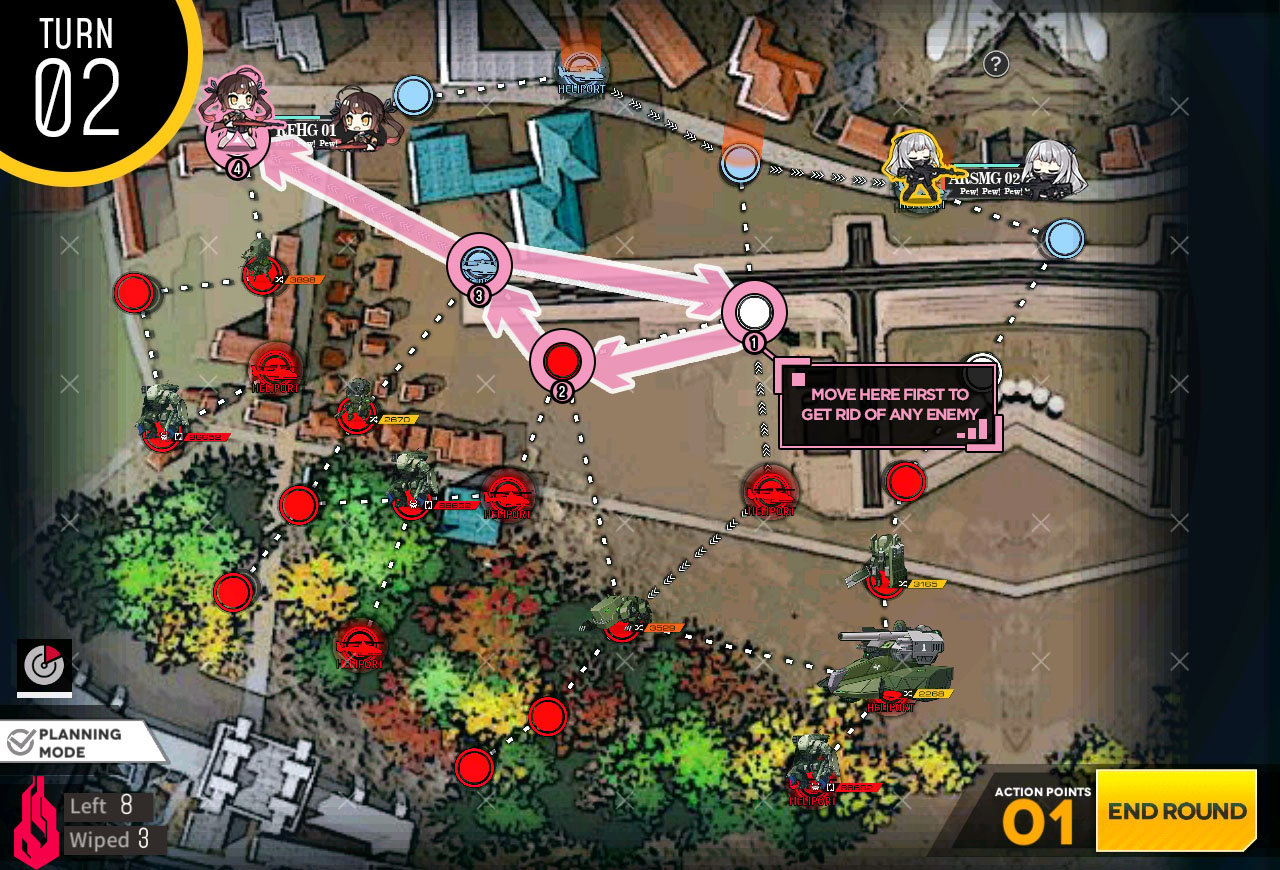
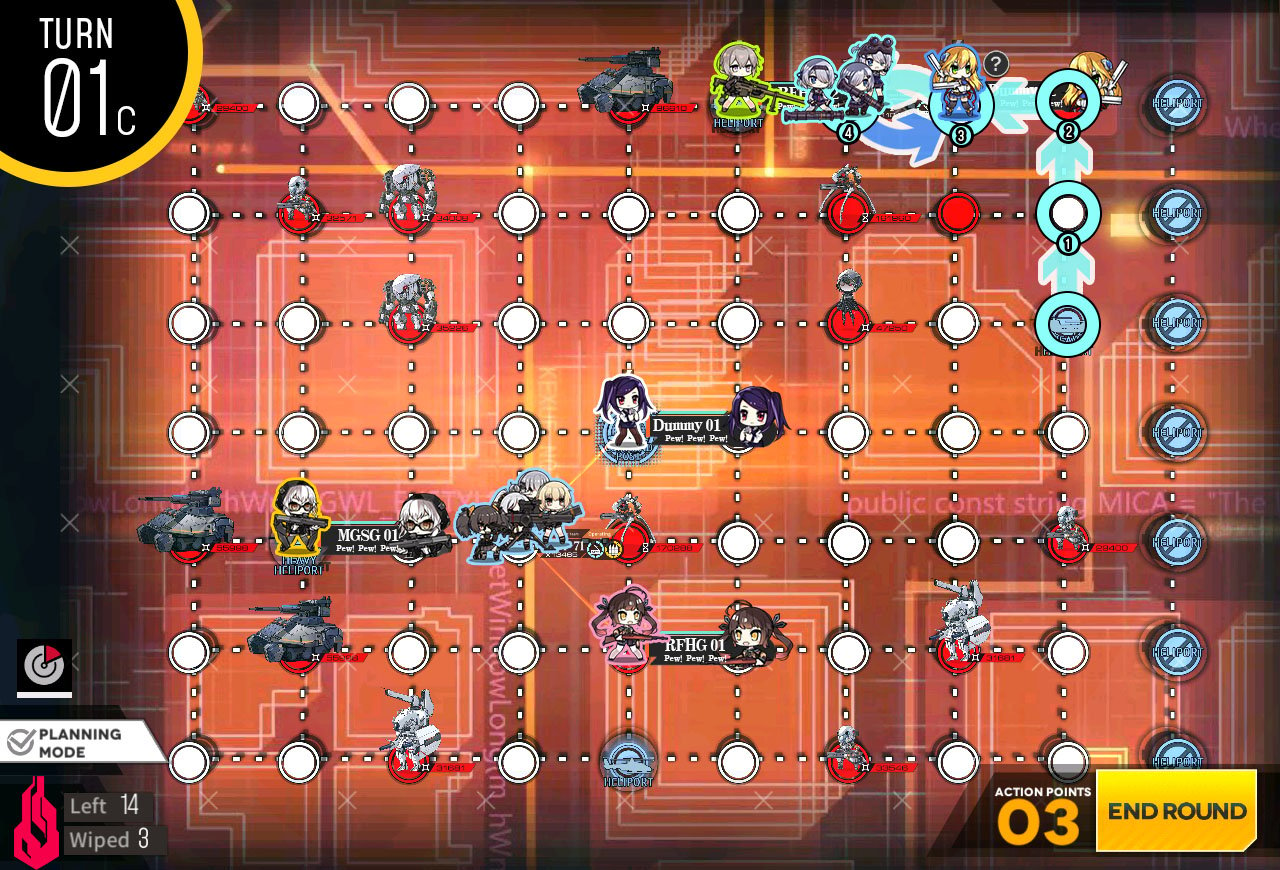
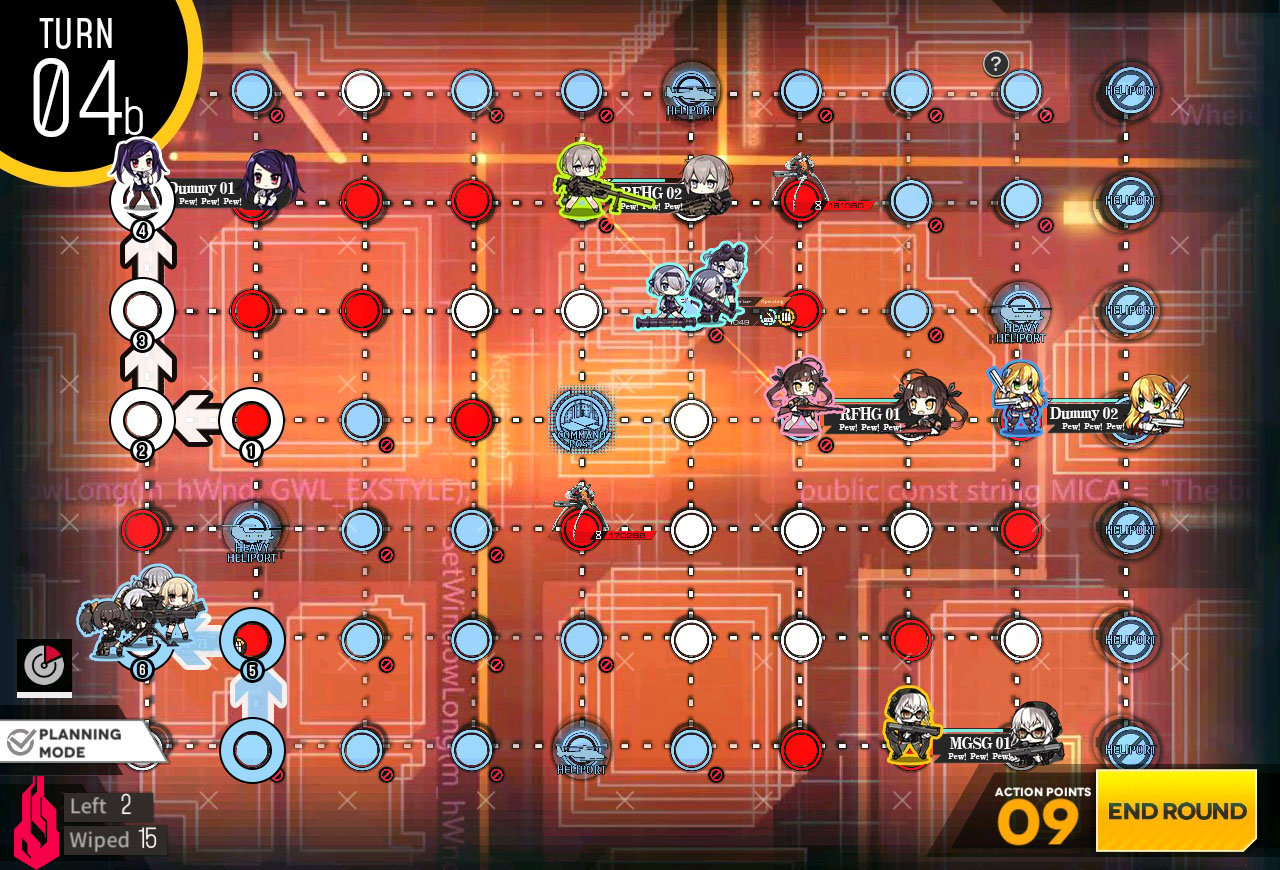
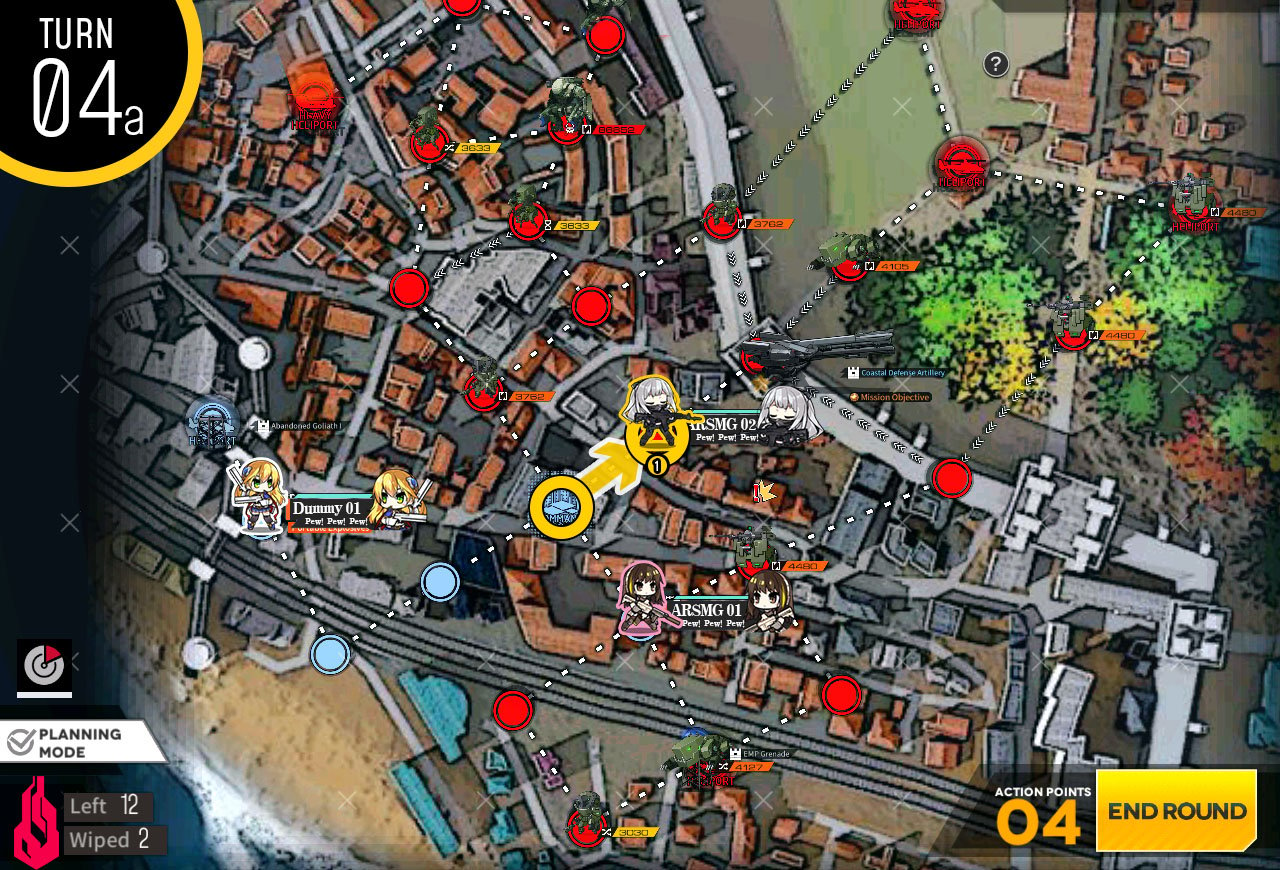
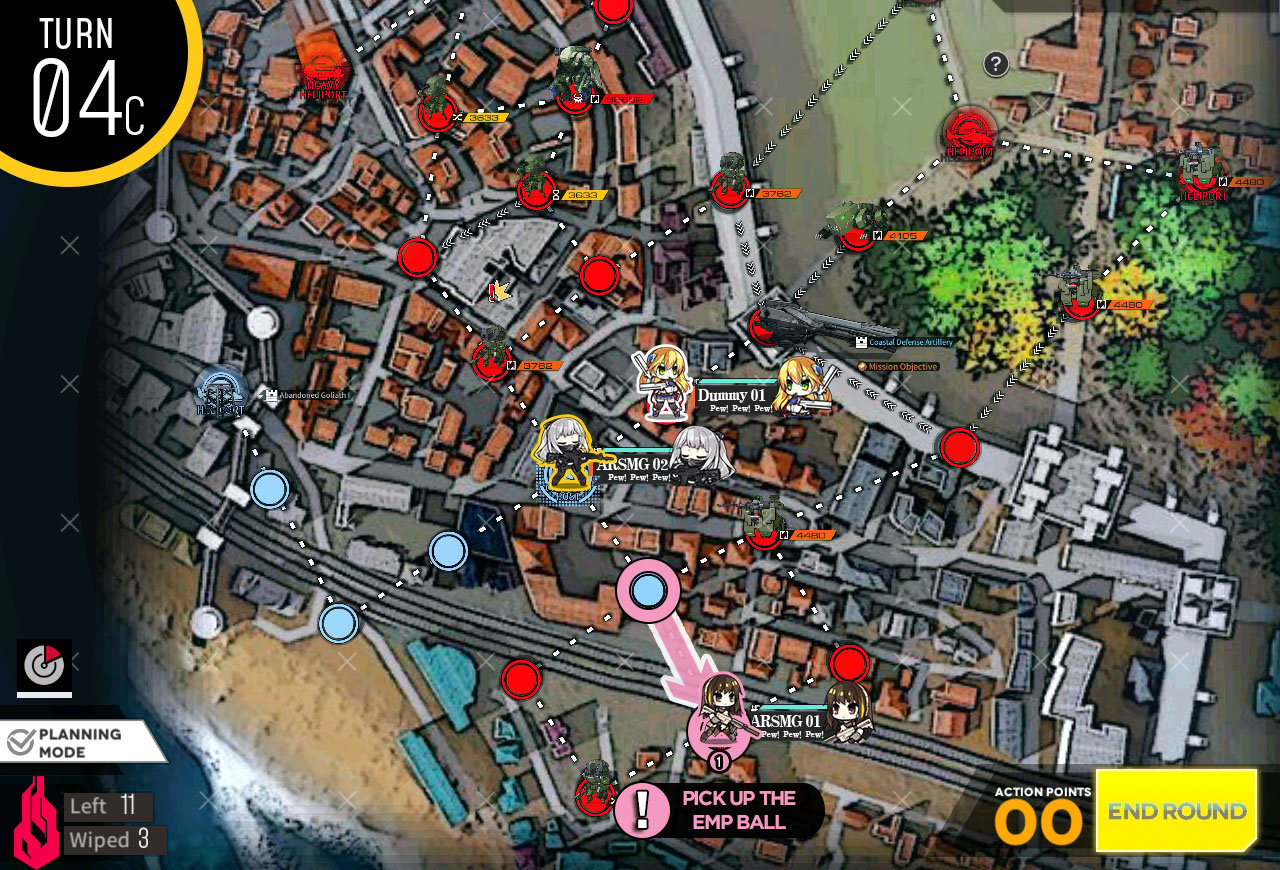
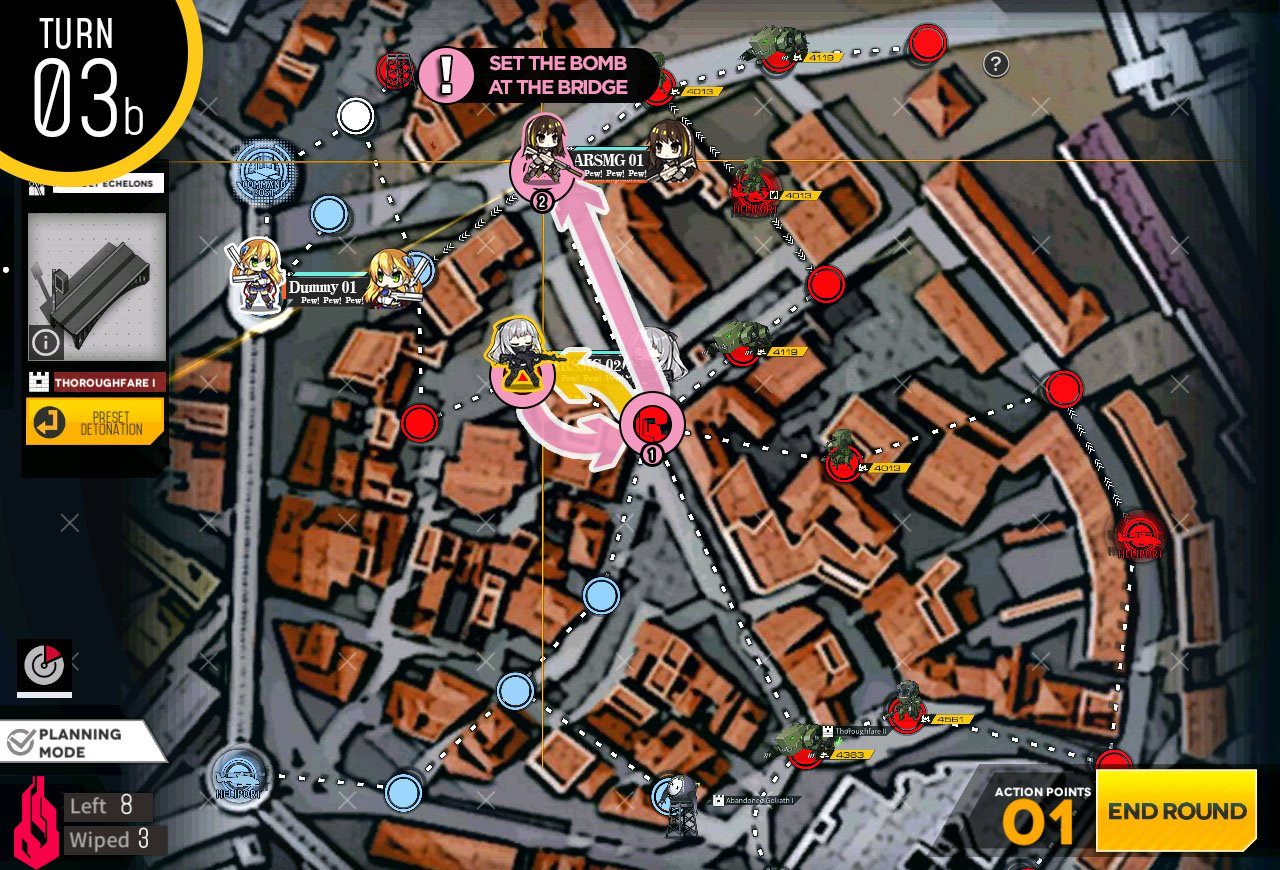
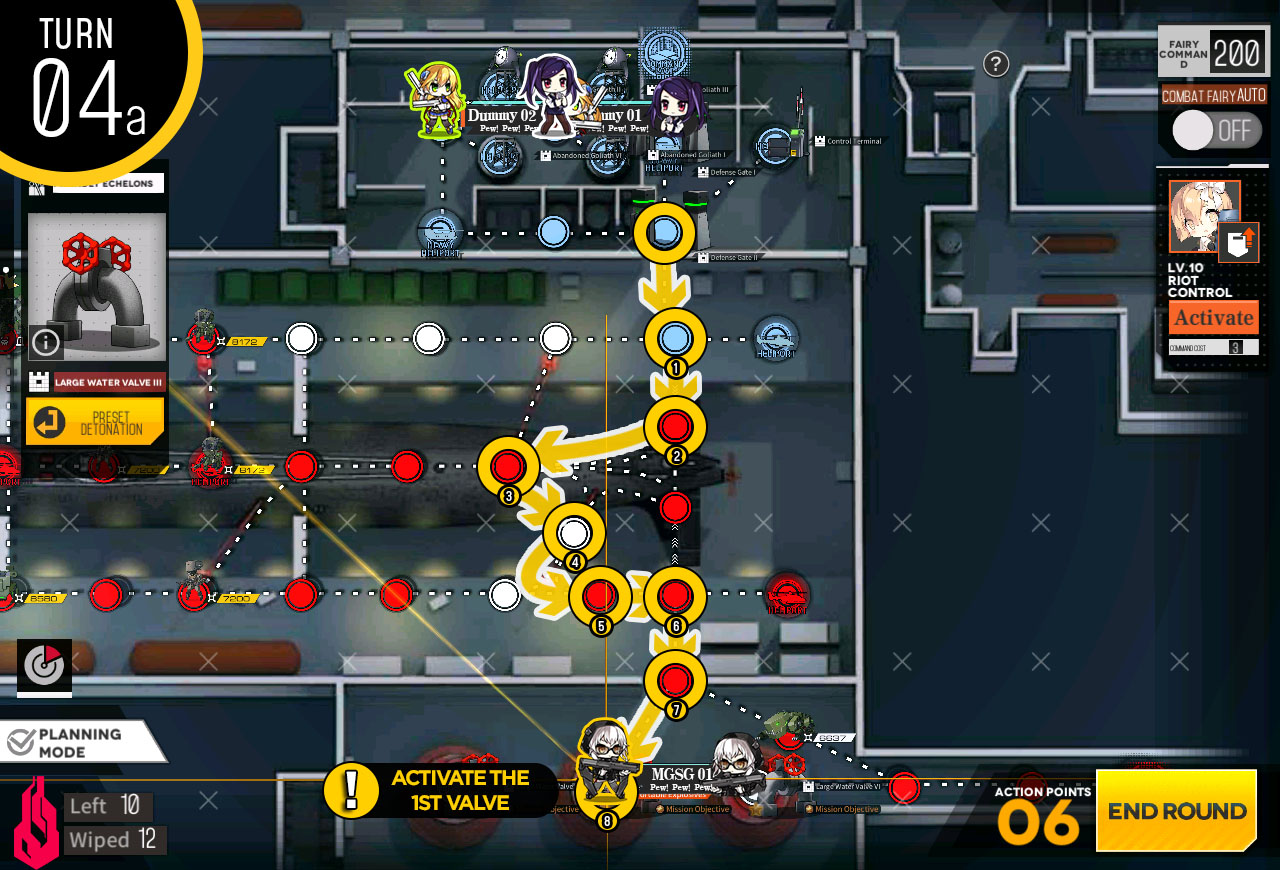
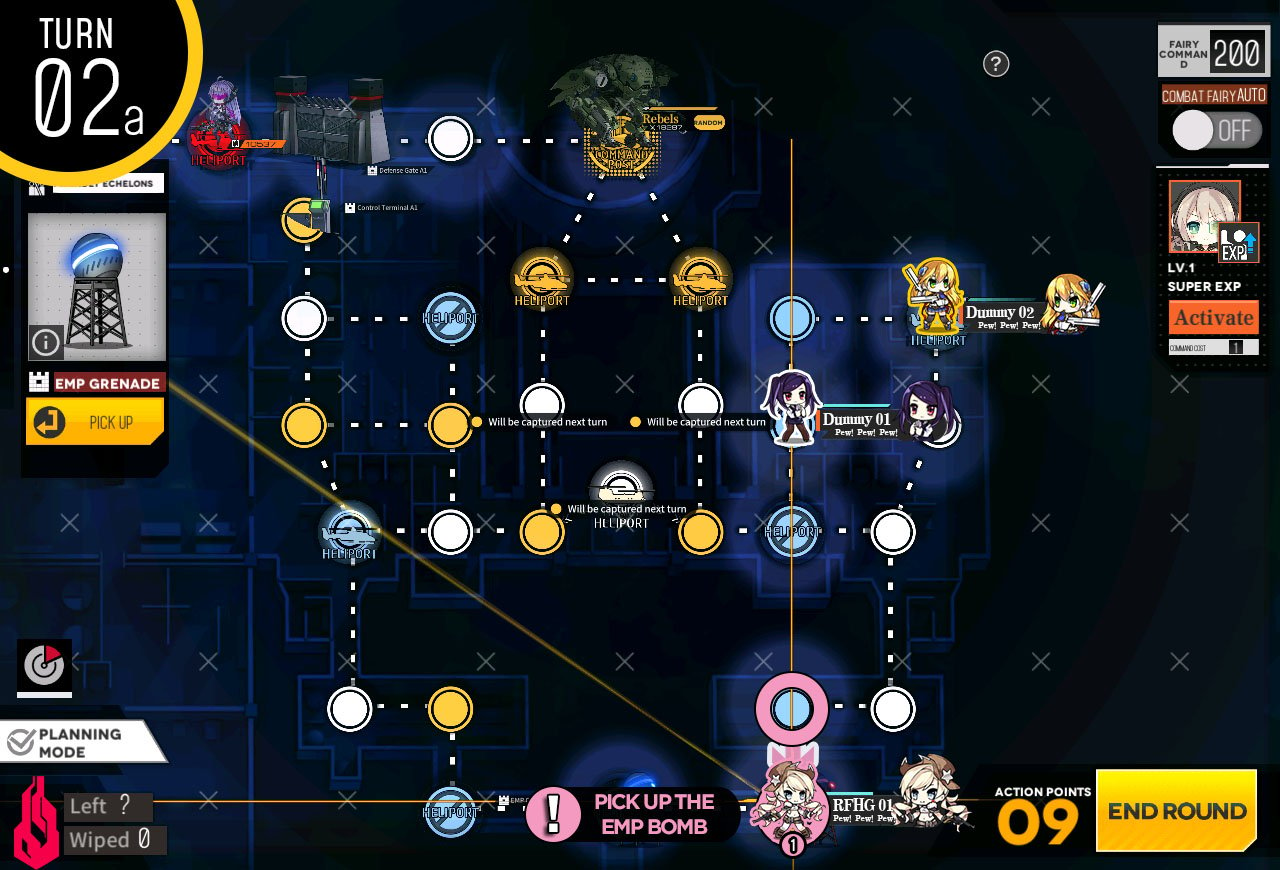
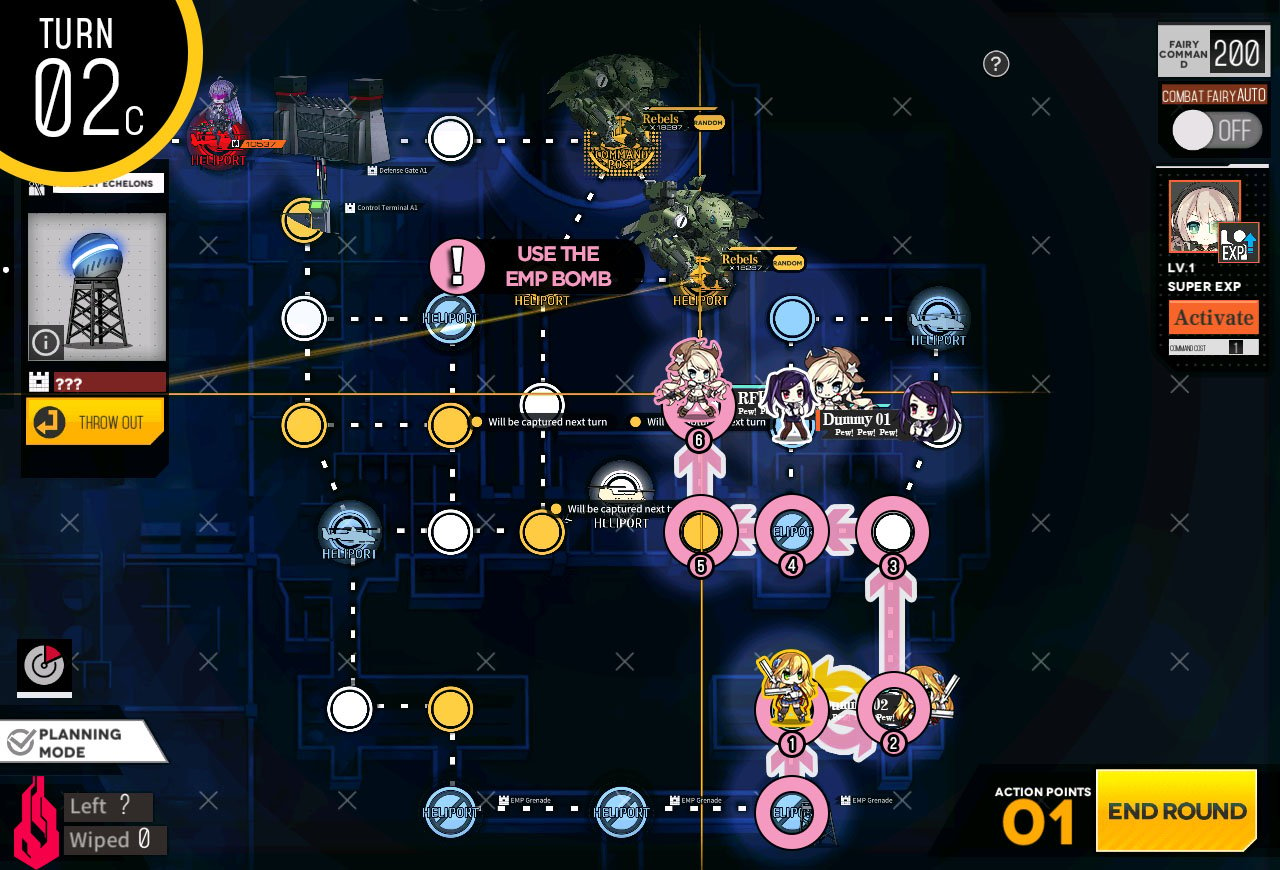
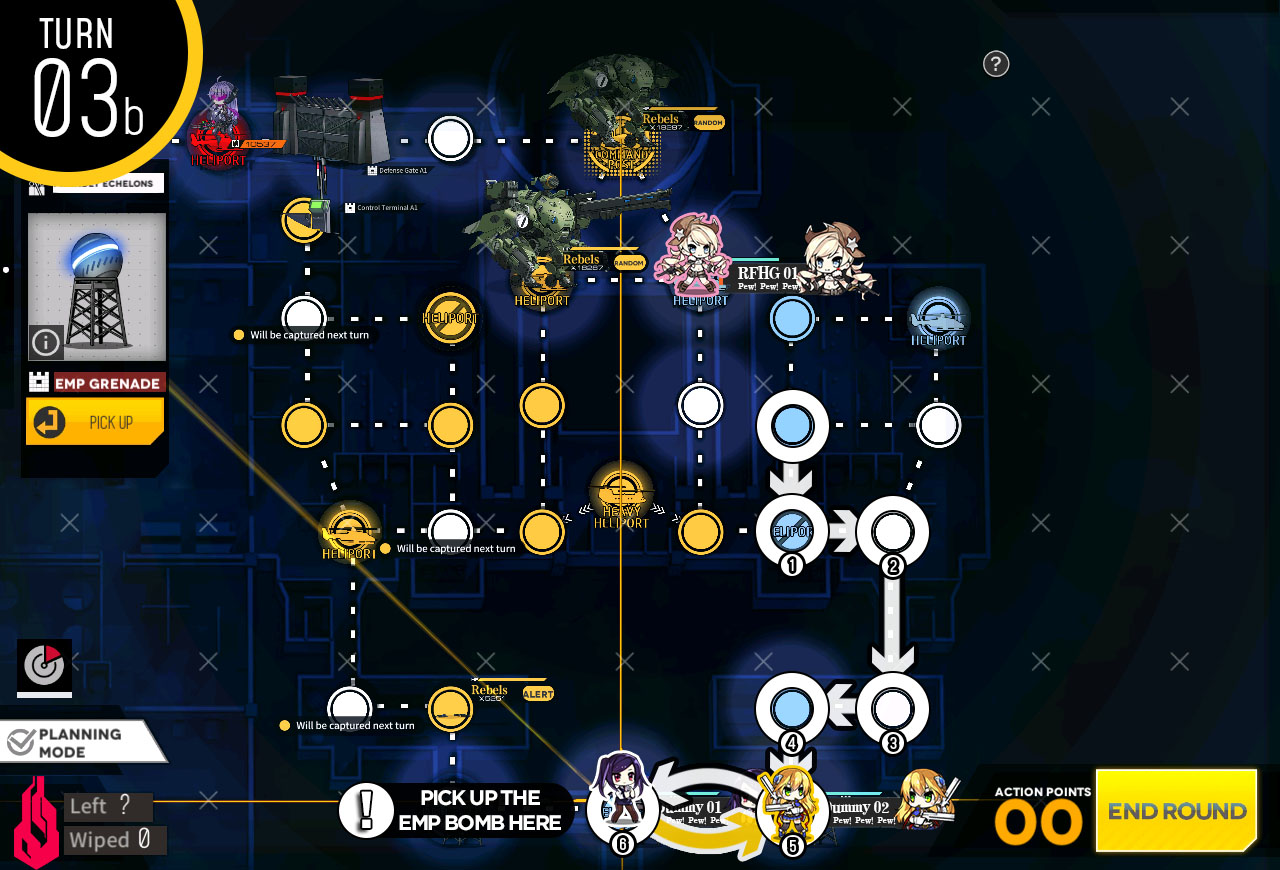
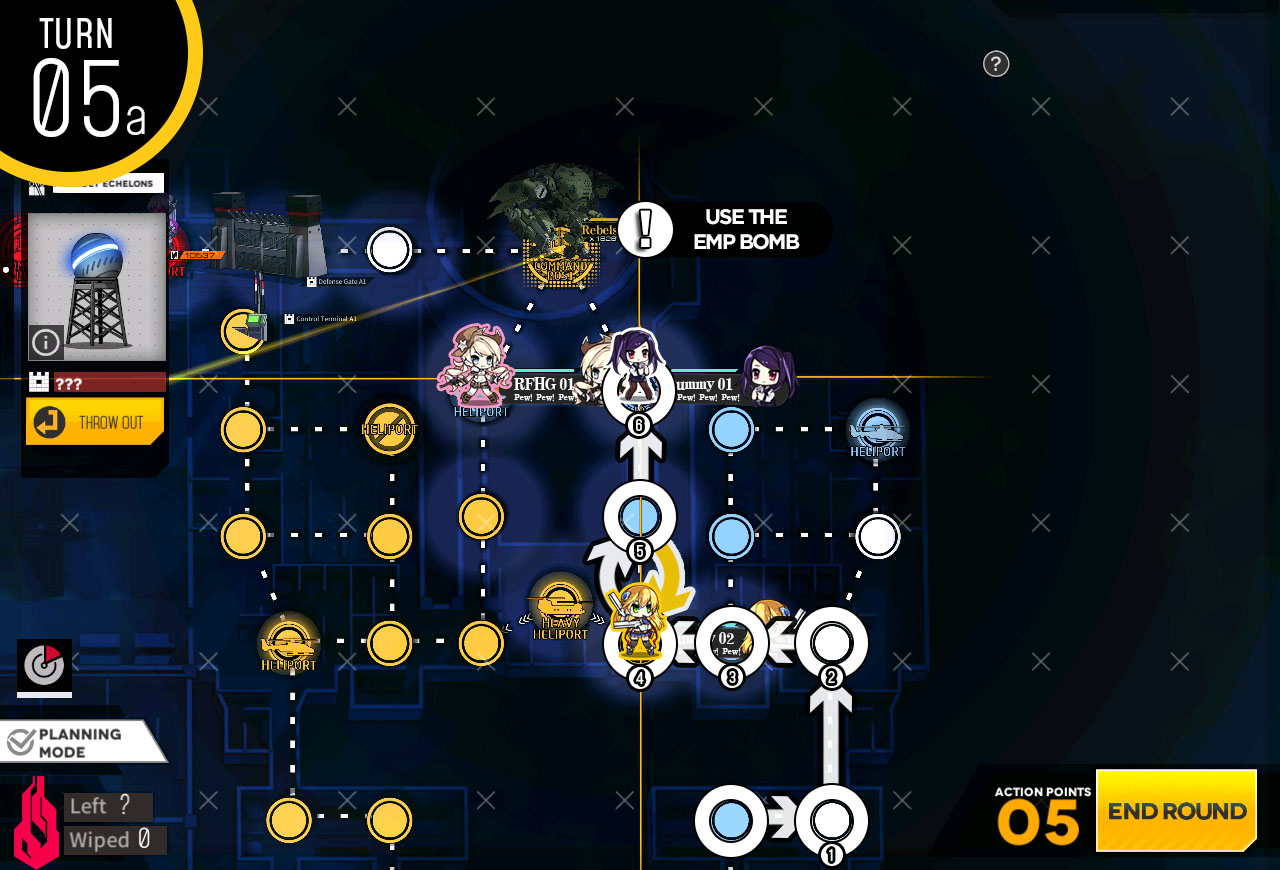
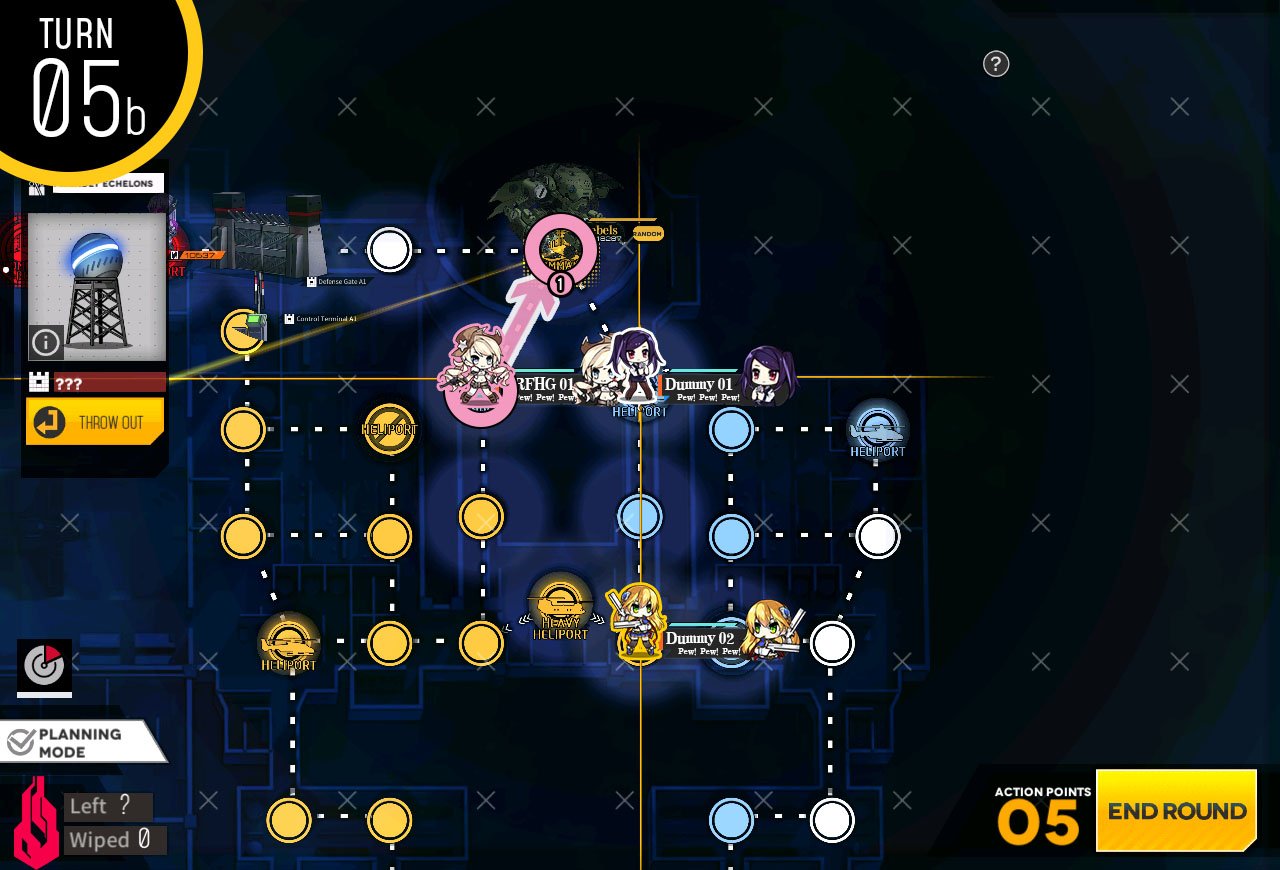
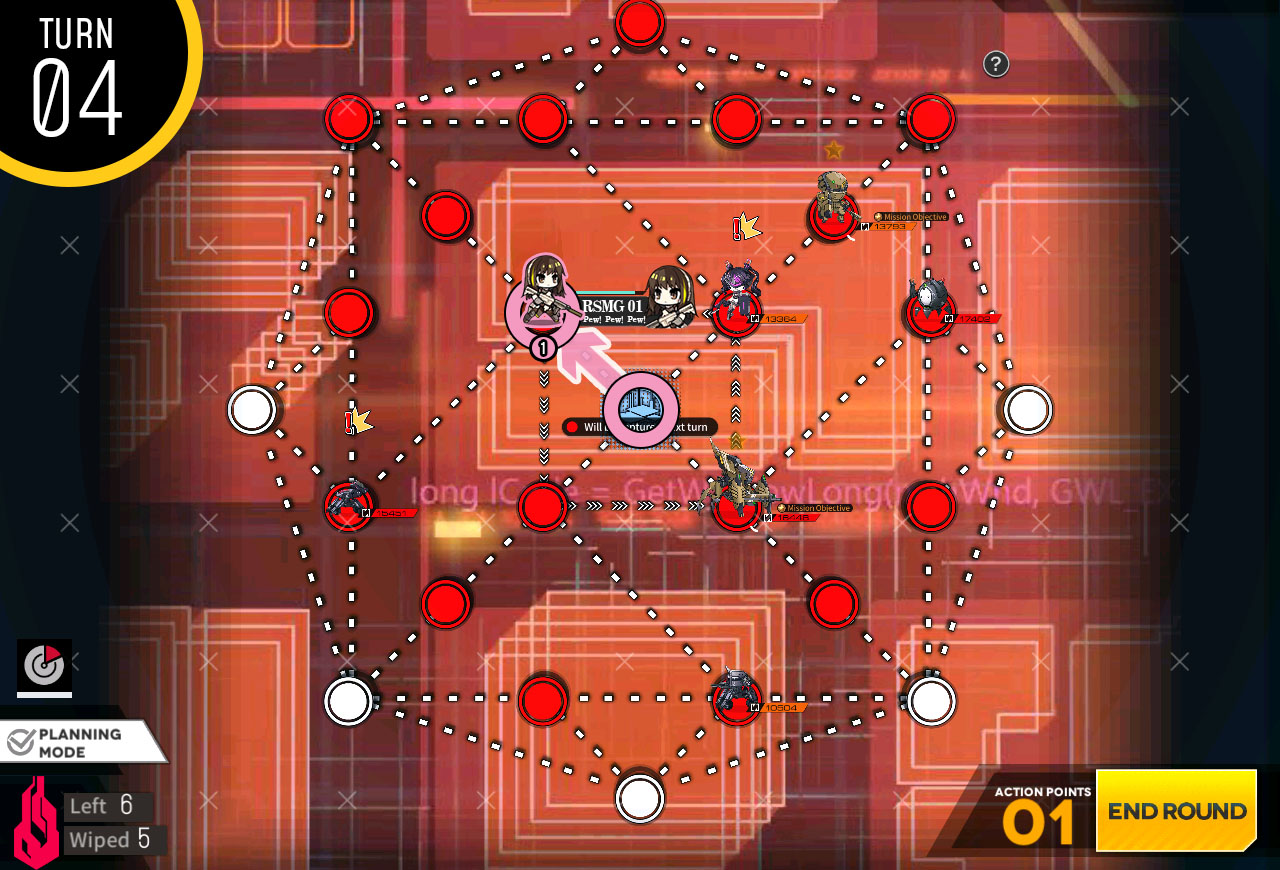
Move to push the EMP bomb down 1 node and gain access to the rest of the map.
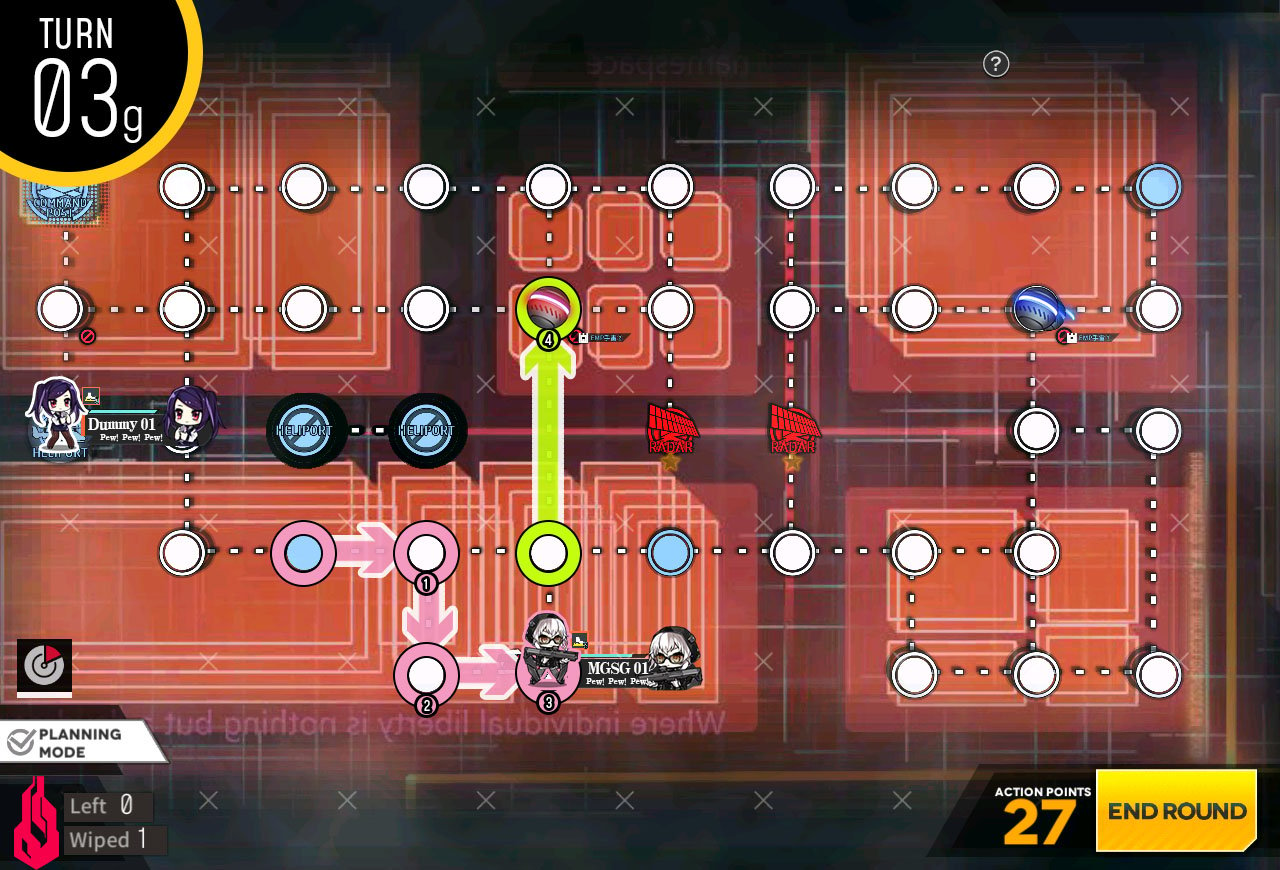
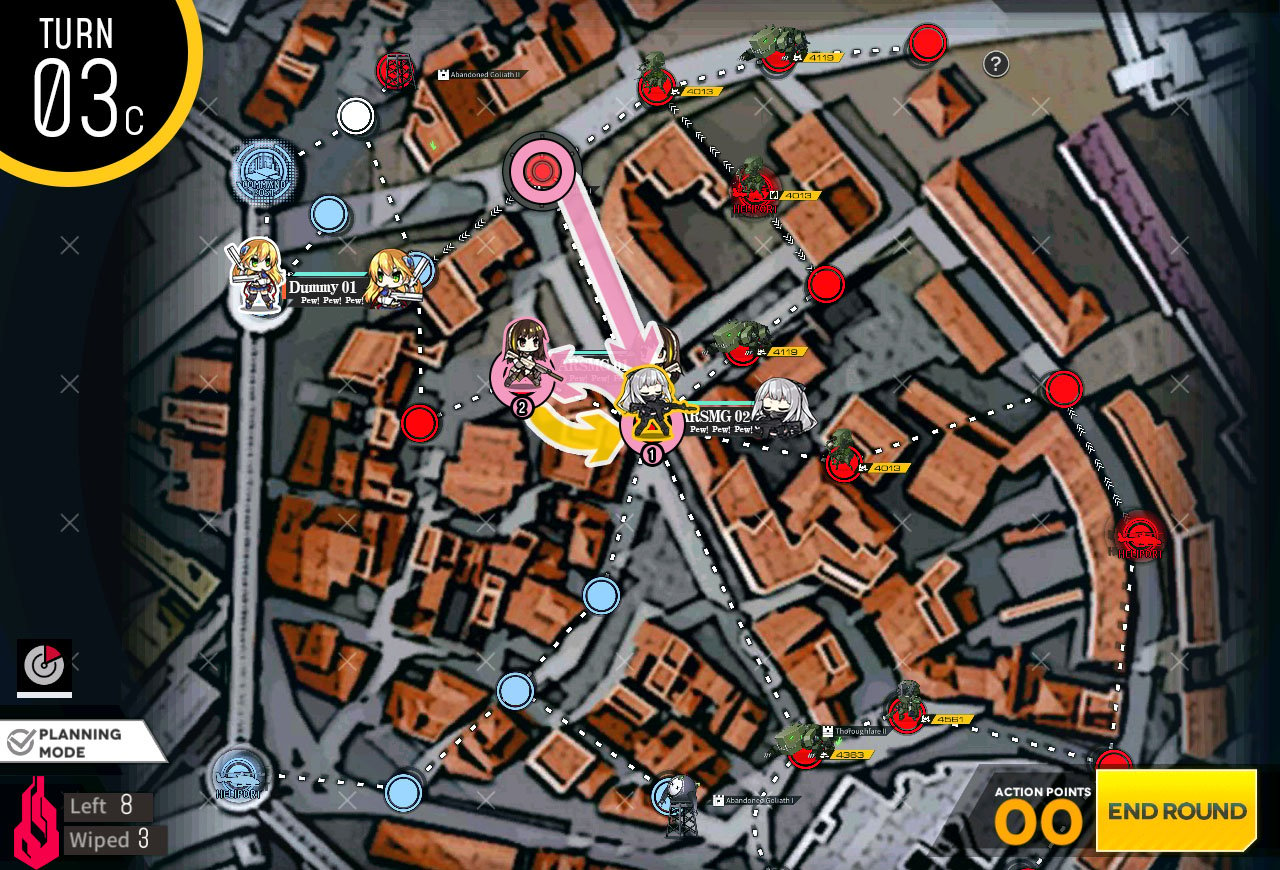
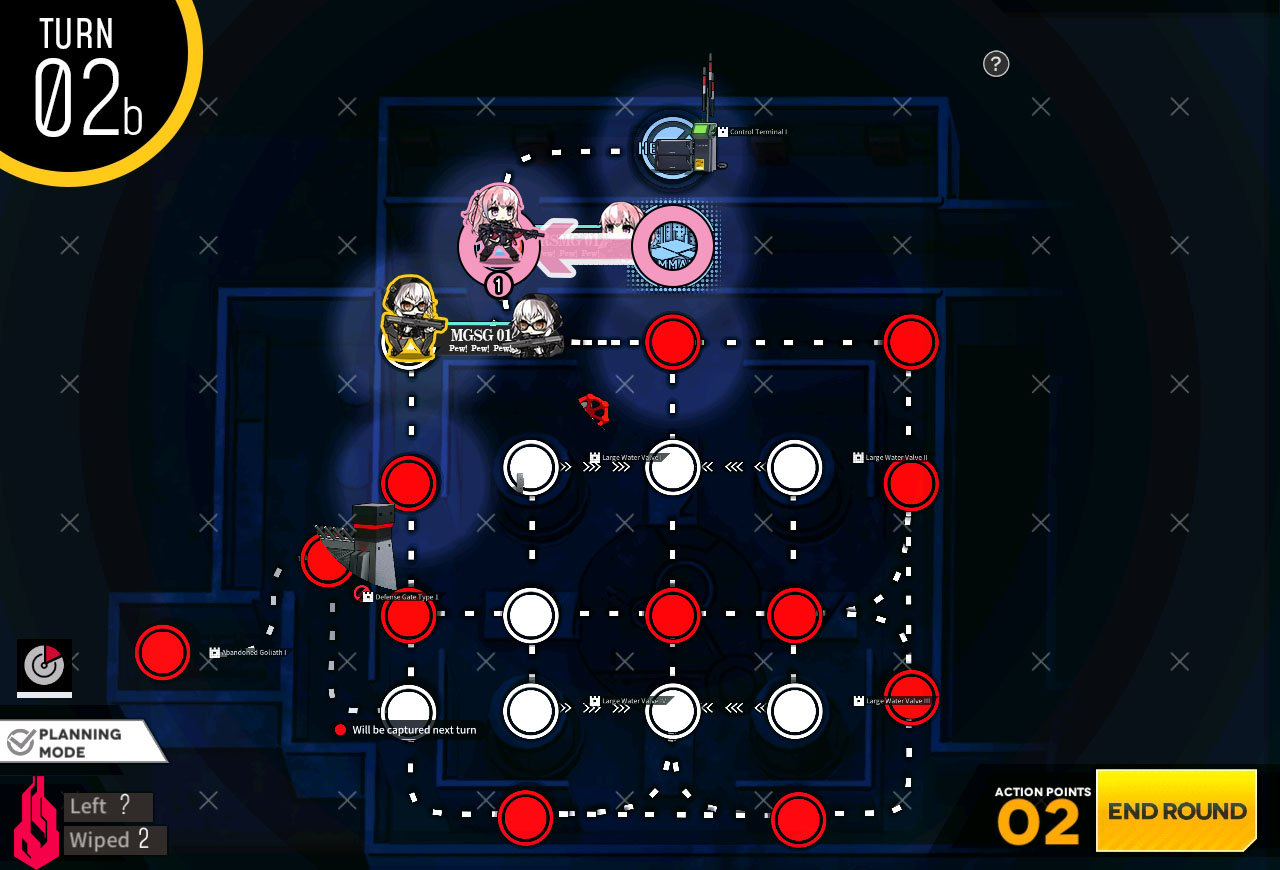
Then take out the enemy unit on the left and push the ball towards the radar.
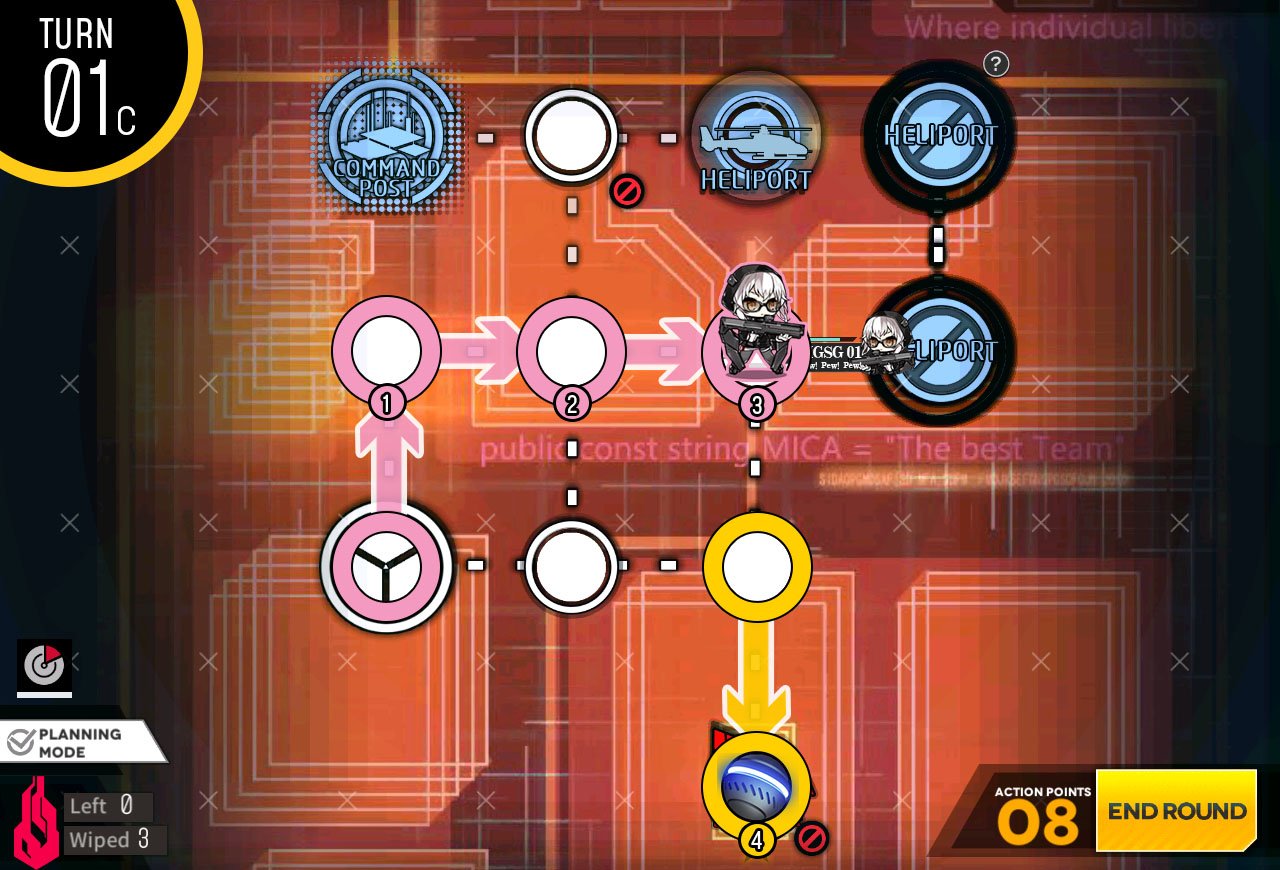
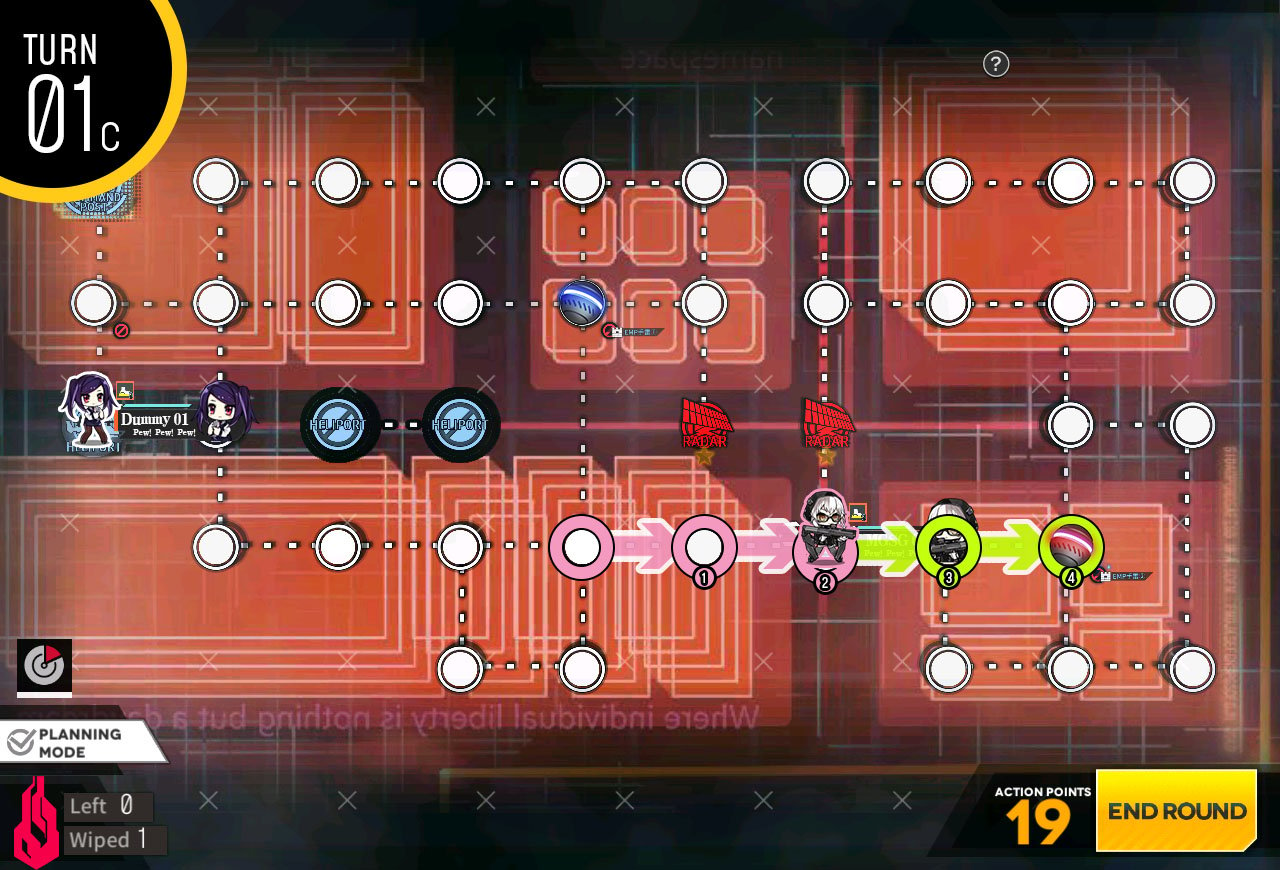
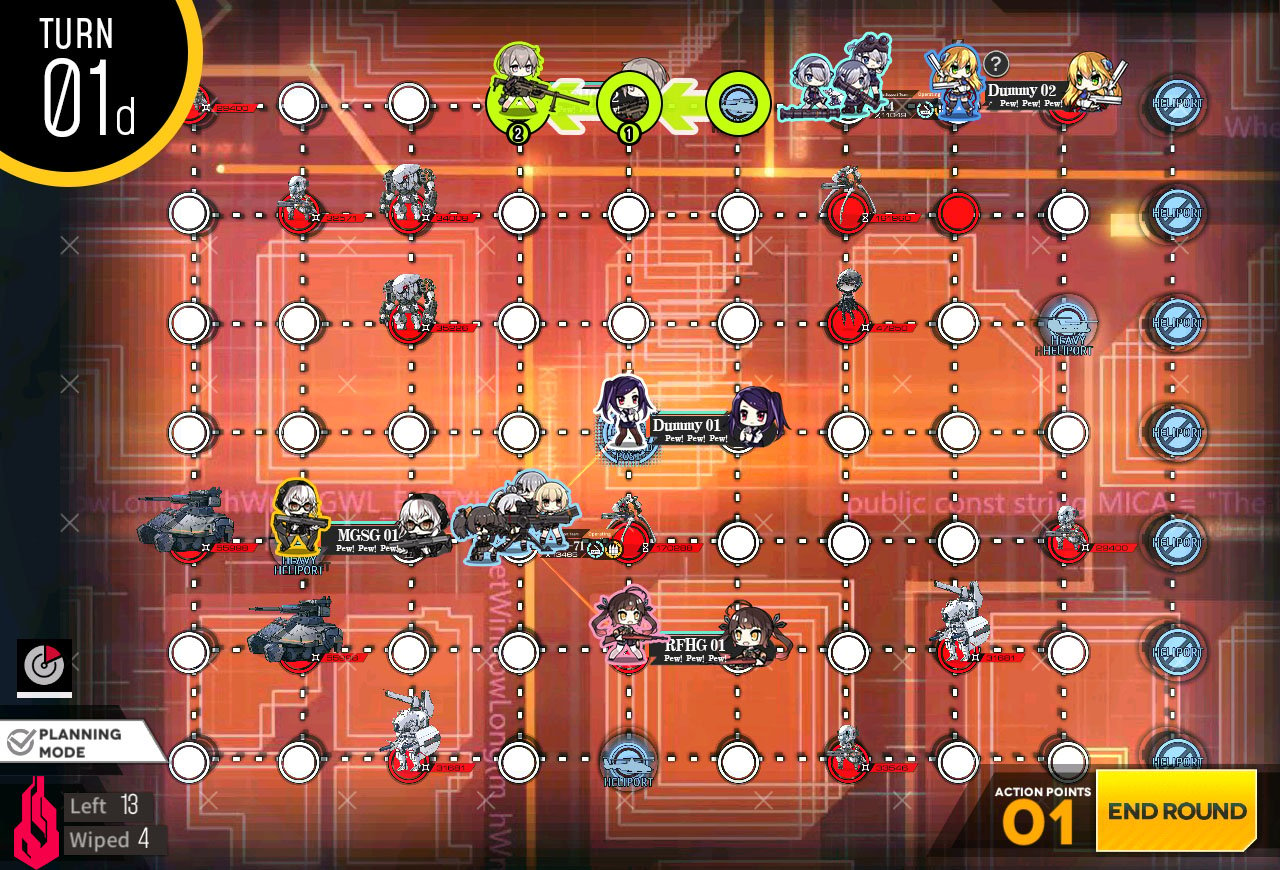
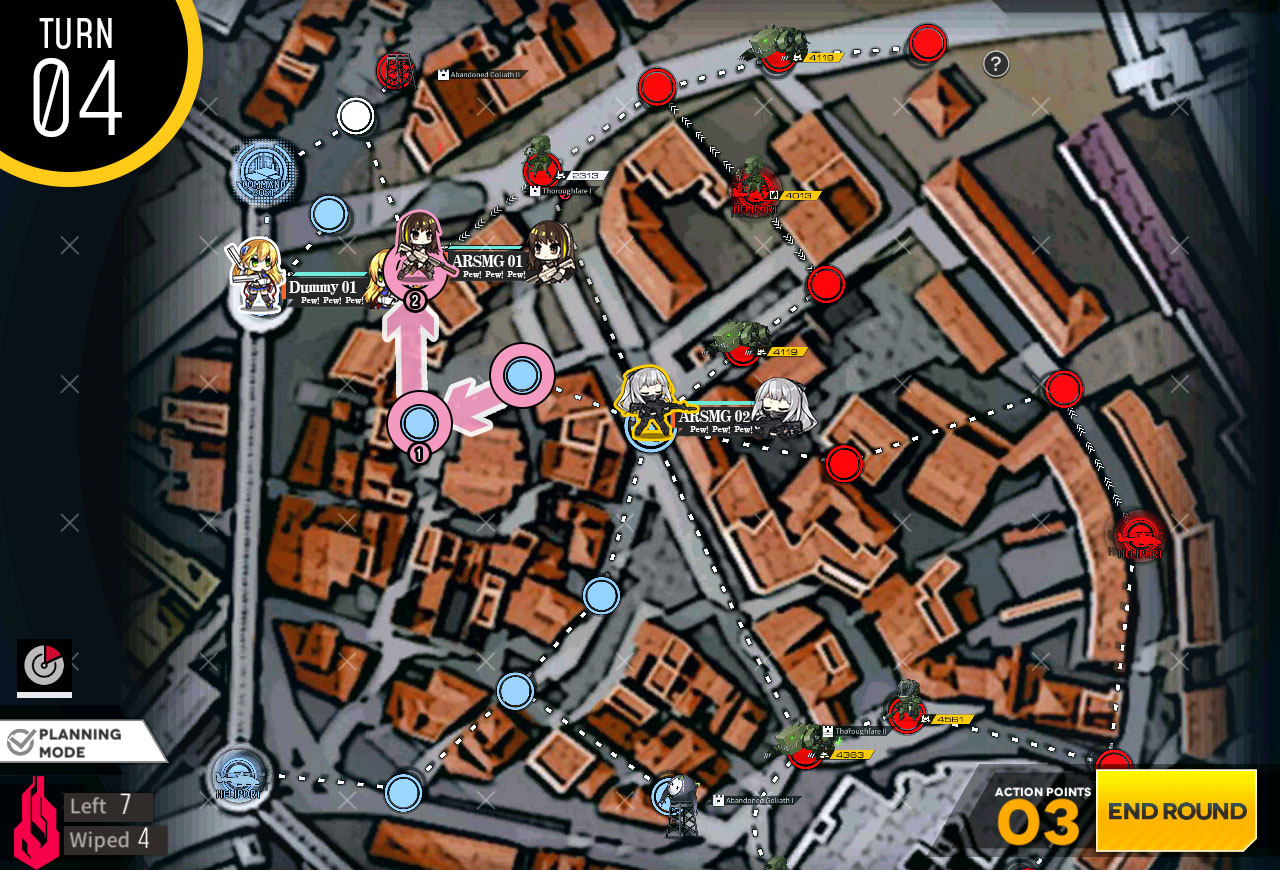
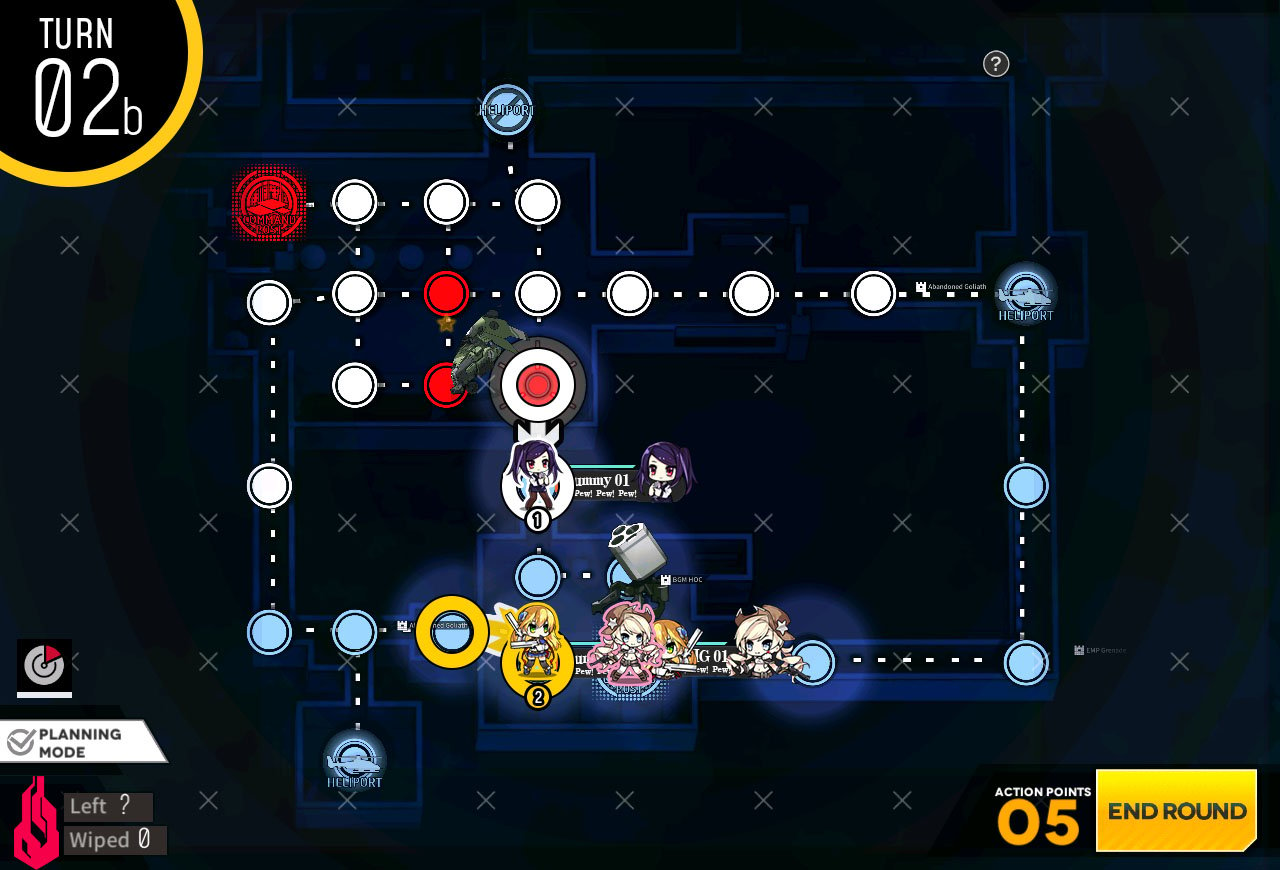
Take out the last unit on the map and push the EMP bomb down to radar node. End the turn to clear the mission.
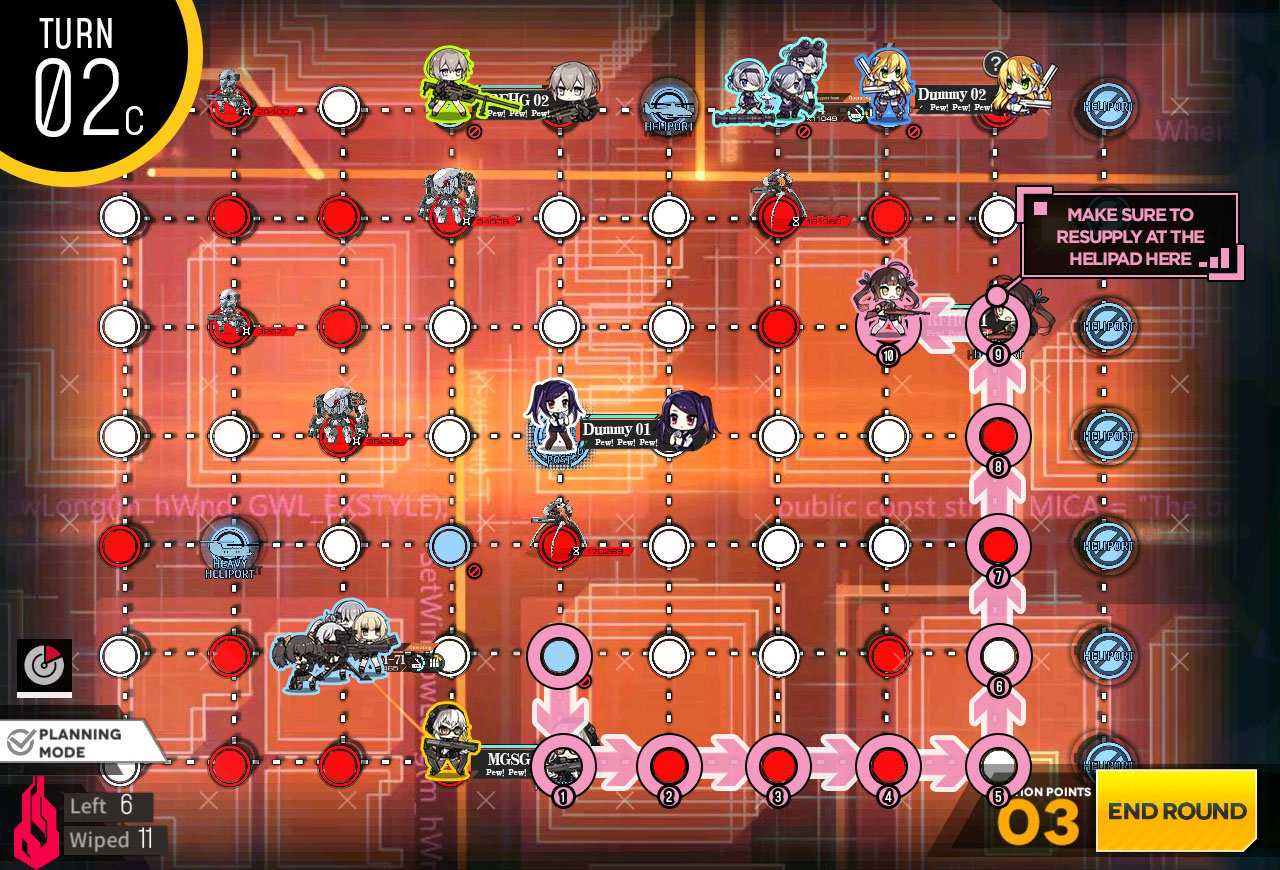
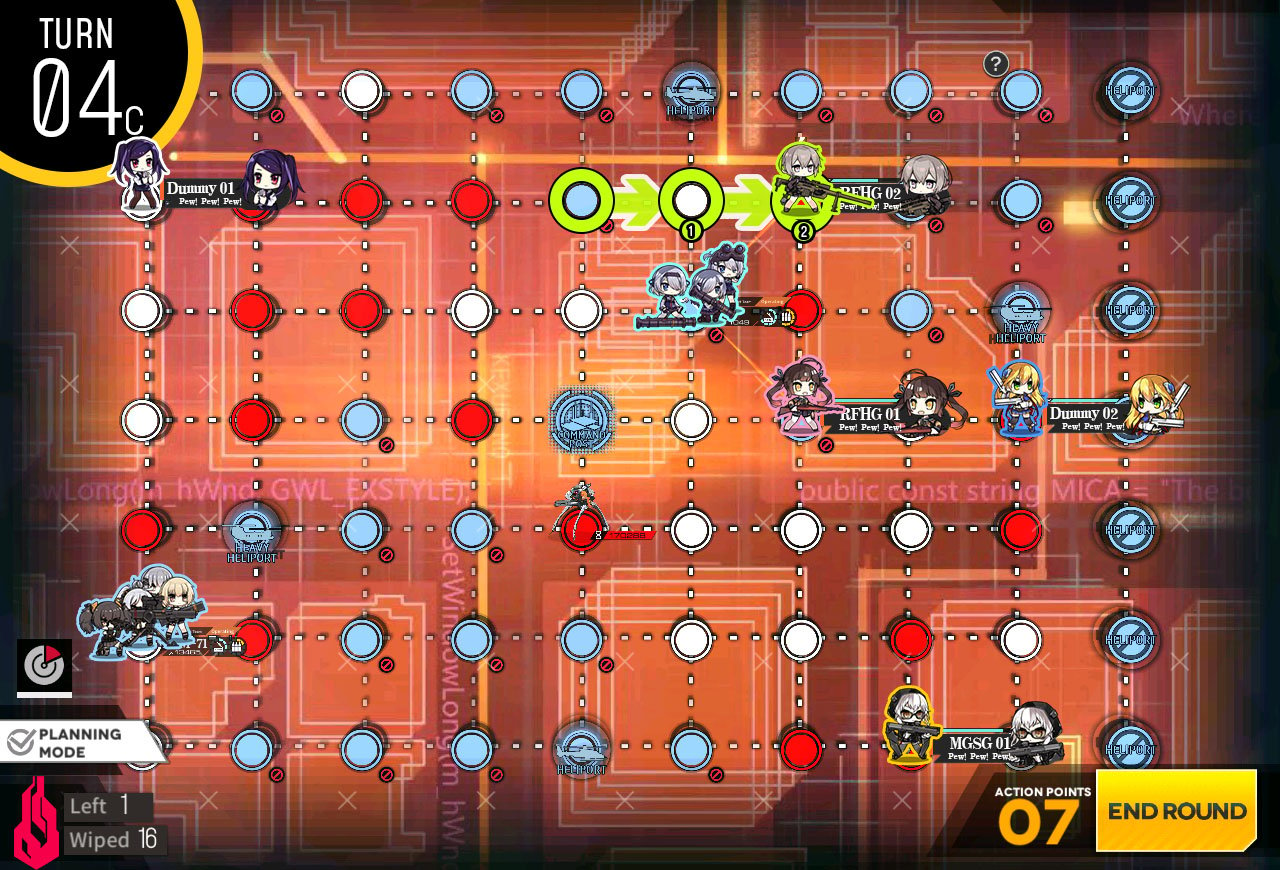
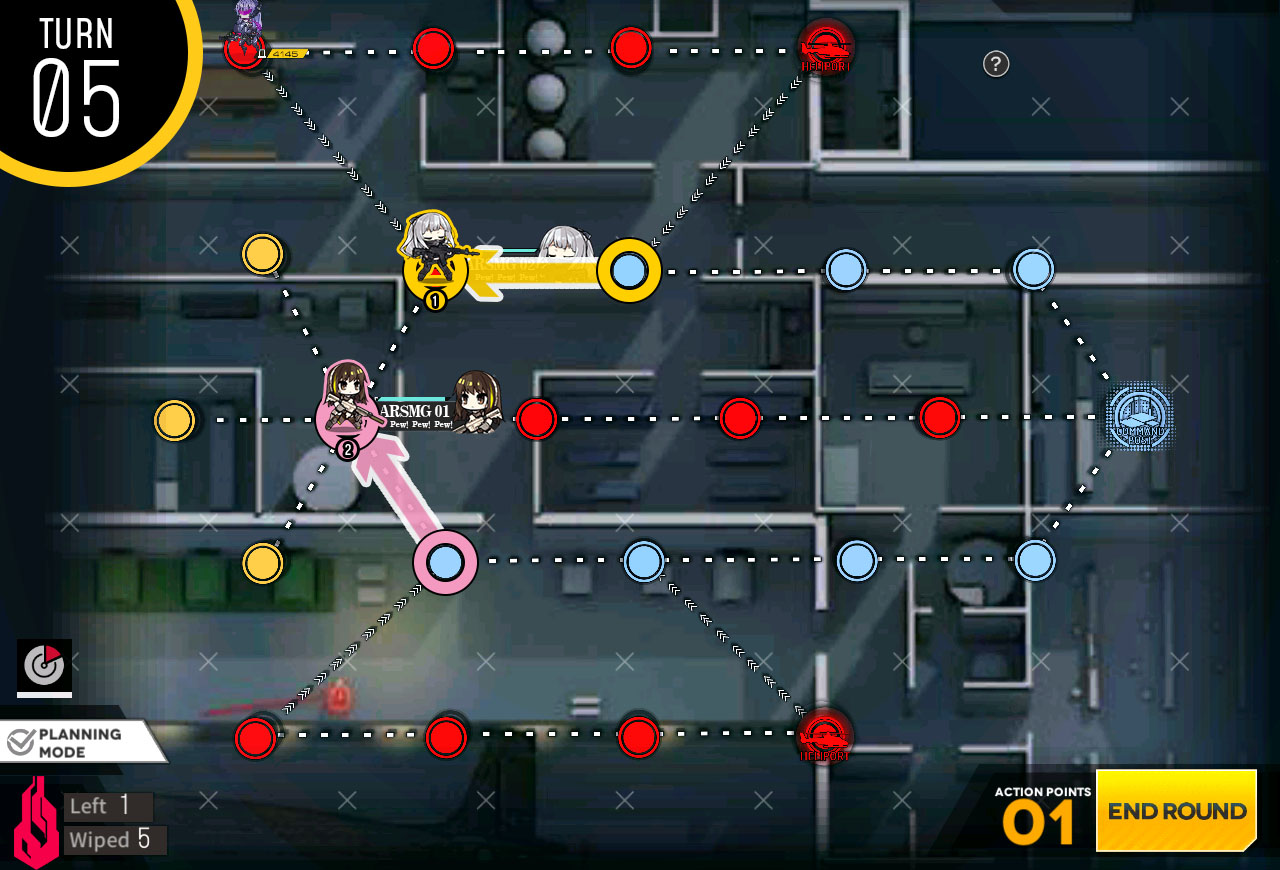
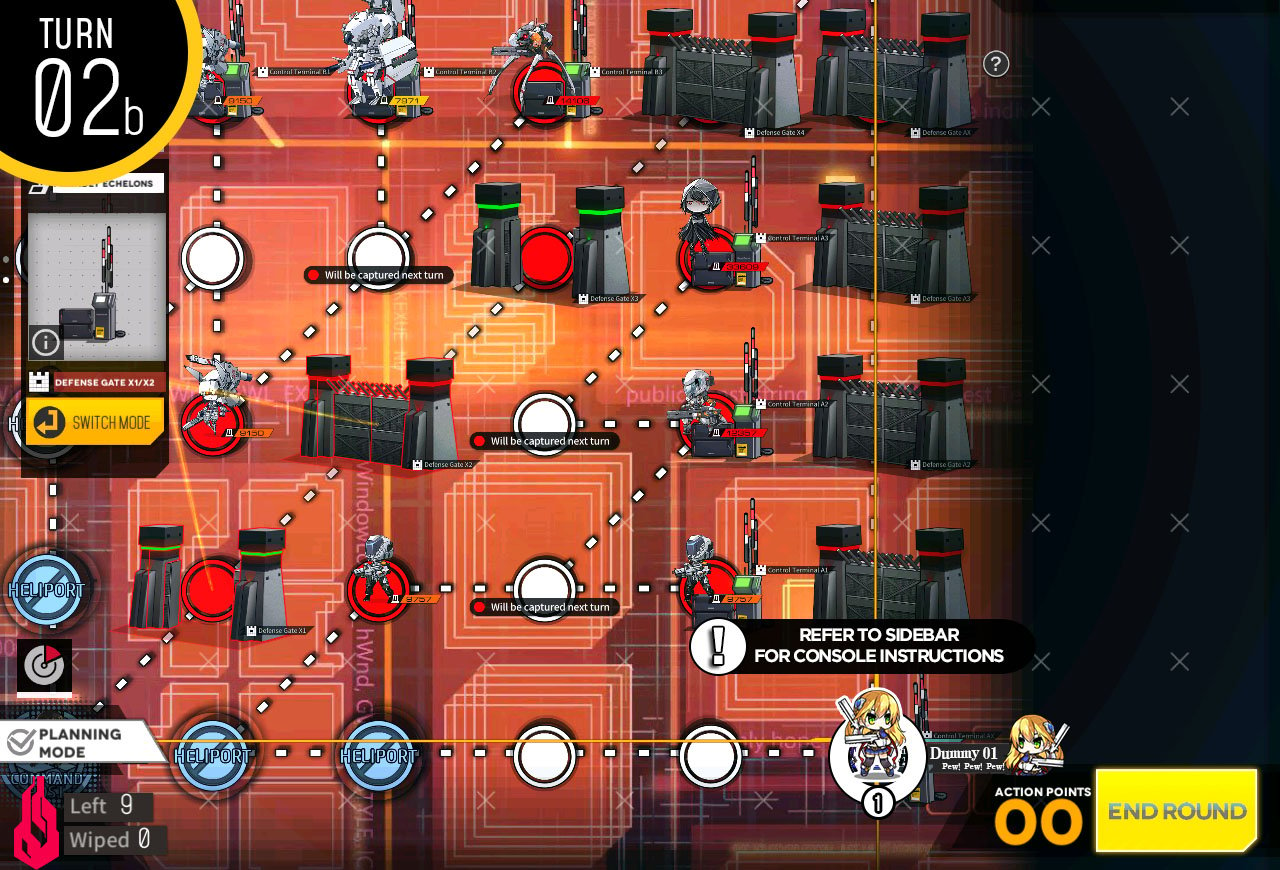
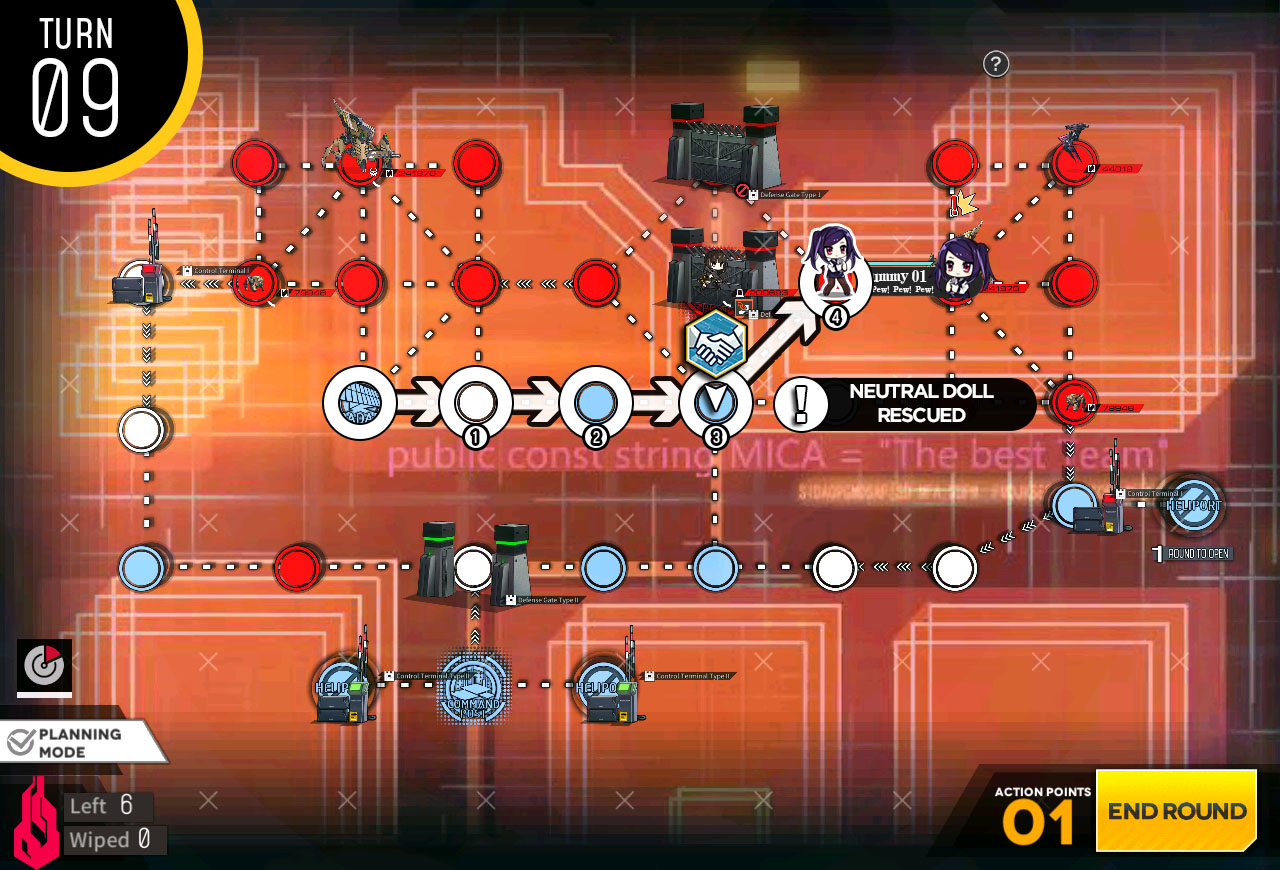
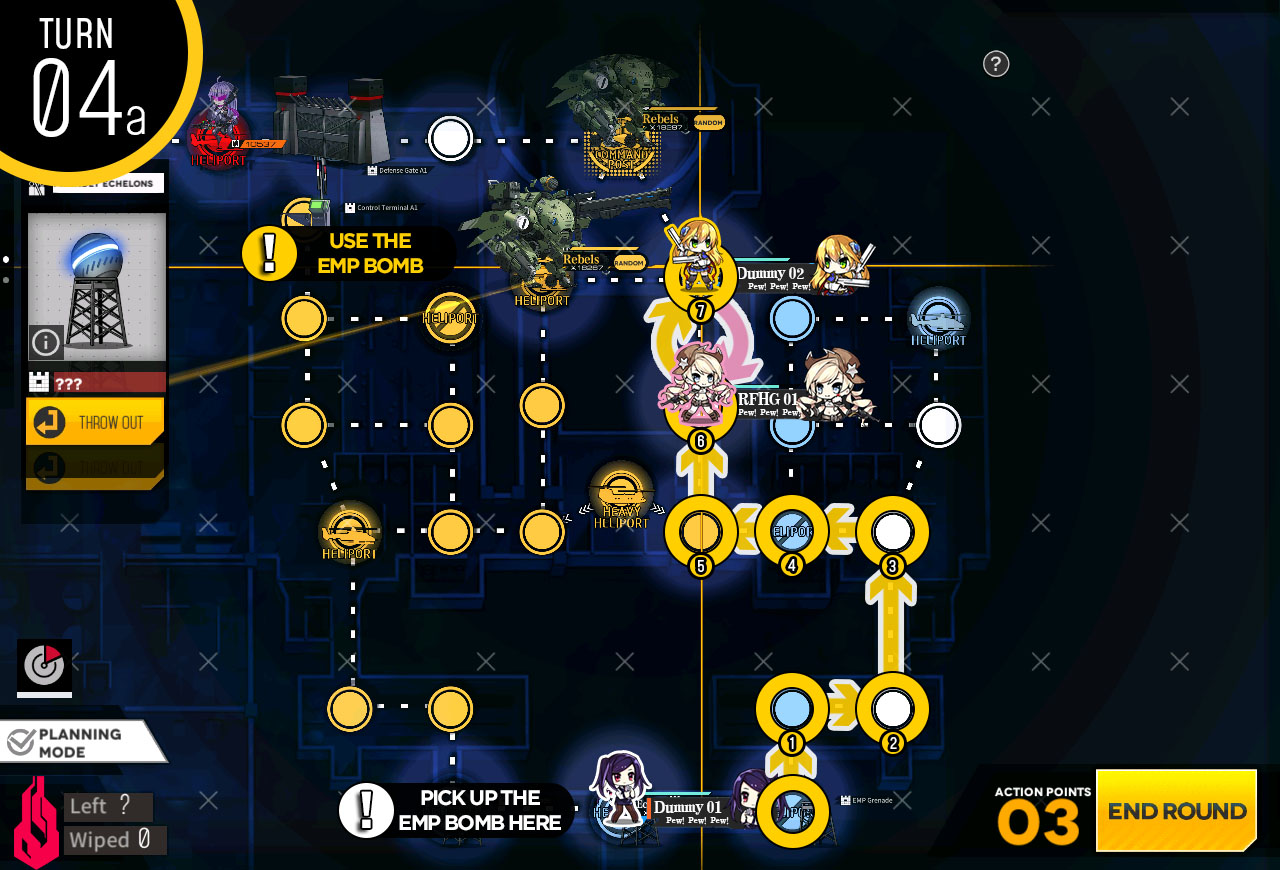
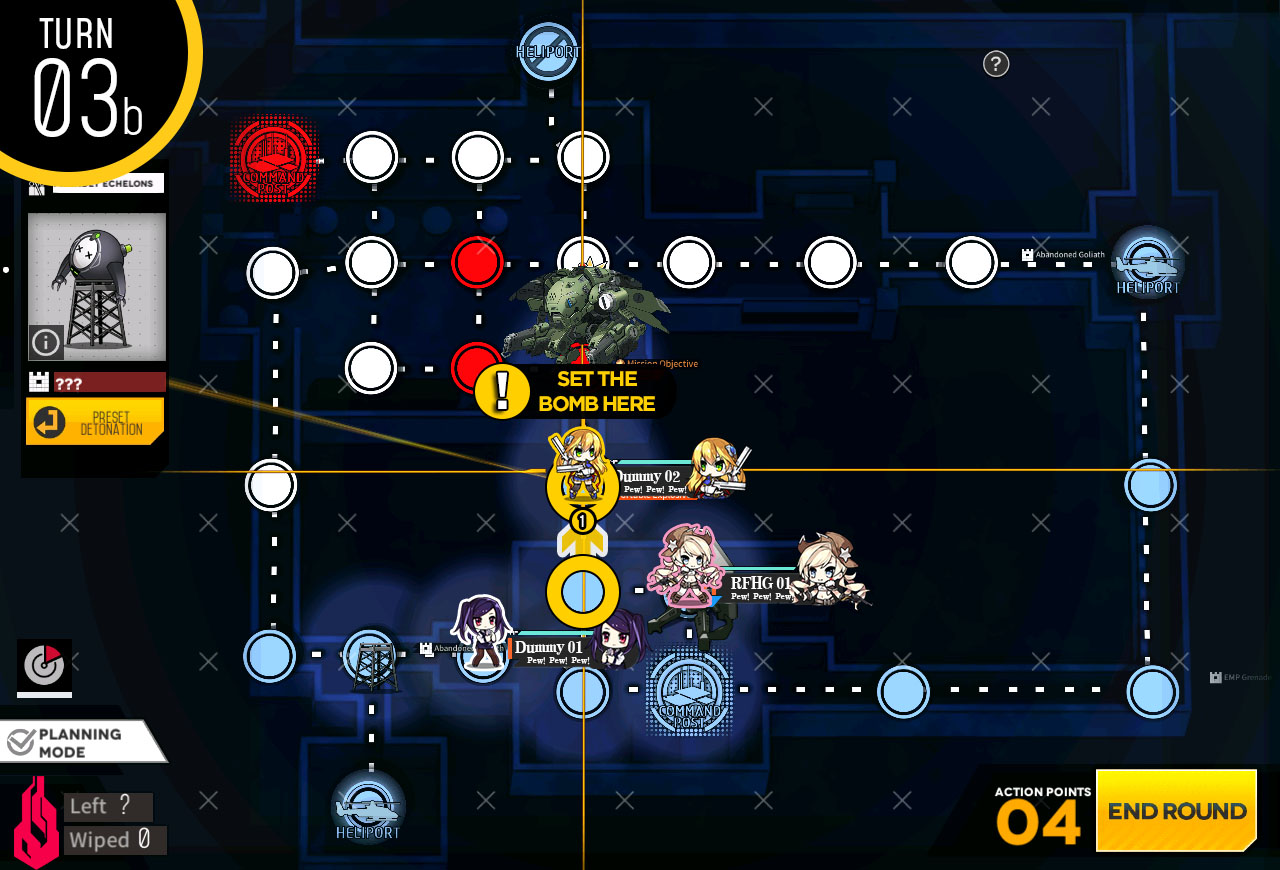
Make sure to click on the EMP #2 not the EMP #1 or you will have to restart the mission.
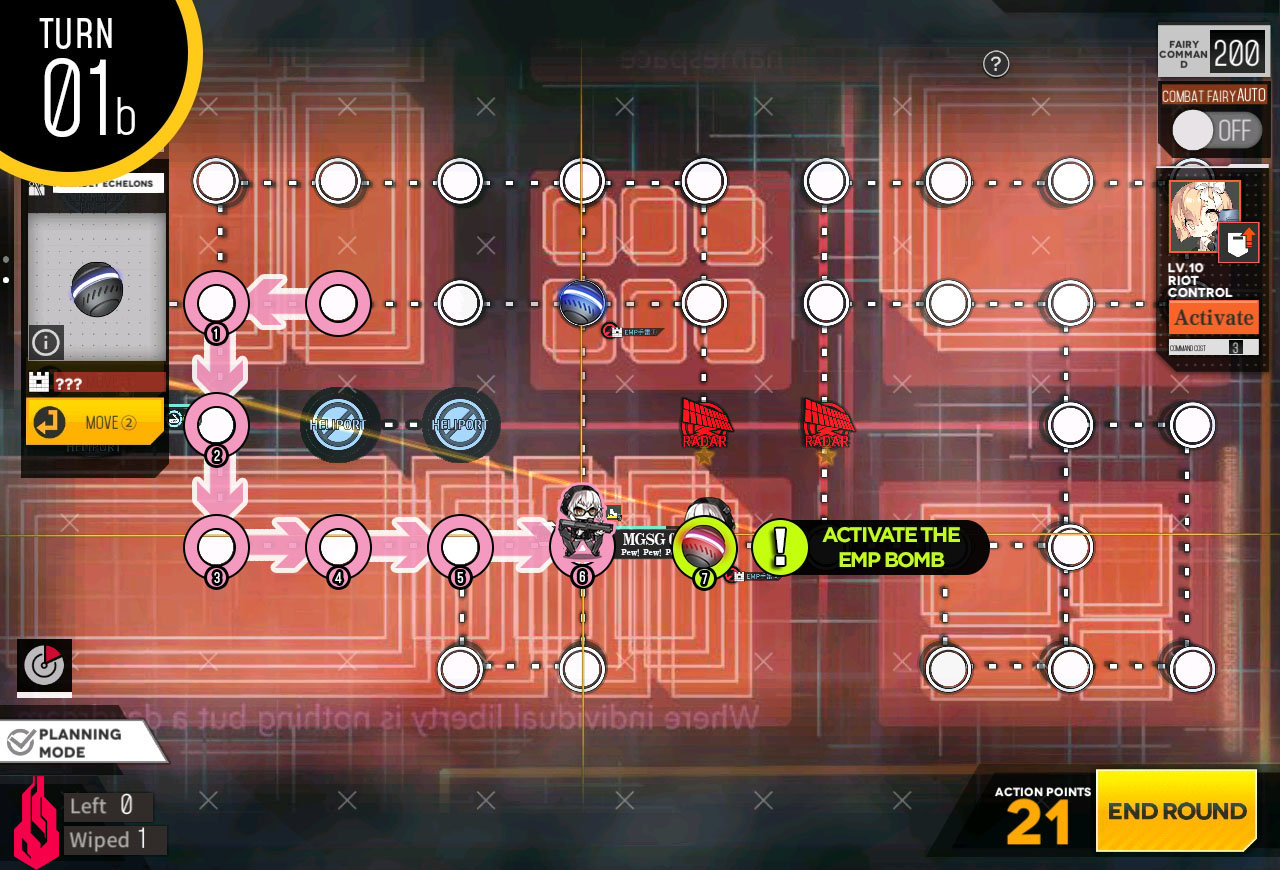
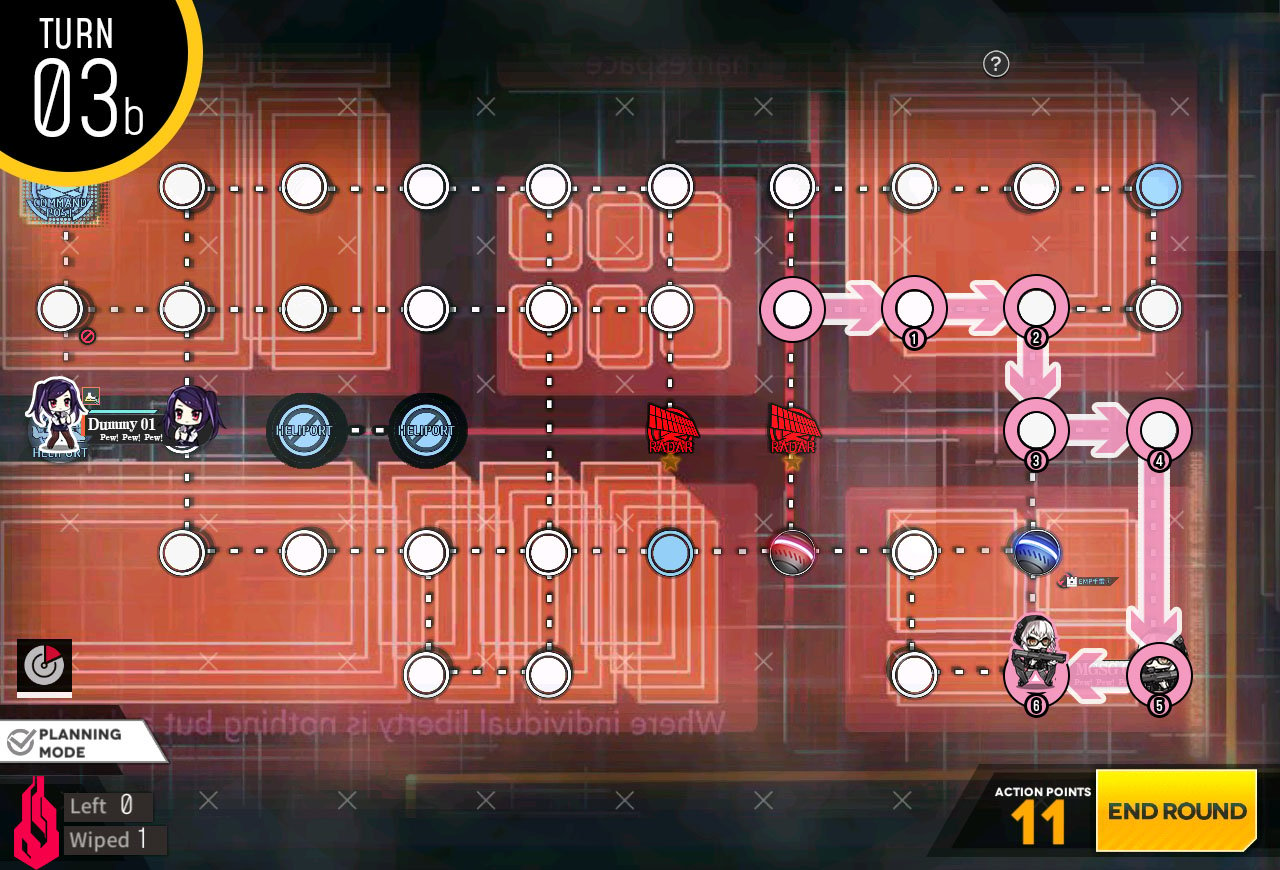
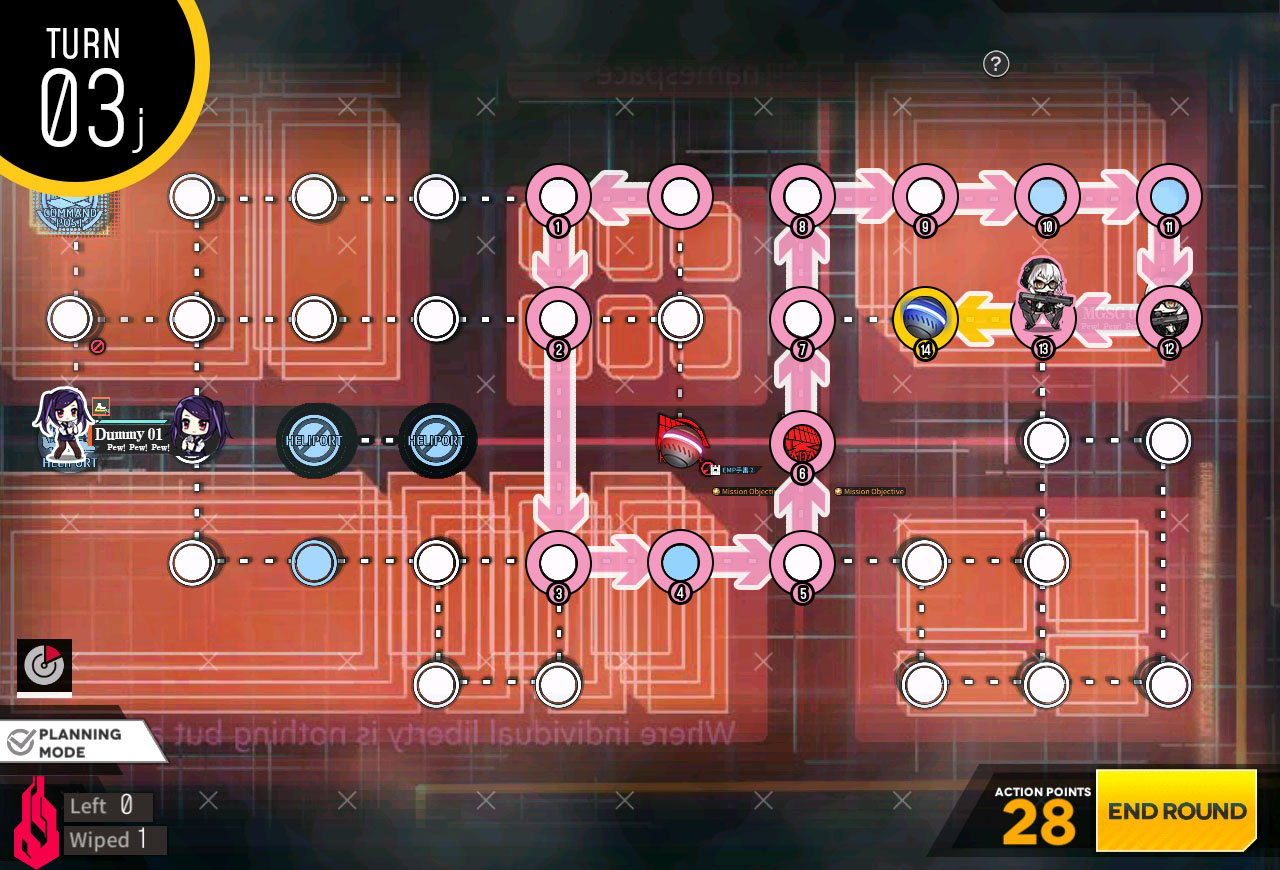
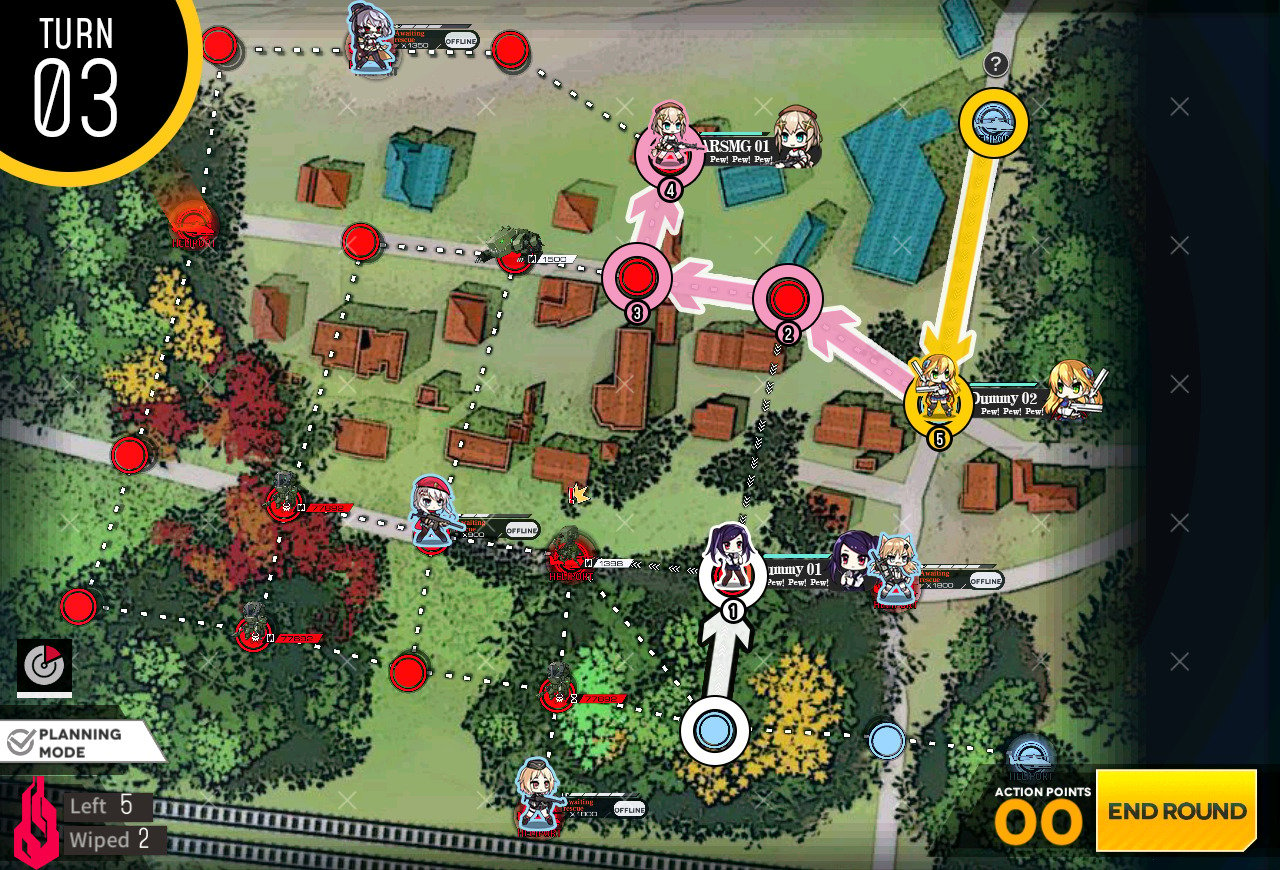
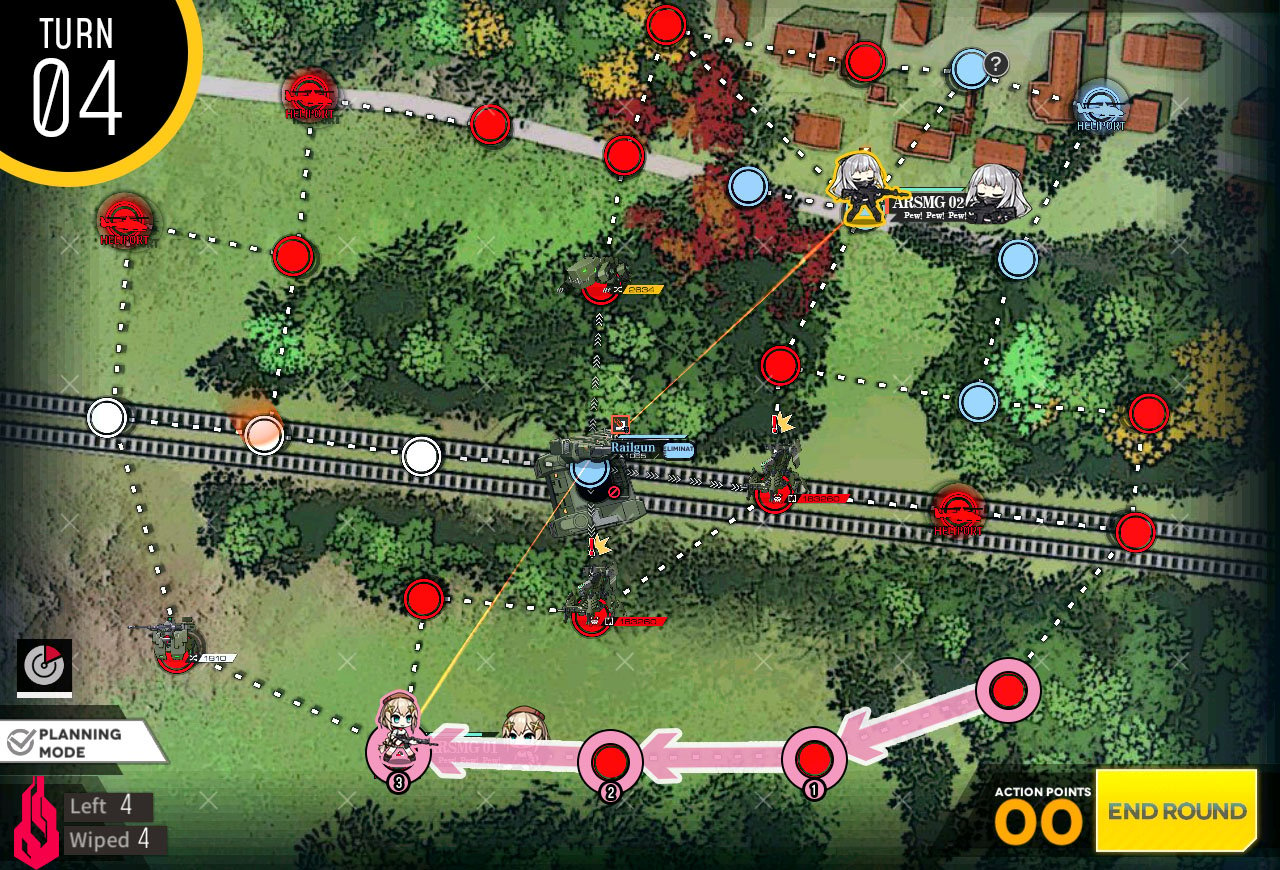
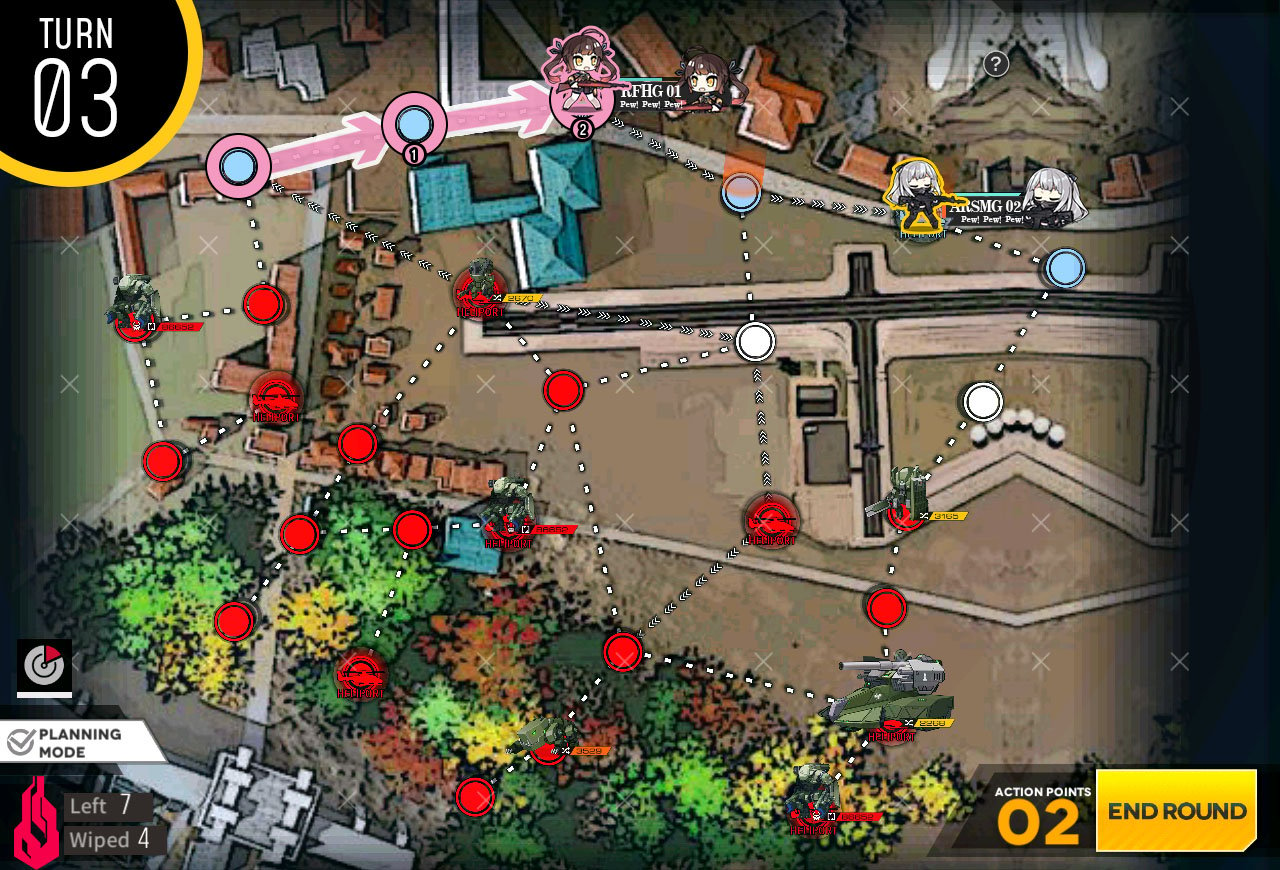
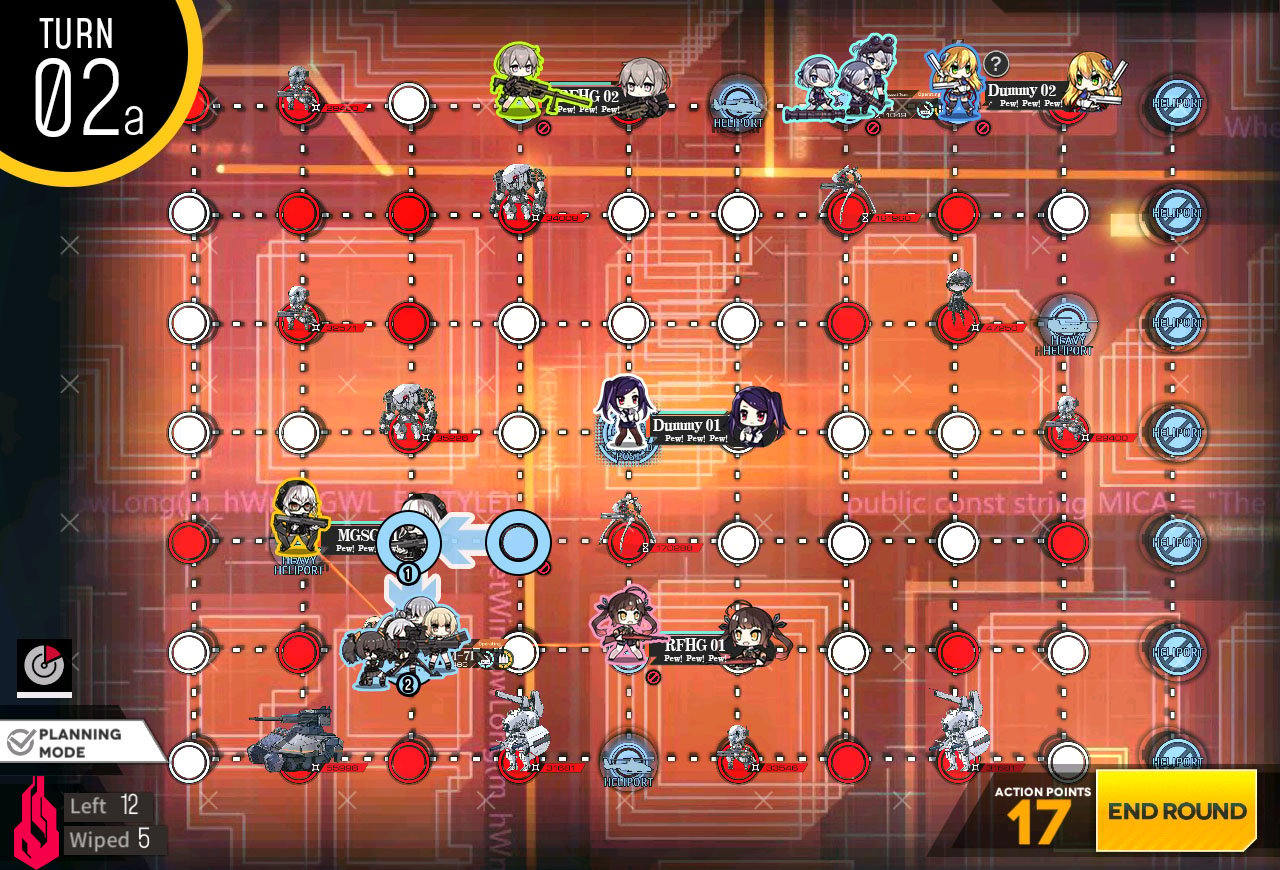
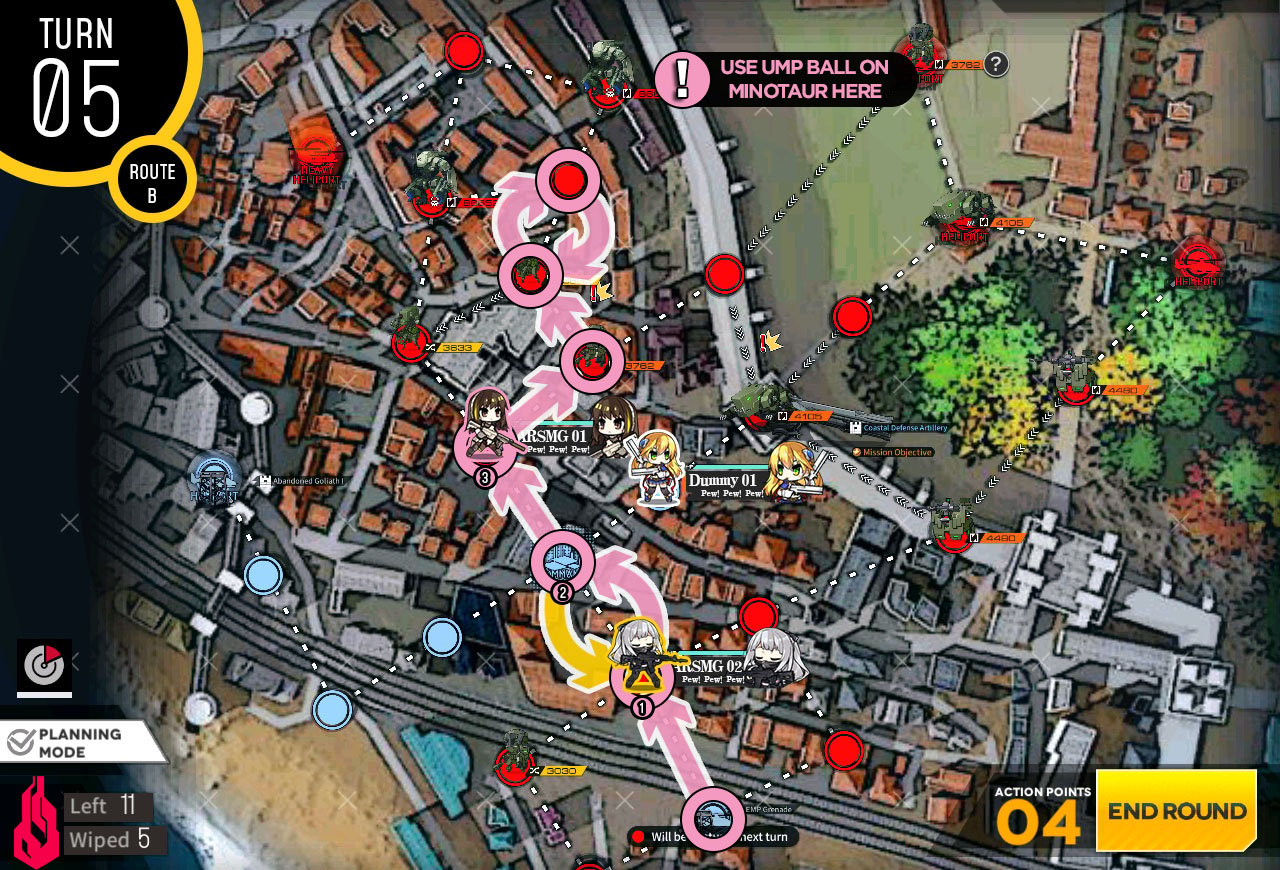
Push EMP #2 all the way to the right at the T-intersection.
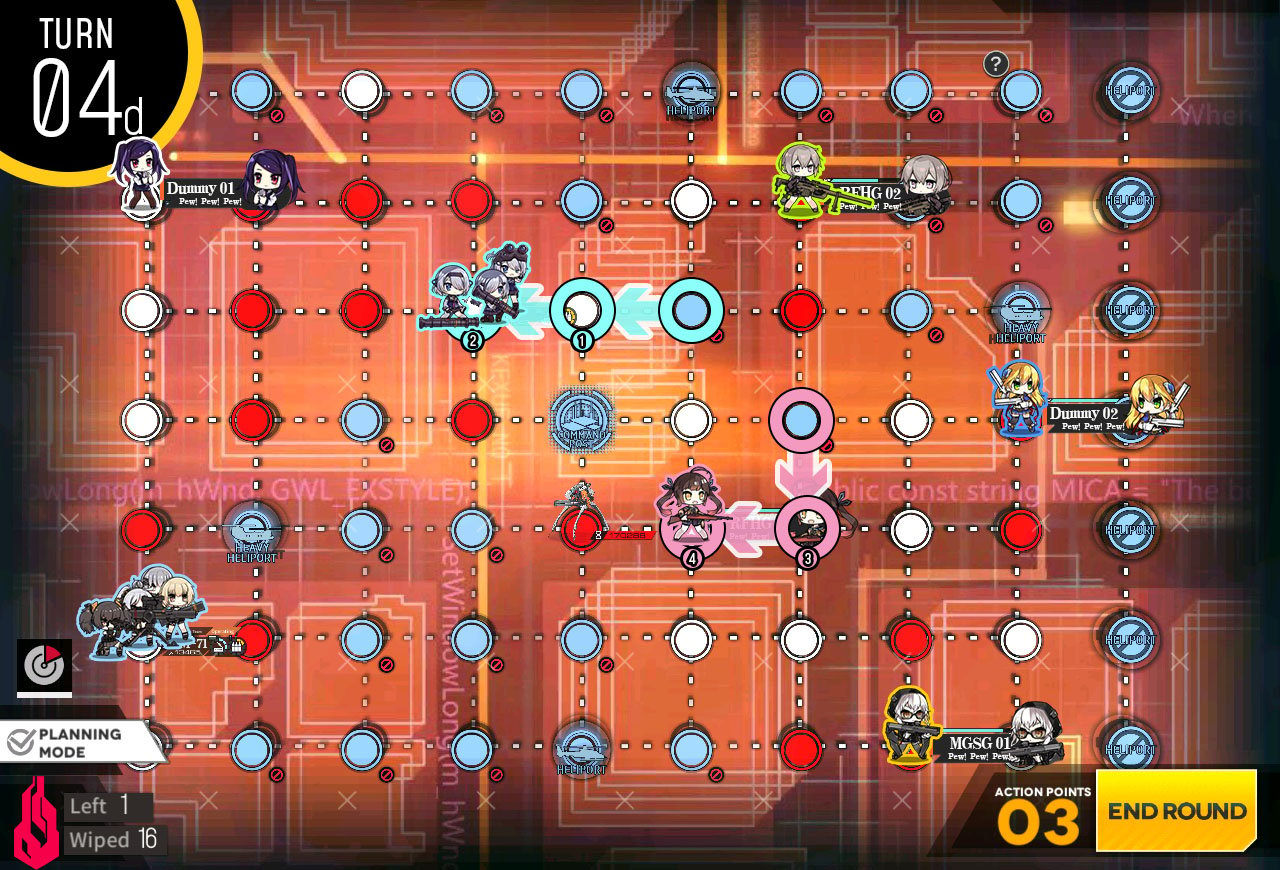
Push up the EMP bomb to the top T-intersection.
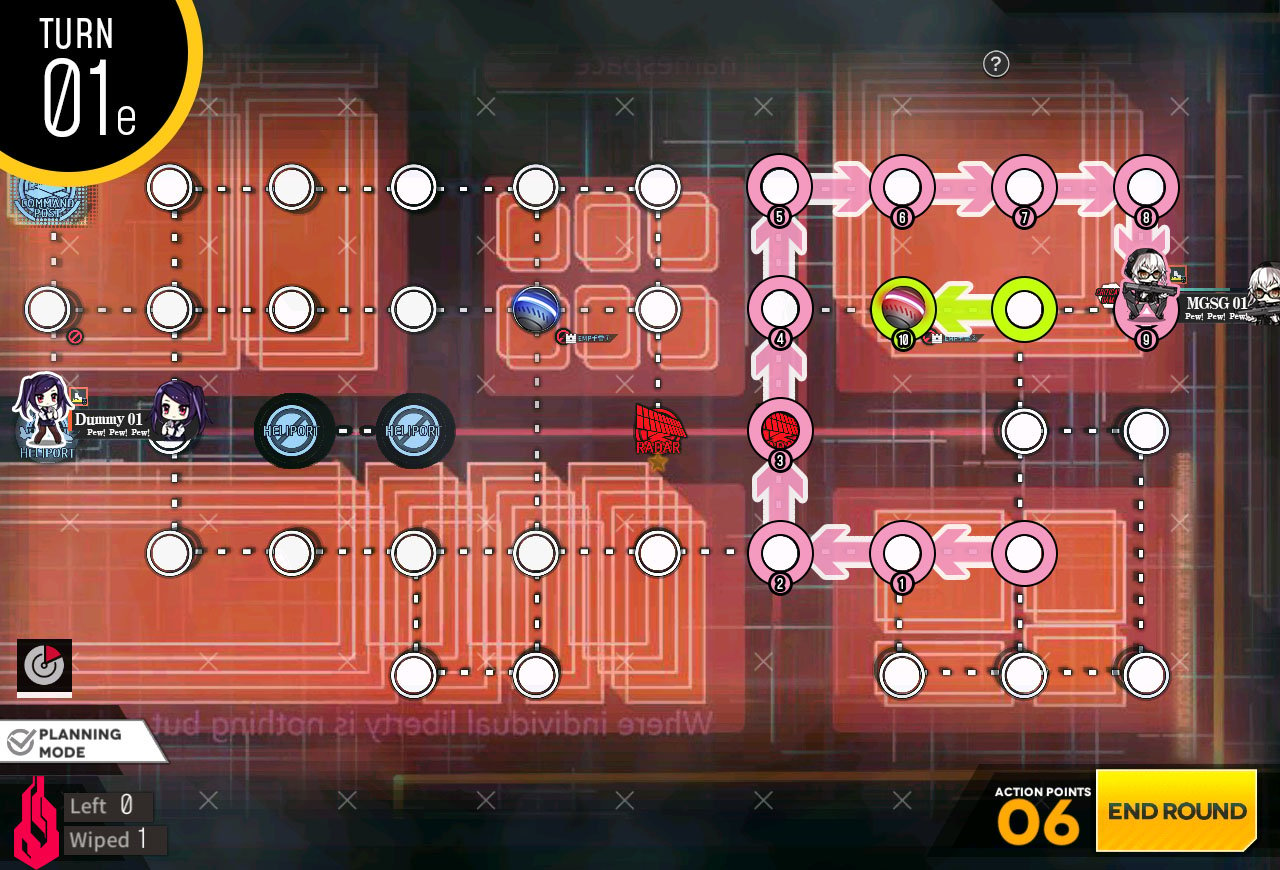
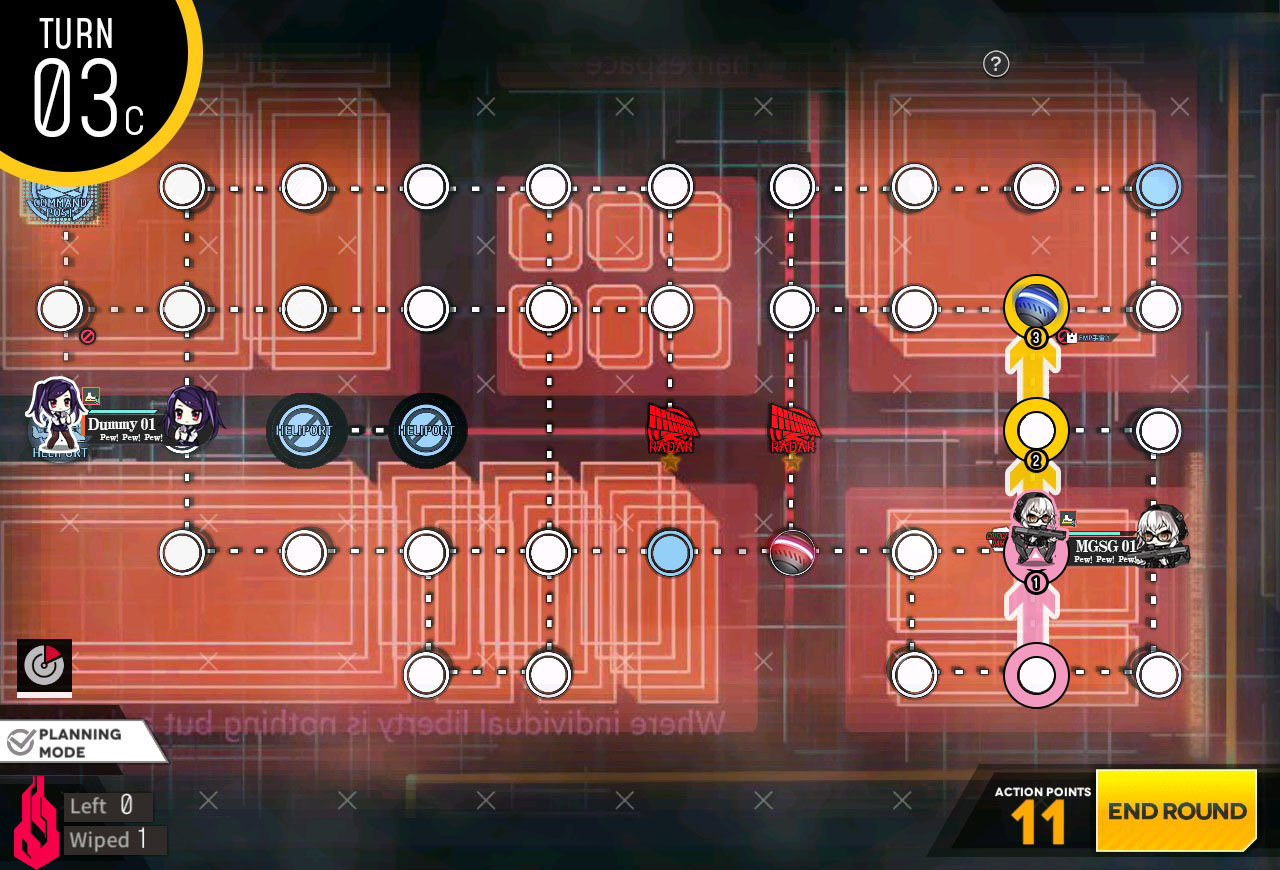
Go long way around and push the EMP bomb to the left once.

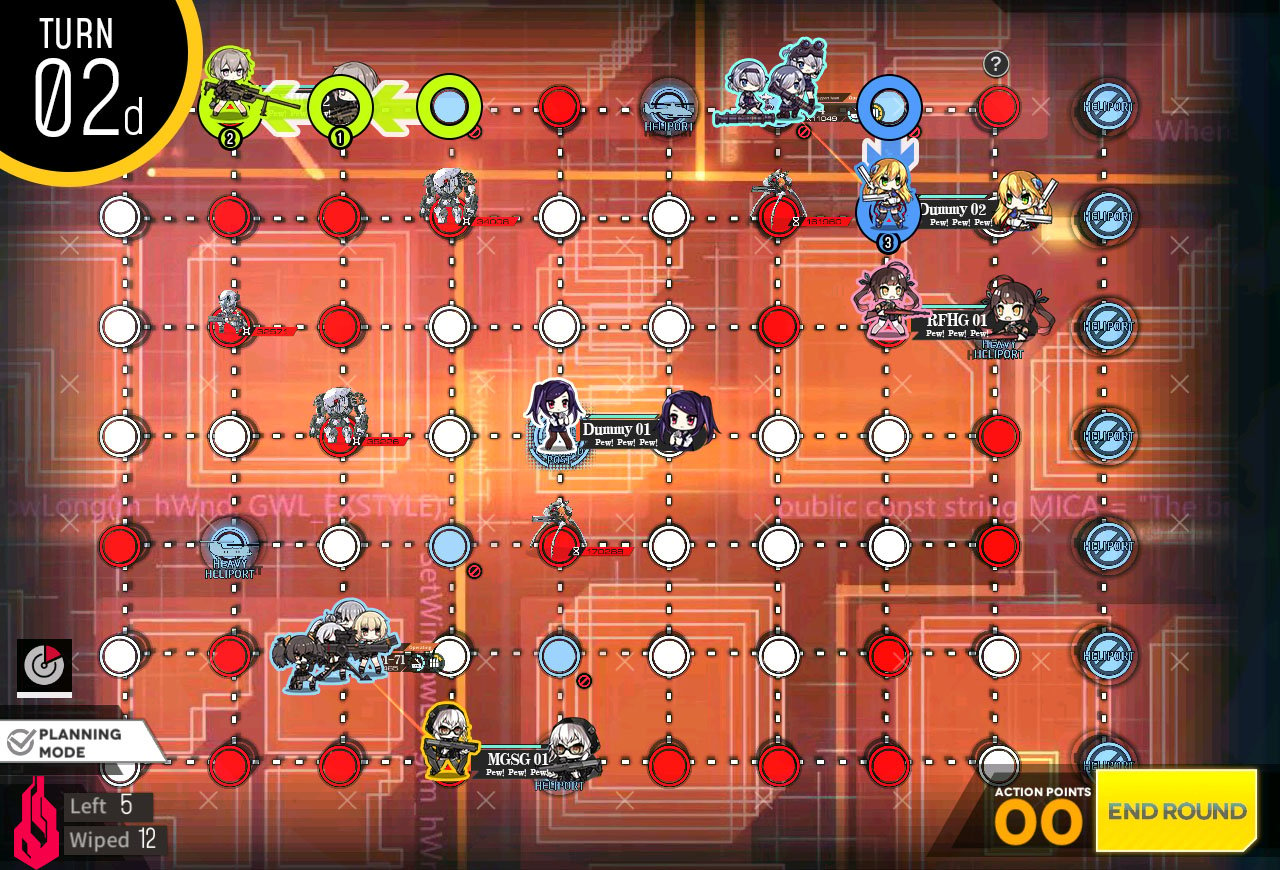
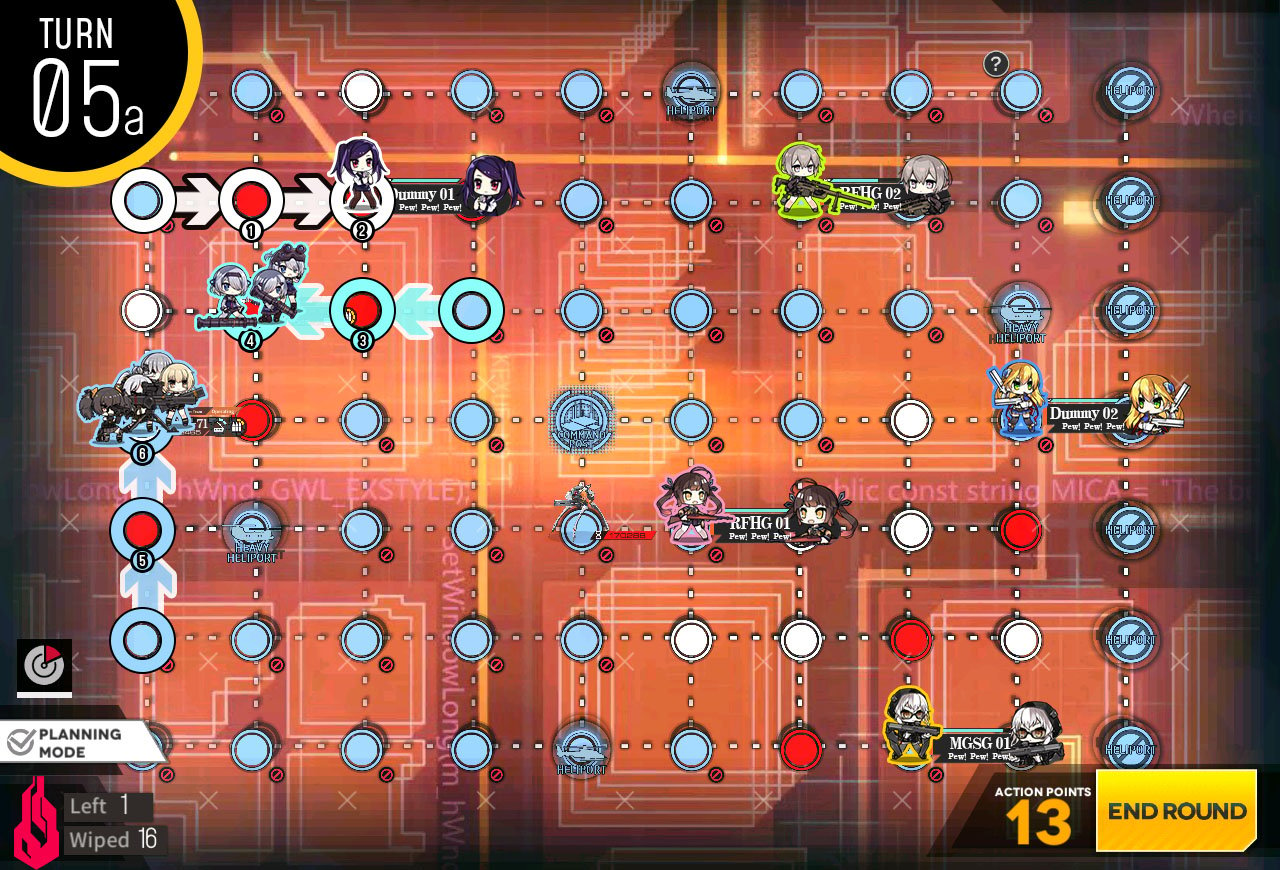
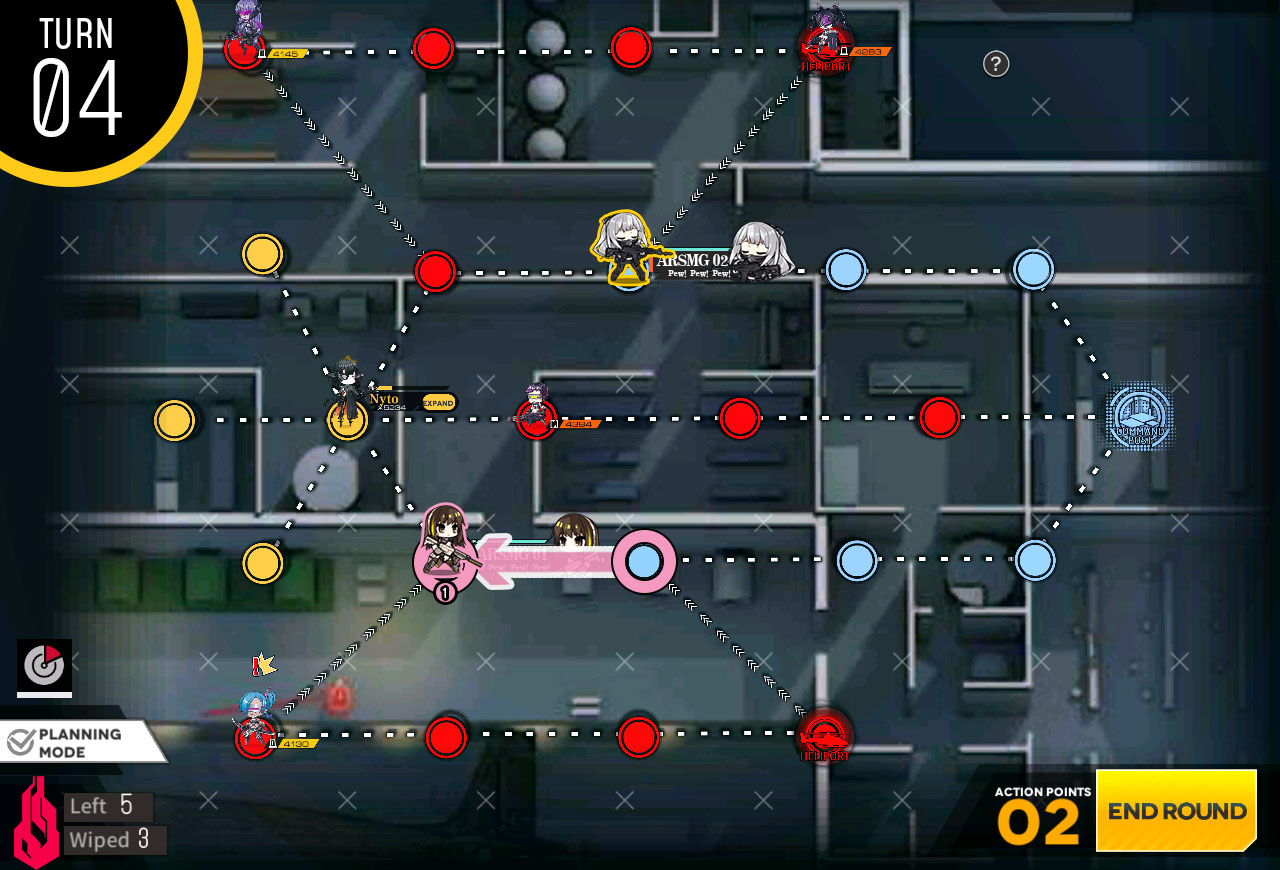
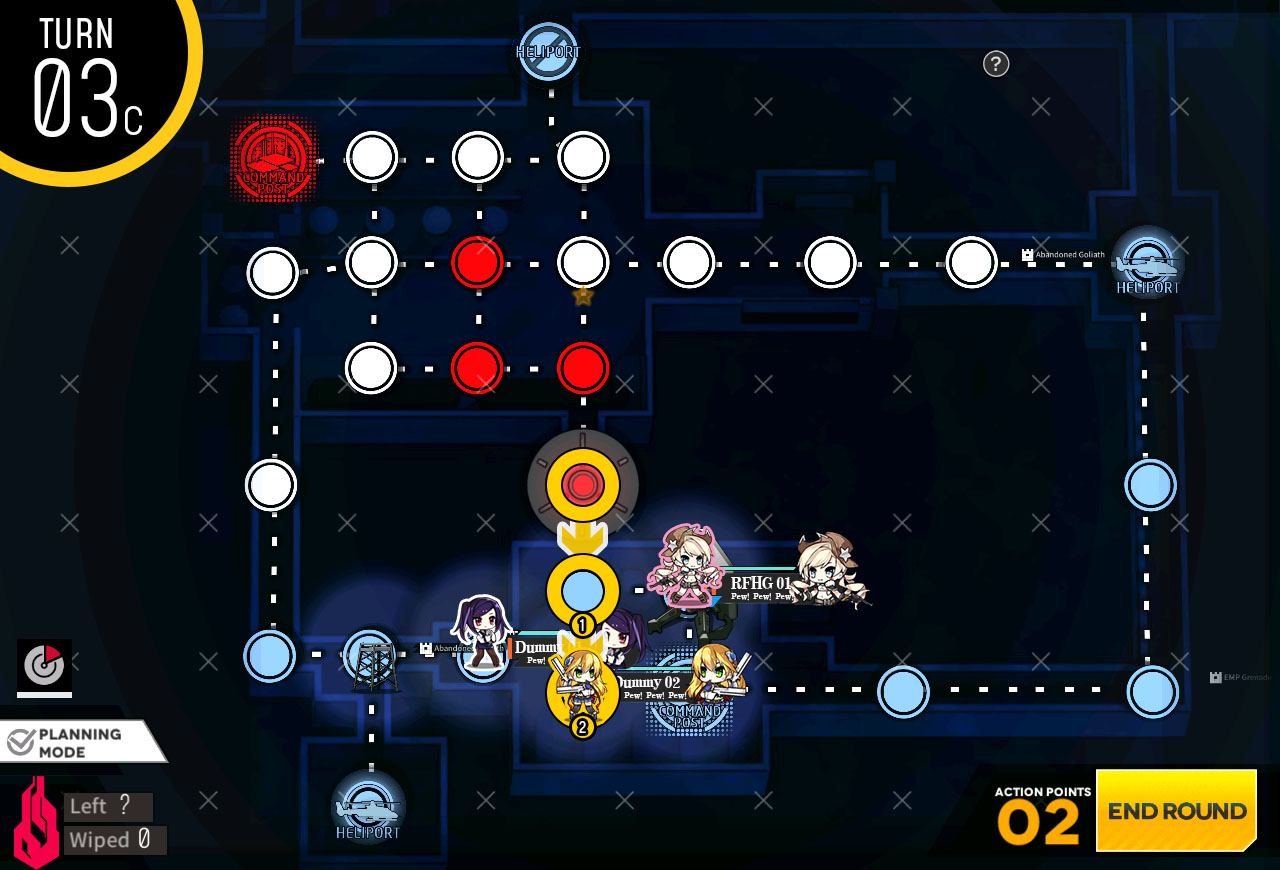
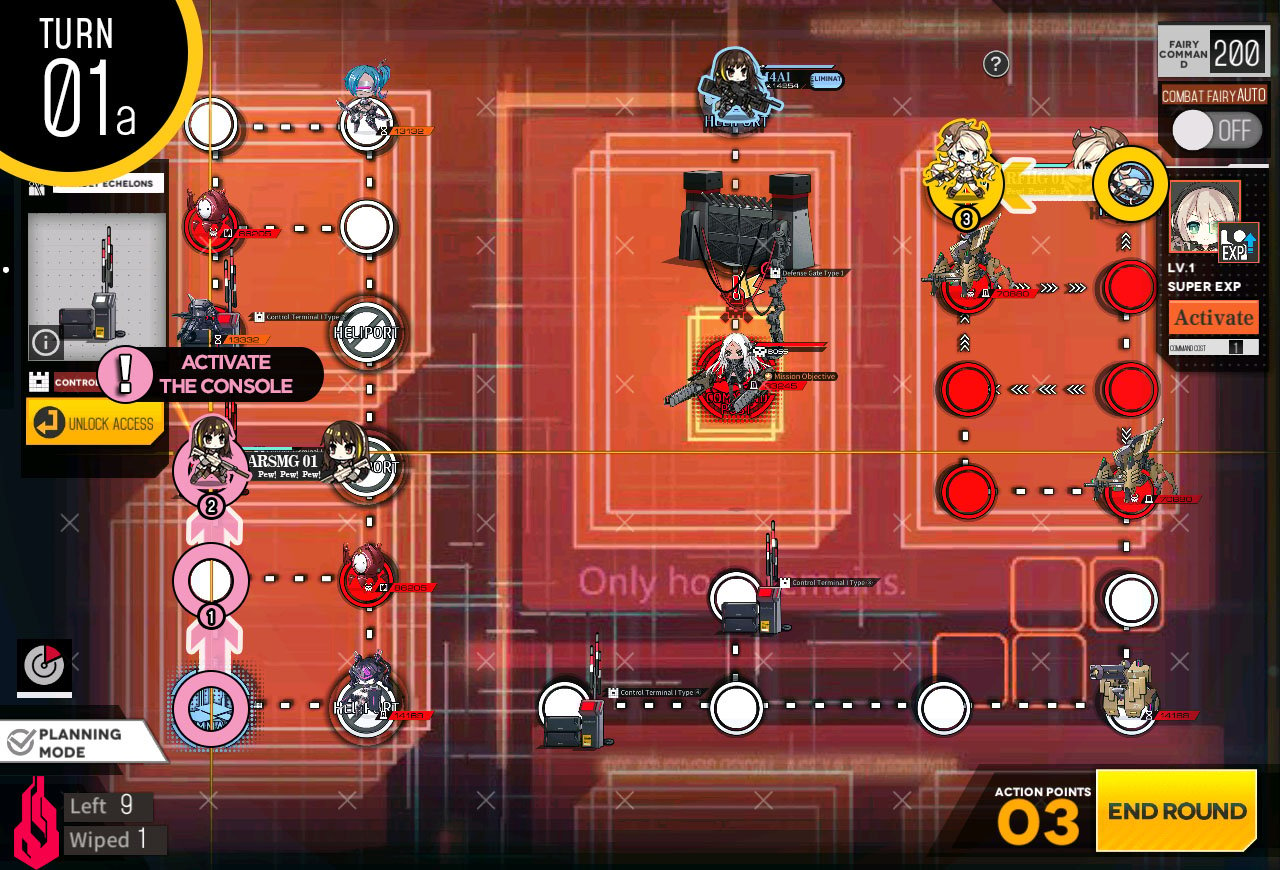
Now we work to bringing the EMP #1 from left side to the right.
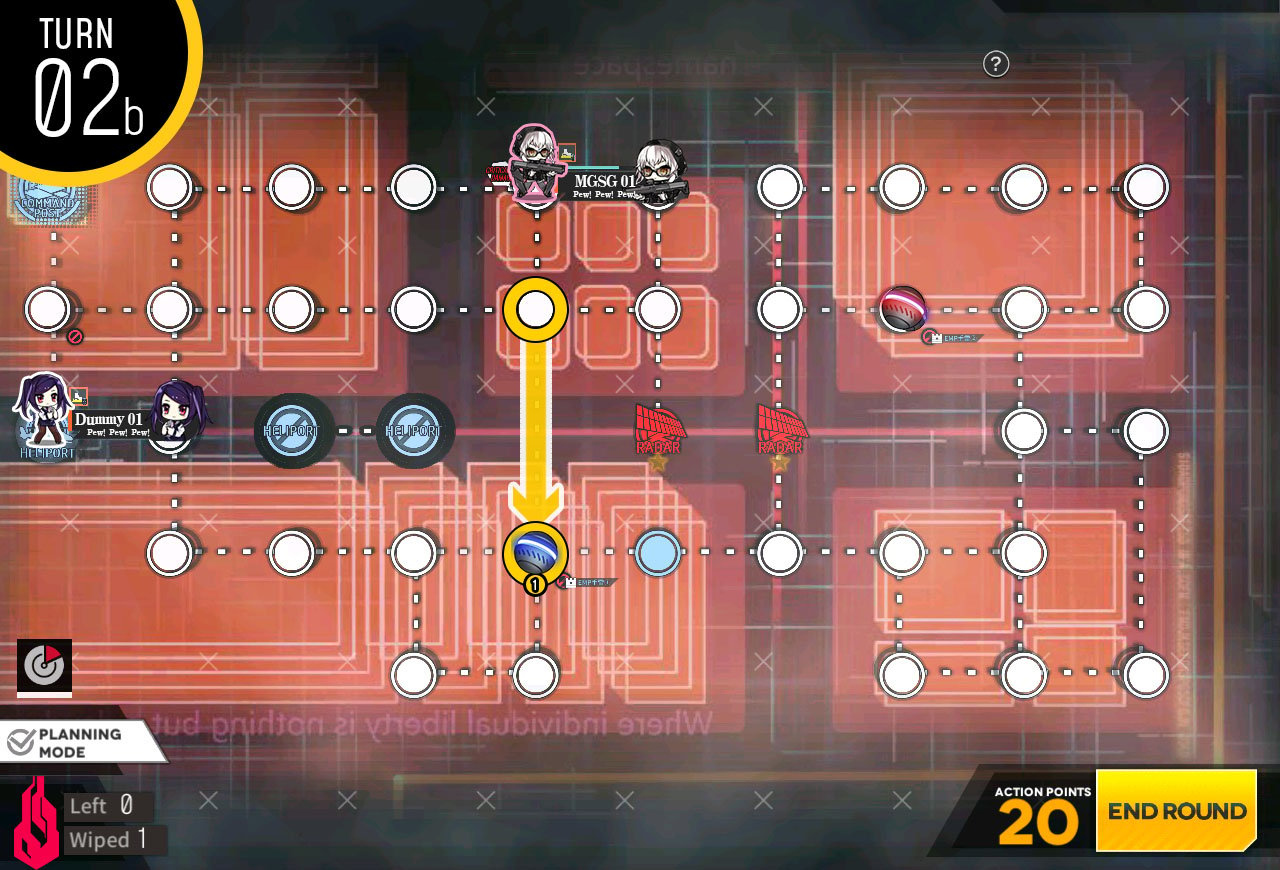

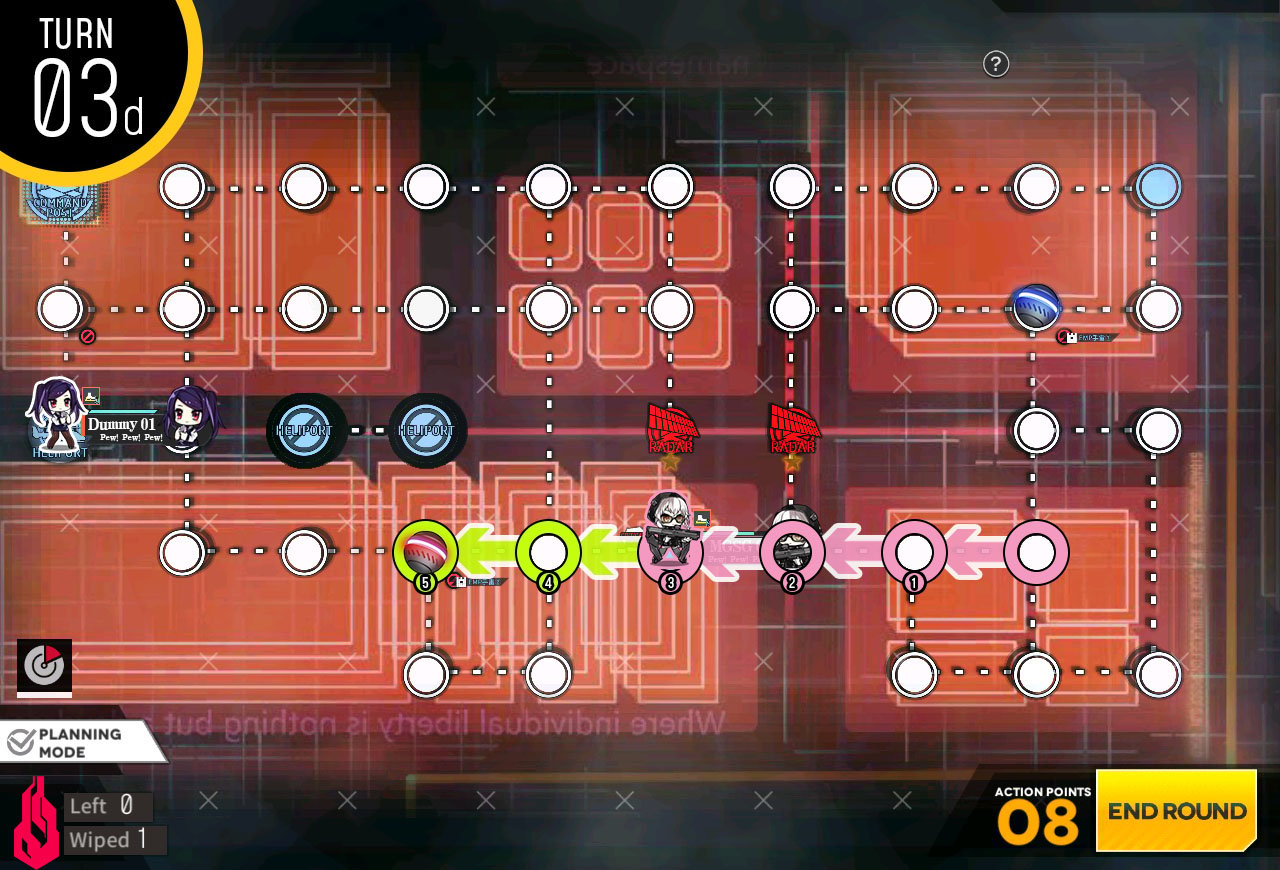
Repeat the process of moving EMP #1 to the left T-intersection.
We push the EMP #2 first to the left so that we don't block ourselves.
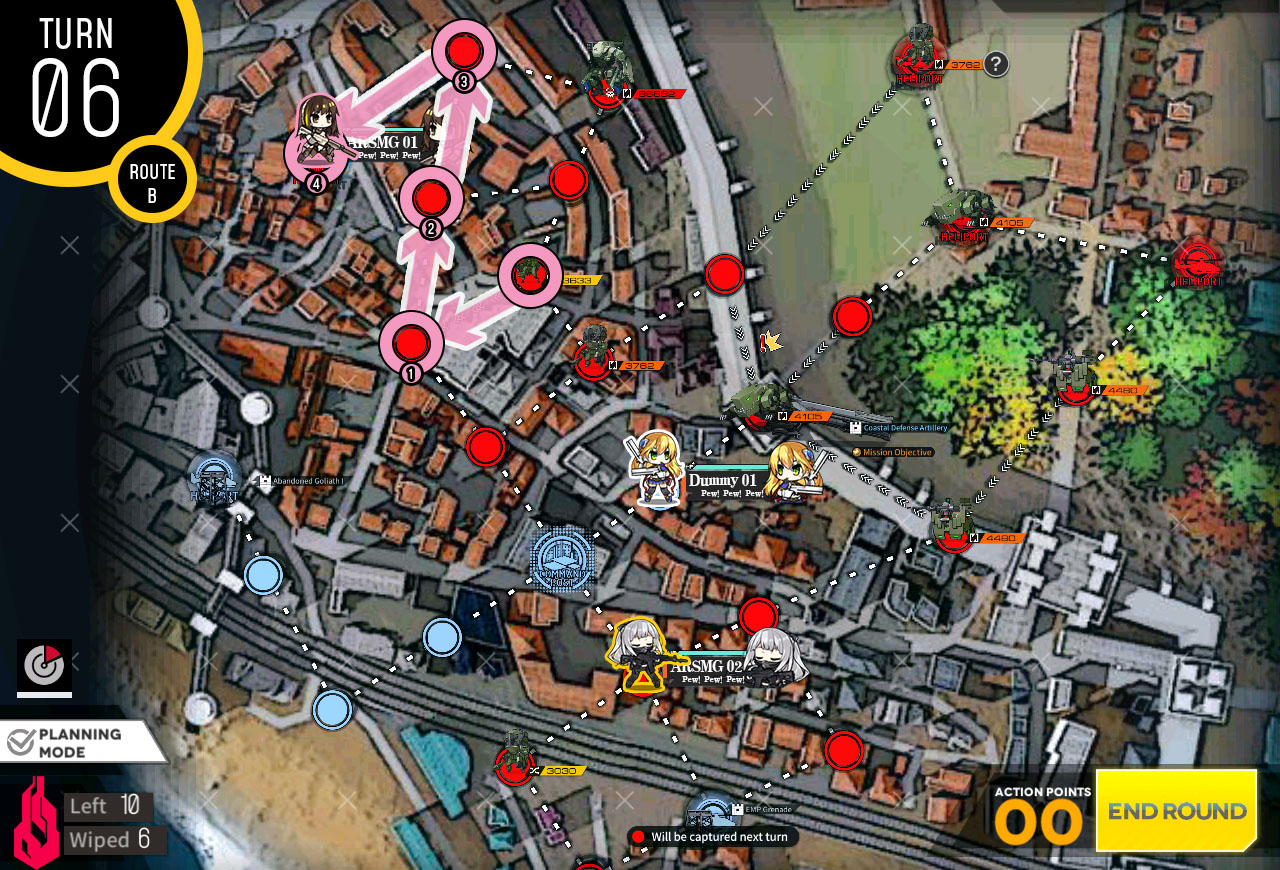
Move EMP #2 down to the bottom.
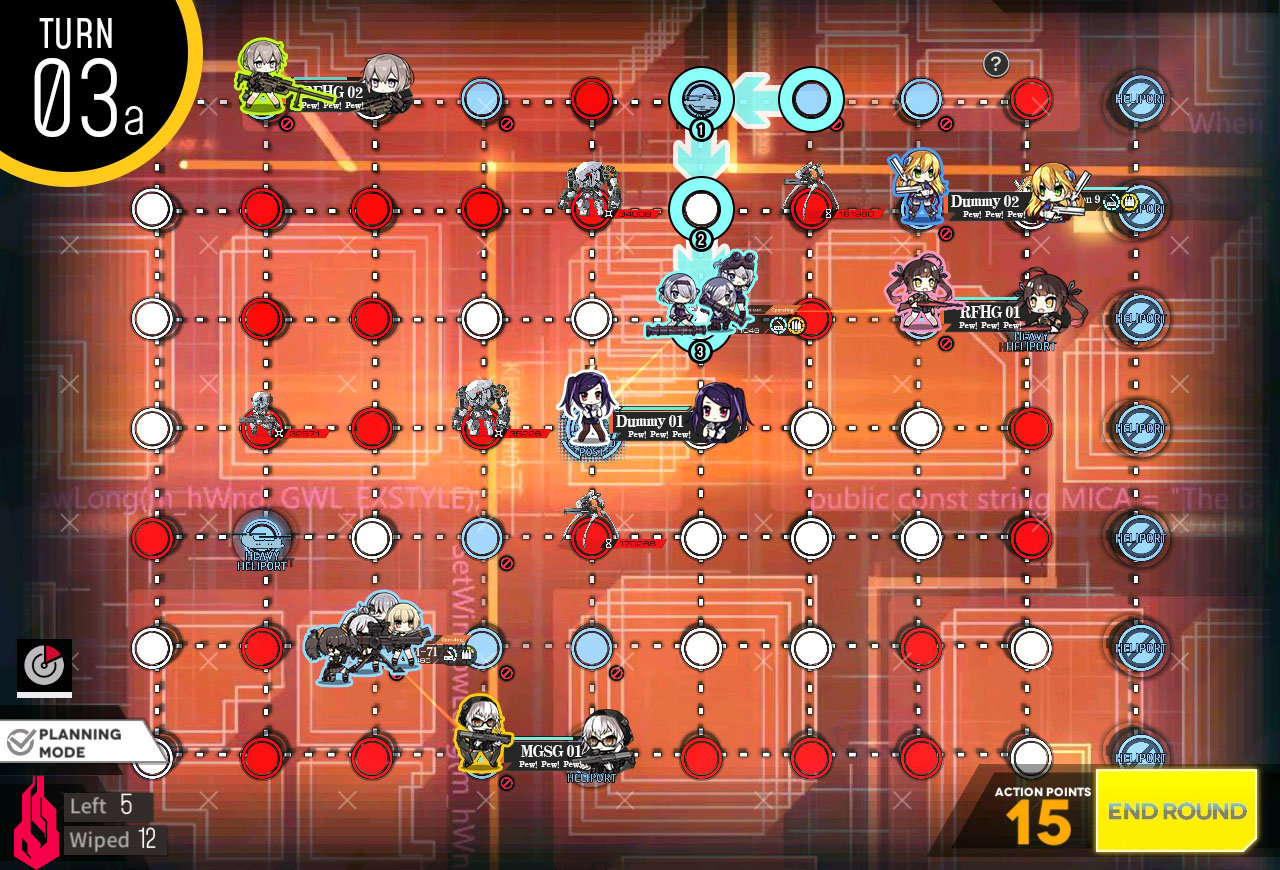
Now move to the bottom T-intersection and move EMP #1 to the top.
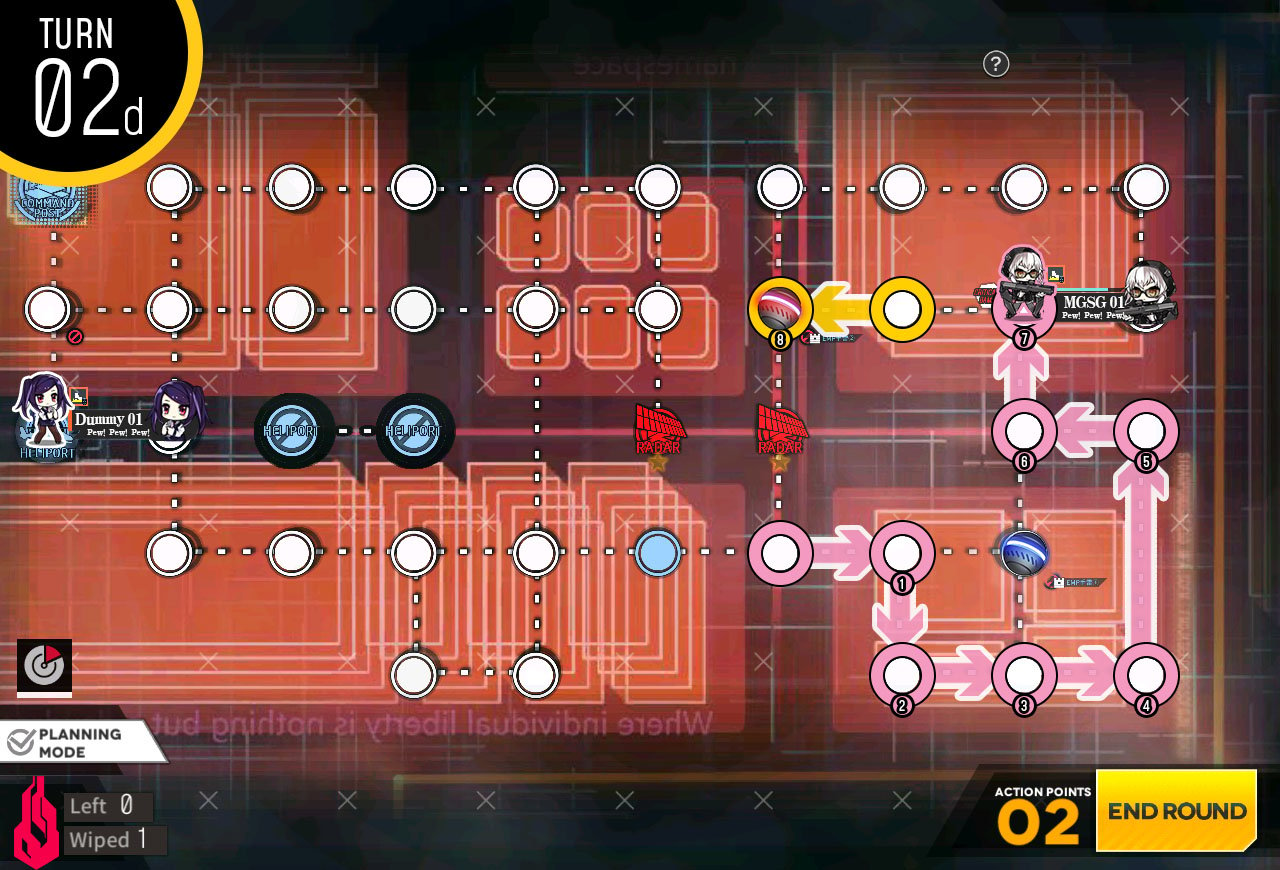
Slide EMP #2 to the left side but past the path leading up.
Go around the long way and push the EMP #2 to the right once.
Push EMP #2 up one node.
Now move to put EMP #2 on the left radar node.
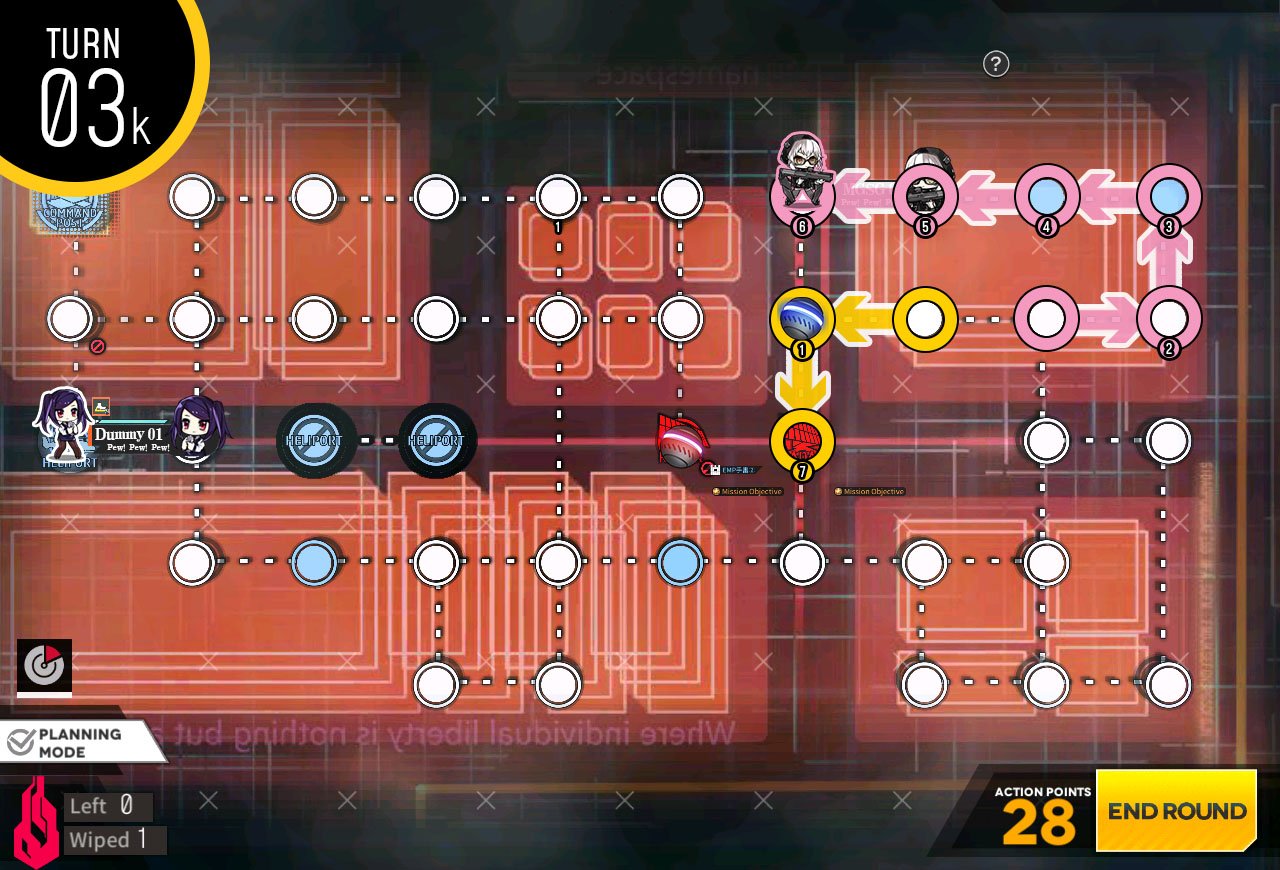
Now all you have to do is to put EMP #1 on the right radar node, using identical sets of movement to move the EMP #2. Once you have both EMP bombs on the radar node, hit end turn.
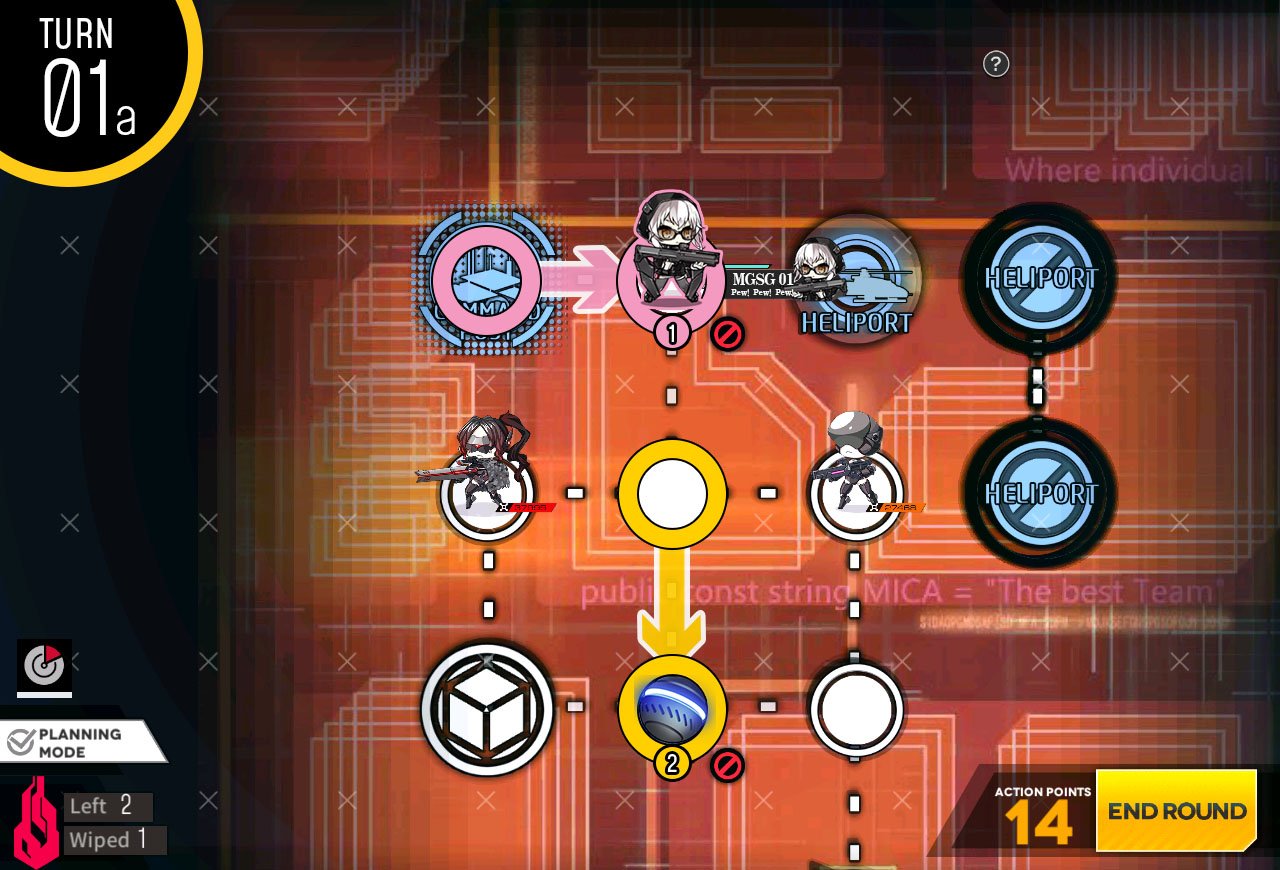
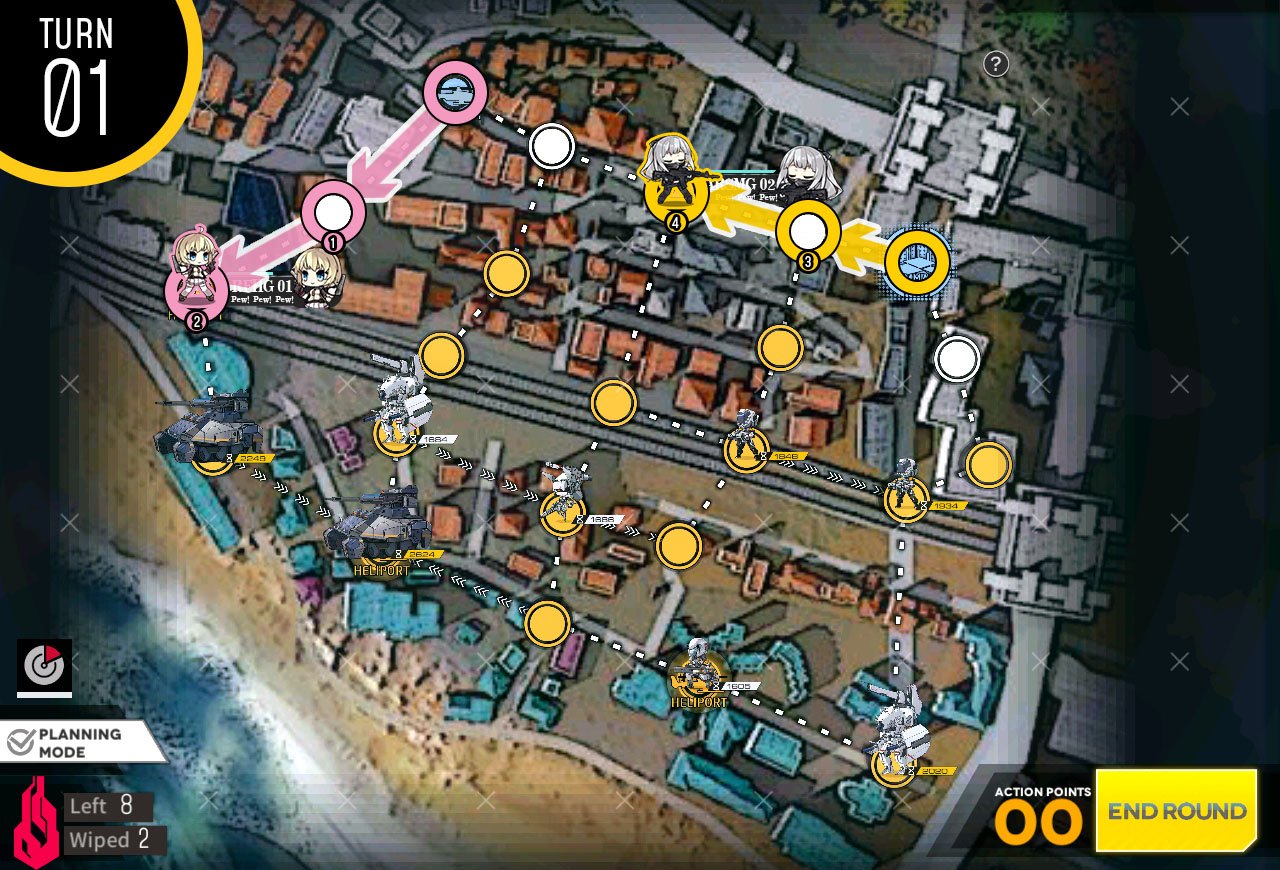
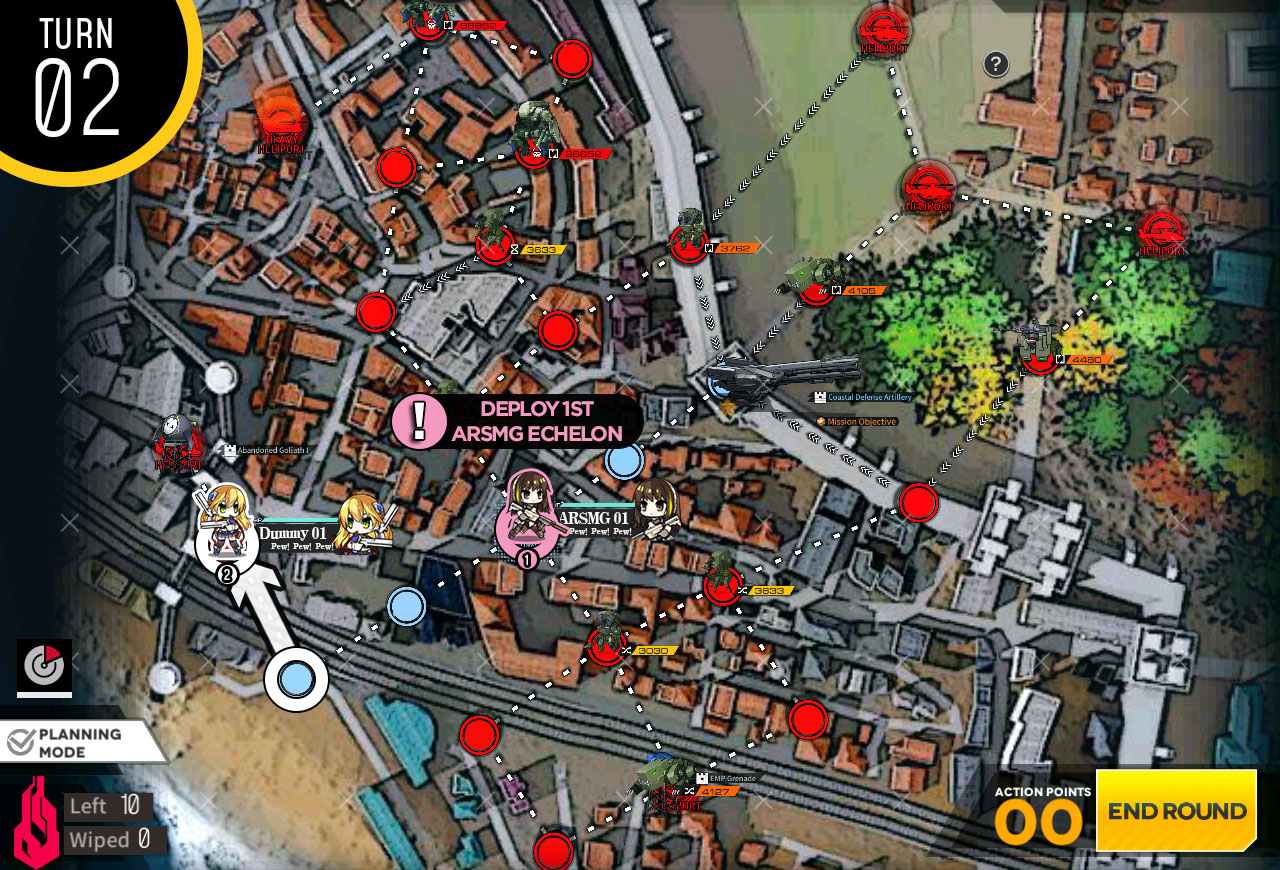
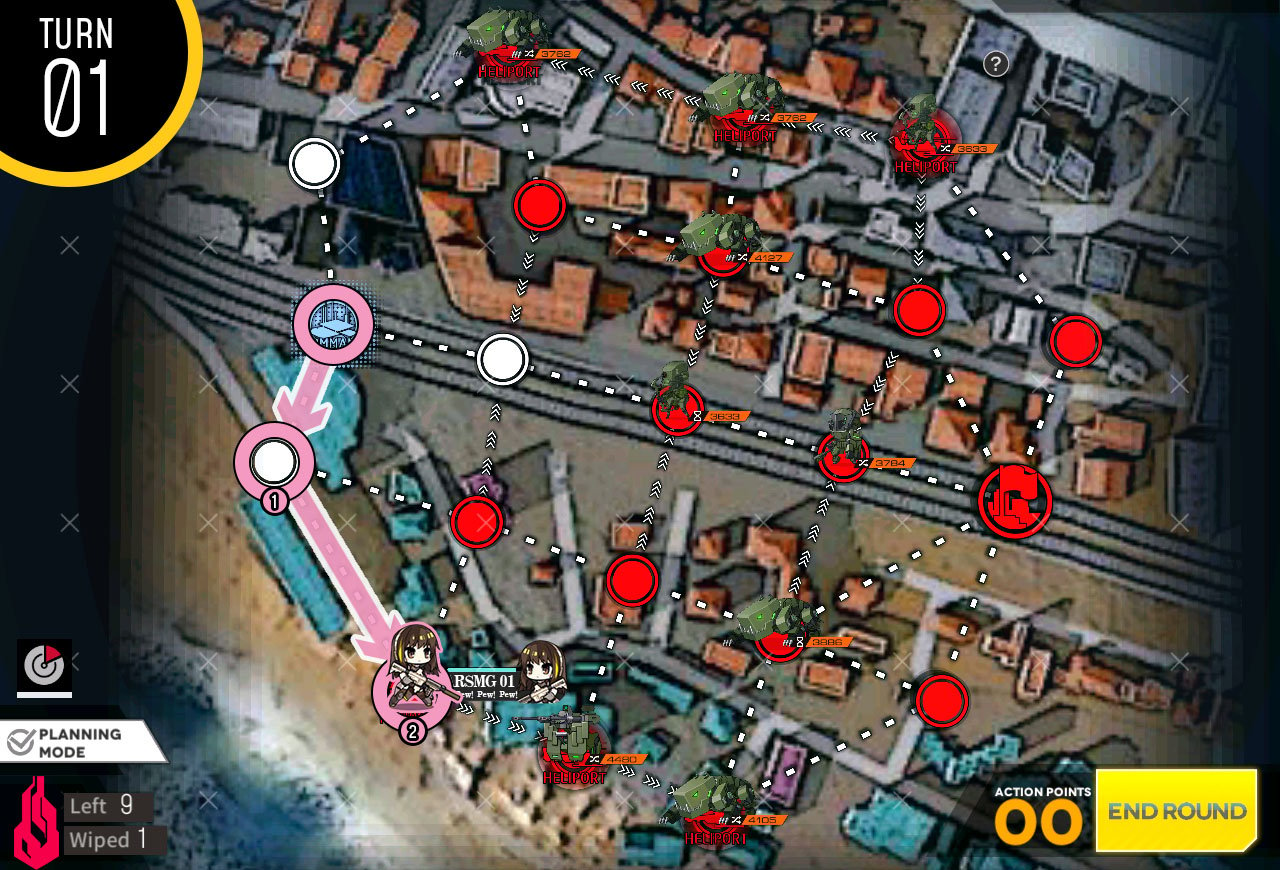
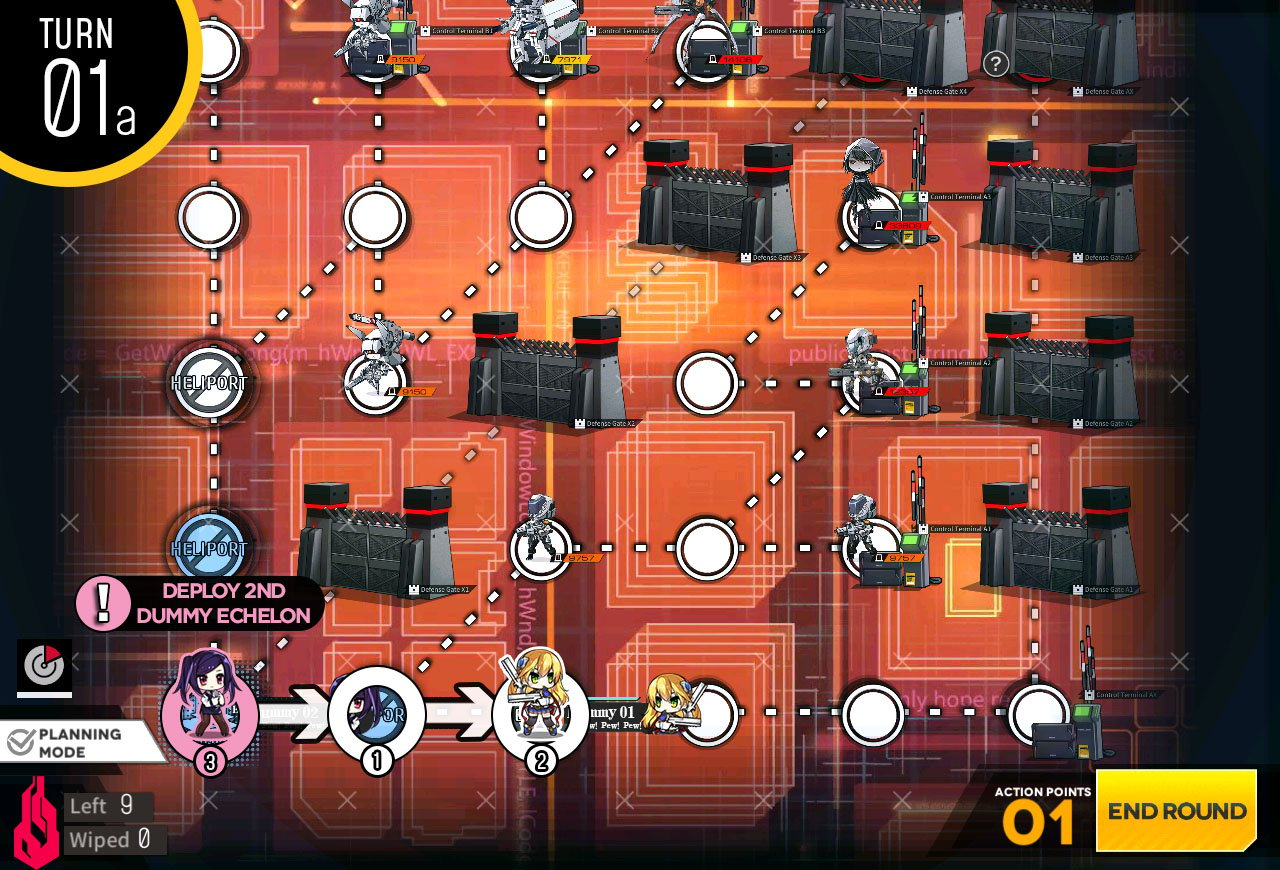
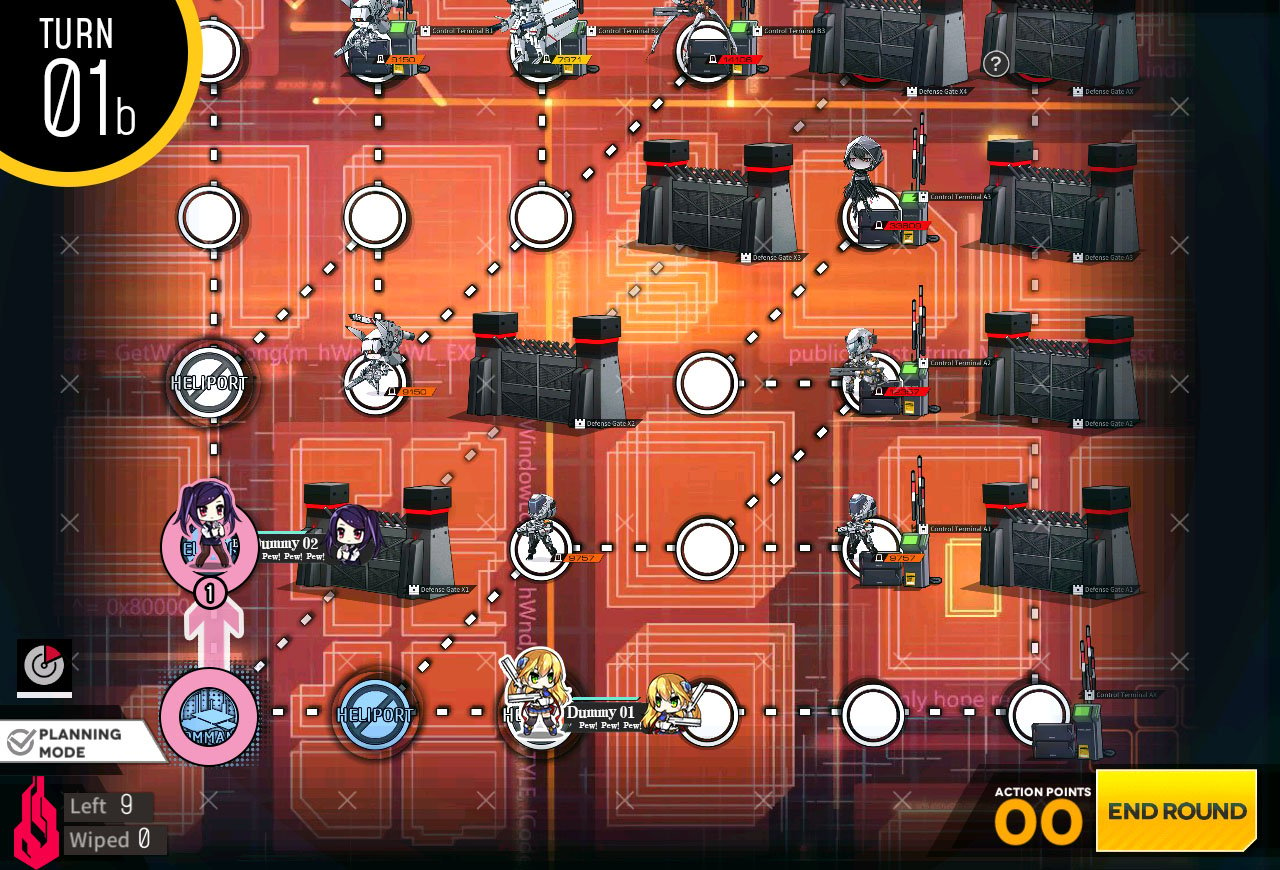
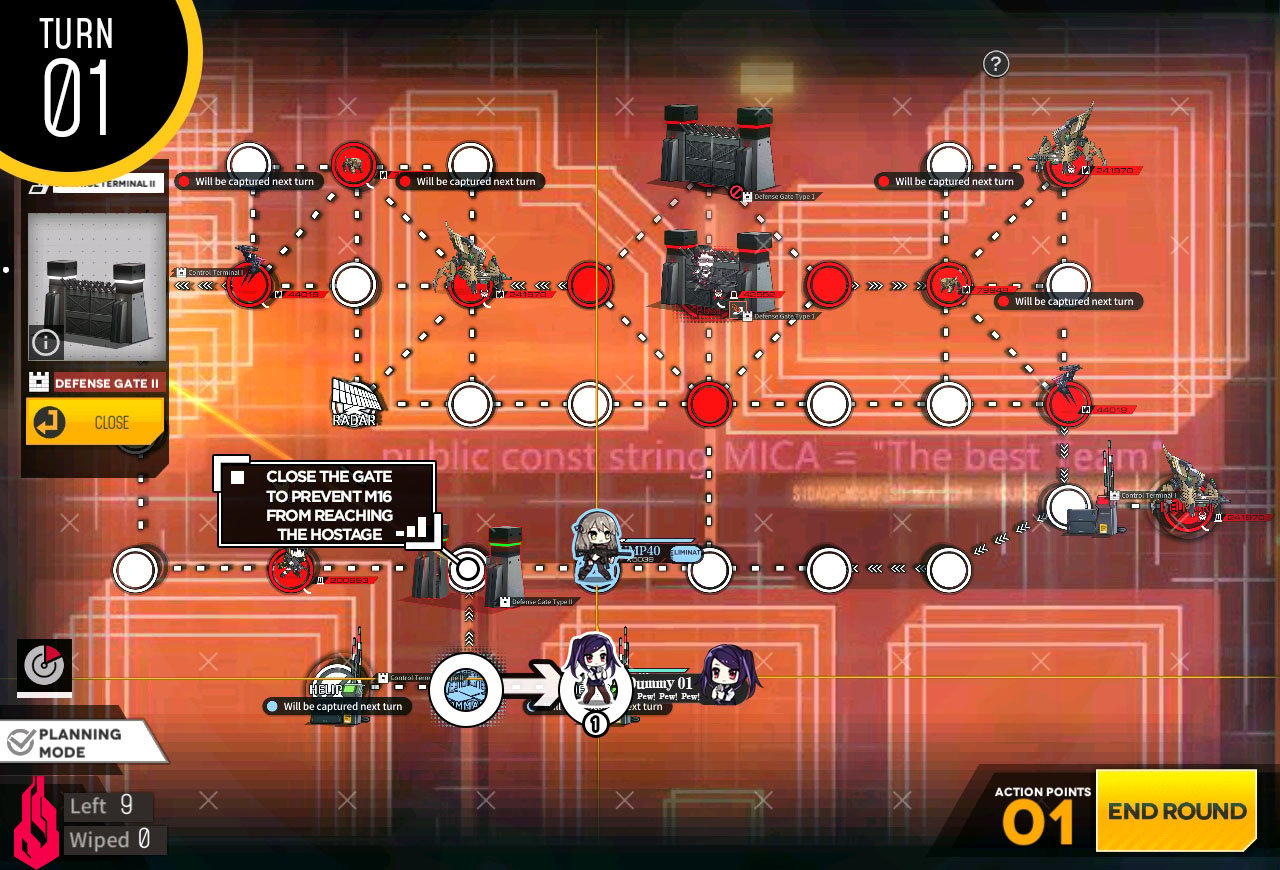
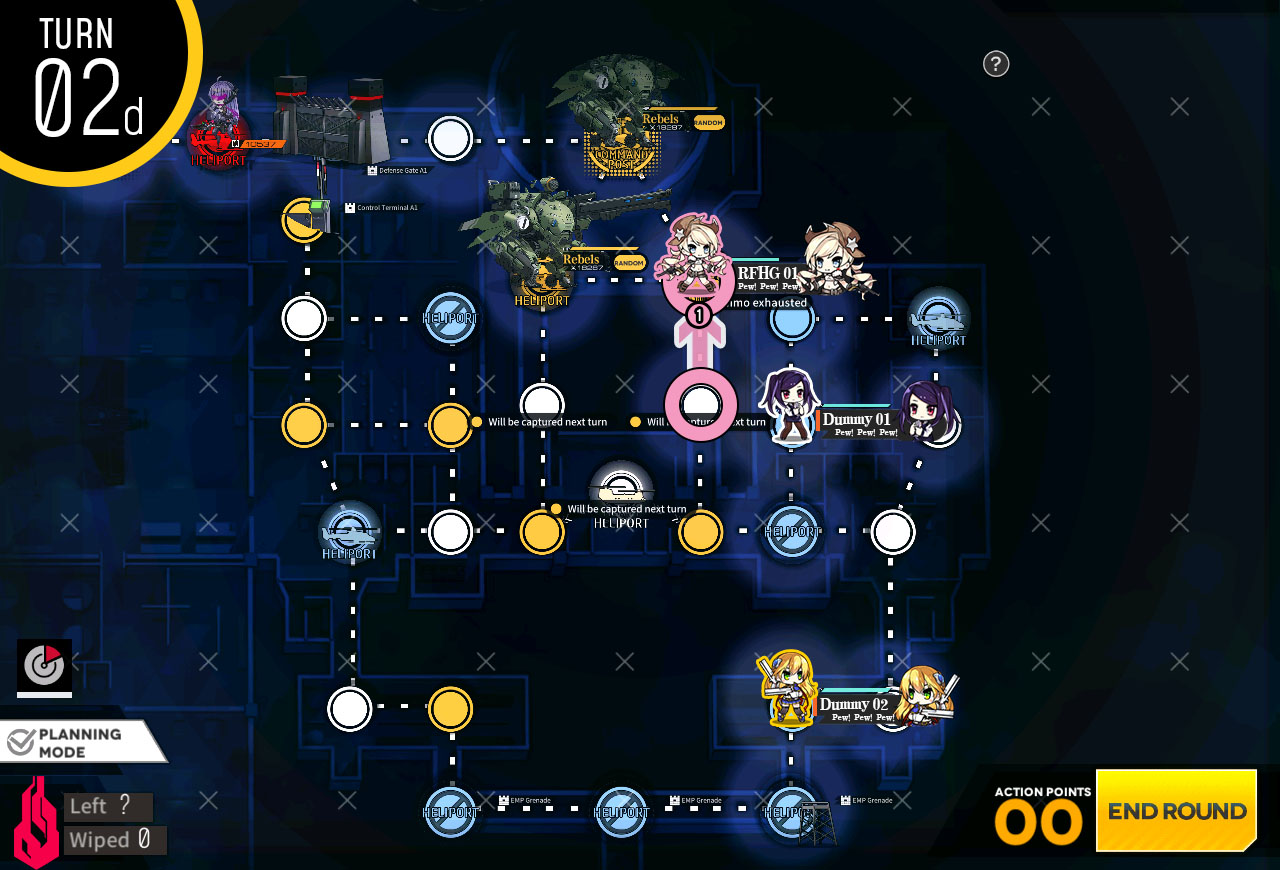
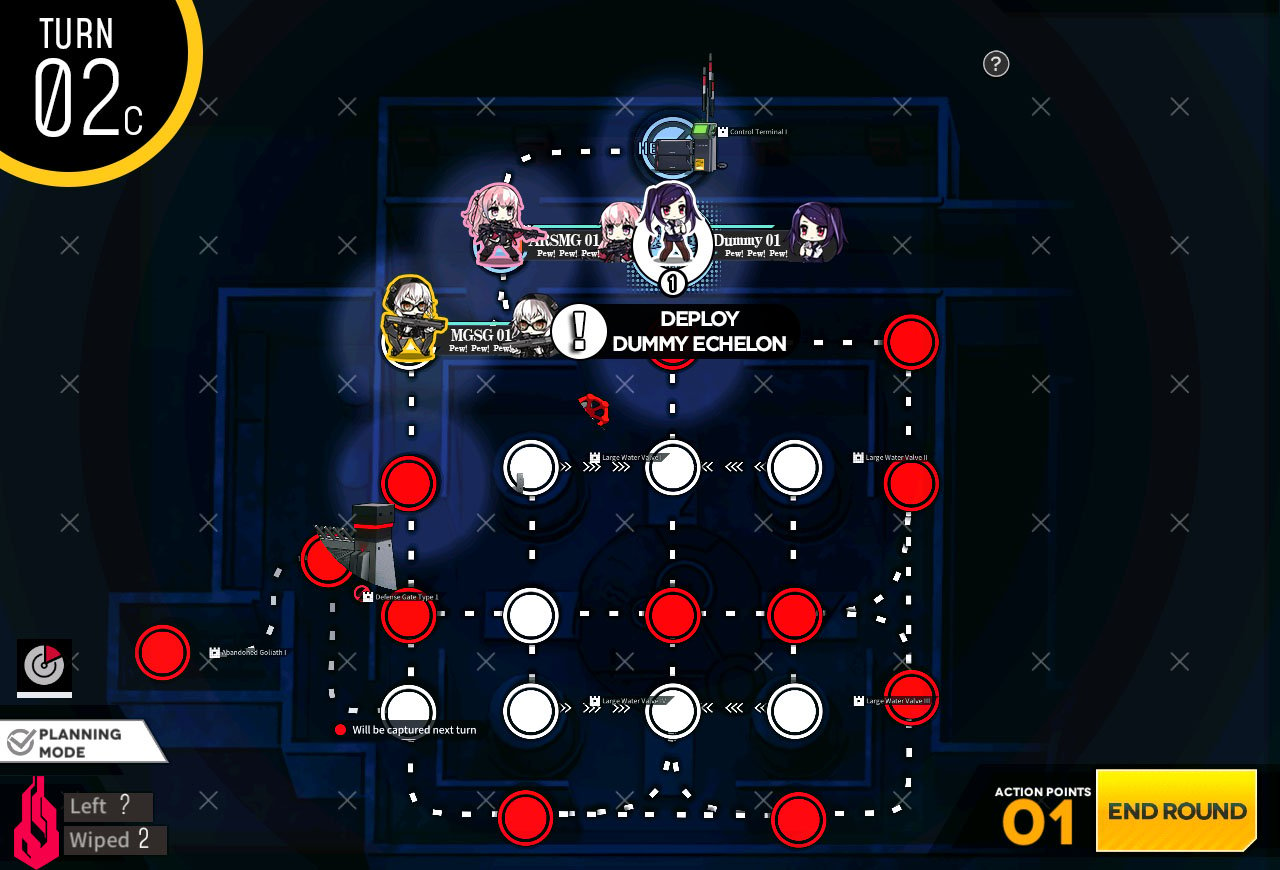
Move down to the left to deploy Dummy then end the turn.
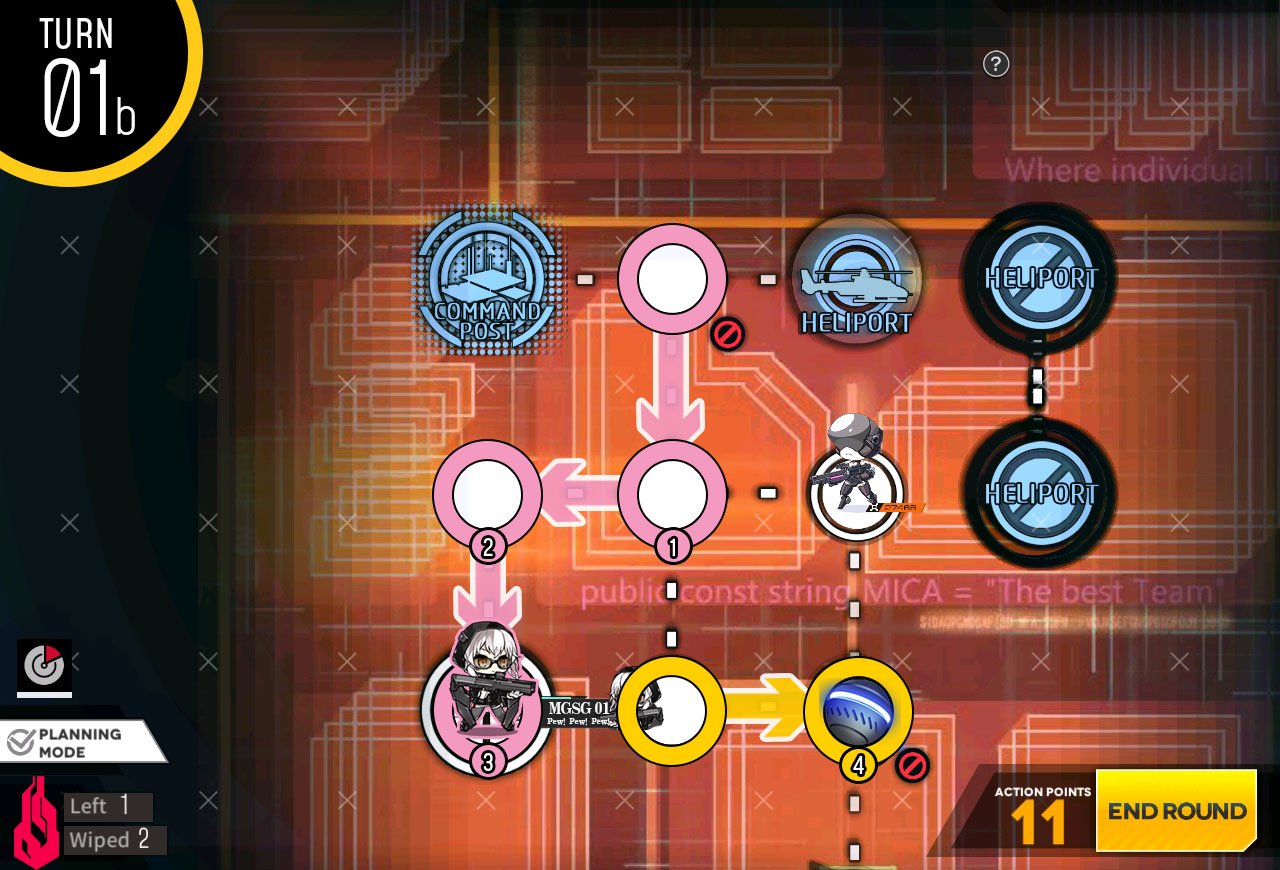
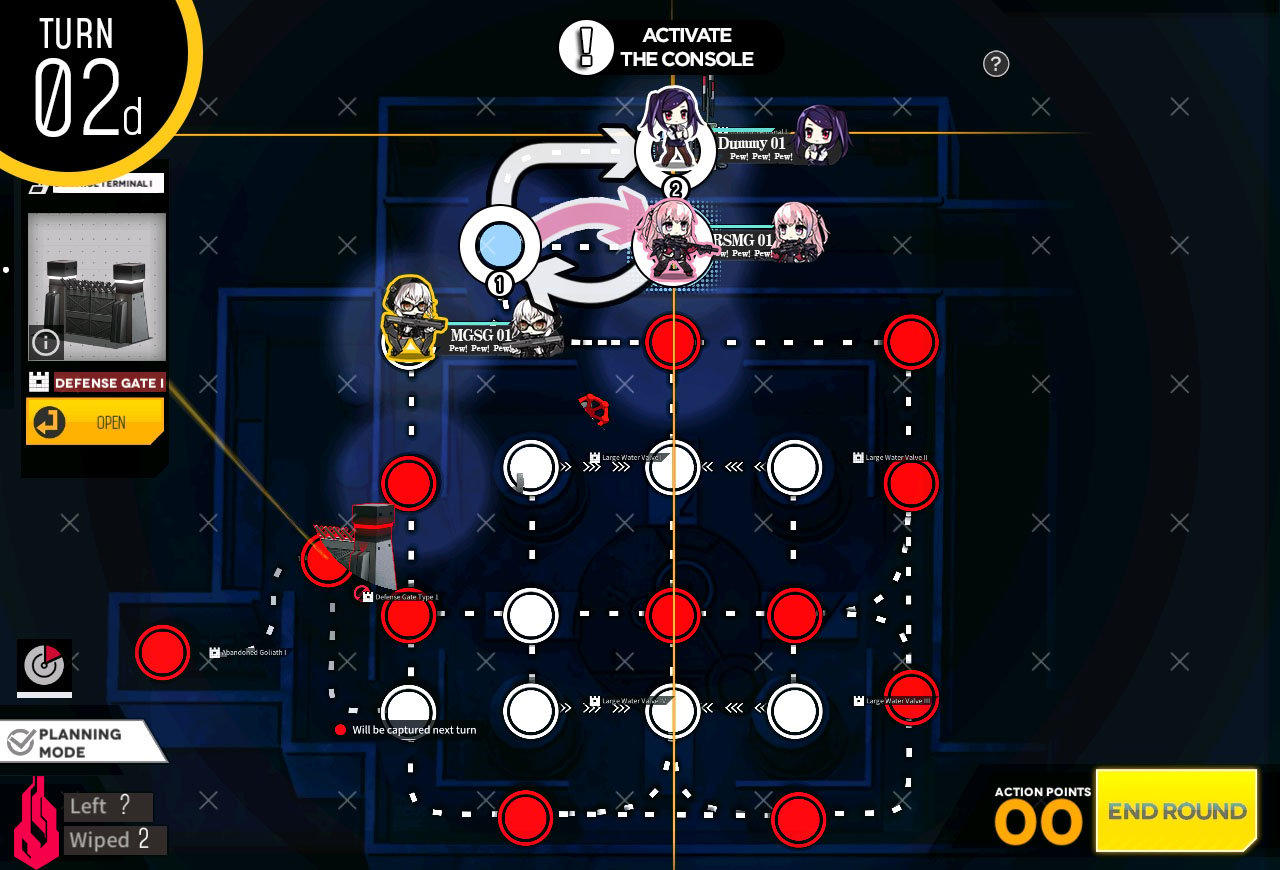
Move down the left edge of the map to the helipad.
Then simply move to enemy HQ and end the turn to clear the mission.
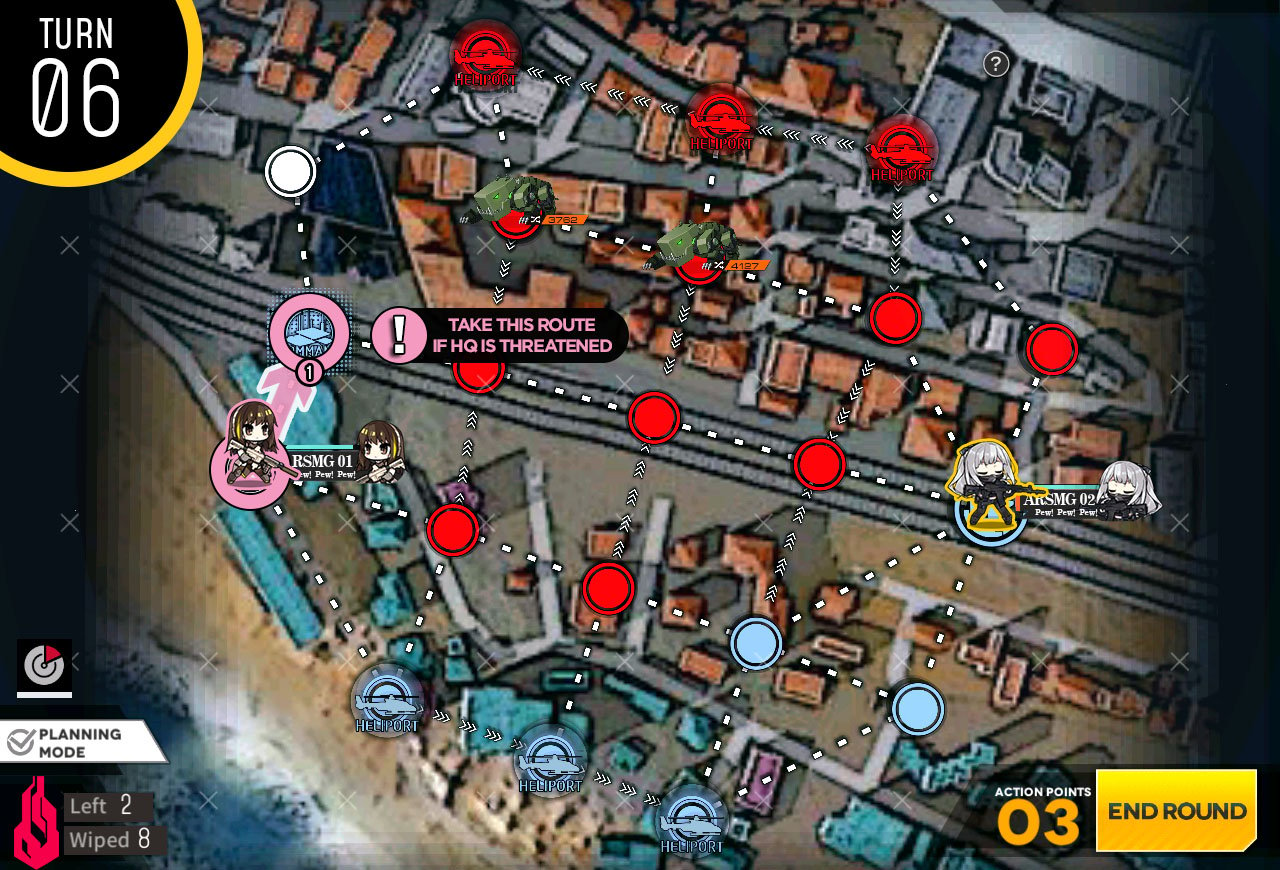
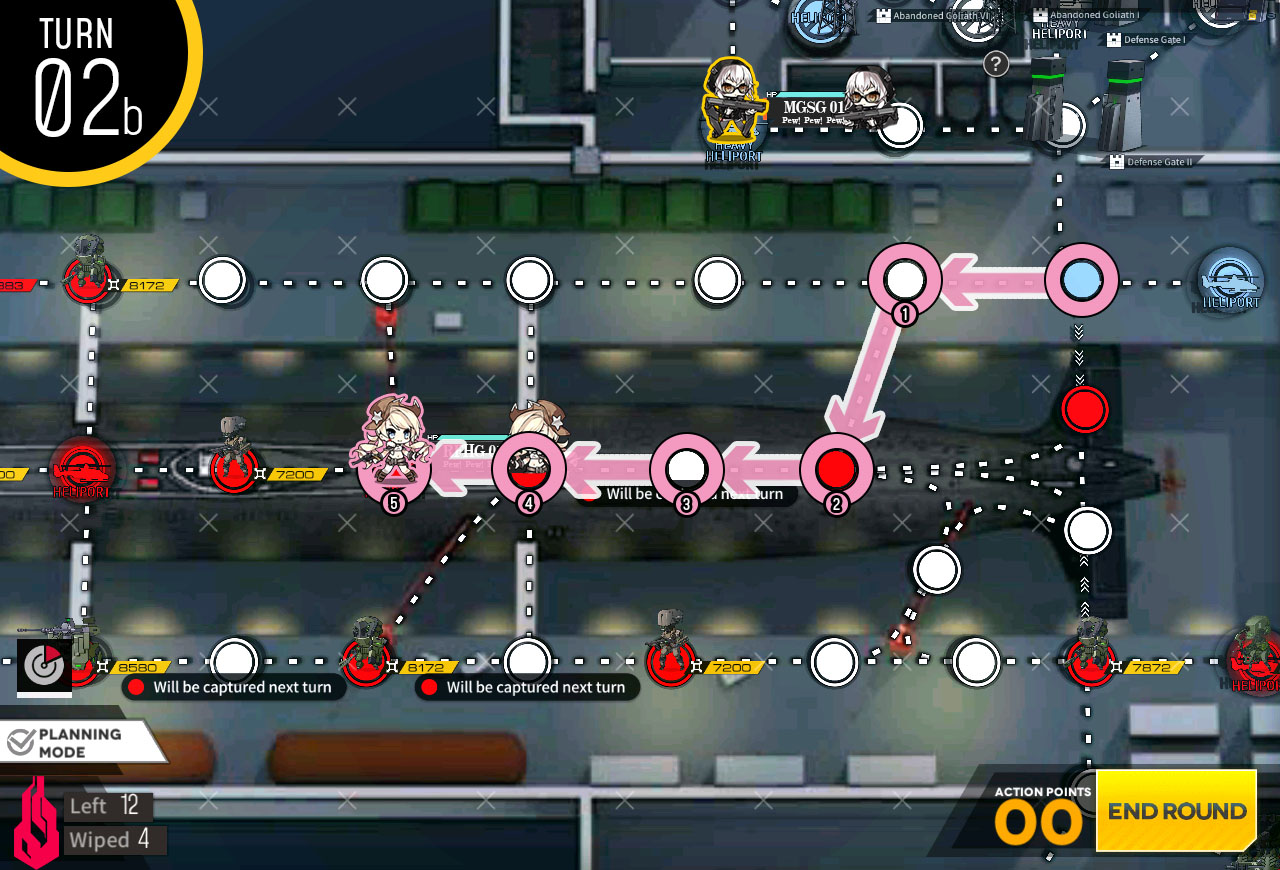
Move echelon to the right and stop above the helipad.
If you see enemy unit moving to the left of the helipad, you need to kill it prior to taking the helipad, otherwise, you can skip to next direction [saving a turn as result].
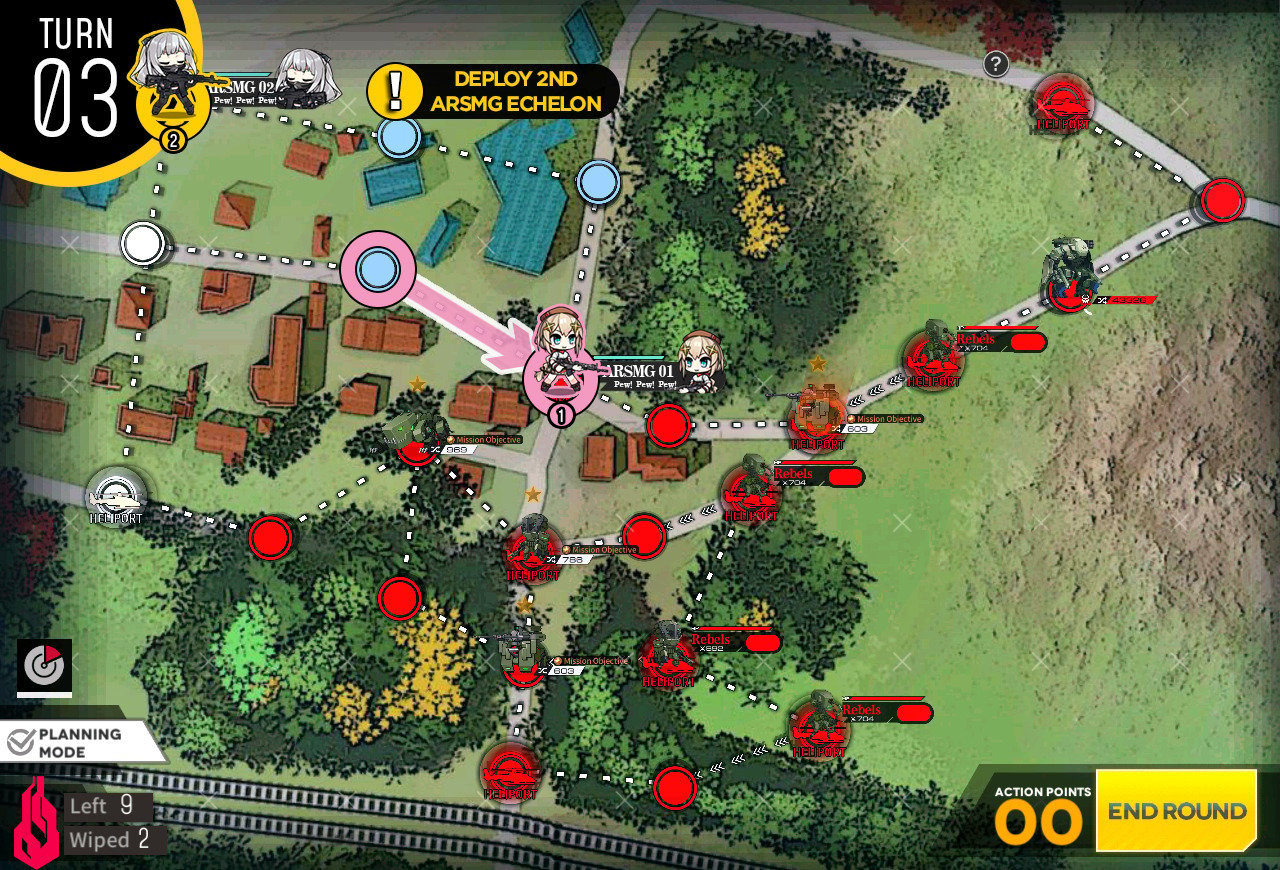
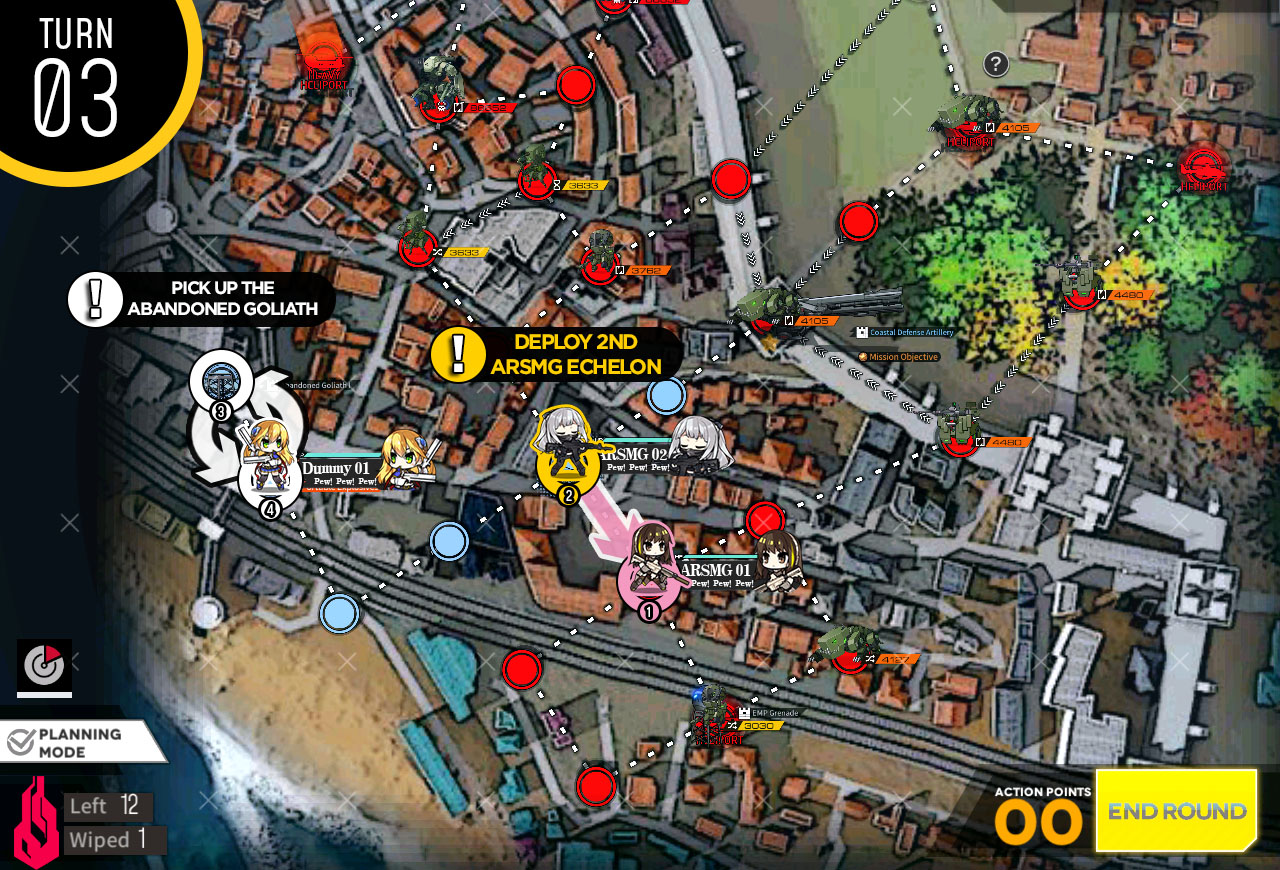
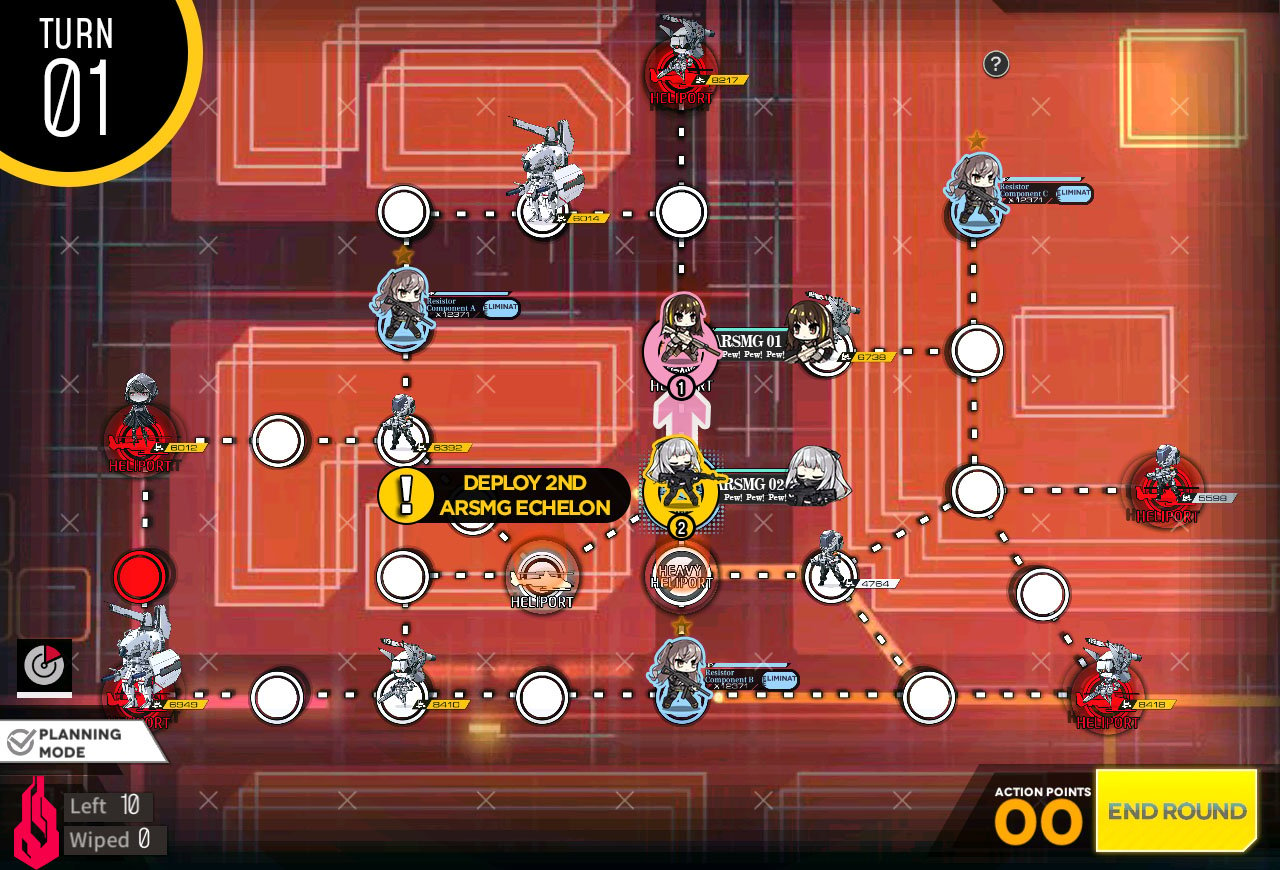
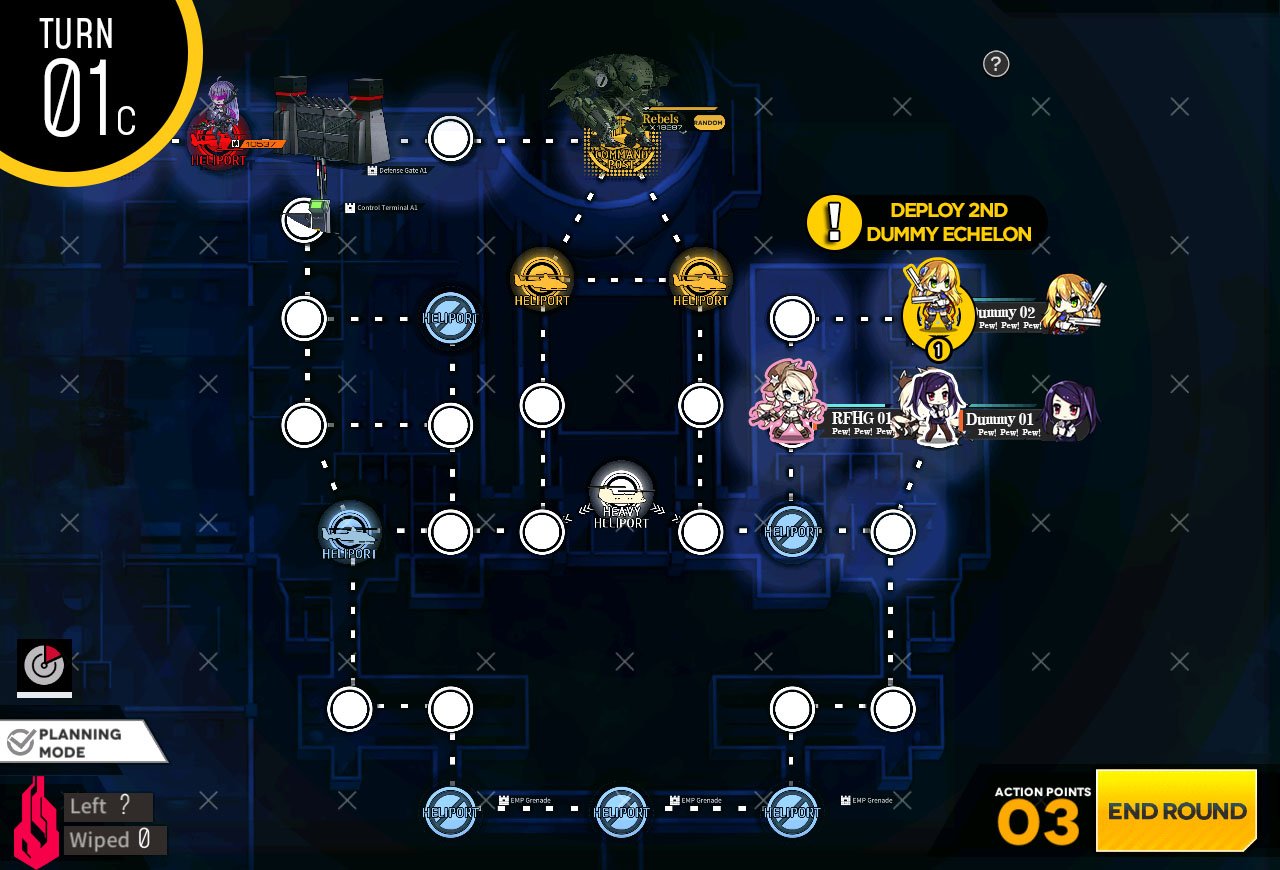
Take enemy helipad and deploy 2nd combat echelon on the Starting helipad.
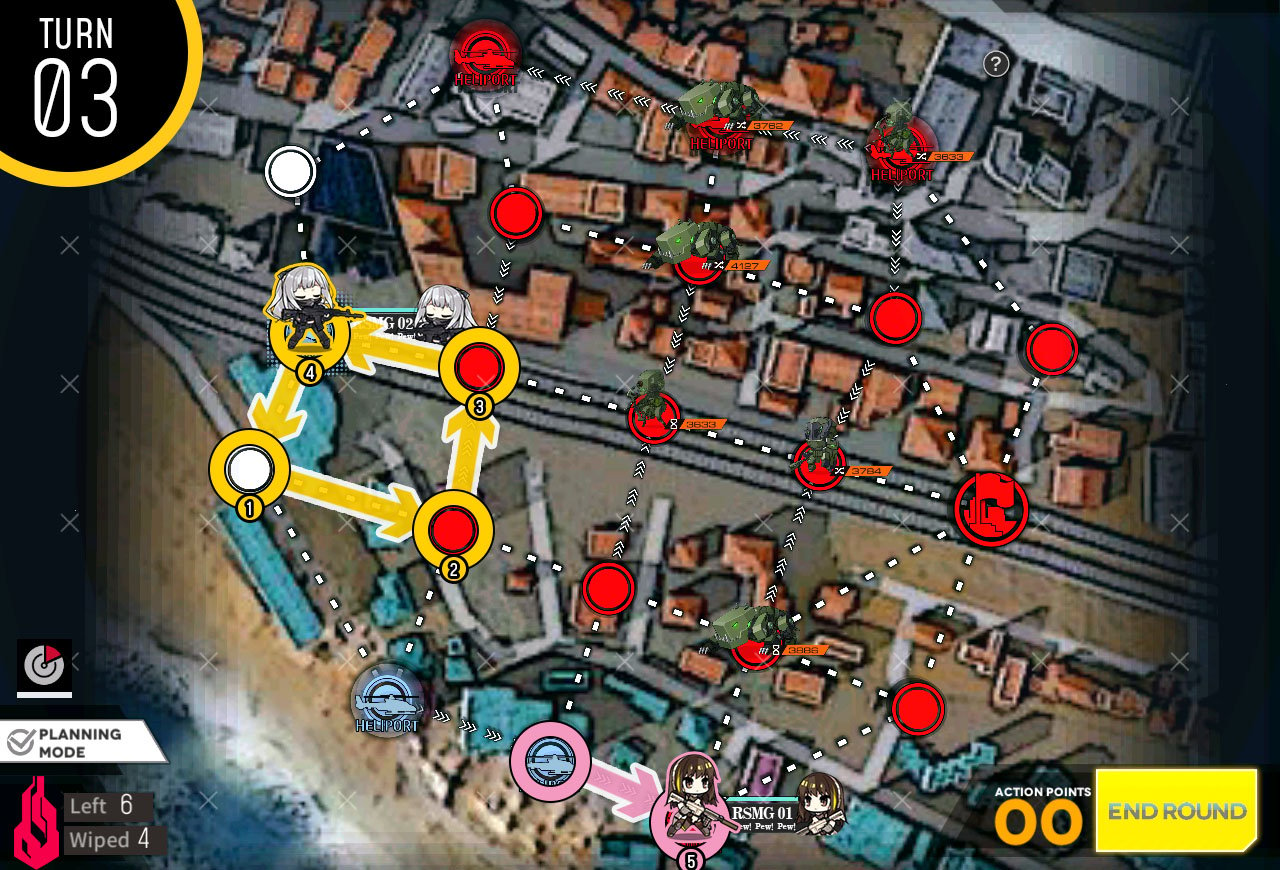
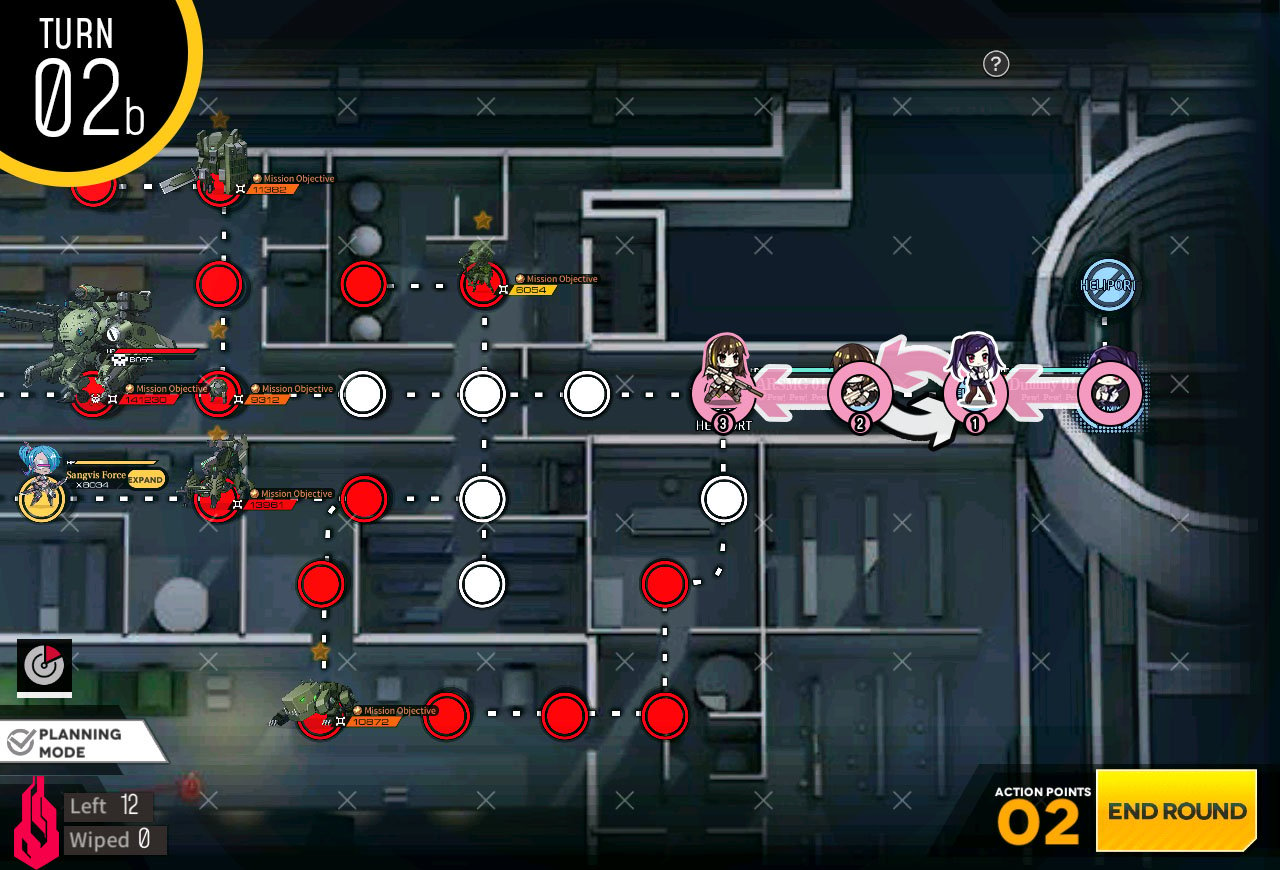
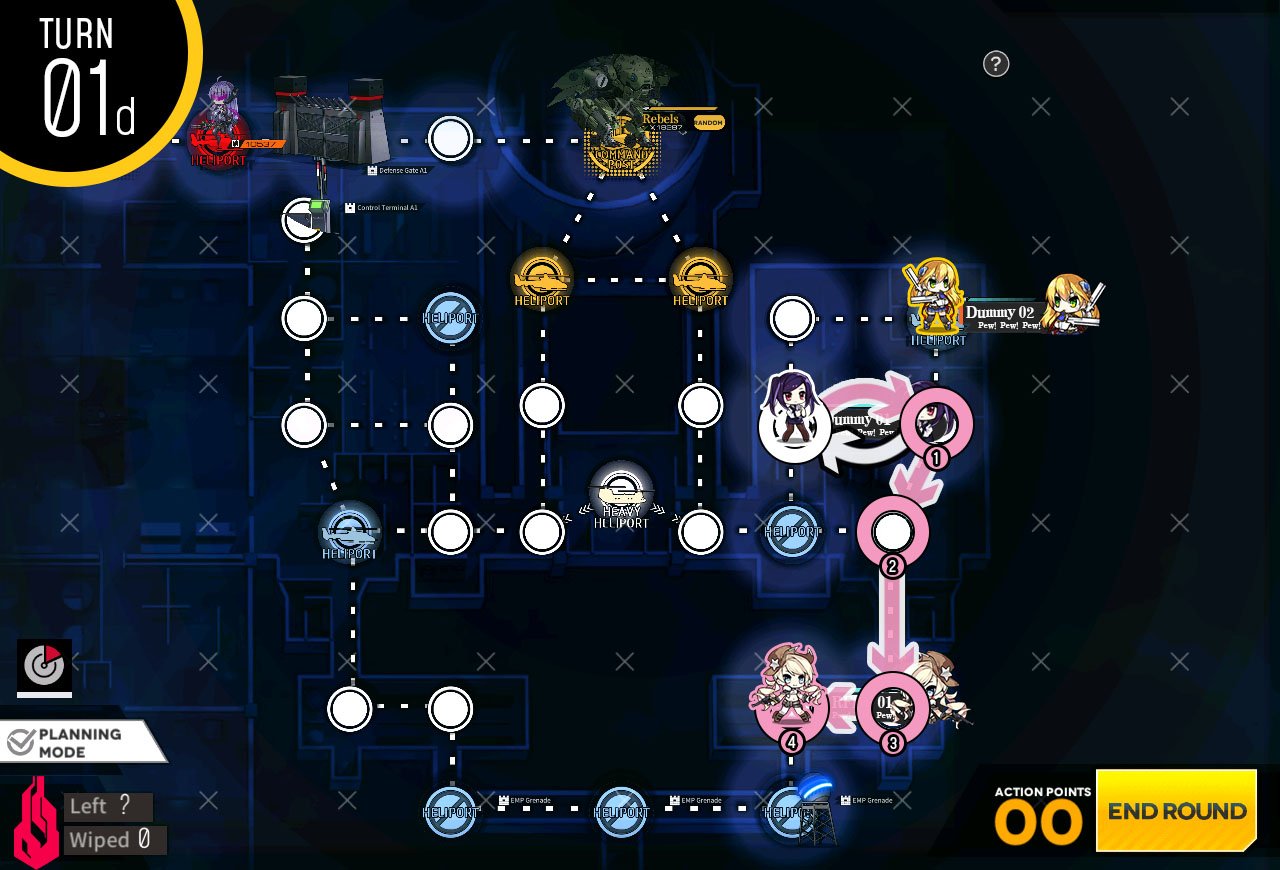
Combat echelon at the starting helipad moves down to capture another helipad. Combat echelon at the center moves to the right one node.
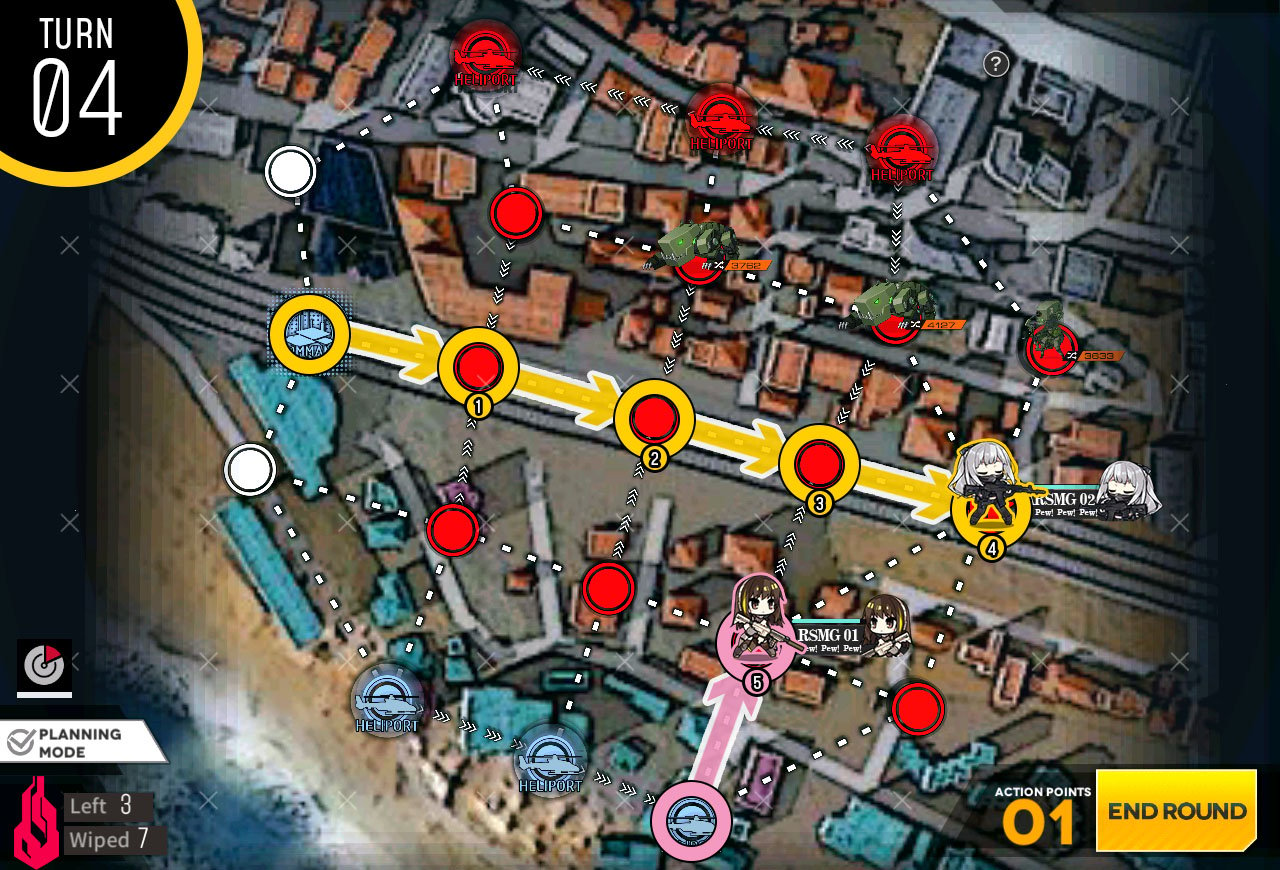
Combat echelon at the center captures the marked helipad for the objective. 2nd combat echelon moves to clear out the enemy units at the bottom to meet 8 kill requirements.
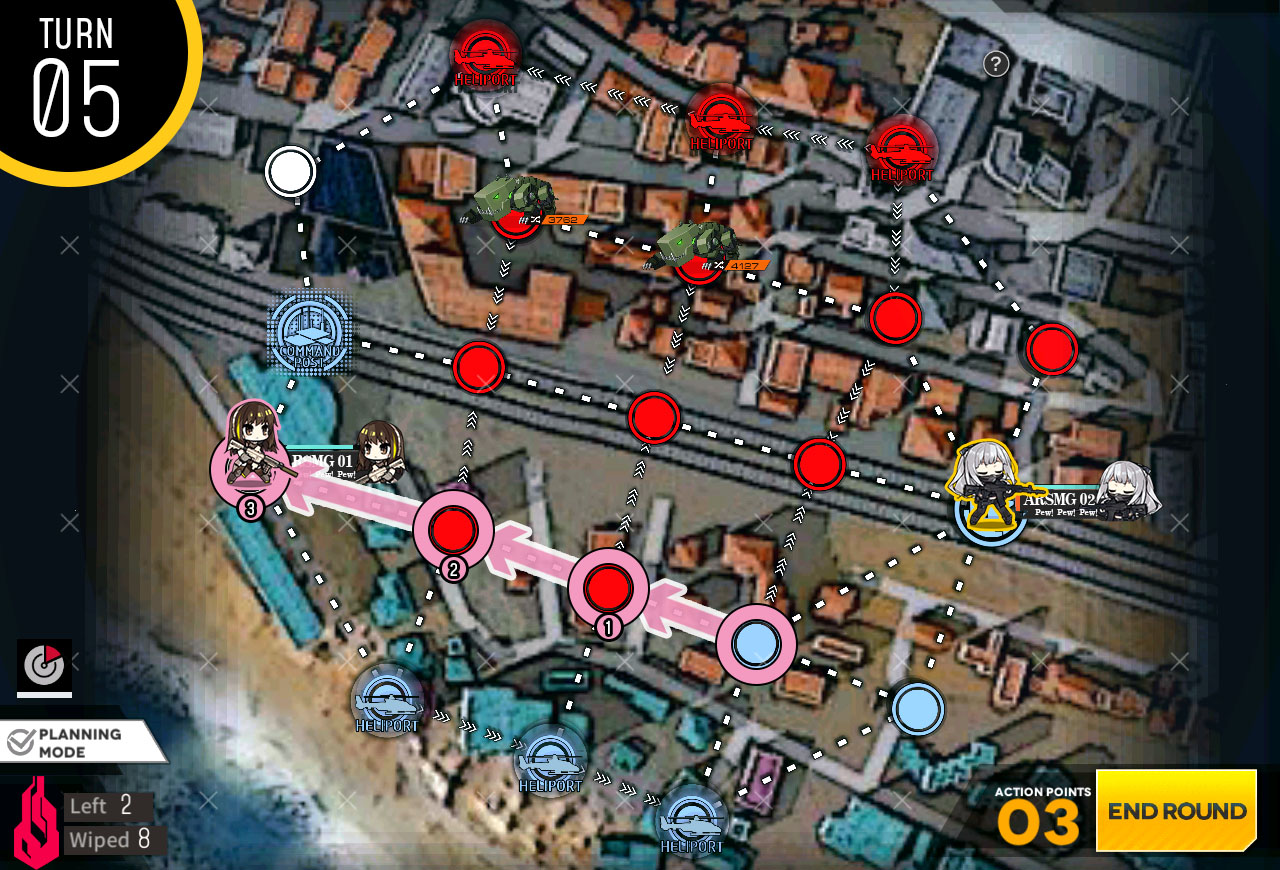
On turn 5/6, make sure to check that you have 8 kills and helipad under control prior to ending the turn.
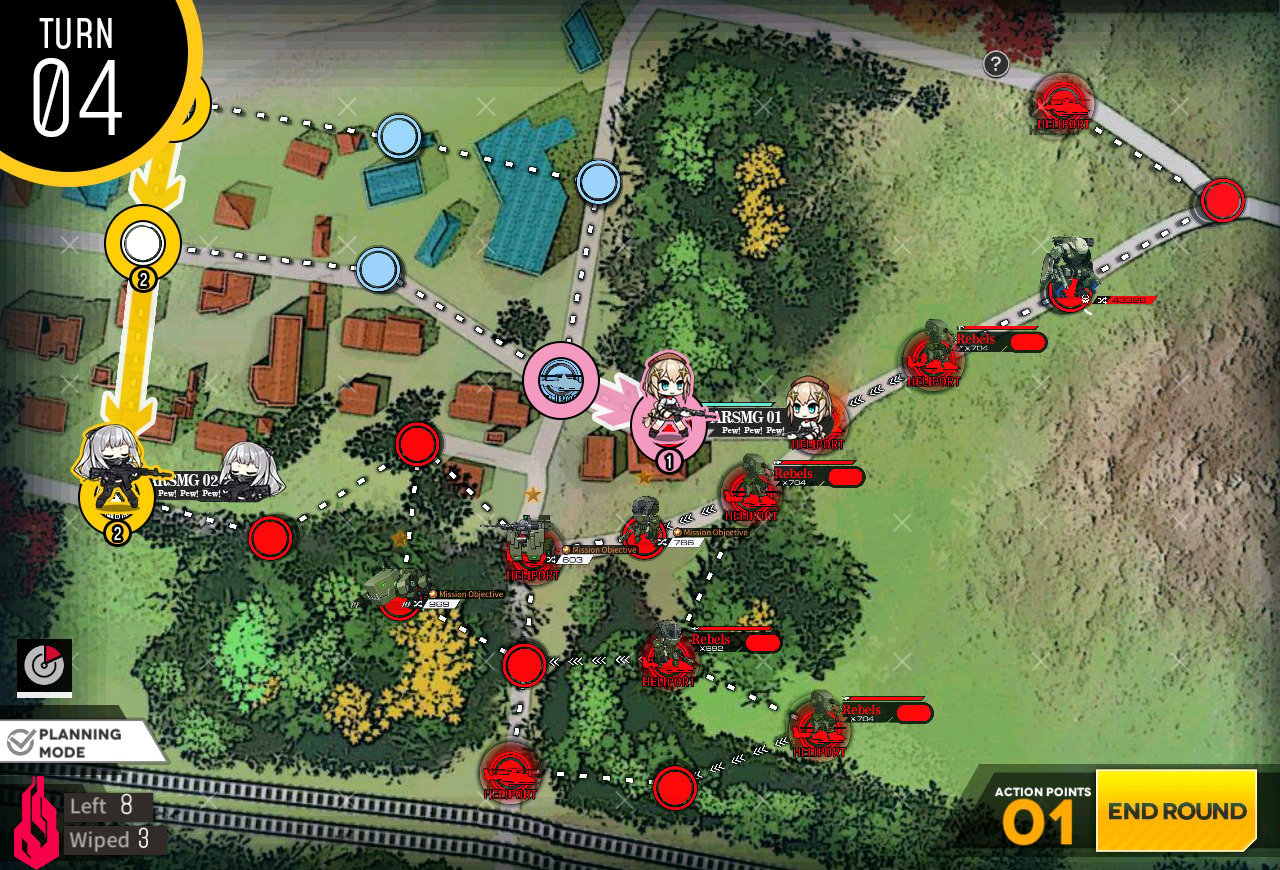
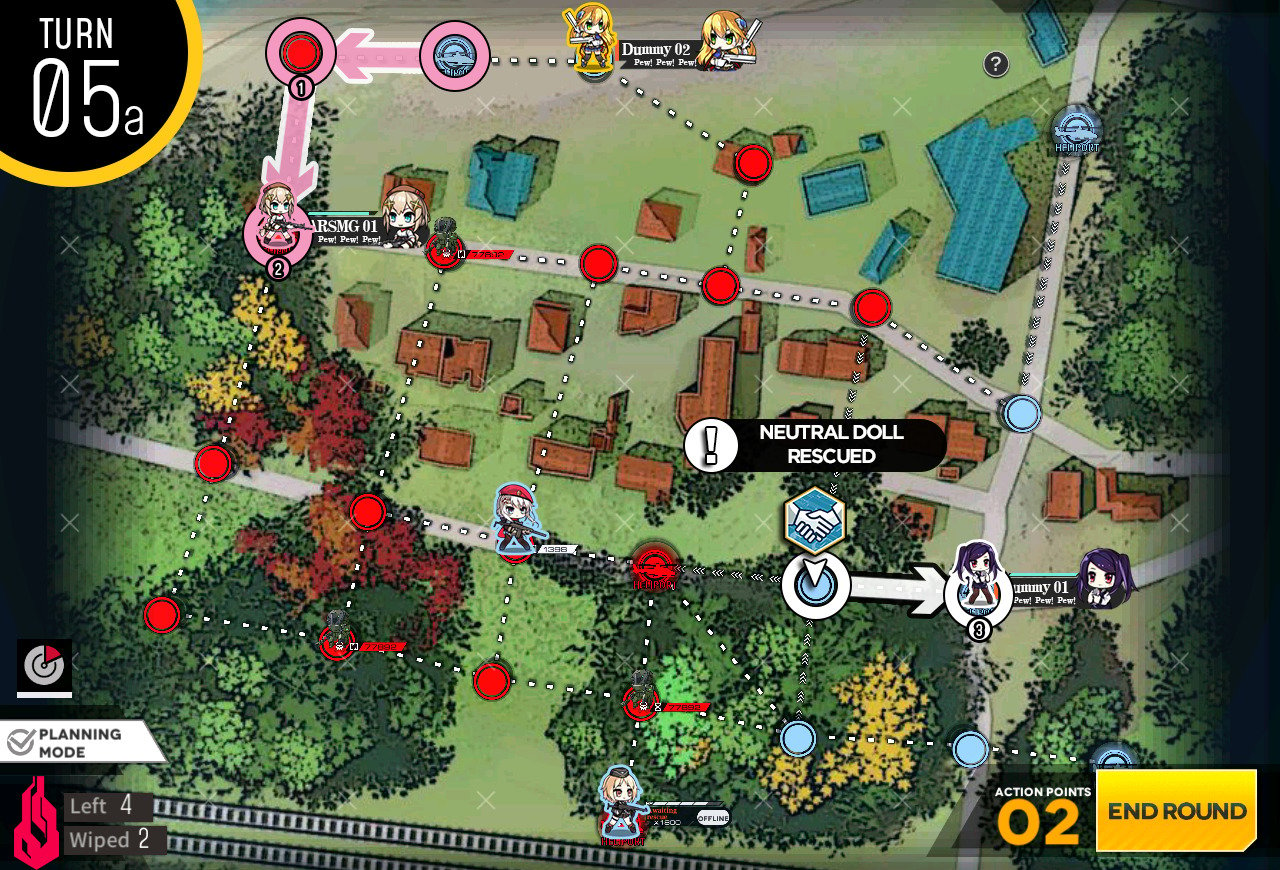
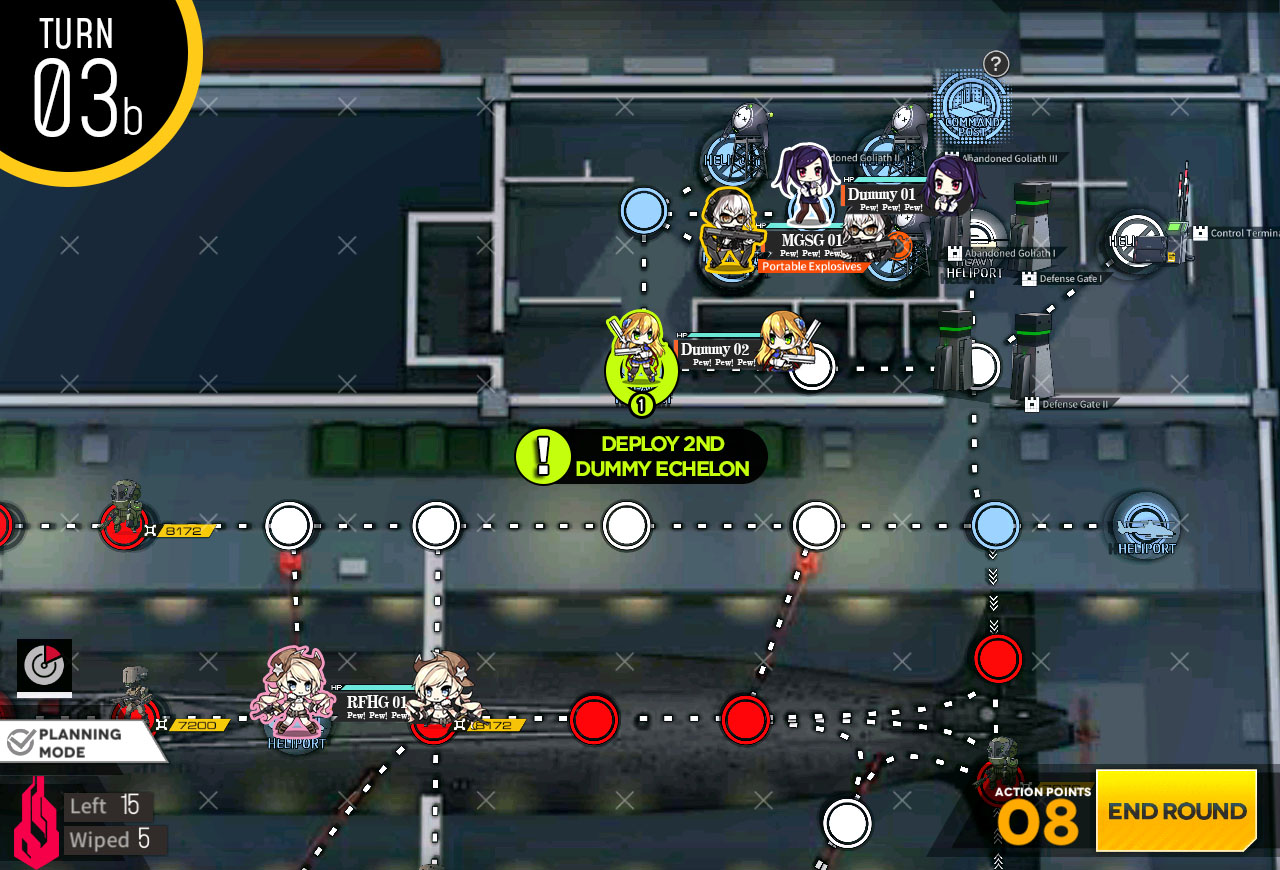
Make sure that the dummy team spawned on the bottom right helipad moves one node to the left.
Move just the dummy echelon at the bottom one to the left and end the turn.
Move the bottom side dummy up one node. Then Combat echelon move towards the hostage at the top. Move down the dummy unit at the top helipad one node as well.
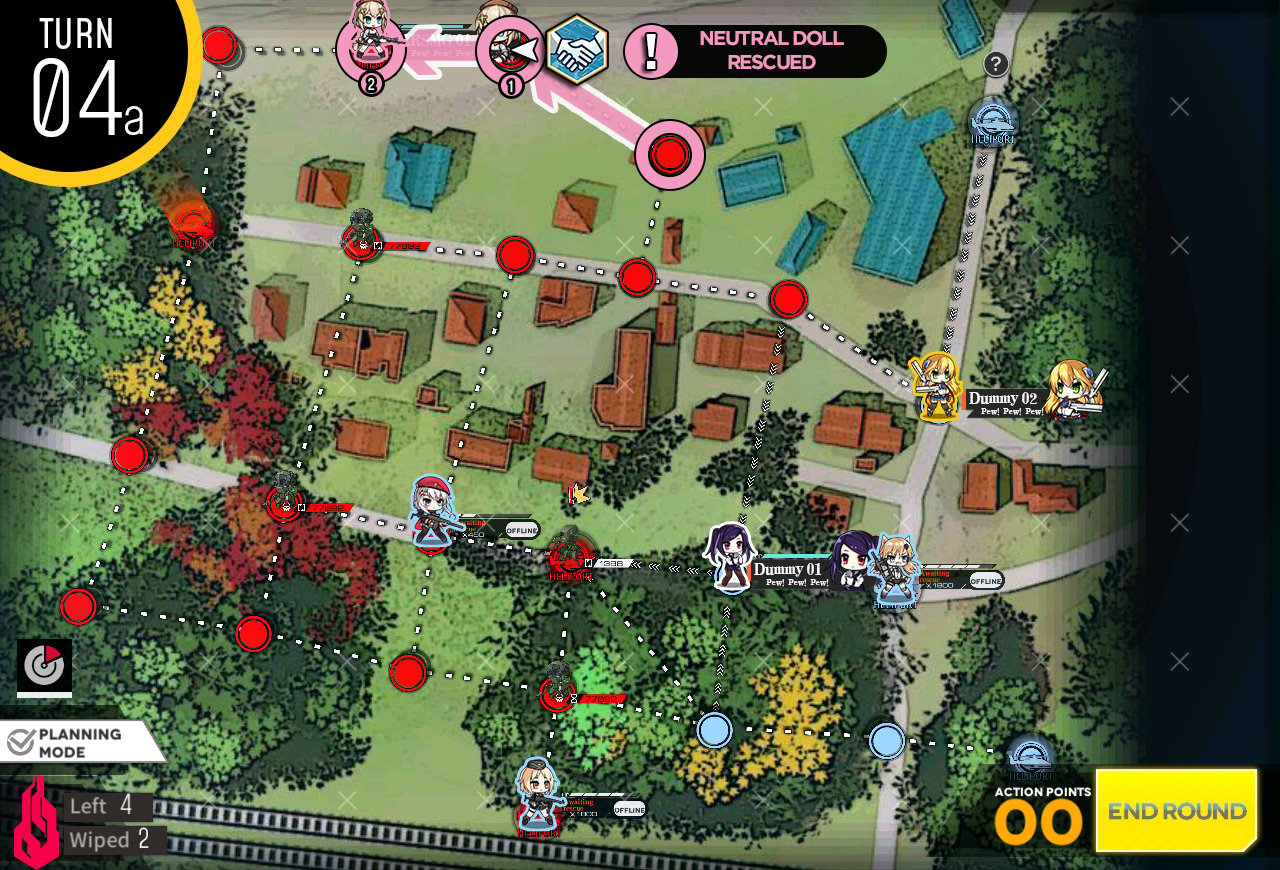
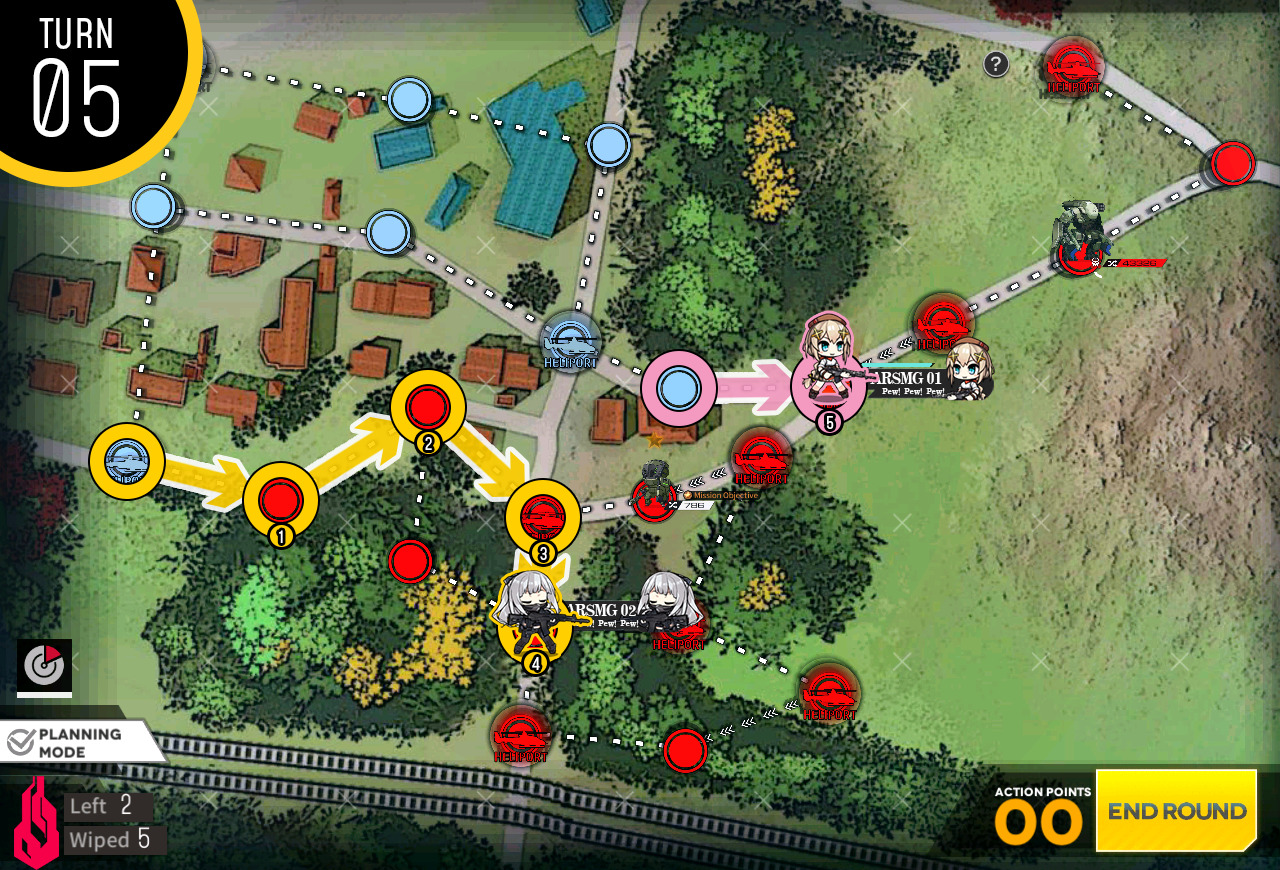
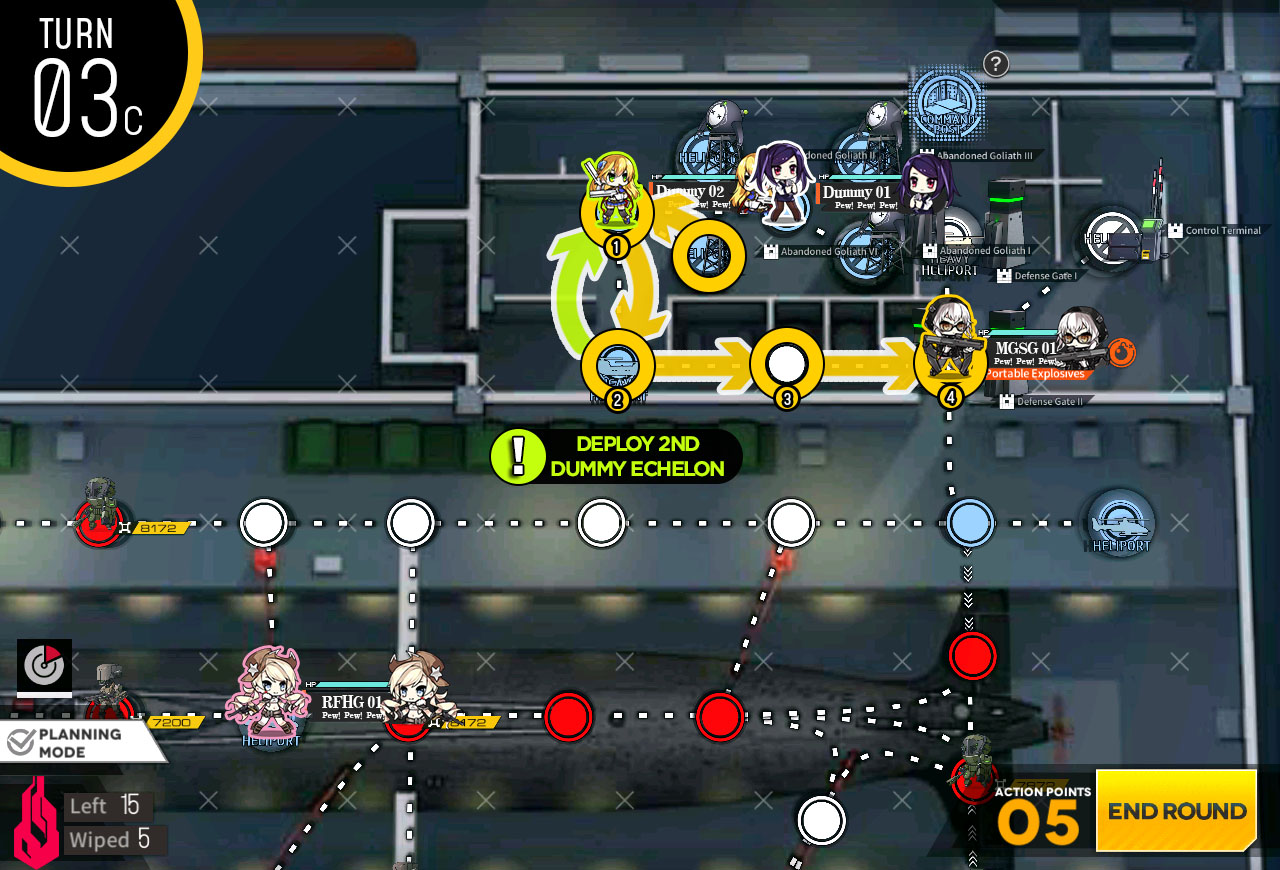
Combat and dummy echelon at the top move on to rescue the hostage unit. Hostage will be automatically rescued at the beginning of next turn.

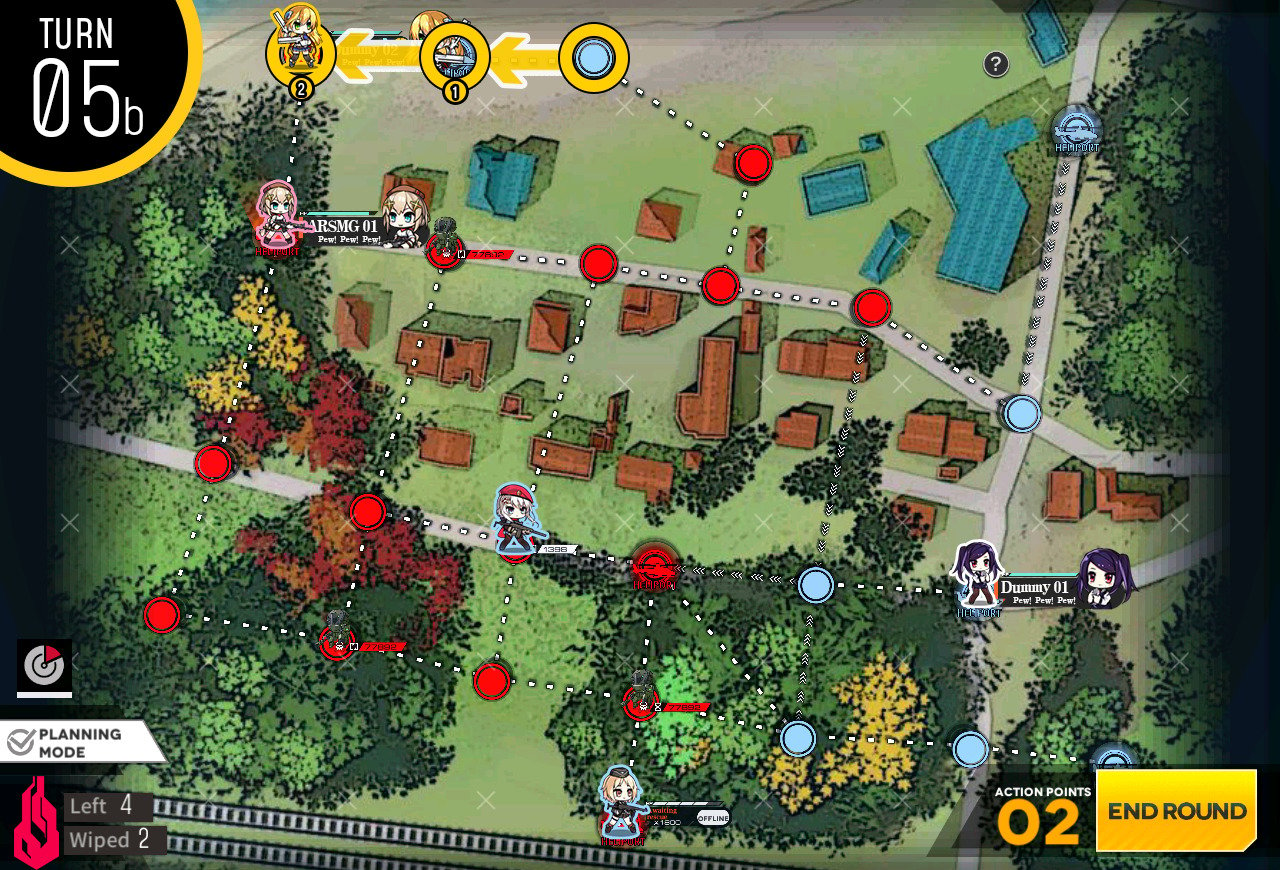
Now that one of the hostage unit has died, we have to capture the helipad on the left side with combat echelon and extract the hostage with dummy unit on the bottom side of the map. Once you hit end turn, mission should be cleared.
Start with combat echelon on the helipad and move down so that we can deploy 2nd combat echelon.
Continue to move down the combat echelon one node and 2nd combat echelon near the 1st combat echelon.
1st combat echelon takes the long way to the bottom to avoid strong Hydra units.
Continue to move the max movement allowed towards the marked node. There are rare cases in which the path is already blocked by the Hydra unit with bad RNG, in this case just restart the mission.

Move on to the marked node and end the turn.
Spawn combat team on the helipad and the dummy team in the middle.

Once echelon is on the enemy HQ, hit end turn and clear the mission.
Start with combat echelons on each location. Combat echelon on the left moves down to take helipad and other combat echelon moves to node between starting locations.
Combat echelon near the HQ move around in wide arc to the right side of the map and end movement on the bottom helipad.
All that's left to do is for combat echelon on the left side to kill remaining enemy units to clear the mission.
Combat echelon at the top helipad sweeps the top portion of the map starting with right side first. Then end your turn on the helipad next to the console panel.

Next turn simply move to the spot to capture the 3rd helipad and end the turn to clear the mission.
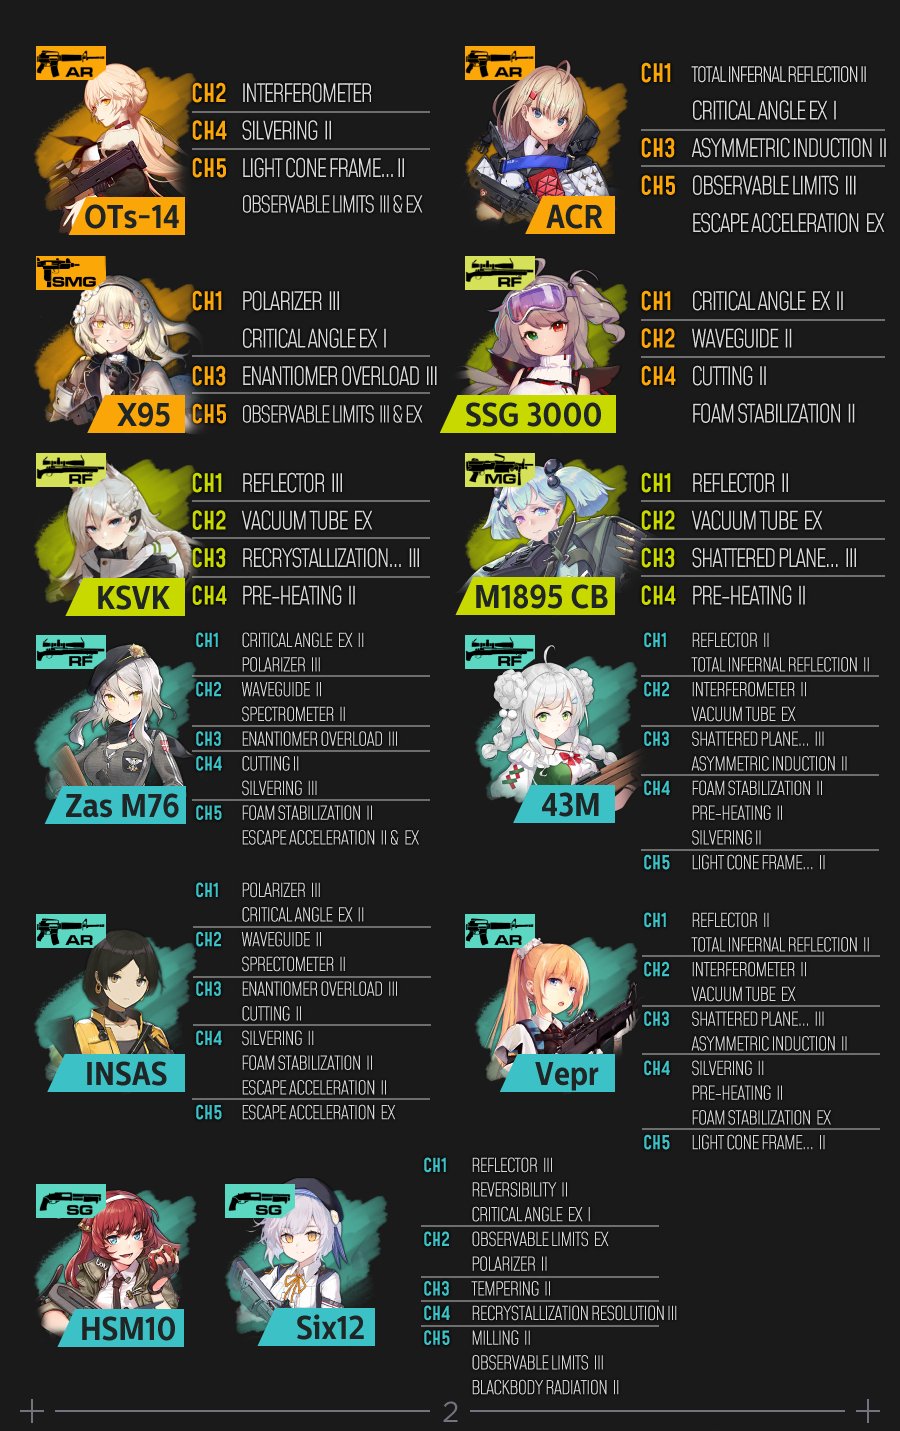
2 Combat echelon that can kill armor units [level 70+ / 4x links]
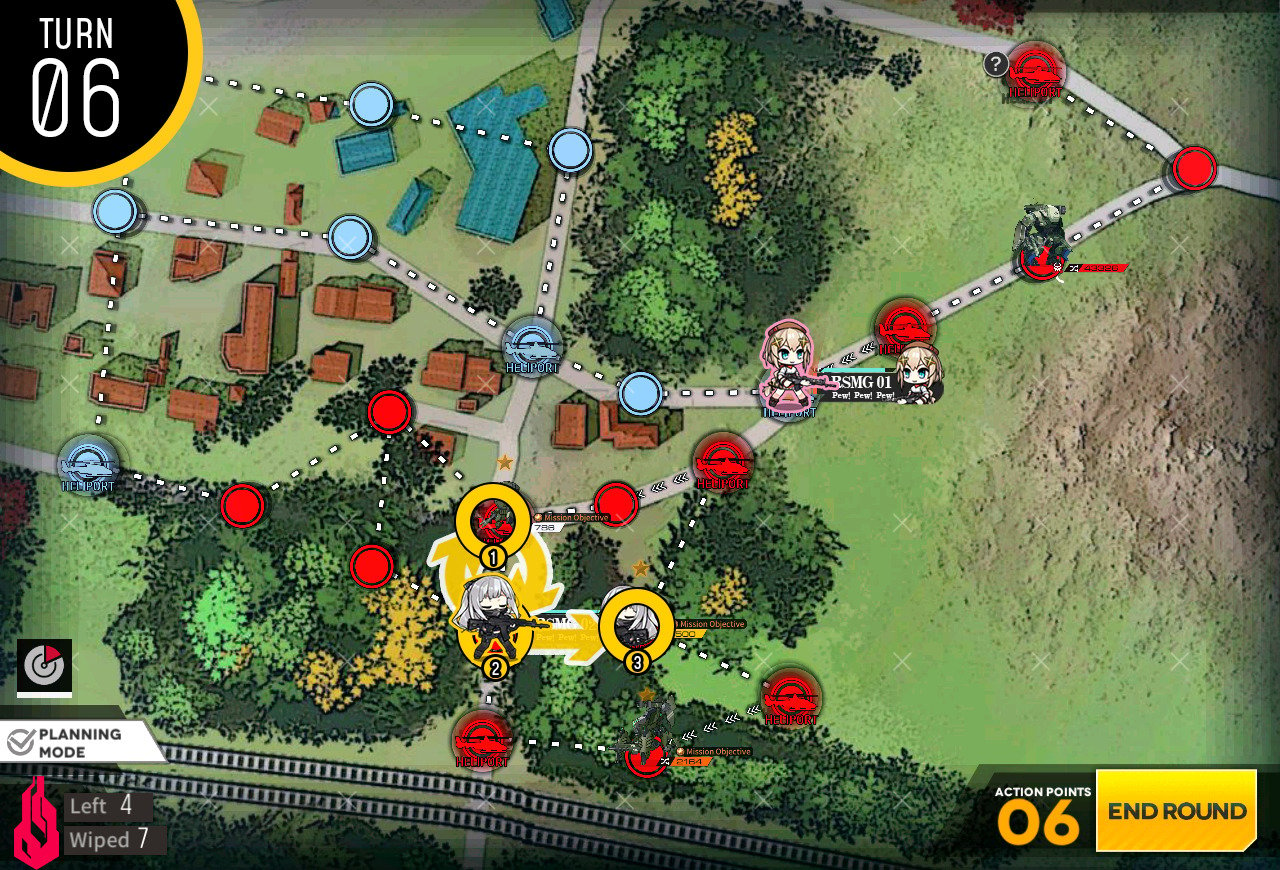
Resupply and continue to sweep the area over so that enemy units are least 2 nodes away from the marked nodes.
If there's no enemy units threatening the marked nodes, move combat echelons back to starting position.

If there is an enemy unit near the marked node, simply kill them or prevent them from taking over. Ending the turn on 4th turn will clear the mission.
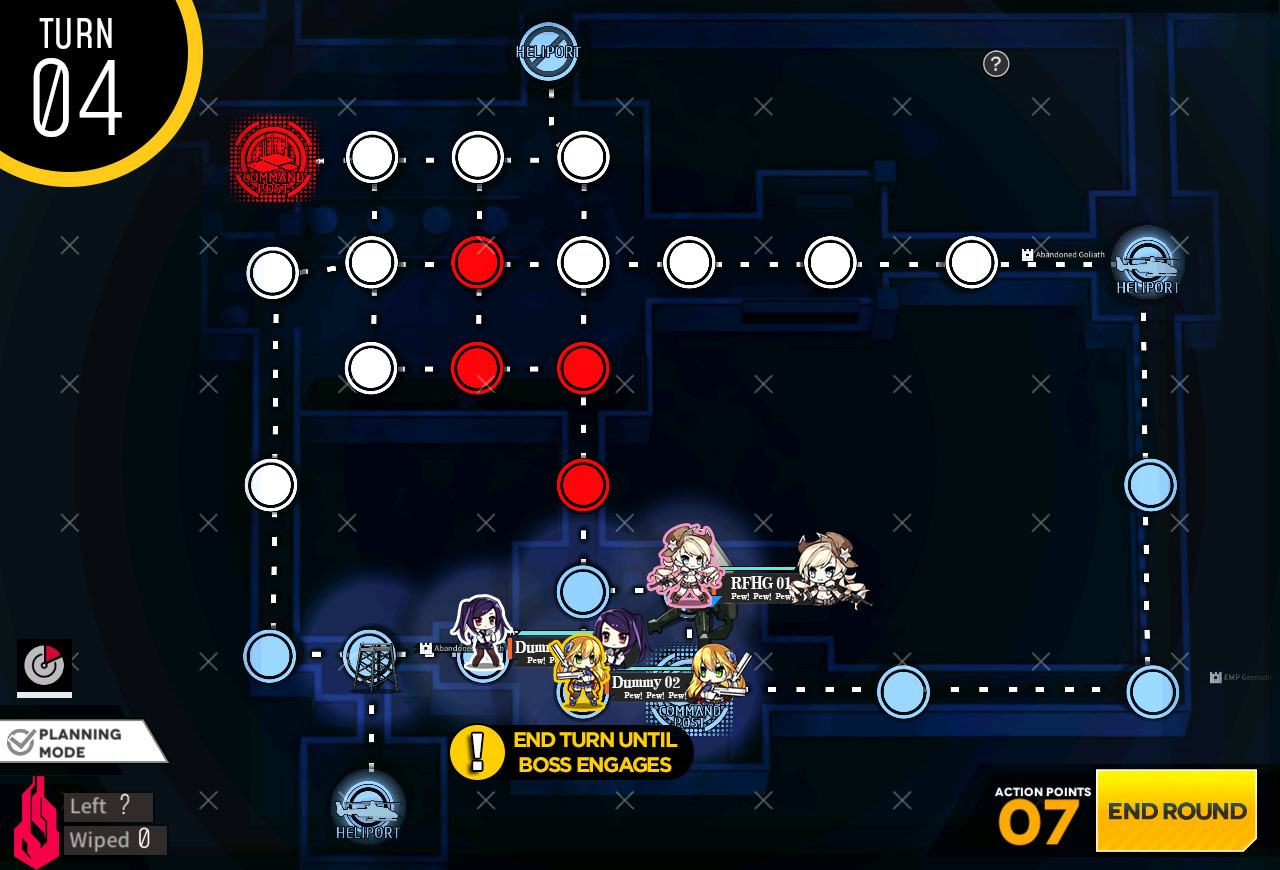
Move the combat echelon up towards the Goliath bomb.
Deploy 2nd combat echelon to defend the HQ.

Move to node below the bomb and helipad.
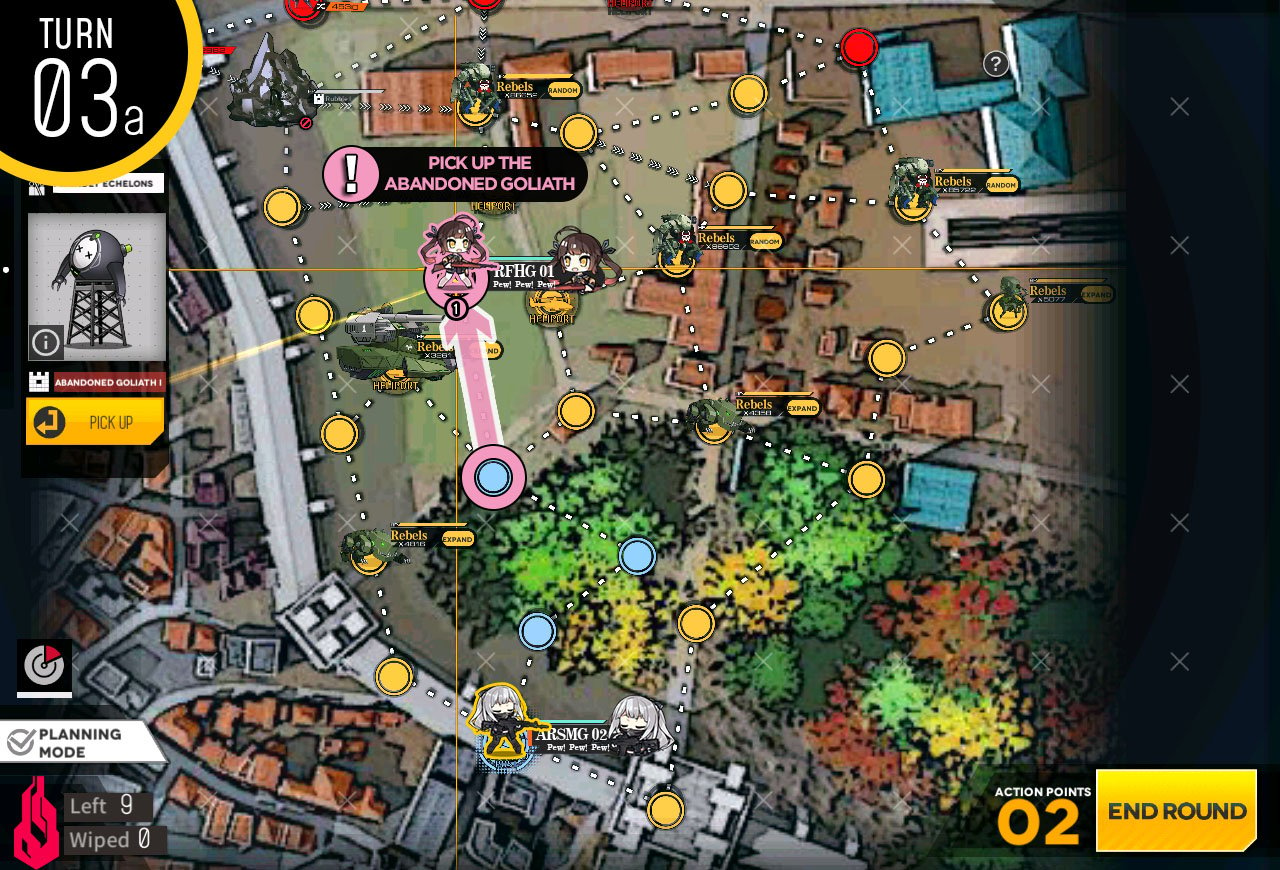
Move to recover the bomb for the rock pile.

Then take the helipad next to it to. You can repair and resupply next turn prior to taking off.
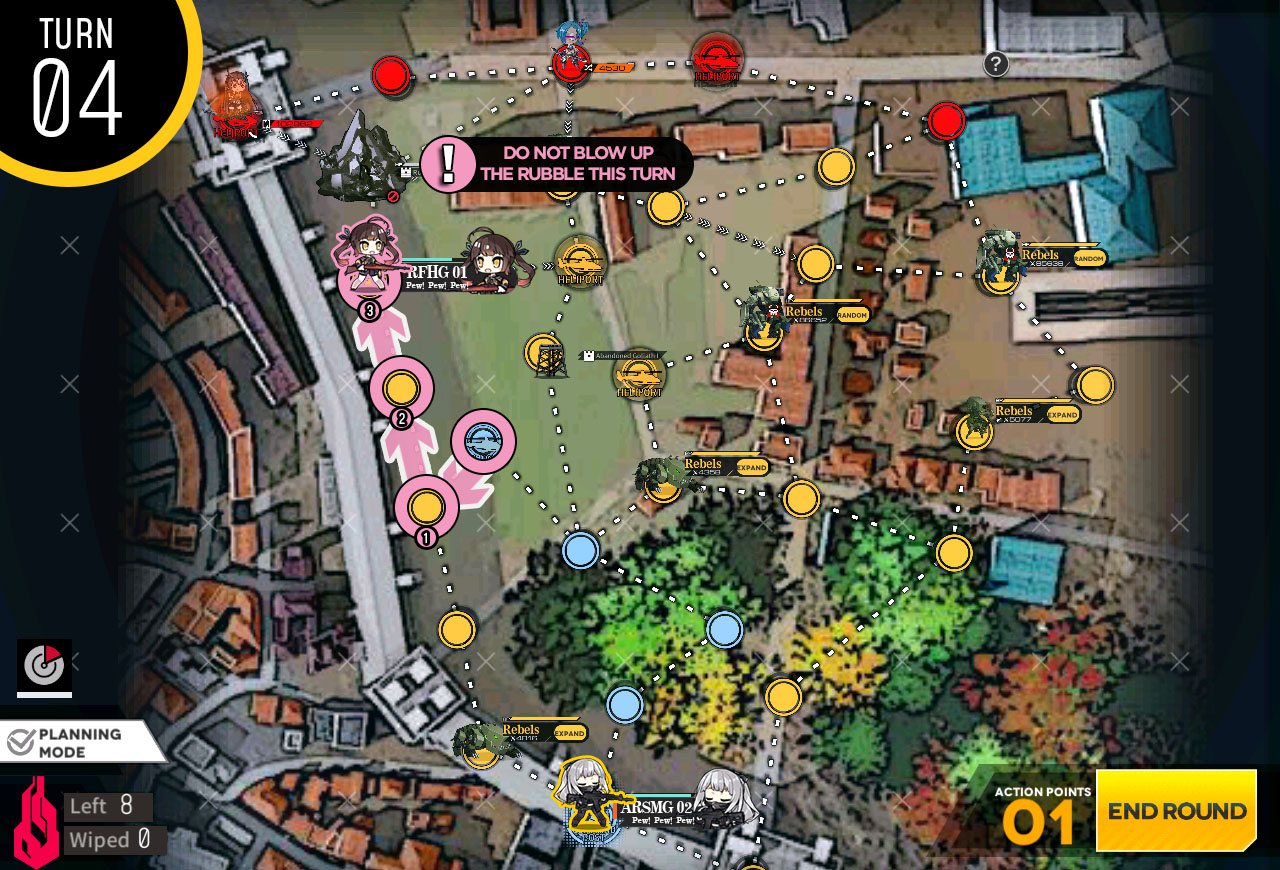
Move adjacent to the rock pile but DO NOT use the bomb this turn. Or SF boss will block the path and we will have to go around the long way.

At the beginning of the turn, blow up the rock pile and move pass so that we are safe from SF boss.
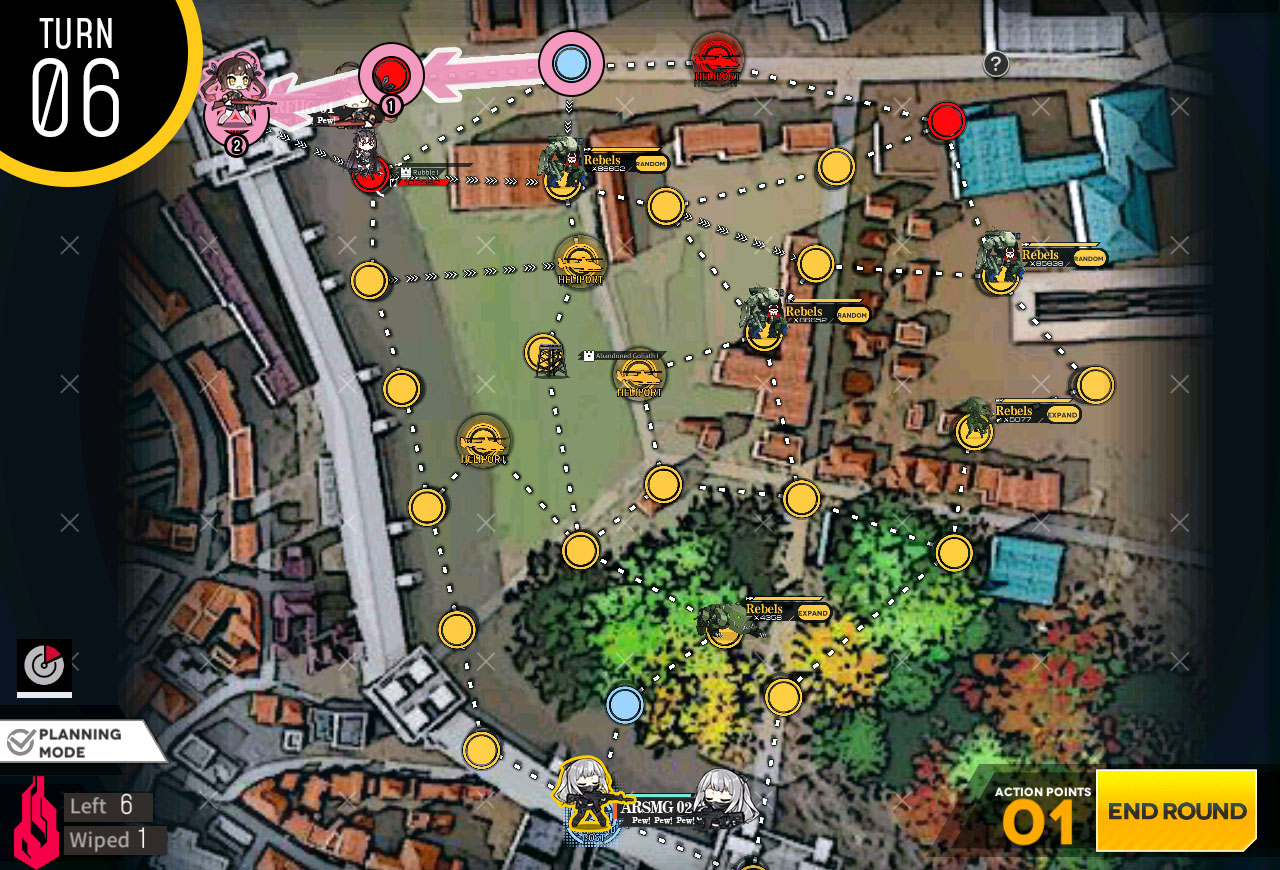
Once SF boss is out of the way, simply move on to the enemy HQ and clear the mission.
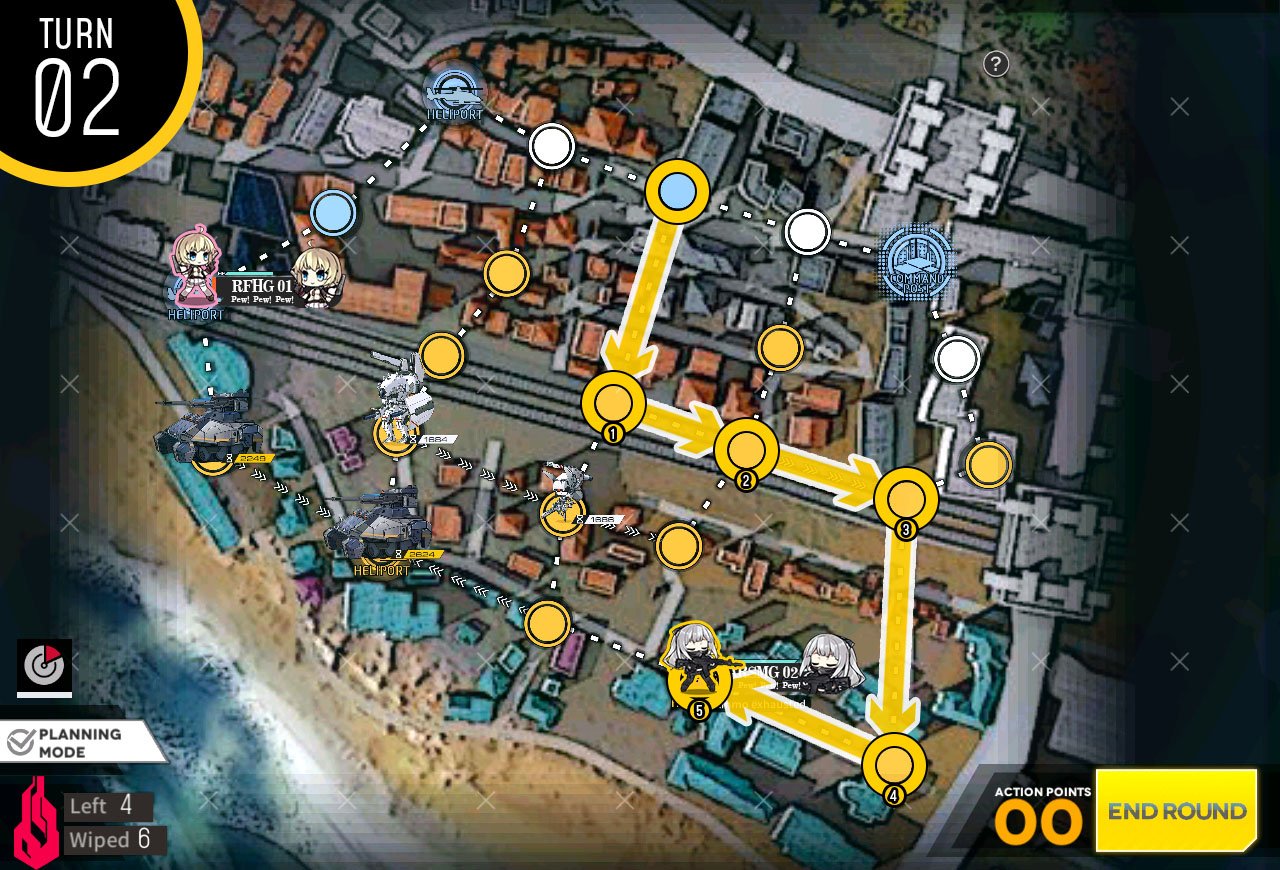
HOC moves to the right and we deploy 3rd combat echelon. On the right side, we move the combat echelon out of the heavy helipad and we deploy 2nd HOC on the right side. Move combat echelon at the bottom up towards the center.
Combat echelon to the left of the HOC on the right side of the screen sweeps the top right section of the map. Swap with dummy echelon and repair/resupply as needed.
HOC follows behind so that it can provide support for the tank enemy unit.
Continue to move combat echelon on the top to wards the left side but stopping 2 nodes away from the helipad.
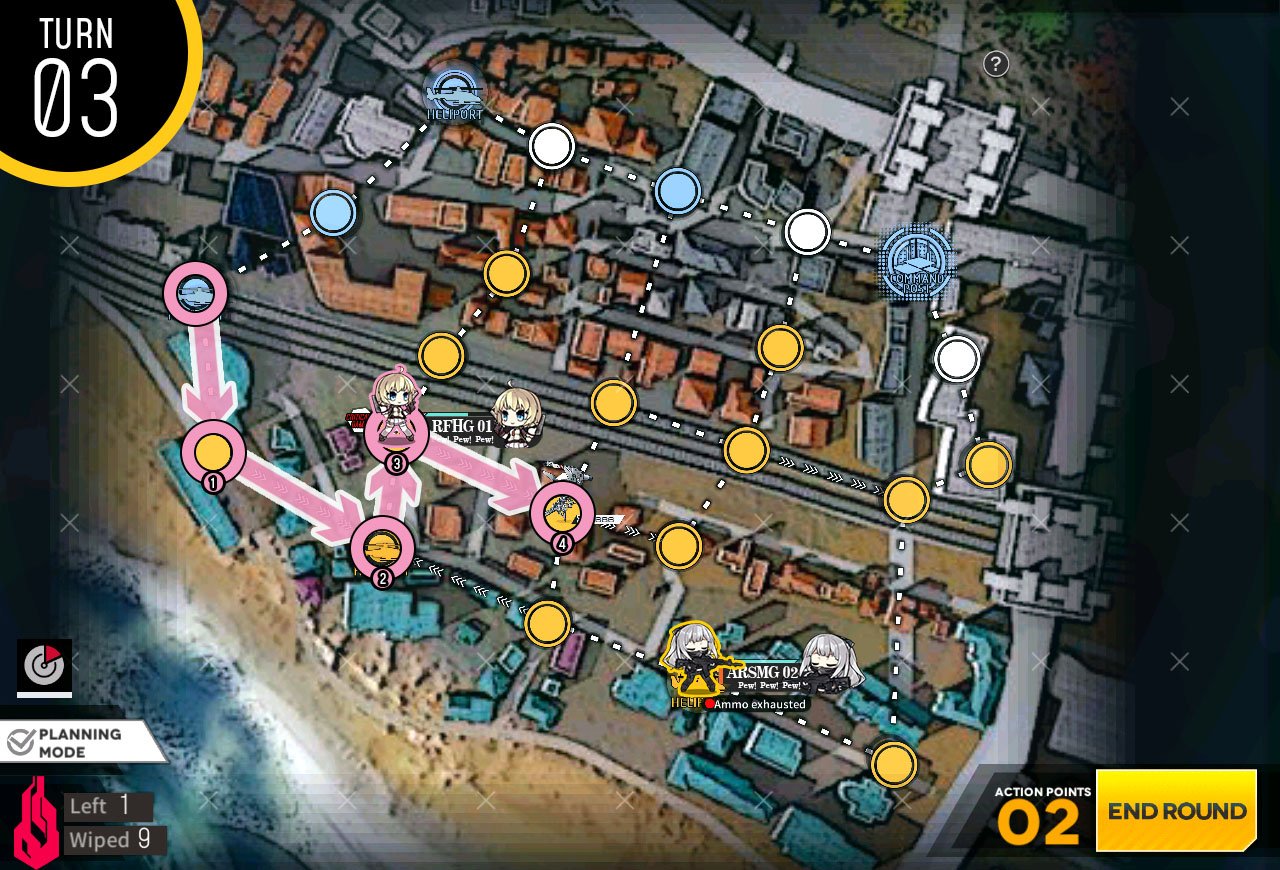
At the beginning of turn 2, move HOC at the bottom left side down and left.
Combat echelon at the bottom left heavy helipad moves to clear out the armored units and stop short of the helipad.
Combat echelon at the bottom sweeps the bottom left side and stop to resupply at the heavy helipad on the right side. Then move one node to the left.
Combat echelon at the top center moves 2 nodes to the left again. Then Dummy echelon at the top moves down 1 node. Once you confirm that all units are at correct place, end the turn.
HOC at the top side of the screen moves towards the center HQ.
Then combat echelon at the left side sweeps the top left corner of the map and swaps with the dummy unit at the HQ. Resupply and repair as needed.

Combat echelon at the HQ continue to move up and take out the enemy units.
Dummy unit at the top move to capture the node above the heavy helipad. Then HOC at the bottom left corner moves to capture the node below the heavy helipad. Combat echelon at the bottom move past helipad and capture the node for the turn.
Dummy echelon near the center moves to the left so that it's two nodes away from the HQ. Confirm the echelons are at a right place and end the turn.
All that's left to do is to kill one of the enemy units and capture the rest of the map. We are going to use surround capture to the best of our abilities. Move dummy and combat echelon units on the right side to capture nodes on the bottom right corner.
Same steps for the HOC and dummy at the left side of the map.
Combat echelon at the top center fights the last enemy unit we have to fight.
Now that we have no use for HOC, we can start using it for the node captures as well. Same goes for the combat echelon near the center right side of the map.
All that's left to do now is to move into position that we capture all nodes this turn. You have 3 more turns so don't worry if you mess up the steps.
Finish moving your echelons in place and end turn to clear the mission.

Start by moving combat echelon up 1 node then deploying 2nd combat echelon at the HQ.

Combat echelon that will fight the Nyto will take the bottom route. Repair and resupply as needed prior to moving.

Now we move 1 node at a time. The enemy units at the top and bottom of the map will not move unless you are adjacent to them.
Some units will not move as there are multiple units running into combat echelon. Wait as needed [Top section of the map].
Once you clear out all the enemy units at the bottom, move to the last unit on the top left and wait for it to run into combat echelon.
Move dummy echelon towards the Goliath bomb to the left.
Move dummy closer to the bomb and deploy combat echelon on the HQ to prevent it from being taken over.
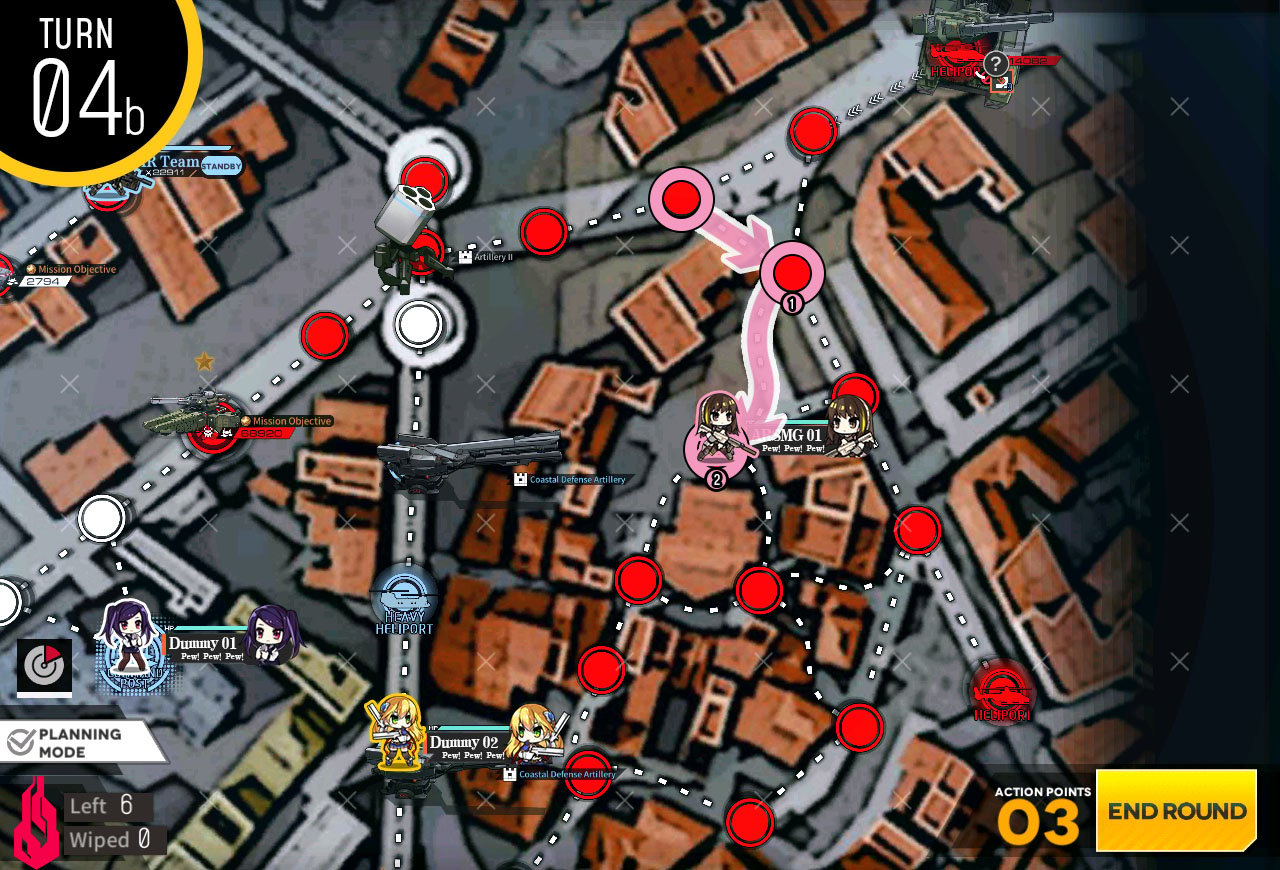
Combat echelon moves down towards the EMP bomb. Then deploy 2nd combat echelon at the HQ. Dummy echelon picks up the bomb and moves back down one node.
Combat echelon at the HQ moves towards the costal defense artillery.
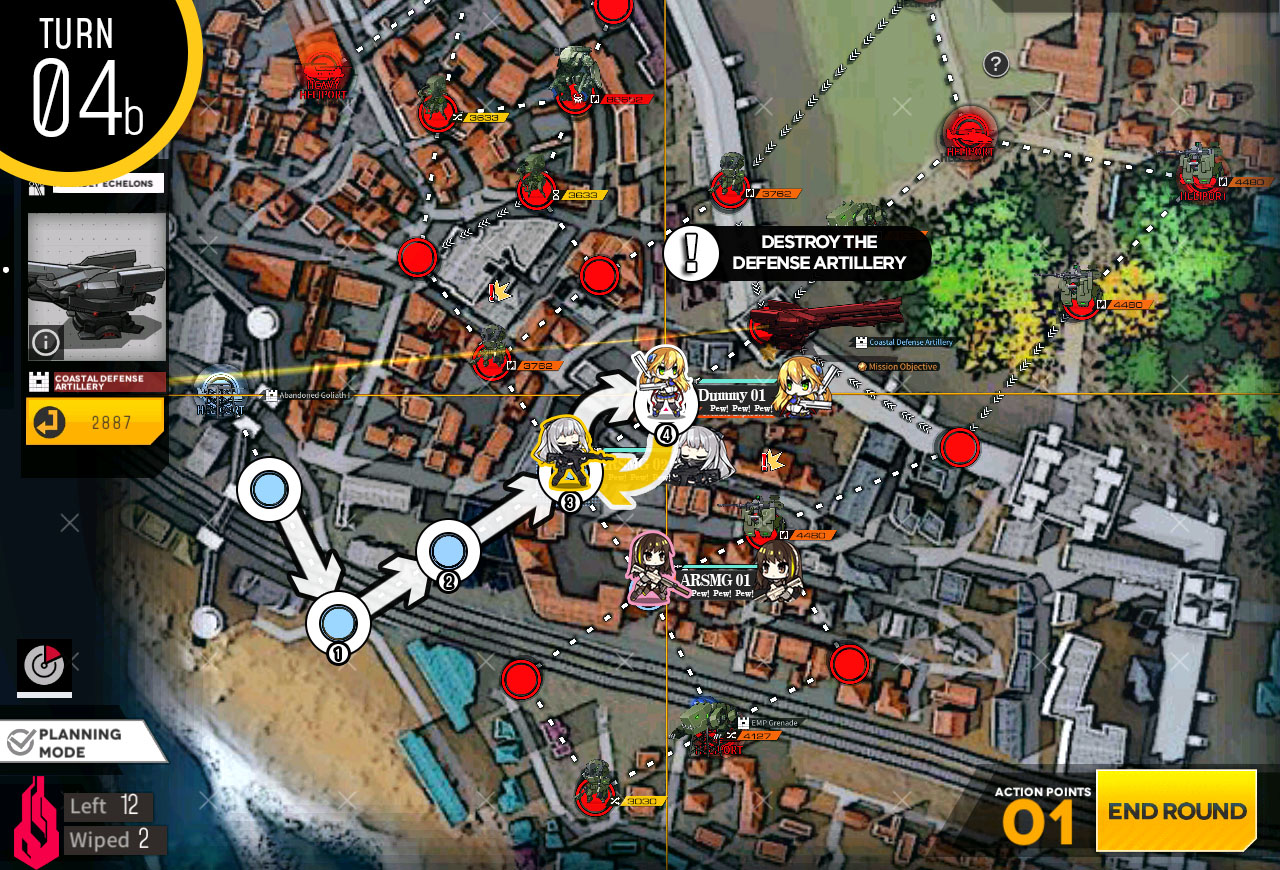
Dummy echelon then moves and swaps with combat echelon and plants the bomb, which will blow up next turn.
With remaining move, combat echelon near the EMP bomb moves to collect it.

At the beginning of turn 5, you will see that either path is clear for you to get to marked helipad or not. If it is not clear, you will have to move to the right of the path and EMP the Minotaur unit at the right side so that it doesn't move. Next turn it will stay in place and open the path to the helipad.
Get to the helipad and End the turn. In this case Dummy unit might get run over and forfeit the S-rank clear but it will still clear the map.
Combat echelon at the HQ moves down to take the helipad at the bottom.
Move combat echelon to the next helipad and deploy 2nd combat echelon on the HQ.
Continue to take adjacent helipad at the bottom. If there's enemy units near the HQ, use 2nd combat echelon to clear them out.
It's almost time to connect the dot. Move 2nd combat echelon to the rally point and move 1st combat echelon up one node.
1st combat echelon moves to finish connecting the dot.
Now all that's left to do is to make sure that line is not broken for 2 turns. Move combat echelons accordingly to kill enemy units too close to the line.
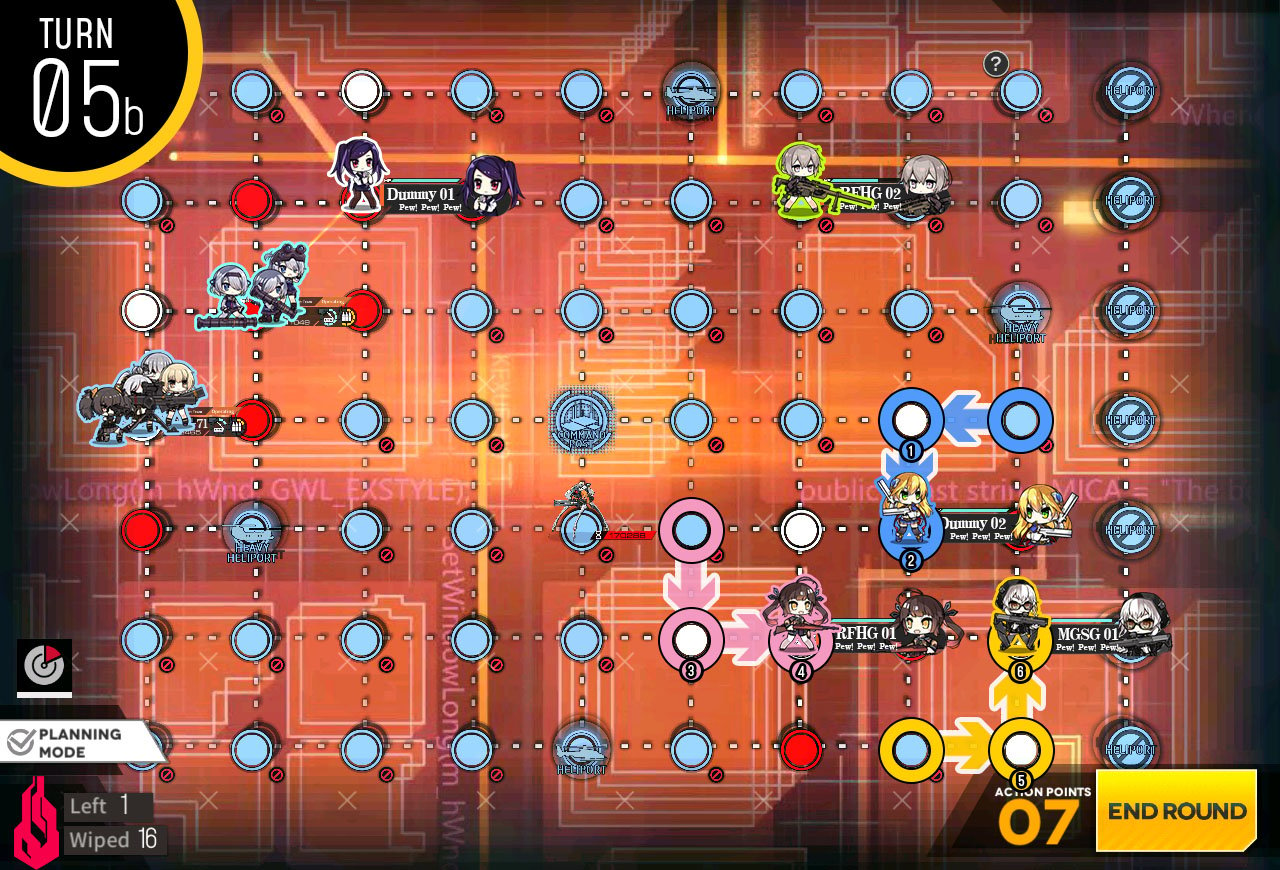
Combat echelon at the bottom moves to the right and stops short of the bomb. Combat echelon at the top moves down and deploys dummy echelon on the HQ.
Swap combat echelon and dummy and take the bomb at the top.
Combat echelon then moves down to move towards the rally point. 2nd combat echelon also move up towards the rally point.
We now connect the dot using all 3 of our echelons. Move 2nd combat echelon to the rally point and 1st combat echelon to the left.
Then 1st combat echelon Swaps with the 2nd echelon and moves to the bridge and schedule the demolition.
Move back to the original spot to the left of the rally point and end turn.
Now all that's left to do is to prevent enemy unit from breaking the line. Move 1st combat echelon to the right of the dummy echelon and hit end turn.
Start with combat echelon on the helipad and move up to take heavy helipad. Then deploy 2nd combat echelon. Leave all UMP45 as "eliminate" command.
You will see that bottom UMP45 moved up to the helipad. Changed command to "standby". Next move combat echelon on the HQ to the left and swap with another UMP45.

Then we deploy dummy echelon at the HQ before ending the turn.
You can see that the UMP 45 from the left side came towards the HQ. Swap the location so that the UMP45 from the left side goes to the top heavy helipad. Then change the command to "standby".
Now we move the UMP 45 from the bottom closed helipad to the open helipad on the left by swapping around echelons.
Once we swap so that combat echelon is at the bottom closed helipad, move towards the UMP 45 on the right side and swap position with it.

Then dummy echelon moves down and swaps position with the UMP45 and puts her in the correct spot. Change command of all UMP 45 to "standby" and end turn.
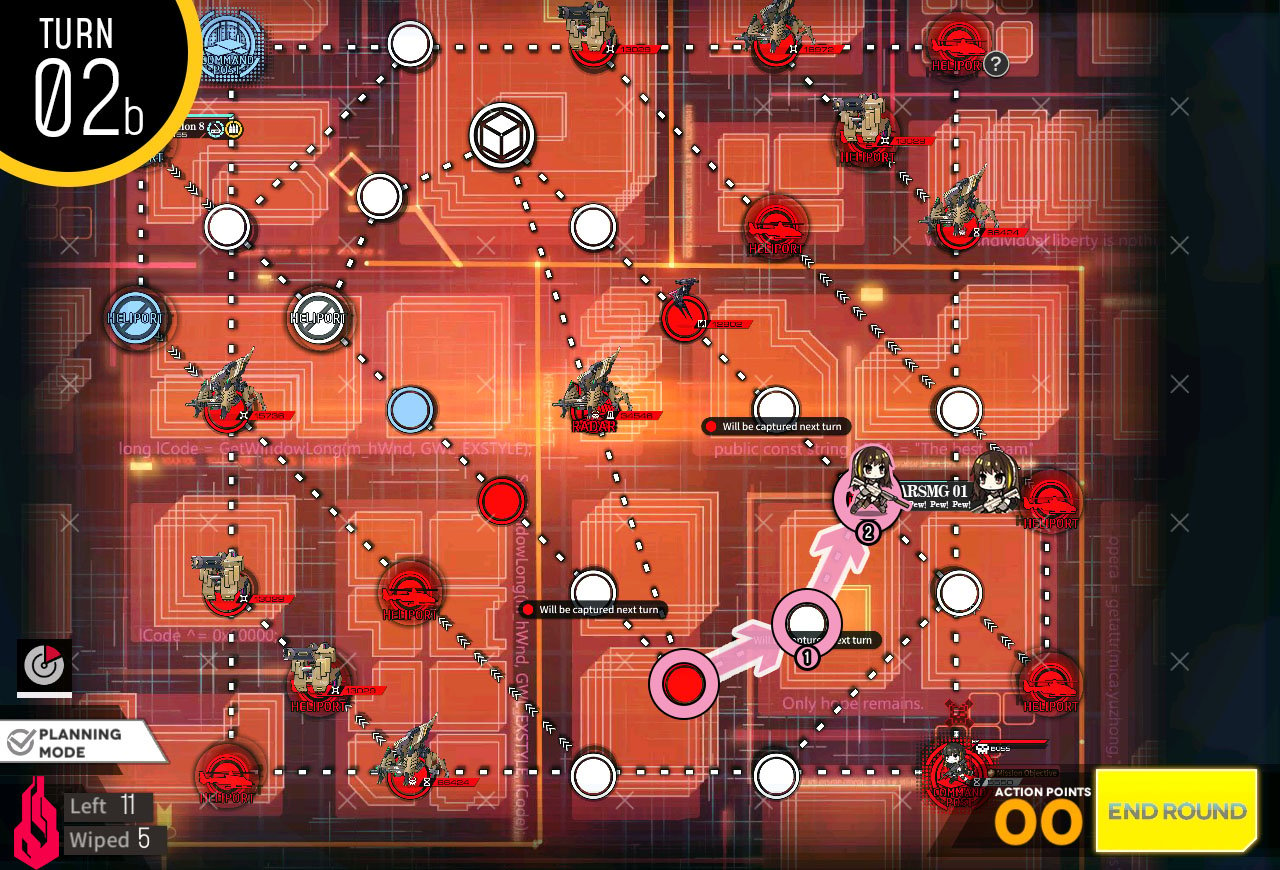
Move dummy echelon to the right to capture new helipad. Then deploy 2nd dummy.
Move 2nd dummy towards another console panel.
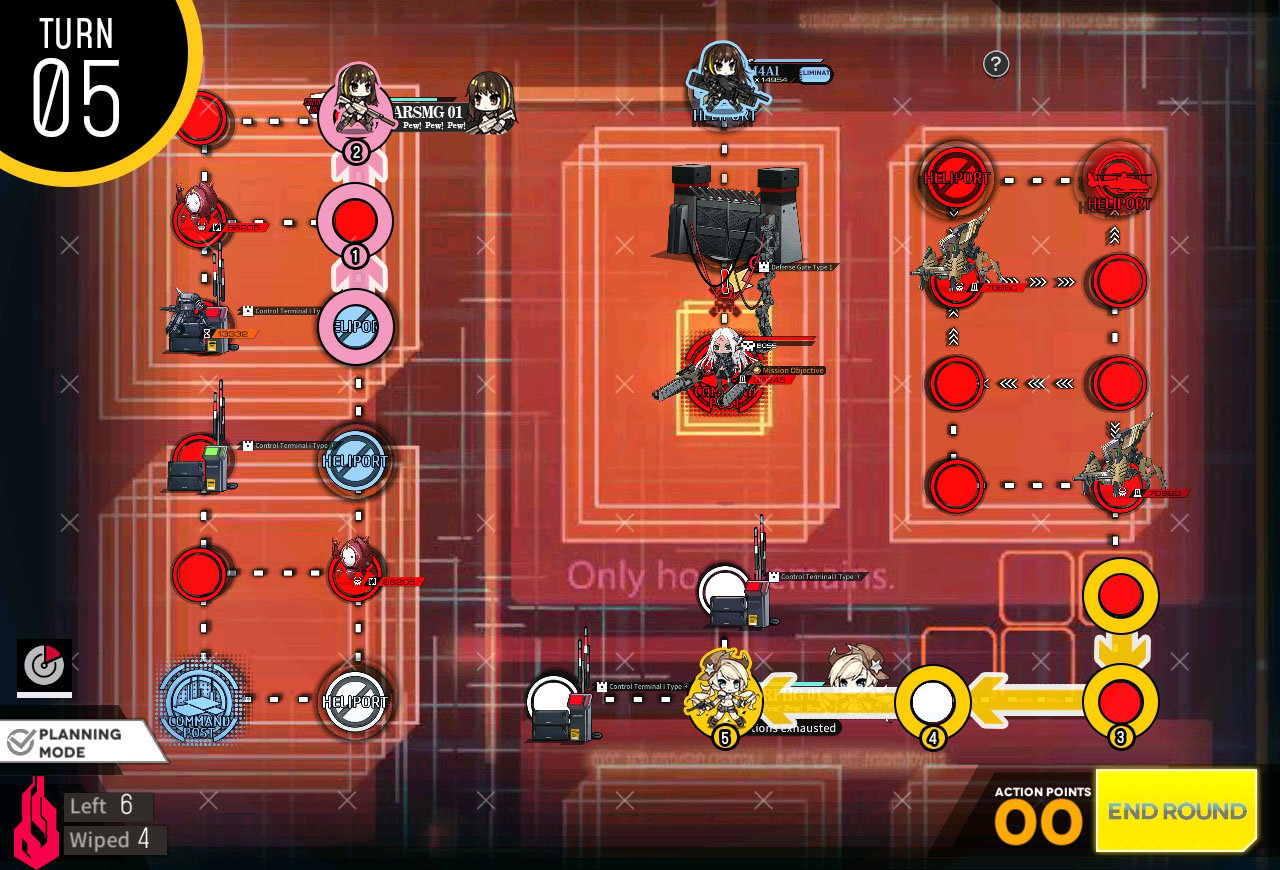
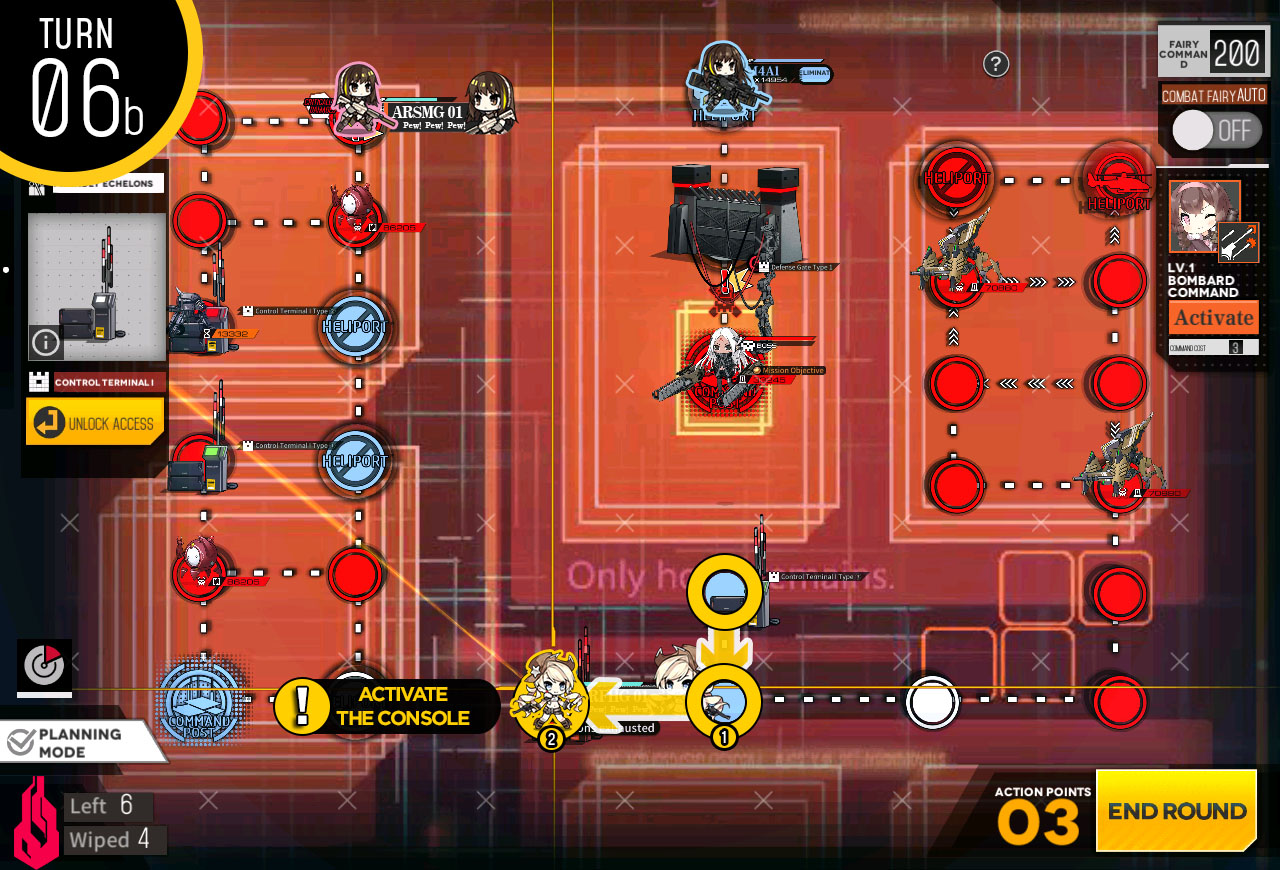
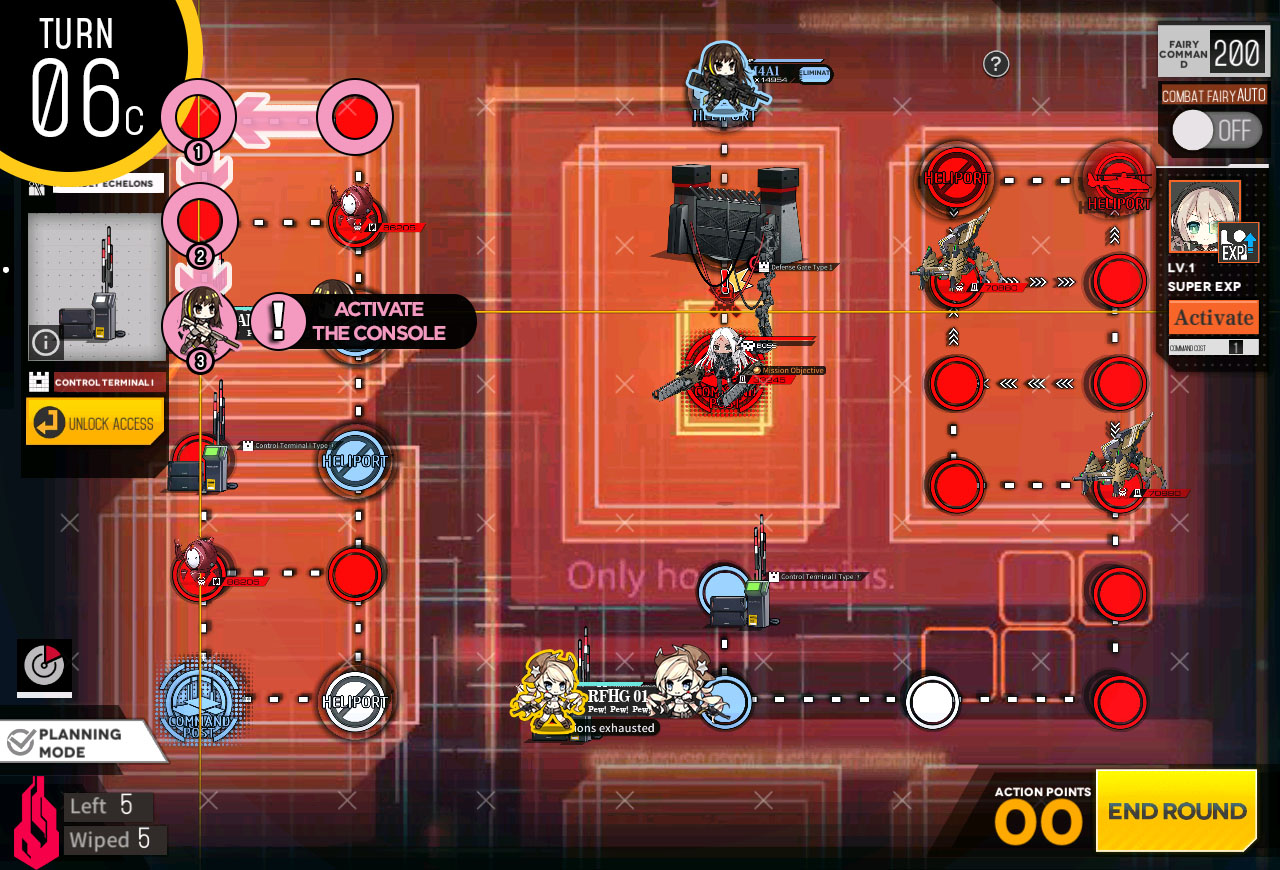
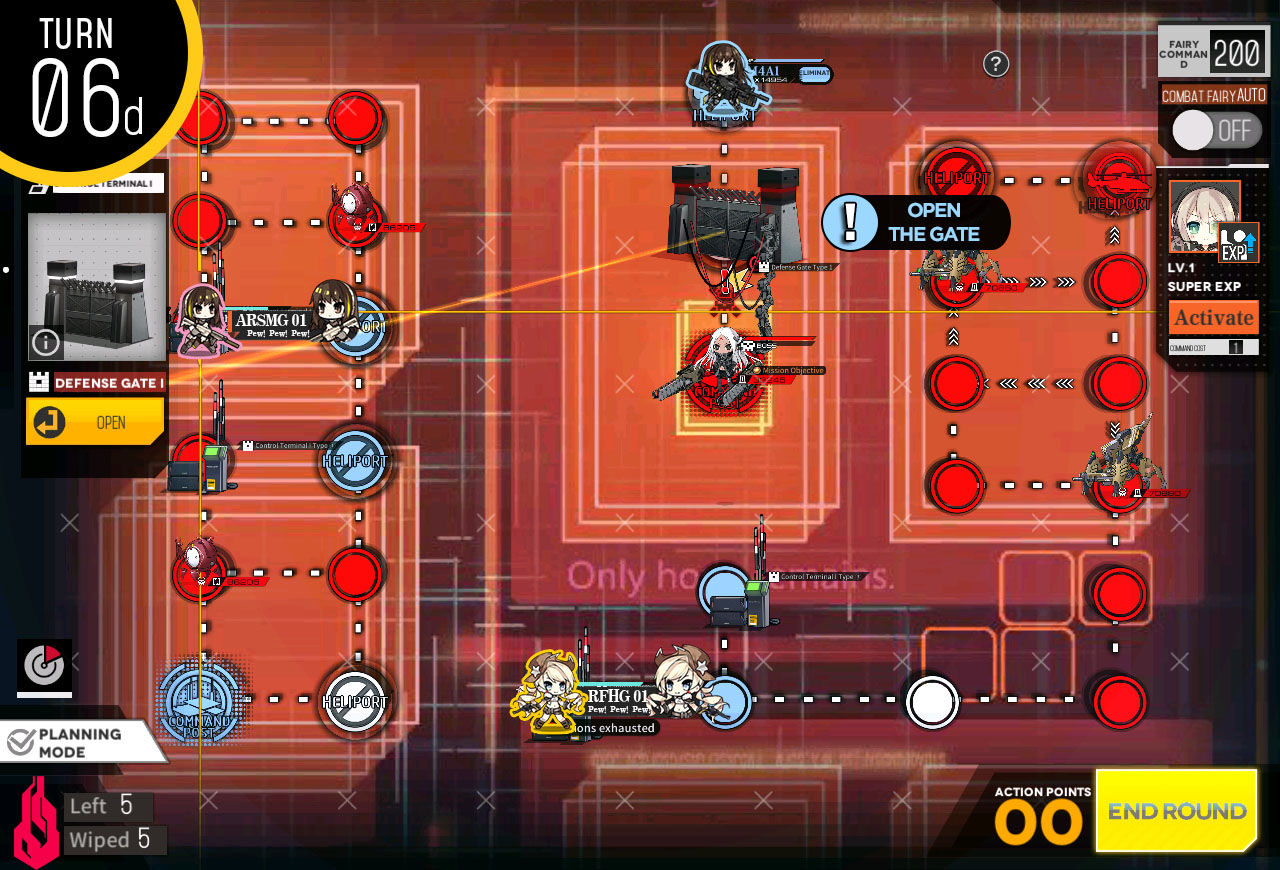
Continue moving echelons to the console panels on the both end. Deploy Combat echelon that will fight the Boss Nyto.
Echelon at the console will activate the console and hit buttons in correct order: x1/x3 mode first, then x1/x2 mode, then hit x1 mode to open first 3 gates.

At the beginning of next turn, move dummy up to the upper console and open the last gate to the Nyto boss.

Combat echelon moves into clear the boss and take enemy HQ.
Take the path down the center but careful to avoid resupply point as it is in threat range of Manticore.
On 2nd turn move down to resupply at the node then move on to stay out of Manticore's range.

And at the next turn run into M16 and beat her. IF you are curious about the pattern it's similar to the previous time we fought her: stun attack followed by large "+" shaped attack. Make sure to move T-dolls out of 2nd pattern attack.
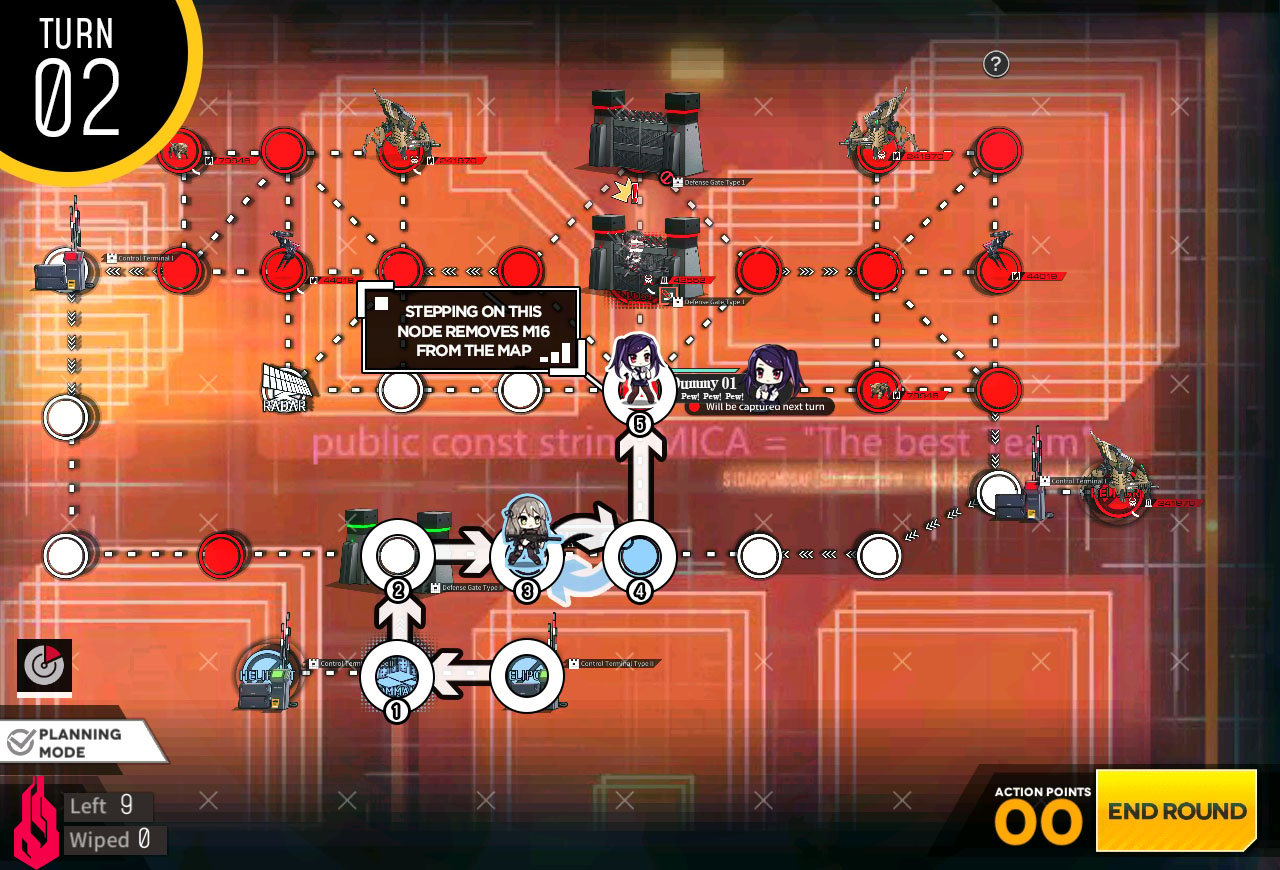
Open the gate again and move to the node below the center gate. This removes M16 from the map, allowing us access to the left side.

Return back towards the HQ and step on the node to the left of where the M16 was. This removes few enemy units on the map. Change command of UMP 40 to "standby".
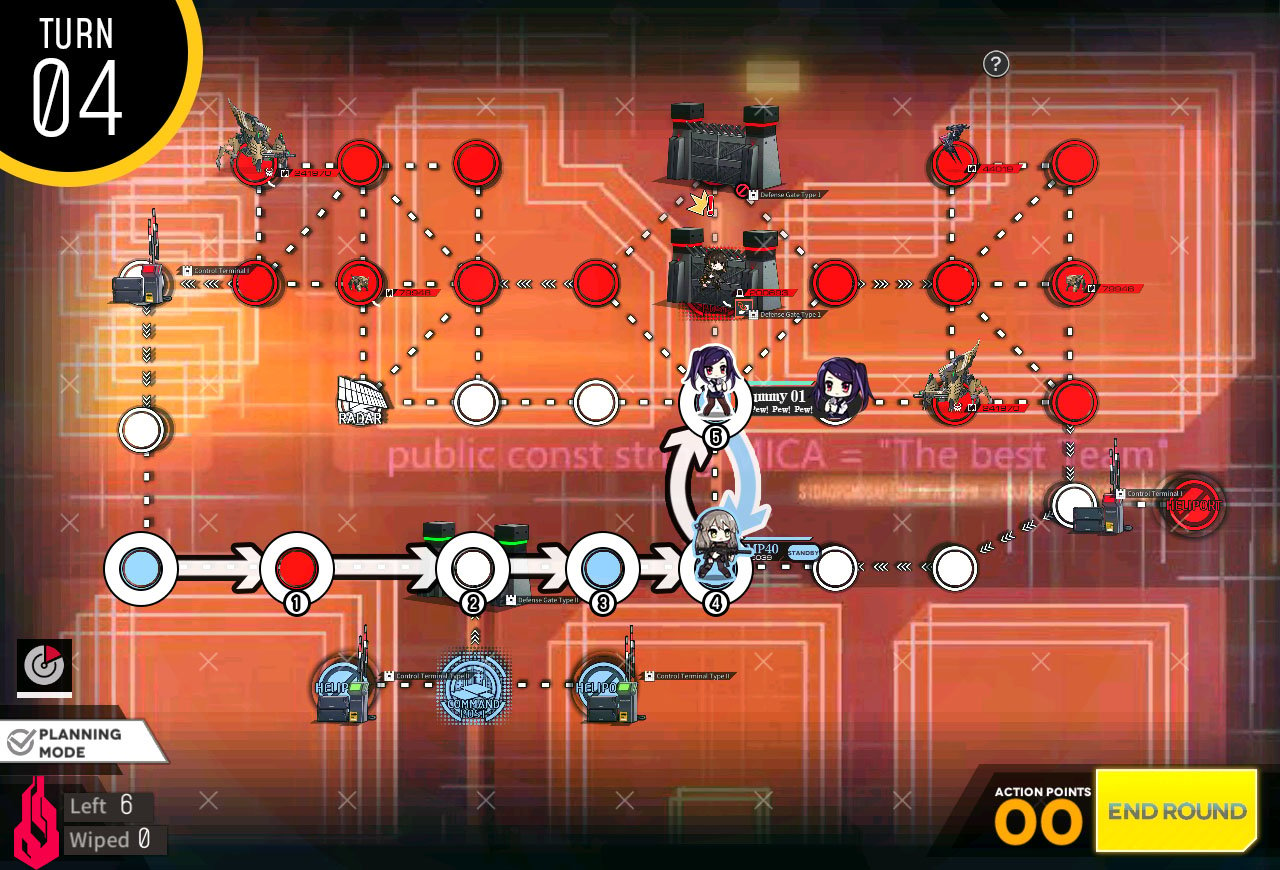
Dummy echelon travels back to the node below the center gate.
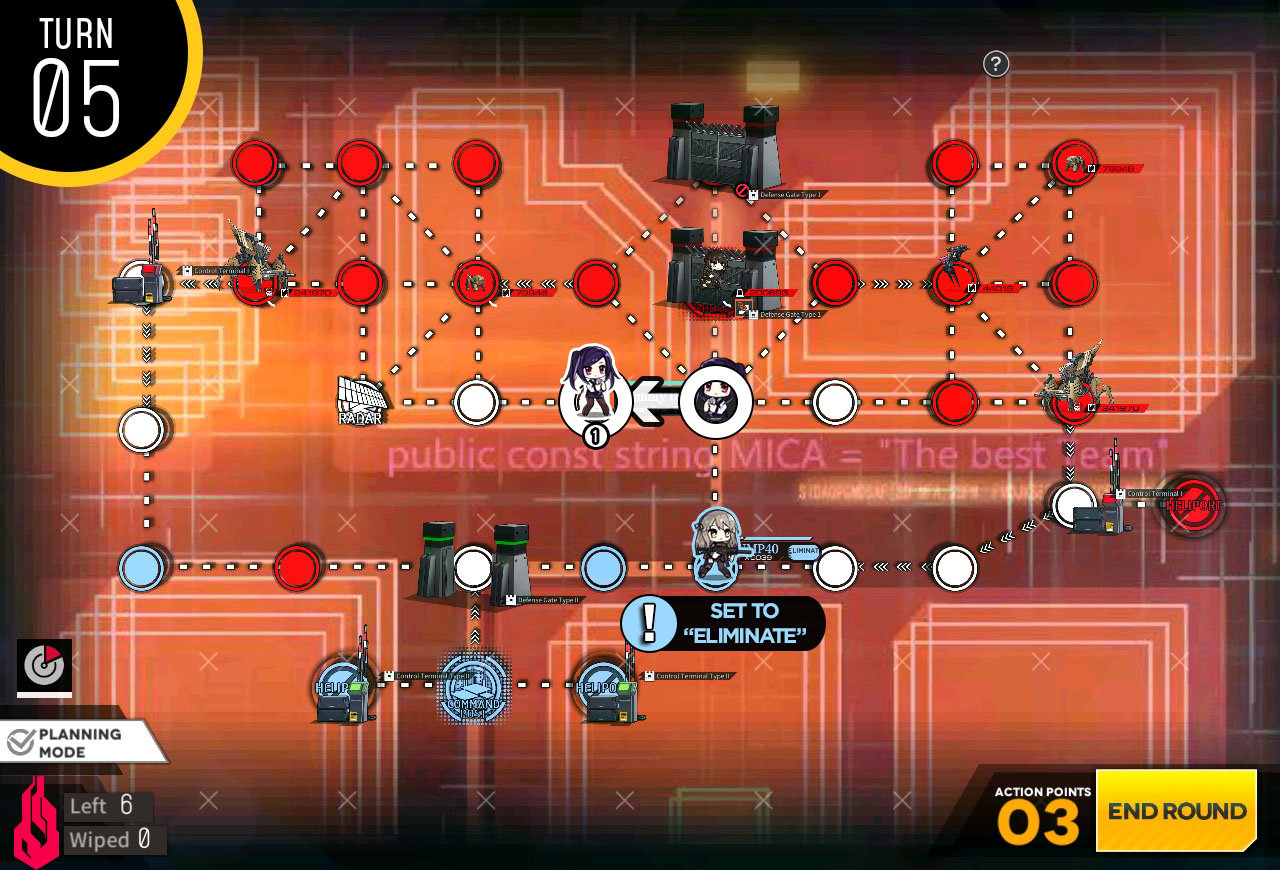
Dummy echelon moves one node to the left. Switch UMP 40's command back to "eliminate".
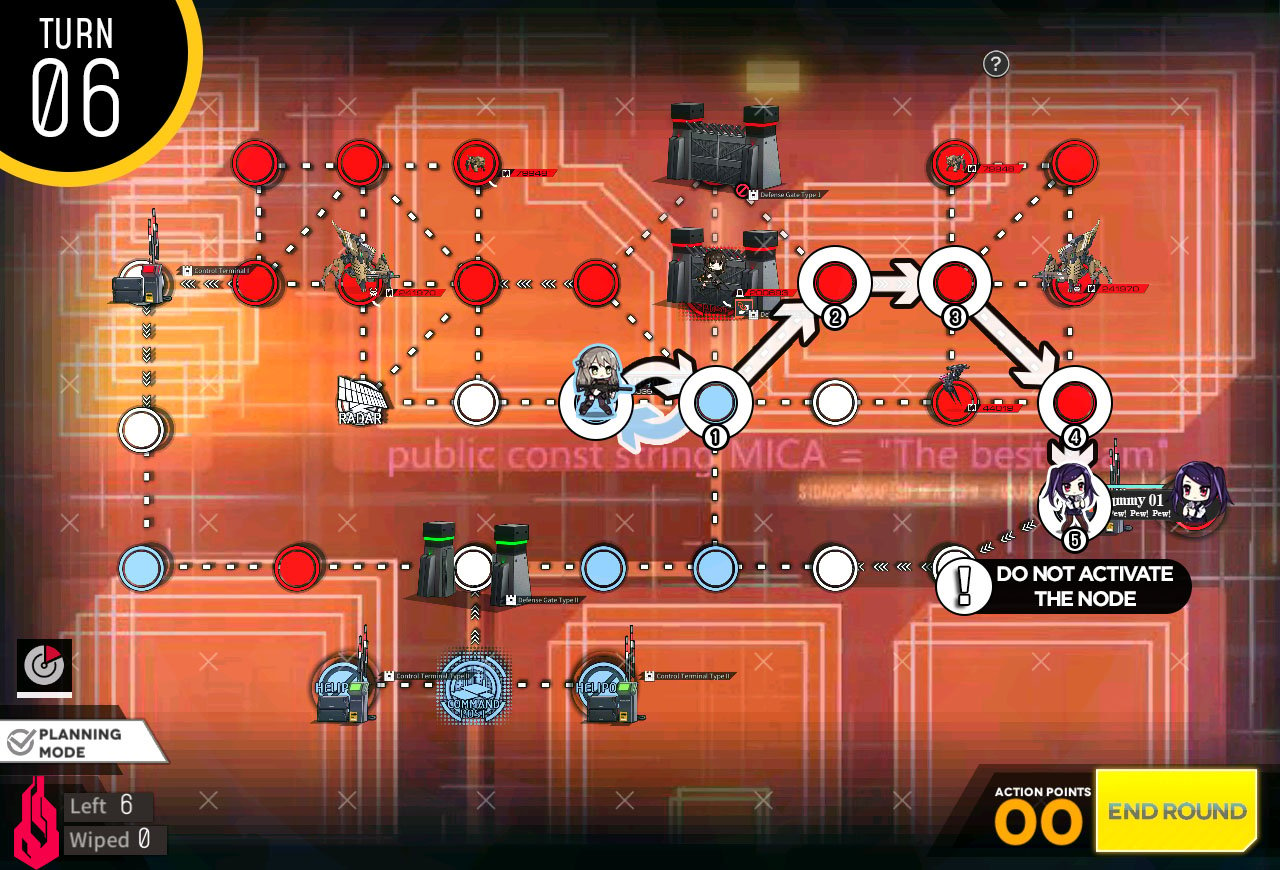
Swap position with UMP 40 and take the node adjacent to the limited-time helipad. We do not activate the console.
Dummy echelon moves back to starting position last turn.
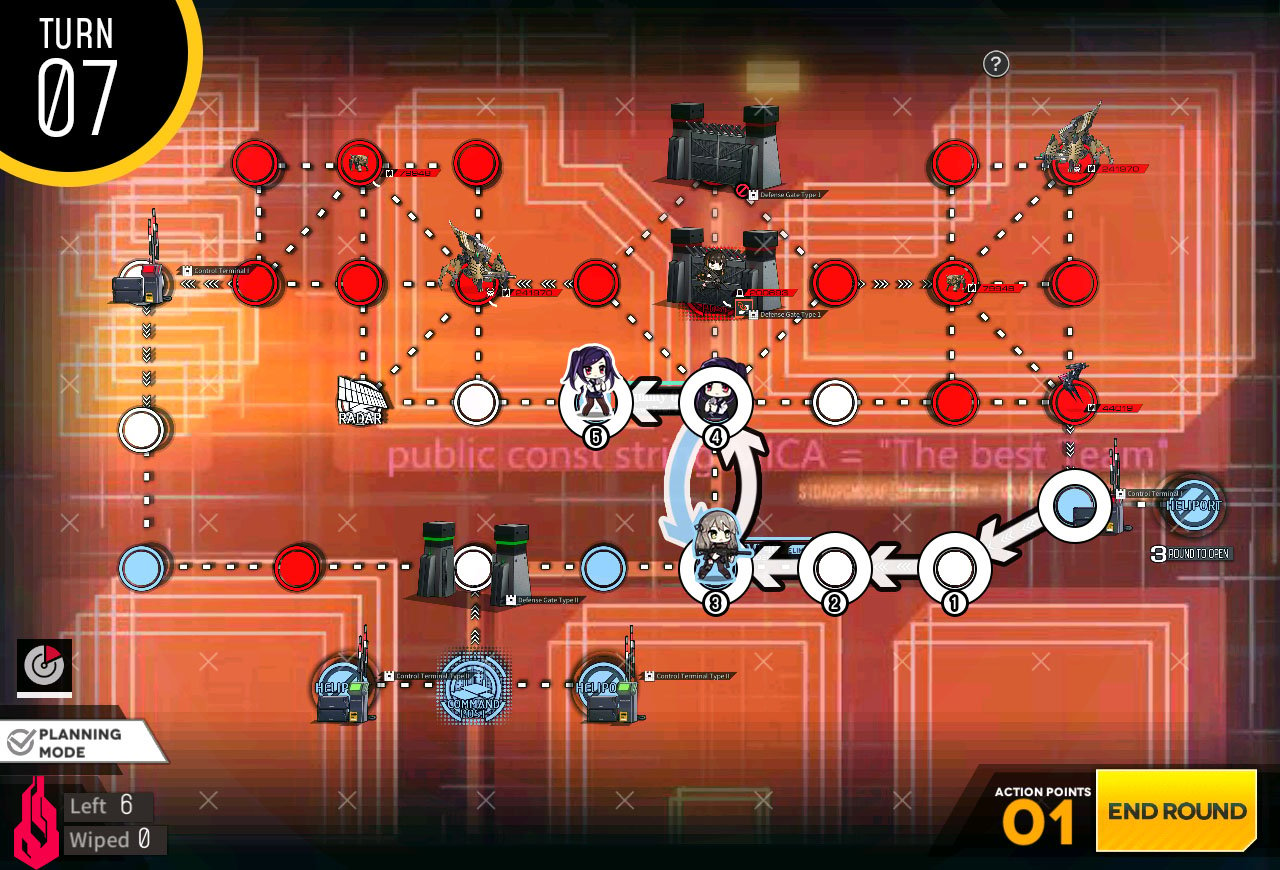
Dummy echelon moves to step on the radar. Turn back command of UMP 40 back to "standby".
You will notice that UMP40 has turned to a hostage unit. Move to rescue and stop at the node to the right of the center gate.
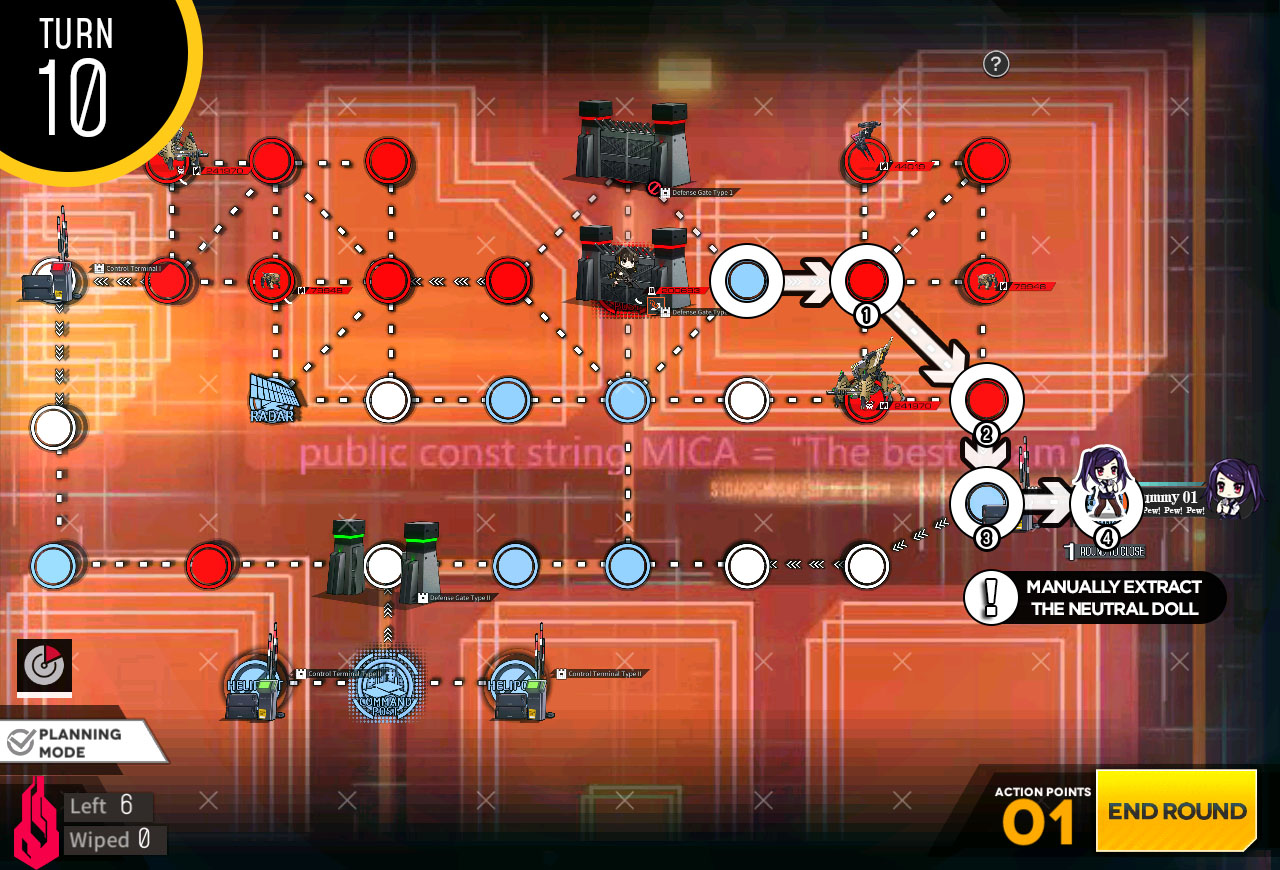
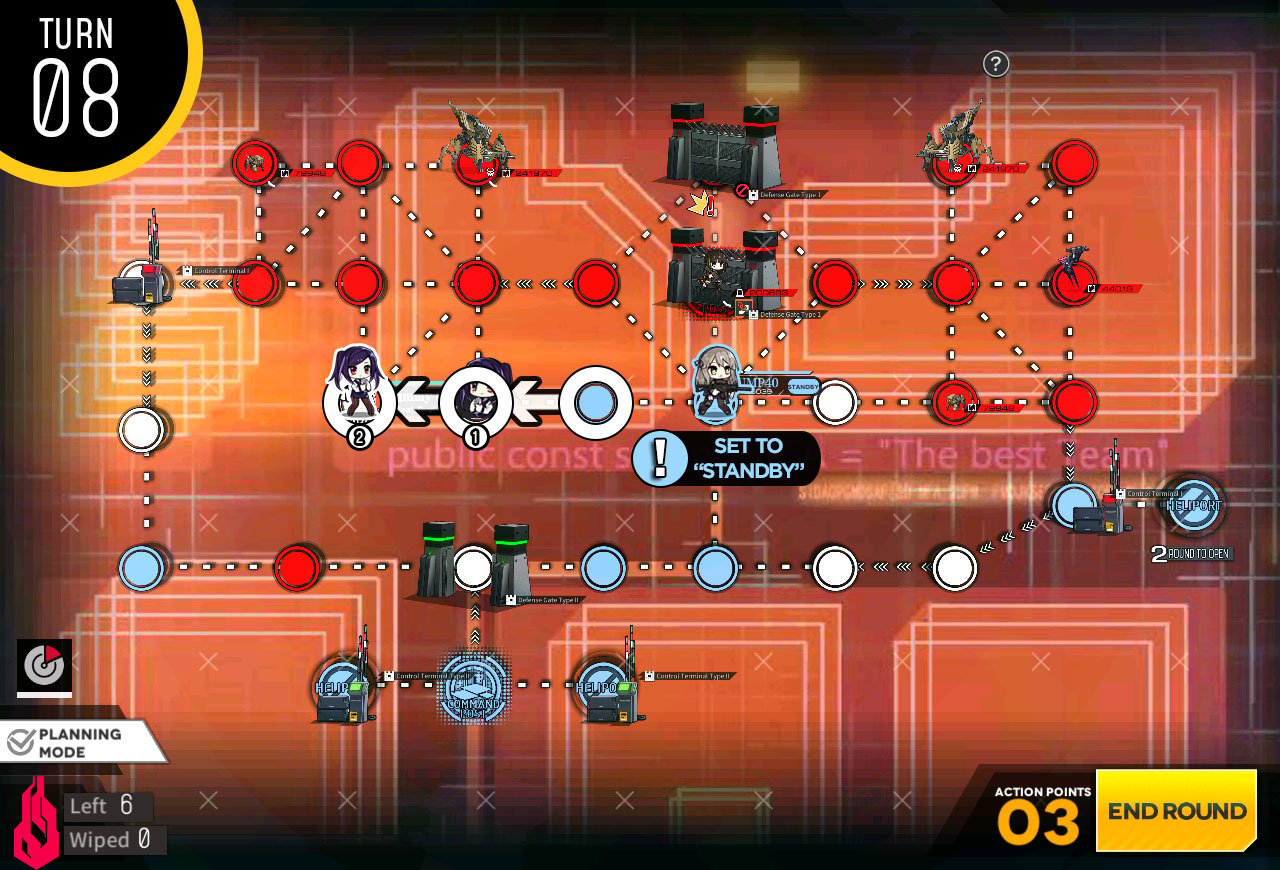
All you have to do now is to manually extract hostage at the open helipad to the right. This allows you to achieve both hidden objectives.
Simply end turn and take free crates!
Just watch them fight each other and clear the mission.
This map is showcase map for upcoming feature of SF capture system. Set all SF bosses to "capture HQ" and enjoy. There are rare cases in which that SF bosses fail to defeat the Hydra unit above. In this case you will have to clear it manually by deploy combat echelon or retry the map.
Move dummy from the helipad to the upper artillery and deploy the 3rd dummy.
3rd echelon moves down to the bottom artillery.
Once every echelon is in position, start targeting enemy units from the top right side of the map.
Take out all enemy units save for tank on the north part of the map.
Now we move the dummy at the top artillery towards the recon centre. Use the bottom artillery to kill the recon center.
Now all we have to do is kill the unit on the marked node and end turn on it.
Move Dummy echelon towards heavy helipad.
Deploy combat echelon on the HQ.
Move combat echelon to the heavy helipad.
Deploy 2nd dummy echelon.
Move combat echelon to the left. You are free to deploy HOC here to support against enemy units. It is not a must.
Sweep the top of the map behind the Ares boss unit and come back towards the heavy helipad.
If echelon is badly hurt you can repair at the heavy helipad prior to taking out the last unit needed to clear the mission.
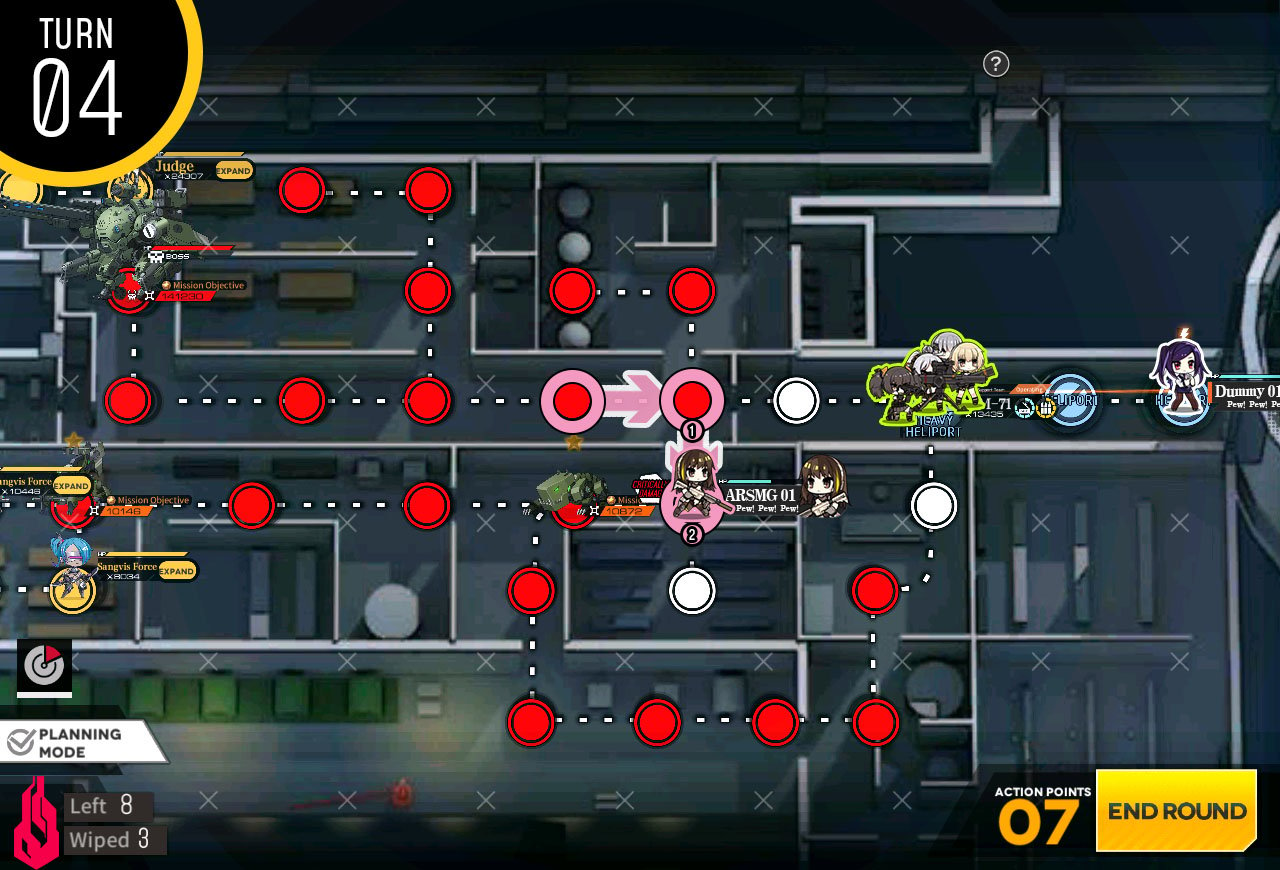
Move combat echelon up and pick up the bomb then deploy the dummy echelon on the HQ.
If you haven't picked up the bomb, make sure to pick it up now.
Swap with dummy echelon and move to the Thoroughfare II. Plant the bomb for demolition.
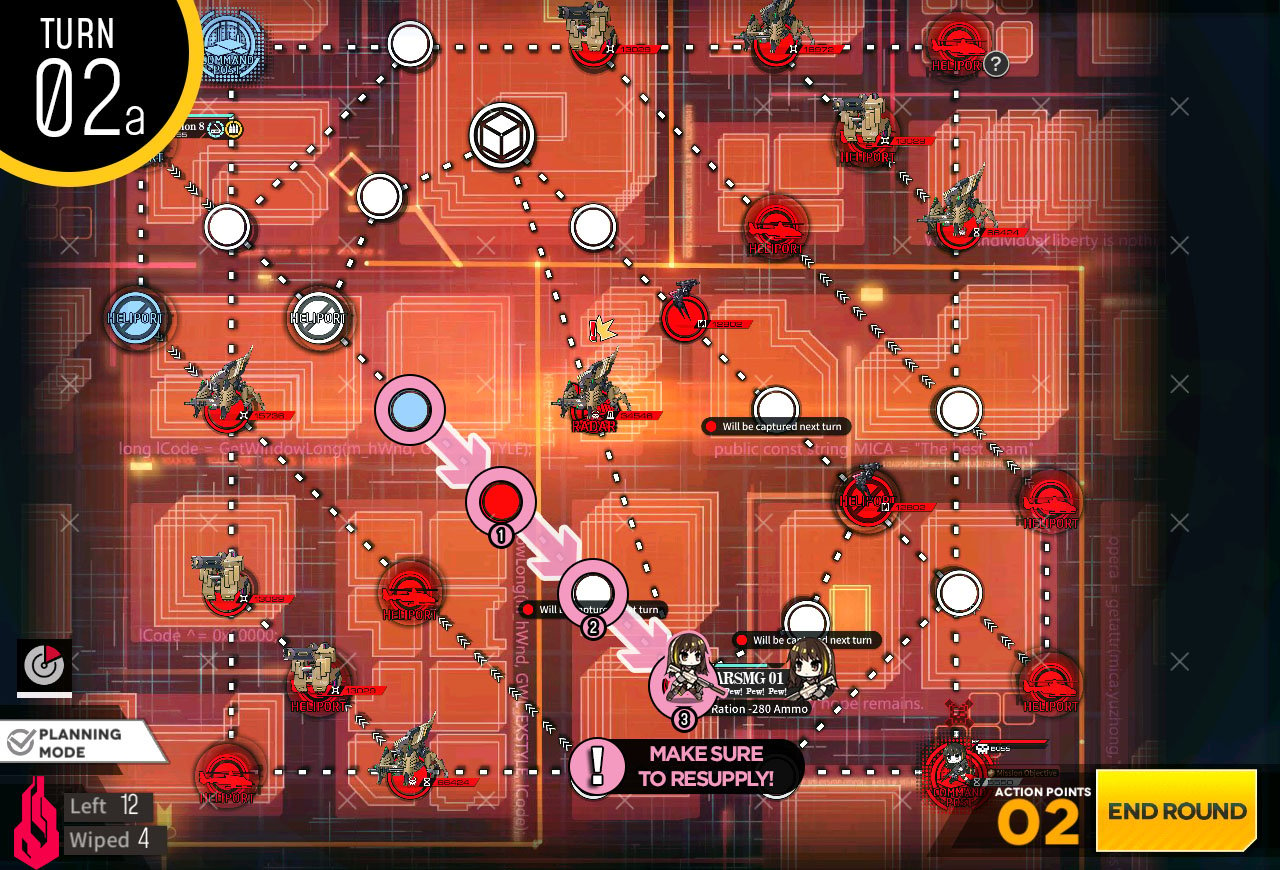
Make sure to eliminate the marked Cerynitis node below the Hydra node that you pass through to get 2 kills.
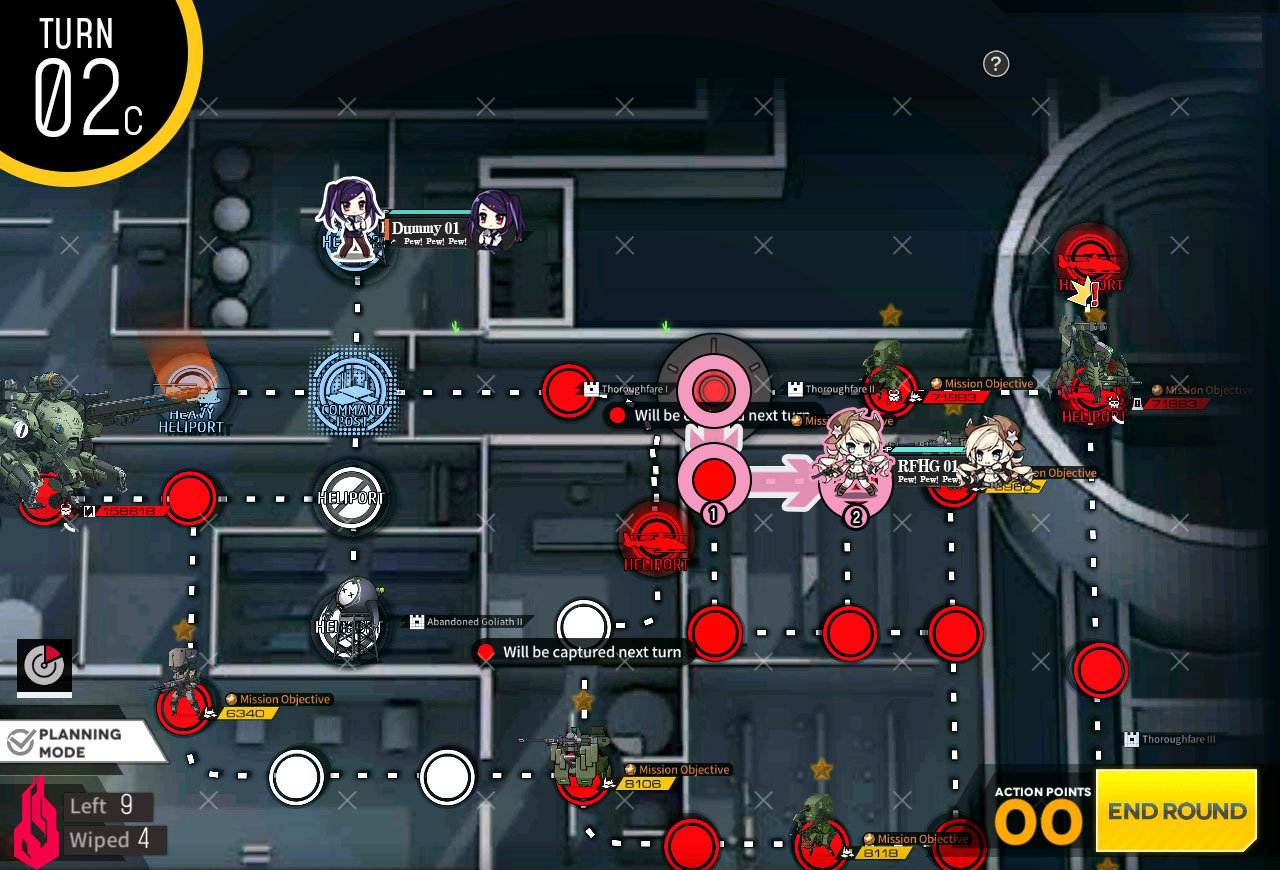
Then move down and to the right. You should have 4 kills by now.
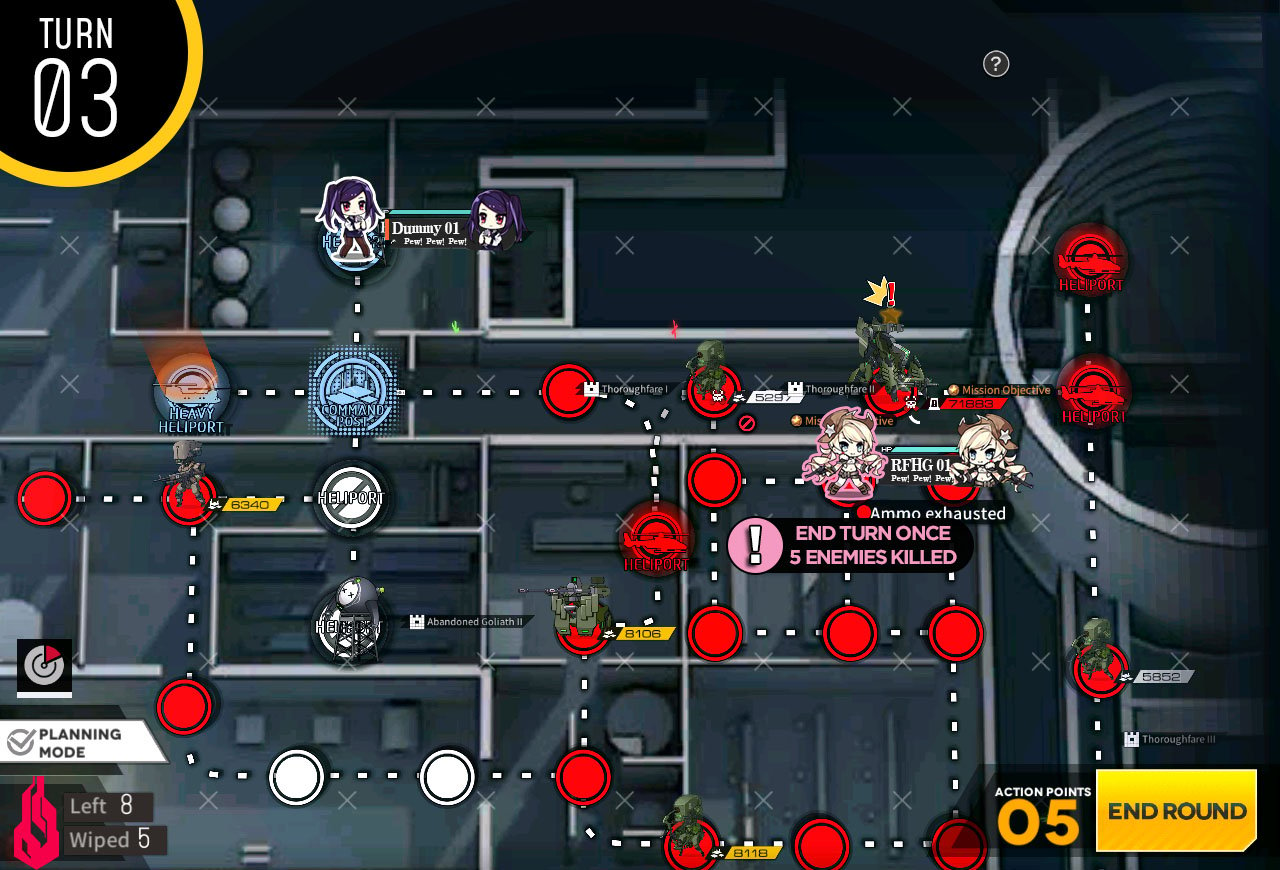
If you have 5 kills, simply end the turn and you clear the mission. If not for RNG reasons, simply kill another unit and hit end turn.
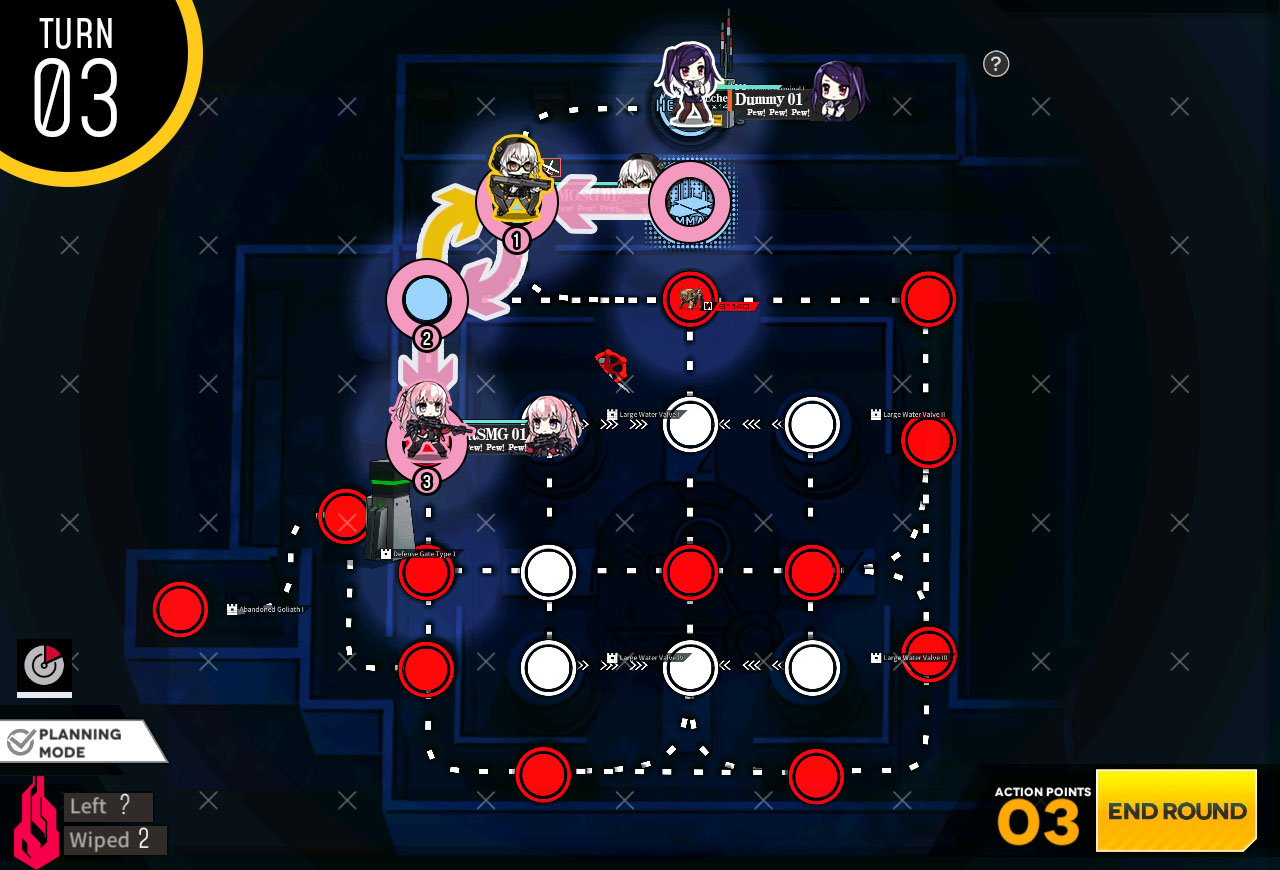
Move dummy echelon up one to surround capture 2 helipads. Then combat echelon moves down to capture another helipad next turn.
Deploy 2nd combat echelon at the Helipad where dummy was. Then move dummy echelon to the right to capture 2 more helipads by next turn.
Combat echelon by the right helipad moves to capture the helipad at the middle of the map.

2nd combat echelon at the helipad moves up and grabs a bomb.
Deploy 2nd dummy at the helipad.
2nd combat echelon moves down and on to the gate.

1st combat echelon reupplies and moves towards the marked helipad that on the left side of the map.
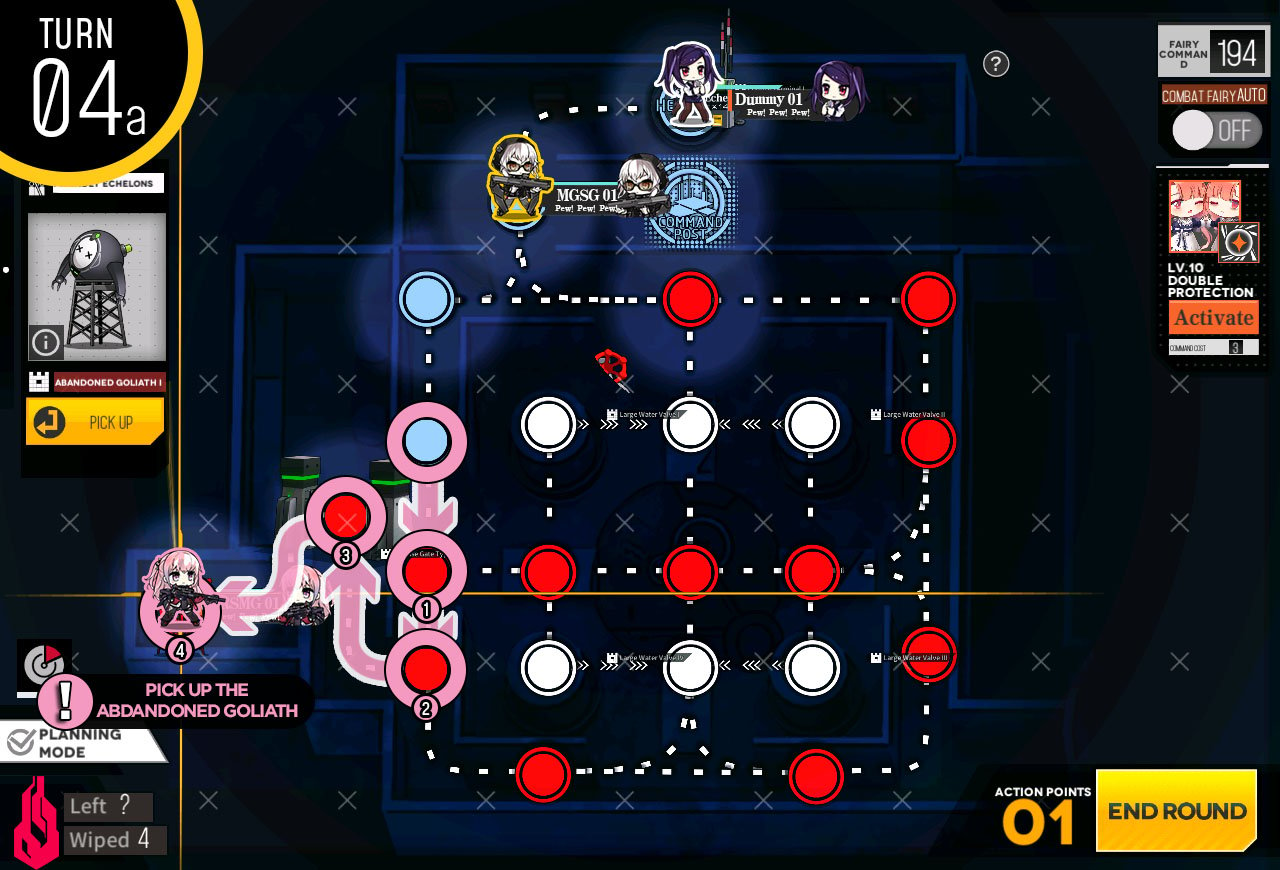
At the beginning of turn 4, take 2nd combat echelon all the way down to the middle water valve at the bottom of the map and plant the bomb for demolition.

Move the 2nd combat echelon to the left to avoid blast damage, and move the 1st combat echelon to the marked helipad node.
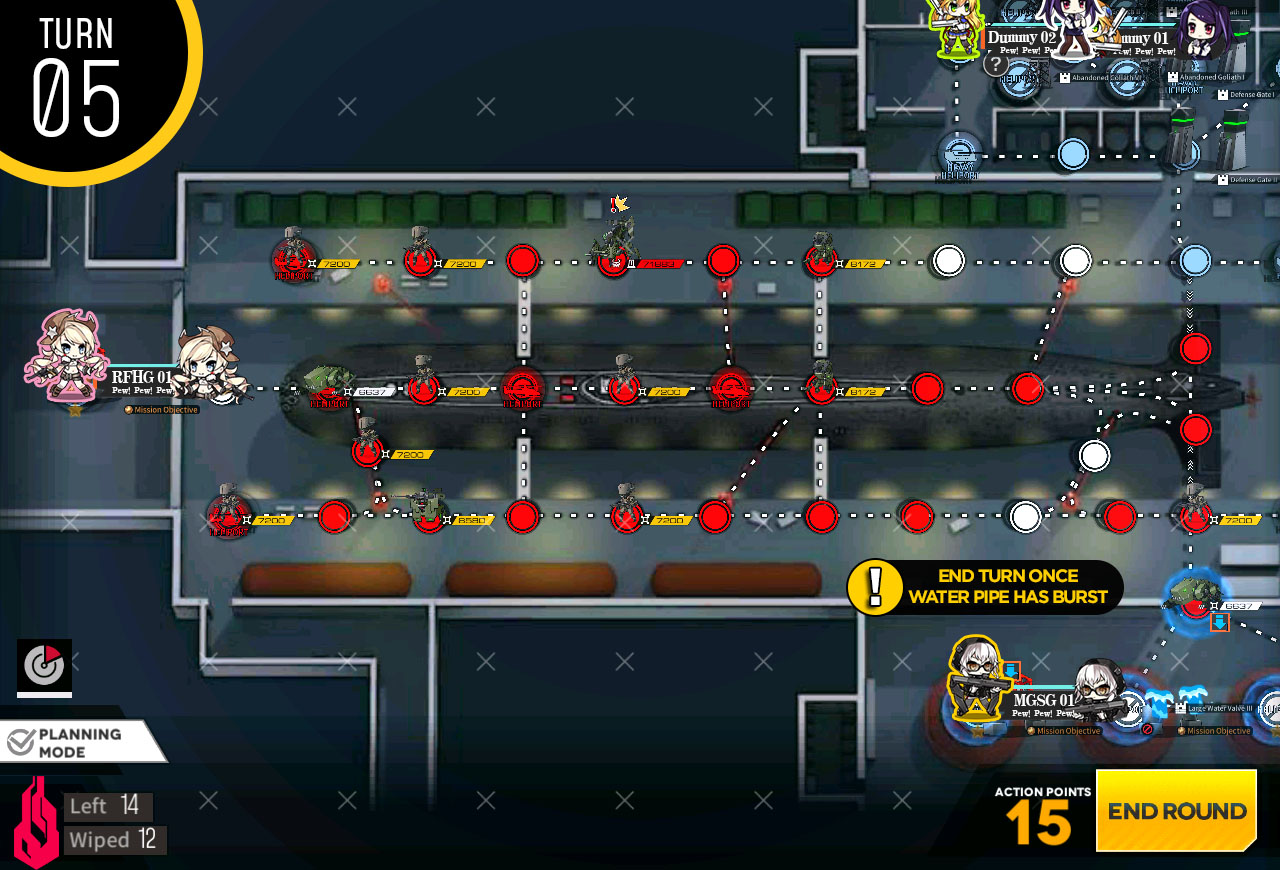
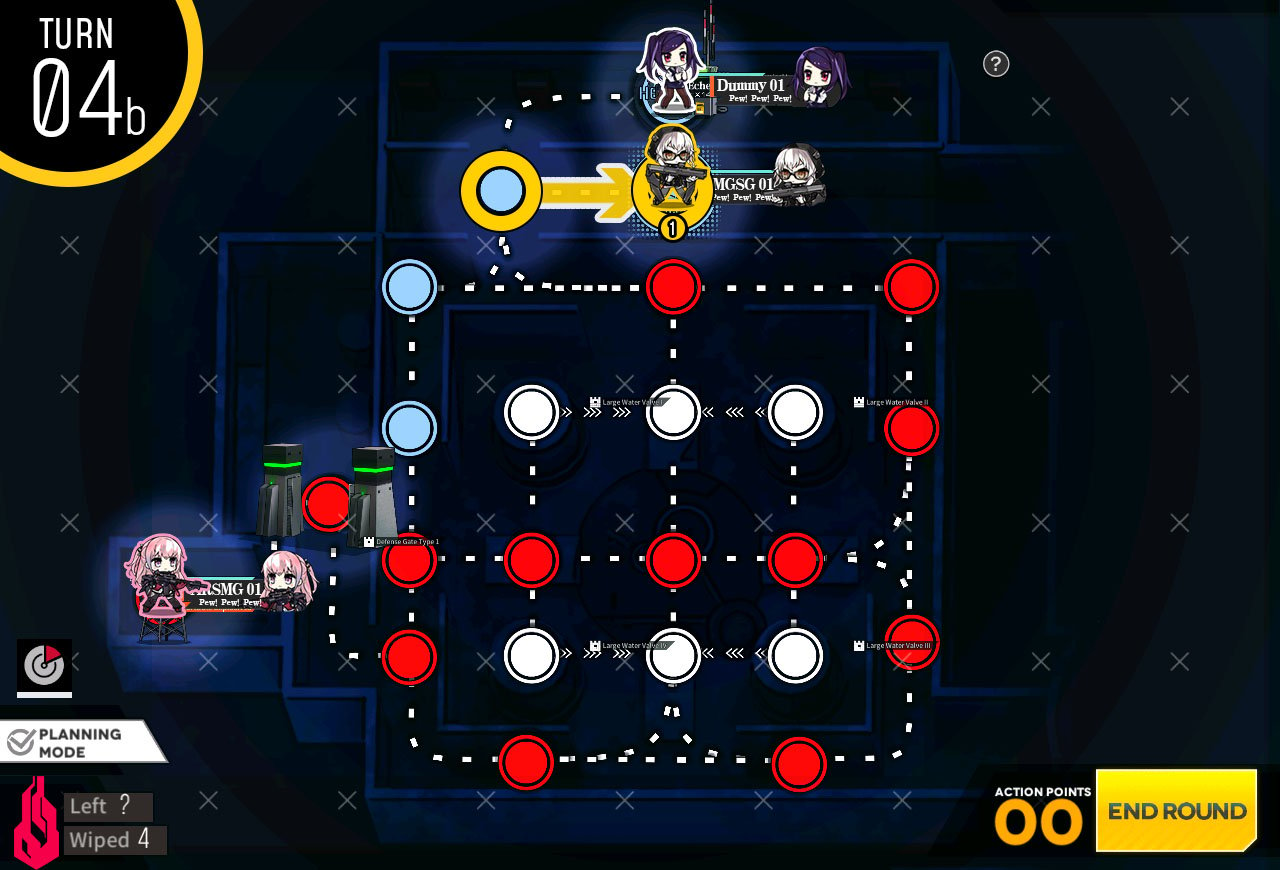
Hit end turn again to clear the mission.
Move combat echelon down 1 and deploy dummy echelon on the helipad.
Combat echelon takes out the enemy unit to the left and dummy echelon follows down.
Deploy the 2nd dummy unit from the helipad.
Combat echelon moves down to the bottom closed helipads, which reveals EMP bomb.
On 2nd turn, combat echelon moves down to pick up the bomb.
Dummy echelon at the helipad moves down towards the EMP bomb.
Combat echelon moves back up and takes the center path towards the Ares boss unit. When combat echelon is adjacent to it, EMP activate will pop up. Use it and fight it at a weakened state.
Take the helipad and and end the turn.
All that's left to do is repeat the step 2 more times with other two bombs at the bottom. 2nd dummy moves and retrieves the furthest EMP bomb on the left and move back.
1st dummy joins the 2nd dummy at the bottom and grabs the last EMP bomb.
Bring up the 2nd dummy and swap with the combat echelon and check it at the Area to its left.
Combat echelon then swaps back and takes out the weakened Ares.
Then begin moving the last EMP bomb back to the top.
Once you get the final bomb to the last Ares, just repeat the step and you clear the mission.
Ares boss unit has similar pattern as Nyto as you have to burst down the shield before it triggers massive explosion. When shield is down it will go into a stunned state. Thanks to EMP, Ares's AoE laser will only do minor damage and can be mostly ignored.
Dummy echelon picks up the bomb from the bottom and move closer to the HQ.
Then 2nd dummy echelon moves across to pick up the 2nd bomb and moves down towards the HQ. You will see the location of the Yegor as you walk by.
2nd dummy echelon above will set bomb to explode next turn before moving from the spot.
2nd dummy echelon moves down one from the explosion. 1st dummy echelon will move next to the HQ.

Combat echelon moves and grabs the EMP bomb that is on the bottom right corner of the screen.

Then combat echelon moves back and above the HQ where the artillery unit is.

Now that we confirmed that Yegor stepped on a bomb, we move to set 2nd bomb on his path.
Deploy 2nd bomb for the explosion next turn and evacuate the dummy echelon out of the way.
We skip 4th turn and wait for Yegor to approach closer. Combat echelon activates the artillery to weaken the Yegor. Then we throw the EMP bomb and finish him off, same as 5-1A in terms of pattern, just more HP.
Take out the enemy unit on the marked node and return to the HQ.
After resupplying, combat echelon sweeps the right side of the HQ.
To prevent from fighting the Manticore unit, move back onto the HQ.
Finally move on to the marked node and end the turn to clear the mission.
Combat echelon on the left side moves up to activate the console. Then move the combat echelon on the left side to the left.

We don't want to get attacked by Goliath plus so we move combat echelon back down to the HQ on the left.
Now that Goliath Plus moved out of the path on the right, send combat echelon through and capture the closed helipad.

Shift combat echelon up one node to capture another helipad. Then combat echelon on the right side moves down and around the one way path. This will draw Manticores away from chokepoint.
Now that Manticore unit is out of the way, simply move past it and down towards the consoles. Make sure to move the combat echelon down 1 node on the left side as well.
combat echelon on the left side moves up and past the Goliath's path. Then combat echelon at the right side moves to the console area.

Activate the first console
And the second console at the bottom.
combat echelon on the left side moves and activates the last console required to unlock the gate to Elisa.
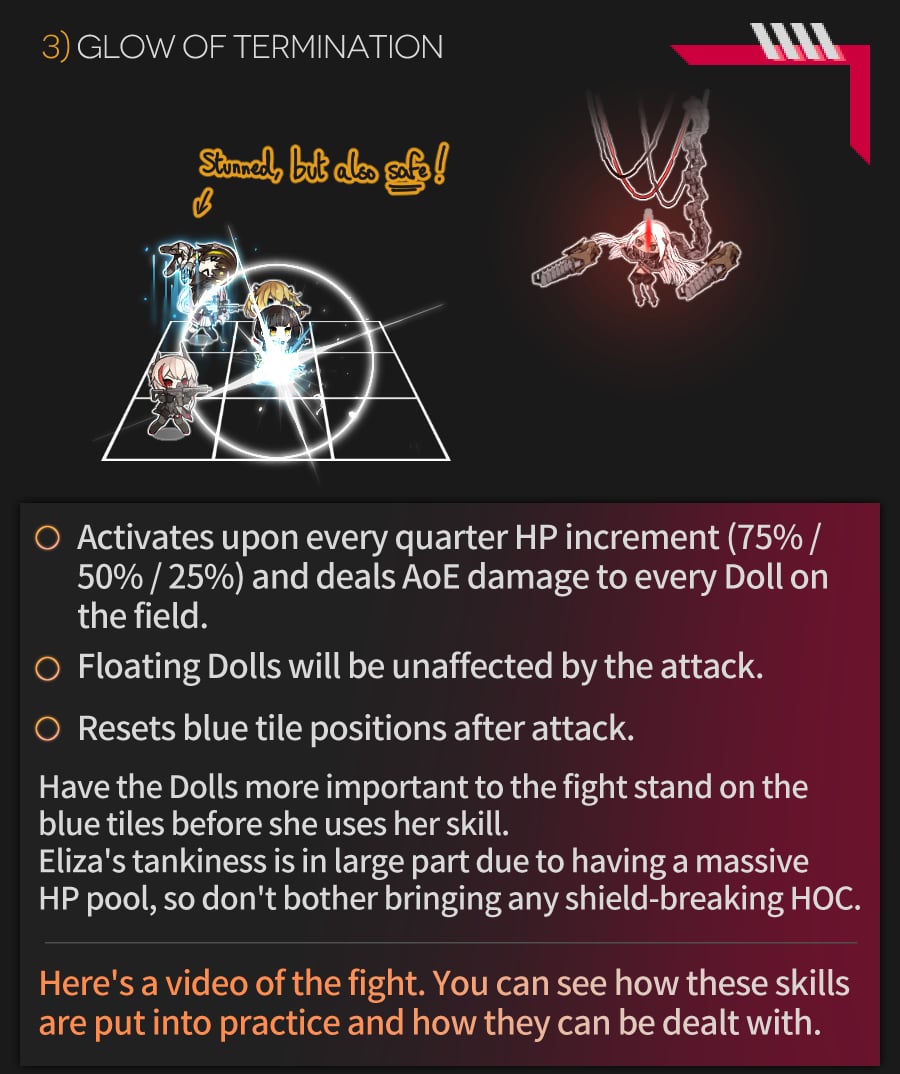
Once gate is open M4 will move down and Elisa will meet up for a final battle. Pattern is relatively simple. You need to avoid the blue squares which will knock up M4 in the air for a brief amount of time. However if Elisa goes into pattern that targets all the tiles, you need to step on the blue tile to avoid getting hit. Repeat and rinse until you clear the fight!

Start with combat echelon and deploy 2nd combat echelon at the HQ.
Swap the 2nd combat echelon down towards the left side of the map and 1st echelon follows behind.
Deploy dummy echelon at the HQ.
Swap Dummy echelon with 1st combat echelon and move to activate the console and open the gate to the left.
1st combat echelon will move down towards the gate but stop short in order to let Manticore unit move out of the way. There is a Armored doggo units moving up towards the HQ, so I recommend turning on the Airstrike fairy on 1st combat echelon.
1st combat echelon picks up the bomb past the gate.
Now that HQ is mostly safe, move the 2nd combat echelon back on to the HQ to avoid unnecessary fights.
1st combat echelon with the bomb moves out of the gate and onto the water valve near the center of the map. Do not plant the bomb as we cannot run away from it.
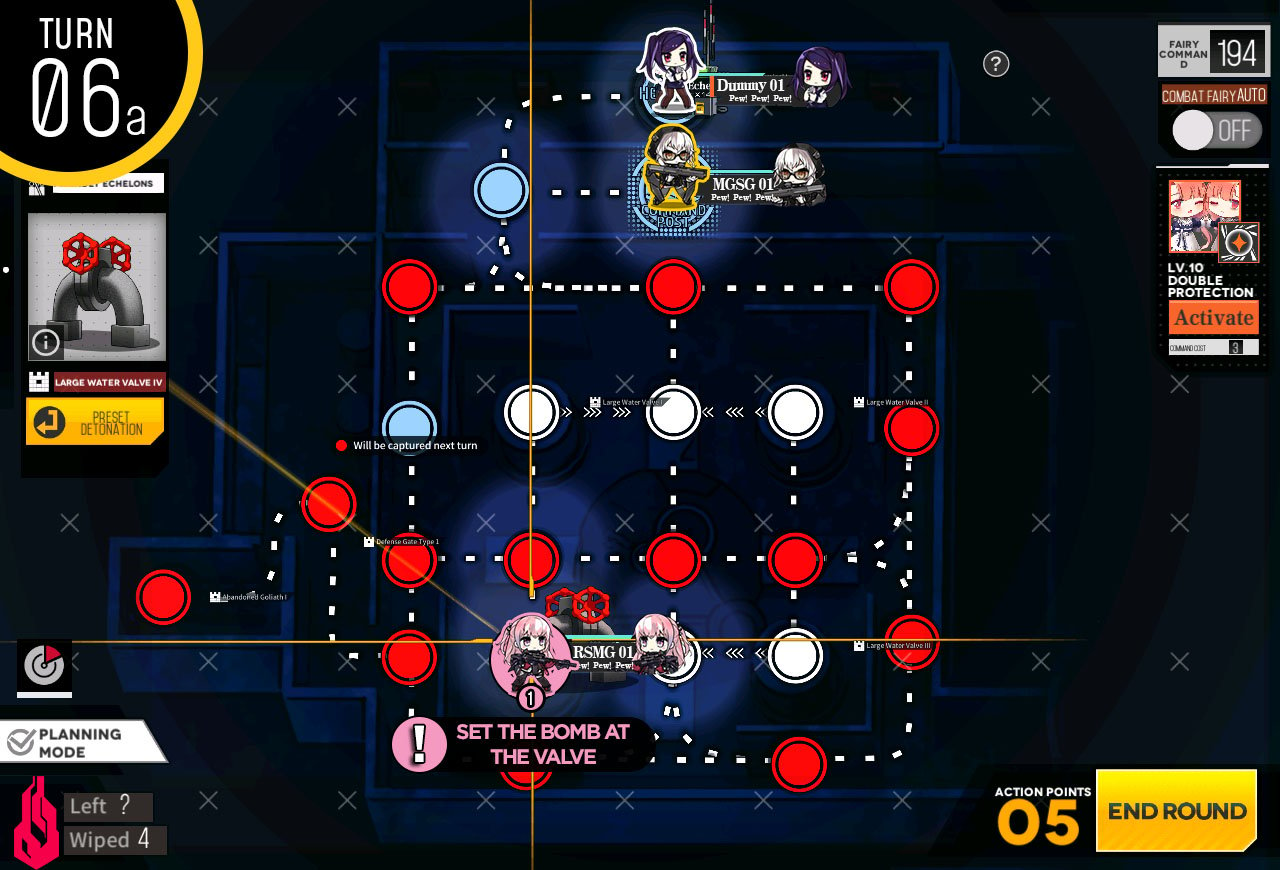
Beginning of turn 6, plant the bomb on the valve before moving.
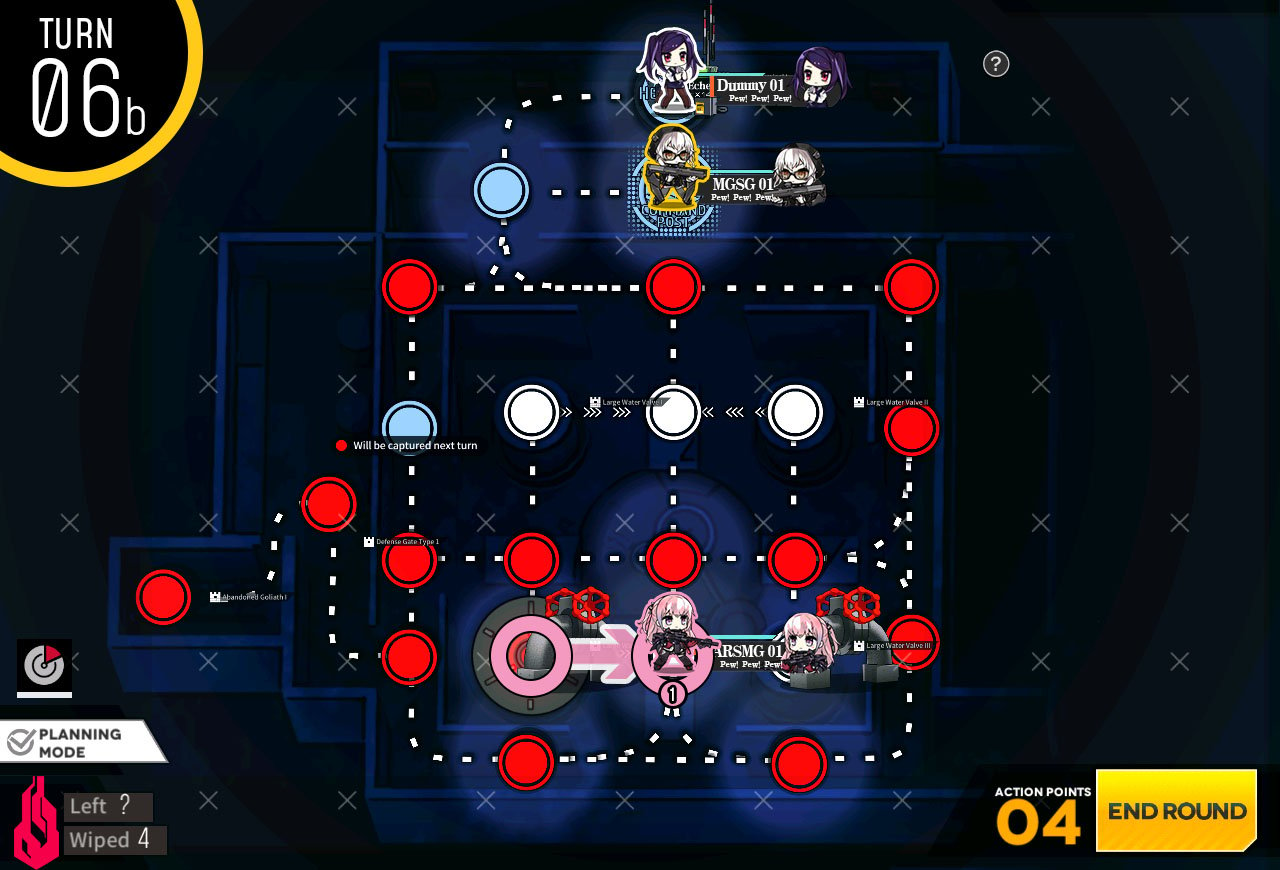
Move just to the right and hit end turn.
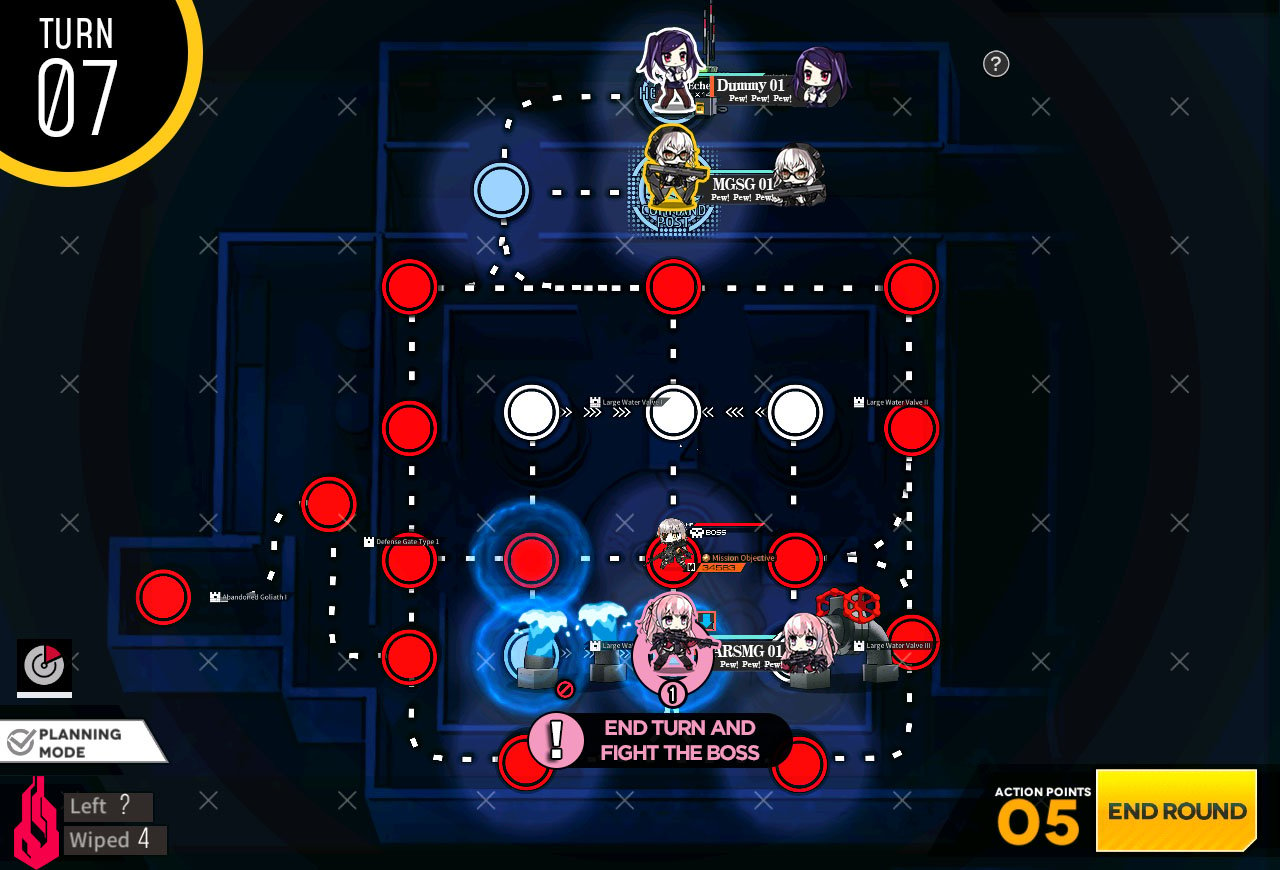
You will see the M16A1 moving on top, simply hit end turn and fight to beat the boss. If you are curious about her pattern, check out the information page!